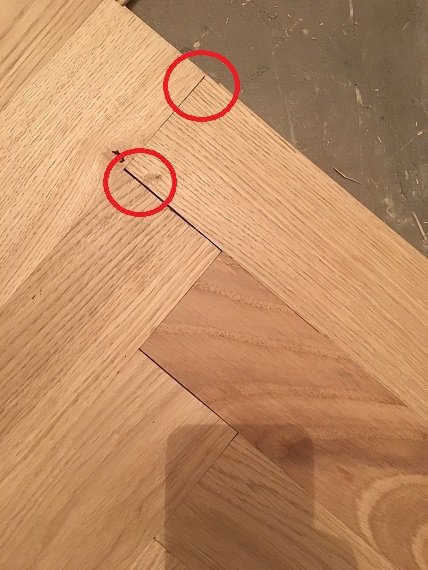
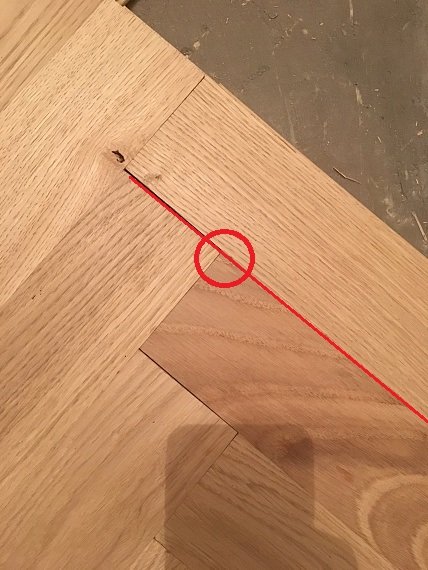
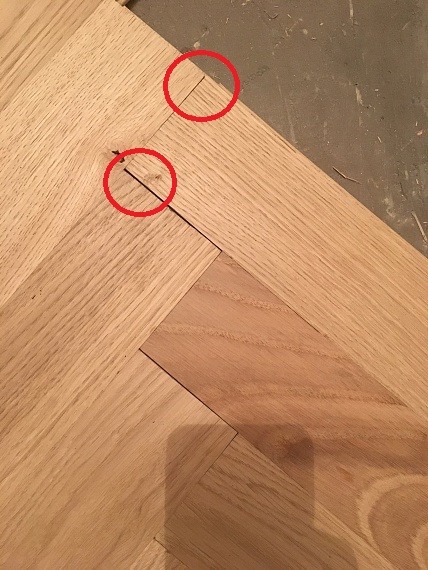
You can see it, for example, in the picture here. The gaps are different sizes at each end of the gap because it's not 90 degrees between the rod and the rod it meets. So it's probably not the visual estimation as such, but rather that I've laid quite a bit of herringbone now and have learned what causes errors when things go wrong
Here you can see, for example, some of the layout in our kitchen.
By ripping, I mean as in the picture below. That is, if in the marking it lies outside the rod to the left. You can rip half a mm along the drawn line to make them line up.
Alternatively, if there is space for the rods further ahead as you say. Then lay a rod 90 degrees and take up the whole error in one place and then fill it with filler. However, if you can tear it down, it's clearly better.
Even though the above solution is a way to go, I think it's better to find the cause of the unwanted deviation. There is a great risk that more errors will be introduced that propagate in the pattern.
It can be seen that the gaps start earlier and then build up. A thought; are the lösfjädrarna a bit too large and prevent the rods from coming together?
Are the rods straight? After all, there is a possibility that some rods are not perfect. I've personally encountered floorboards whose short sides were slightly rounded.
Even though the above solution is one way to go, I believe it is better to find the cause of the unwanted deviation. There's a big risk that more errors will be introduced and propagate through the pattern.
It seems that the gaps start earlier and then build up. A thought; are the detachable springs slightly too large and preventing the rods from coming together?
Are the rods straight? After all, there's a possibility that some rods are not perfect. I've personally encountered floorboards whose short sides were slightly rounded.
It could very well be that you've made the springs too large; you need to check this. Generally, the grooves are only about 4 mm deep, which means your springs should be around 6-7 mm and not wider. I find it hard to imagine that the rods would warp enough to create these problems.
I can say this, when I laid the first hågen, I just went for it... but I had to tear it up, this time I was more careful and replaced several boards if they didn't lie properly against the others. I have dentures but only in the first plow, followed the retailer's instructions regarding that
As for sawing, using a plunge saw is a good idea, but I don't own one... A bit sad to rent one just to maybe cut one board. Then when the list band and such are to be done, I will rent one.
I will try later today to remove it and ensure it's at a 90-degree angle.
You can see it, for instance, in the picture here. The gaps are different sizes at either end of the gap because it's not 90 degrees between the rod and the rod it meets. So it's probably not the eye measurement as such but rather that I've laid a lot of herringbone now and have learned what it depends on when it goes wrong
Here you can see, for instance, a bit of the laying in our kitchen.
By the cleavage, I mean according to the picture below. That is, if it's in the marking outside the rod to the left. So you can cleave half a mm along the drawn line so they align.
Alternatively, if there's space for the rods further up as you say. Then, place a rod 90 degrees and take up the entire error in one spot and then fill it in with putty. But if you can tear down, it's clearly better.
no that didn't seem to help, getting it to 90 degrees, so I'll try your other trick, I'll go borrow/rent one tomorrow, it should be exciting, never used one of those before, do you have any good tips?
The plunge saw is actually very easy to use. Just take it easy and make sure everything is level and that the rail has proper support underneath. Do not use an unnecessarily deep cutting depth.
In post #91 in the first picture, can't you just place a block and give it a whack, shouldn't everything straighten out then? Could it be the rods otherwise that aren't exactly the right measurements?
In post #91 in the first image, can't you just place a block and give it a hit, shouldn't everything straighten out then? Could it be that the bars are not exactly the right dimensions?
Definitely worth trying this if the TS hasn't already done it.
In post #91 on the first image, can't you just place a block and give it a hit, shouldn't everything align then? Could it be the planks that aren't exactly the right measurements?
Not sure if that's a good idea, since the whole floor is a "puzzle," if I hit it there's a chance of moving planks further into the floor and creating a gap there instead.... And even if you try, it might be difficult to fix it later, as it might be in the middle of the floor.
A plunge saw is actually very easy to use. Just take it slow and make sure everything is flat and the rail has proper support underneath. Don't use an unnecessarily deep cutting depth.
regarding depth, I only use as much as needed to get through,
falkn said:
You probably don't need to worry about that.
try.. but it doesn't turn out well... I moved several boards, and now I've finished modding, tomorrow it will be the plunge saw, and I hope it can save me,
Used a plunge saw, but it doesn't get better, took the angle square to check how the angle was, and
On one piece it doesn't match... And it's in the first groove, so I replaced it with another one, and above are pictures of the result, just tested it so far, it's far from perfect, I know, but much better than before..... Is there anything else I can do, I’ve also checked which one at the end of the groove I am hitting and it's correct.
I think it looks okay. You won't see this later when the whole floor is finished and you're standing up. After sanding and treatment, everything blends together a bit as well (for the eye).
feels so frustrating... every day this week I've started with the floor, thinking I'm just going to go for it... but every evening has ended the same... you wonder why you chose this kind of floor... you can't move forward, just staying in the same place, trying to find the problem, solve one and two more seem to appear...
the plan was to finish the floor before the weekend, but it's starting to look very unlikely, also don't have enough flooring, sent an email to the supplier on Monday and still haven't gotten a reply...
feels like I have to lower my expectations and... I want it to turn out well, but I've realized it's never going to be perfect if I don't hire a floor installer... then a lot might disappear when the floor is treated and sanded, as mine will be very dark, so it'll hide some parts, then there's glue and sanding dust to fill the worst... have a thousand other things I need to tackle, but this floor just waits for me day in and day out... but oh well, I can only blame myself for choosing it. thanks for the help I've gotten from you... appreciate that you tolerate me
Vi vill skicka notiser för ämnen du bevakar och händelser som berör dig.