mlkjhr: So what do I need the dyckertpicka for then?
I've now managed to figure out how many boards, and how to cut the first and last ones. And started with 3 boards. There were 3 ceiling boxes to be passed there.
This is in a cathedral ceiling, where it's 1.5 boards wide horizontally at the ridge where the ceiling boxes are, otherwise a 27-degree slope.
It'll be a bit tricky to get the boards to meet nicely at the ridge, 90-27 = 63 degrees to saw. You have to set the table saw at 27 and stand the board on its edge when sawing, plus have a board behind it because otherwise the aluminum support hits the saw blade. I'm thinking of taking 4 boards to the local joinery to have them planed.
And regarding the nailing, it works. A few times I've had to nip off the dyckert as it came too far back, i.e., where the tongue is supposed to come on the next board. Do it again, do it right.
Sometimes half the head is visible, occasionally the whole head. If I were a professional carpenter, I'd nail right in the groove and let the painter touch it up. As it is now, it's a bit fiddly.
MrTim: that was an interesting idea!
Do you mean you shot the T-Dyckert through the hole in the clip? I can imagine it being a bit tricky to aim there...
Or did you just shoot and let the dyckert make a new hole in the clip?
I just shot, no problem getting through.
Good luck.
35 mm brad nail in the blue setting works best. The downside is that you have to go after and drive in the brad nail with a nail set (is that what it's called?). But it can be done afterwards in one go when the whole ceiling is up. The brad nail holes are barely visible in the angle between the board and the tongue.
I think nailing "in the middle" of the board is a shame. It looks ugly if the nail lines don't align perfectly as well.
That's how I usually do it. I've never held a nail gun. Exercise is healthy
Okay, I have installed half of the ridge roof with green today.
A bit tricky in the beginning, until you get used to it.
Because when you angle the gun, the pin that drives the brad doesn't reach as far forward, so you have to adjust the drive depth, and if you then change the angle, it goes wrong, so I've had to correct about 5-10 nails afterward, but it's not the end of the world.
And just as many I've cut off with side cutters and redone.
And in 90% of cases, the entire brad head is covered by the next board; sometimes you can see half, but I haven't missed so much that the entire brad is visible... yet...
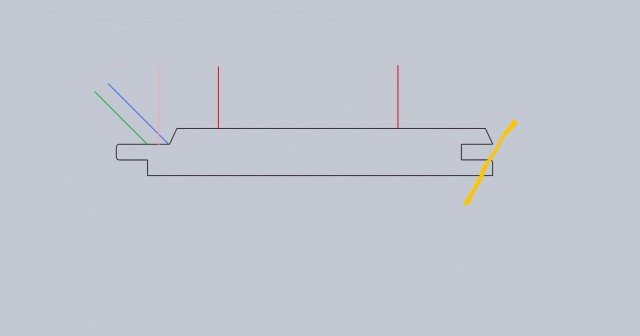
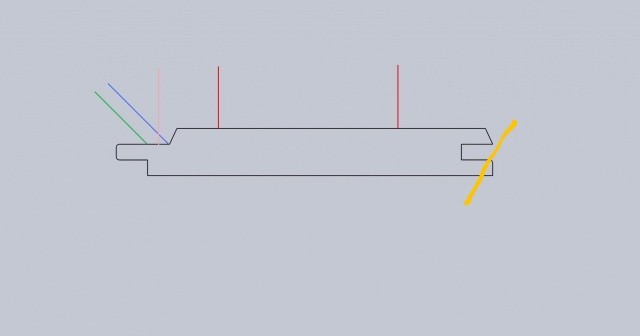
Old thread, but I faced the same problem now when the roof was going to be nailed. My dad had a simple trick to set the nails hidden which I thought I'd share: turn the plank so you have the groove towards you instead of the tongue and nail at the top of the groove:
Then the tongue of the next plank will hide the nail.
I did it this way in the other room (had already set in the first according to green before he came and shook his head...) and it was both easy and nice.
Take care!
Click here to reply
Vi vill skicka notiser för ämnen du bevakar och händelser som berör dig.
")