123,629 views ·
73 replies
124k views
73 replies
Scaffolding in wood?
Some tips from a carpenter. Think safety when building scaffolding. For example, scaffolding planks should be made of spruce and of the highest construction class, and "jump-tested" to be approved. Place the plank on 2 sawhorses and jump on it, turn and repeat the procedure. If the plank holds up, it is approved as an s-plank. Battens, diagonal braces, and other details in the scaffolding should be nailed NOT screwed, because screws do not give a warning before they break, nails do. Respect the small heights. I know a guy who stepped off a two-step ladder, landed on a hammer, and is now in a wheelchair. Always think safely.
I don't know how it is in Sweden, but here in Åland the company I work for charges about 900kr for renting a skylift for a day! And in one day with a skylift, you can accomplish a lot! And it's convenient; once you've used one, you never want to go on scaffolding again!!! I promise from my own experience, to avoid lugging around on scaffolding... NO THANK YOU!
It might be worth considering!
It might be worth considering!
Yes, safety first, I saw in some pictures that there were missing guardrails, fun if someone would fall down, then it doesn't matter how stable the scaffolding is & how much weight it can bear, no rent a proper scaffolding instead, so you get a guarantee that it holds, you get a safe structure. + I won't lose my job ") hehe
hehe
/Scaffolder
Ps. of course, you fill in the holes in the facade afterwards just like "chris47" said, with latex caulk, silicone, or window putty, then you just paint over with color, can't tell there was a hole there. All facades that have ever had scaffolding on them don't have holes where it can leak in!
hehe/Scaffolder
Ps. of course, you fill in the holes in the facade afterwards just like "chris47" said, with latex caulk, silicone, or window putty, then you just paint over with color, can't tell there was a hole there. All facades that have ever had scaffolding on them don't have holes where it can leak in!
Here's another option
-if you want to avoid building the scaffolding yourself
http://www.malarlisa.nu
-if you want to avoid building the scaffolding yourself
http://www.malarlisa.nu
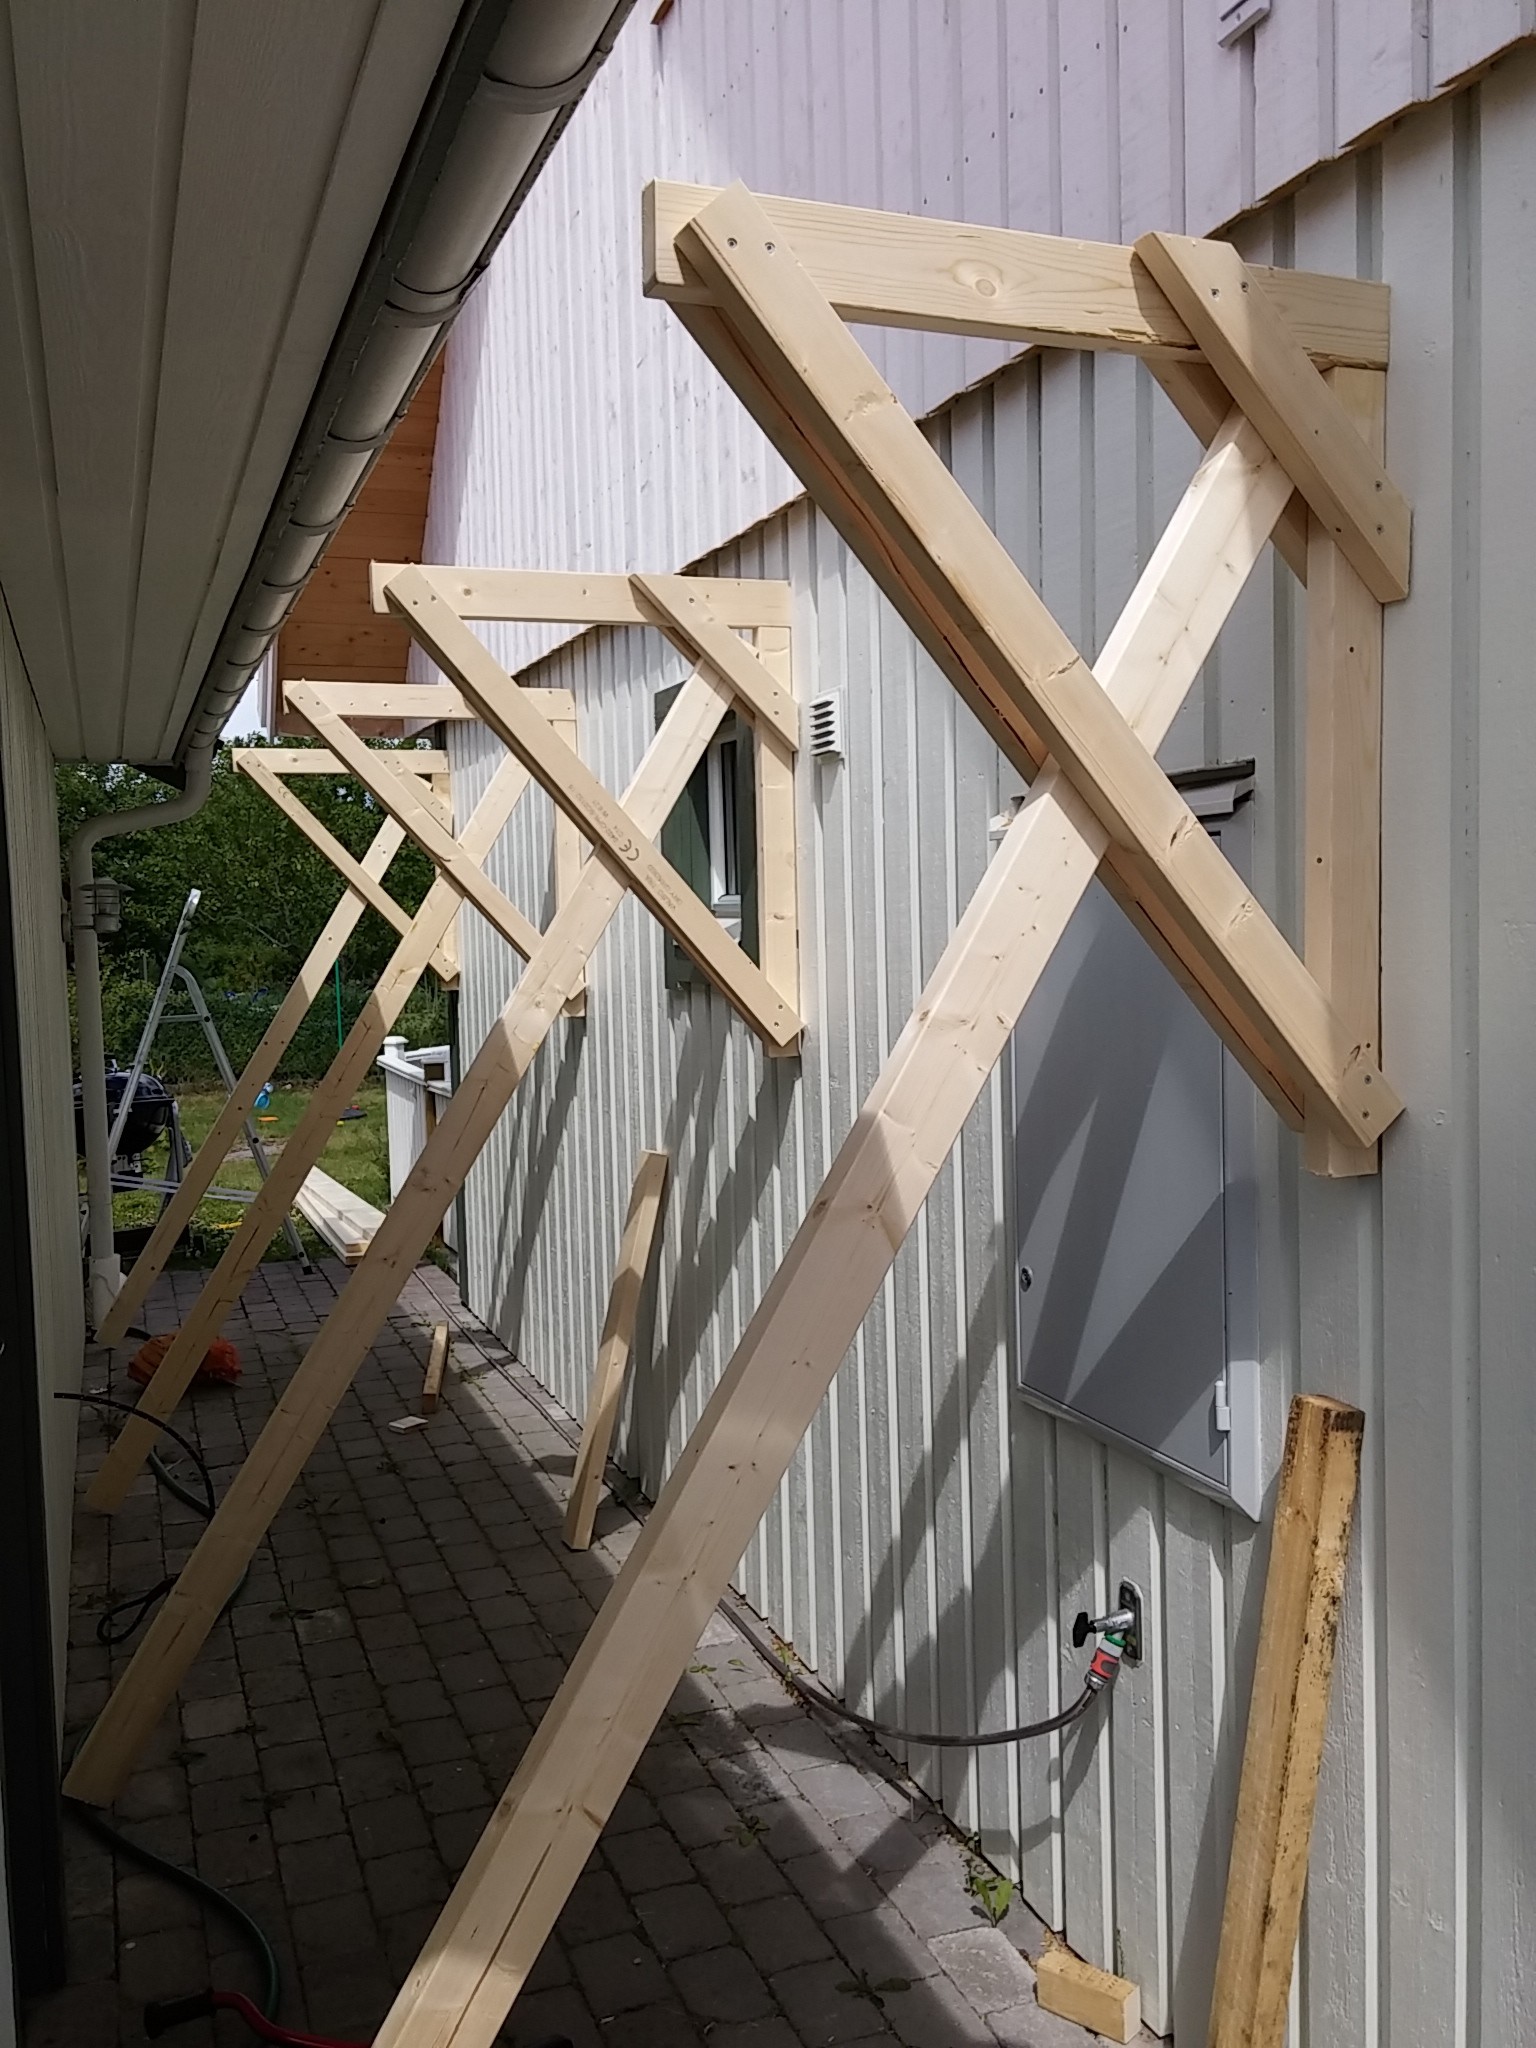
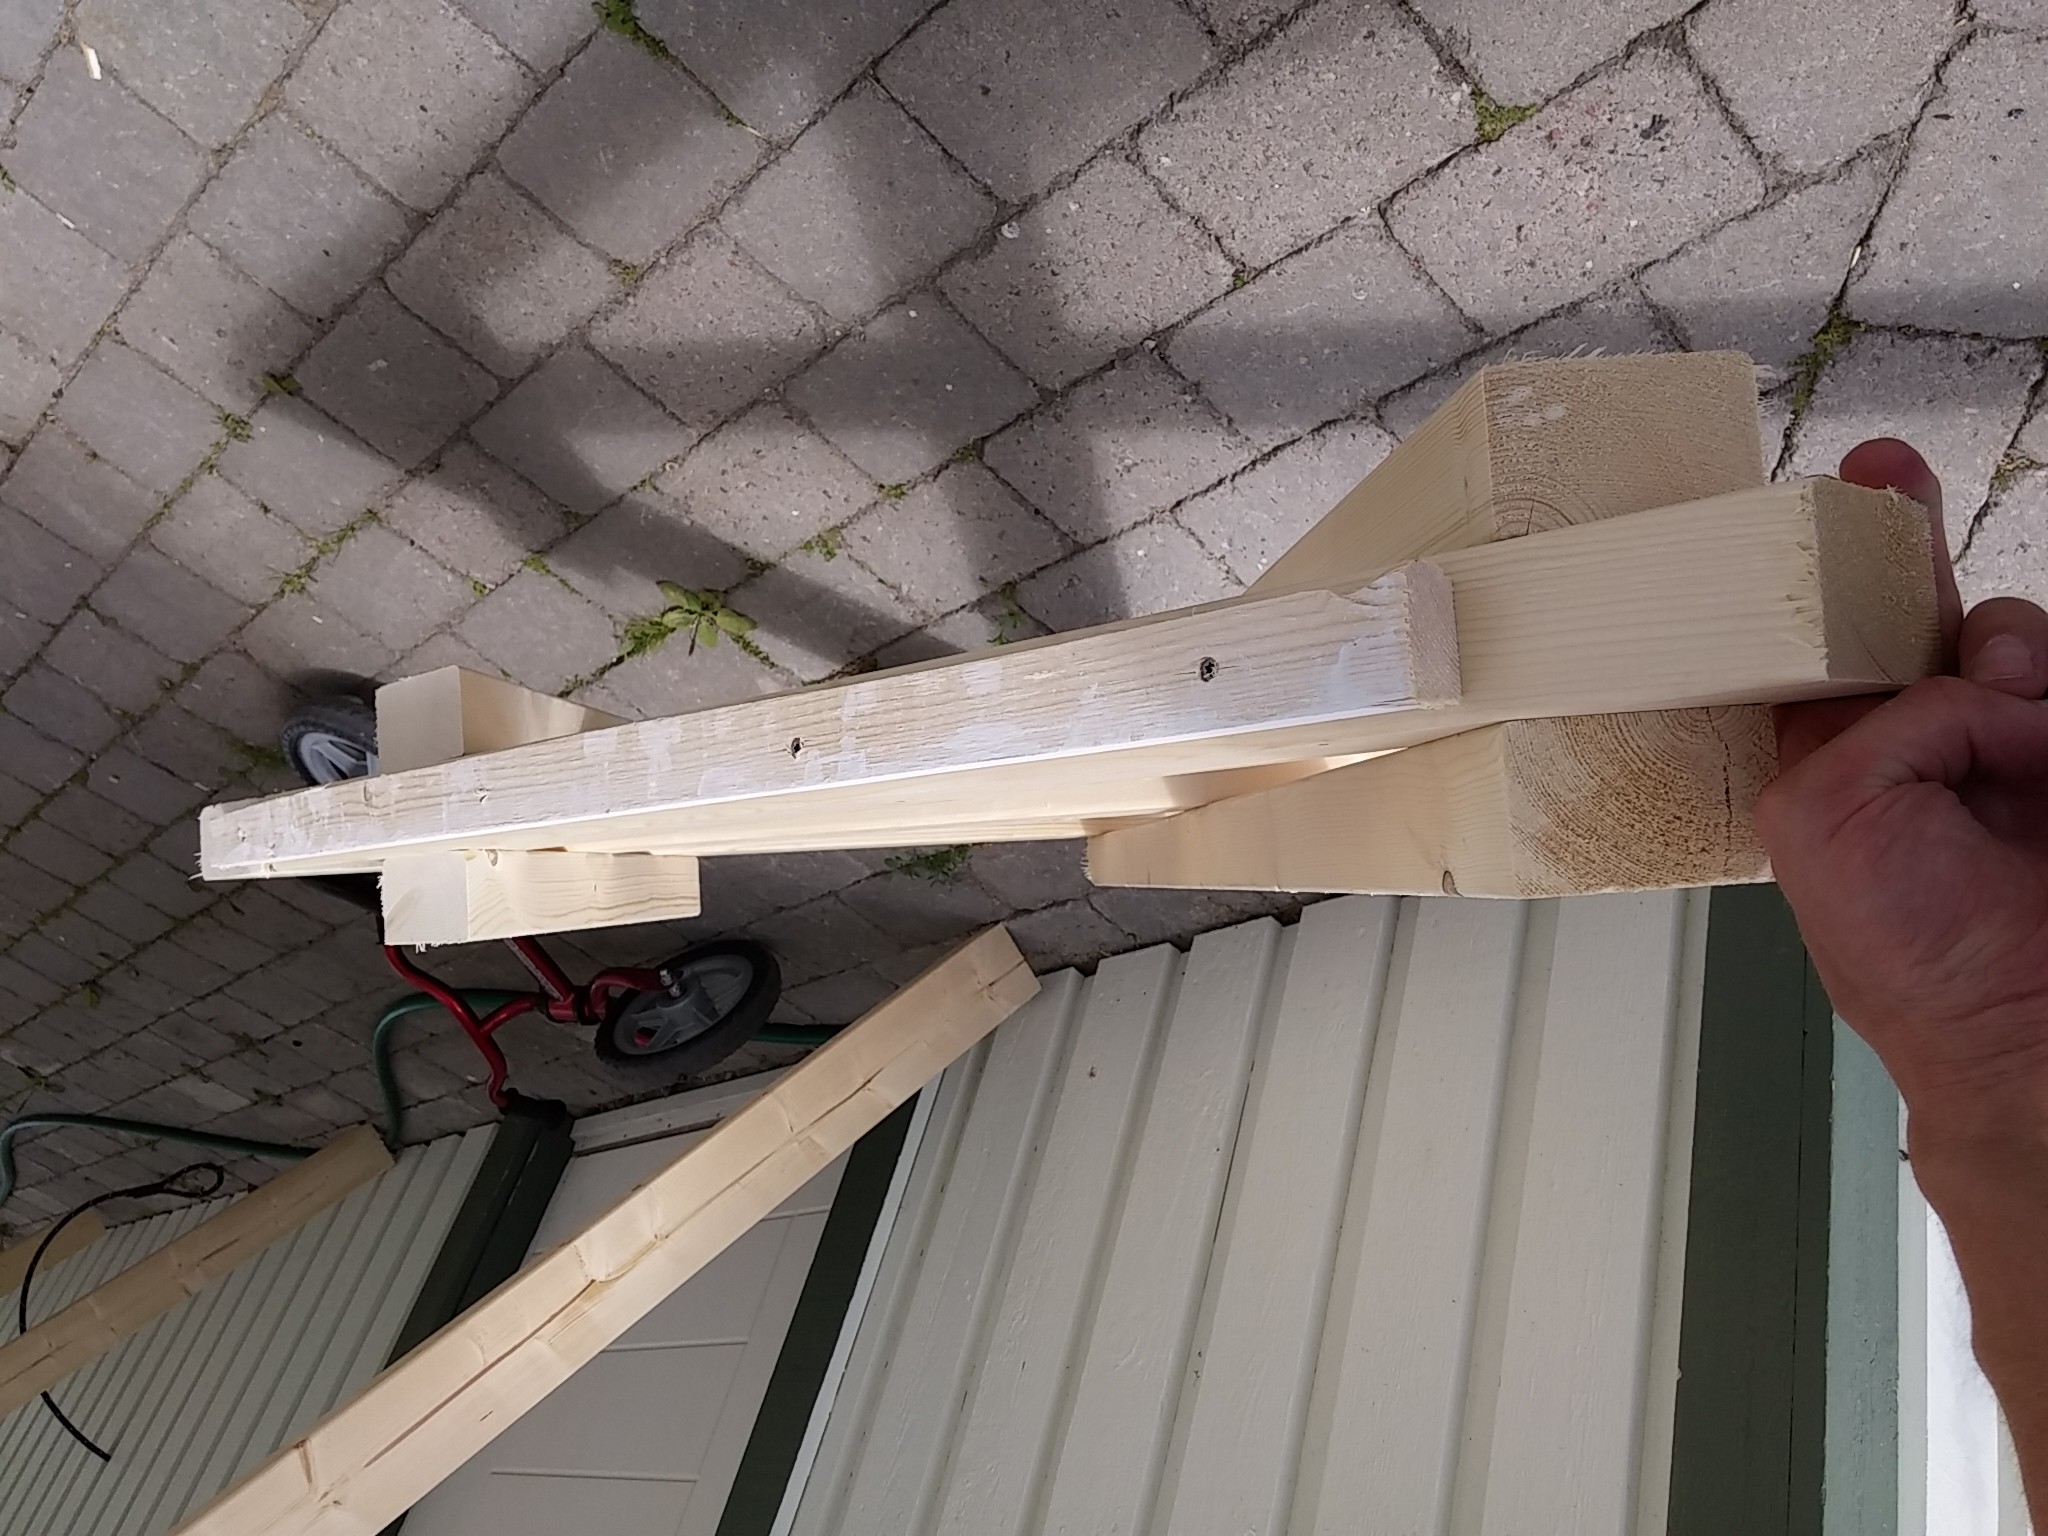
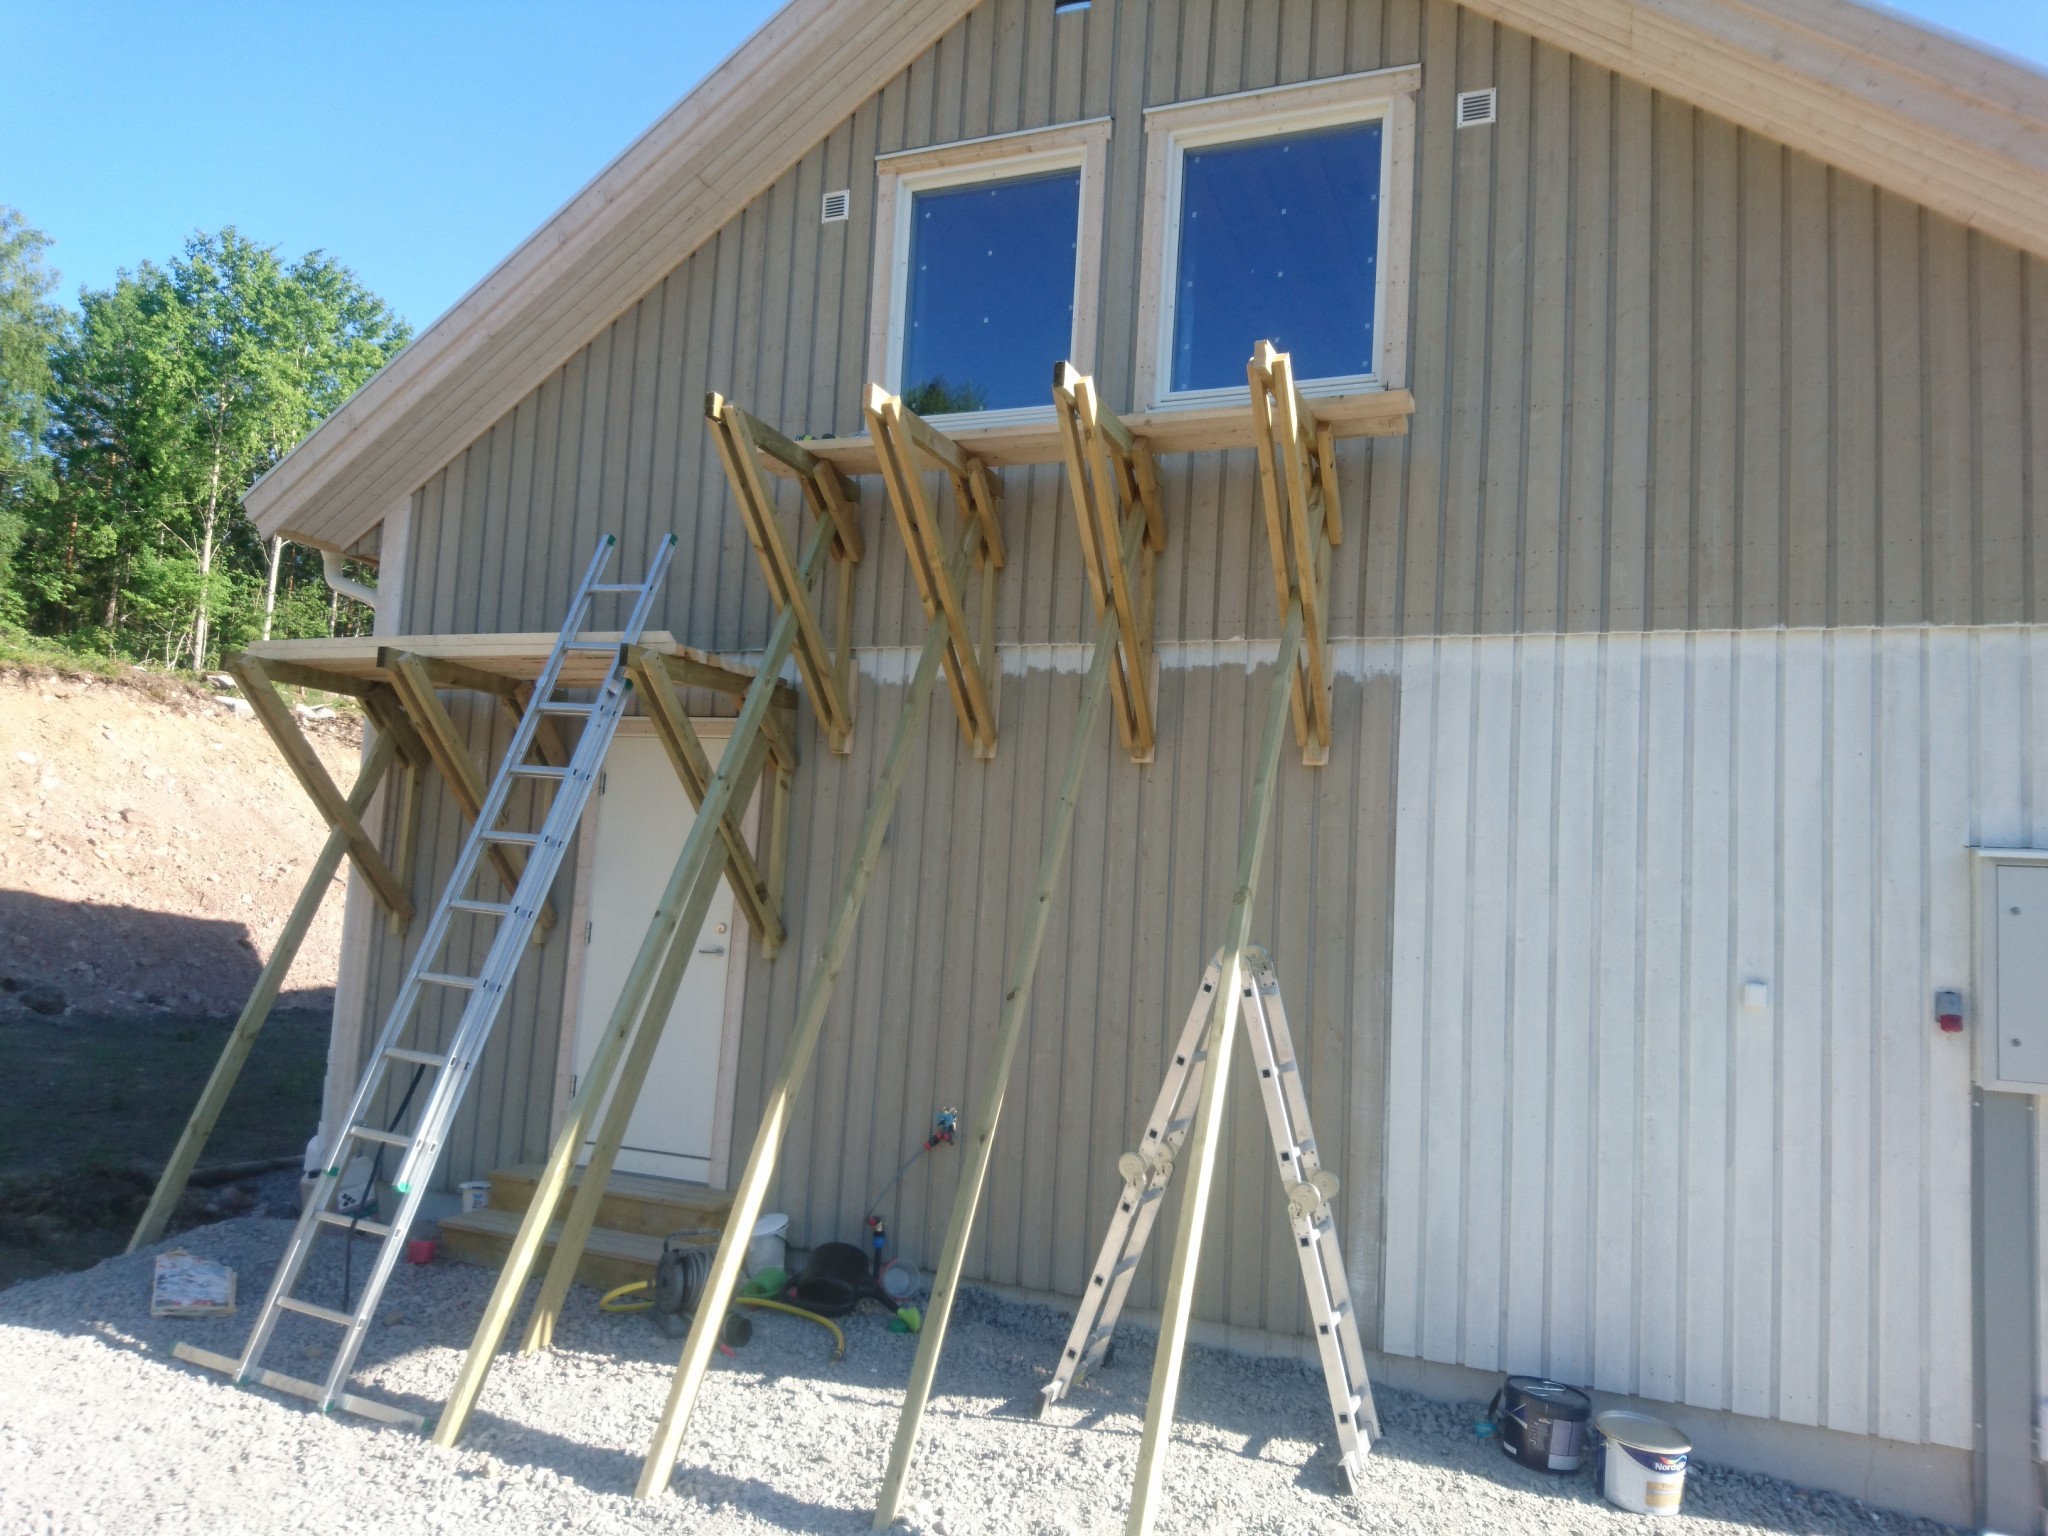
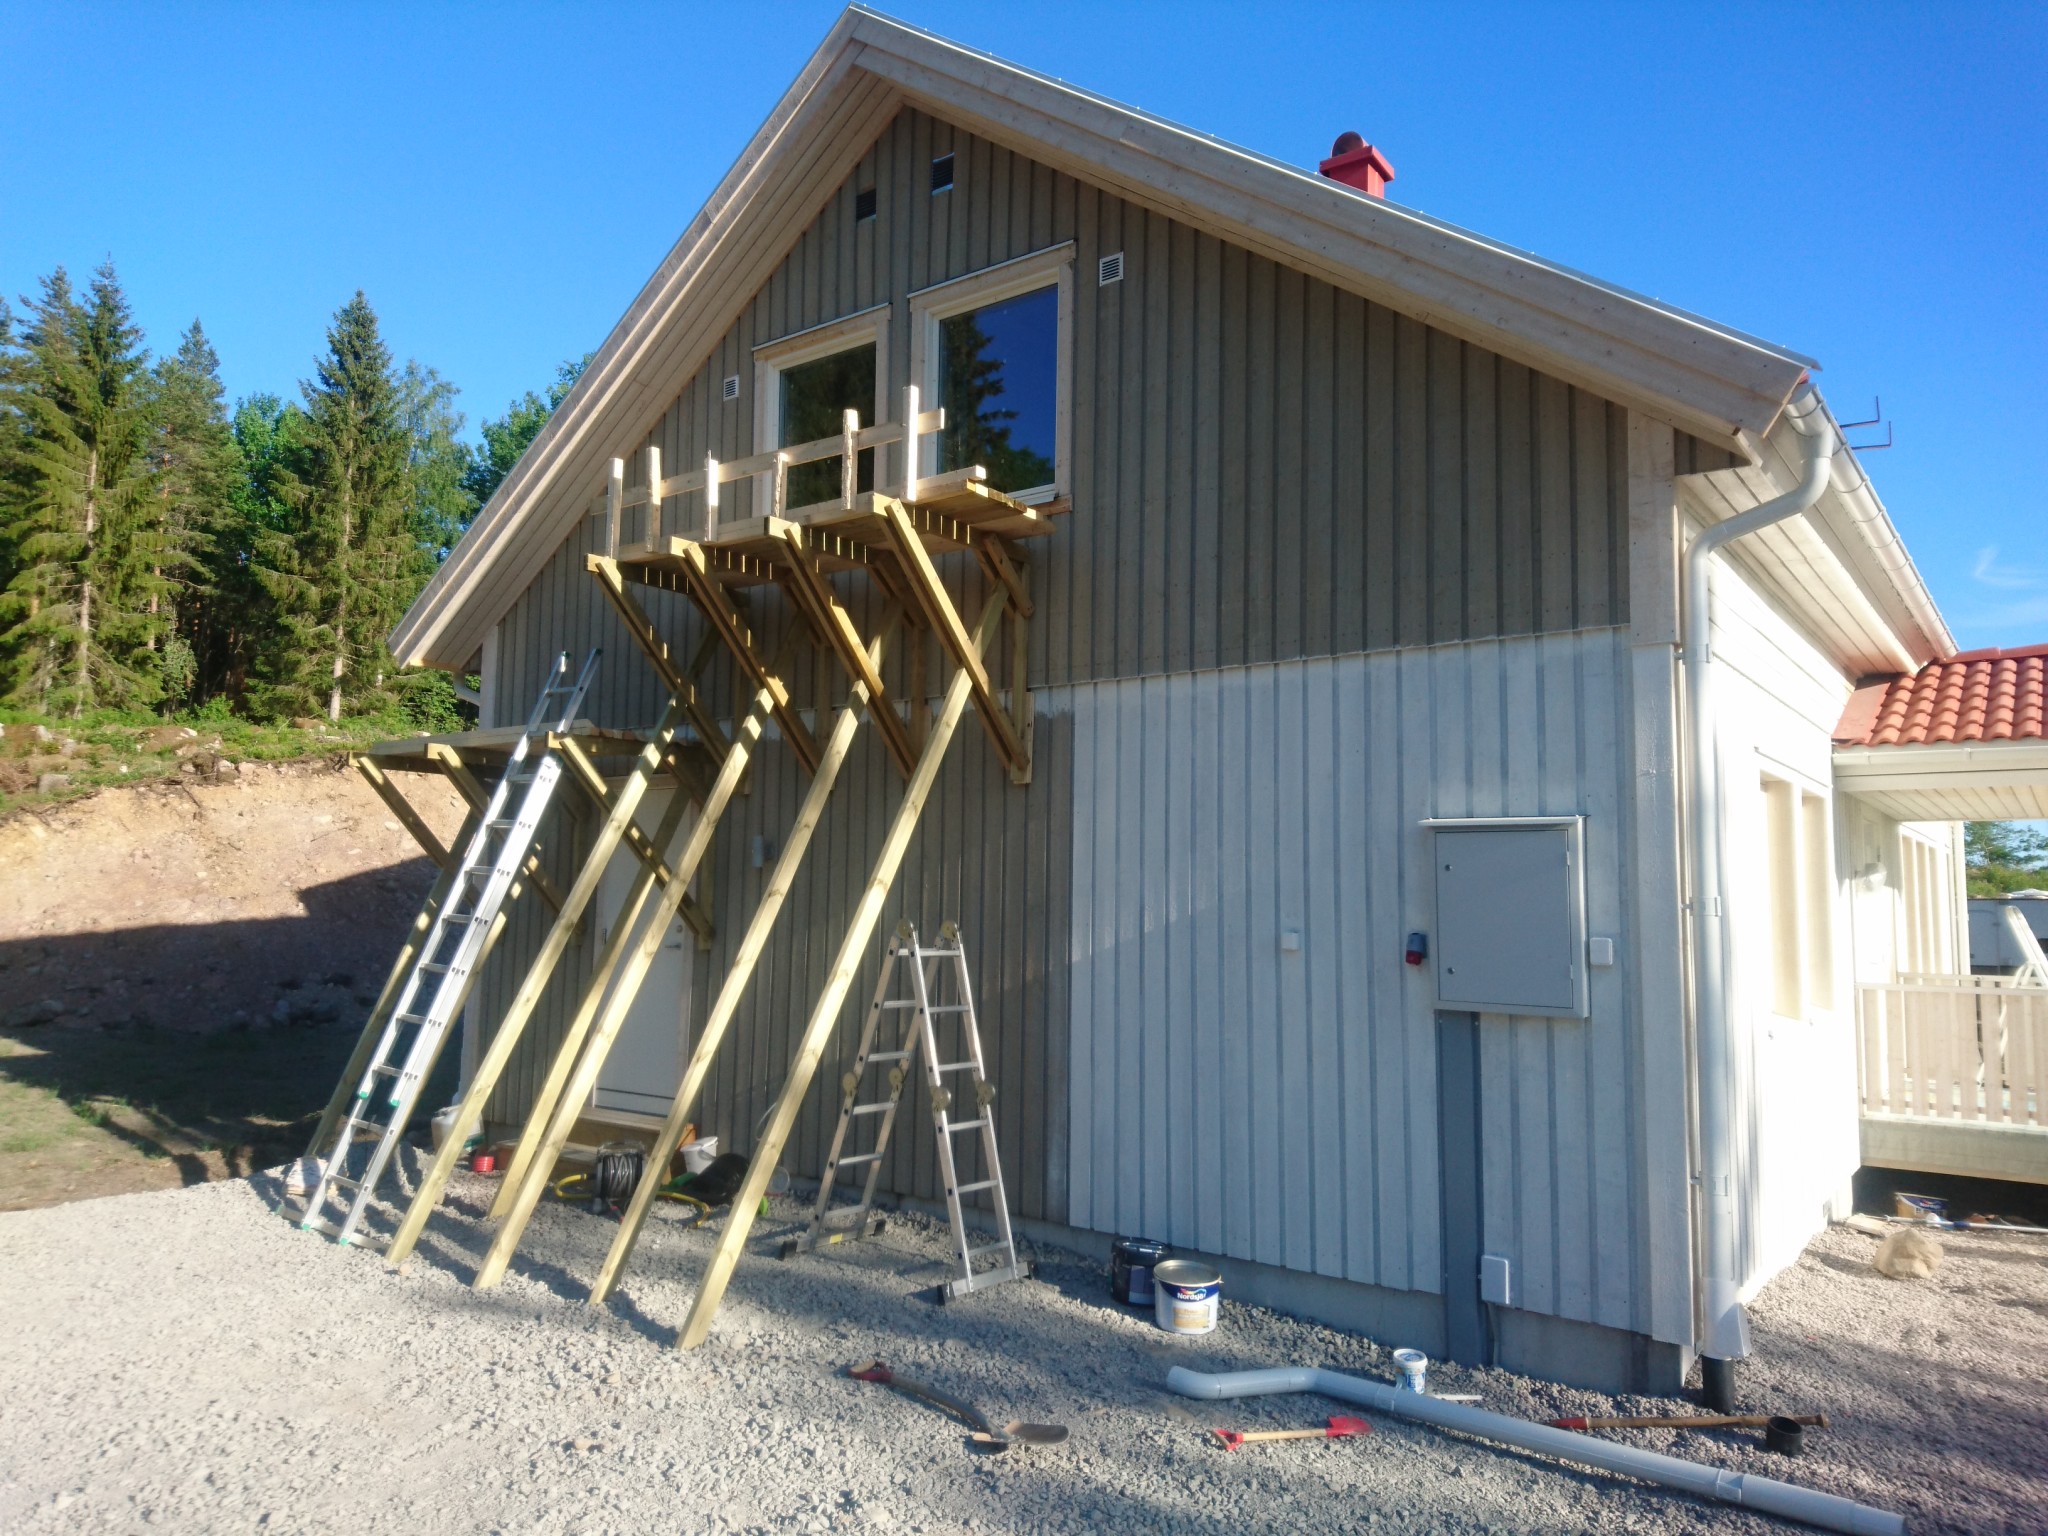
Thanks for the tip about the knekt. The materials I used were 45*70 & 45*90 and then 45*195 to walk on. It took a total of 3 hours to pick up the materials and assemble them into 5 knektar. The materials cost 1700 at Byggmax.Canuto said:This is what a "knekt" looks like, I think. I used such ones myself in the 80s when I replaced a large gable window. Very simple construction. Make two, or three depending on how long a span you want to cover with the scaffolding, lean them against the wall, put on planks, and climb up. Should not be attached to the wall as they must be able to slide down for maximum stability. The more load, the better it holds. Unless you've forgotten the support in the ground, that is! Test which angle against the ground is optimal for the supports! Good luck! U.P.A.!! Canuto
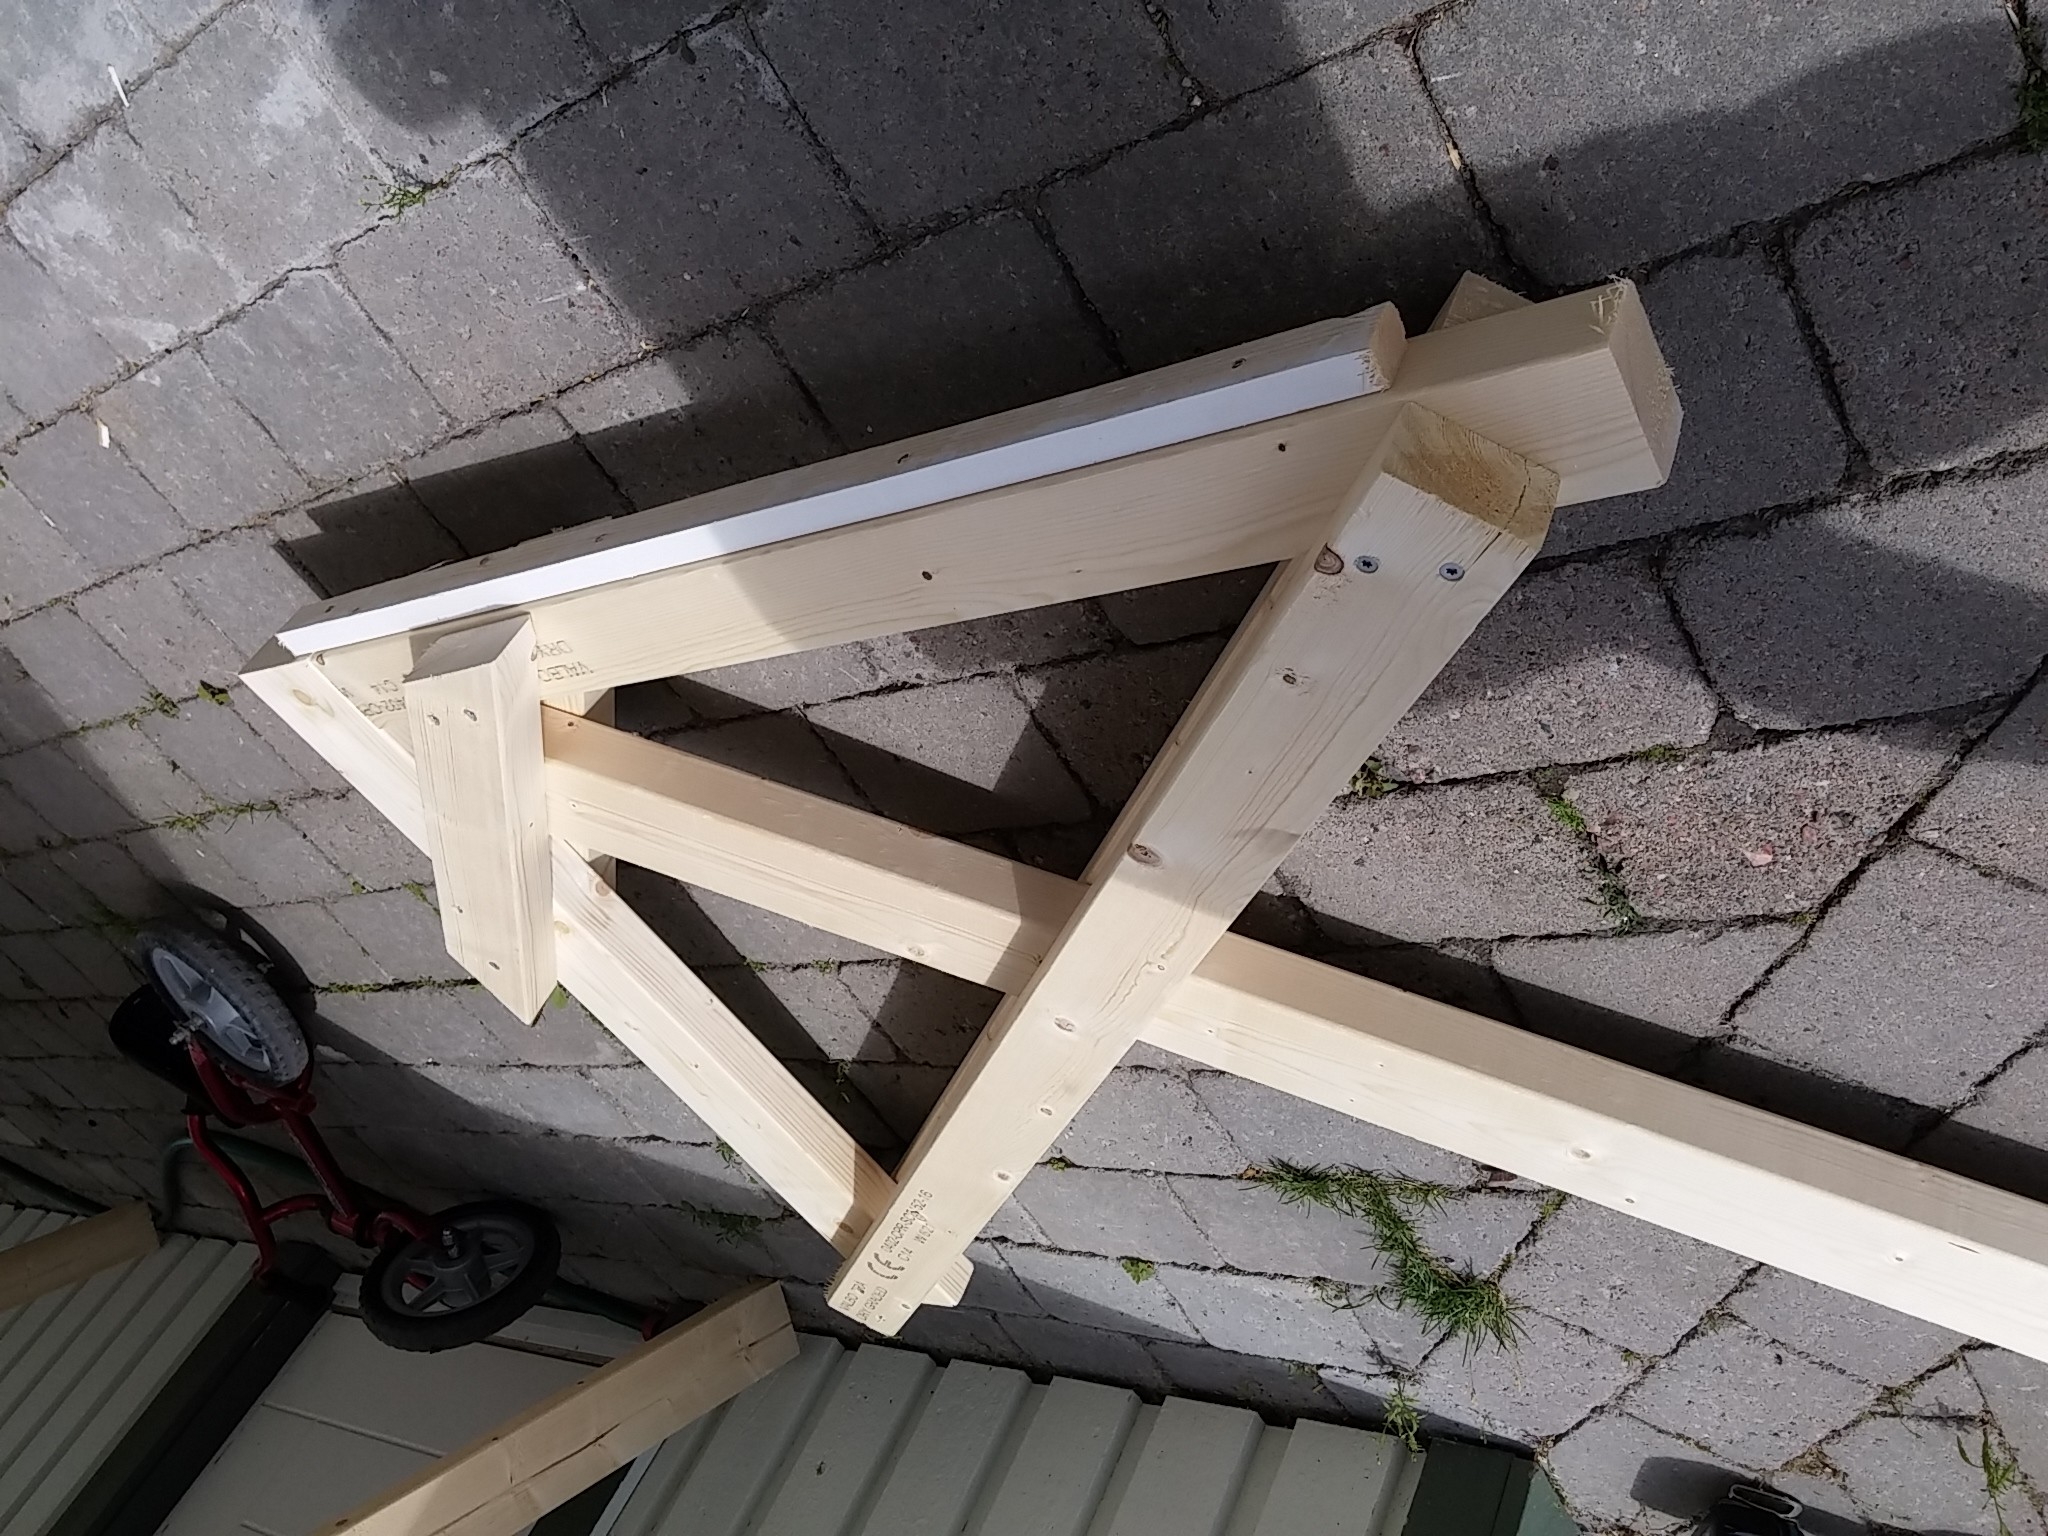
I added a strip that goes into the wall panel of the house so the knekt can't slide over the wall. Seen in the pictures.
Also added a stop so that the plank to walk on can't slide outward. Visible in some picture.
The screws used were 80mm long and 140mm in some spots (when I screwed into end grain).
The support must take a hold in the ground outside where the plane lies, or it might tip out from the wall.
It becomes very stable.
Furthermore, it is very easy to fine-tune so that the plank to walk on doesn't sag.
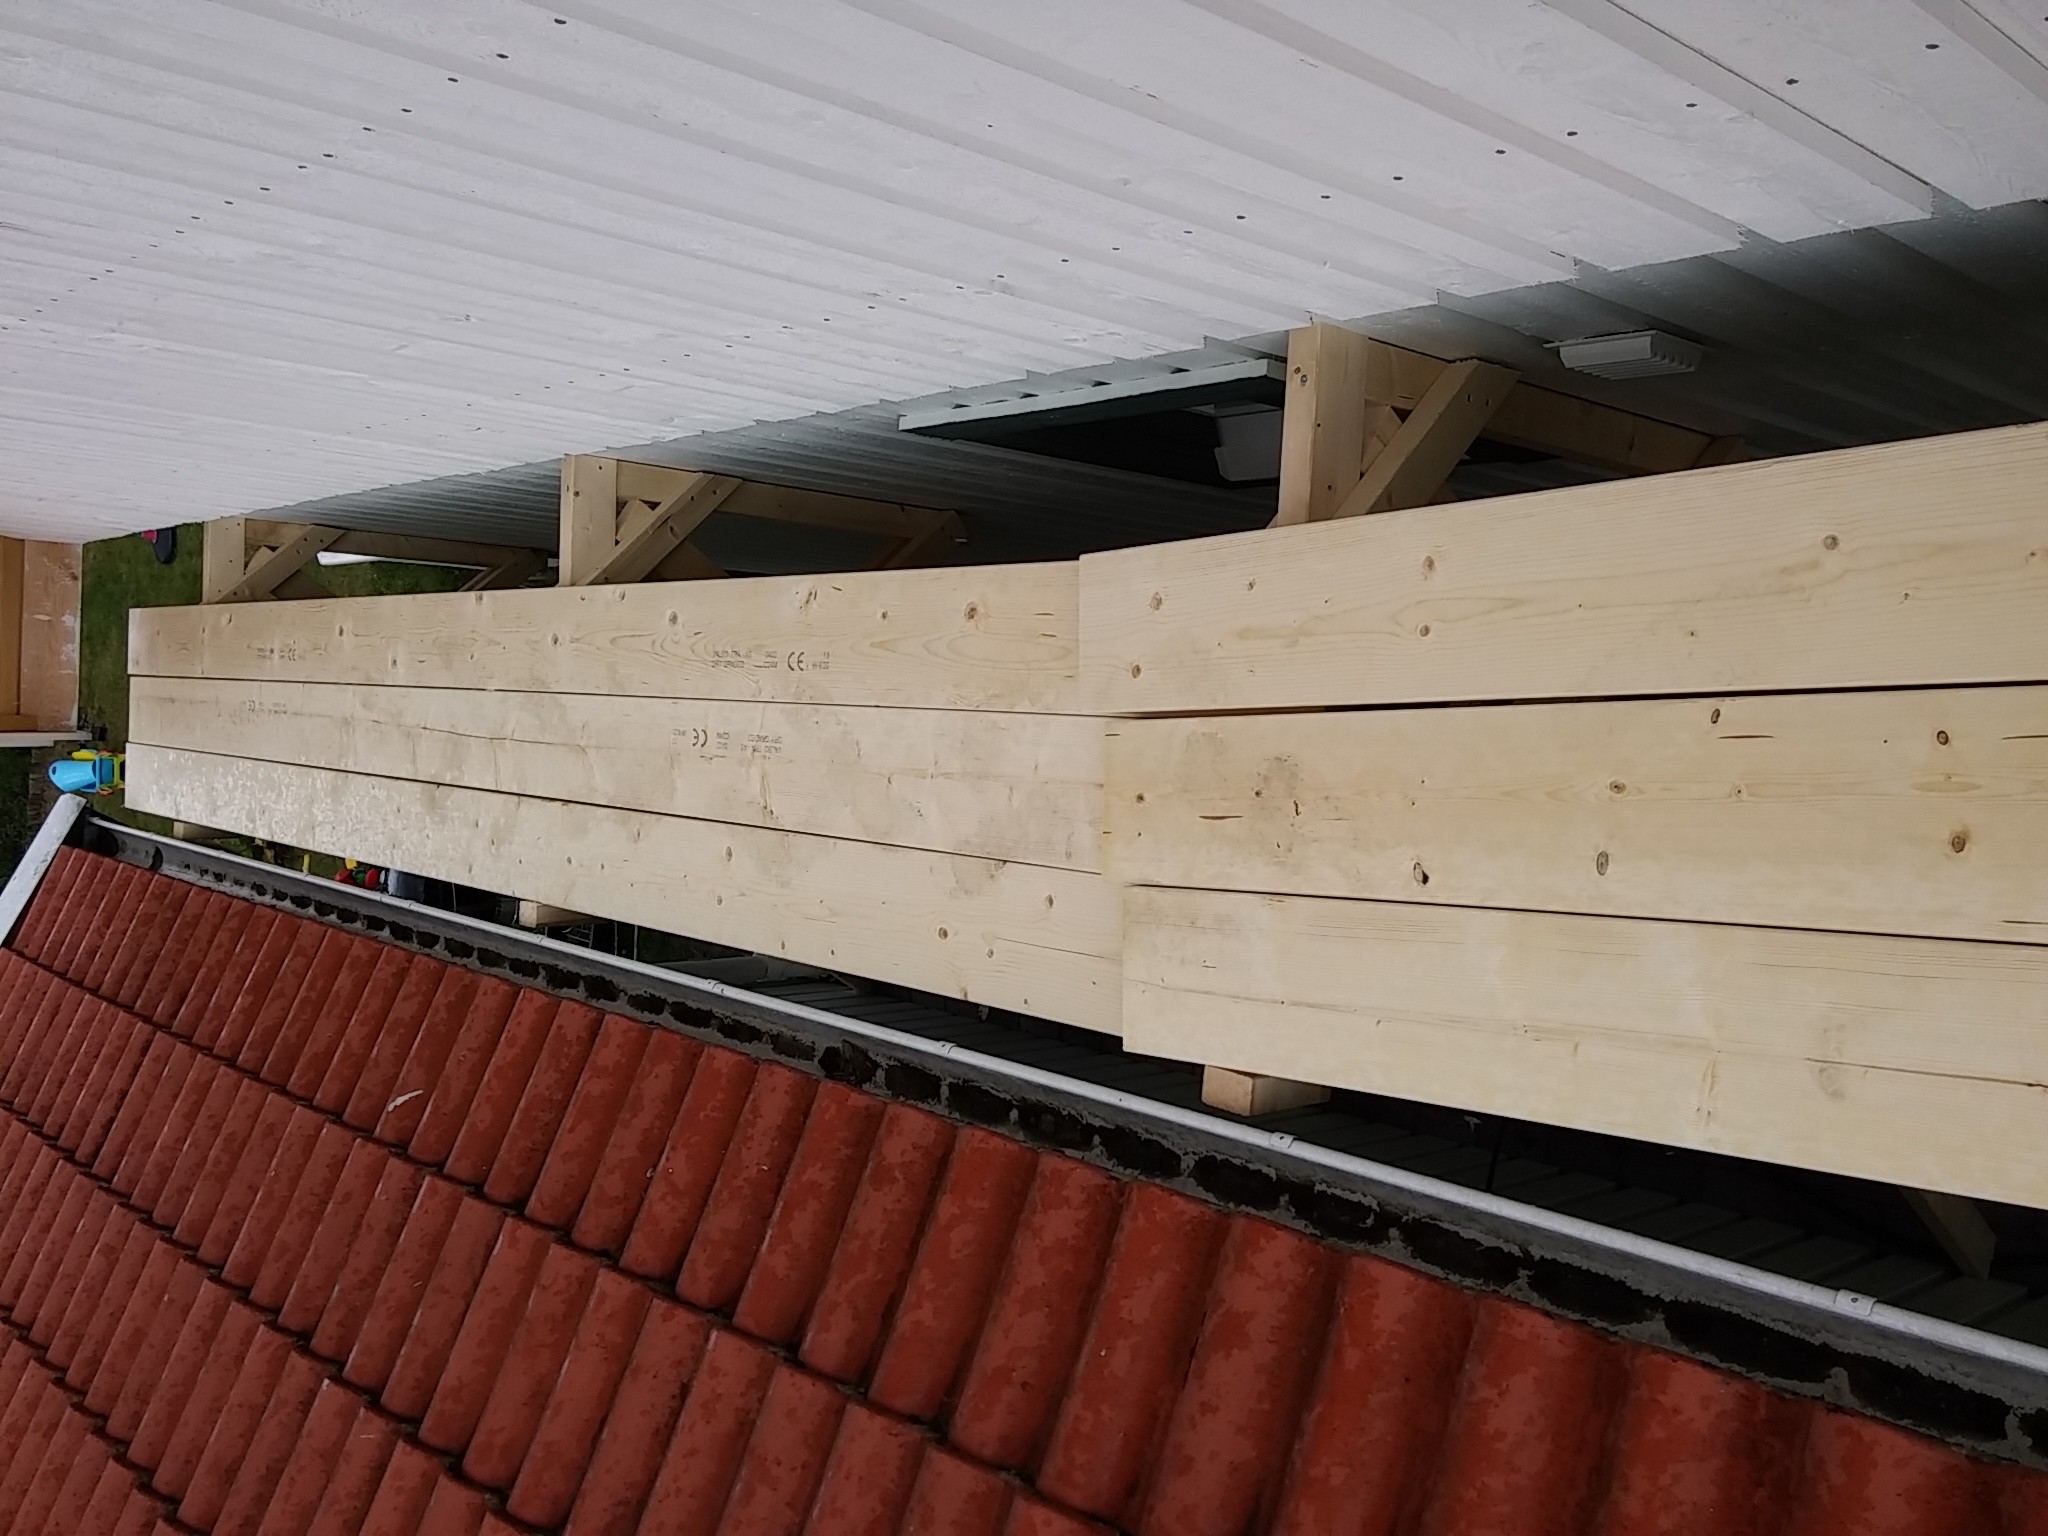
It's also easy to move around to the other side of the house when I'm going to paint there (a 4-legged scaffolding must be dismantled to be moved).
Last edited:
Interesting! I'm going to try to build some trestles in the next few days.J j-man said:
From what I understand, the long brace lies loosely inside the other screwed-together part. Shouldn't one secure these two parts with a clamp?
No, the long stöttan should only be attached at one point because the "shelf" needs to be able to tilt for the construction to work. The heavier the load, the more the knekt will be pressed against the facade, increasing the friction. Make sure that the long stöttan stands firmly in the ground. I dug holes about 2 dm deep to place the stöttorna in.Q qrt said:
OK, but what do you mean by "attached"? Is it screwed in at the top?J j-man said:No, the long support should only be attached at one place because the "shelf" needs to be able to tilt for the construction to work. The heavier the load, the more the bracket will be pressed against the facade, increasing the friction. Make sure the long support stands firmly in the ground. I dug holes about 2 dm deep where I placed the supports.
Alternative developed by the University of Gothenburg 2011. At least meets the then-current occupational safety requirements.
https://www.craftlab.gu.se/digitalAssets/1382/1382930_rapport-trastallningar-2011-web.pdf
https://www.craftlab.gu.se/digitalAssets/1382/1382930_rapport-trastallningar-2011-web.pdf