16,293 views ·
8 replies
16k views
8 replies
How much does tile adhesive build, acceptable board differences?
How much can you build out extra with tile adhesive?
I only find old threads about the thickness of the adhesive in general normal cases.
And it seems to be okay to use tile adhesive for filling. However, there are no details mentioned about how much you can dare to fill out.
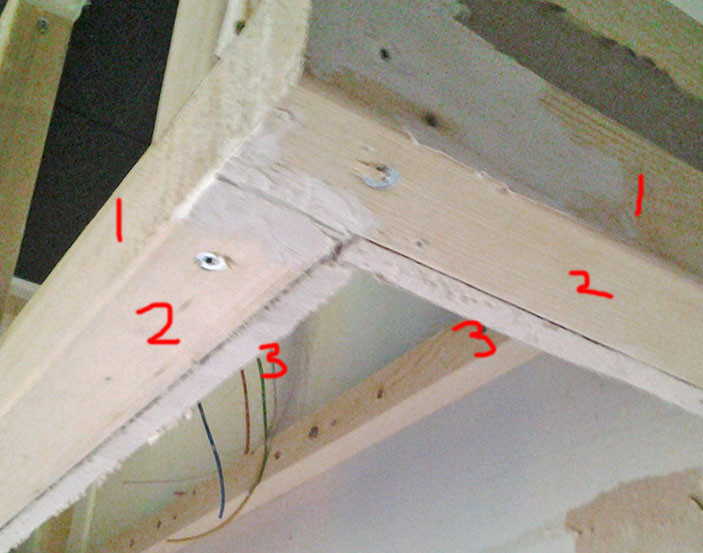
The extension sticks out 4mm more. Need to compensate for that on the other details so the tiles align.
I only find old threads about the thickness of the adhesive in general normal cases.
And it seems to be okay to use tile adhesive for filling. However, there are no details mentioned about how much you can dare to fill out.
The extension sticks out 4mm more. Need to compensate for that on the other details so the tiles align.
On walls, it's completely hopeless to adjust level differences with the adhesive. The tiles start slipping immediately if the adhesive layer is too thick. Even if you manage to stabilize the tiles with string/cardboard pieces/crosses or the like so they don't slip, it still becomes very difficult to make it look nice because the thick adhesive layer can easily lead to uneven joints. Additionally, you'll have the hassle of adhesive seeping into the joints.
So if you want to make it easy for yourself, adjust before you lay the tiles. Some sort of filler sounds appropriate. Attach some 4mm thick strips and fill to their level so the wall becomes smooth, in the same way as plastering a wall. I'm not very familiar with the range of mortars and filler suppliers anymore, so I can't give you a tip on a suitable filler. Tile adhesive sounds like an expensive and cumbersome option compared to something intended for use as a filler.
Edit: If it's just behind a half tile row or so, you can usually get away with adding a little extra adhesive, but I understood that you have larger areas to deal with.
Last edited:
It would help if I used 6mm gypsum and some 4mm wood panel to align everything, if 4mm wood panels even exist.
It's not small pieces of tiles but large panels as shown in the picture.

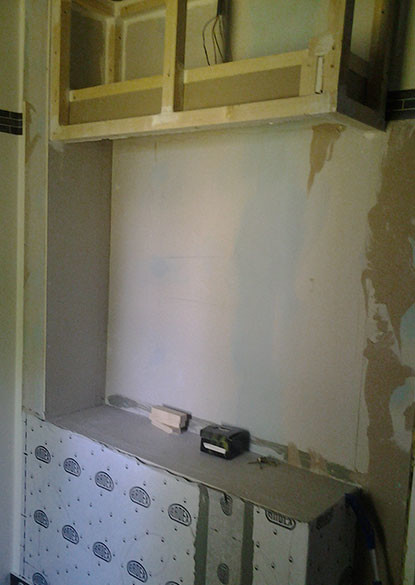
Is it advisable to use 6mm renovation plasterboard where it is missing? And then just need to "spackle" that small area instead of all the old pre-plastered ones?
Or 10mm plywood without plasterboard?
Or Pine plywood 4mm + 6mm plasterboard?
Or 10mm plywood without plasterboard?
Or Pine plywood 4mm + 6mm plasterboard?
Last edited:
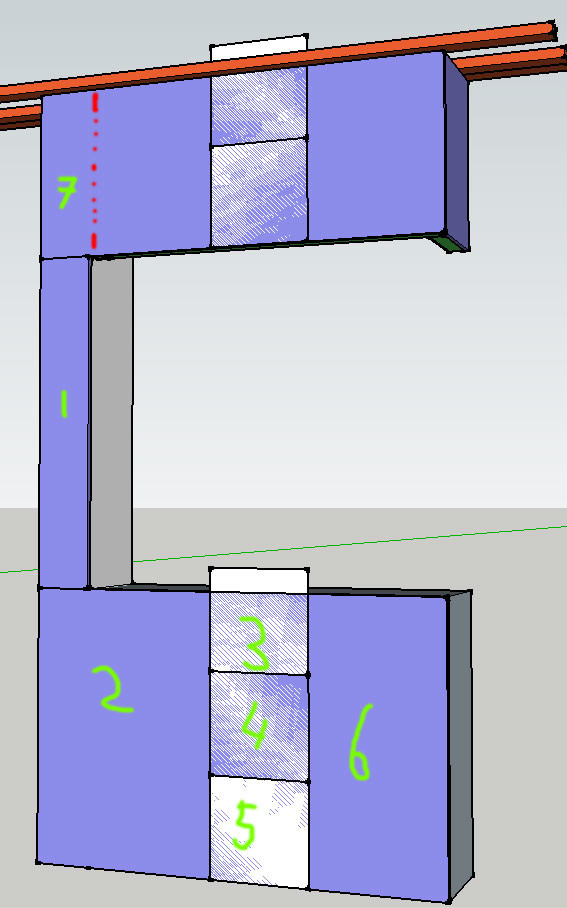
Imagine that sides 1, 2, 3 need to be plastered and tiled.
Should I make side 2 as narrow as possible by lowering the plaster on 1 & 3 by an extra 13mm so they act as walls for 2?
Or should I do as in the picture, ending it in line with the stud and making a wider cover for side 2?
Narrower cover, less load/risk of it coming off. I'm thinking in hindsight.
Click here to reply