12,987 views ·
40 replies
13k views
40 replies
Drilling through concrete slab & load-bearing capacity
I still don't quite understand how you're achieving this. I'm designing a staircase in StairDesigner, and in the picture, I have a staircase with a 200mm nose, a width of 690mm, and a length of 1951mm. With 13 steps, I obviously also get an 18.8 cm step height, but the step depth is 16.6 cm.J justusandersson said:
That's about 6-7cm less than what I'm aiming for..
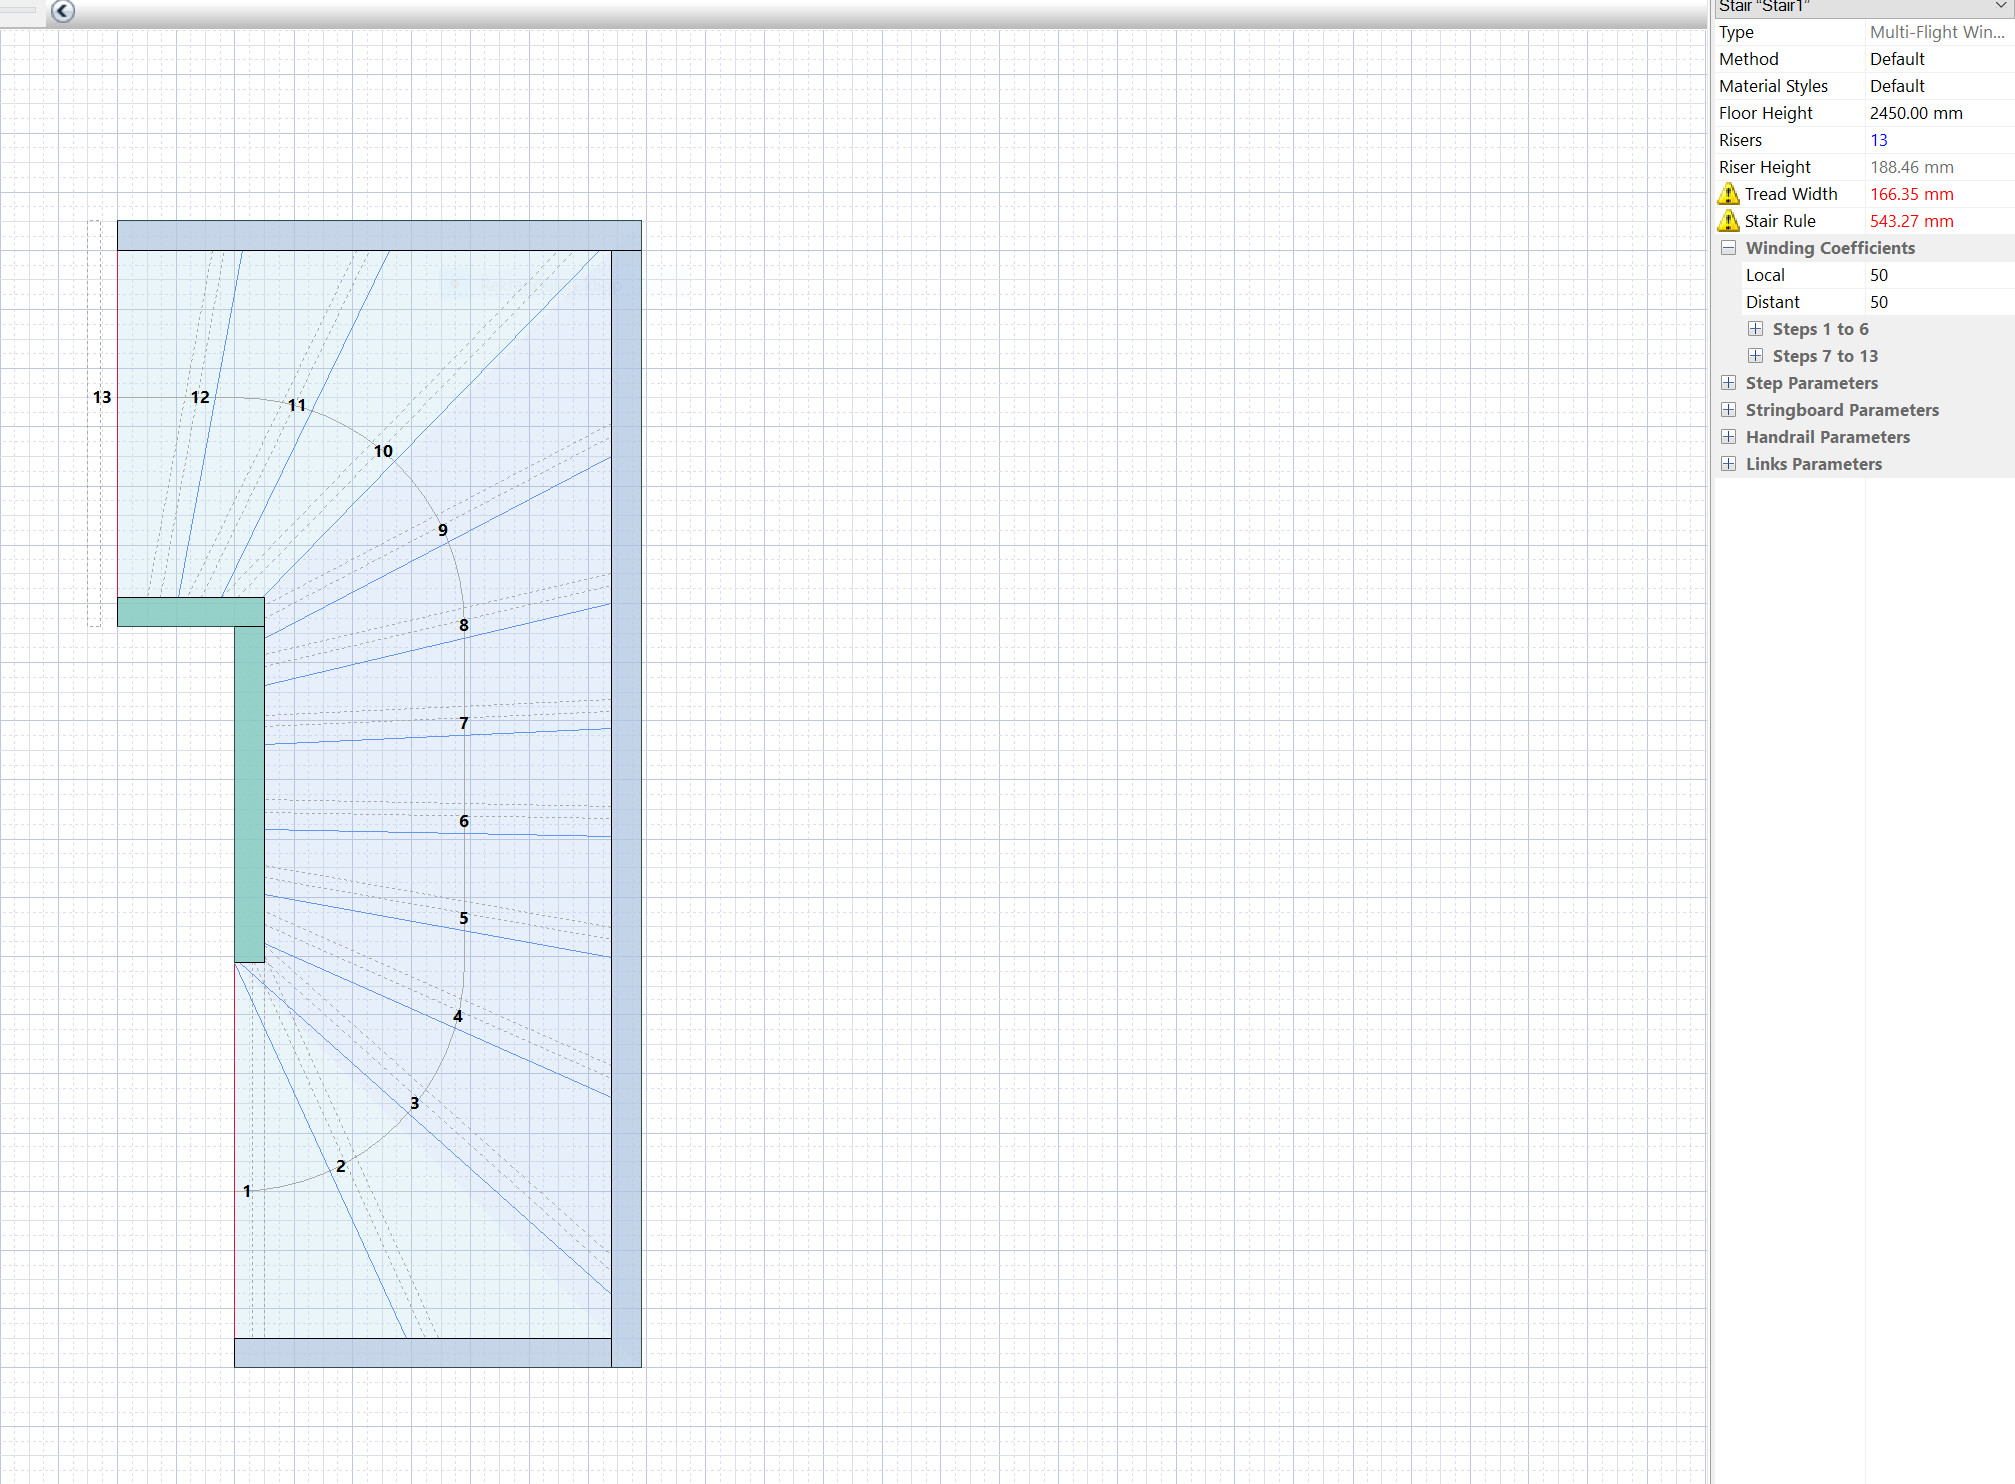

It is difficult to draw stairs. In addition to everything else, it requires good spatial ability. Personally, I would never use a computer program for it. If you get a step depth of 16.6, it is misprogrammed. There can also be differences between Swedish and foreign traditions. Do not confuse the theoretical step depth with what you can achieve in practice through an extended stair nosing.
Alright, I do believe this program is used by several Swedish suppliers, but I won't pretend to know more than the very basics of the program.J justusandersson said:It's difficult to draw stairs. Besides everything else, it requires good spatial ability. Personally, I would never use a computer program for it. If you get a step depth of 16.6, it is poorly programmed. There may also be a difference between Swedish and foreign traditions. Don't confuse the theoretical step depth with what you can get in practice through an extended stair nose.
Another thing I wonder about your sketch is where you mean to open the floor slab - on the right or left of the sketch? On the left, there are several steps that are perpendicular to the rest of the staircase?
We're probably talking past each other. You have an opening, 1856x690 mm, which can be extended slightly. I start from this opening without any additional hole cutting. Then I draw an L-staircase, which is a trick to both create space for the longer stair run needed for a lower slope and to avoid a ledge that one might hit their head on.M mefi said:
I think soJ justusandersson said:I think we are talking past each other. You have an opening, 1856x690 mm, which can be extended somewhat. I am assuming this opening without any additional hole cutting. Then I draw an L-staircase, which is a trick to both make room for the longer stair run needed for a lower angle and to avoid a head-bumping edge.
")
Correct, 1856x690 mm is there today, on the lower floor it is possible to have the staircase 1950 long (due to a small notch in the joist about 100mm that will not be a problem for headroom). However, there is a wall along one short side on the lower floor, on the same side of the opening where we want the staircase to start. This, combined with the limited ceiling height, means that we can't have more than a maximum of 1 step under the joist.
What we are considering is having a U-staircase, with the first step under the joist, and the last (1 or 2) steps placed where the joist is today.
I have finally completed the hole drilling. I did it myself and started by trying to saw with an angle grinder, but realized after about 30 seconds and not too many centimeters that it would take a loooong time and leave a substantial layer of dust even outside my plastic covering. It was very dusty, despite the vacuum cleaner!
I had to bring out the rotary hammer and drilled around 15 holes through the joists. Then, I chiseled. It went quite quickly! Now I'm working on smoothing out a nice edge again with cement filler. Really satisfied so far and haven't seen any cracks.
A total of 7 rebar rods were cut on the surface which was 25x70cm.
7 irons in the small area of a floor structure made in the 40s still sounds like a lot of reinforcement to me. Did you take any pictures of what it looked like where you can see the irons, feel free to share if so.
Mja, I took some pictures but not so close. You can glimpse some of (the cut-off) irons in a couple of pictures.B bossespecial said:
Haha, yes nice! You were 100% correct!Jarlingar said:
The most nerve-wracking moment was probably really when I was going through the wooden floor. I used a multicutter and it started to smell a little burnt. When we went in and saw that there were shavings up to the floorboards, we brought out a water bucket & fire extinguisher
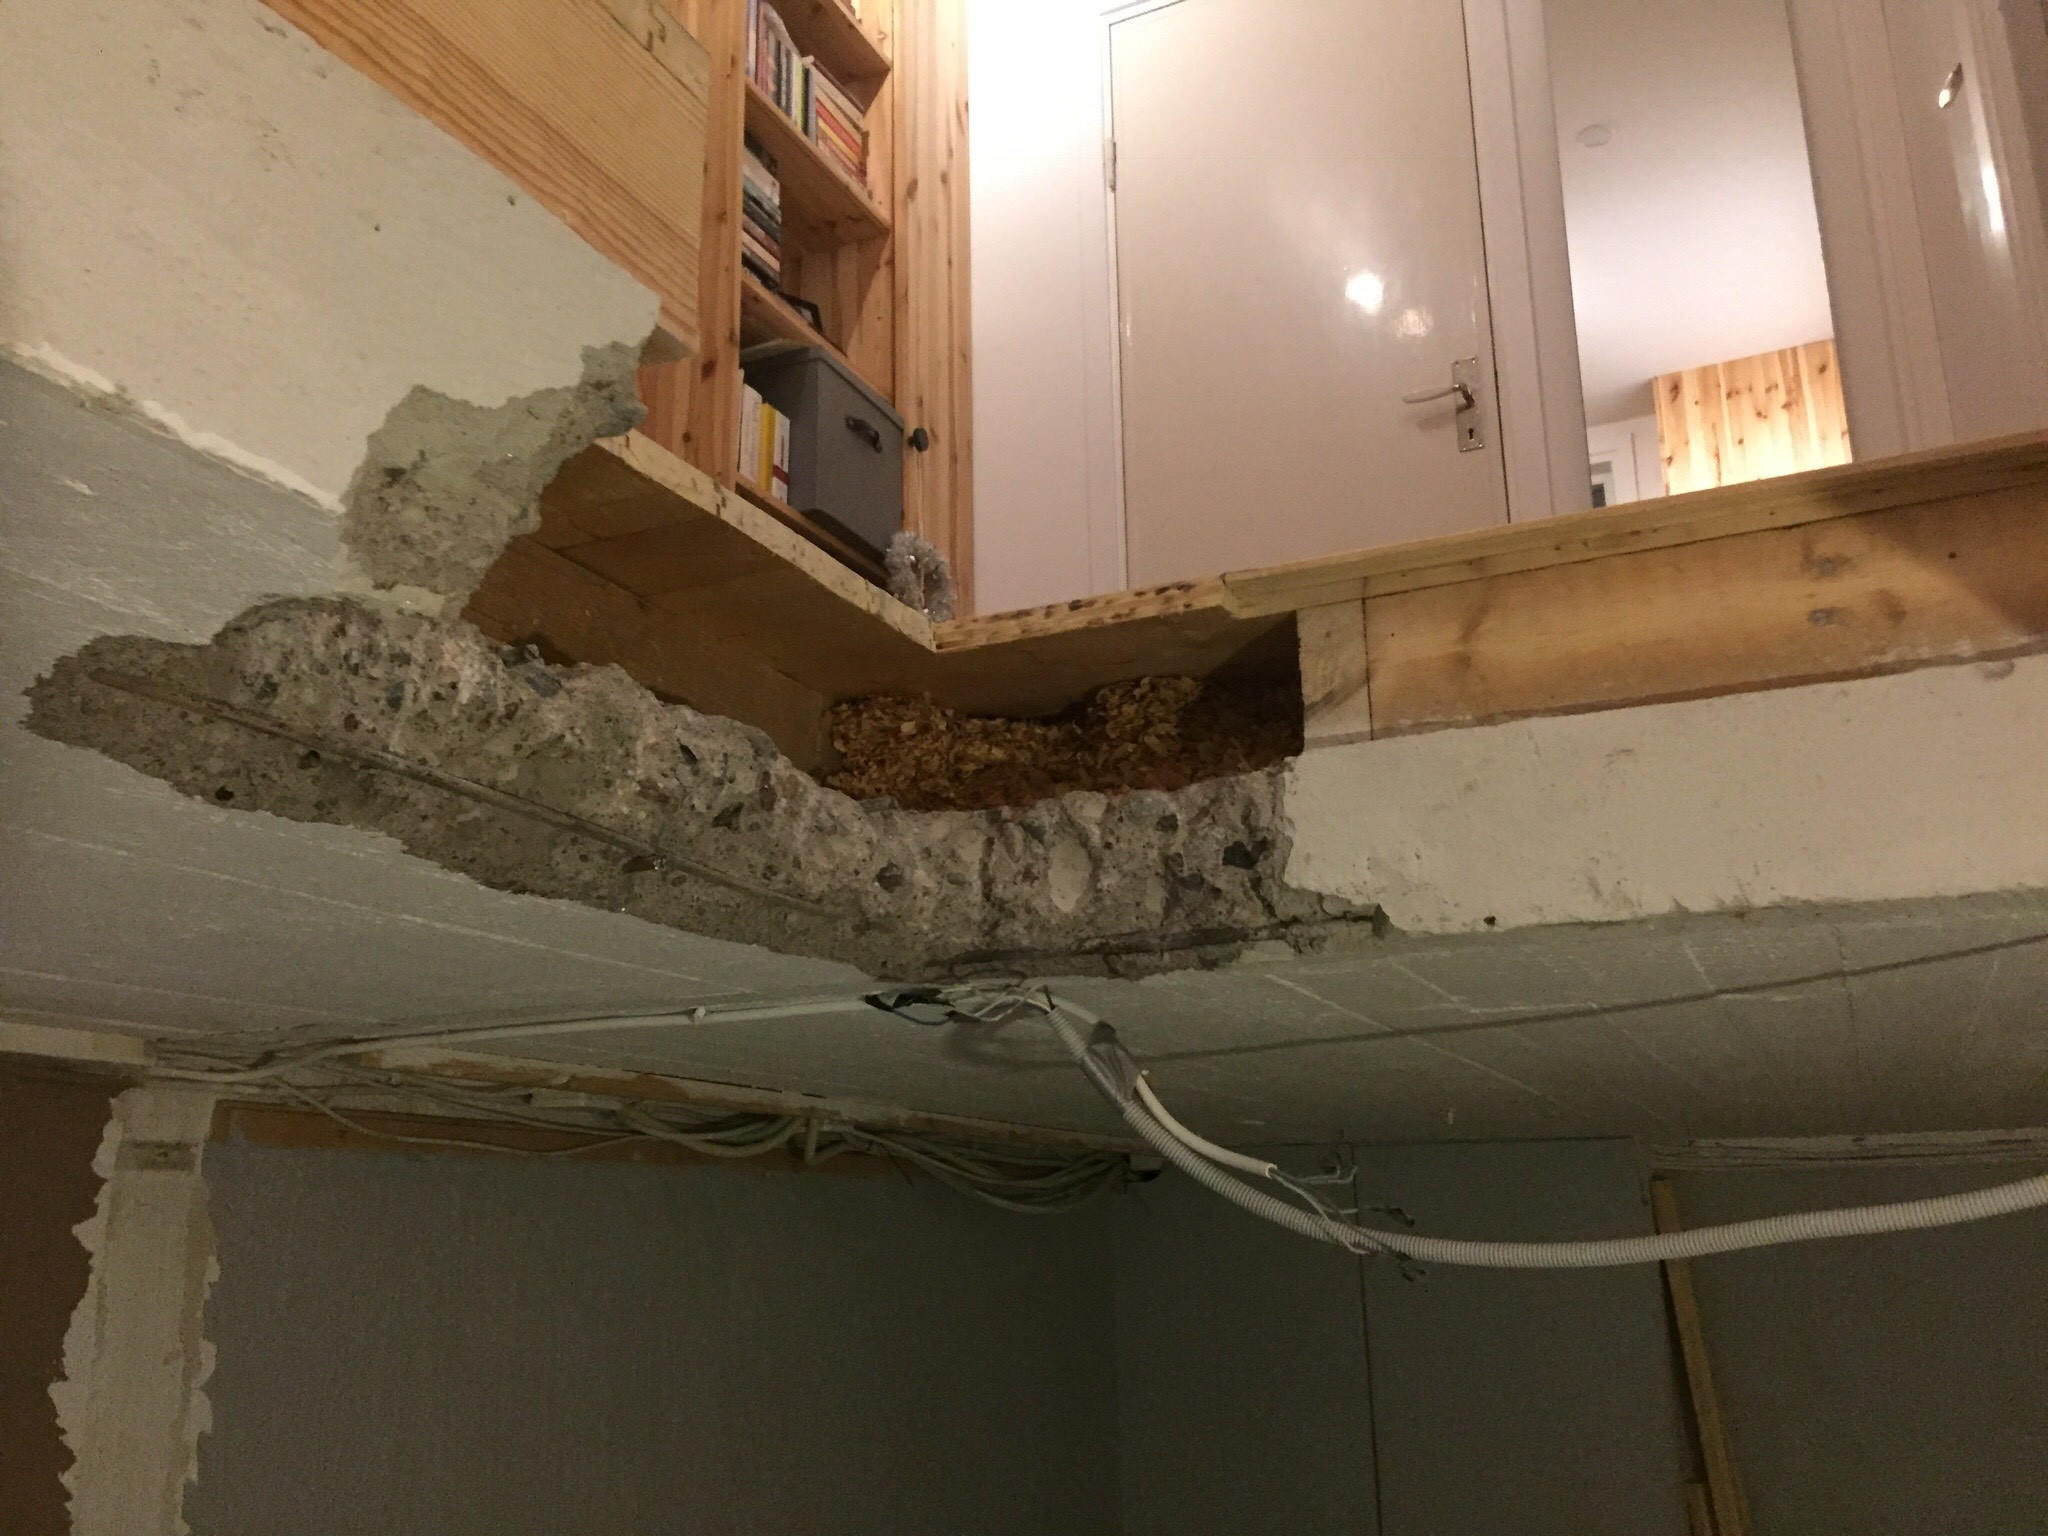
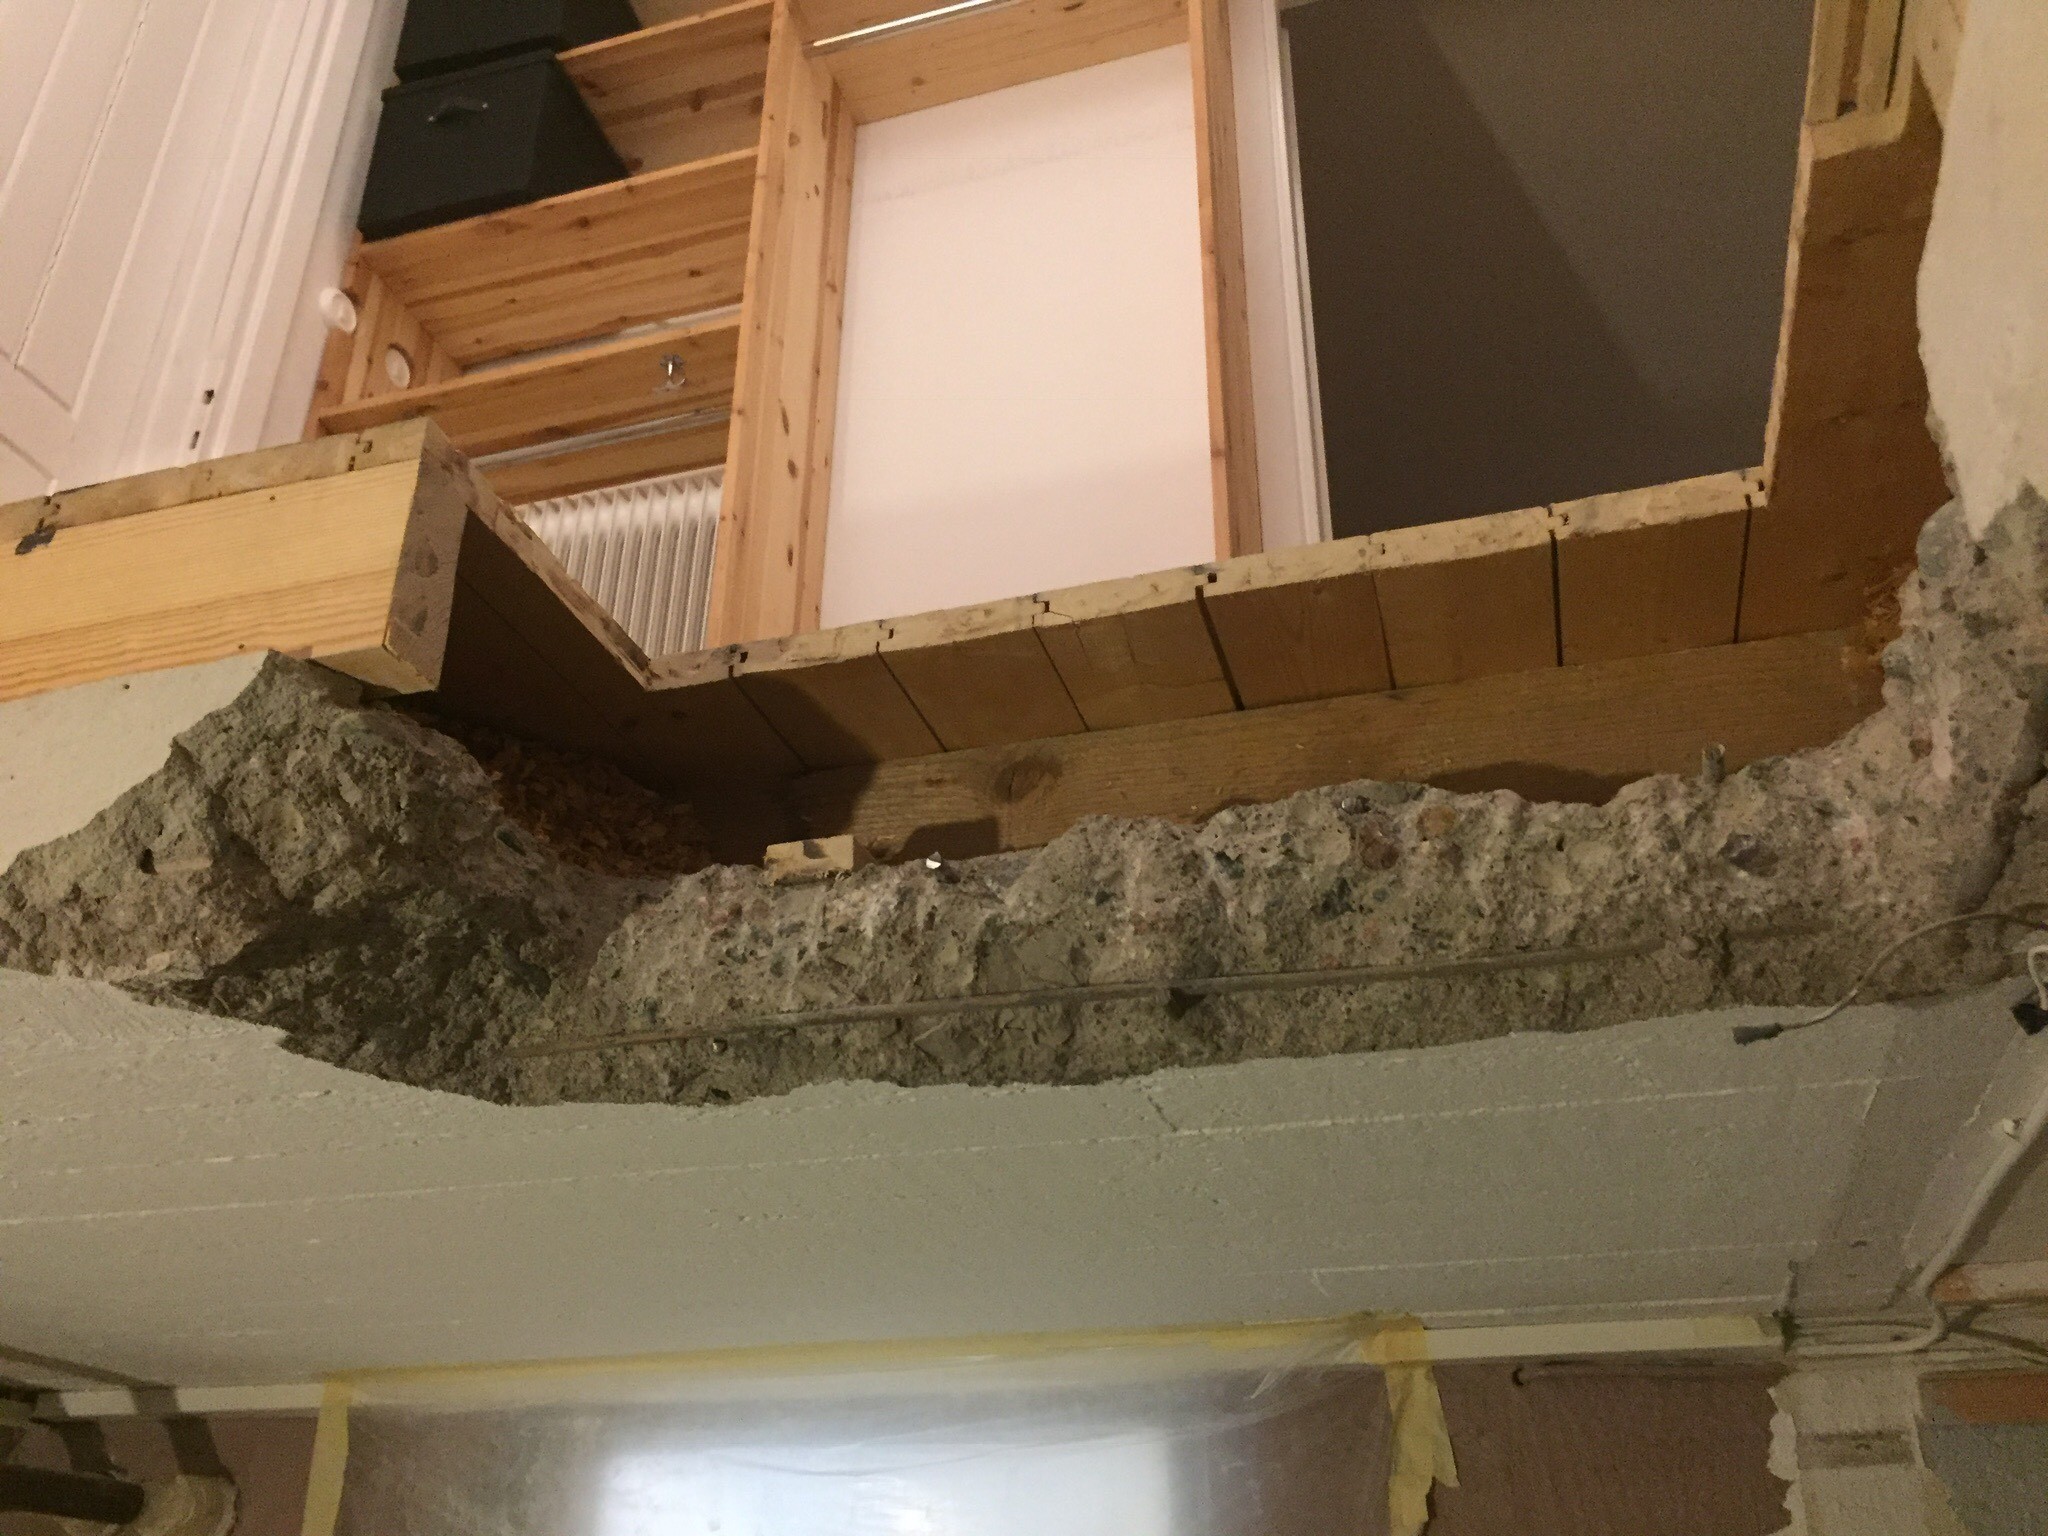

It looks like only one iron is cut parallel to the existing hole, so it will probably work. Was it camshafts, looks like smooth iron?
Yes exactly, one iron lay parallel to the one that remains underneath, quite far out. It was smooth iron. Some of those that came out perpendicular to the hole were bent into a loop and had a slightly larger diameter.B bossespecial said:
Click here to reply