I don't understand what you want me to explain. In terms of length, it won't become more.
And you seem to want to scrub the wood.
Would it become longer just because you round off the edges?
Oh, you're still on rounding off the edges... I thought we left that behind when I explained that I won't need to sand the planks.
Getting evenly rounded edges requires much more than just sanding the surface, so yes, I consider it much more work. But as I said, that problem is over for me.
The board in the middle has been unscrewed and scrubbed lightly with a scrubbing brush and regular soap.
No trace of the board having rested against the beam underneath.
Not here either.
Like new!
The other board I unscrewed had a less green and more brown tone but was in equally good condition. So now I'm just waiting for the temperature outside to get a bit nicer, and then the screwdriver will get to work!
You can see in the pictures how tightly the boards are placed. I will address this by inserting an unfolded measuring stick on both ends of each board as a spacer before they are screwed back into place. This will obviously mean the boards closest to the house wall will need to be cut to length, but that’s no problem. The circular saw or table saw will handle this no problem. The boards are probably quite moist after the winter snow, so they are likely to shrink a bit. However, the gaps have never been sufficient at any time of the year, so I believe the measuring stick trick will be quite optimal.
It was much more work than I thought to flip the boards... but it was 100% worth it! The hardest part was probably that the previous owner had used a handsaw when cutting the boards. This had made all the end grains "ragged" and with a rather sharp edge. I didn't want it like that, so I took out the belt sander and sanded all the ends and beveled the edges a bit... it was tough because my belt sander is quite heavy. I screwed up three rows at a time so the deck could be used in the meantime. Due to my limited health, I couldn't do the job in one go, but it probably spanned over three weeks before all the boards were turned. Another thing that was incredibly difficult was that the previous owner used two different types of screws. Torx 25 was OK, but then they probably ran out, and he bought screws of poor quality with Torx 20. They were hopeless to remove! Even the smallest debris in the "track" would round them, requiring drilling them out.
The end result is very nice though!
However, this method is not for perfectionists. For one, the previous owner was not very careful with how he drove down the screws, so they weren't in neat rows, and some were screwed in at an angle for some reason. This meant that the exit holes ended up a bit here and there. I wanted as neat rows of screw heads as possible, which means there are some holes in the planks that couldn't be reused. Hopefully, they will swell again/fill with debris over time.
Reusing also means you can't choose how the planks are cut and laid, so in some places, there is, for example, a large gap between end grains.
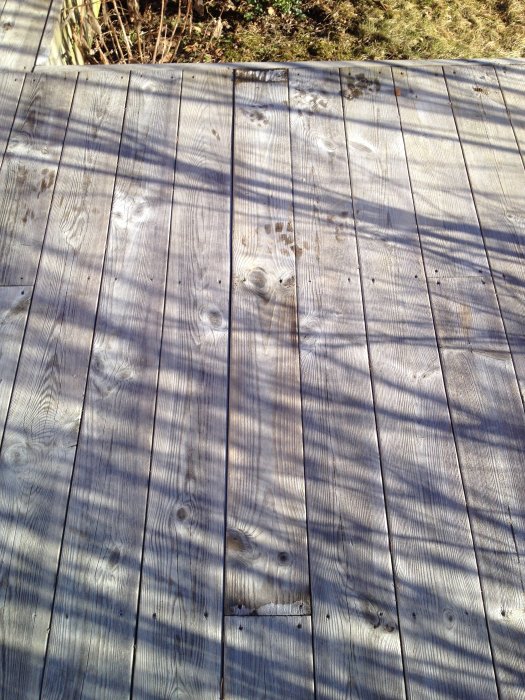
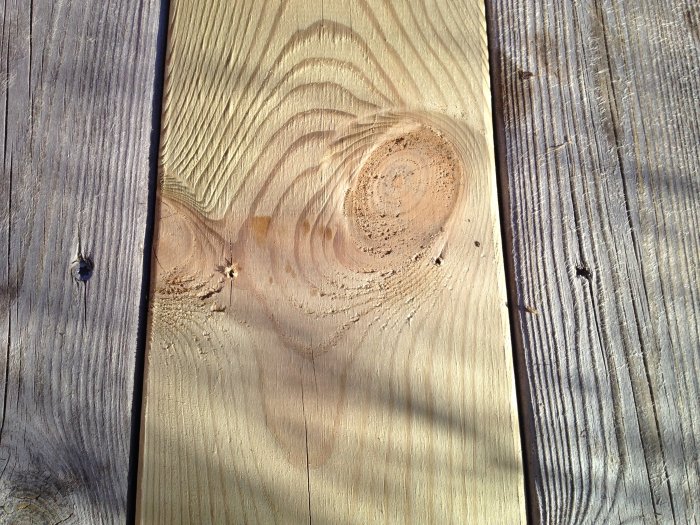
Then there are clear marks on the boards where they have rested against the joists. Considering how clean the two test boards became, I believe that it is possible to scrub away all the marks, but the effort required is too great for me, so I hope that weather and wind will solve this over time. A fun detail in this is that when the deck is dry, the marks are darker than the rest of the planks, but when the deck is wet, it's the opposite. It's probably due to the difference in how moisture penetrates the planks.
I have some work left to do. First, an adjustment needs to be made along one edge because the outermost plank row is now a bit further out. This is because I had to shift all the planks to increase the gaps. I also need to replace/flip the vertical boards that function as the facade, so to speak. Some steps also need to be flipped/replaced for everything to be uniform. However, a privacy screen is to be built at one end of the deck first, and then the facade boards will be affected, so there is no point in fixing them now.
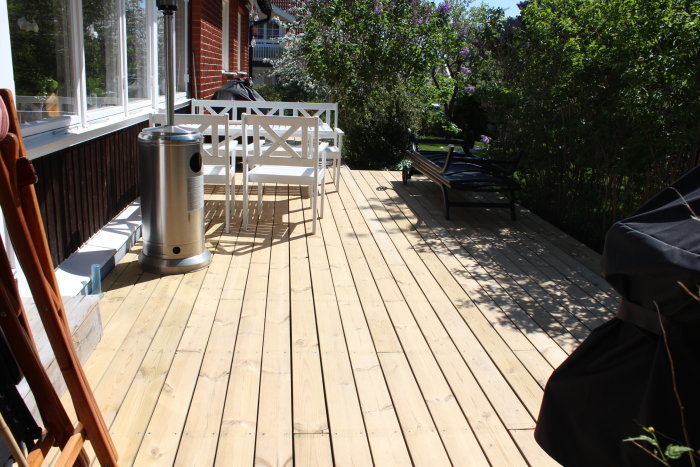
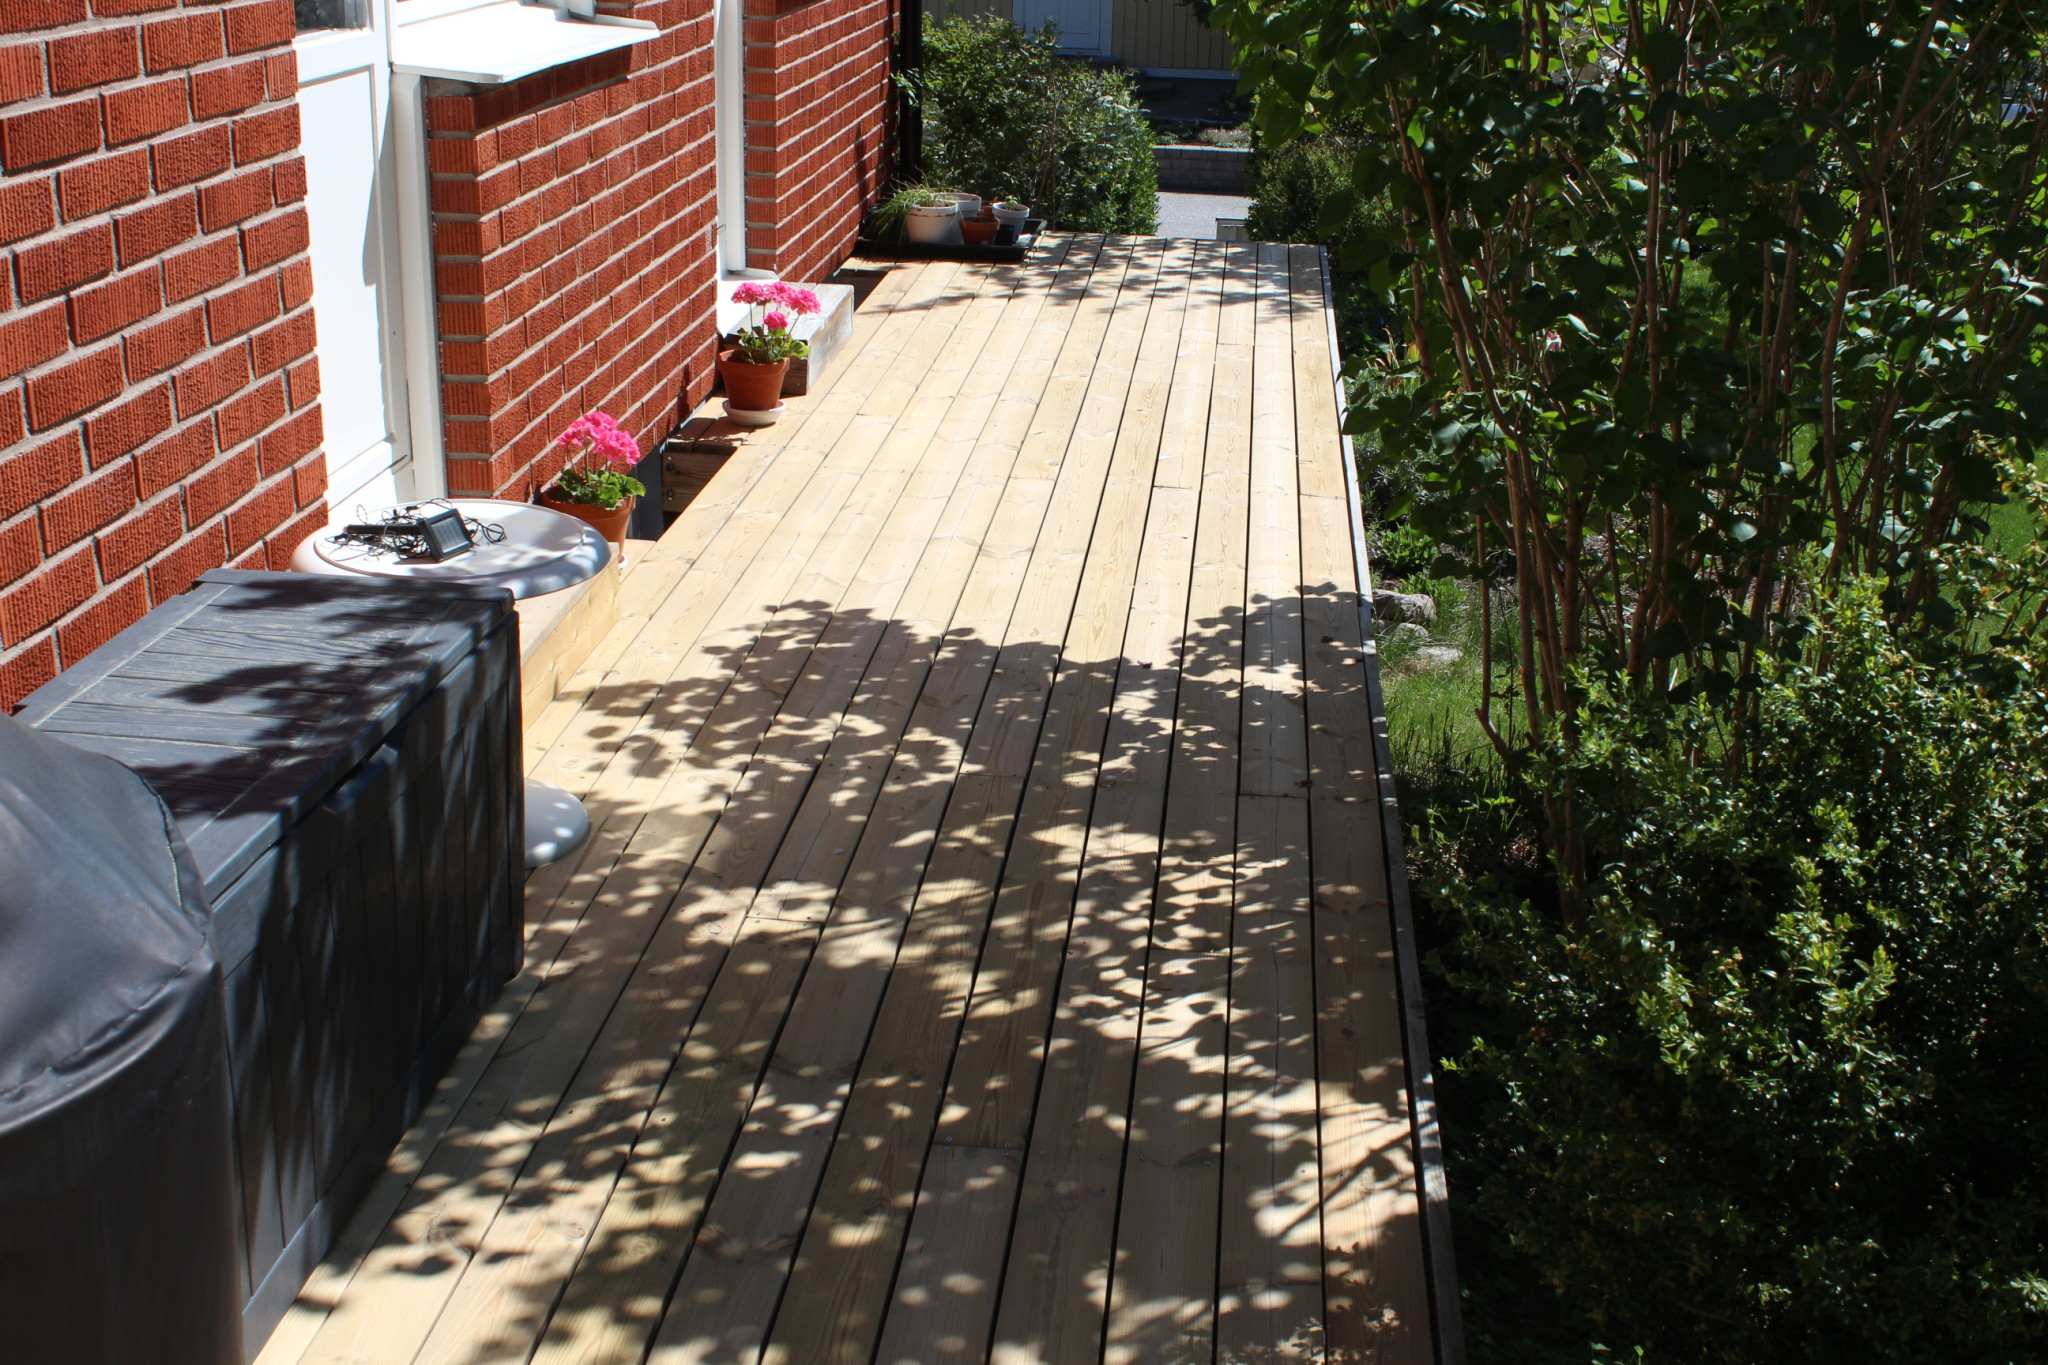
Pictures!
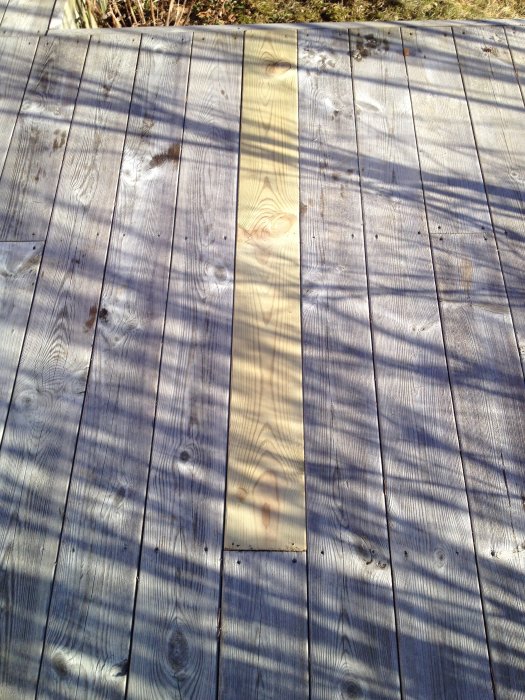
Pretty nice considering the deck was built 10 years ago!
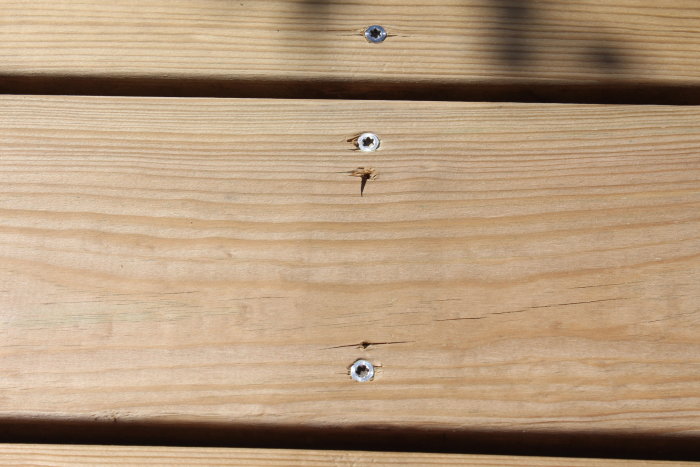
An example of the dark where the plank has rested against the joist. We scrubbed the entire deck with soap when all the boards were turned, and if you can kneel and scrub thoroughly, I believe you can reduce the difference even more.
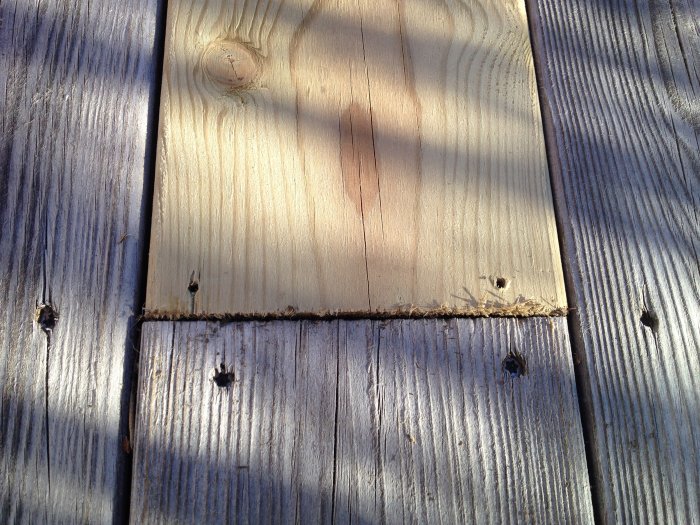
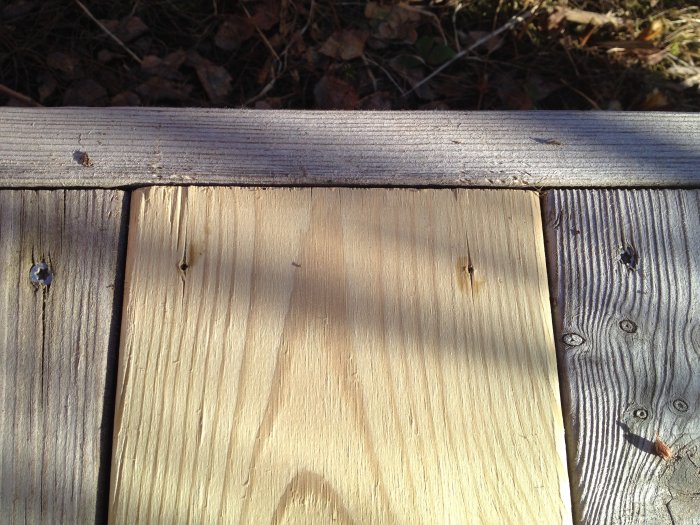
Here, the screws were driven in like a "V" from the other side. For me, it was more important that the screw heads ended up somewhat uniformly, so I ignored the old screw holes where it was too crazy.
Summary:
If you're not the type who needs everything to be perfect, this is a very cheap (almost free) and significantly labor-saving method compared to buying new. It's also environmentally friendly with reuse! We believe the previous owner didn't take care of the deck at all, so our hope is that it's at least 10 years until we need to replace the boards if we make sure to maintain it.
It took much more work than I thought to flip the boards...but it was 100% worth it! The toughest part was probably that the previous owner had used a handsaw when cutting the boards. This had made all the end grains "ragged" and with a sharp edge. I didn't want that, so I took out the belt sander and sanded off all the ends and beveled the edges a bit...it was tough because my belt sander is quite heavy. I screwed up three rows at a time so the deck could be used during the process. Due to my limited health, I couldn't do it all in one go, so it spanned over three weeks before all the boards were flipped. Another incredibly tough thing was that the previous owner had used two different types of screws. Torx 25 was OK, but then they probably ran out, and he bought very poor quality screws with Torx 20. They were impossible to remove! The slightest debris in the "track" and you'd round them off, which required drilling out.
The final result is very nice, though!
However, this method is not for perfectionists. The previous owner wasn't very careful with how he drove the screws, so they weren't in neat rows, and some were driven in at an angle for some reason. This meant that the exit holes ended up here and there. I wanted as neat rows of screw heads as possible, which means there are some holes in the planks that couldn't be reused. Hopefully, they'll swell/fill up with debris over time.
Reusing also means you can't choose how the planks should be cut and laid, so there's a bit of a gap between the end grains in some places.
There are also clear marks on the boards from where they've rested on the beams. Considering how clean the two test boards got, I think it's possible to scrub off all the marks, but the effort is too great for me, so I hope the weather will take care of this over time. An interesting detail is that when the deck is dry, the marks are darker than the rest of the planks, but when the deck is wet, it's the opposite. It probably has to do with the difference in how moisture penetrates the planks.
I have some work left to do. I need to make an adjustment along one edge because the outermost plank row has now ended up slightly further out. This is because I had to shift all the planks to increase the gaps. I also need to replace/flip the vertical boards that function as a façade, so to speak. Some stairs also need to be flipped/replaced for everything to be consistent. However, a shelter needs to be built at one end of the deck first, and that will affect the façade boards, so there's no point in fixing them now.
Pictures!
[image]
[image]
Pretty nice considering the deck was built 10 years ago!
[image]
An example of the dark area where the plank rested on the beam. We scrubbed the entire deck with soap when all the boards were flipped, and if you have the patience to scrub properly, I think you can reduce the contrast even more.
[image]
Here, the screws were driven in as a "V" from the other side. For me, it was more important that the screw heads were somewhat uniform, so I ignored the old screw holes where it was too crazy.
Summary:
If you're not the type to need everything to be perfect, this is a very cheap (virtually free) and remarkably labor-saving method compared to buying new. It's also environmentally friendly with reuse! We believe the previous owner didn't maintain the deck at all, so our hope is that it's at least another 10 years until we need to replace the boards if we take care of it.
Hello!
I just read through your thread as we've been thinking about the same thing for a while now—simply flipping the deck boards to freshen up the deck without spending too much money on the whole thing.
I flipped a few boards today, and they look really good on the "underside." I have the same issue with discoloration where they rest on the crossbeams, but it's a minor aesthetic problem.
It has been about 3 years since you did the work, how has it held up? Are you as satisfied today?
Also, have you noticed anything regarding the theory of the "happy mouth" vs. "sad mouth" (happy face/sad face...)?
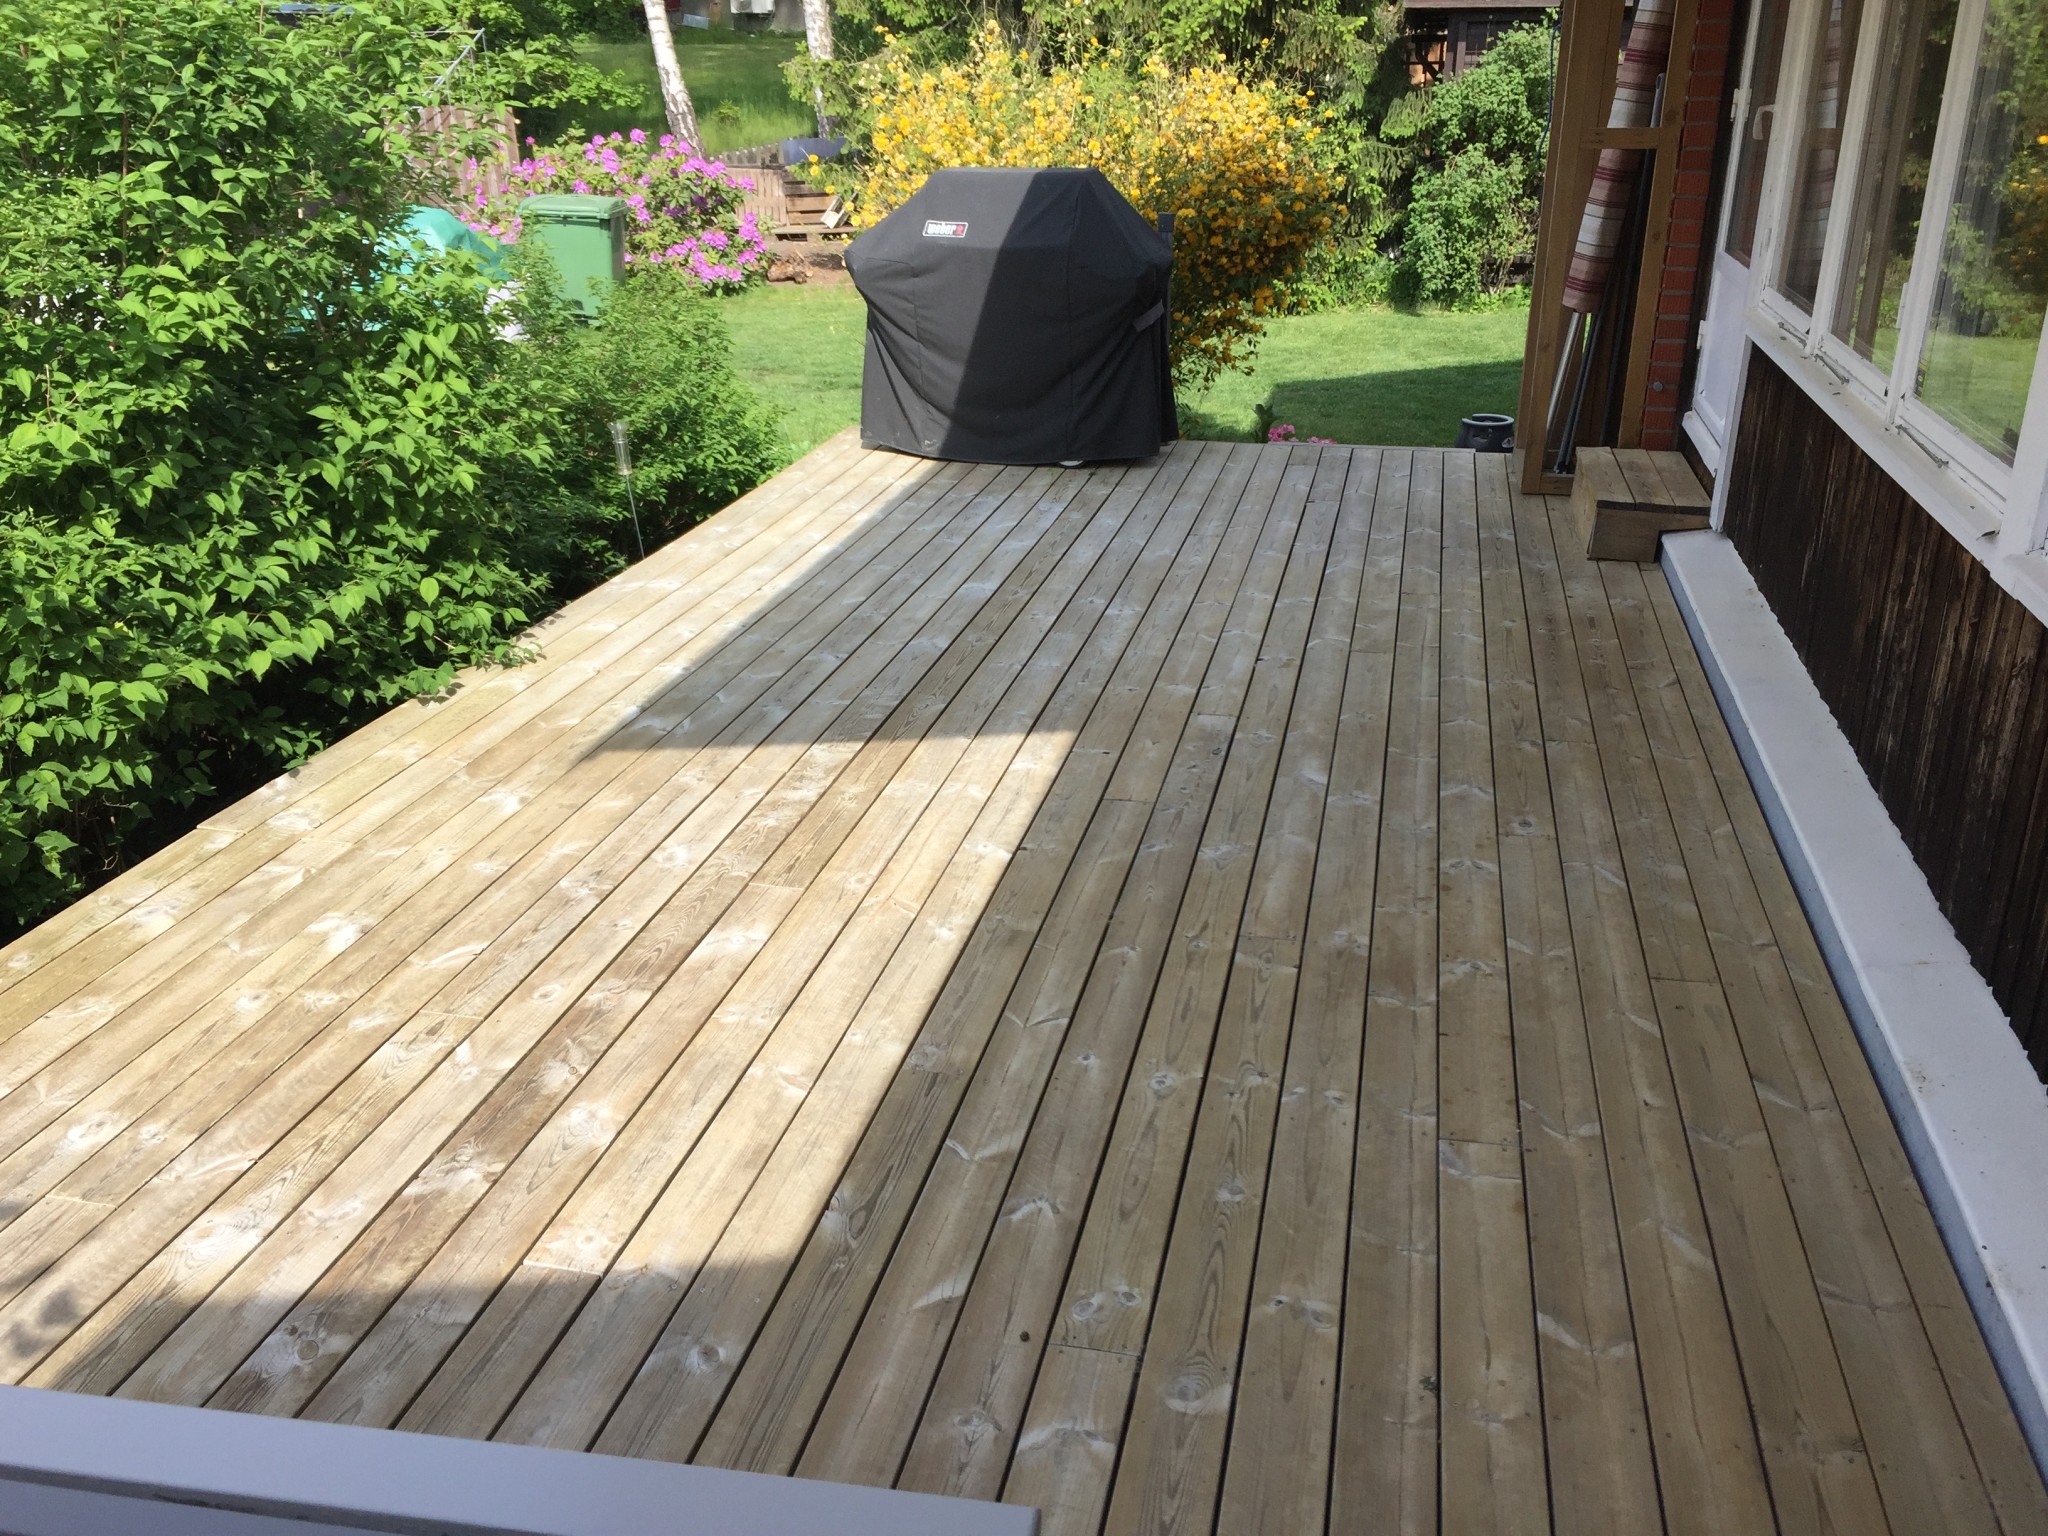
Funny that you wrote just now! My wife and I did the first bit more serious work on the deck yesterday and today since we flipped the boards. The only thing we've done until yesterday is soap scrub and pressure wash (T-racer attachment) in the spring, otherwise, the decking has been left alone. Yes, I have tightened screws that had risen above the surface as well. This is how it looked before what we did this weekend:
I have nothing negative to say about flipping the boards when they start to feel a bit worn. OK, it's not like new boards... i.e. some cracks, a lot of screw holes (which are very small and barely visible unless you look for them), defects that you understand the one who laid the deck chose to lay downwards, and minimal traces from what I described earlier in the thread, namely the "stripes" from where the board rested against the joists. The latter has really evened out over time.
I had no choice regarding happy/sad face because all the boards needed to be flipped. However, I seem to recall that it was mostly in one direction, but some deviated. Some of the boards have warped, but I don't think it has much to do with how the growth rings are positioned.
Since the boards are still in such good shape, we chose this weekend to apply Thompson's One Coat Water Seal. One of the neighbors works in a professional paint shop, and he applied it to his deck last year and is very satisfied. The fact that he could also get a good price was the deciding factor for us.
The preparation consisted of light sanding with 100-grit paper on a pad with a handle. For tougher spots, like knots, slivers, and where there was a large height difference between two board ends ("stub your toe" warning), I used an oscillating sander. In hindsight, and if we'd had the energy, we probably should have sanded the whole surface with the machine... but now it turned out like this, and we're happy with it.
Thompson's was very easy to apply with a pressure sprayer, and it was then worked in with a brush on a handle. We had to be quick with the brush since the product absorbed very quickly in the warm weather and with such dry boards. After just two hours, you can use the deck, and we've already seen how splashed water beads on the surface. According to the neighbor, the water still beads on their deck just as well after a year.
Thank you so much for the detailed response!
Appreciated!
I need to get a more powerful screwdriver and start flipping boards as soon as time allows then.
/C
PPaxman said:
Hello CalleD!
Funny that you wrote just now! My wife and I have done the first more serious work on the terrace since we flipped the boards yesterday and today. The only thing we've done until yesterday is soap scrubbing and pressure washing (T-racer attachment) in the spring, otherwise, the decking has been left alone. Well, I have also driven down screws that came over the surface. Here's how it looked before what we've done this weekend:
[image]
I have nothing negative to say about flipping the boards when they start to feel a bit worn. OK, it’s not like new boards... that is, some cracks, a lot of screw holes (which are, however, very small and barely visible unless you look for them), defects that you understand the person who laid the decking chose to place downwards, and minimal traces of what I described earlier in the thread, namely the "stripes" after where the decking lay against the joists. The latter has really evened out over time.
I had no choice regarding smiling/frowning face since all boards needed flipping. However, I seem to remember it was predominantly leaning in one direction, with a few exceptions. Some of the boards have warped, but I don't think that has much to do with how the growth rings are situated.
Since the boards are still in such good condition, we chose this weekend to apply Thompson's One Coat Water Seal. One of the neighbors works in a professional paint store, and he applied it to his deck last year and is very pleased. The fact that he could also get a good price for us was decisive.
The preparation consisted of light sanding with 100-grit paper on a pad with a handle. In tougher spots, like knots, splinters, and where there was a significant level difference between two board ends ("stub your toe" warning), I used an oscillating sander. In hindsight, and if we’d had the energy, we probably should have sanded the whole surface with the machine...but we ended up doing it this way, and we're satisfied with it.
Thompson's was very easy to apply with a pressure sprayer, and then worked in with a brush on a handle. We had to be quick with the brush since the product was absorbed very fast in the warm weather and with such dry boards. After just two hours, you can use the terrace, and we've already seen how splashed water beads up on the surface. According to the neighbor, the water still beads up on their terrace just as well after a year.
Funny that you wrote just now! My wife and I have done the first bit of more serious work on the deck yesterday and today since we flipped the boards. Up until yesterday, all we've done is scrubbed with soap and power washed (T-racer attachment) in the spring, otherwise, the decking has been left alone. Yes, I've also tightened screws that have come up over the surface. This is how it looked before what we did this weekend:
[image]
I have nothing negative to say about flipping the boards when they start to feel a bit worn. OK, it's not like new boards...that is, some cracks, lots of screw holes (which are very small and barely visible unless you're looking for them), defects that you understand the person who laid the decking chose to place facing downwards and minimal traces after what I've described earlier in the thread, that is "lines" from where the decking has rested on the joists. The latter has really evened out over time.
I had no choice regarding happy/sad face because all the boards needed to be flipped. However, I seem to remember there was a majority in one direction, but some deviated. Some of the boards have warped, but I don't think it has much to do with how the growth rings are situated.
Since the boards are still in good condition, we decided this weekend to apply Thompson's One Coat Water Seal. One of our neighbors works in a professional paint store and he applied it last year on his deck and is very pleased. The fact that he could also get us a good price was a deciding factor for us.
The preparation consisted of light sanding with 100-grit paper on a pad with a handle. In more difficult areas, like knots, splinters, and where there was a large height difference between the ends of two boards ("stub your toe" warning), I used an oscillating sander. In hindsight, and if we had the energy, we should probably have sanded the entire surface with the machine...but it ended up like this and we feel satisfied with it.
Thompson's was very easy to apply with a pressure sprayer and was then worked in with a brush on a handle. We had to be quick with the brush as the product was absorbed very quickly in the warm weather and with such dry boards. Already after two hours, you can use the deck and we've already seen how splashed water beads on the surface. According to the neighbor, the water is still beading as well on their deck after a year.
is that impregnation expensive? How did you handle the gap between the decking? When you flip decking like this, it's likely very dry and should probably be screwed with a gap of maybe 4mm at minimum, perhaps more.
Hello.
Just flipped the decking with great results
Instead of spending 15000kr-20000kr on new decking, I turned the boards over. The deck is about 30 m2 + front and some steps. I blasted out the screws with a pressure washer, and it actually went really well to get a grip on them and unscrew them. Many were broken, but they could be knocked out or pulled out.
Sure, there will be some marks where the joists were, but with some scrubbing and possibly sanding, it will look 80% new. Not bad for a deck that's 20 years old and, as I said, a big chunk of money saved. I'll get back to you with pictures.
Hello.
I just flipped the decking with great results
Instead of spending 15000kr-20000kr on new decking, I turned the boards over. The decking is about 30 m² + front and a few steps. I blasted out the screws with a pressure washer, and it actually went really well to get a grip on them and screw them out. Many were broken, but they could be knocked out or pulled out.
Sure, there will be some marks where the joists were, but with some scrubbing and possibly sanding, it will look about 80% new. Not bad for a deck that's 20 years old, and as I said, a big amount saved. I'll be back with pictures.
There's no chance that 30 sqm of new decking costs 15-20k. I would say around 170kr/sqm + 10-12% waste. So about 6000kr.


") According to the neighbor, the water still beads on their deck just as well after a year.
According to the neighbor, the water still beads on their deck just as well after a year.