13,919 views ·
23 replies
14k views
23 replies
The new panel boards are warping! Complain?
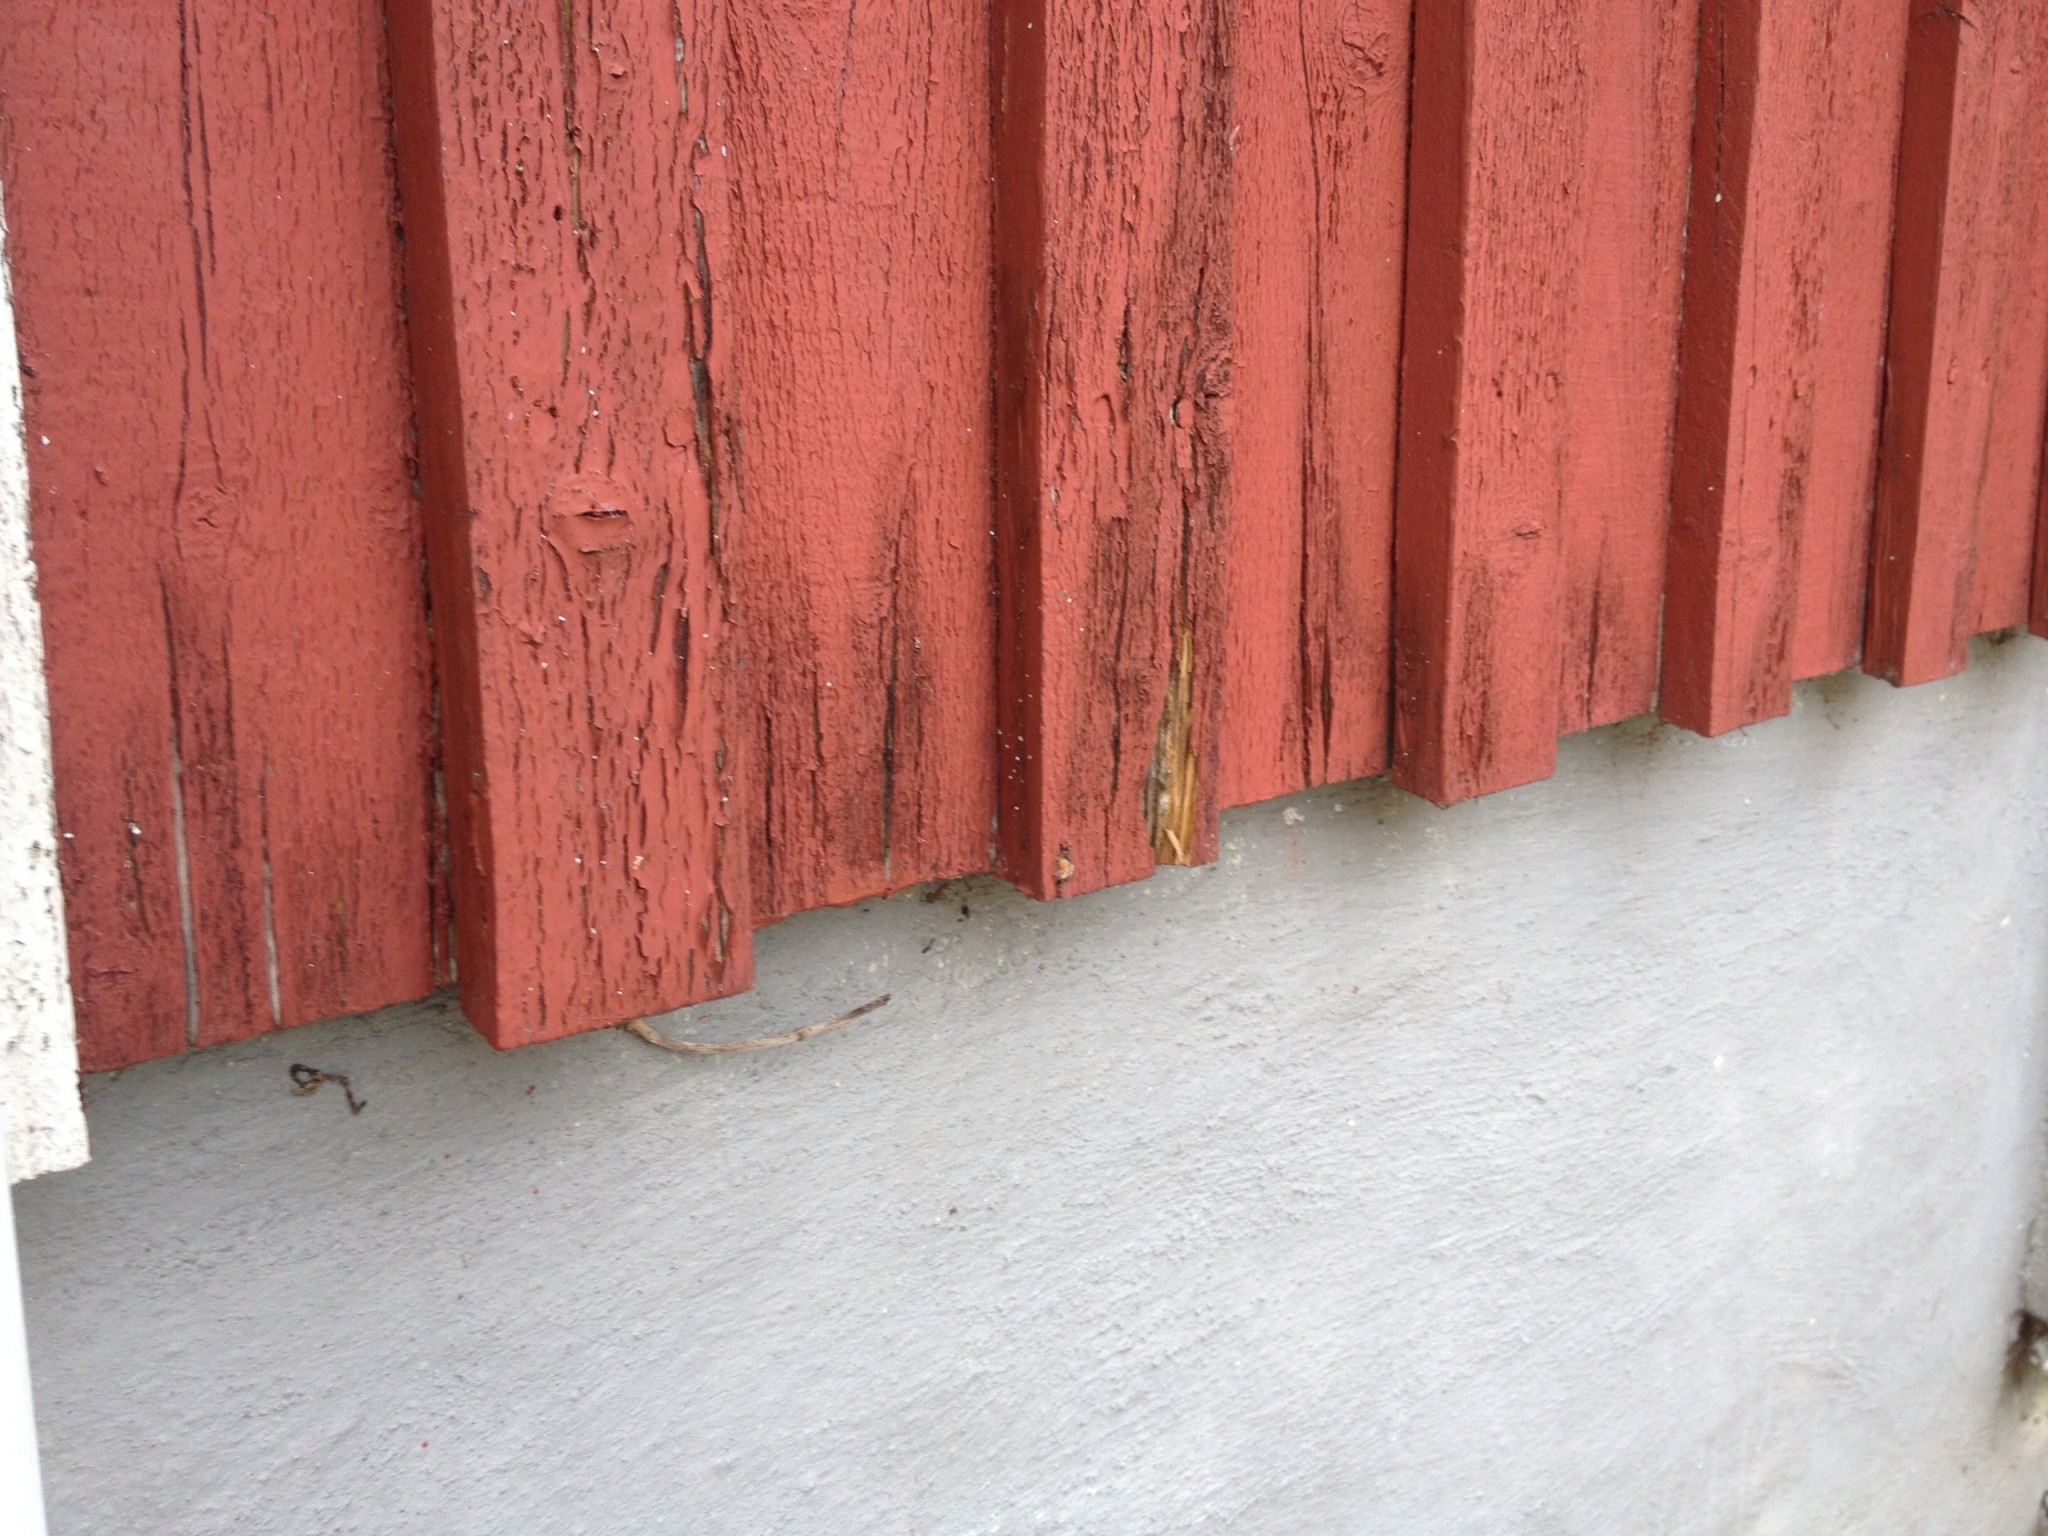
If they were twisted and bent already when you received them, I would make a complaint. Beijer had to pick up half of my cladding since they weren't okay, which they did without hesitation.Yrrol said:
Here there should be a nail in the bottom board and two in the lid. The nail in the lid should not be in the bottom board. And the boards should be placed so that the bottom board has its concave side outward and the lid board so that the convex side comes out, when the boards try to straighten the growth rings. ")
But I understood that your new panel does not look like it does in this picture!?
But I understood that your new panel does not look like it does in this picture!?
Please explain the numbers more because I'm not following them.....Elkludde said:
The problem with planed boards is that you cannot choose the inside and outside, because they always become concave towards the unplaned side. Of course, you can set the bottom board with the unplaned side outwards and the cover with the planed side outwards!! :eek:thomasx said:There should be a nail in the bottom board and two in the cover. The nail in the cover should not be in the bottom board. And the boards should be set so that the bottom board has its concave side outwards and the cover board so that the convex side comes outwards, when the boards try to straighten the growth rings.
But I understood that your new panel does not look like in this picture!?
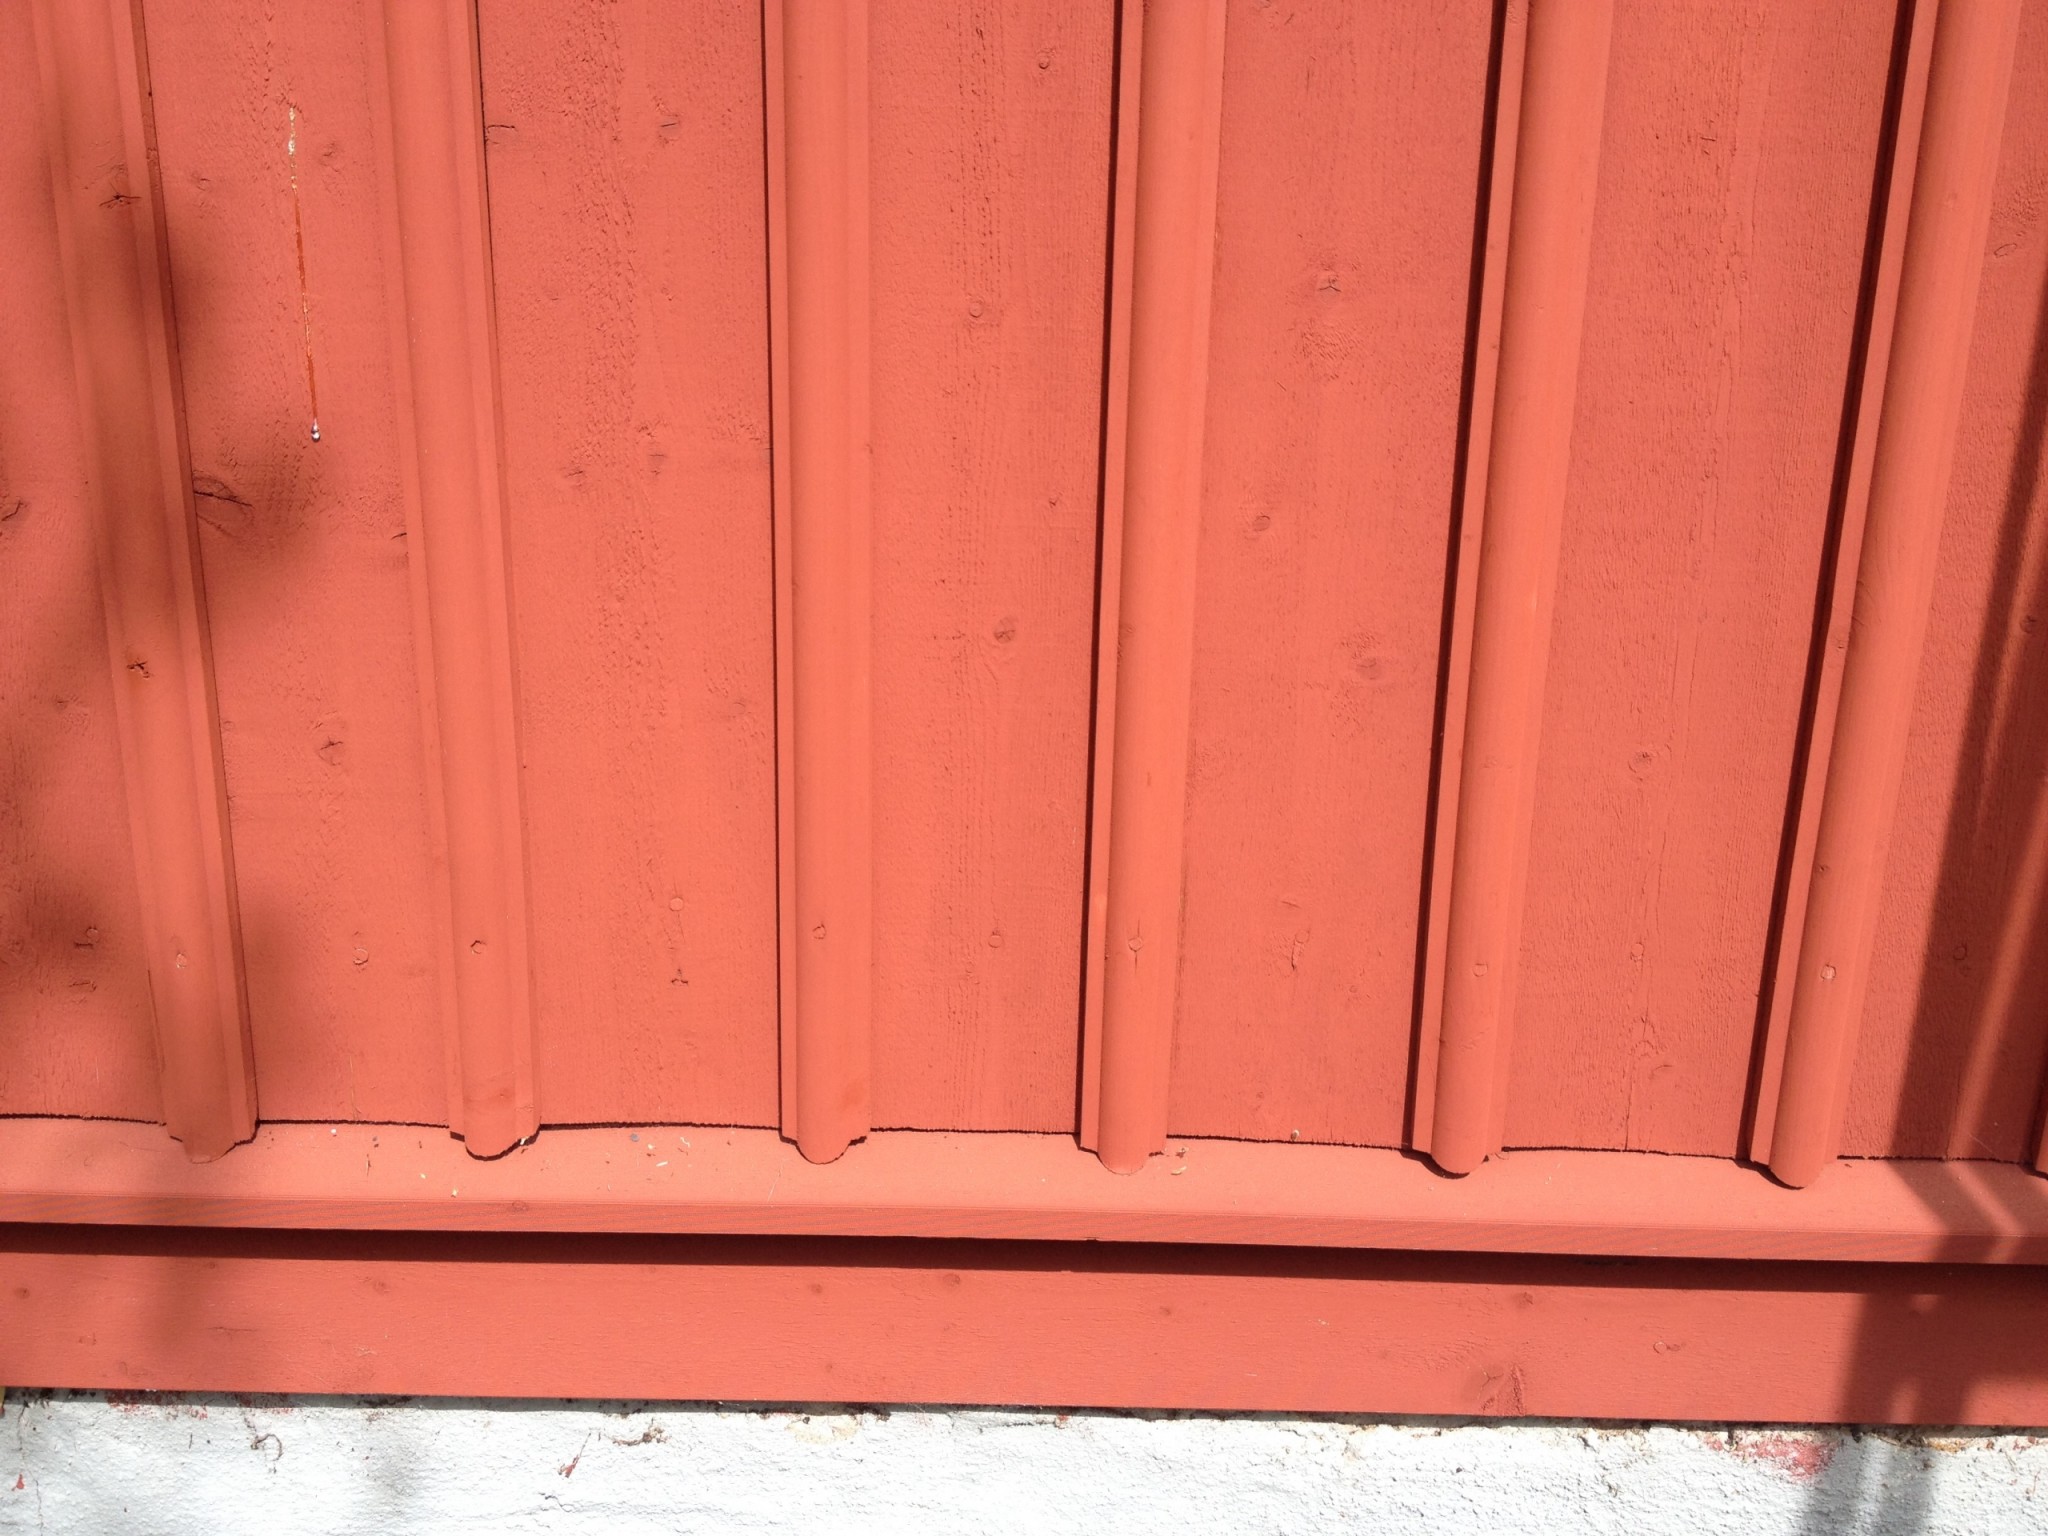
This is what the new one looks like:thomasx said:Here, there should be a nail in the bottom board and two in the lid. The nail in the lid should not be in the bottom board. And the boards should be placed so that the bottom board has its concave side facing outward and the lid board so that the convex side is facing outward when the boards try to straighten the annual rings.
But I perceived that your new panel doesn't look like it does in this picture!?
Thanks for all the tips!
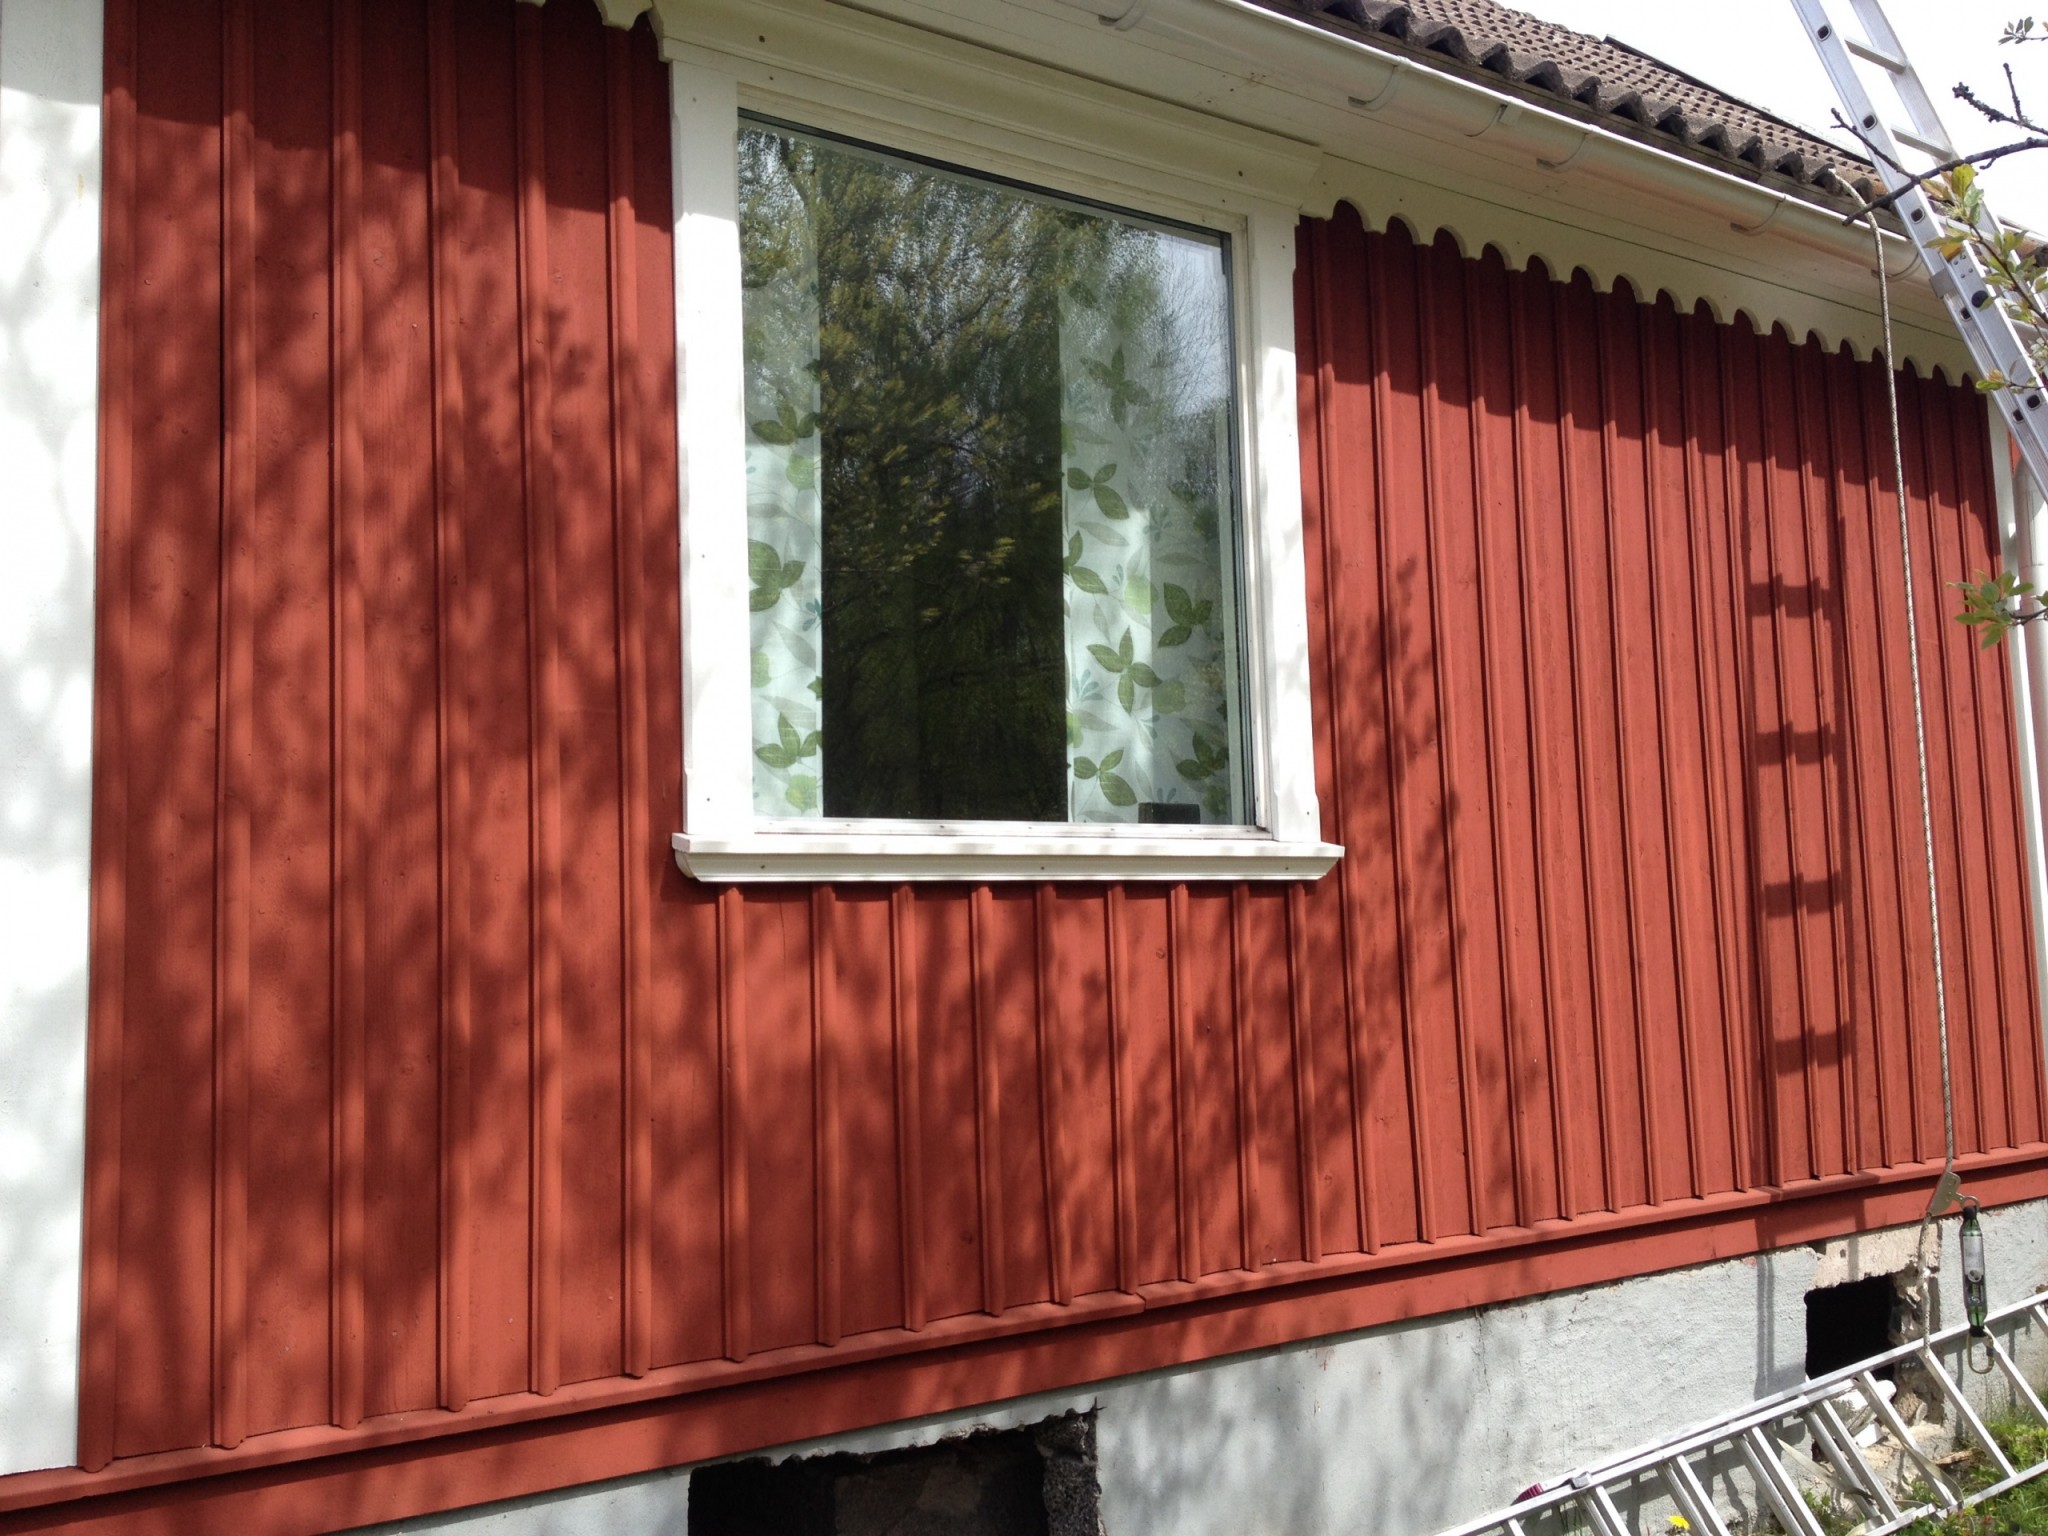
Go ahead with the following for the next wall:
- Make sure to install the cap and base panel at the same time
- Nail the base panel in a zigzag pattern
- Oil the end grain before painting
Does anyone have tips on a suitable oil for the end grain when I'm painting with falu rödfärg?
Go ahead with the following for the next wall:
- Make sure to install the cap and base panel at the same time
- Nail the base panel in a zigzag pattern
- Oil the end grain before painting
Does anyone have tips on a suitable oil for the end grain when I'm painting with falu rödfärg?
Click here to reply