T
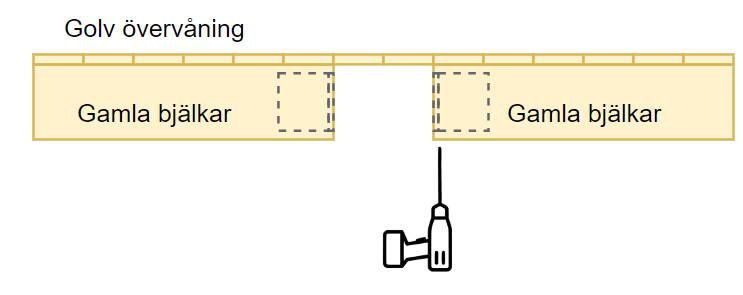
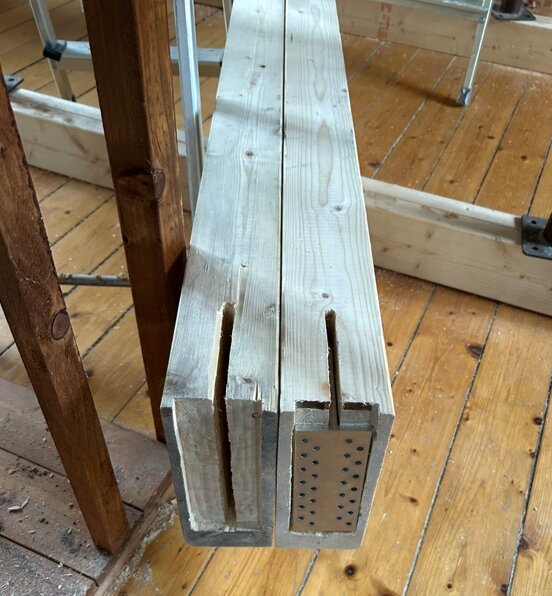
I would then use a twist drill with a point and drill a series of holes that are "edge to edge" or somewhat overlapping, and then use a wide chisel to chop down the small edges that remain. It's a good idea to clamp a piece of wood as a guide along the groove so you get vertical sides and it doesn't stray.
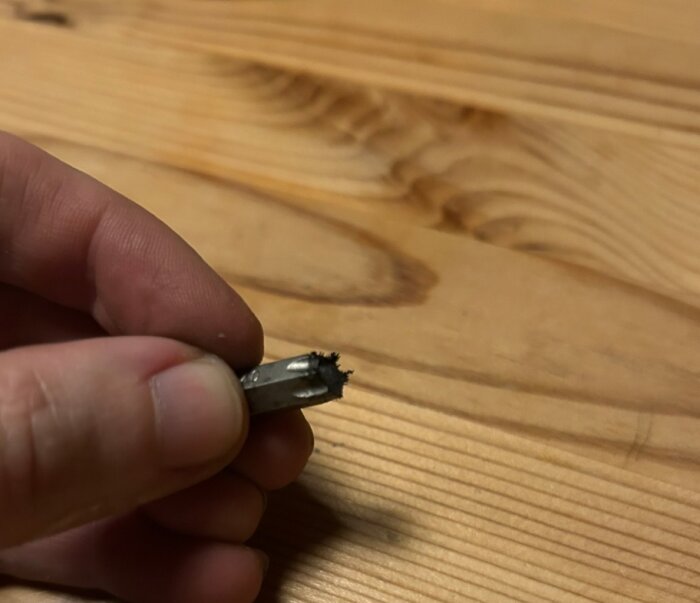
Another option if you have an 8mm chisel or lockbettel is to chisel out the entire hole. Since you'll have an open side, it's quite easy to remove the chips.

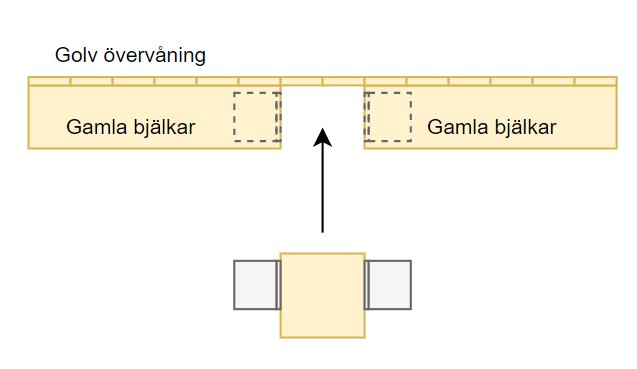
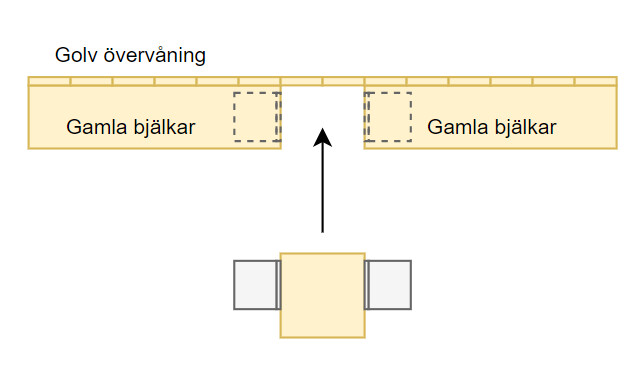
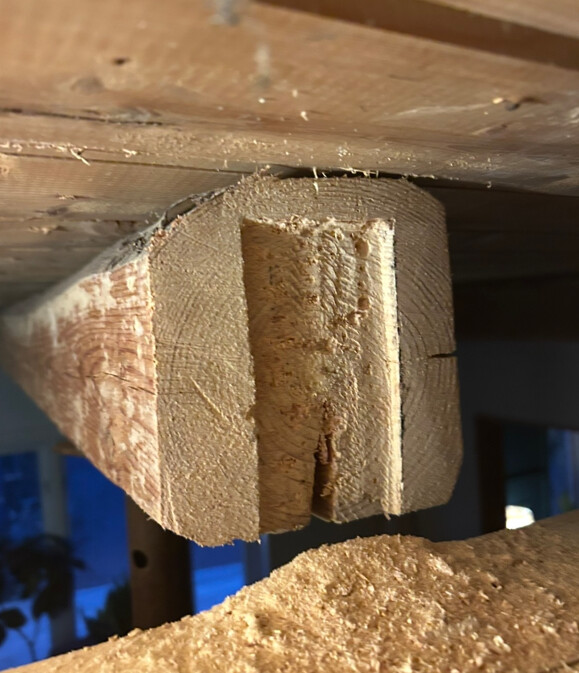
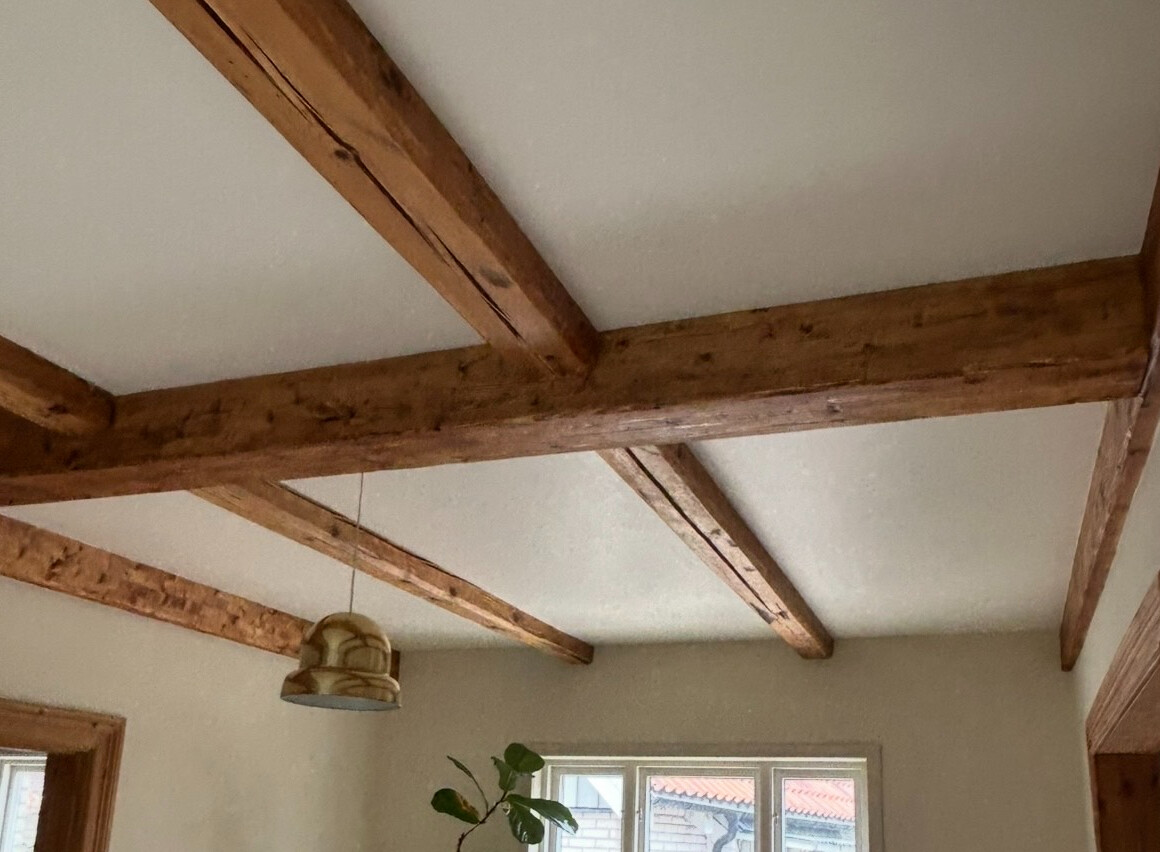
If the grooves were to go straight through the entire beam, I would saw two grooves and then chop away the waste, but I assume you want the groove from the top side and not all the way through.
 
Thanks for the tips Testarn!

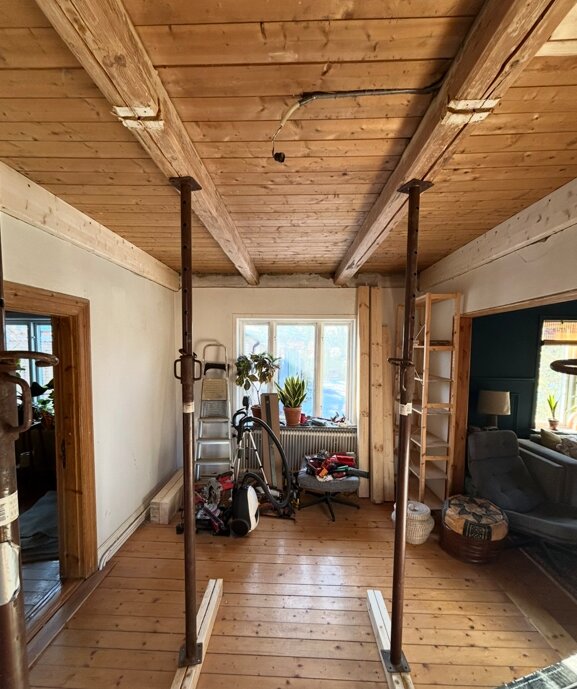
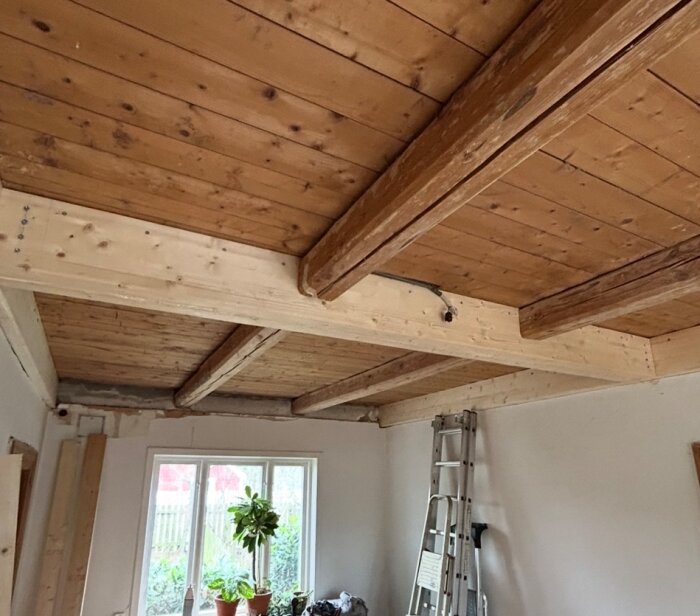
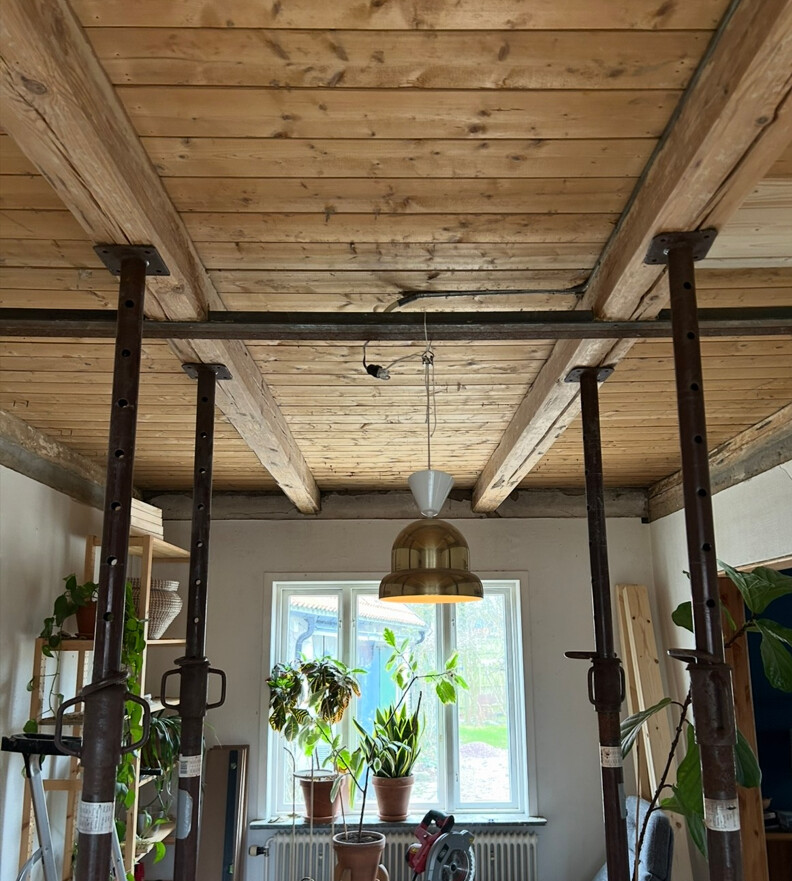
With the old beams, I will probably have to go through the whole thing since the new beam is inserted from below with the beam holders mounted.
Diagram illustrating installation of new beam under old floor beams with arrow showing insertion direction.
Another challenge I realize now is that it will be tight to access between the old beams to make the cut from the side. Might have to go from below if it's going to work. 🤔

Diagram showing the installation of a new beam between existing beams with a drill approaching from below for wood removal.
 
T
Yes, with the old beams, you'll probably have to go from underneath as you show.
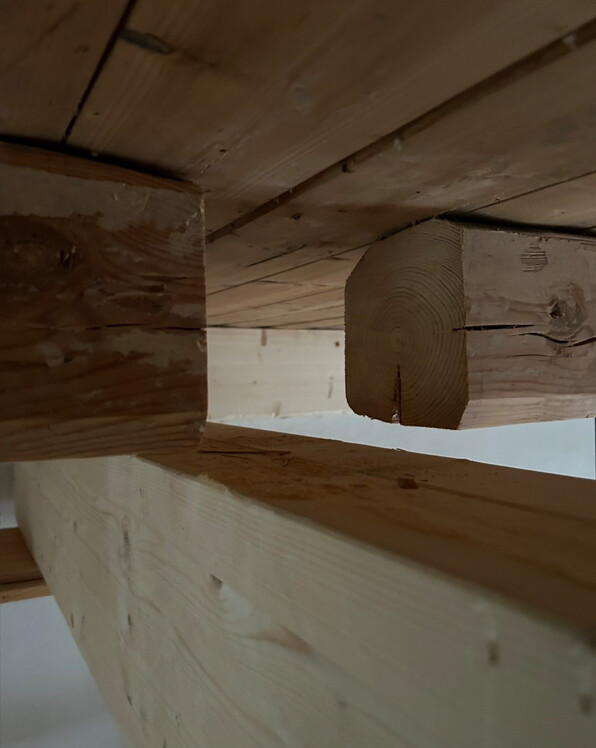
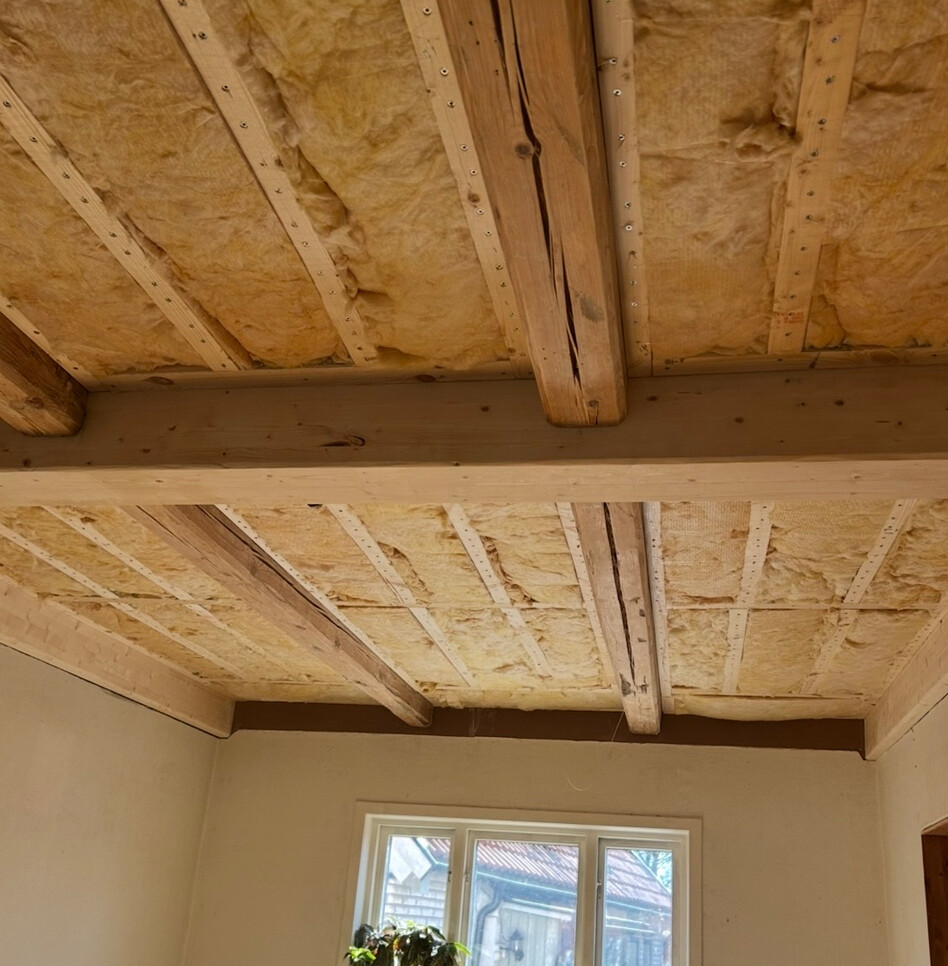
One tip is that if you cut away a piece of the beam, you can use pieces of that material to glue back into the groove under the fitting, so you "hide" it fairly well.
Moreover, if you use a piece from the surface, it will hardly be noticeable.
 
  • Like
riomontana
  • Laddar…
That was a really good tip, I will definitely do that! 👍
 
  • Like
Testarn
  • Laddar…
Hello.

Thought I'd upload some pictures from the work and the result!

Started with propping up the old beams.

Wooden ceiling supported by metal props in a renovation project, with a window below showing green plants on a windowsill and a hanging lamp.

Then I sawed off the old angle irons with a reciprocating saw, went smoother than expected.

Two rusty steel beams lying on the snowy ground, next to a stone path and wooden fence.

Then the attachment surface for the cross beams was screwed up along the long sides.

Wooden ceiling beams being supported by metal posts in a room under renovation, with tools and plants by a window in the background.

After that, the notches in the cross beams were made.

Wooden beams with slots, metal brackets, and cutouts on a wooden floor, part of a renovation project involving fitting and cutting old beams.

Then fitting and cutting of the old beams.

Close-up of wooden beams being fitted together, part of a renovation project to stabilize floor structure. Visible are cut joints and smooth wood surfaces.

Next, the notches in the old beams were made.

Close-up of a wooden beam with a slot cut out, part of a renovation project showing detailed woodworking and joist fitting.

After that, the beams were pumped up with 2 jacks from biltema to fix the sagging floor on the upper floor.
Wooden ceiling with exposed beams in a room being renovated, showing plants by a window and a ladder against the wall.

Everything was secured with self-drilling dowels that were drilled straight through beam and beam holder.
Self-drilling dowels and screwdriver bits on a wooden table, used for securing beams in a renovation project.

The drill and the T-40 bit called it a day after that job.

A hand holding a worn-out T-40 drill bit on a wooden surface, illustrating tool wear after a renovation project.

Framing and insulation.

Ceiling with exposed wooden beams and insulation over a window; part of a renovation project improving structural support and aesthetics.

Finally, the surfaces with drywall, lady mineral revive for the walls, and treatment of the beams to get a similar color to the old ones.

Ceiling with exposed wooden beams and a brass pendant light in a renovated room with white walls and a doorway leading to a dark interior space.

Wooden ceiling beams with plasterboard, a light fixture, and a partially visible plant and window below.

The next project will be to install a staircase and build a bookshelf underneath along the entire wall.
But that will have to wait until next winter.

Best regards, Linus
 
  • Like
Granngubben and 3 others
  • Laddar…
T
Nice!

Fun to see the result and the steps to get there. Well done!
 
  • Like
riomontana
  • Laddar…
Click here to reply
Vi vill skicka notiser för ämnen du bevakar och händelser som berör dig.