Thought I'd see if I can revive the thread, I am in the process of doing the same thing with similar kitchen doors made of oak from the 1980s. How did this end?
There is oil-hardened Masonite that reasonably shouldn't swell and shrink causing the door to warp?
But it could be that the oak swells and shrinks but not the Masonite, and then the door will warp……
Protte
Thought I'd try to revive the thread, I'm in the process of doing the same thing on similar oak kitchen doors from the 1980s. How did this end?
There is oil-hardened masonite that reasonably should not swell and shrink and cause the door to warp?
It ended beyond expectations, actually. The whole process went as follows:
1. Glued plywood to fill in the panel part with some tough glue that I spread with a notched trowel. Unfortunately, I've forgotten what the product was, but I remember it was like wet room glue.
2. Glued masonite with a white side on top with a little overhang. I used the same type of glue as for the plywood.
3. I placed two doors on top of each other with the masonite side against each other and clamped them together. After the glue cured and I released the clamps, to my relief, the doors did not warp at all.
4. The overhang was cut off with a table saw and a router with an edge bit made the masonite flush with the door. A rounding bit rounded the edges.
5. Primer painting.
6. Final painting with three coats.
7. Drilled new holes for the new handles. I made a jig to get the holes at the right distance from the edge. This worked "so-so." A tip is to drill the holes before rounding the edges with the rounding bit.
The final result is completely acceptable in our household. Many would probably not be satisfied and would think it looks homemade, but it's about personal taste, level of ambition, economics, and environmental thinking.
Final reflections:
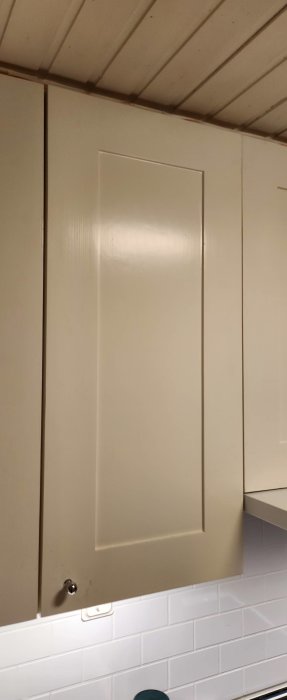
Masonite is the wrong material to work with if you require precision and finish. It is soft and incredibly sensitive, so if you make the slightest mistake anywhere, it is nearly impossible to fix neatly. On one door, I drilled a little wrong for the handle. I tried to fill the holes with fine filler, but as soon as I started sanding the filler, the surface of the masonite "dissolved" and it became a chase-your-tail situation with more filler and more sanding. In the end, it was just about accepting that it didn't turn out so nicely...luckily, the handle (in its correct position) covers most of the mess. I also had to be very careful with the sandpaper after the routing.
The effort is massive. For me, this became a "damn it" project that I would never have started if I knew how much work it involved. In hindsight, the result was about what we hoped for, and completing such a project gives a certain pride...which is not to be underestimated in this context. That we saved quite a bit of money by not getting new doors is actually secondary to that.
Damn, that sounds like a massive undertaking. It feels familiar to embark on something like that and regret it somewhere along the way. Then it all becomes about sheer determination in the end. When you say you clamped two doors at a time, how many did you glue per batch? Considering that a kitchen has a bunch of doors, I imagine you'll need a lot of clamps to do it somewhat efficiently.
The main thing is that they don't warp. It might be worth trying with 3mm HDF or MDF.
The outcome exceeded expectations, actually. The whole process went as follows:
1. Glued plywood to fill out the panel part with some adhesive, which I spread using a notched trowel. Unfortunately, I've forgotten what the product was, but I recall it being some kind of wet-room glue.
2. Glued hardboard with a white side on top with a slight overhang. I used the same type of glue as for the plywood.
3. I placed two doors on top of each other with the hardboard sides facing each other and clamped them together. After the glue cured, and I released the clamps, to my relief, the doors had not warped at all.
4. The overhang was cut off with a table saw, and a router with an edge bit trimmed the hardboard flush with the door. A rounding bit smoothed the edges.
5. Primer painting.
6. Final painting with three coats.
7. Drilled new holes for new handles. I made a jig to get the holes at the correct distance from the edge. This worked "just okay." A tip is to drill the holes before rounding the edges with the rounding bit.
The final result is fully approved in our household. Many would probably not be satisfied and think it looks homemade, but it's a matter of personal taste, ambition level, economy, and environmental considerations.
Final reflections:
Hardboard is the wrong material to work with if you require precision and finish. It's soft and incredibly sensitive, so if you make the slightest mistake anywhere, it is nearly impossible to fix it neatly. On one door, I drilled slightly incorrectly for the handle. I tried to fill the holes with fine filler, but as soon as I started sanding the filler, the surface of the hardboard "dissolved," leading to a chase-your-tail situation with more filler and more sanding. In the end, I had to give up and live with it not looking very nice...fortunately, the handle (in its correct place) covers most of the unsightly area. I also had to be very careful with the sandpaper after routing.
The effort involved is massive. For me, this became a "determined" project that I would never have started had I known how much work it entailed. In hindsight, the result was about what we hoped for, and completing such a project brings a certain sense of pride...which is not to be underestimated in this context. That we saved quite a bit of money by not getting new doors is actually a secondary consideration.
When you say you clamped two doors at a time, how many did you glue per session?
It's been a while since I did the gluing, but as I recall, I probably clamped more pieces than two at a time. I can say that we lived without doors for quite a few months, which was incredibly convenient... but it quickly gets dirty on the shelves and the things on them.
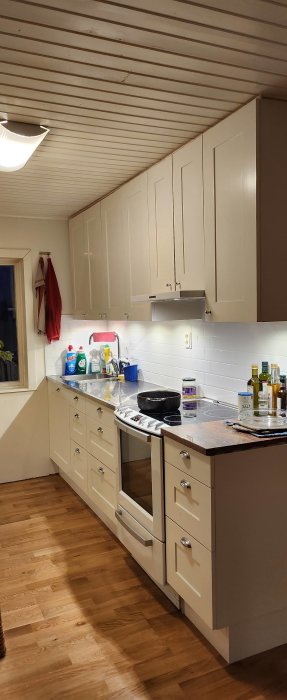
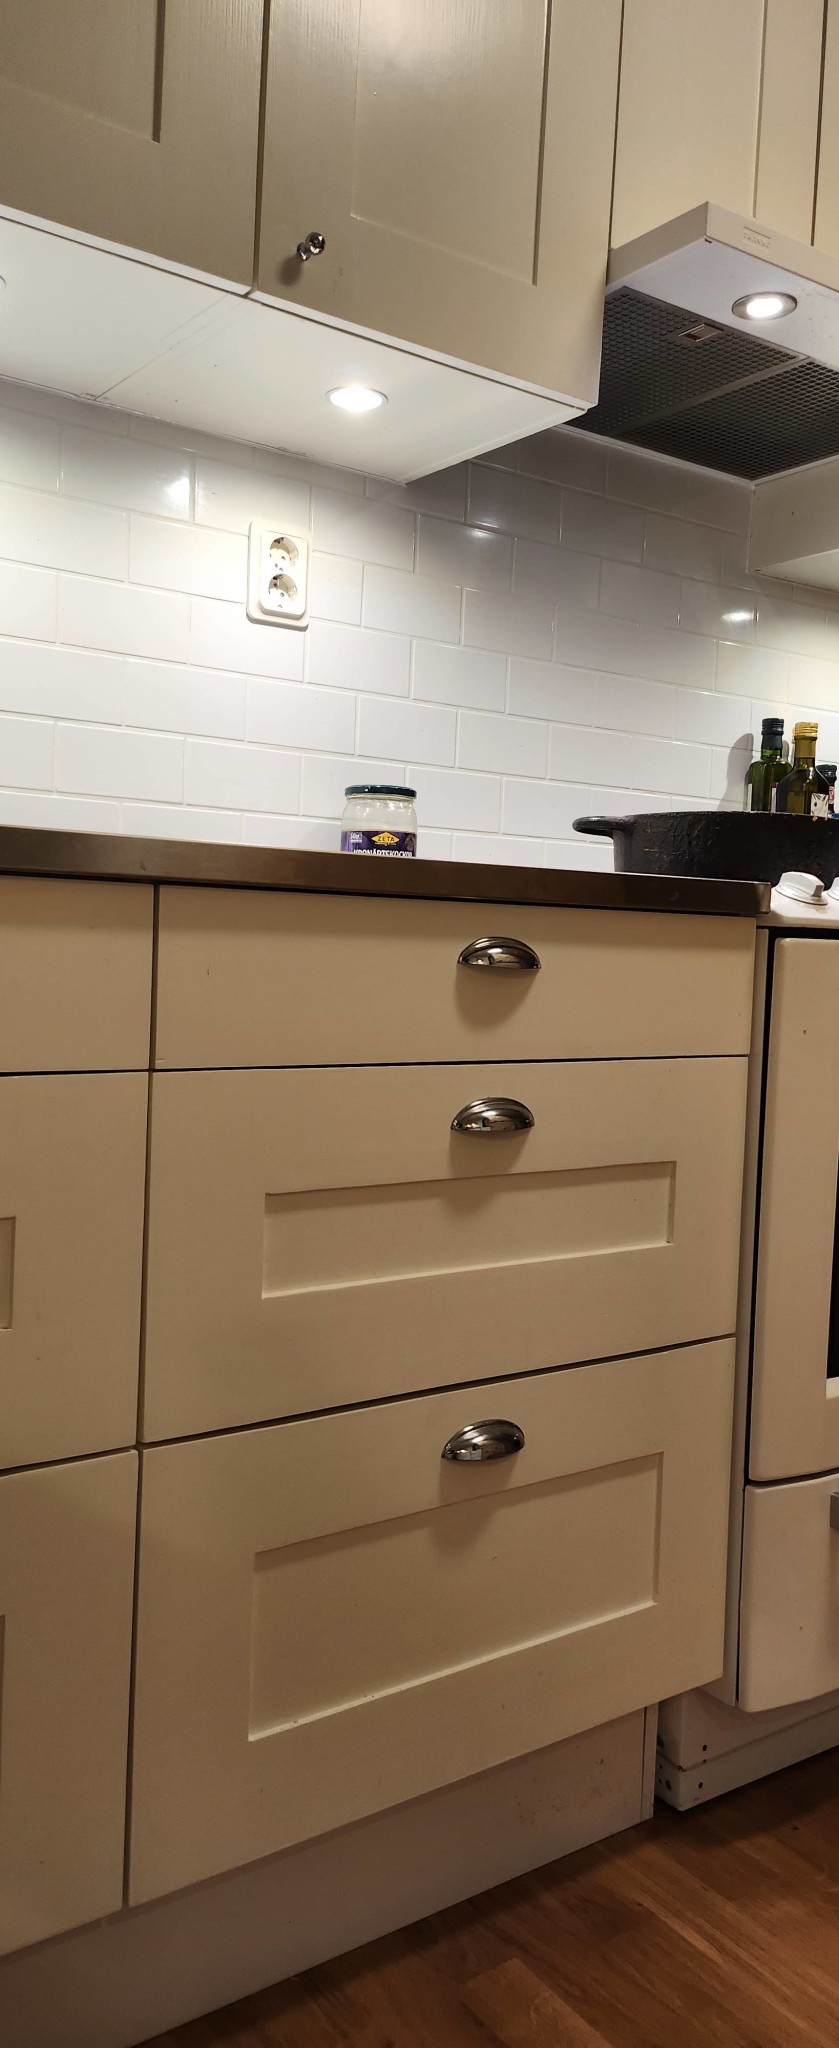
Here's a picture. New floor is laid, new sink, countertops are stained and oiled. Tiling is underway.
This project has been going on for several years. This is because I'm not entirely healthy, so I can't work as efficiently as healthy people. My wife is not the handy type, but we have very kind neighbors who support and help when they can... and they encourage us to keep the project going. However, we are approaching completion now... what remains is to replace the stove fan and install all the moldings, as well as some small fixes.
It’s been a while since I did the glueing, but as I remember it, I likely forced together more pieces than just two at a time. I can say that we lived without cabinet doors for quite a few months, which was incredibly convenient...but of course, it quickly becomes dirty on the shelves and everything on them.
Here is a picture. New floor laid, new countertop, worktops stained and oiled. Tiling in progress.
[image]
This project has been going on for several years. This is because I am not completely well, so I cannot work as efficiently as healthy people. My wife is not the handy type, but we have very kind neighbors who step in and help out when they can...and they encourage us to keep the project going. We are nearing completion now...what remains is to replace the stove fan and install all the trim as well as some small fixes.
Looks nice!
You probably saved quite a bit of money on the project.
I can relate to how everything takes a long time when you're not completely well, but you just have to keep pushing on, and it’ll be done when it’s done.
The savings are, as I wrote, secondary to the feeling of accomplishment... but of course, what we've saved by doing it this way can, for example, be spent on a more exclusive stove hood. That's not something you just put together yourself.
It was a while ago since I did the gluing, but as I remember it, I probably forced together more than two pieces at a time. I can say that we lived without doors for quite a few months, which was incredibly convenient... but it quickly gets dirty on the shelves and what's on them.
Here is a picture. New floor is laid, new countertop, the worktops are stained and oiled. Tiling is underway.
[image]
This project has been going on for several years. This is because I'm not completely well, so I can't work as efficiently as healthy people. My wife is not the handy type, but we have very kind neighbors who help out and assist when they can... and they encourage us to keep the project going. However, we are approaching completion now... what's left is to replace the stove fan and mount all the moldings and a few small fixes.
It looks really nice! Great inspiration, and probably a bit of the style we're going for. Now it feels doable.
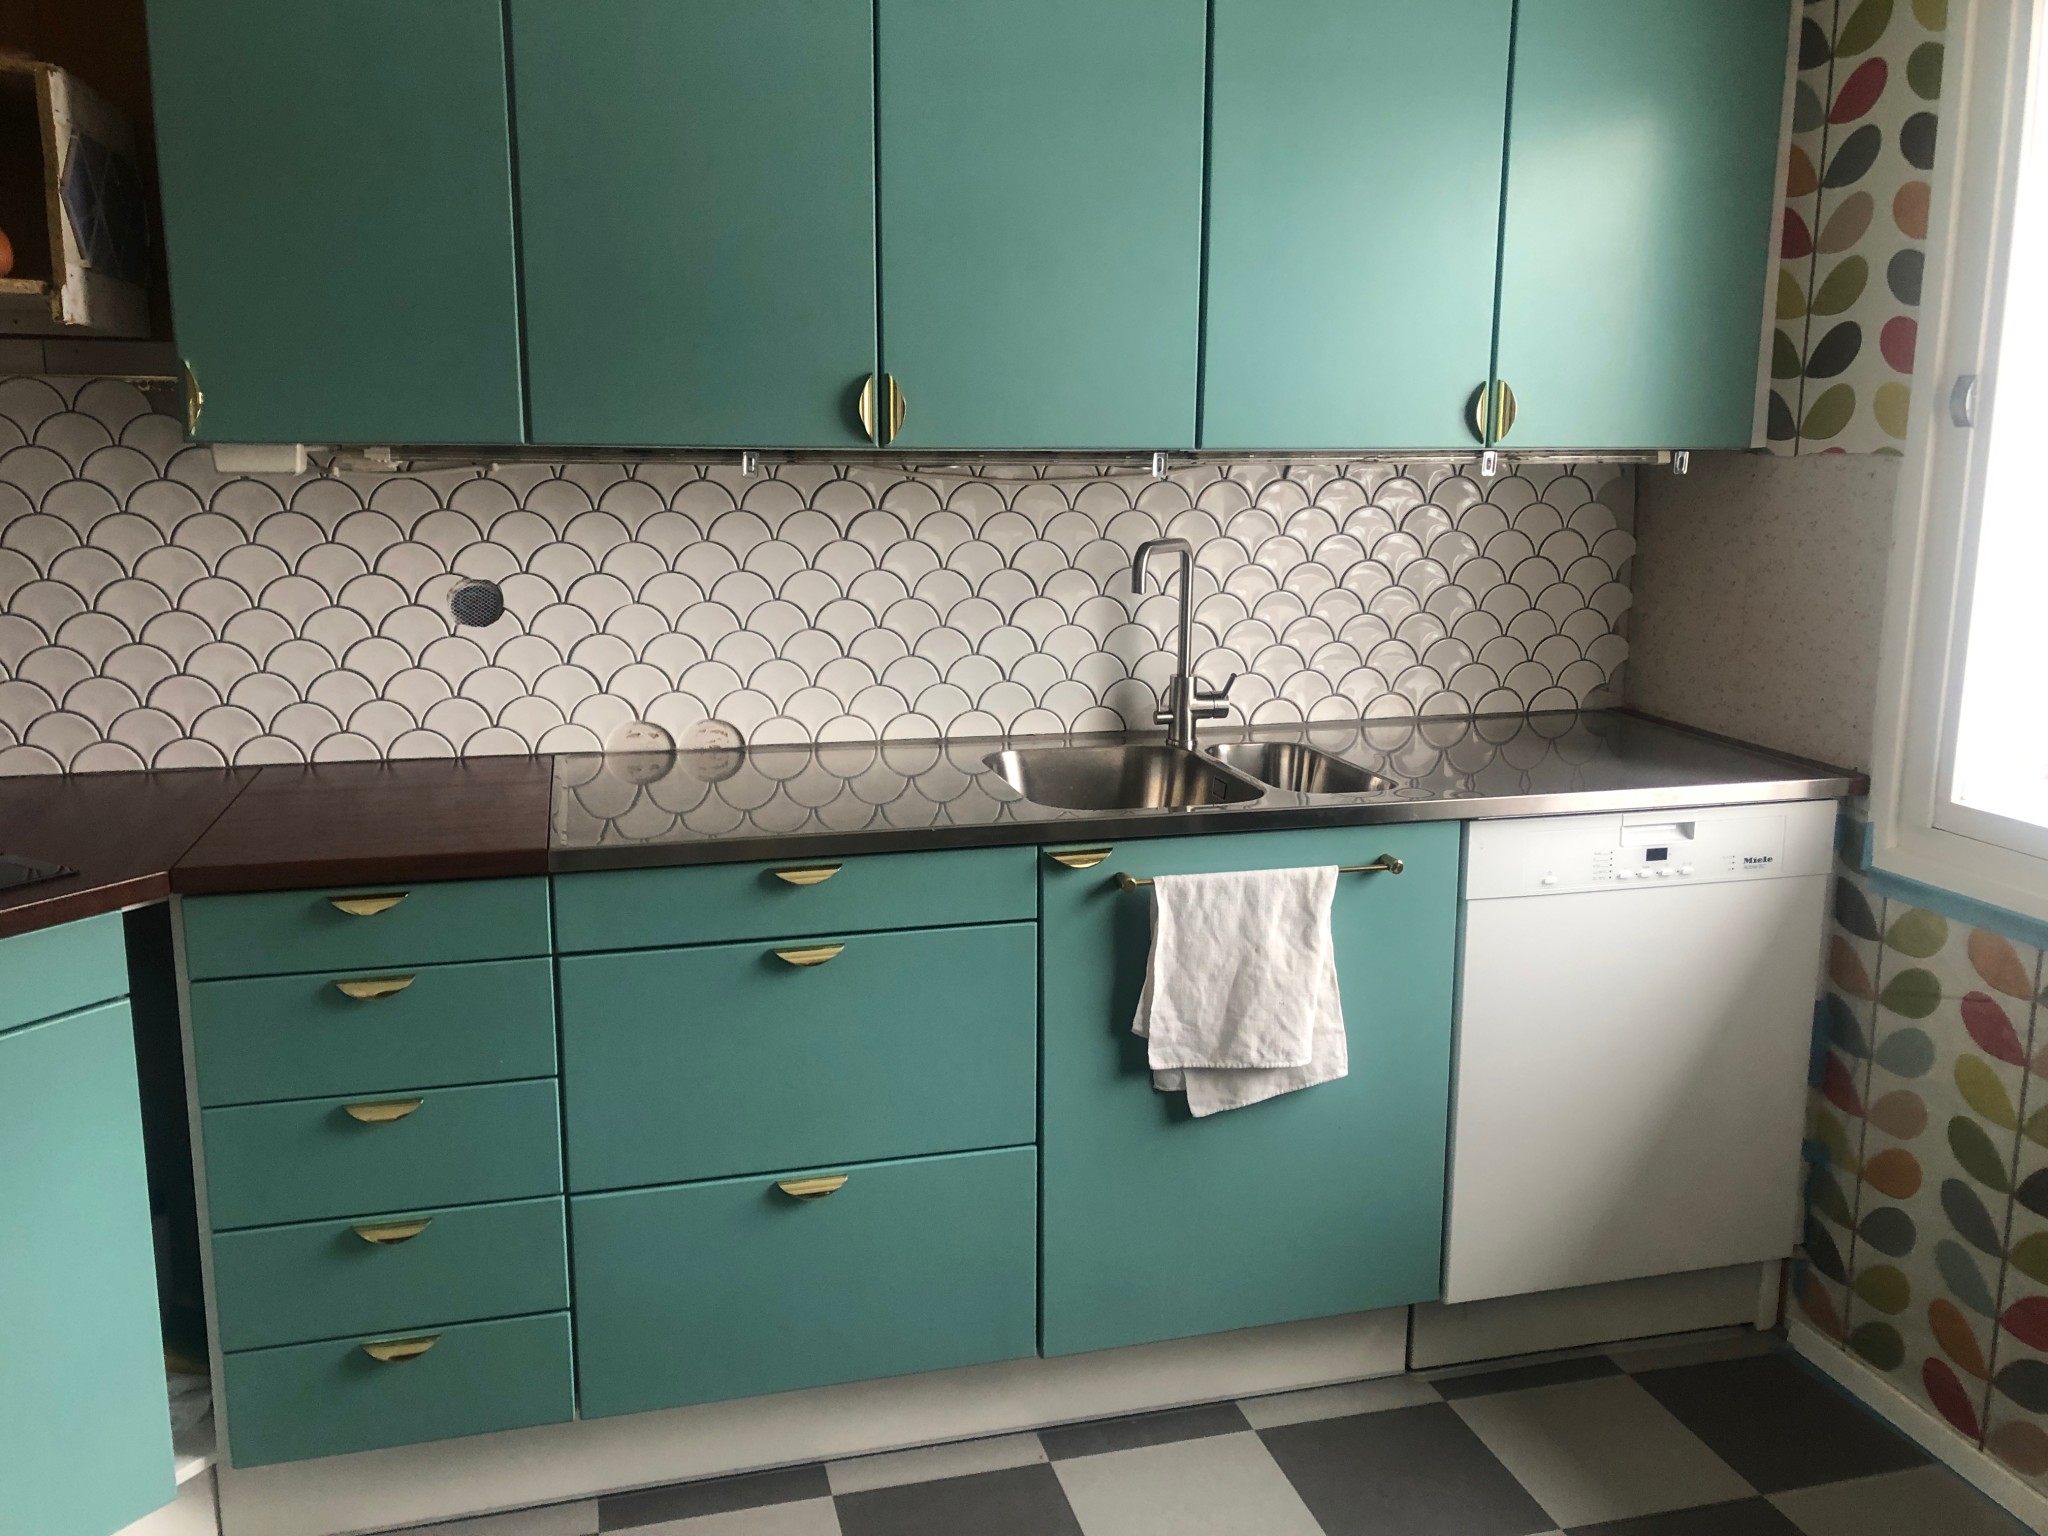
I ended up making my own kitchen cabinet doors about a year ago. In my case, the problem was that I got tired of kitchen suppliers who couldn't deliver wooden doors. And I have similar reflections. It's a huge job, and it didn't turn out perfect. The biggest job is the painting. I'm doubtful whether I would do it again, but I'm satisfied in the end.
It is impossible to get a perfect result when painting with a brush, so one must be forgiving about that. Skilled spray painting and the right conditions are required to achieve a "factory look," and I had neither.
It's impossible to get a perfect result when painting with a brush, so one must have leniency for that. Skilled spray painting and the right conditions are required to achieve the "factory look," and I had neither.
The doors I replaced were spray painted. I believe it was done in 2004 when the previous owner renovated the kitchen after a fire. It wasn't a perfect result either. And it was definitely not durable. It was worn down to the primer in many places. Moreover, the appearance of factory-painted MDF was not what I was after.
Click here to reply
Vi vill skicka notiser för ämnen du bevakar och händelser som berör dig.
")