12,875 views ·
73 replies
13k views
73 replies
Plaster with screed rails
Thank you very much for the film & your tips.B BSOD said:Agree that it looks thick, more like mortar than plaster. Doesn't it say on the bag how much water should be used? I usually mix in water by feel, but it's usually looser than your film.
#4 shows roughly how firm the plaster usually is when I plaster.
Fasten the guide rail if you can't get it right. Then unscrew it and remove it 1-2 hours after the plaster has set. You don't want to try to remove it with a chisel, it will also pull off the plaster...
Should I use primer when I've primed or should I mix the mortar looser first to see if it works?
You preferably want to divert the moisture, so in today's weather, open windows and a fan are best, but if you have a dehumidifier, keep it on as well.T Tummenmitthand said:
I used 10mm the last time I plastered indoors.T Tummenmitthand said:
So the thickness of what you want is not the important part.
(When you plaster as thick as the largest grains in the mortar, it gets tricky. Even the smallest stone that's a bit larger tears up the surface. So at least double the thickness compared to the largest grain size in the plaster)
It's mostly technique and water that you need.
Then, to be honest, I often screw the avdragslisterna in place when I plaster leca.
But to be honest, it's probably more about being able to set the guides and then go at it without doing that step when the mortar is already mixed.
That way, you can focus the setting time of the mortar on getting it on the wall before the day ends.
Note well, when the mortar is starting to set, everything should be up on the wall, and in my case, the mixer emptied.
Then it's straight into starting to scrub.
Last edited:
Regarding consistency, there is an old masonry trick. I won't say more than that to avoid getting into serious trouble, but instead link to this video that shows how it's done. 🙄
There are plenty of other good tips in this video as well, and it also makes you happy to hear a bit of norsk")
There are plenty of other good tips in this video as well, and it also makes you happy to hear a bit of norsk
Last edited:
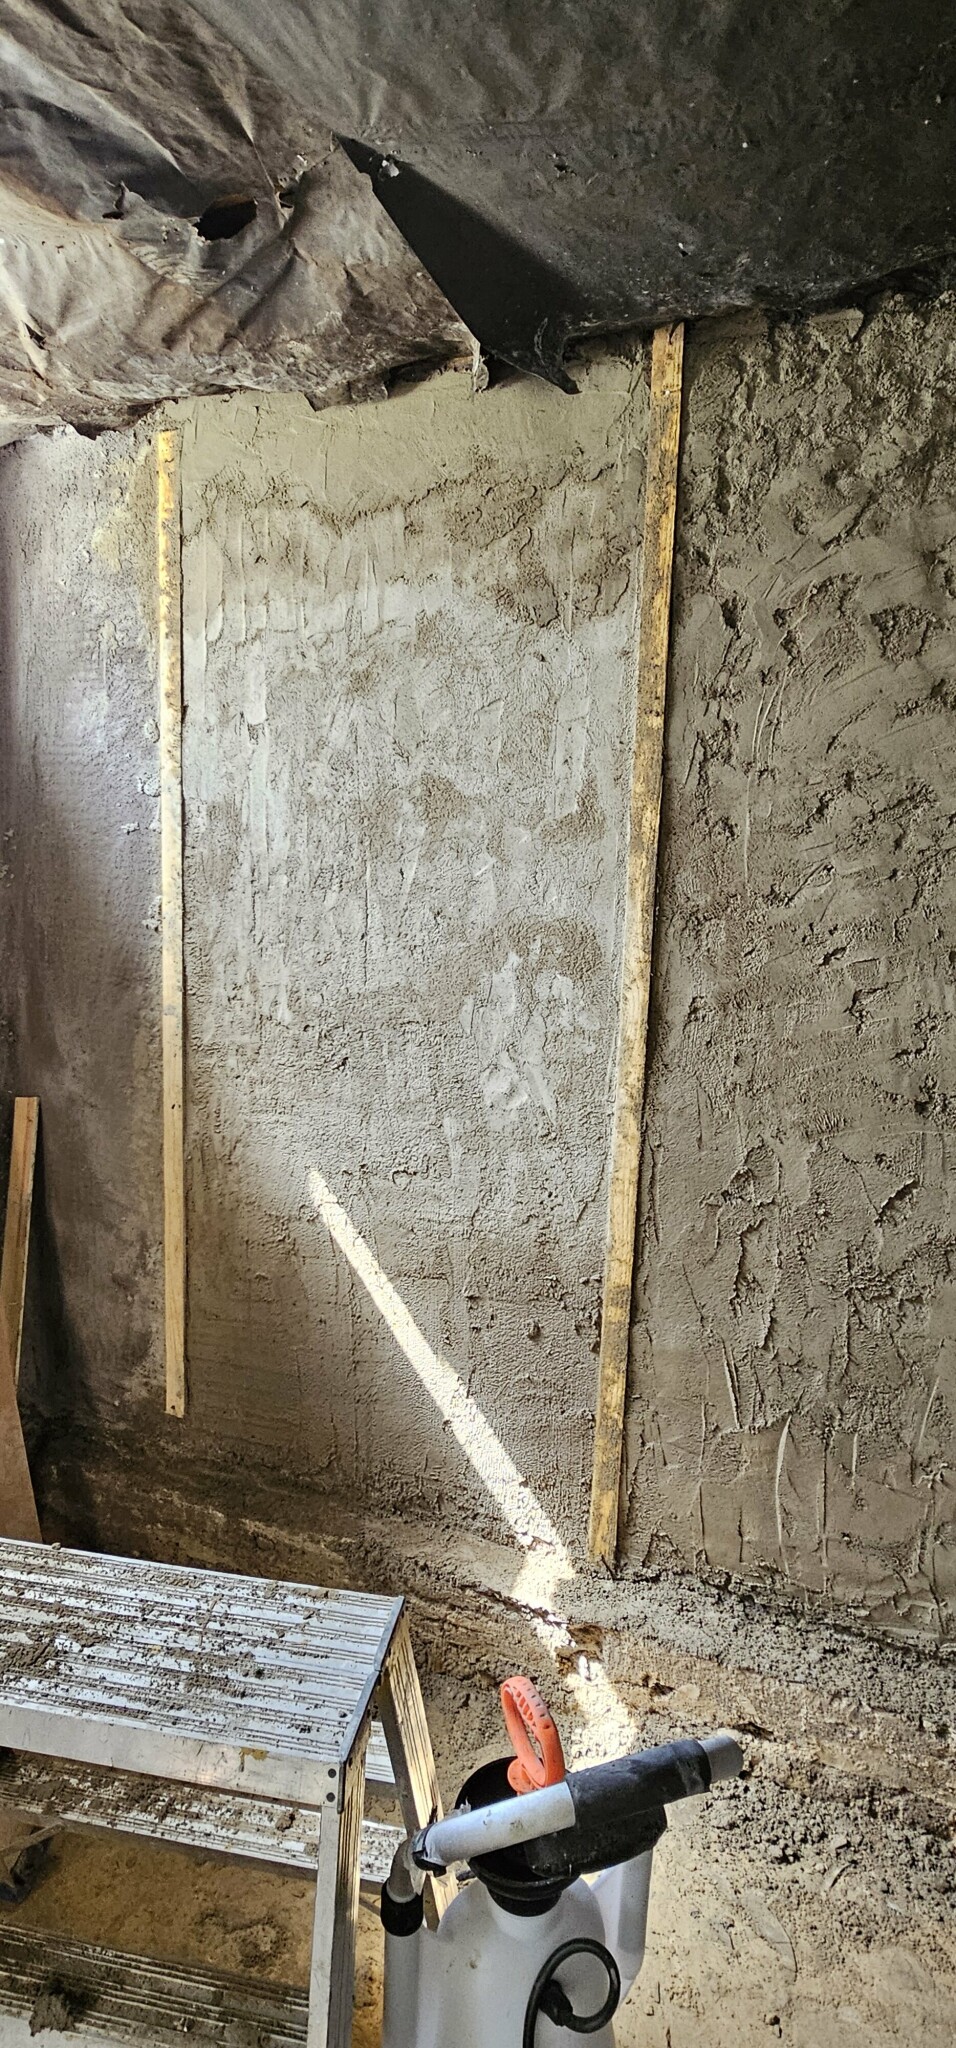
Thanks for your help, made wooden slats as you wrote. Image of the result applying the second layer as it's about 2cm from the wall to the slat.A Alexn72 said:I used 10mm last time I plastered indoors.
So the thickness you want isn't the important part.
(When plastering as thick as the largest grains in the mortar, it gets tricky. Even the smallest stone that's a little larger can tear the surface. So at least double the thickness compared to the largest grain size in the plaster)
Instead, it's mostly about technique and water in your case.
To be honest, I usually screw on the rails when plastering leca.
But to be honest, it's probably more about being able to set up the rails and then proceed without doing that step when the mortar is already mixed.
Then you can use the mortar's setting time to get it on the wall before the day ends.
Note, when the mortar is about to start setting, everything should be on the wall, and in my case, the mixer emptied.
Then it's straight on to start scrubbing.
More water in the mixer, but I think I can only handle 2 bags before it dries in the bucket.
Do you smooth it out with a board?T Tummenmitthand said:
They look better, but I think you should have a bit more water and just focus on applying the mixture. Then with a zigzag motion, smooth it out with a board or similar.
Your picture suggests that you are not doing exactly that.
If you look at the upper part and compare it with yours, you will see it looks "wetter"
Which makes it easier to smooth out and achieve an acceptable surface before scrubbing.
Another tip is to lay plastic on the floor so you can pick up what you drop.
Last edited:
mexitegel said:
Thanks for the picture 👍A Alexn72 said:Do you scrape it off with a board?
They look better, but I think you should have a bit more water and just focus on applying mortar. Then in a zigzag motion, scrape off with a board or similar.
Your picture indicates that you are not doing exactly that
[image]
If you look at the upper part and compare with yours, you see that it looks "wetter."
Which makes it easier to scrape off and get an acceptable surface before scrubbing.
Another tip is to lay plastic on the floor so you can pick up what you drop
Is that why there are small "islands" 🙈
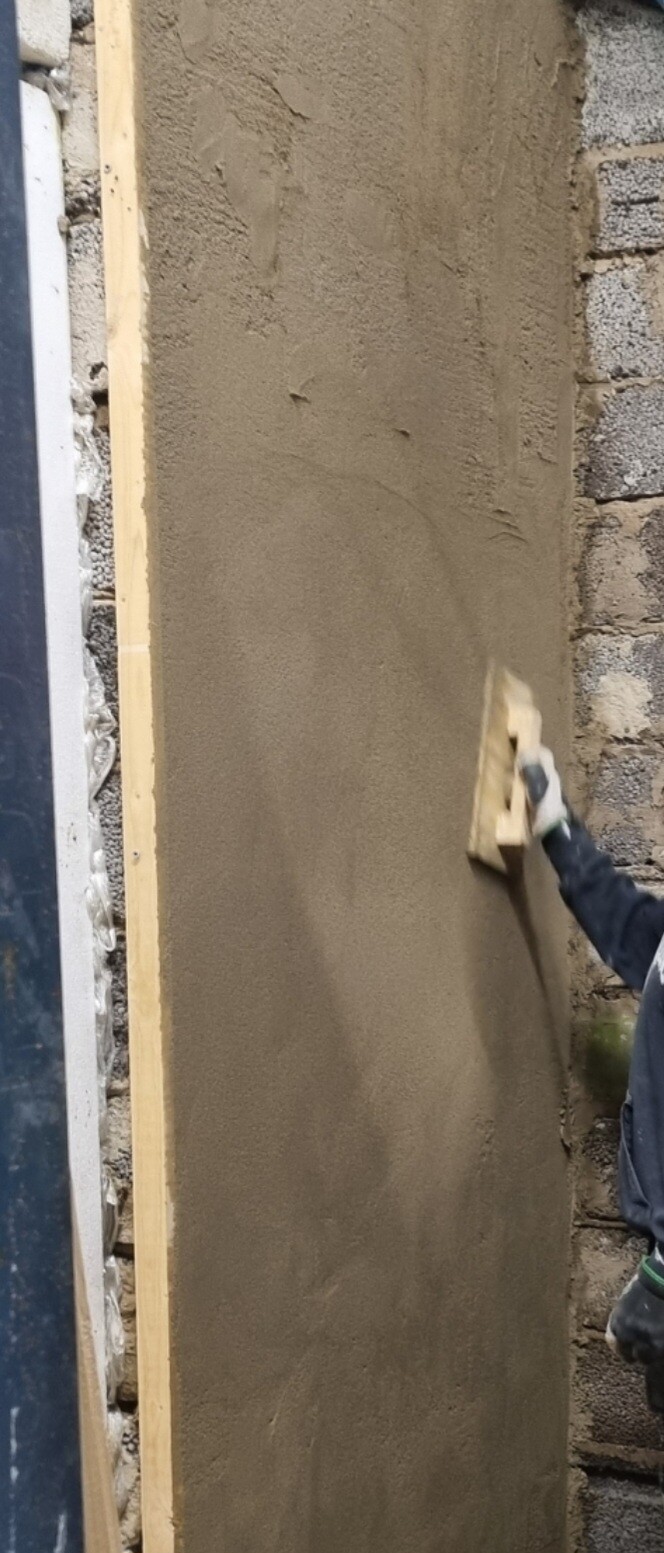
I applied with a trowel and then scraped with a board, but the board doesn't reach everything, so I used a plastic float to smooth and adjust 🙈 leveled with the trowel.
Going to do another wall, add more water 😁 test.
However, the depth is 20mm between the wall to the batten and the bag says 10-12mm.
So apply plaster 10mm then apply the next layer when it's dried or when it's damp, about 2h?
Use the trowel to apply.
And the board to level off.
If it's missing..... then apply more.
And level off again.
No poking😉
Your islands, or rather pits, are the result of the trowel...
If you look at the image I sent, you can see that the trowel has also been used there, but it's only to add material.
Never to smooth out.
If the wall is even otherwise, it's fine to add extra material with the trowel because the float board will fix it later.
20mm is not a problem to apply, but it's not entirely optimal when it dries.
There's a slightly greater risk of drying cracks.
Last edited:
Thanks, does it work eA Alexn72 said:Use the trowel to apply.
And the board to level off.
If it's missing..... Then apply more.
And level off again.
No fiddling😉
Your islands or rather pits are the result of the trowel...
20mm is no problem to apply but it's not completely optimal when it dries.
There's a slightly higher risk that you might get drying cracks.
A Alexn72 said:Use the trowel to apply.
And the board to level off.
If it's missing..... Then apply more.
And level off again.
No fiddling😉
Your islands or rather pits are the result of the trowel...
If you look at the car I sent, even there the trowel has been used but it's only to add material.
Never to smooth.
If the wall is even otherwise, it doesn't matter if you add extra material with the trowel because the scrubbing board fixes it later.
20mm is no problem to apply but it's not completely optimal when it dries.
There's a slightly higher risk that you might get drying cracks.
Now that I have filled the plaster to the ribs and leveled off.A Alexn72 said:Use the trowel to apply.
And the board to level off.
If it's missing..... Then apply more.
And level off again.
No fiddling😉
Your islands or rather pits are the result of the trowel...
If you look at the car I sent, even there the trowel has been used but it's only to add material.
Never to smooth.
If the wall is even otherwise, it doesn't matter if you add extra material with the trowel because the scrubbing board fixes it later.
20mm is no problem to apply but it's not completely optimal when it dries.
There's a slightly higher risk that you might get drying cracks.
Is it to wait until tomorrow and water to reduce the risk of cracking.
When is it time to scrub with a plastic board?
S
sinuslinus
Träskalle
· Östergötlands län
· 6 013 posts
sinuslinus
Träskalle
- Östergötlands län
- 6,013 posts
You tear off the lath and fill in the cavity immediately when you are done with that part. Then you have to sense when the mortar is dry enough. Maybe it's a 15-minute wait. You sprinkle water lightly with a lime brush and then you scrape. If the sand in the mortar starts to roll on the surface, you have too much water or have been scraping for too long.
Rubbing/scrubbing is usually done between 0.5-4 hours after the mortar is mixed.
If the plaster sticks to the board because it's loose, you have to wait.
But if it has hardened too much, you will never get the surface together.
S
Then it is more like you are planing off the material instead.
And the guides are removed as soon as you have scraped off and filled in.
What kind of surface are you aiming to get?
I keep it moist but not wet for the first 3 days.
As far as I know, the mortar should react with the air and moisture. So if you soak it, it won't be good, and if it dries completely, it won't be good.
Last edited:
Thank you so much for the help, I crashed and the work stalled 🙈A Alexn72 said:Scraping/scrubbing is usually done between 0.5-4 hours after the mortar is mixed.
If the plaster sticks to the board because it's loose, you have to wait.
But if it has hardened too much, you'll never get the surface together.
Then it will rather be like you're planing off the material instead.
And the guide rails are removed as soon as you have scraped off and filled in.
What kind of surface are you aiming to get?
I keep it damp but not wet for the first 3 days.
As far as I know, the mortar should react with the air and the moisture. So if you soak it, it won't be good, and if it dries completely, it won't be good either.
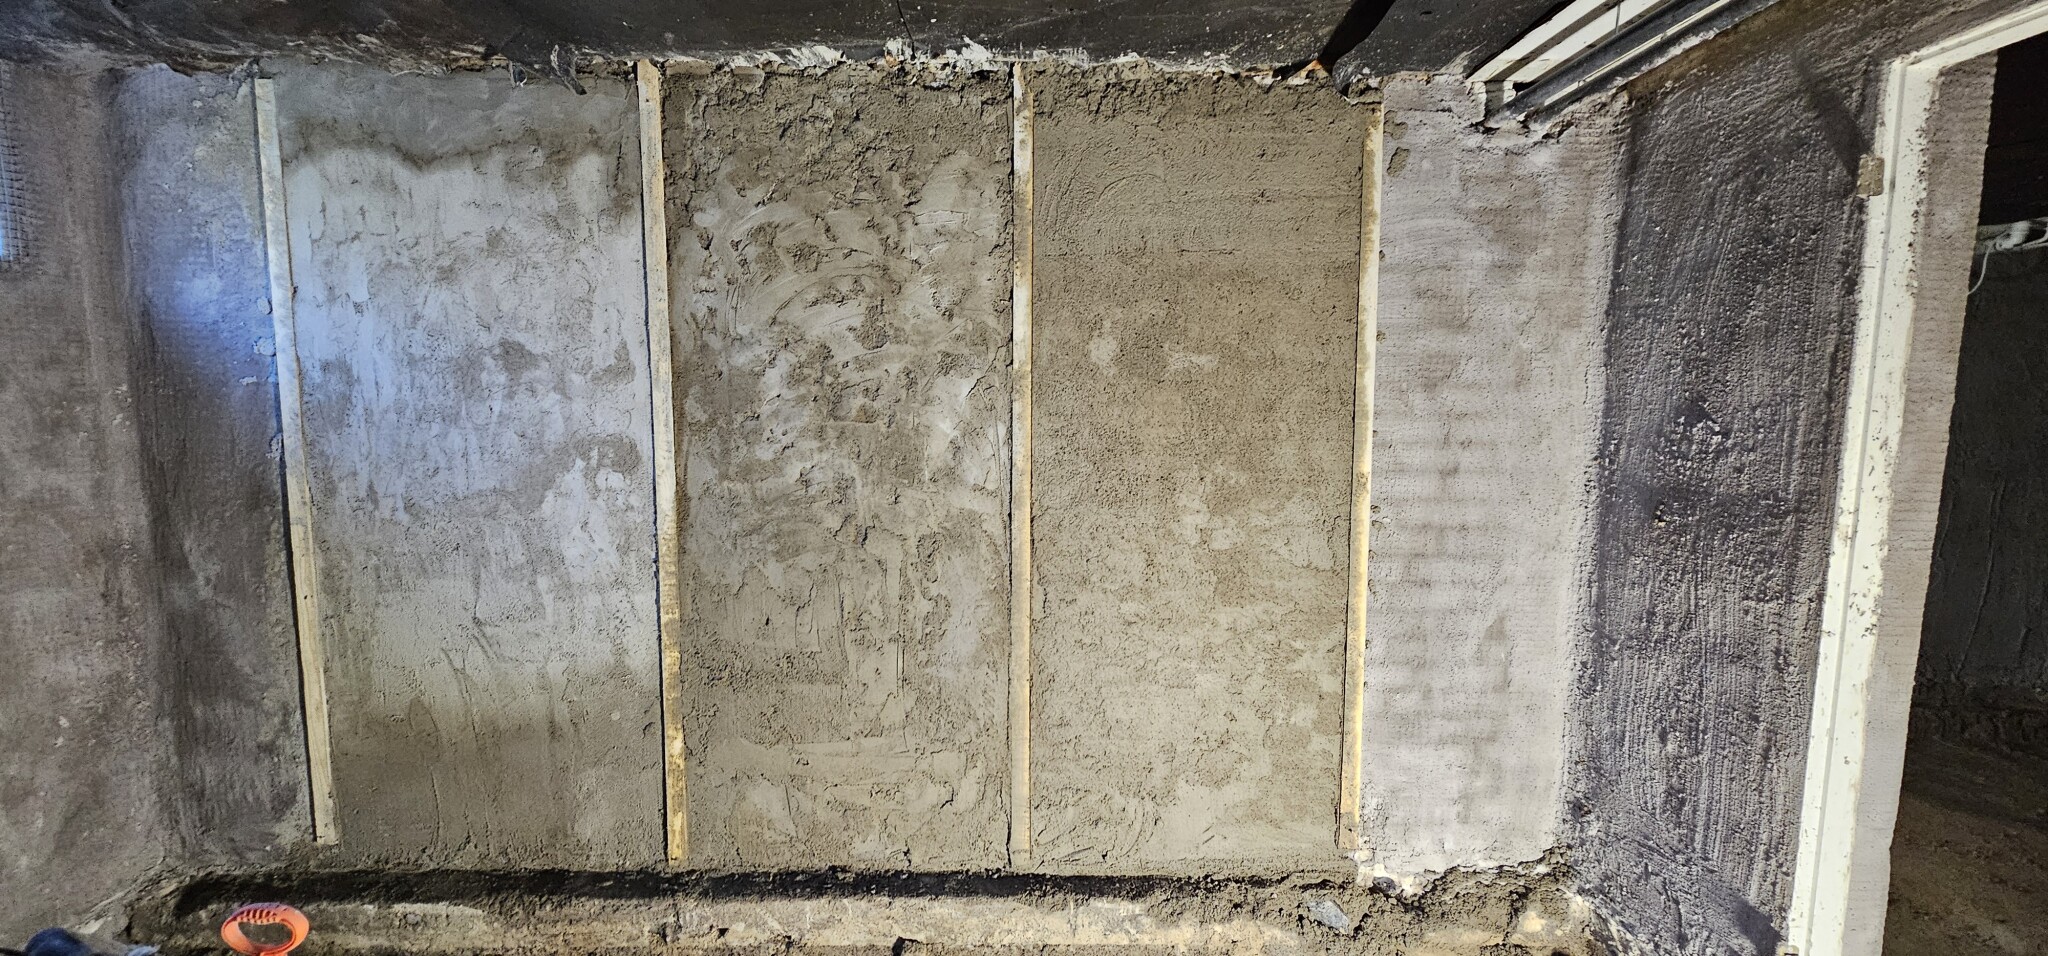
I'll continue later today and I thought the surface should be reasonably smooth.
Attaching a picture of 3 different plaster squares and even if the 3rd square is not smooth where it's come off a bit,
So thank you so much for your help, including stopping fiddling with the ladle 😅 And many other good tips.
I'll buy some fine putty to throw on the last one to fill in the gaps.
T Tummenmitthand said:Thank you so much for the help, I crashed and the work came to a halt 🙈
Going to continue later today and hoping the surface will become fairly smooth.
Attached is a picture of 3 different plaster boxes and even though the 3rd box is not smooth where it's come off a bit,
Thank you so very much for your help, among other things, to stop fiddling with the spoon 😅 And many other good tips.
I will buy fine plaster to throw on the last one to fill in the voids.