21,921 views ·
110 replies
22k views
110 replies
How to prevent the studs from showing through OSB and drywall?

Hobby carpenter
· Sverige
· 150 posts

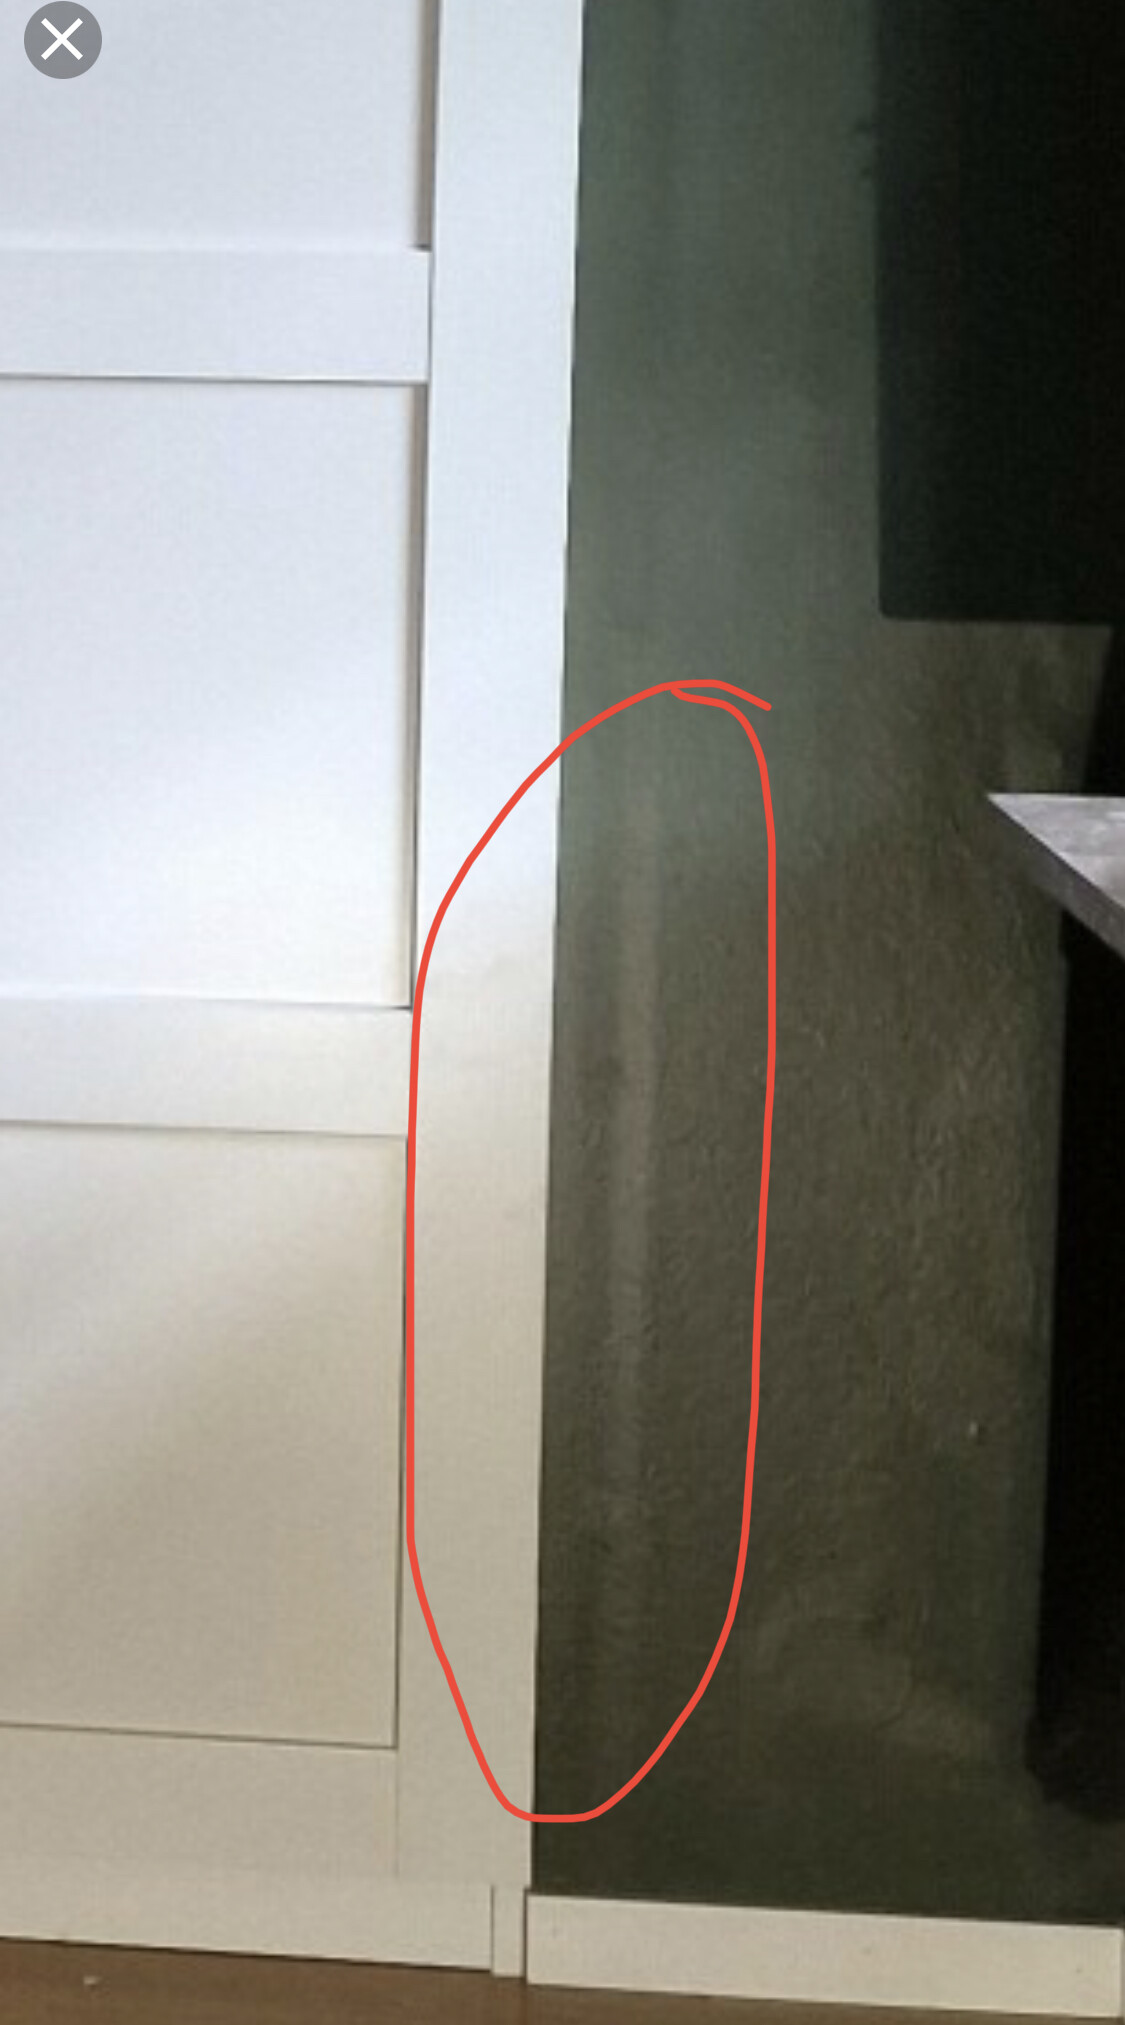
No, you can see the chamfer on the sheet. The mistake, as already noted, is that TS didn't cut away that part when mounting against the wardrobe. An easy but unnecessary beginner's mistake.
To do it right, the proper approach is probably to tear down the plasterboard and redo it. It's probably a good idea to watch a film on how to do it before round 2.
To do it right, the proper approach is probably to tear down the plasterboard and redo it. It's probably a good idea to watch a film on how to do it before round 2.
That can be significantly improved without tearing down, but it might be a bit difficult to fill.
Or you can cover the unfilled joint with trim (common door trim) matching the baseboard around, perhaps the simplest and best solution. I actually think it would also improve the overall impression of the custom-built wardrobe with an additional framing 👍
Otherwise, nicely done! Otherwise, it looks great except for a small mistake with the drywall, but that's a very common beginner's mistake.
Last edited:
Plasterboard is recessed at the edges so you can place a paper/fiberglass tape there when you are placing two boards next to each other.M Mjärn said:
You then fill the recess with plaster to make it even. If you are finishing against something else, you need to cut away the recess or plaster it flush.
Yep, I've been right there too.sunnis said:
Built the garden shed with inner dimensions 2.4 x 4.8 so it would fit perfectly with whole plasterboards. Of course, I didn't split the boards that were going to the corners in two parts, so I had a dreadful plastering job to do instead.
")
Renovation rookie
· Stockholm
· 152 posts
Agree with the others, put casing around to frame and cover up... Nicely built otherwise! 👌M Mjärn said:Have built in an Ikea wardrobe. Framed around it and set OSB and plaster. Then restoration wallpaper. As the title states: How do you avoid having the studs show through OSB and plaster? You can see where the studs are. They kind of shine through the wall.
It might not be as clear in the picture, but that's how it is. On the left side of the picture, it's clearly visible. It would be interesting to know what I've done wrong.
You embed paper tape in the corners. The recessed edges should be there. 😊 The tapes are even "pre-creased" for exactly that.Mikael_L said: