
12,397 views ·
13 replies
12k views
13 replies
How to level wall where kitchen will go up
Hello,
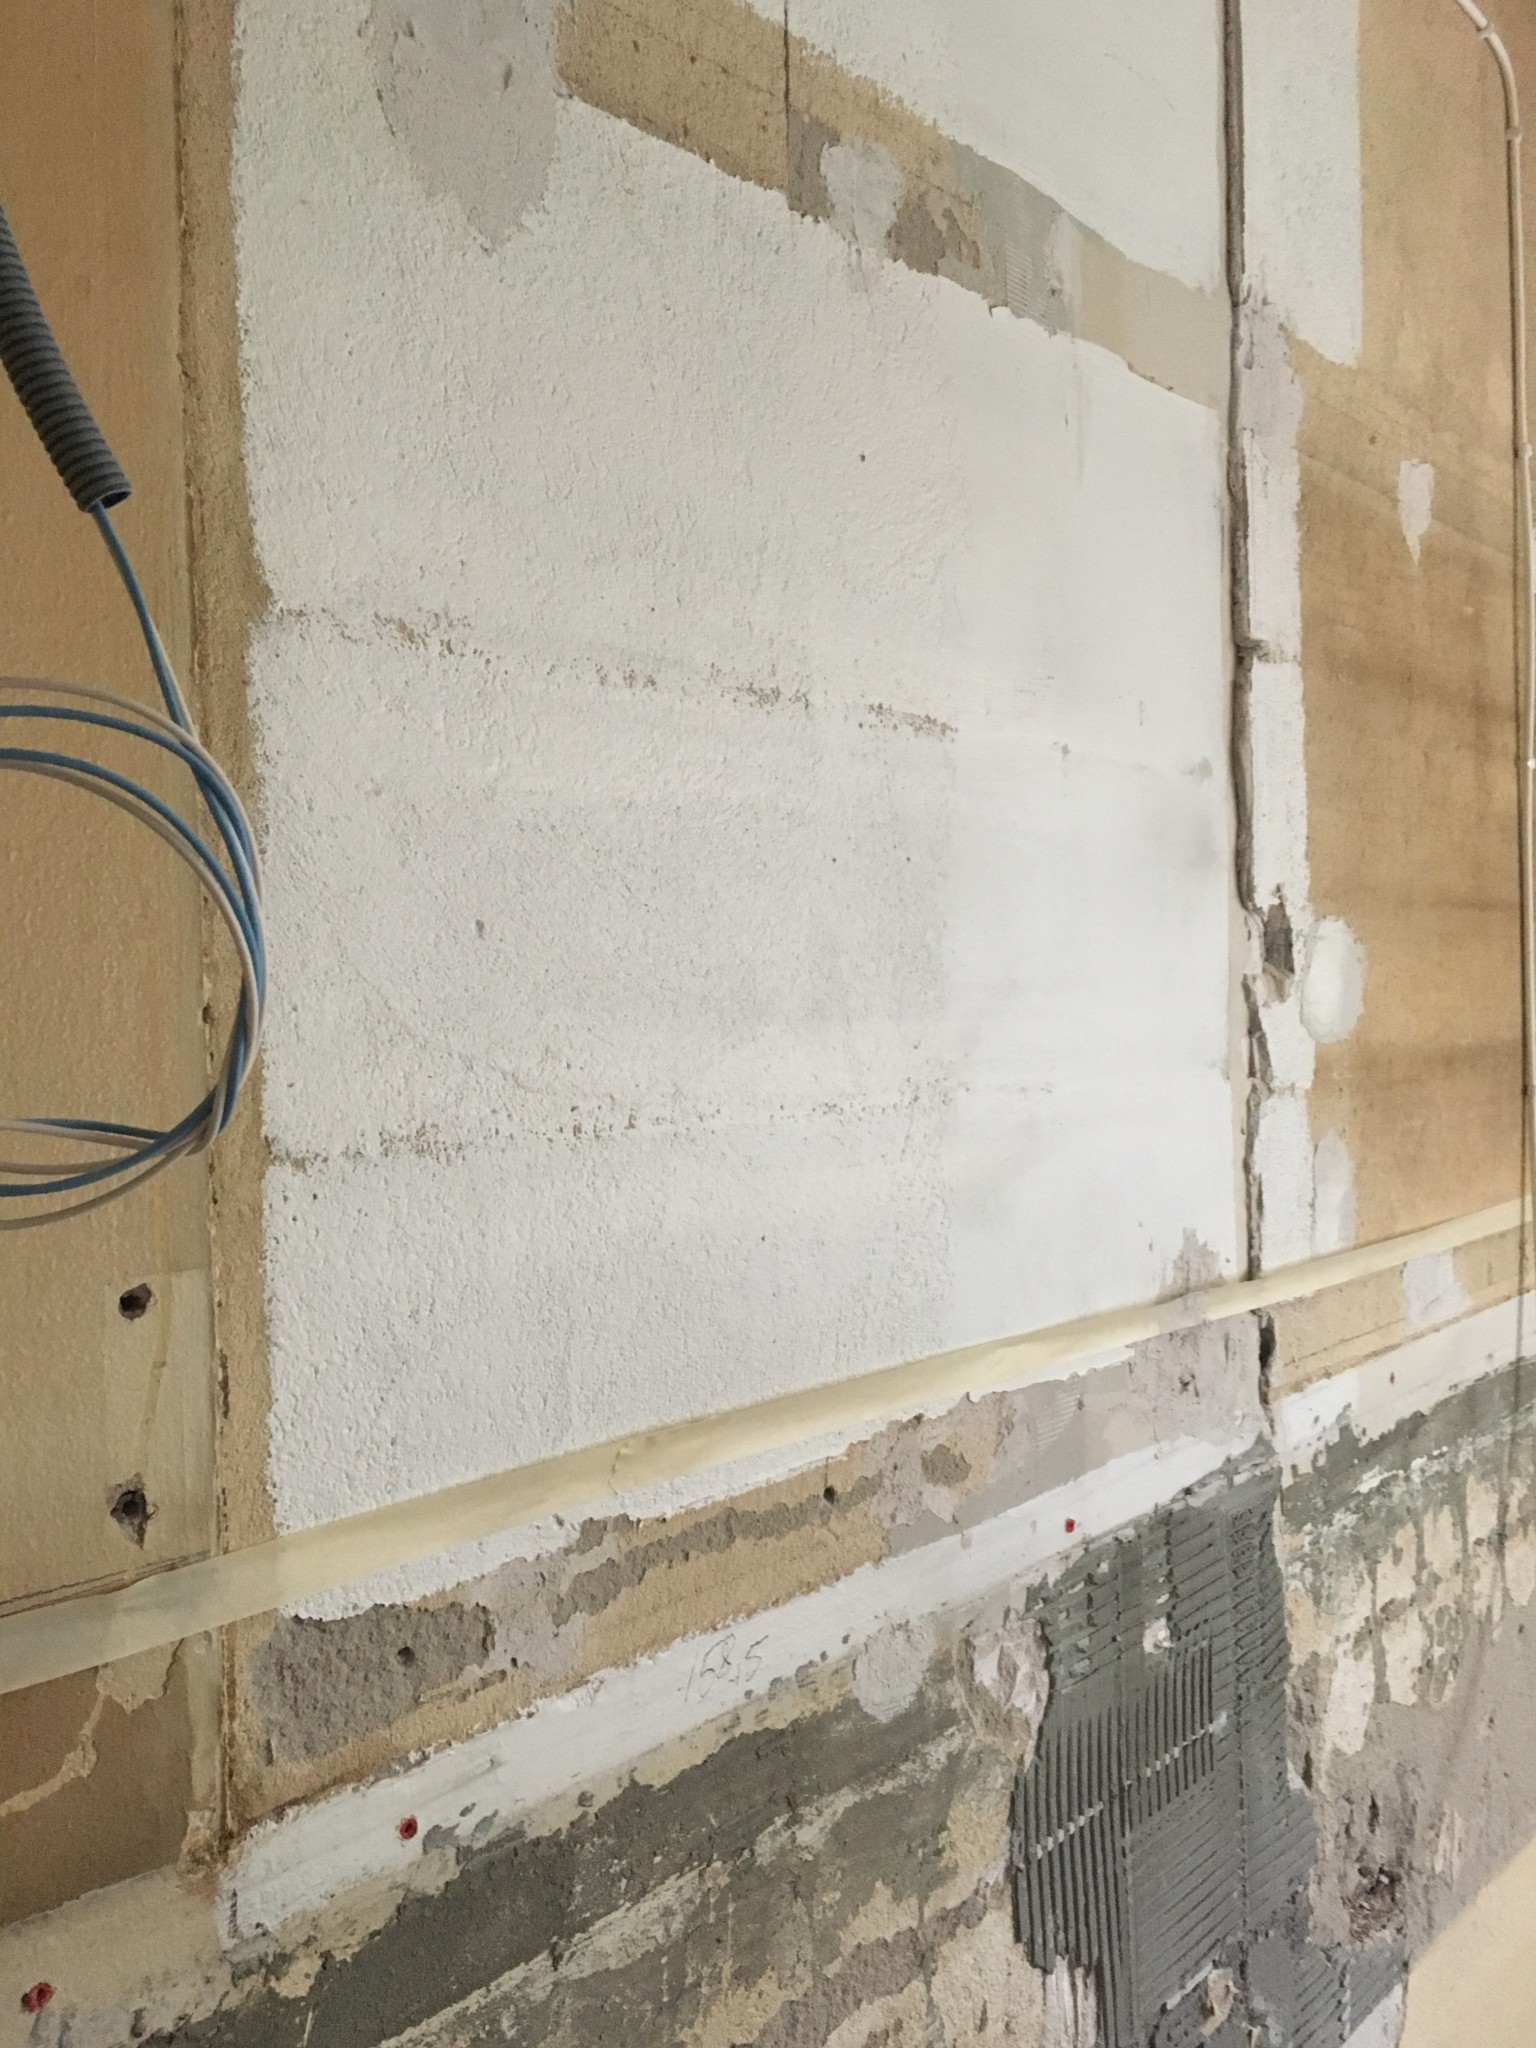
I am facing the following dilemma. We have torn out an old built-in kitchen and are going to install a new kitchen. However, there are quite significant level differences in the wall, and I wonder how we can best even these out.
A small part of the wall also seems to consist only of a gypsum board, and then the pipes run right behind it.
I am facing the following dilemma. We have torn out an old built-in kitchen and are going to install a new kitchen. However, there are quite significant level differences in the wall, and I wonder how we can best even these out.
A small part of the wall also seems to consist only of a gypsum board, and then the pipes run right behind it.
Place timber 28x75 from top to bottom to the floor vertically, at the beginning and end of the installation. Then, tie a string between them, and insert more pieces in between, with a maximum distance of 600mm, preferably shorter. Check that the 28 fits between the string and the wall, otherwise move one of the side pieces outwards. If there is a gap, you'll need to insert small pieces there, like masonite or similar, to align the wall. Then, place horizontal 28x75 at the top and bottom, adjusted for the mounting of the cabinets. The horizontal pieces should be screwed through each vertical piece into the wall for a secure hold. Between the upper and lower cabinets, it's best to use double gypsum boards if you plan to tile. They are a stable material and don't move. If it's lightweight concrete in the wall, you'll need special plugs with screws, which are long. For leca or hollow blocks, you can use the same type. The cabinets will be slightly away from the wall, so if a gap is visible, you should insert a piece against the wall, but what's the best approach for a good installation?
Perhaps I should add that every centimeter is precious in this kitchen, so I would prefer to build on as little as absolutely possible. That also sounded quite complicated with much room for mistakes, are there simpler methods that build less? 
Yes, that's how I build, but you can also reduce by 28m. You need to place a plank at the height where the island cabinets should attach and level down to where it should sit below on the floor cabinets and insert pieces in between if there's a gap against the wall. Screw tightly so the cabinets don't come down with all the porcelain. The cabinets should be screwed into each other; the slightest mm will make them not fit against the wall. The method mentioned earlier is one way, but it's difficult to get right with spacers between the cabinet and the wall, and the lower cabinets must come precisely since there will be a board lying on them, and everything is at right angles, which can make it difficult with the board's connection to the wall.P Peligroso said:
If you are installing an Ikea kitchen, the cabinets are now hung on a metal rail. It might be the same with other kitchens as well. What you need to do is ensure that this rail is installed completely straight by shimming behind it and ensuring there is space for the cabinets to hang vertically from the rail. The rail is 1 cm thick at the top, but the bottom of the cabinets can be closer to the wall than that. Ignore mounting the supports (1 cm) at the bottom of the cabinets and instead shim if the wall slopes inward.
Between the upper and lower cabinets, you need to create a smooth wall to tile, etc., but behind the cabinets, the wall can look as it is.
Between the upper and lower cabinets, you need to create a smooth wall to tile, etc., but behind the cabinets, the wall can look as it is.
I haven't seen any rails for hanging cabinet IKEA model, if they exist, that's great, it's much easier during installation. I only know that in France, Belgium it's like that, where tenants take the cabinets with them when they move, leaving the rail behind.L LennartN said:If you are installing an Ikea kitchen, the cabinets today are hung on a metal rail. It may be the same for other kitchens too. What you need to do is ensure that this rail is mounted completely straight by shimming behind it and making sure there is room for the cabinets to hang vertically from the rail. The rail adds 1 cm at the top, but the bottom of the cabinets can be closer to the wall than that. Skip mounting the supports (1 cm) at the bottom of the cabinets and shim instead if the wall leans inward.
Between the upper and lower cabinets, you'll need to arrange for a smooth wall to tile, etc., but behind the cabinets, the wall can look as it does.
Sorry, it might be a bit of slang. Placing pieces of varying thickness behind the rail so that it has support at every point where you screw it into the wall. There are ready-made plastic pieces available for purchase, but masonite is easy to split so that you get the exact measurement behind the rail.P Peligroso said:
Hi, I haven't installed IKEA in several years,L LennartN said:
LennartN, is there a hanging rail for IKEA, good to know, you learn something new every day then it's some form of attachment on the cabinets you put there.Hi, you can find the rail here http://www.ikea.com/se/sv/catalog/products/60205664/
In the cabinets, there is a bracket that hooks into the rail and then you lock it with a "plastic screw." IKEA's assembly instructions are quite clear about the positioning of the rail, but they do not cover the situation with sloping walls where you might need to either remove the spacer at the bottom of the cabinet or add one, depending on whether the wall slopes inward or outward.
Regarding Skims, it is more correctly spelled shims if someone tried to google it.
In the cabinets, there is a bracket that hooks into the rail and then you lock it with a "plastic screw." IKEA's assembly instructions are quite clear about the positioning of the rail, but they do not cover the situation with sloping walls where you might need to either remove the spacer at the bottom of the cabinet or add one, depending on whether the wall slopes inward or outward.
Regarding Skims, it is more correctly spelled shims if someone tried to google it.
BingoL LennartN said:Hello, you can find the rail here [link]
In the cabinets, there is a bracket that hooks into the rail and then you lock it with a "plastic screw". IKEA's assembly instructions are quite clear on the placement of the rail but do not cover the case of sloping walls where you might need to either remove the spacer that sits at the bottom of the cabinet or add to it depending on whether the wall leans in or out.
Regarding Skims, it is more correctly spelled shims if someone has tried to google.
If I'm not completely wrong, you can perhaps use this for other brands as well, if there are loose metal parts that you attach to the cabinet, it might be cheaper there than with other kitchen brands if available.Ah, thanks for the explanation, I'll have to look into this. The plastic pieces you mentioned, where can I find them and what are they called?L LennartN said:Sorry, it might be a bit of slang. Place pieces of varying thickness behind the rail so that it has support at every point where you screw it into the wall. There are ready-made plastic pieces available for purchase, but masonite is easy to split so that you get the exact measurement behind the rail.
Click here to reply