Hello!
Does anyone know how to neatly finish a cove molding on a sloped ceiling against a corner where it won't meet another molding? The picture shows where I'll place the molding, where the sloped ceiling meets the gable wall (the purple line in the picture). I haven't planned to put any molding where the ceiling meets the other wall, that is, between B and C. How can I finish the cove molding so that it fits as closely as possible to all parts of the corner where A, B, and C meet? Is there a good way, or do I have to put molding between B and C to make it look good?
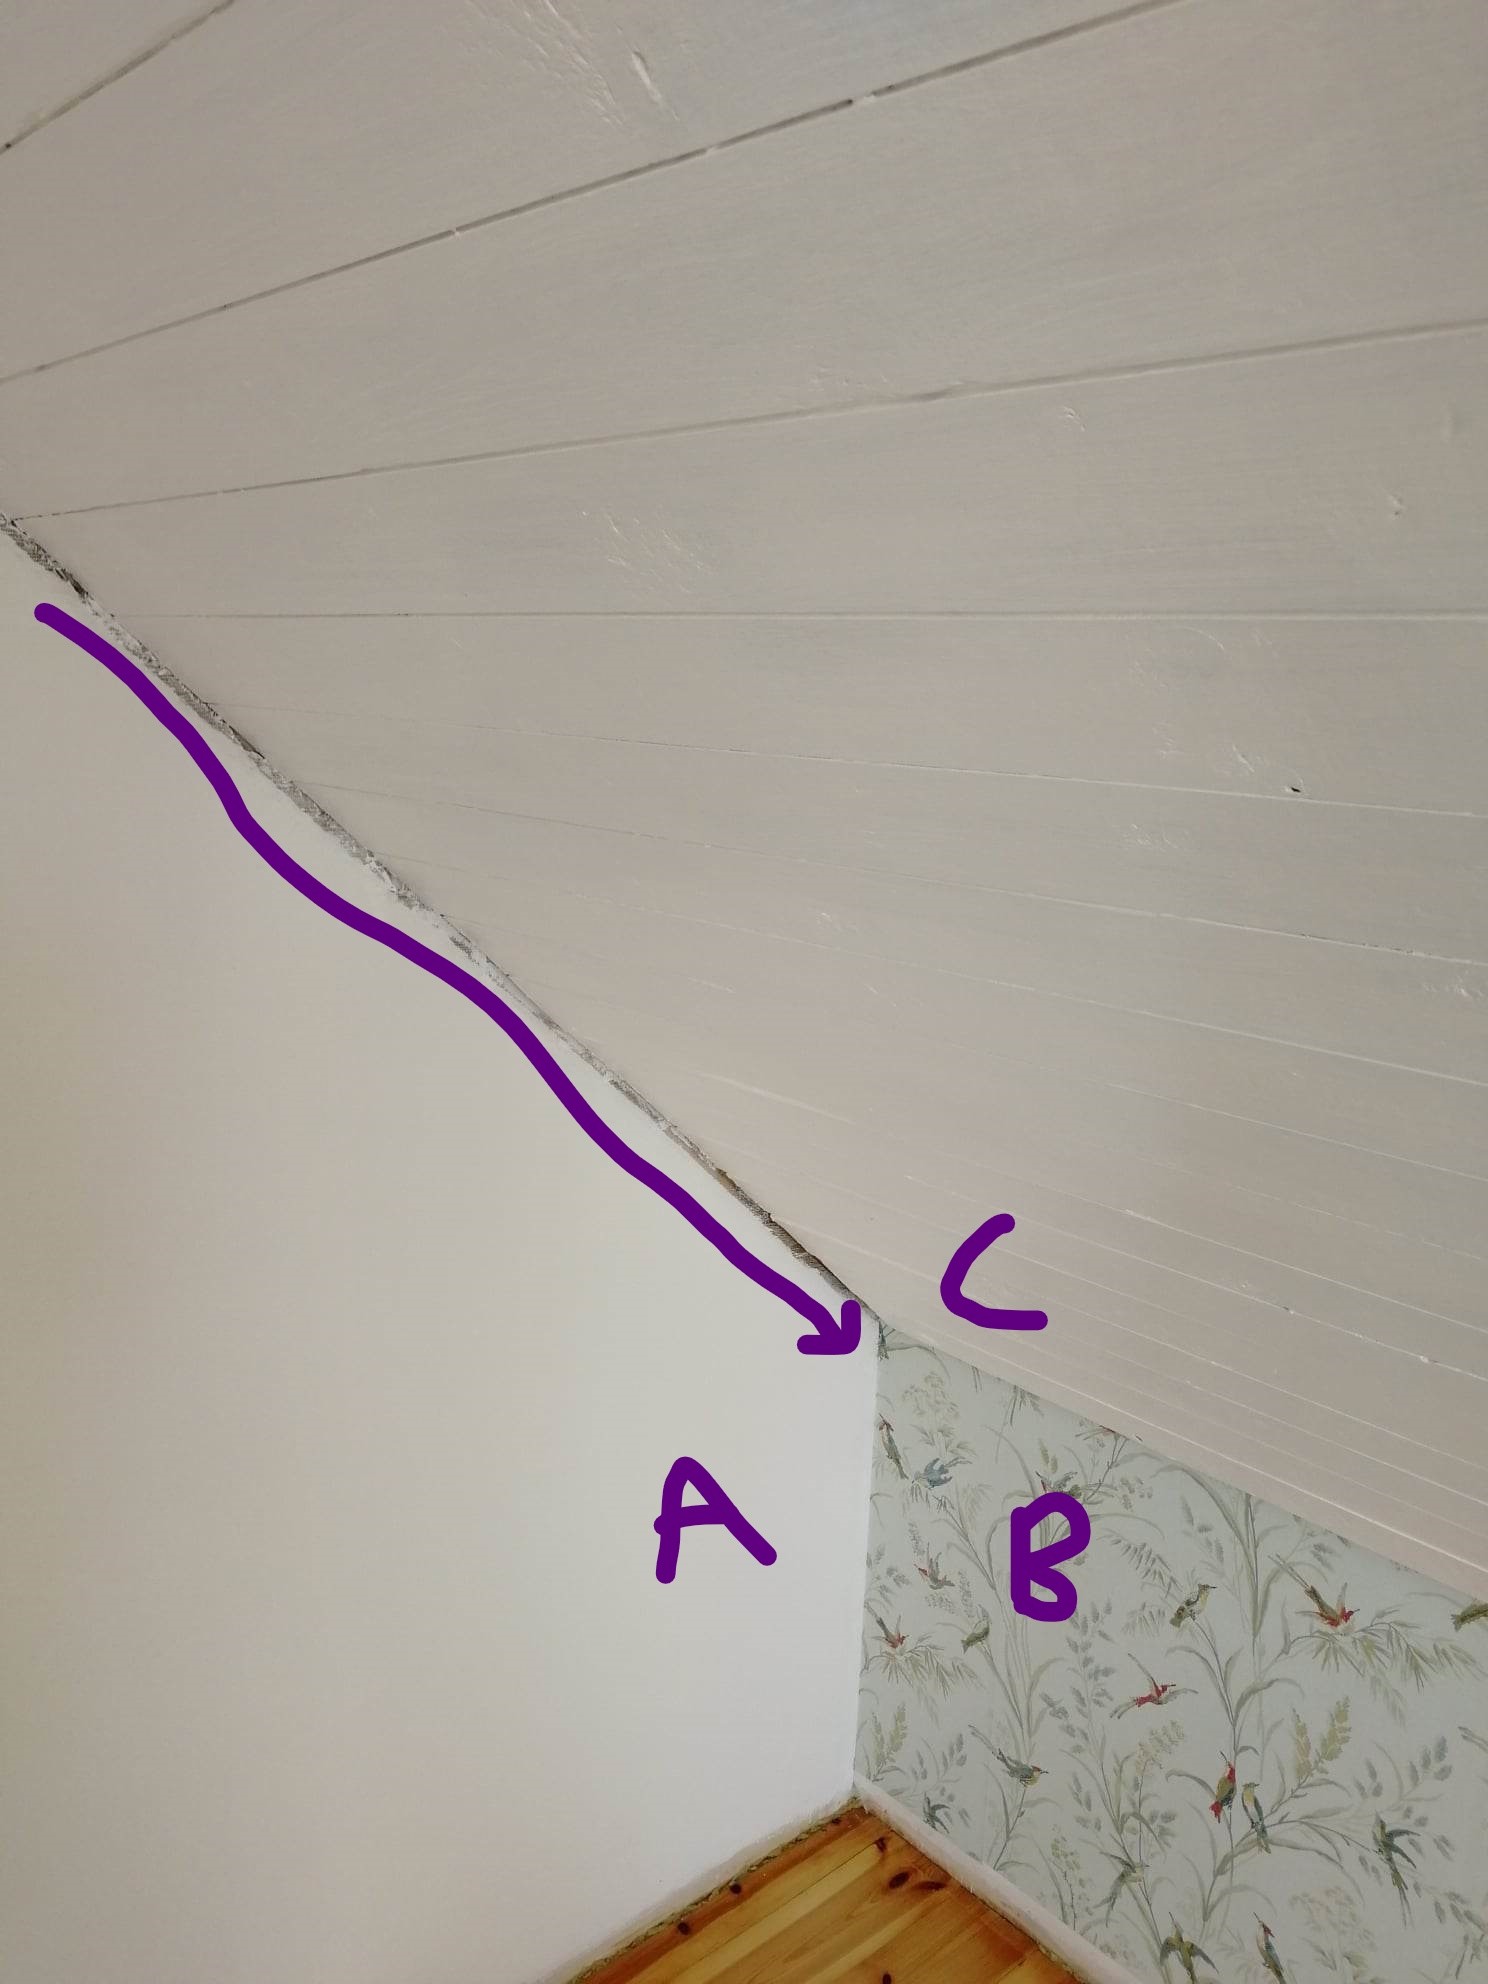
Does anyone know how to neatly finish a cove molding on a sloped ceiling against a corner where it won't meet another molding? The picture shows where I'll place the molding, where the sloped ceiling meets the gable wall (the purple line in the picture). I haven't planned to put any molding where the ceiling meets the other wall, that is, between B and C. How can I finish the cove molding so that it fits as closely as possible to all parts of the corner where A, B, and C meet? Is there a good way, or do I have to put molding between B and C to make it look good?
Best answer
Construction veteran
· Norrland
· 342 posts
Hello! If you know your roof angle, it's simple. Otherwise, you need to find out using a bevel or a measuring stick, and then check the miter saw for the angle (if you don't have a bevel with degrees). Then place the trim in the miter saw in the same way the trim will be positioned on the wall. This means that the saw's fence represents the wall. In other words, the top edge of the trim is facing you. It can be a bit tricky to hold it in place. Then tilt the saw to the correct number of degrees and cut. Done!

@Snickarkirre Thanks!! Exactly what I needed. A little fine-tuning left here, but it looks like it's going well.S Snickarkirre said:Hi! If you know your roof angle, it's simple. Otherwise, you'll need to find out with a bevel gauge or a measuring tape and then check the angle on the miter saw if you don't have a bevel gauge with degrees. Then, position the molding in the miter saw the same way it will be on the wall. That means the backstop on the saw represents the wall. In other words, the top edge of the molding faces out towards you. It might be a bit tricky to keep it in place. Then you adjust/tilt the saw to the correct number of degrees and cut. Done!
Click here to reply