1,344 views ·
5 replies
1k views
5 replies
How to dismantle trellis for the staircase fall protection on the upper floor?
Hello!
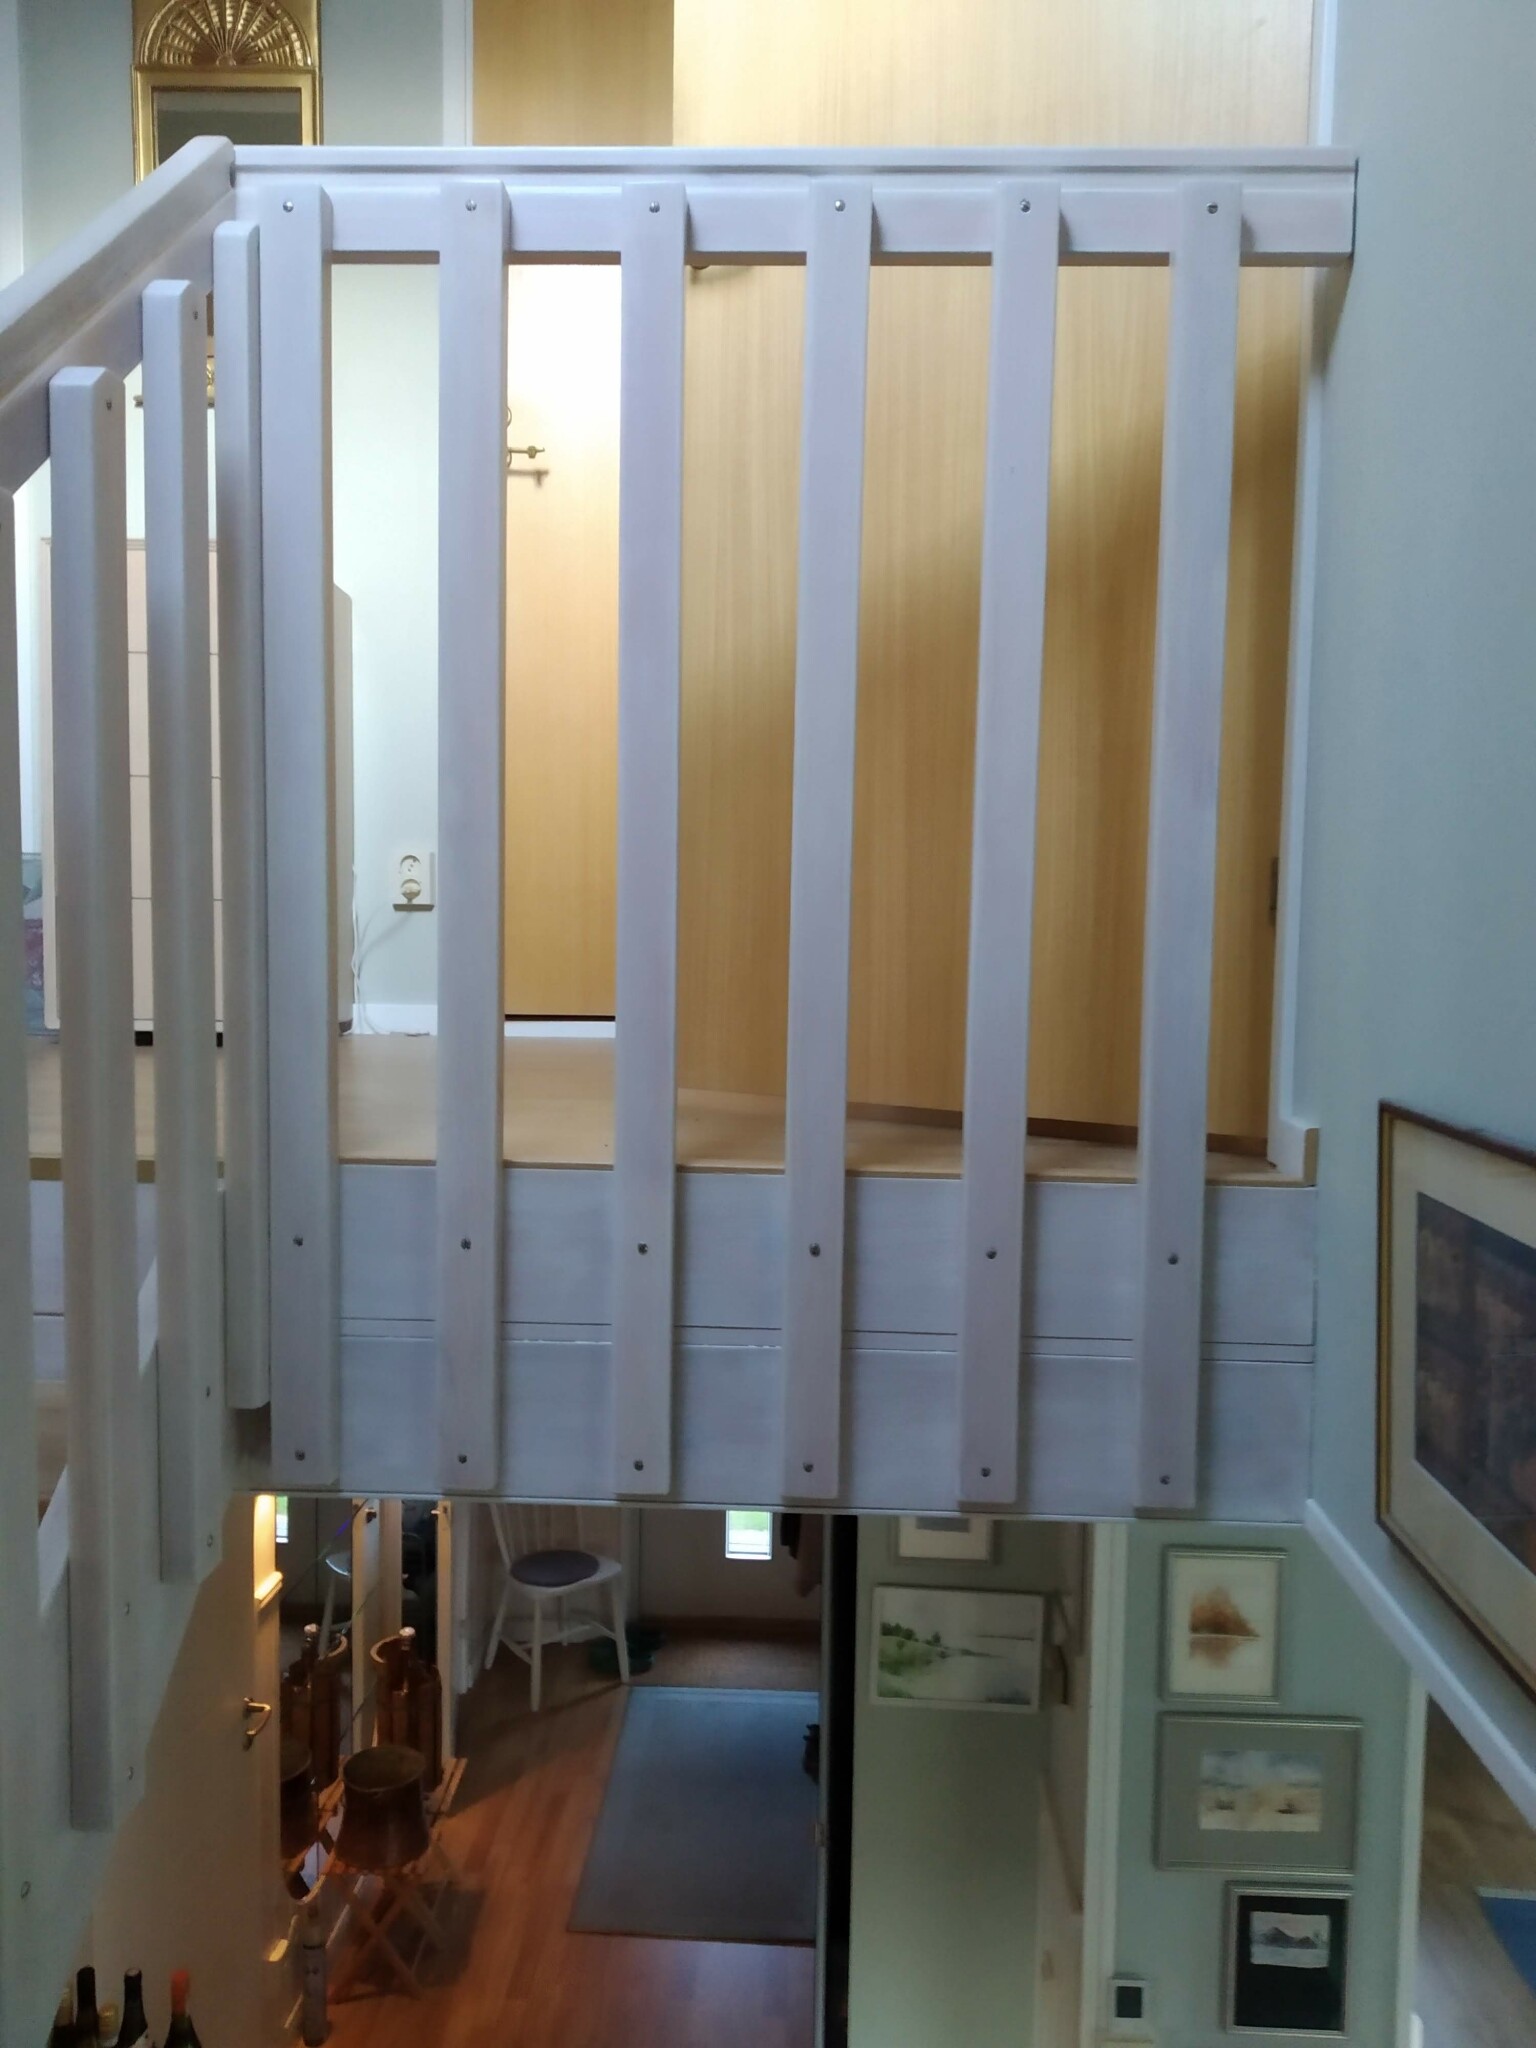
I am going to install ceiling panels on the upper floor. Since I would prefer to have the ceiling continuous by the balustrade, I am wondering how to dismantle the balustrade for the staircase fall protection on the upper floor? I have started and managed to detach it at the top, but I realize that I will crack the slats if I continue. The alternative is to install the ceiling panels next to the handrail.
Does anyone know?
Kind regards, Matti
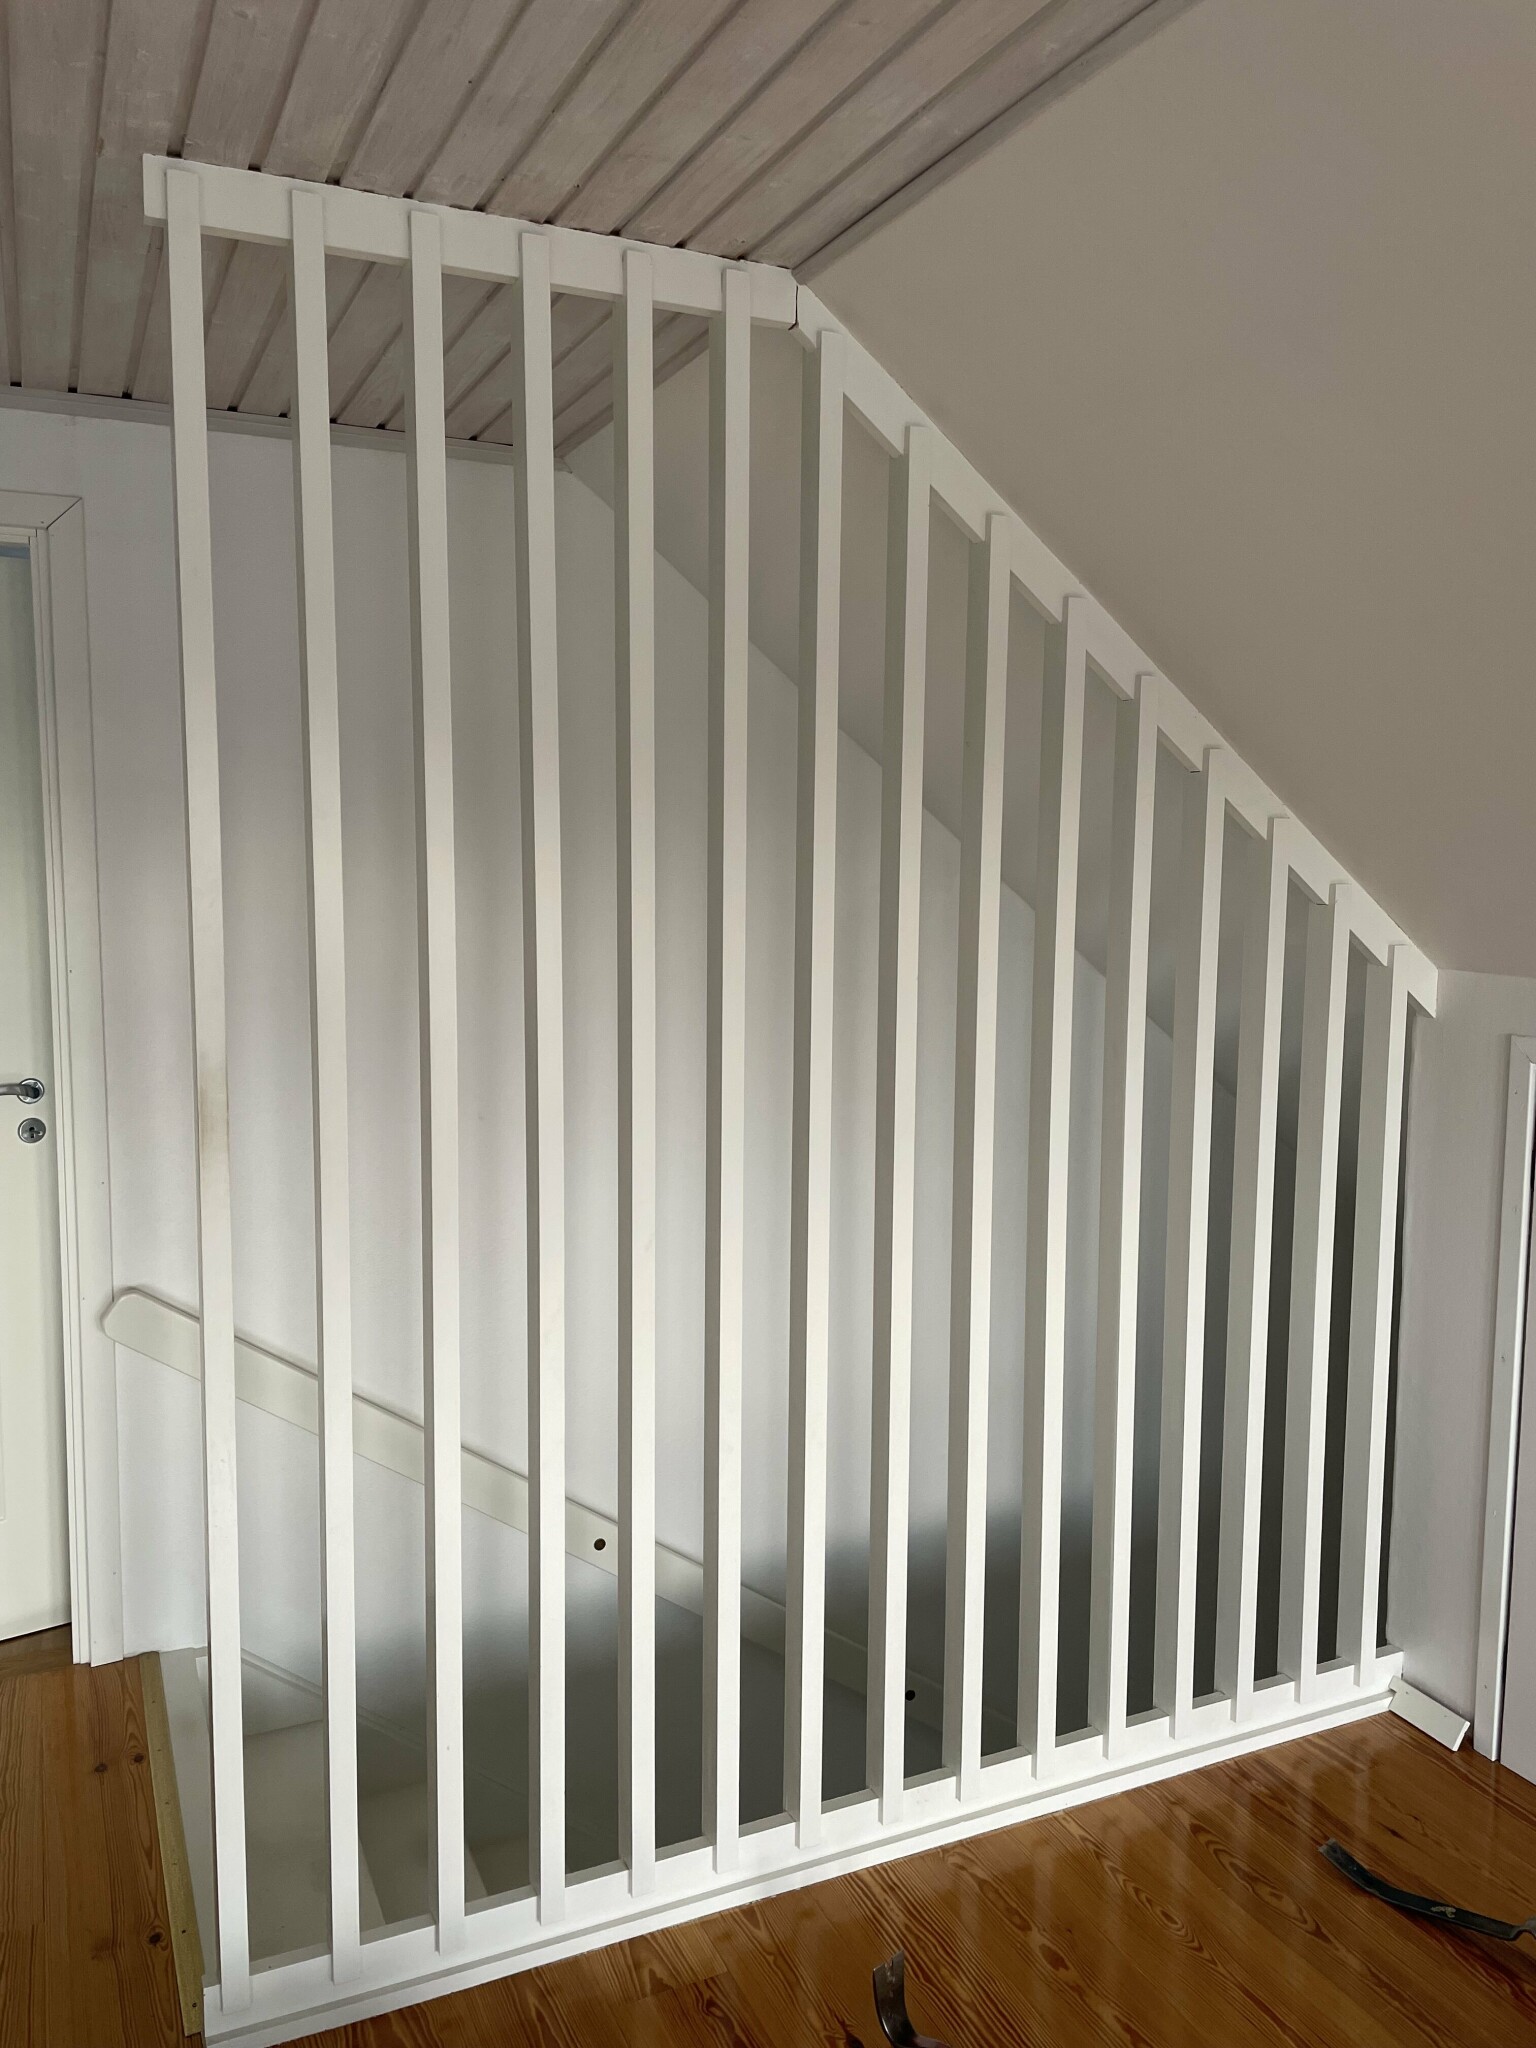

Now no one knows how they assembled it from the beginning, the handrail is flush with the ceiling and is not very thick, it might be that there are screws from above through the panel or that there are screws underneath where the spindles are up into the underside of the ceiling. The last thing is that they drilled holes for screws through the handrail and to hide the holes they placed the spindles afterward.
Mats-S
Construction veteran
· Sollentuna
· 3 617 posts
Mats-S
Construction veteran
- Sollentuna
- 3,617 posts
Questioning the entire solution, why have they extended the spindles all the way up to the ceiling? It doesn't look particularly nice, but sure, it was probably the easiest way ")
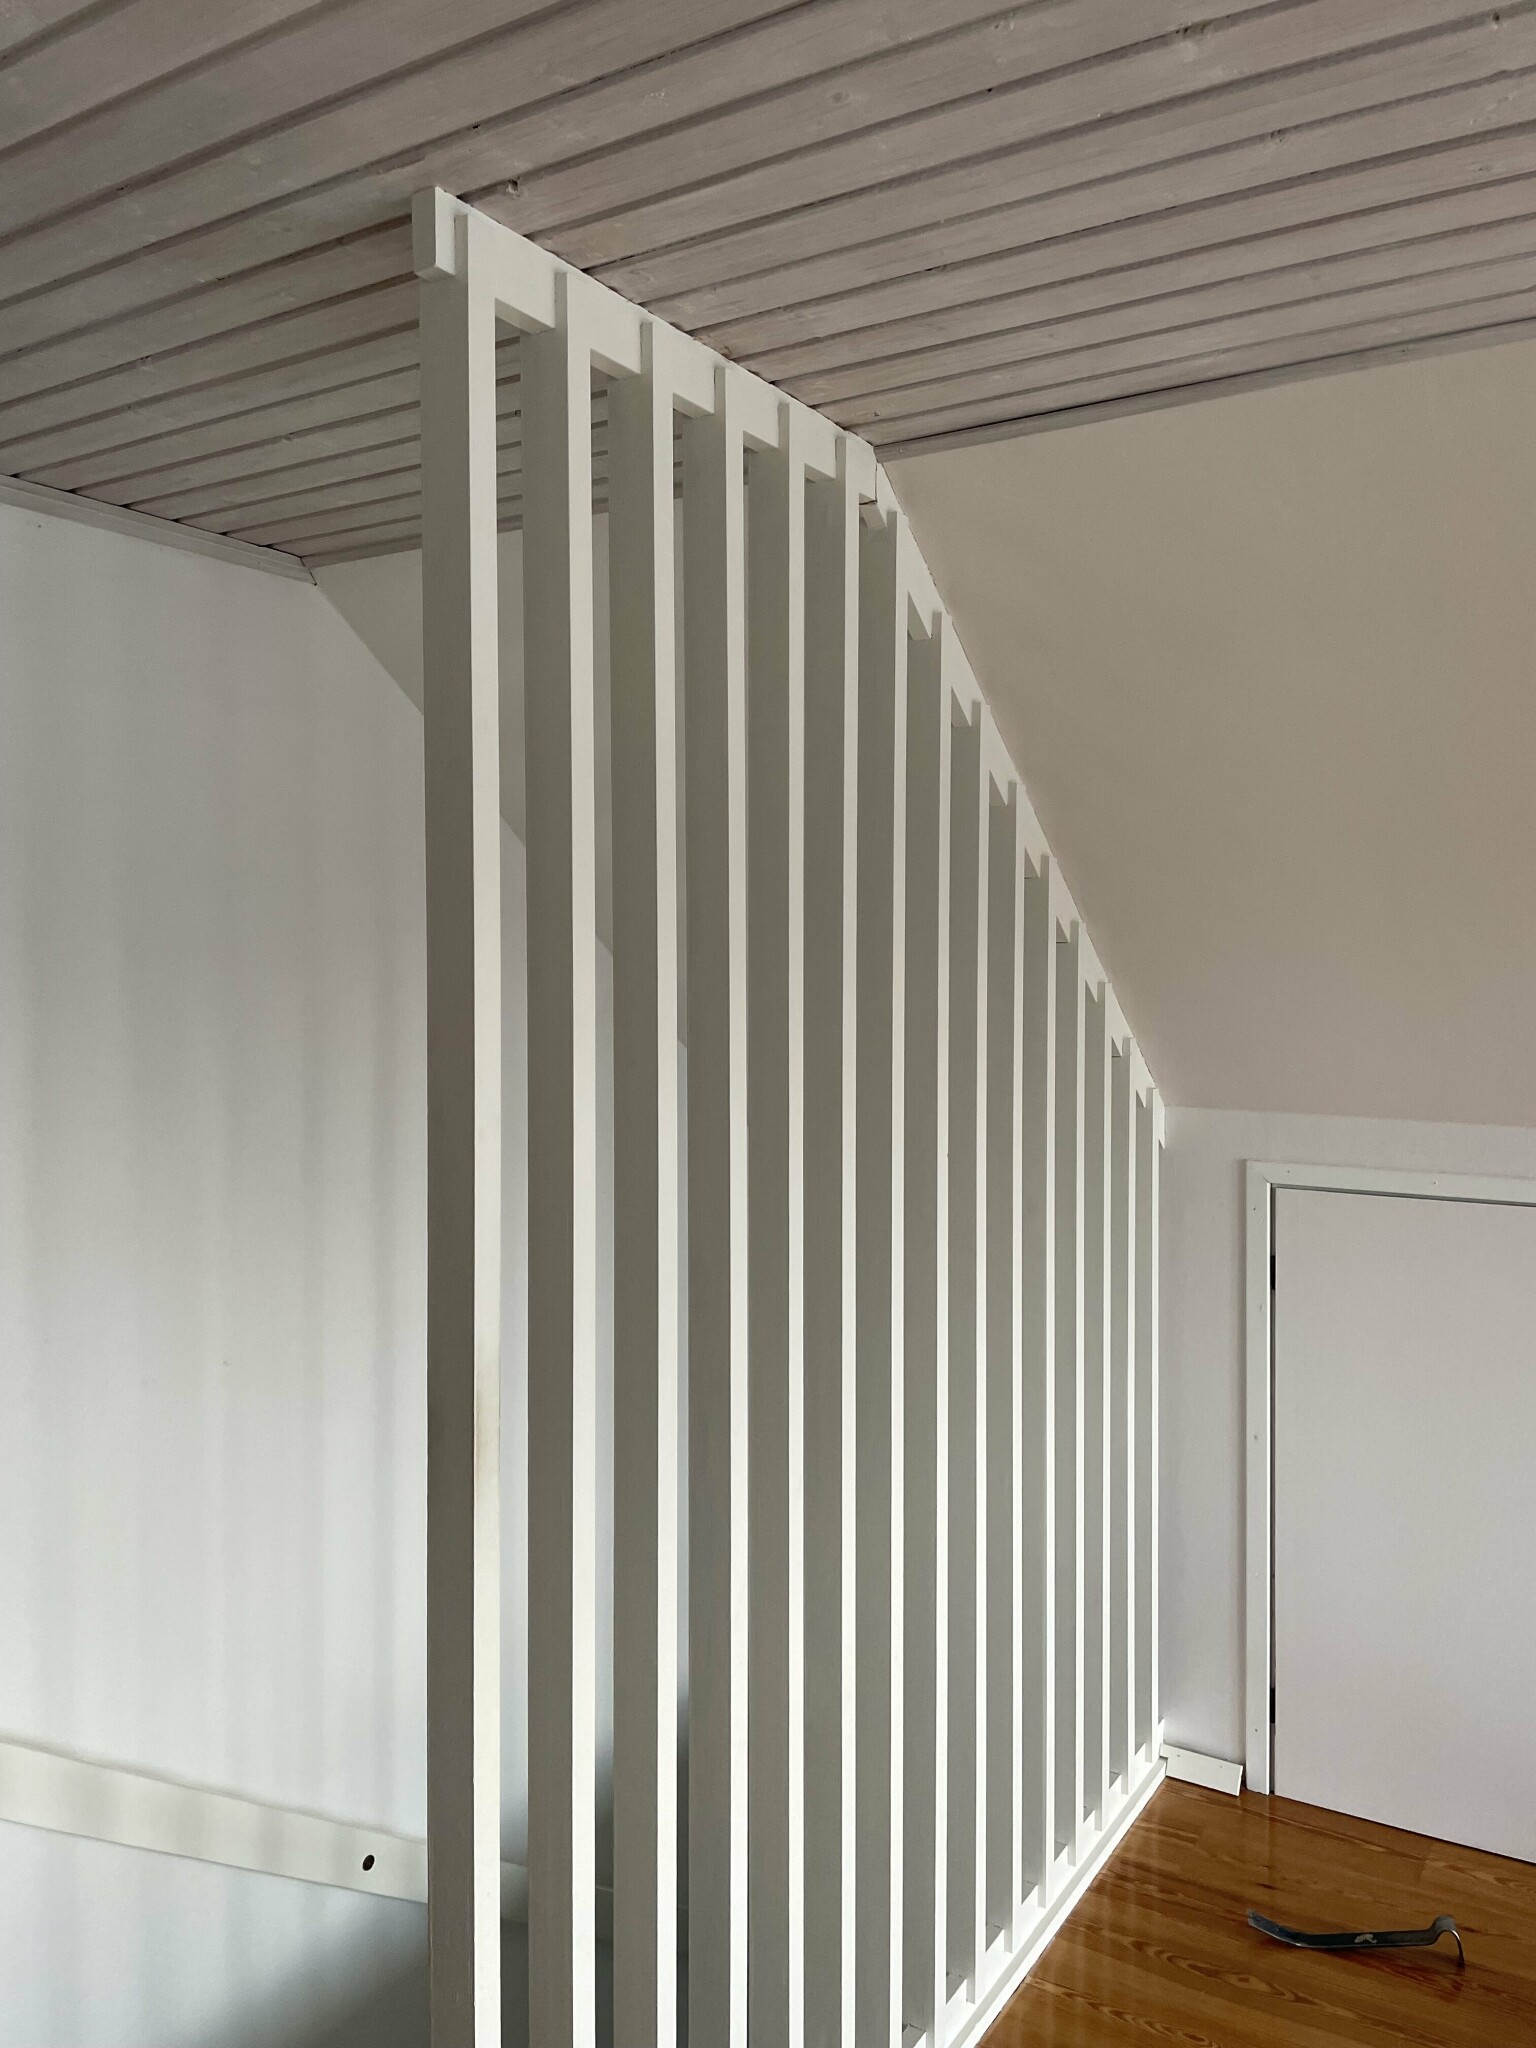
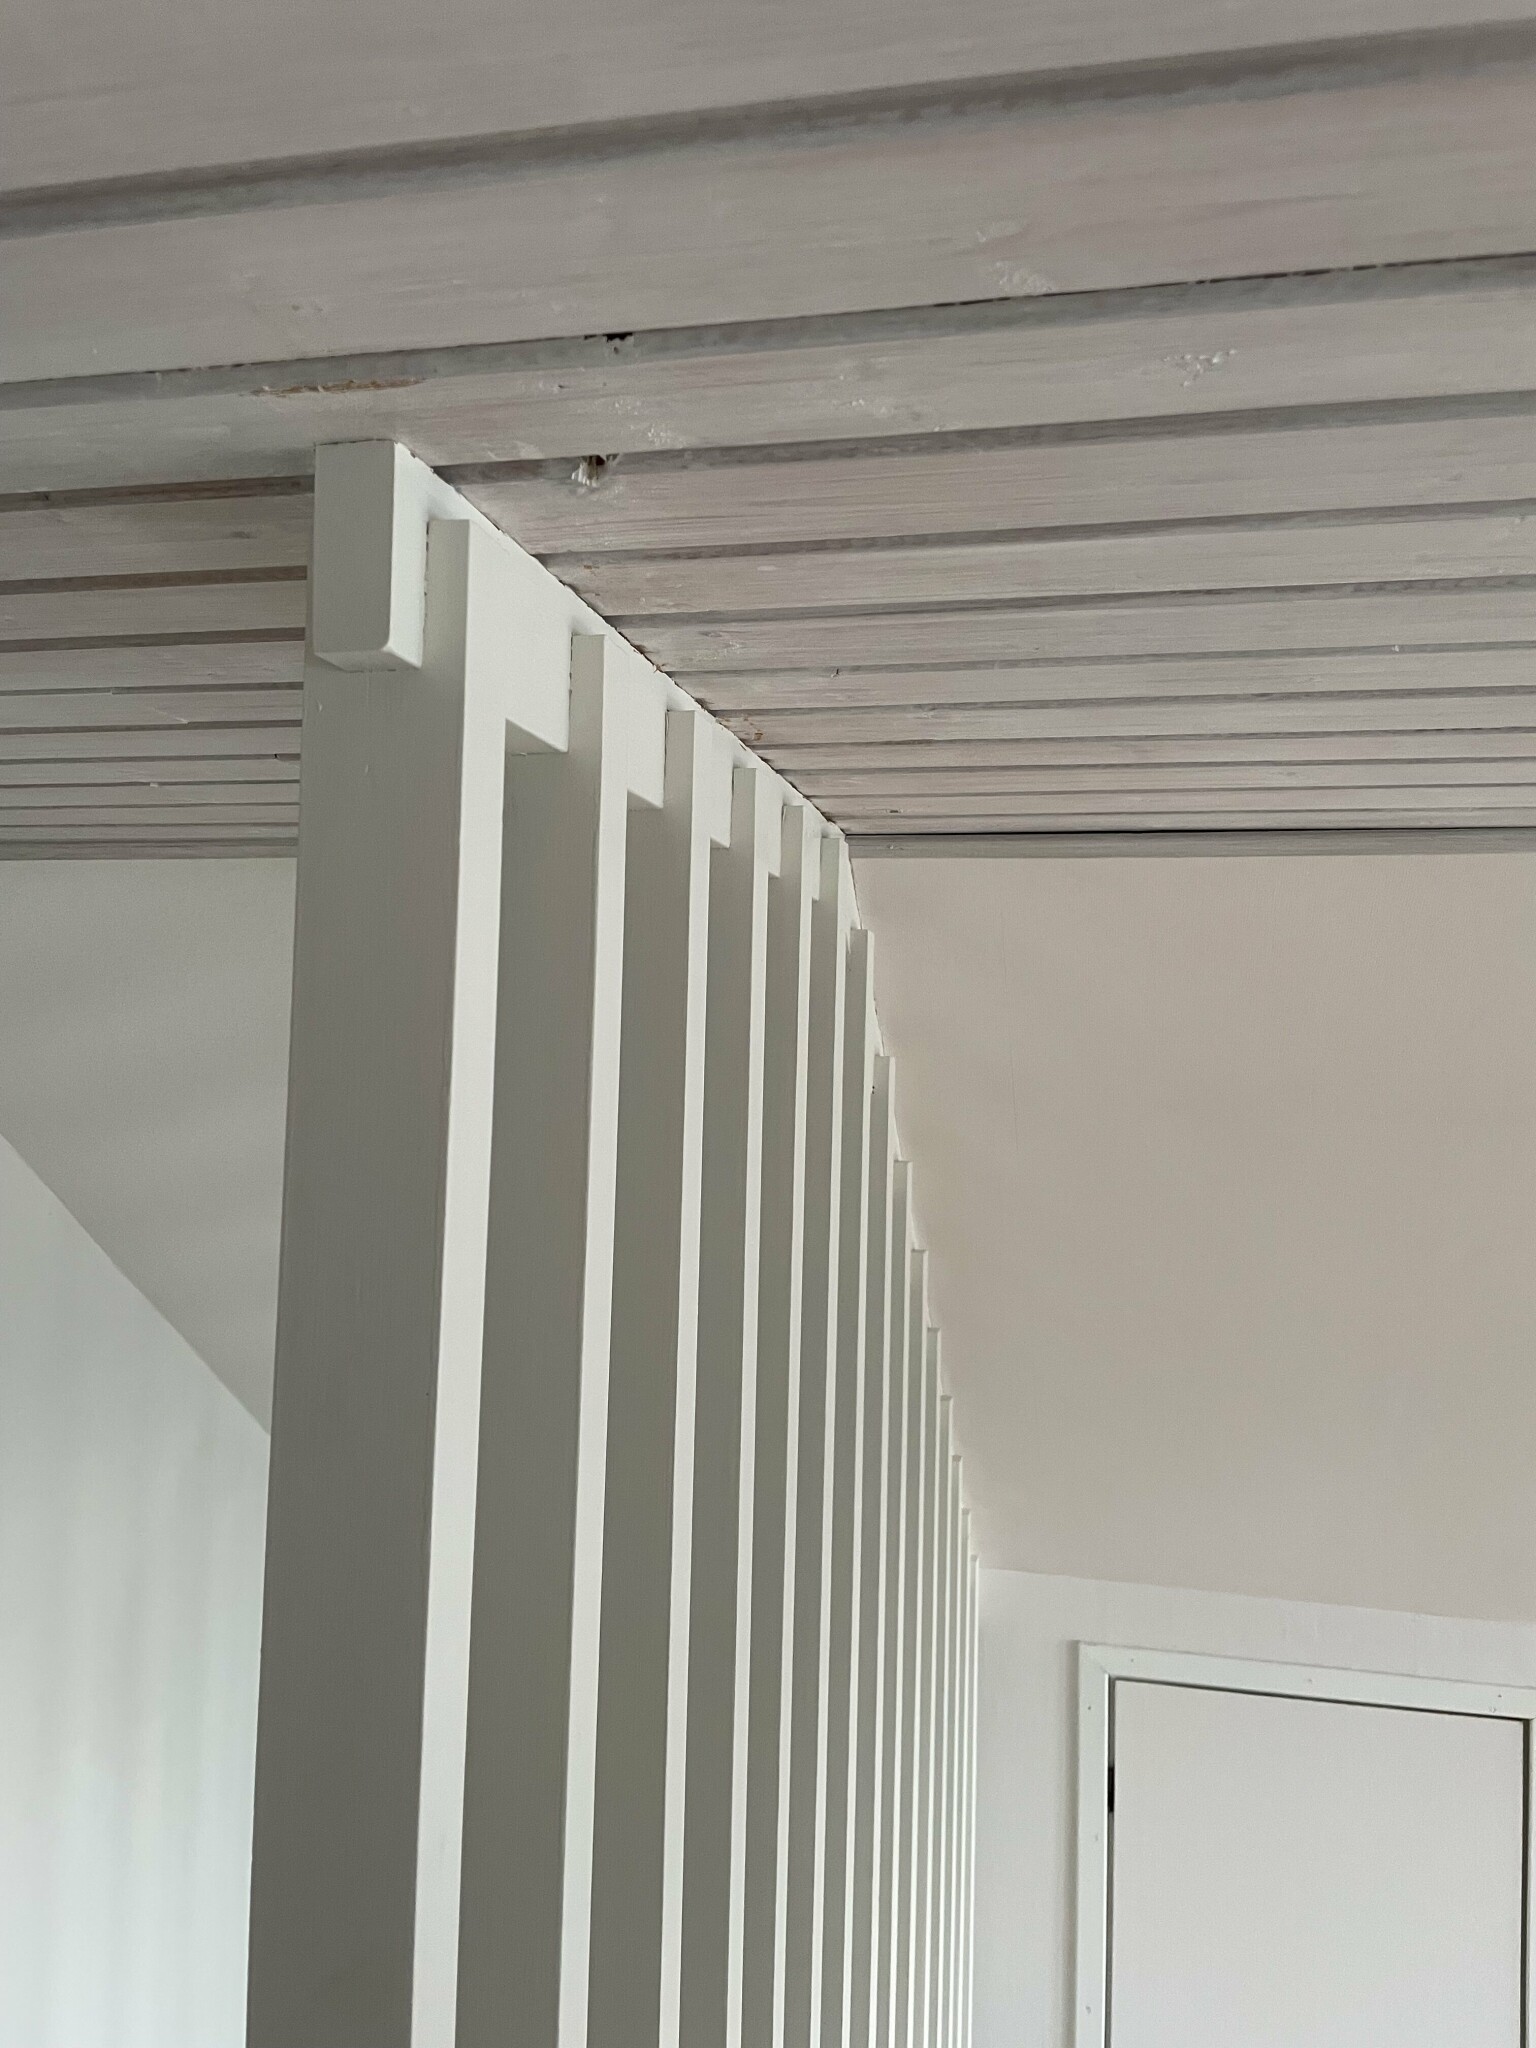
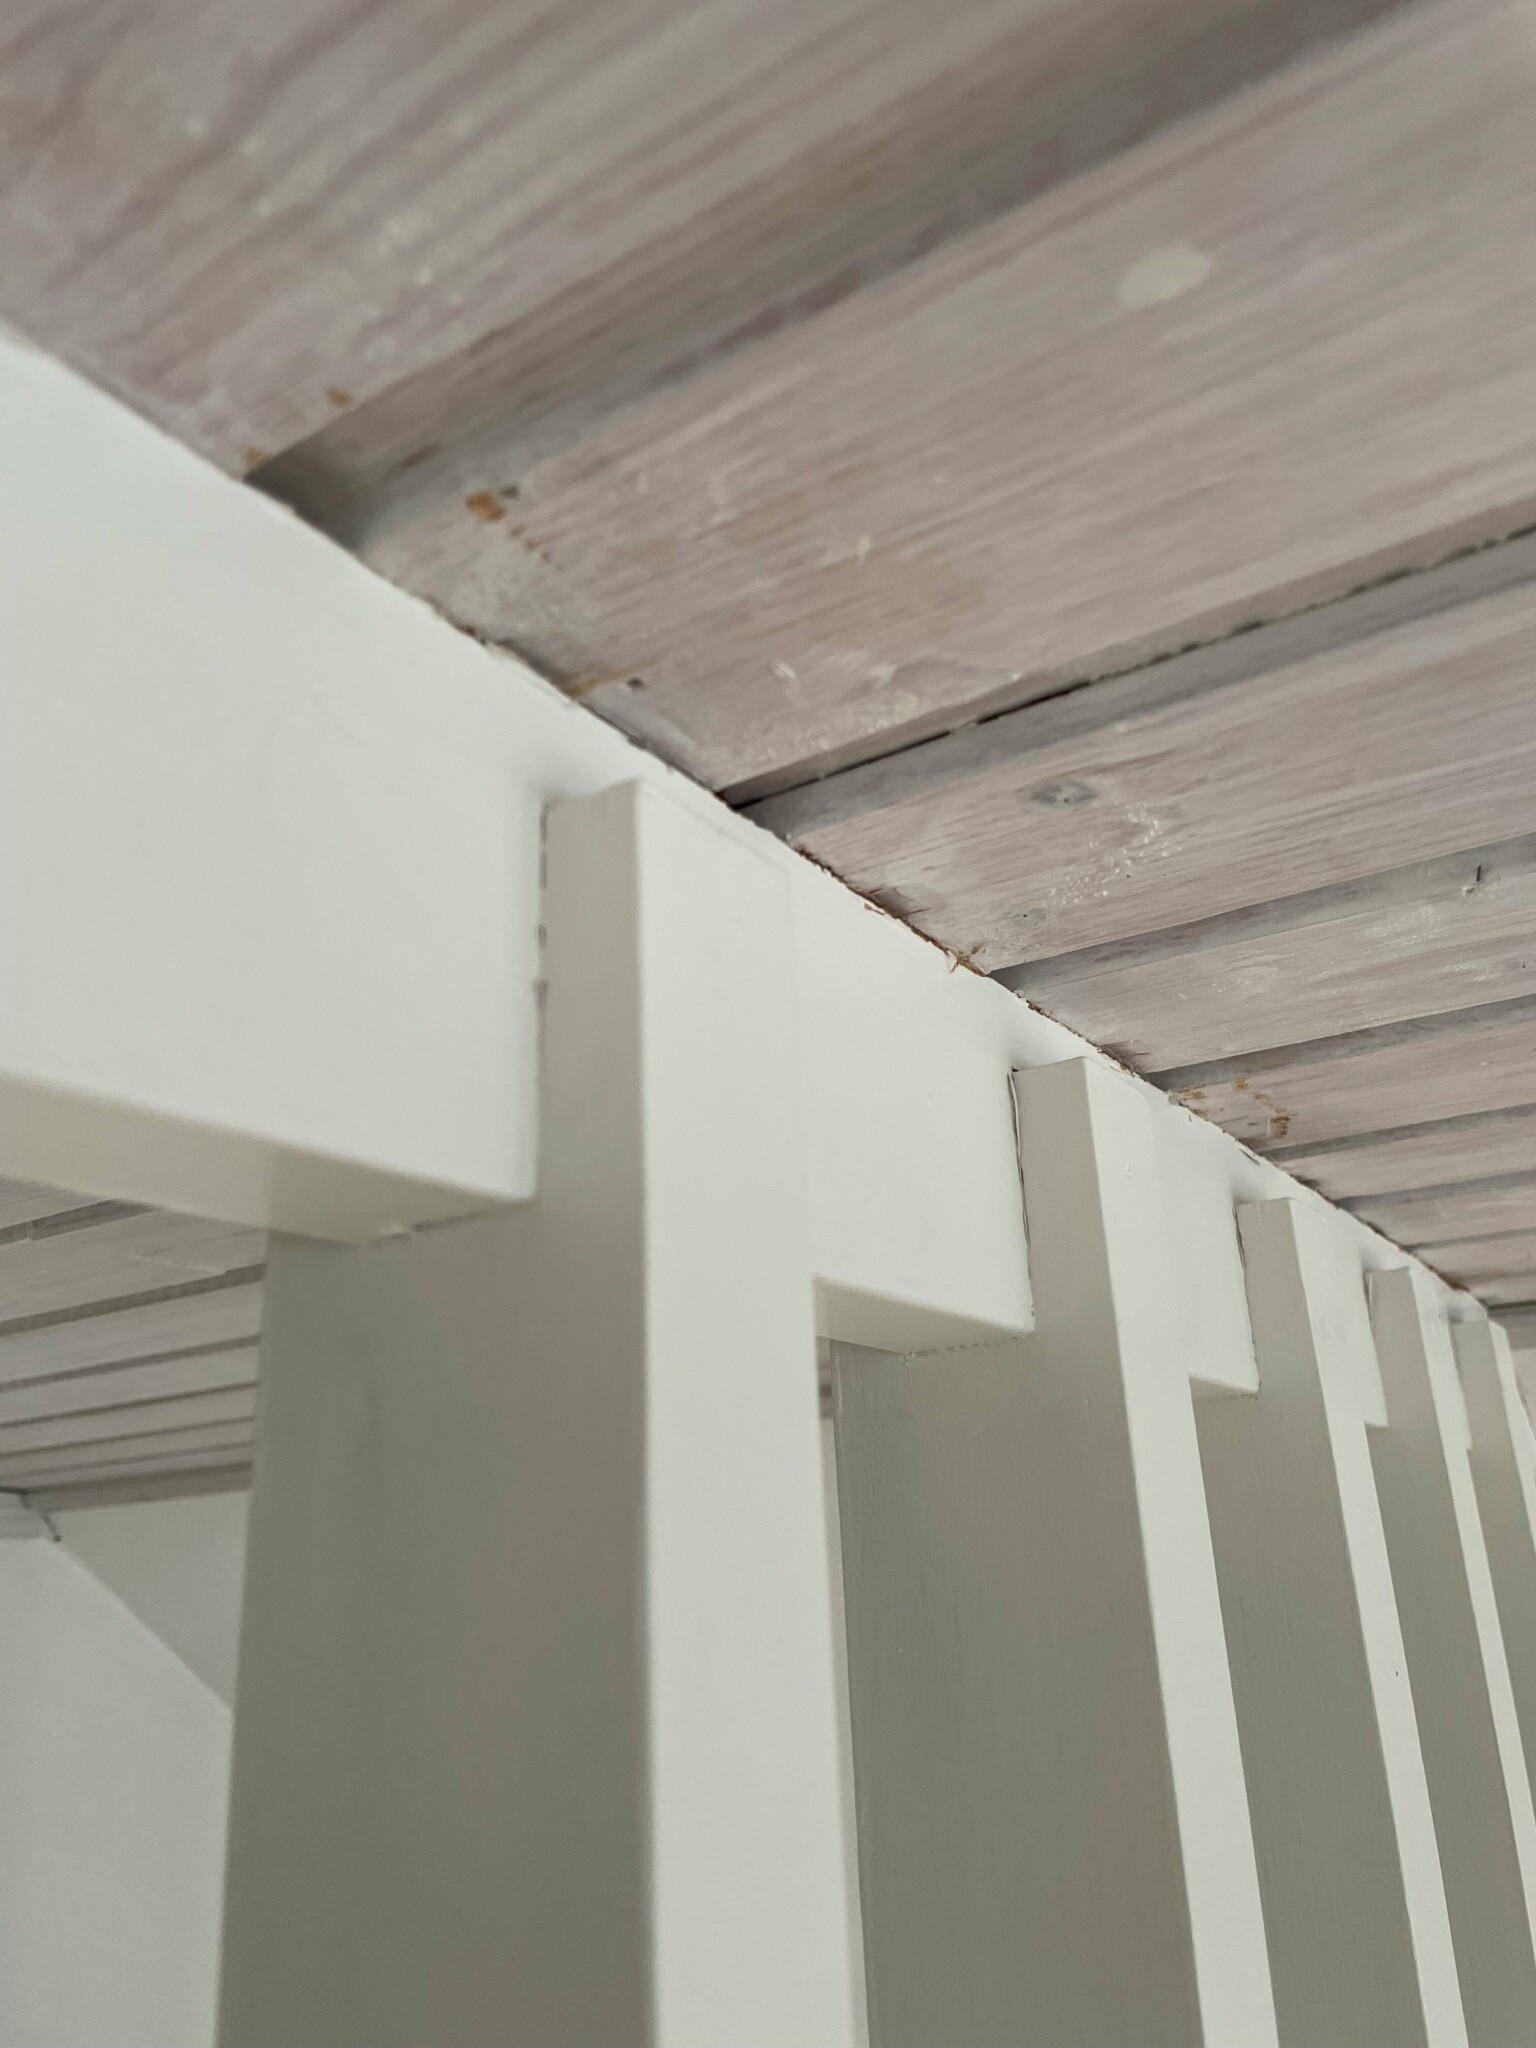
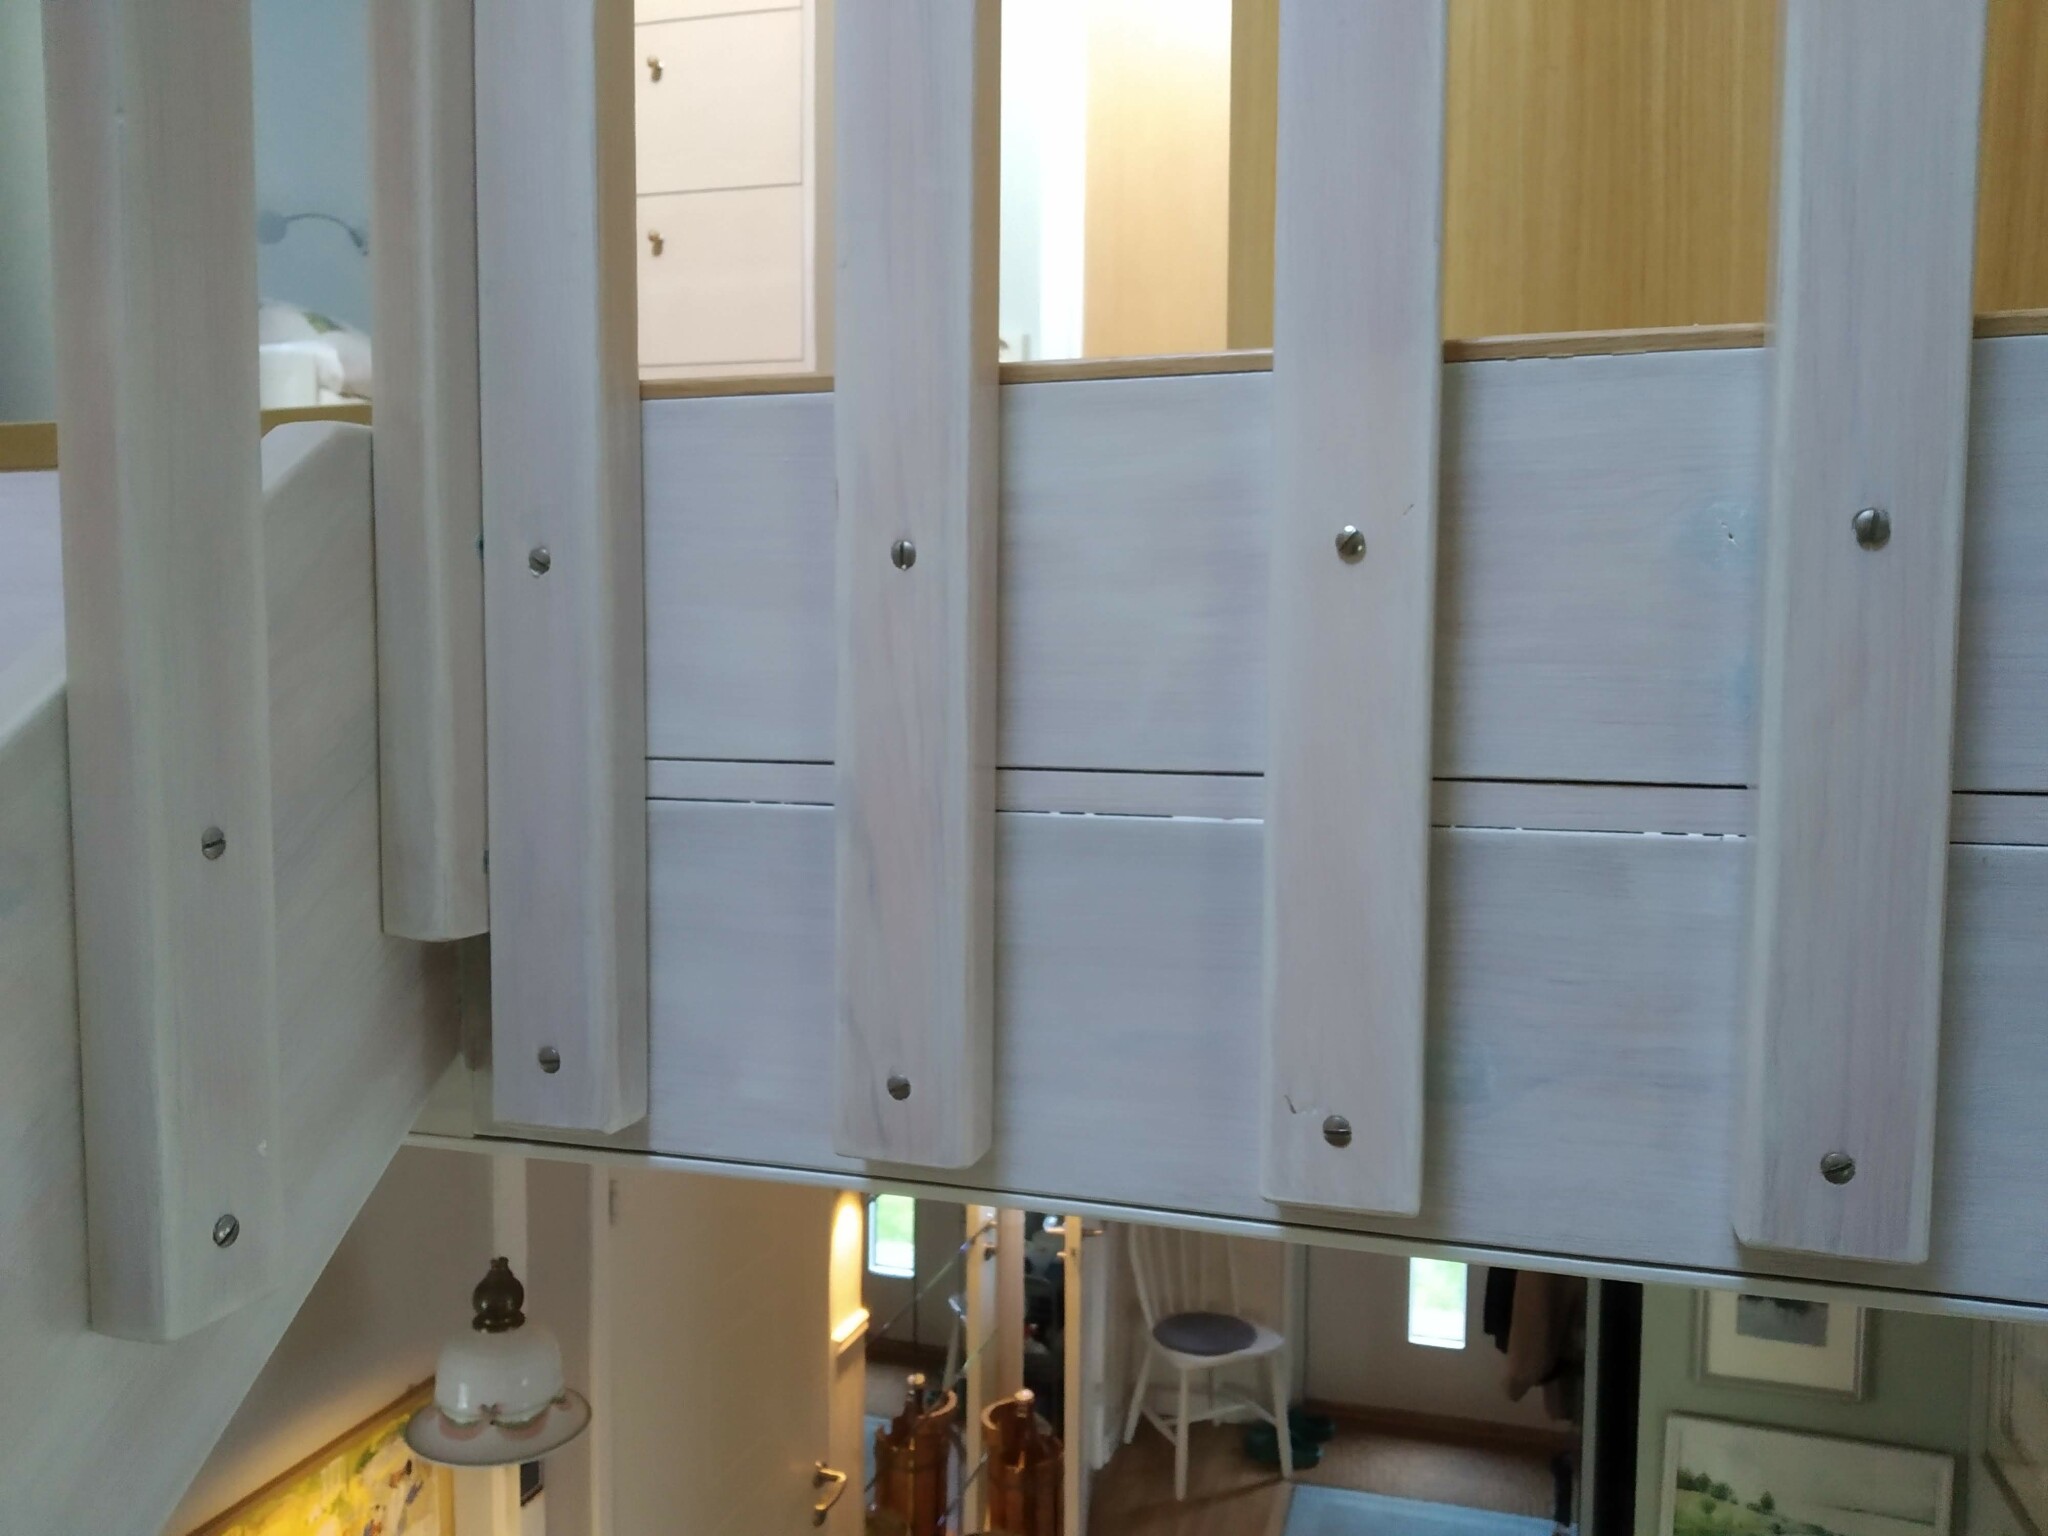
Presumably, the spindles can be moved and attached to the side of the floor structure above the staircase opening. Cut to the appropriate height, and a new handrail is put in place to tie them together at the top. My handrail is 90 cm above the floor.
That means you can easily saw them off now a few dec below the ceiling and then dismantle everything up to the ceiling.
Afterward, cut them to the right length and mount them like I have done (see the pictures). If you have something solid to screw them into, everything will be rock solid when finished (use rounded slot screws, it looks best that way). Then make a nice handrail that holds them together at the top.
IF you find the ending too unsteady, you can let the LAST rib go all the way to the ceiling; make it thicker than the others so it looks better.
This is how I've solved it in my house
Last edited:
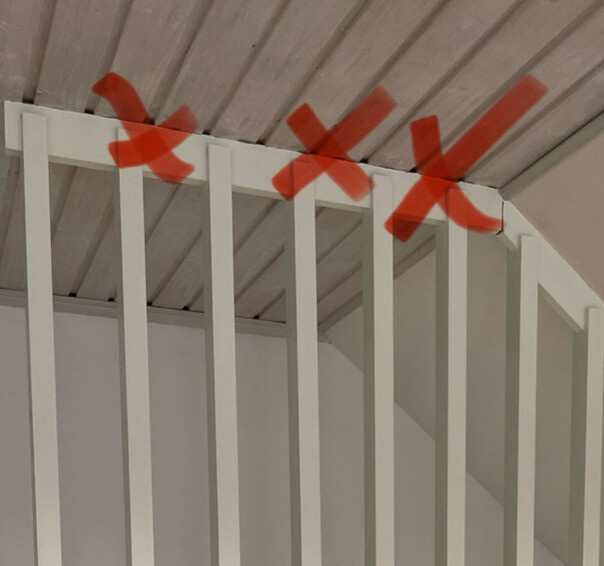
There were three nails approximately where I've marked, which I sawed off with a hacksaw blade, so everything can now be wiggled but the slats are firmly in place at the bottom, if I wiggle more the slats crack, I guess they are interlocked.J jonaserik said:Now no one knows how they were mounted from the beginning, the coping lies right next to the ceiling and is not very thick, it might be that there are screws from above through the panel or that there are screws underneath where the slats are up into the false ceiling. The last option is that they drilled holes for screws through the coping and to hide the holes, placed the slats afterward.
Yes, maybe it doesn't "have to" be that the slats go all the way up to the ceiling but can be a railing, as you show.Mats-S said:
Questioning the entire solution, why have the slats been extended all the way to the ceiling, it doesn't exactly look nice, but sure, it was probably the easiest way
The slats can probably be moved and attached to the side of the floor structure over the stairwell. Cut to an appropriate height, and a new handrail is placed to bind them together at the top. My handrail sits at 90 cm above the floor.
This means you can easily cut them off a few cm below the ceiling, and then remove everything toward the ceiling.
After that, cut them to the correct length and mount them like I've done (see the pictures). If you have something solid to screw them into, everything will be rock-solid when finished (use round head screws for the best look). Then make a nice handrail that holds them together at the top.
IF you think it becomes too unstable at the end, you can let the LAST slat go all the way up to the ceiling, make it thicker than the others for a better appearance.
This is how I solved it in my house
I'll have to think about it.
They are probably screwed or nailed to the top and bottom rail, then puttied and painted to hide the fastening.M Mattixx said:
Click here to reply