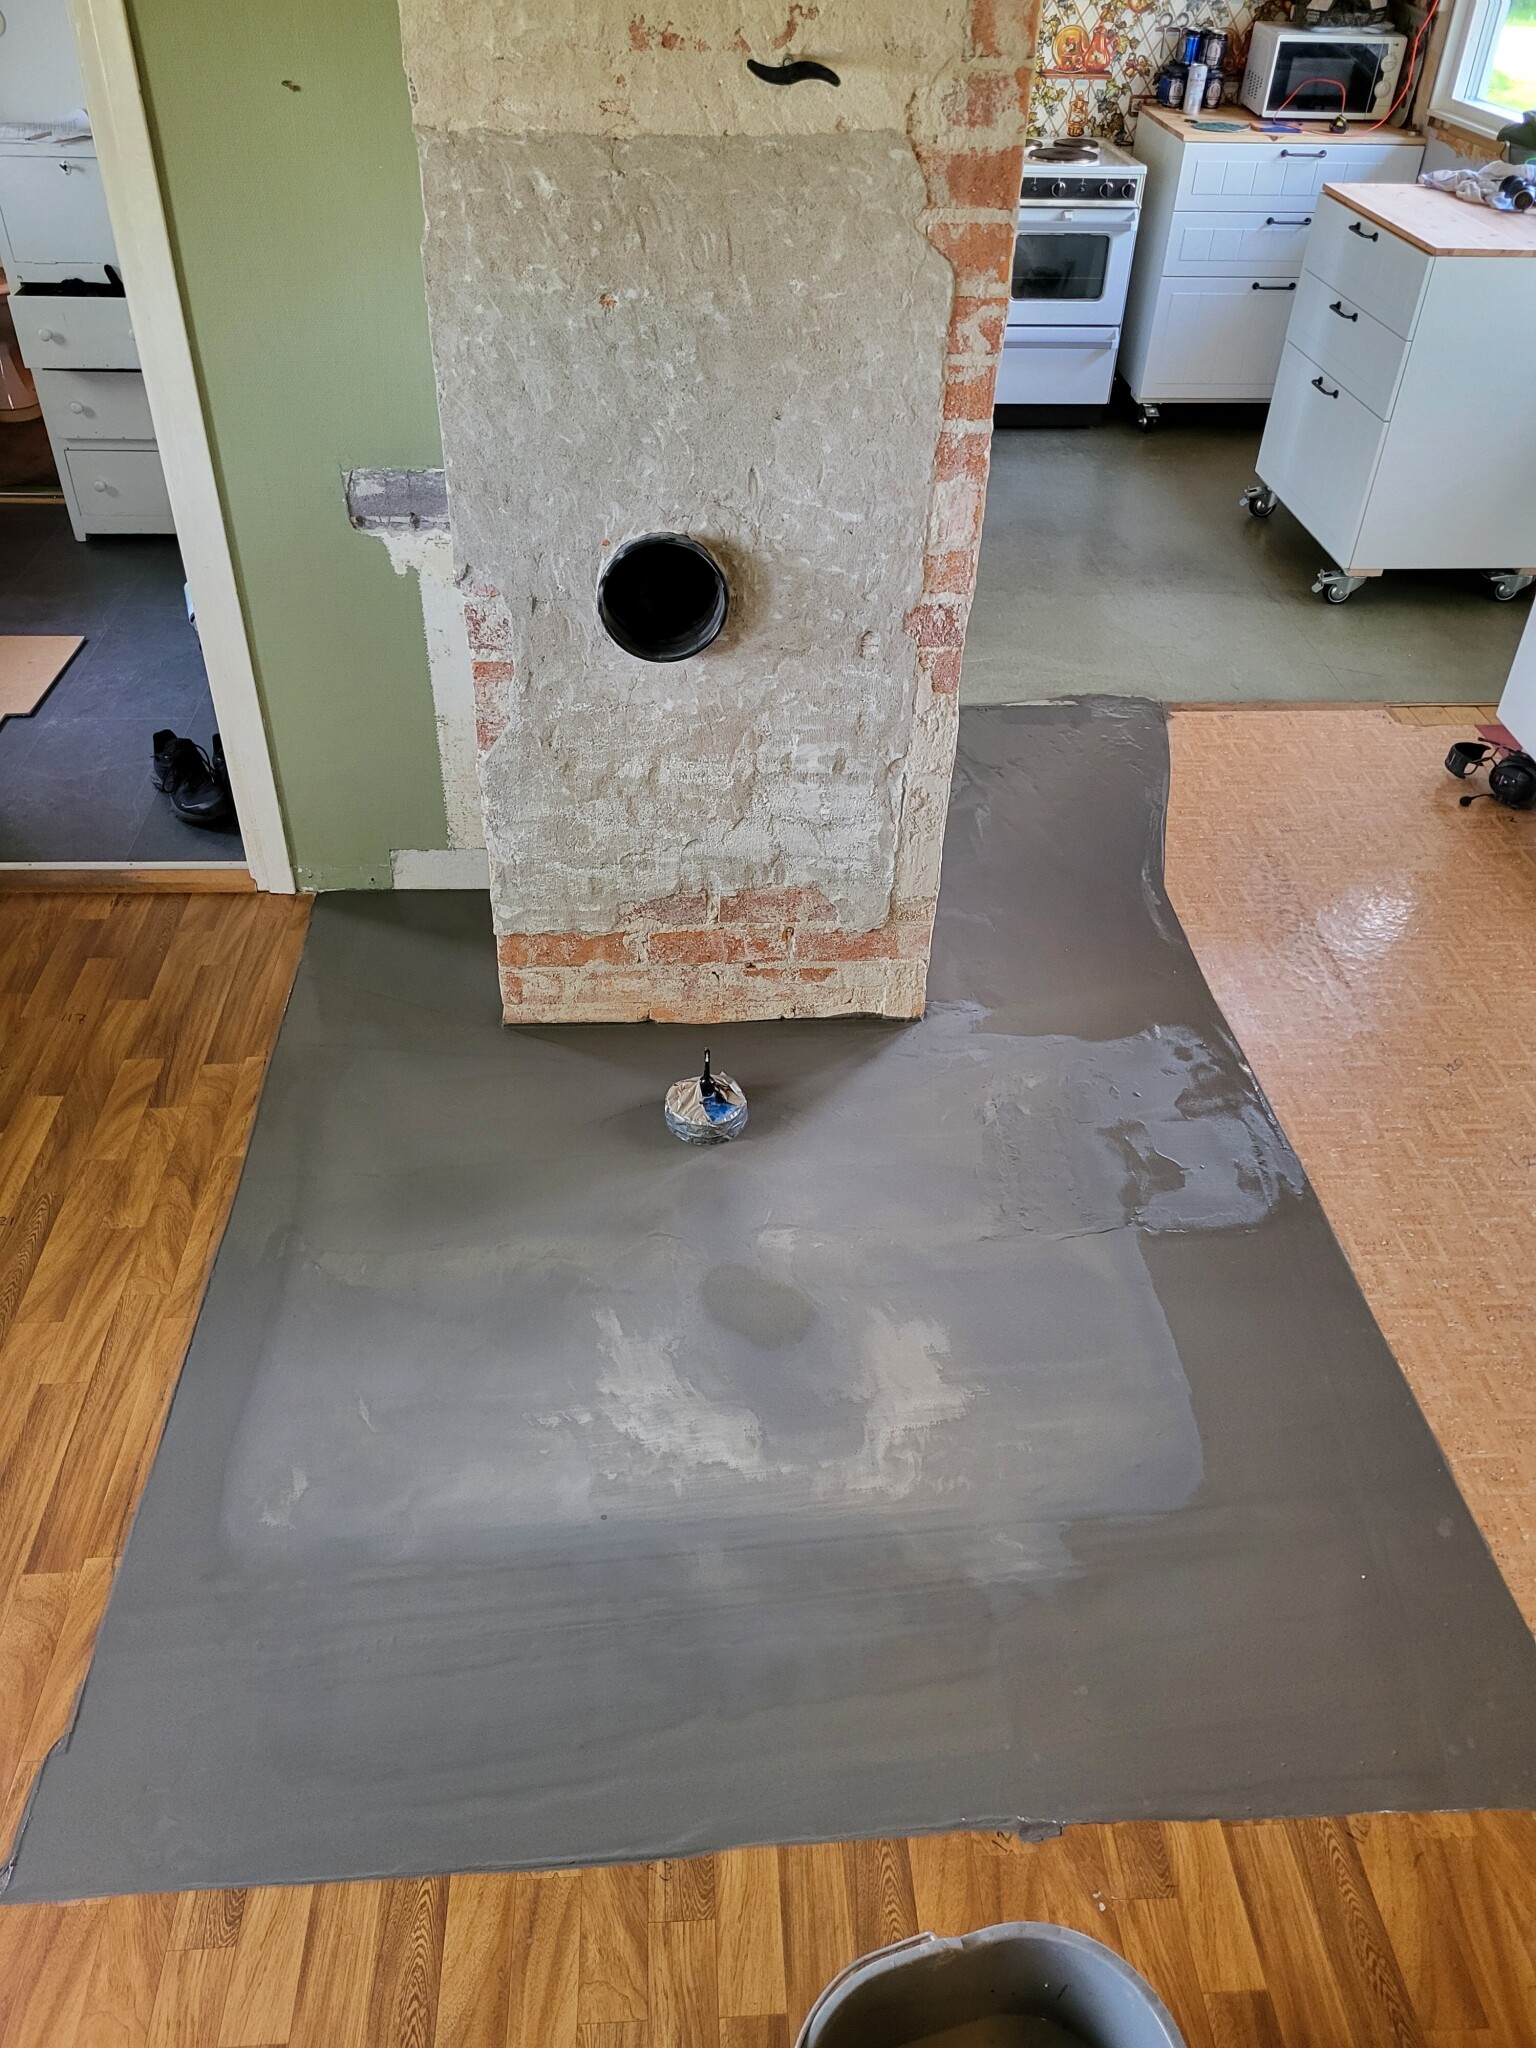
Leveling compound in place:
It was a bit uneven near the edge where I cast the EPS concrete before.
Since I am going to lay parquet up to the hearth (Hearth = non-combustible surface nearest to the stove, in this case, it will be tile), and it was a bit uneven, I cut away the plastic mat and underlying masonite a bit further out.
This also allowed me to level the leveling compound with a long straightedge with fairly good results.
Outside the EPS, the leveling compound is only a few mm thick at the thinnest spot, but since there will be parquet on top, I think it will be fine.
In the picture, you can clearly see where the boundary is.
You can also see that I've cast the hole saw I used to drill the air intake hole.
No worries, it is wrapped in plastic and very loosely taped so that it has a soft "exterior."
Incidentally, purchased at biltema for 369:-. It worked very well but after behaving foolishly, it cracked and lost a tooth.
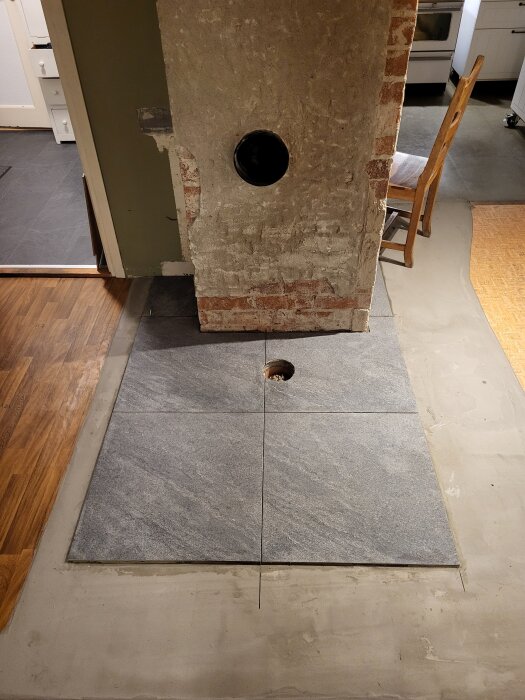
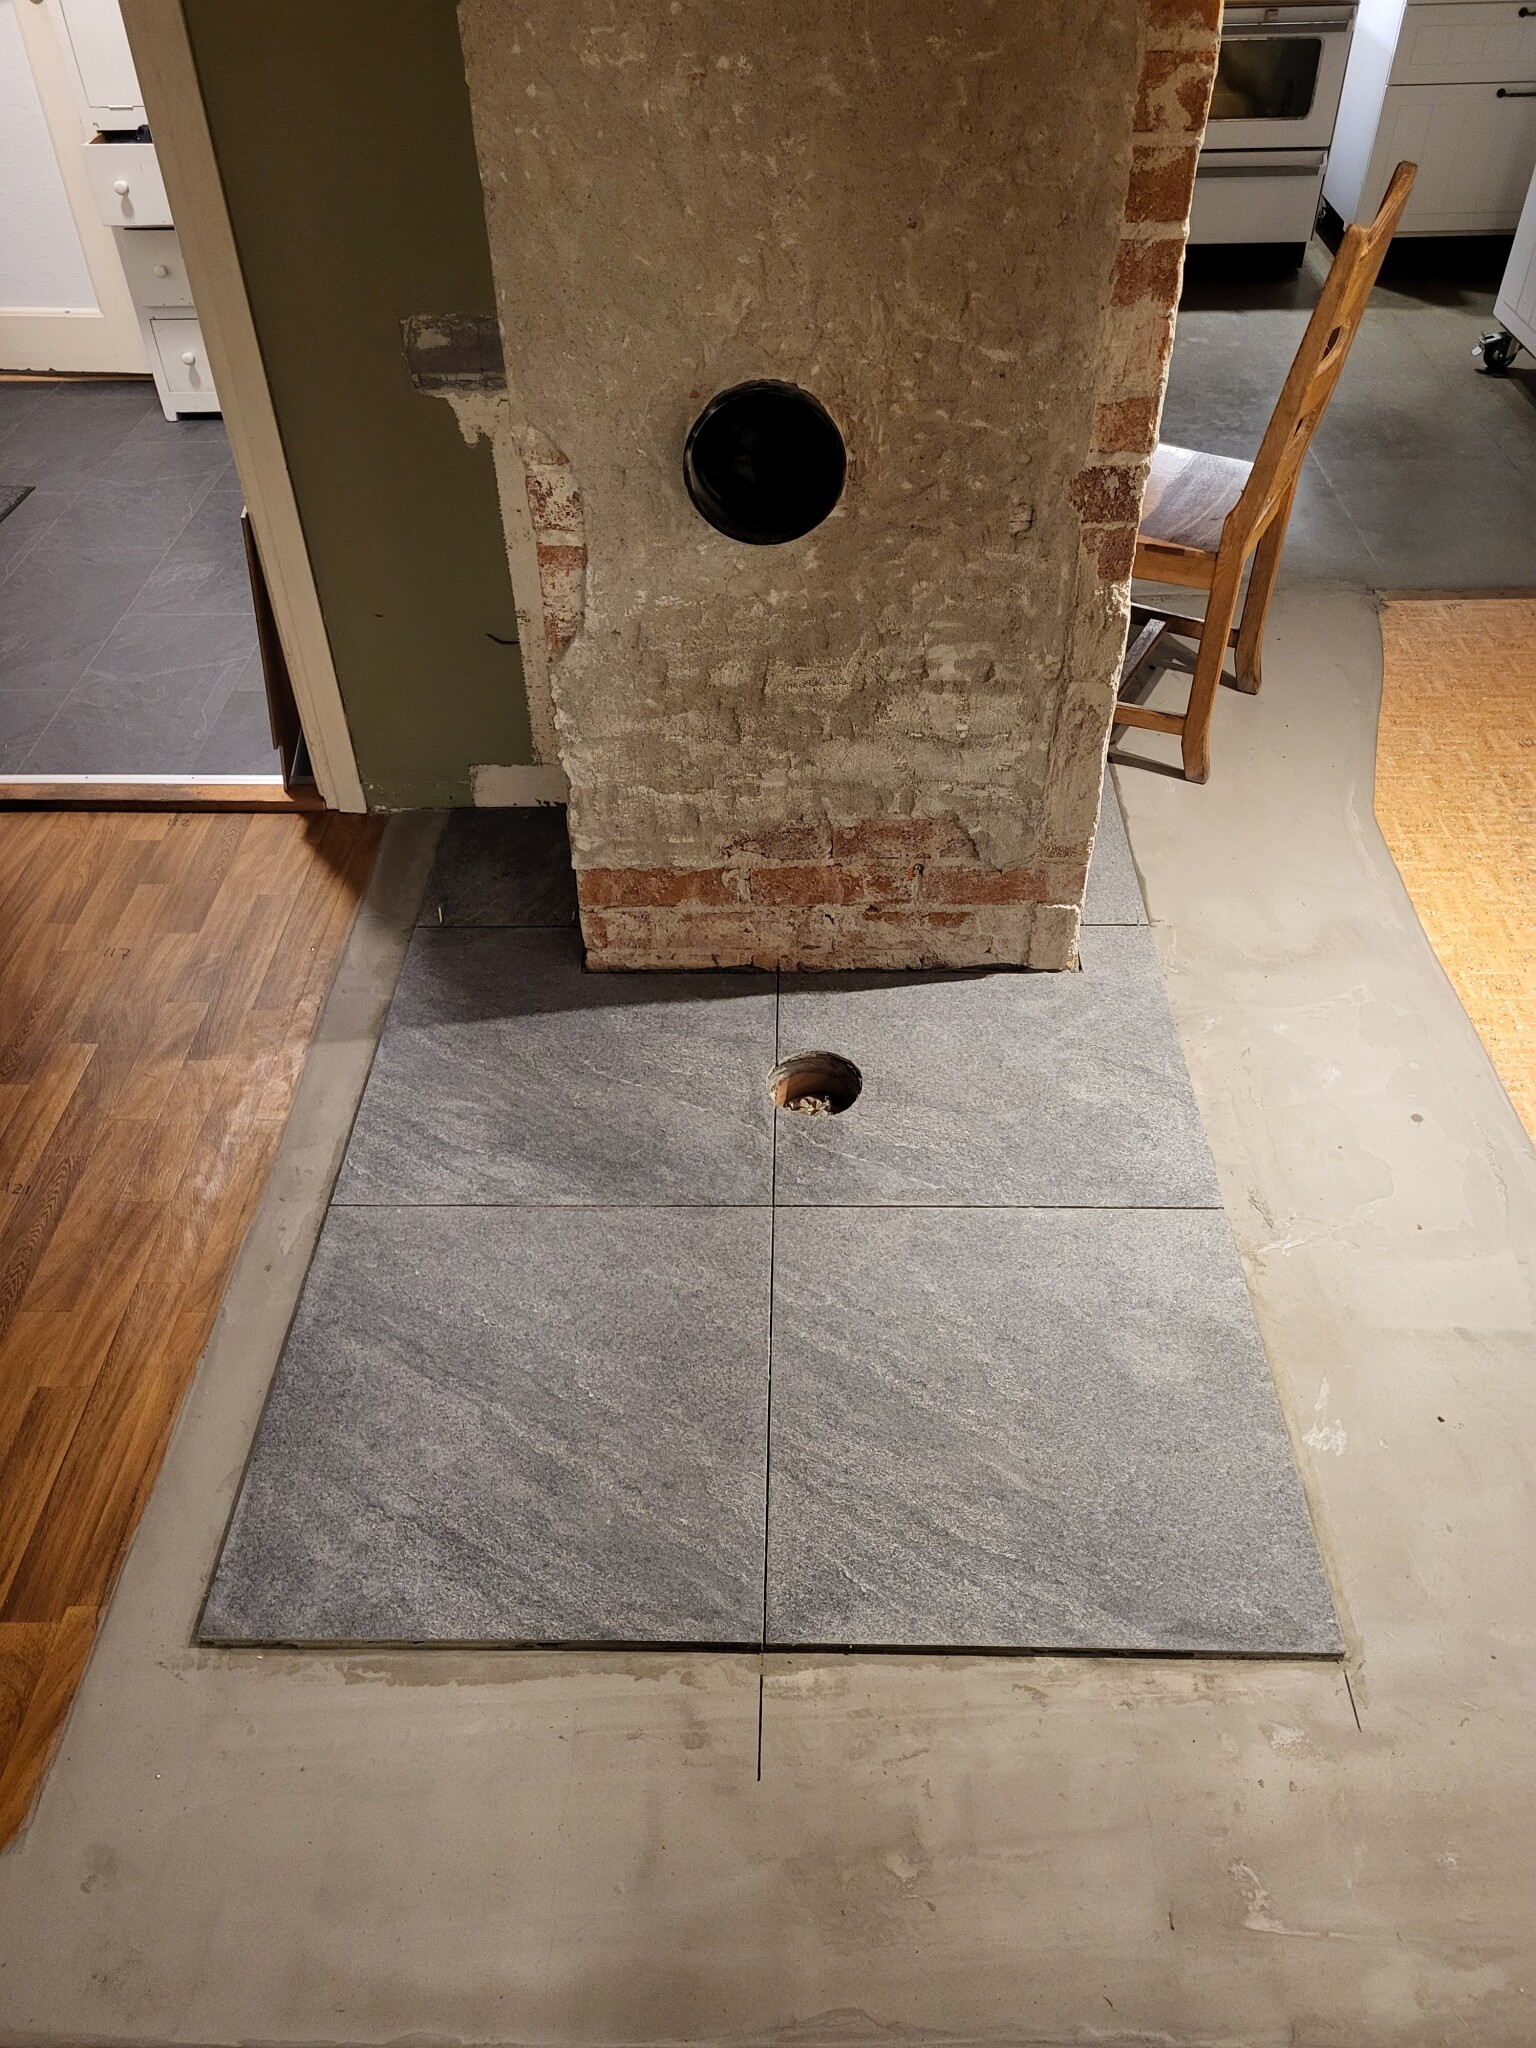
I started laying tiles last night, more pictures to come...
The updates aren't so frequent, but here's how it looks with the tiles in place:
The next adventure on the list, besides grouting, will be to partially seal a rökkanal that won't be used, and to plaster the chimney.
What are you going to plaster the chimney with then?
Why have you kept plaster on the chimney?
It would have been better/easier if all the plaster was gone.
What are you planning to plaster the chimney with then?
Why have you kept plaster on the chimney?
It would have been better/easier if all the plaster had been removed.
The reason I've kept the plaster is a combination of laziness and ignorance.
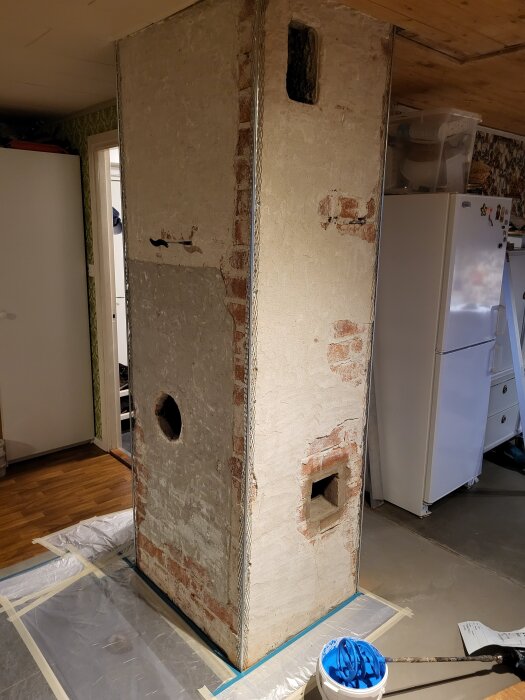
What you see in the latest picture is not plaster, but something harder. There was a layer of Mexican brick right behind the stove that I've chipped away.
Then I spent an incredibly dusty day sanding off something that might have been gypsum plaster on top of the existing plaster. I was careful to only remove plaster that was loose.
For the reasons above, I was recommended to plaster with gypsum plaster, which I plan to do.
Now that I think about it in hindsight, it probably would have been easier, just as you write, to just knock down all the plaster😅
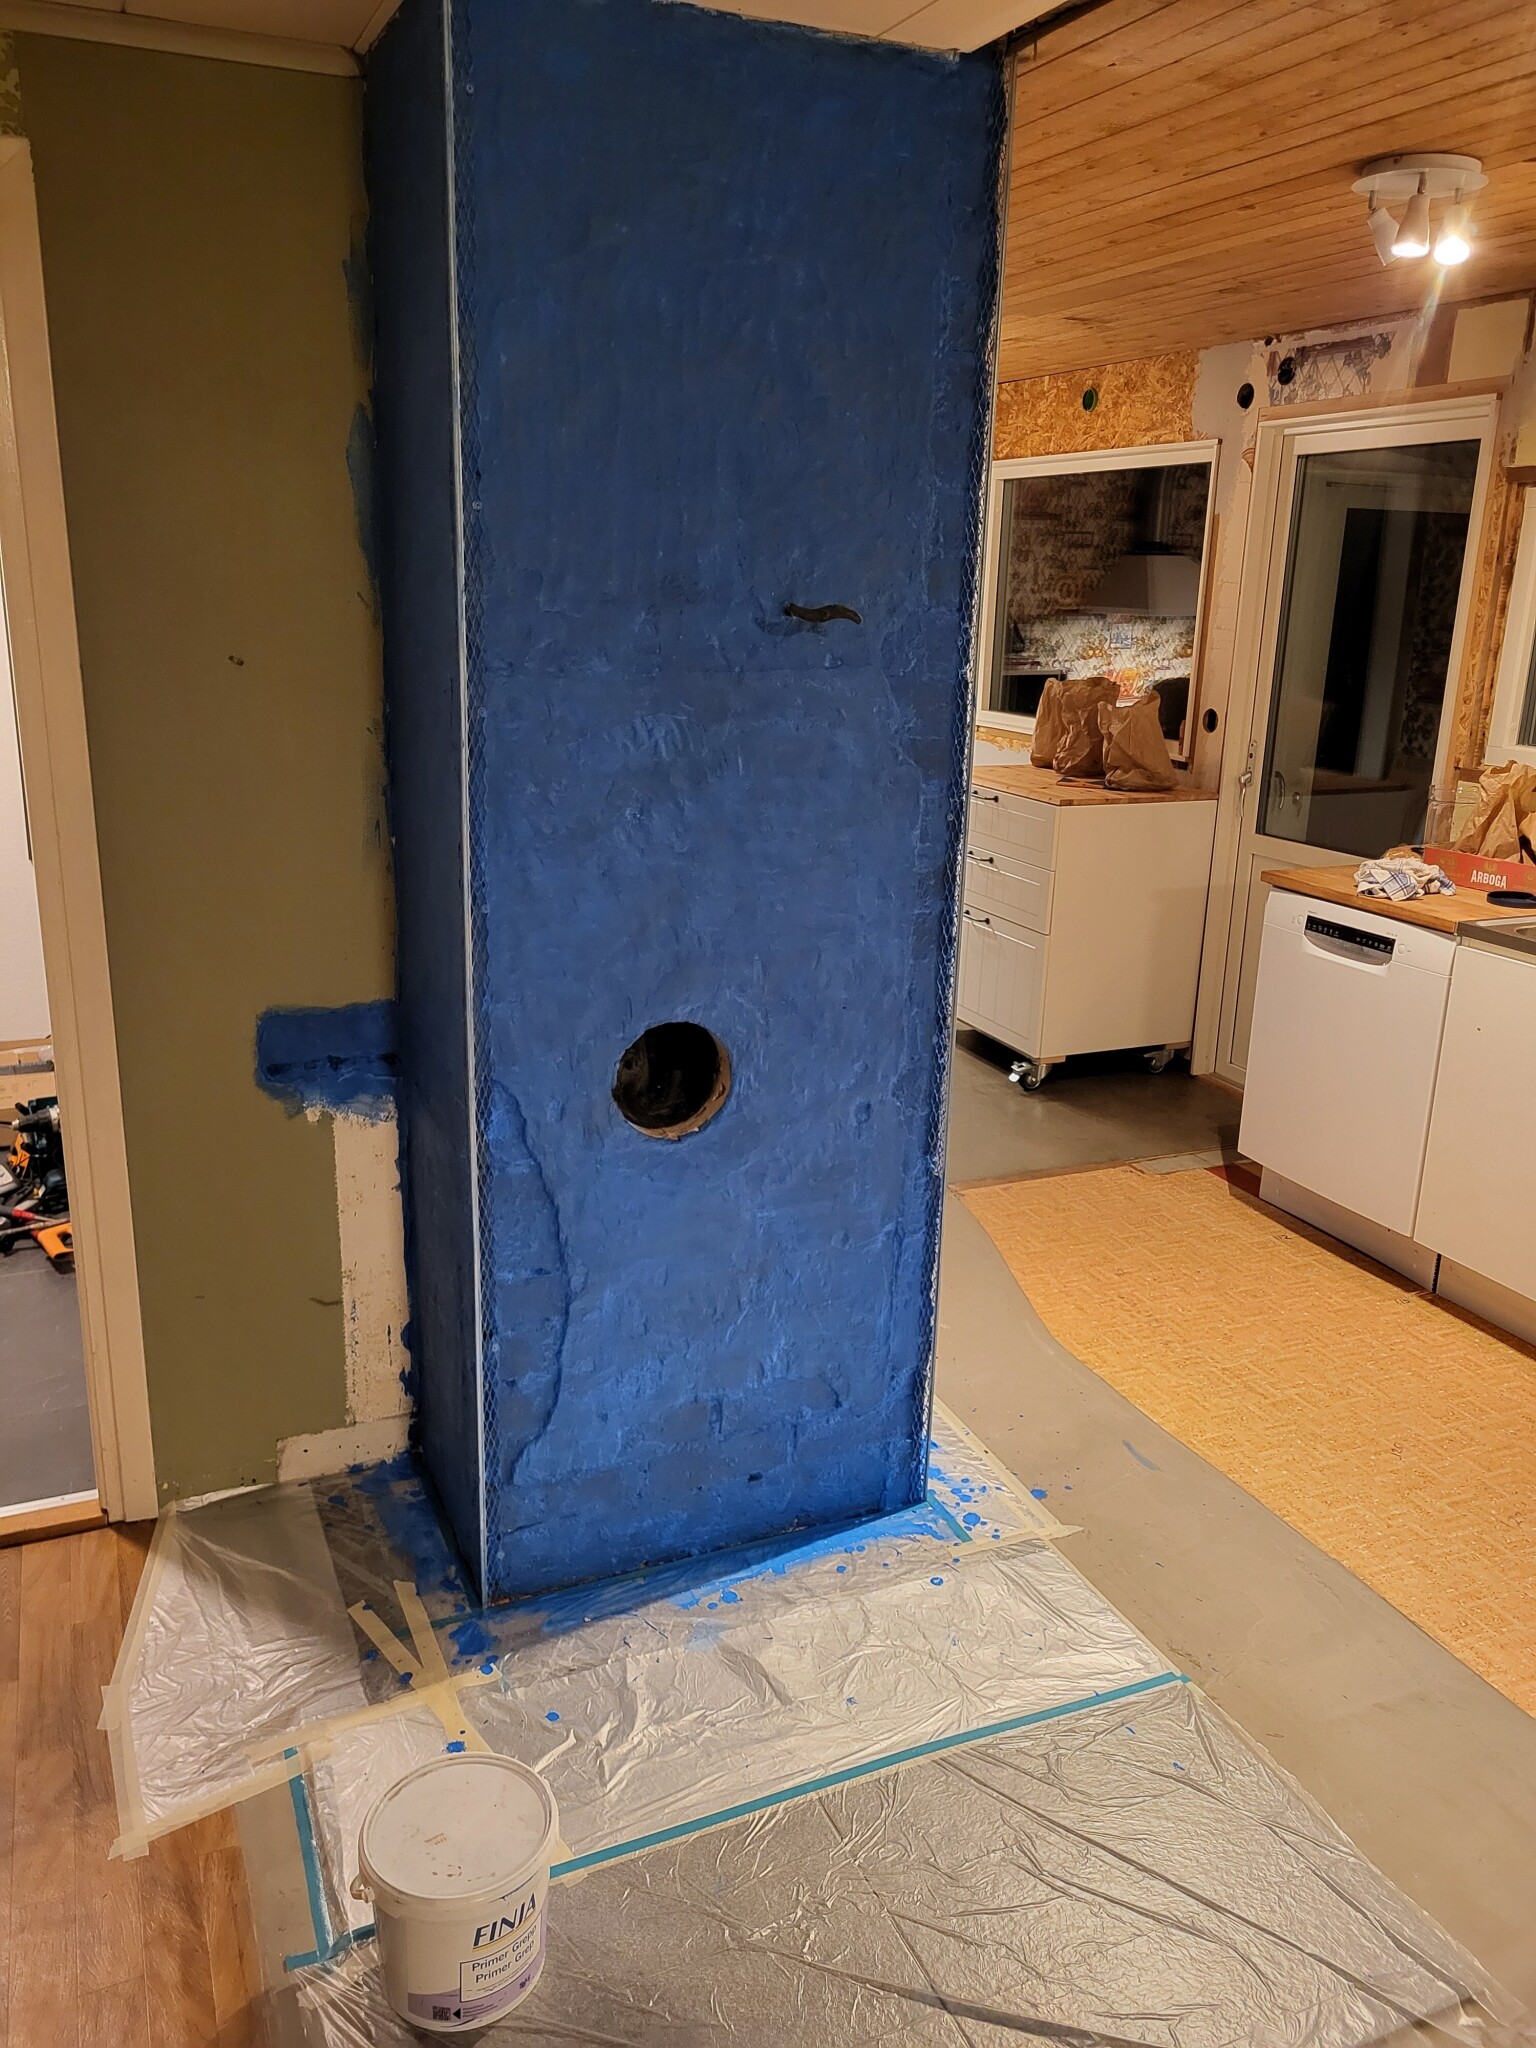
But I think I will continue on this path because I've already bought gypsum plaster, primer, and installed corner reinforcements on top of the plaster, unless that's completely crazy?
Corner reinforcements (or whatever they're called) mounted, ready for primer!
Of course, it would have gone much faster if I had primed before putting the corners in place, but I don't always work that way.
I got a minor shock when I opened the can but realized that gray is a darn boring color!
But... what the heck does it say on the primer can???
"Ready-mixed primer with excellent adhesion on smooth, dense, and non-absorbent surfaces"!!!
In pure panic, I slapped on another layer. I don't know if it helps or worsens the situation, but in my confused state, I think I wanted to delay the drying of the first layer...
Now it's a bit anxiety-inducing, but at worst, I'll get the chance to plaster in the simple way, without an underlying plaster layer😅
Anyone have any advice on how I should think?
I've applied Finja Primer Grepp and bought Finja Gipsputs Natur Inne.
Yep, but it's not 5-10 different people who have responded in the thread. HOWEVER, perhaps I should have highlighted trying on a small area at the bottom.
Good thinking!
I had planned to build up under the corner reinforcements, as well as where the plaster has come loose in the first step.
That way, I'll get a sense of how it behaves at the same time!
Another thought:
There will be a soot hatch (150x150 in cast iron), an adapter for the stove pipe (thin pipe) at the bottom, and a ventilation hatch (one that can be opened/closed using thin chains) at the top.
Do you think it's enough to attach them to the gypsum plaster and possibly a few screws, or should I further support them with regular sealant?
It will stick.
But place some additional/thicker plastic over the newly laid stone.
It's easy for the thin plastic to get holes,
And maybe a little plastic around it, if you're walking around with plaster on your shoes.
You can smooth it out right away, and just drag a stick between the corner moldings.
Start with one side if you feel unsure,
and trowel with an orange trowel when it starts getting hard.
That sounds good!
Being able to stock off (as I believe it's called) against the corner lists
Nneo11 said:
It will adhere.
But put some more/thicker plastic over the newly laid stone.
It's easy for the thin plastic to get holes in it,
And maybe a little plastic around, if walking around with plaster on the shoes.
You can smooth it out at once, and just pull a stick between the corner lists.
Start with one side if you're unsure,
and use the orange trowel when it starts to harden.
That sounds good!
Being able to stock off (as I believe it's called) against the corner lists was one reason I bought them, the other was to protect the corners.
However, I haven't quite figured out what to do in the corners where the chimney meets the wall, should I nail up a temporary list to smooth against, or how do you do it?
Luckily, I have a side that will be covered by a fridge, so I plan to start with that.
I have purchased an orange trowel👍
You want something to "ride" on with the rod.
It's not wrong to set up a 6mm guide rail vertically with maybe 3-4 blobs of gypsum mortar, near the corner.
[link]
To leave in place or pry away when you're finished pulling with the rod, and fill in the groove with gypsum mortar.
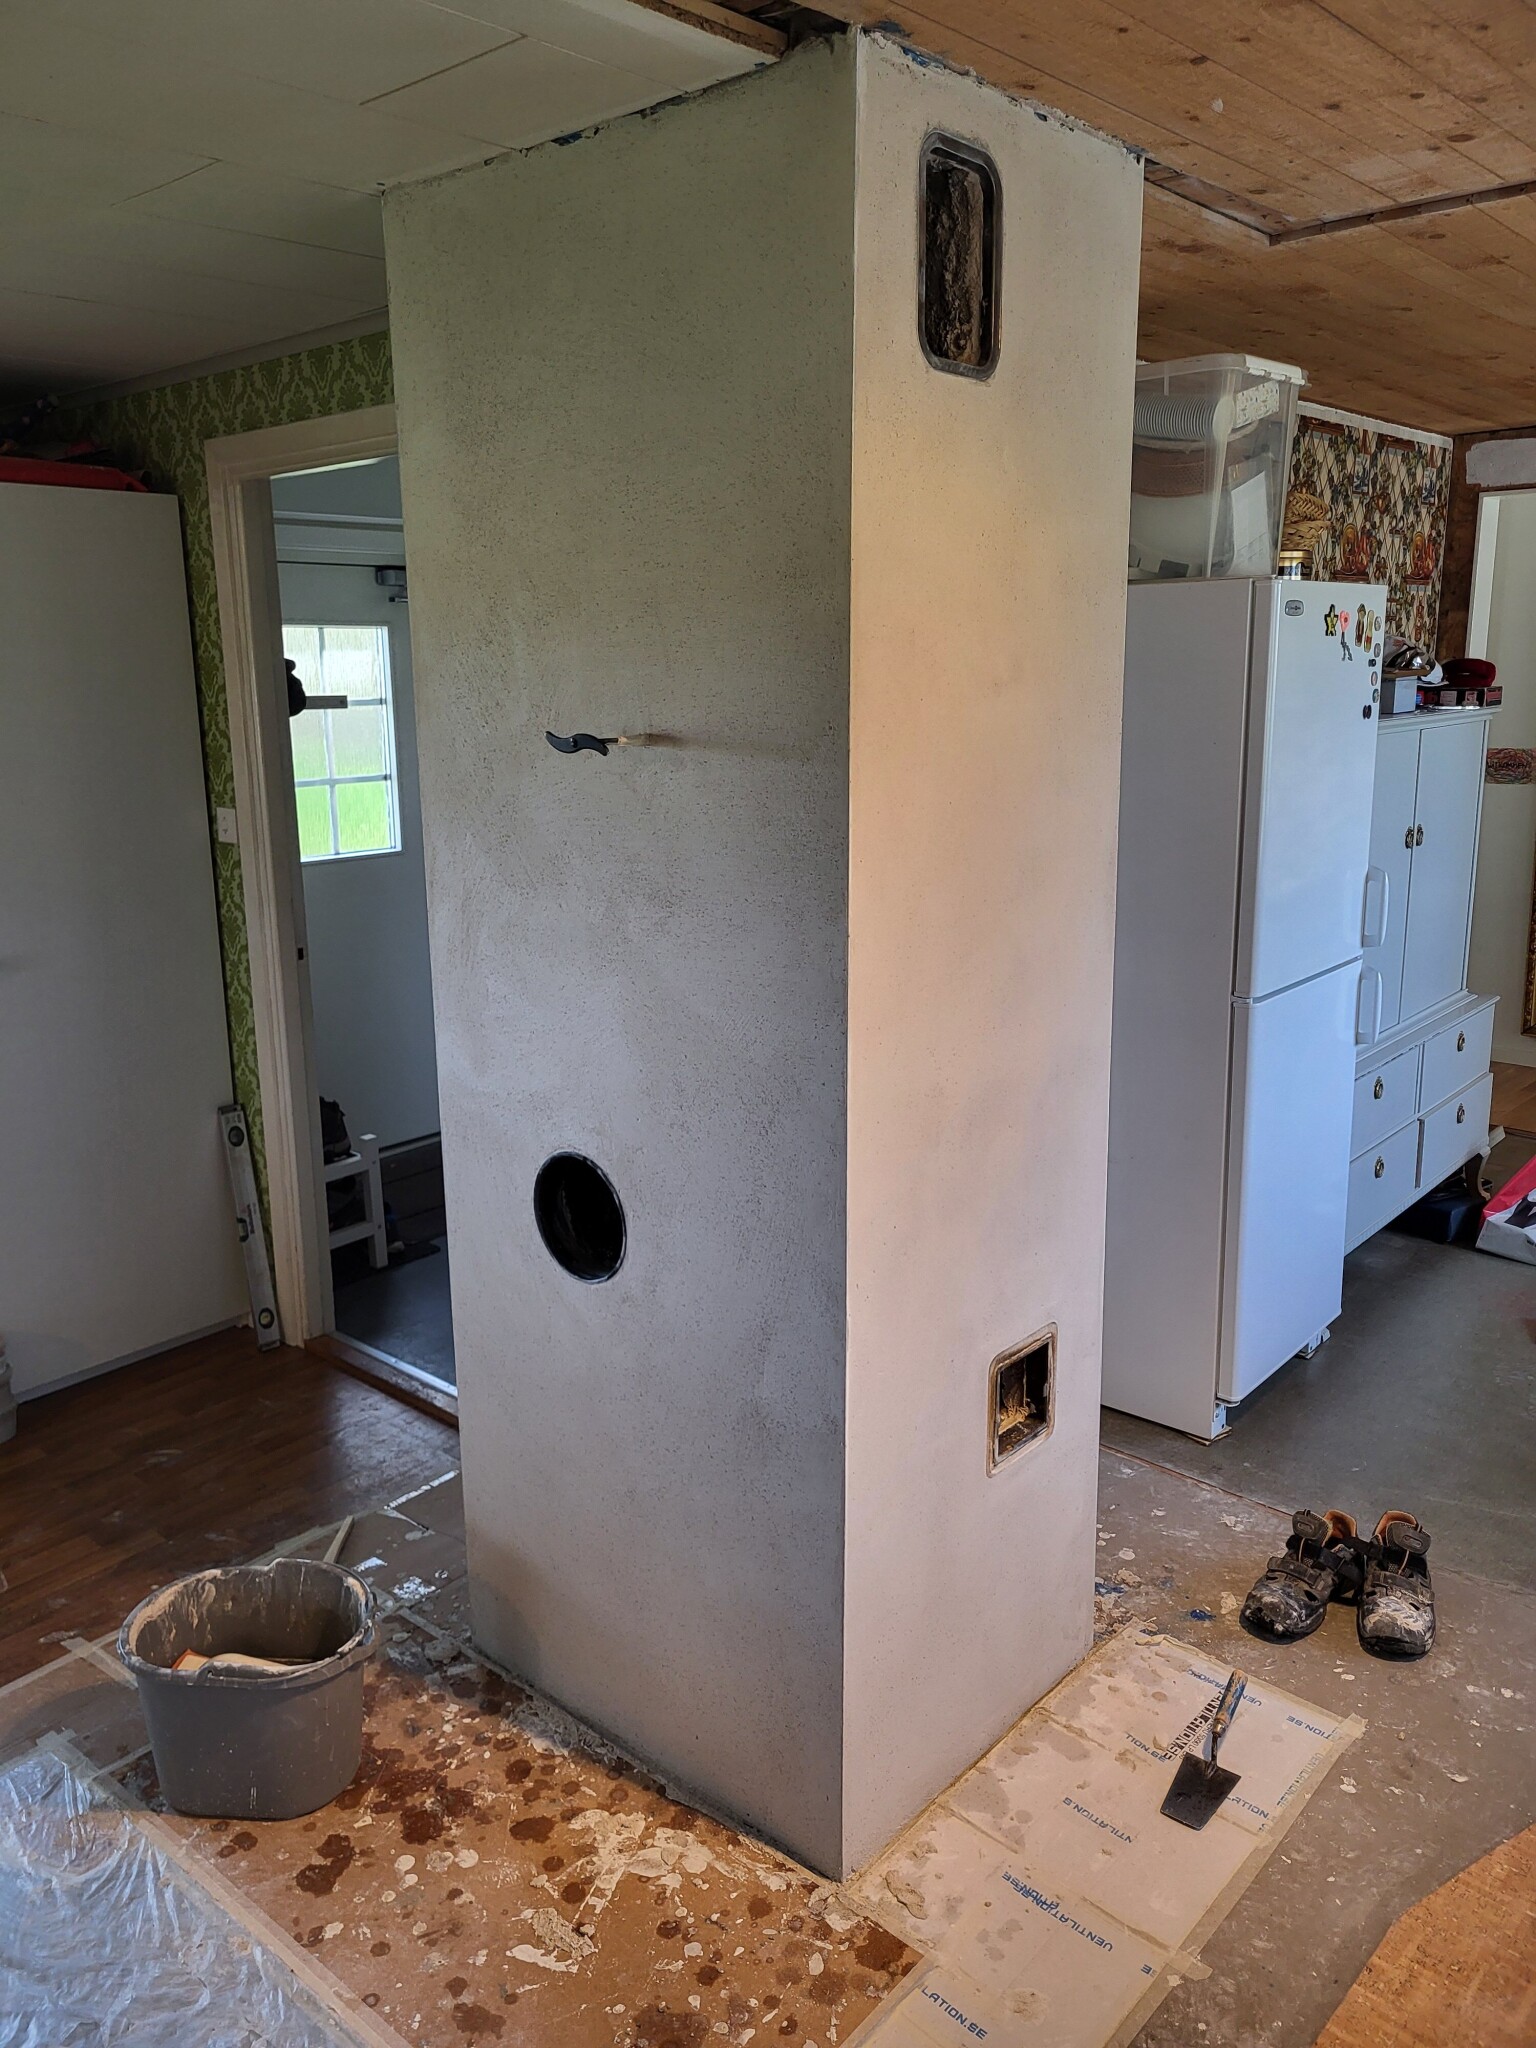
So, after a few hours it looks like this:
Really happy with the result!
The soot hatch, ventilation hatch, and adapter for the stove seem to have stuck well👍
Now it needs to dry for a while before the next step, what do you usually paint with?
In the meantime, I will start project "raising the stove" to fit it for the new height.
I realized I haven't written anything about what has driven this project forward...
I have torn down a wall between the kitchen and the living room.
Apparently, that brings along a few things😅
For instance, the height of the stove needs to be adjusted because I didn't think the pedestal it stood on was very nice.
Vi vill skicka notiser för ämnen du bevakar och händelser som berör dig.