After advice in a previous thread, I have now decided to build a new staircase myself. Therefore, I am creating this build thread, as there were those interested in following how it turns out.
I have an existing staircase that I will use as a template, which ensures I have the correct conditions regarding step height, step size, etc.
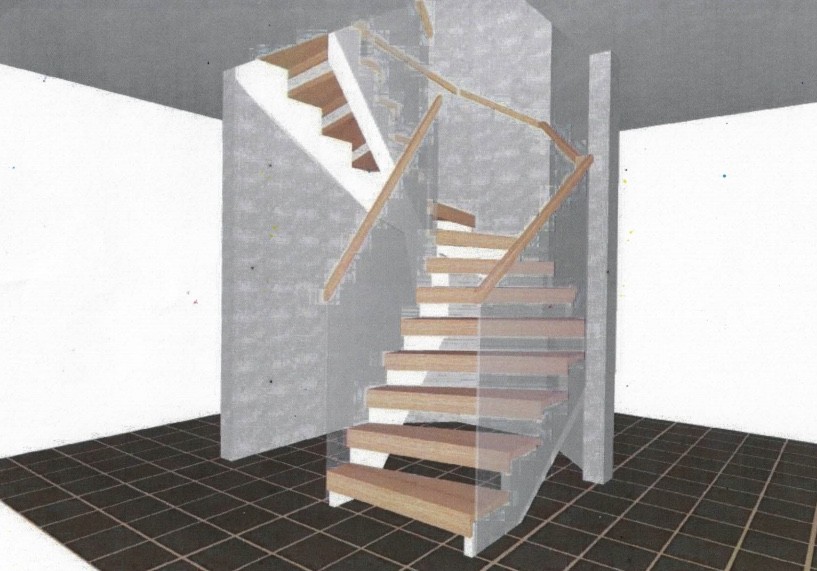
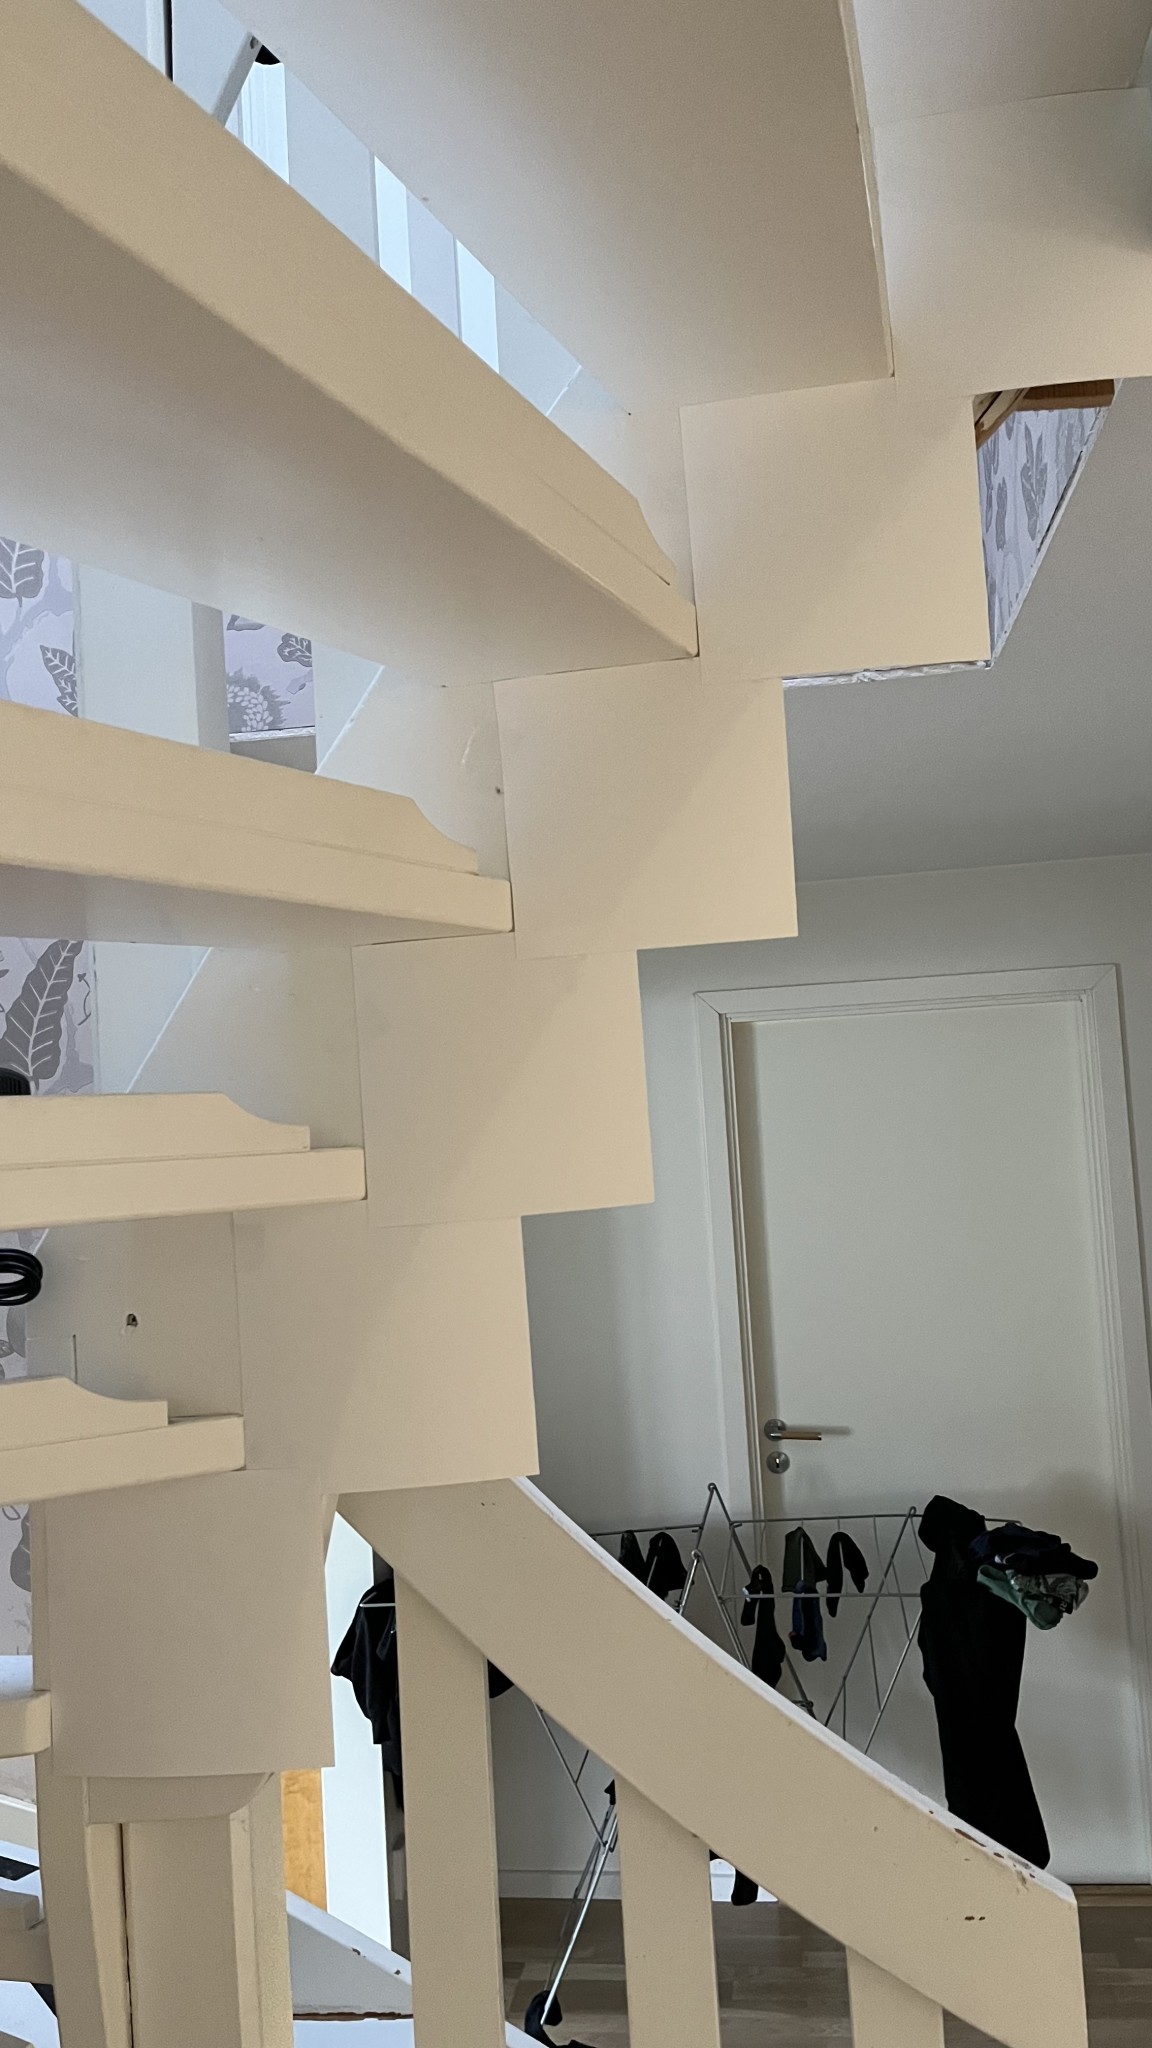
The design of the staircase will be according to the picture stair design.
Underlay stringers, lacquered white - will be sent to a painter.
Steps in solid oak, which will be white-stained and lacquered
Glass railings with handrails in solid oak, which will be white-stained and lacquered like the steps
The plan is as follows:
Template the existing staircase and adjust the template from a "regular" stringer to an underlay stringer
Cut the template in MDF to ensure all parts fit, templates are made for all parts, both stringers and steps
Once the templates are complete, cut all parts
The stringers will be made from the following:
Core of 2 x 18 mm laminated board glued together with regular white wood glue. The reason for this choice is that I haven't found laminated beams in the correct dimension.
The stringers are clad in 4 mm MDF for a nicer finish and a better surface for painting
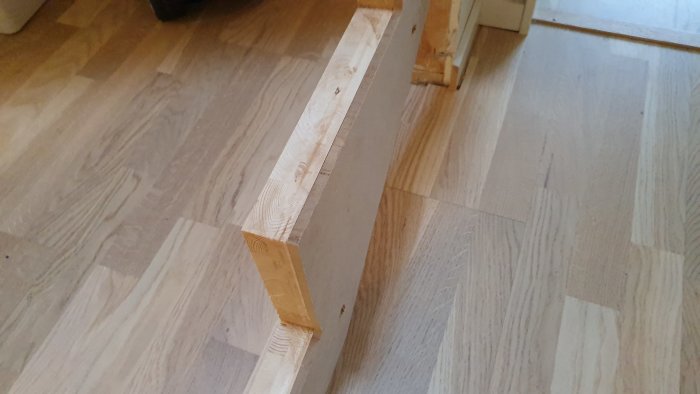
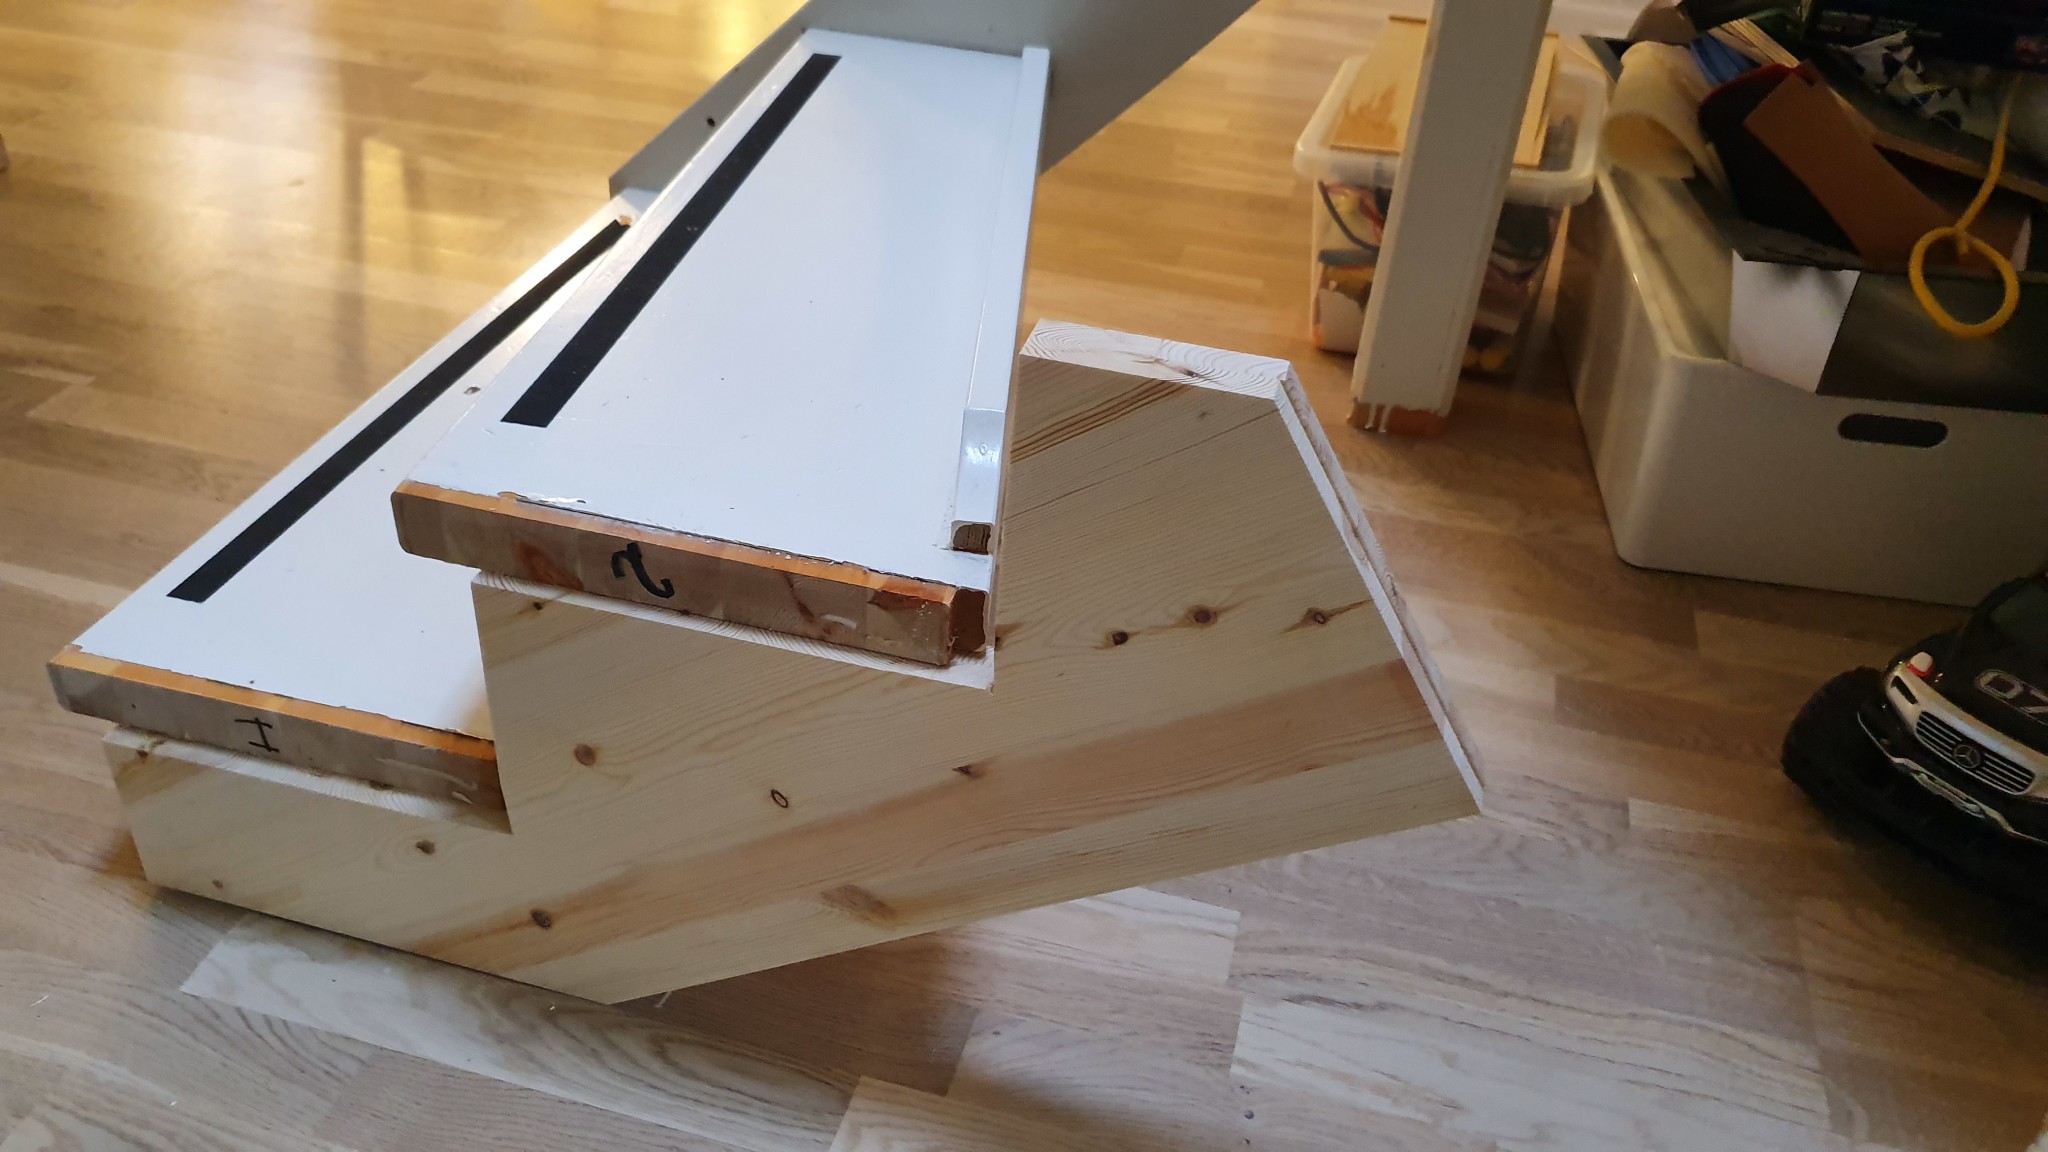
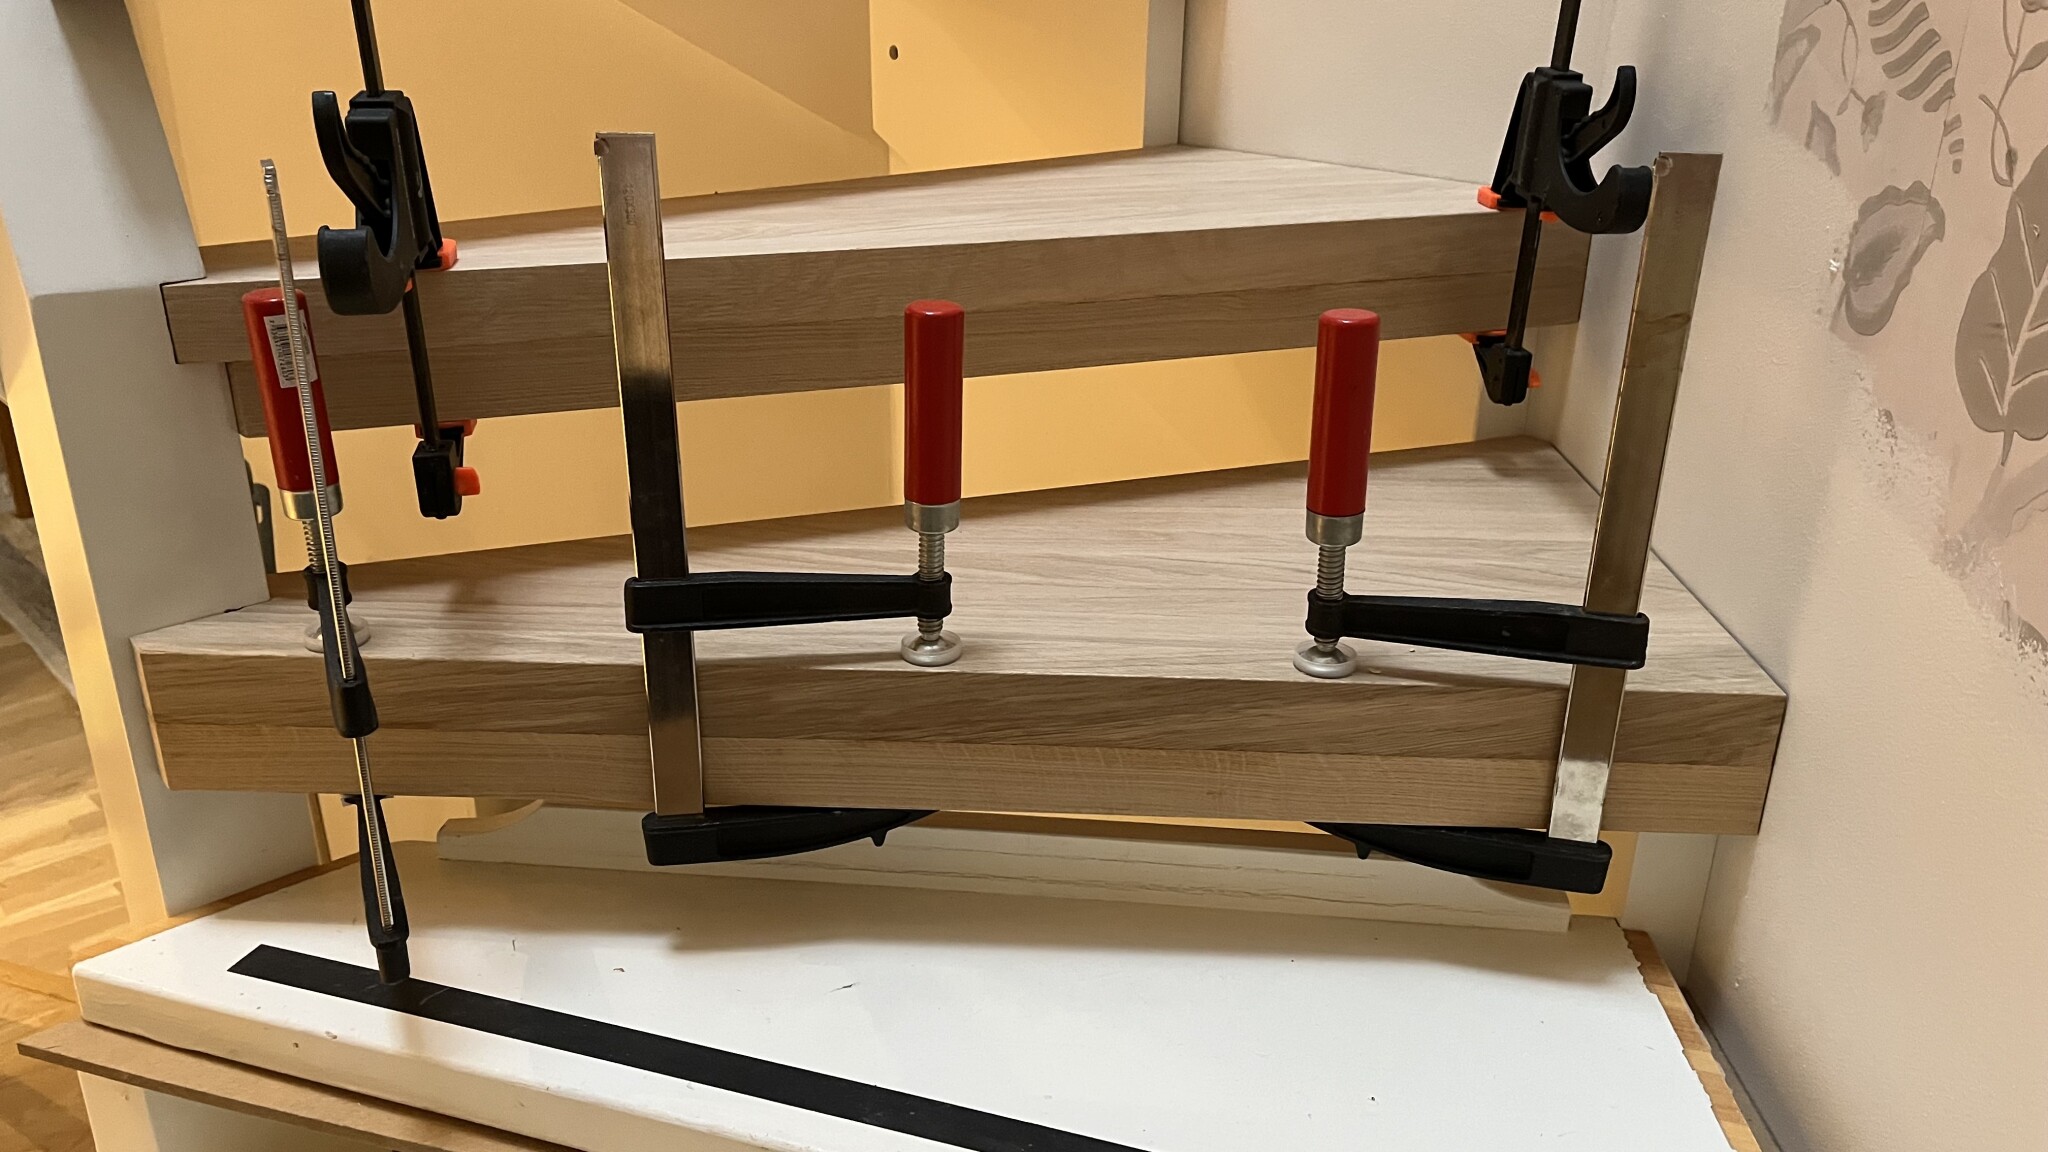
I have made a test, as you can see in the attached pictures.
I won't rush this project, so there might be delays between posts. But be patient, I'll update the thread as soon as I have new info.
Fun that more people are attempting to build a staircase!
I am also contemplating a staircase project that will hopefully happen during the year. A few years ago, I built a staircase for our previous house with stringers on the sides. I made these from glued laminated timber beams glued on the height. For the steps, I used laminated oak boards.
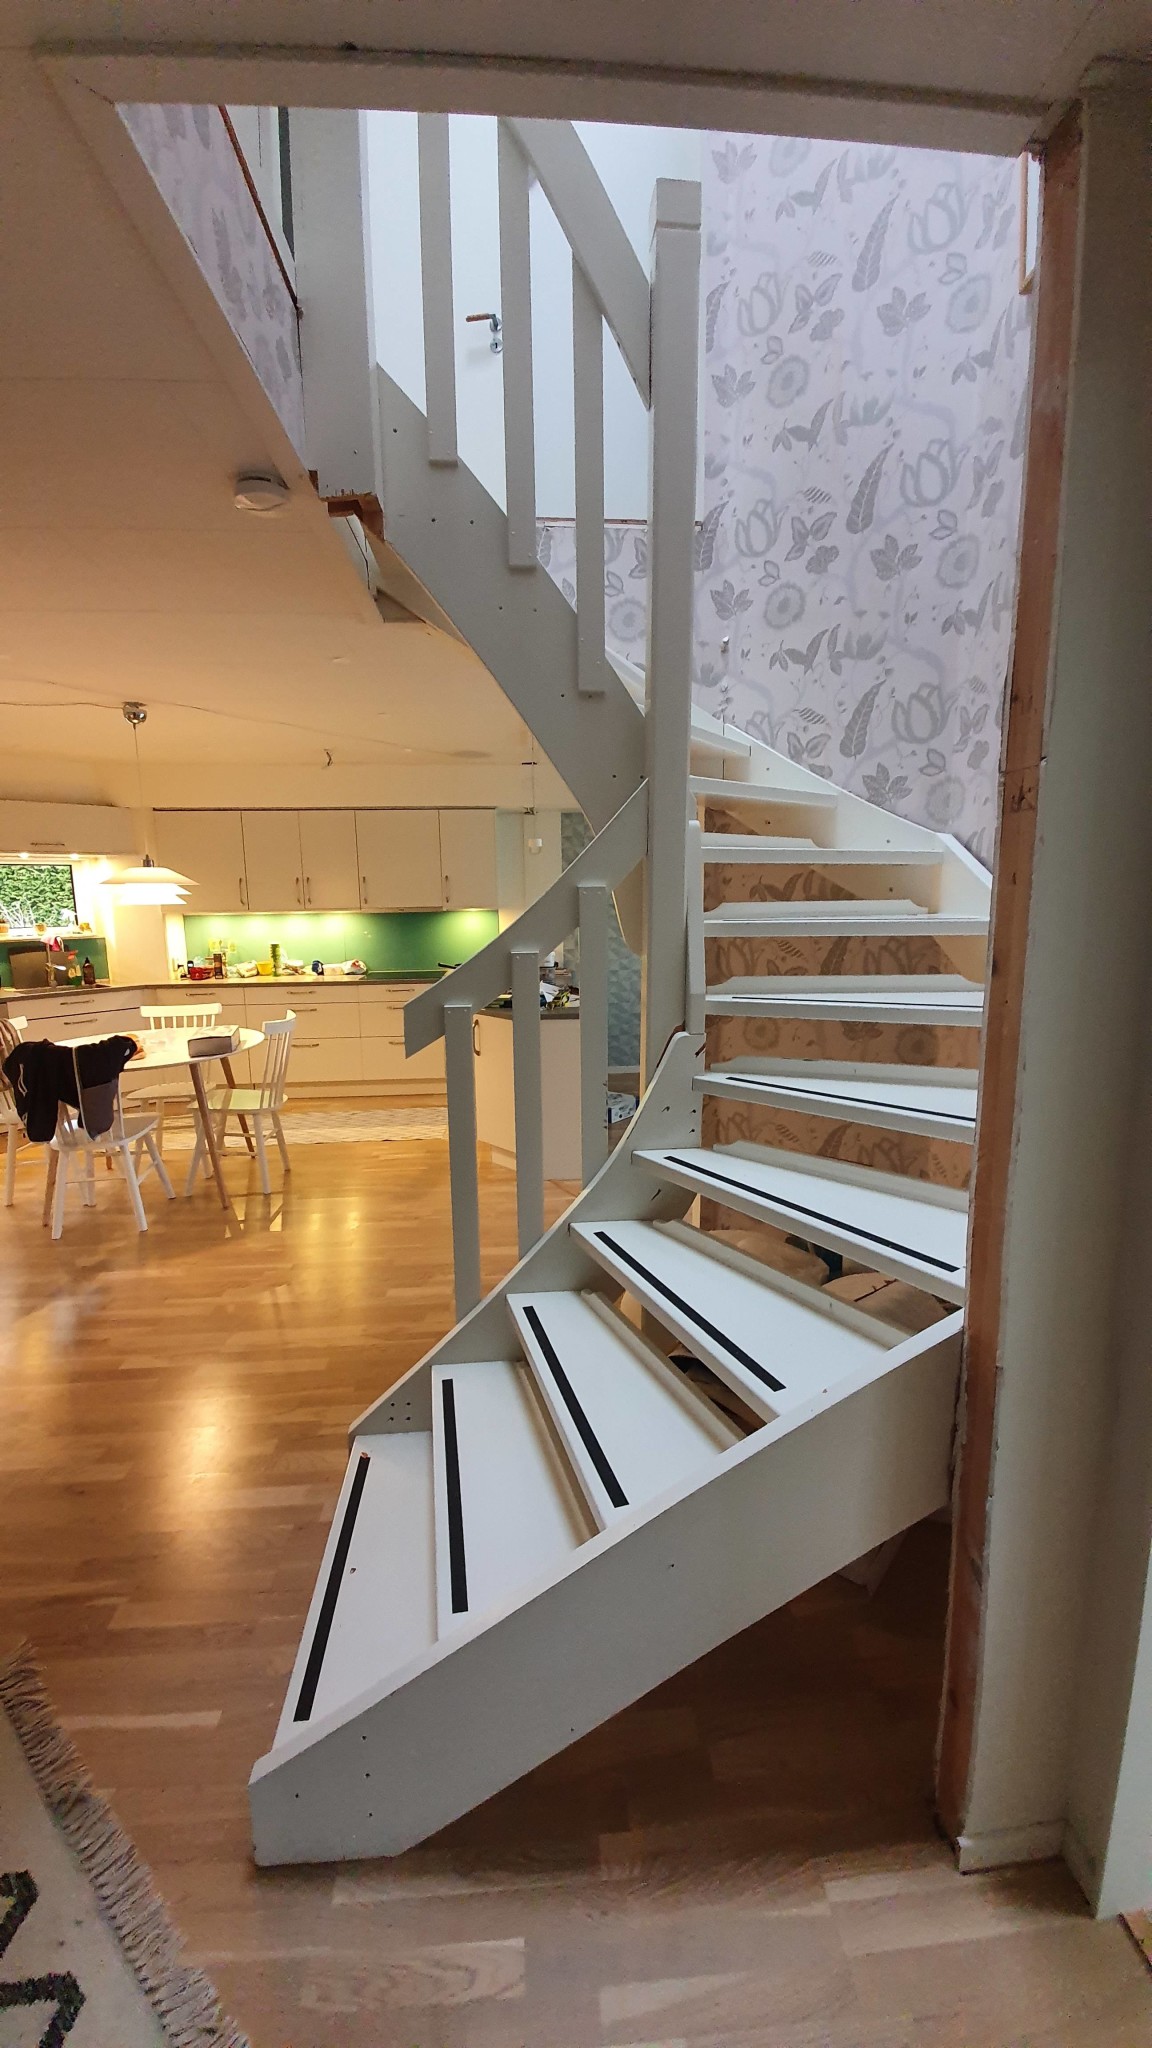
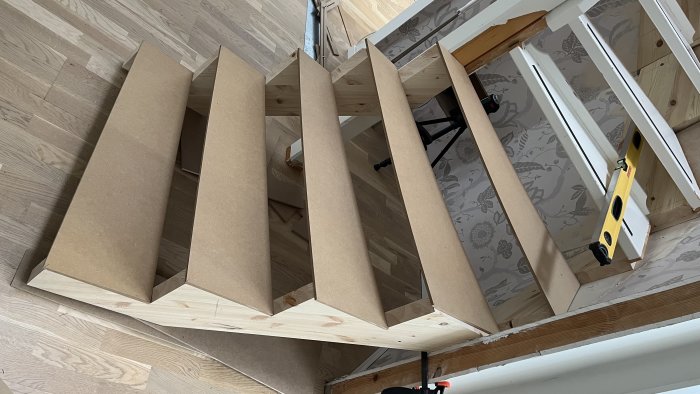
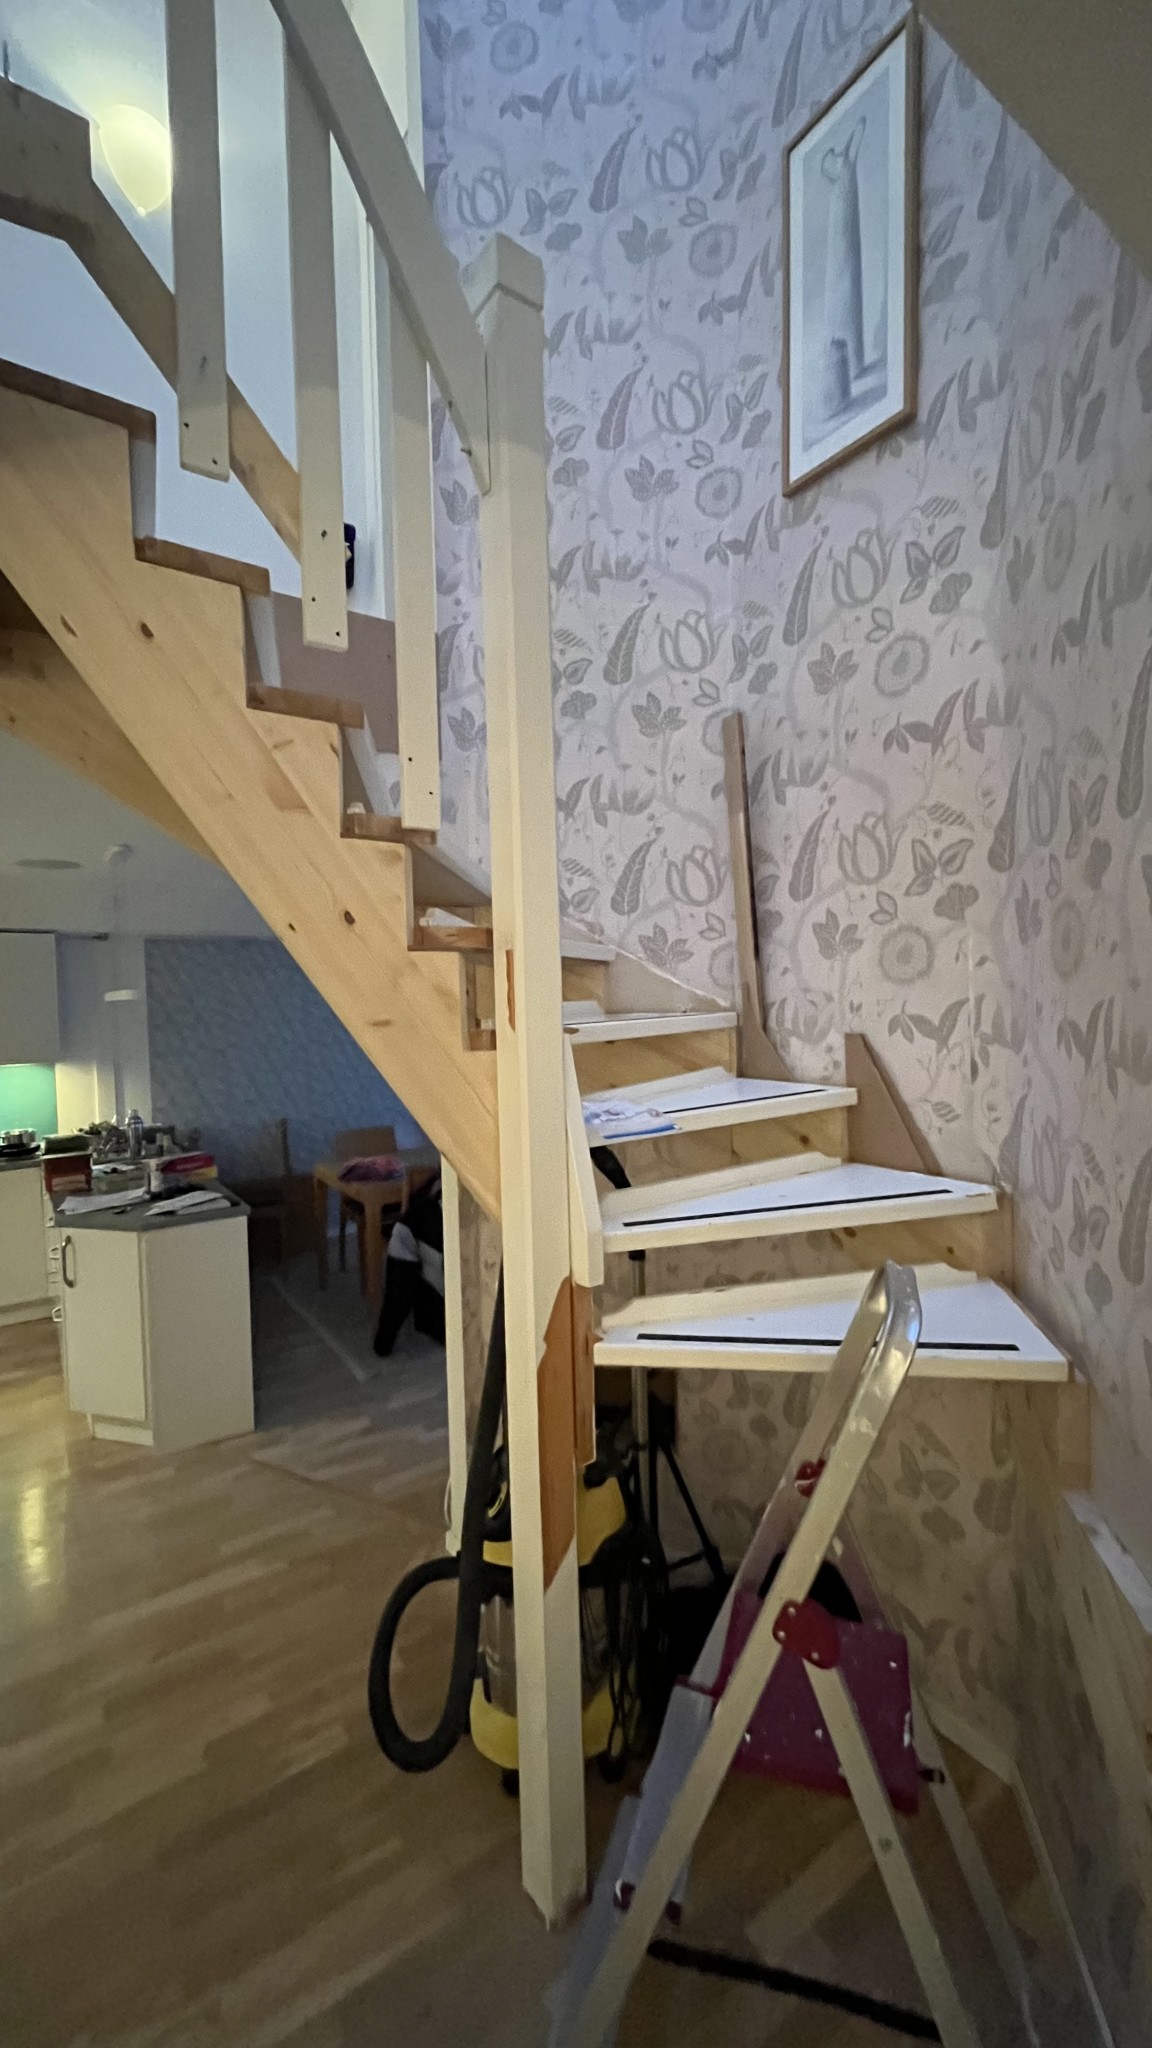
So it has finally happened! 3 years later, I have found time to build the staircase. It has taken me 4 weekends to create templates, cut out, and fit everything. What remains now is to cut out the steps, which I probably won't do until the stringers are lacquered.
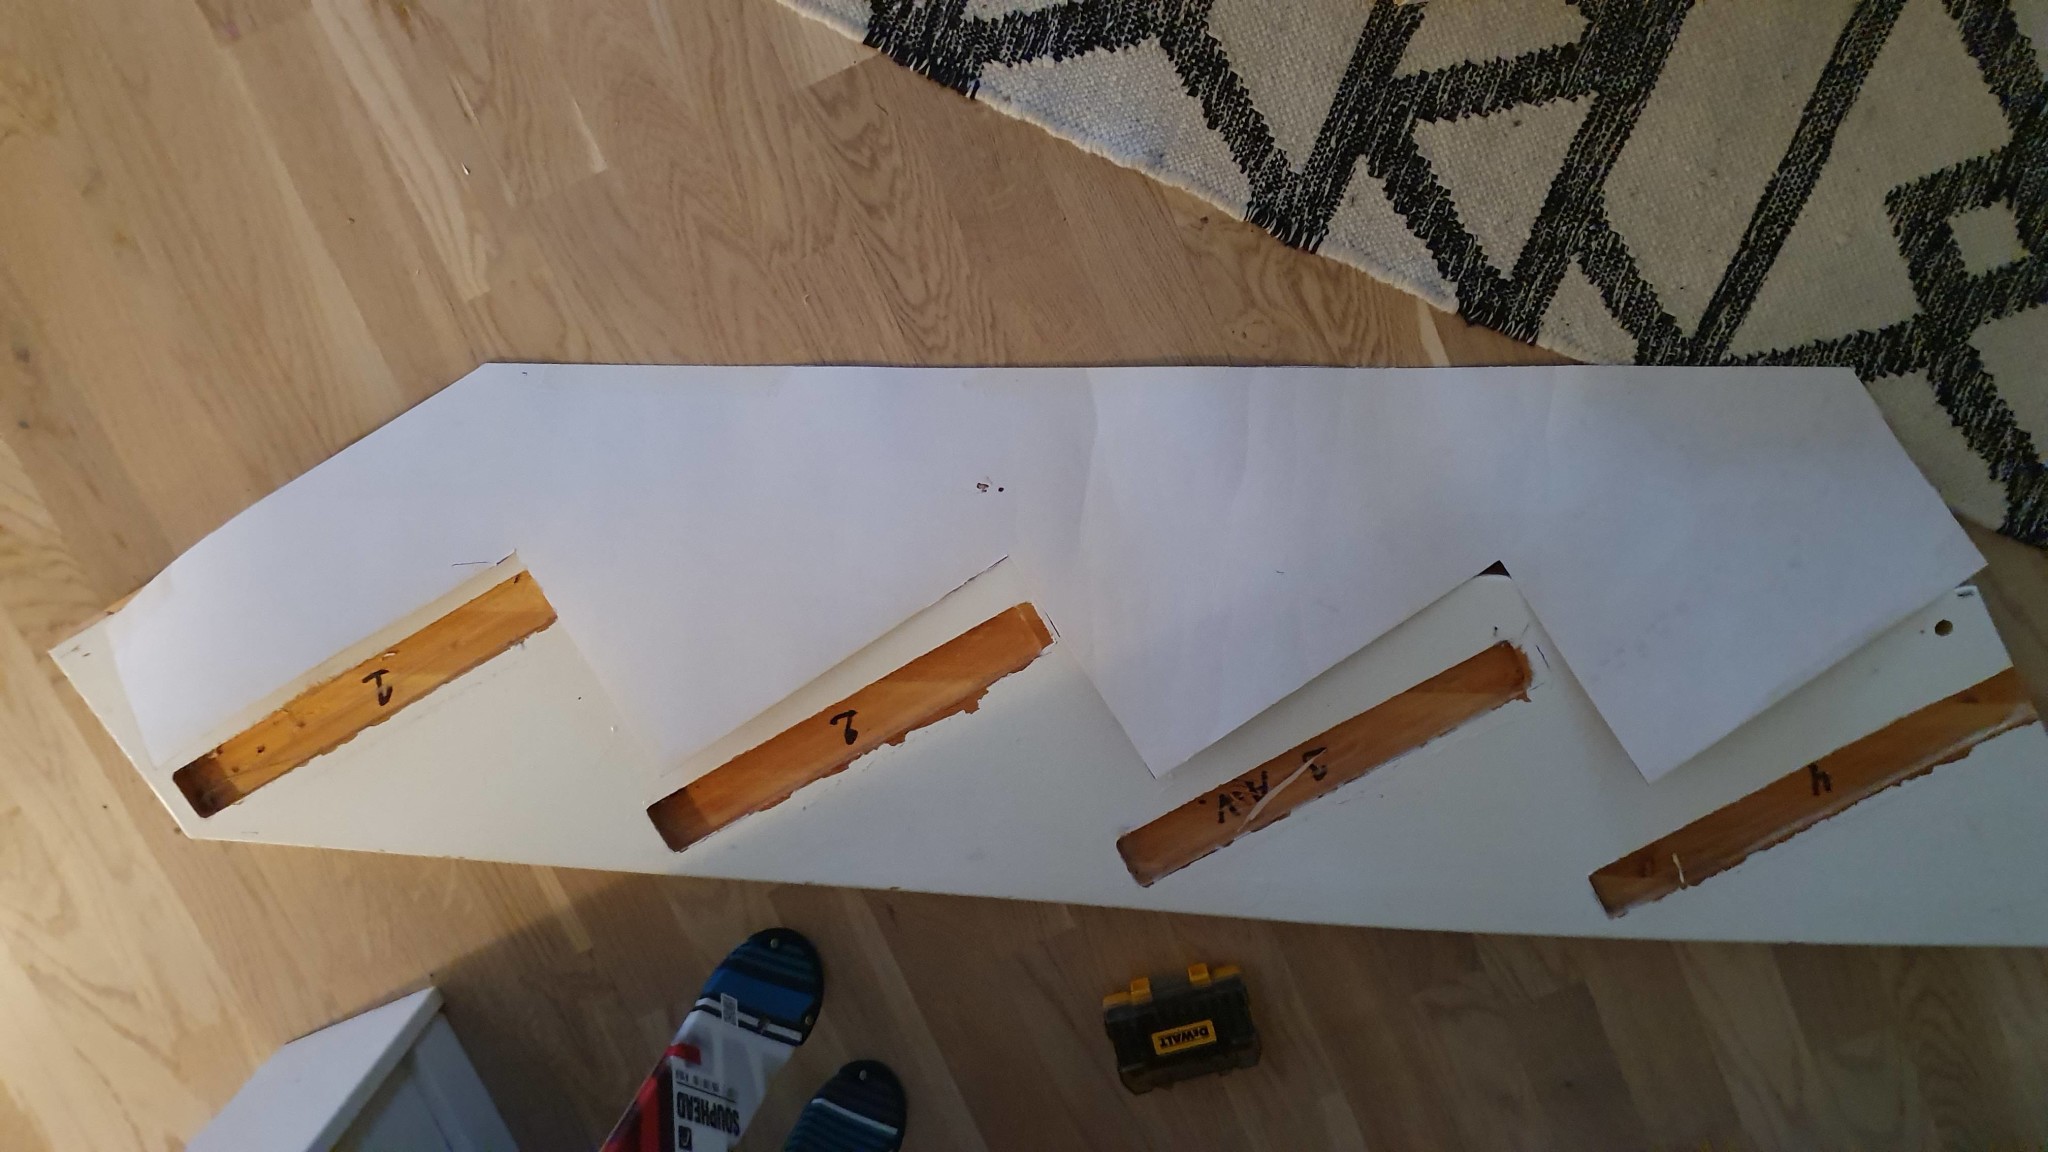
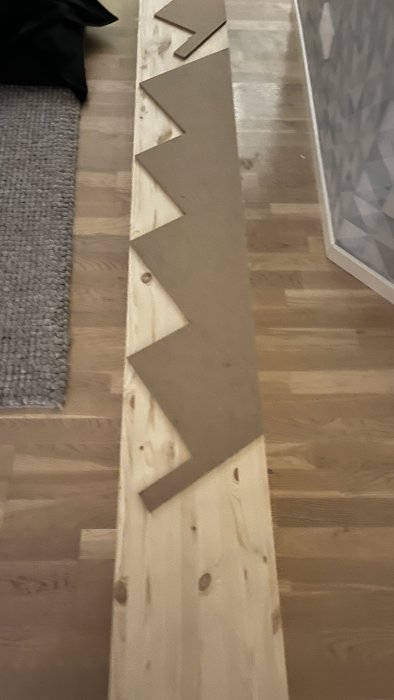
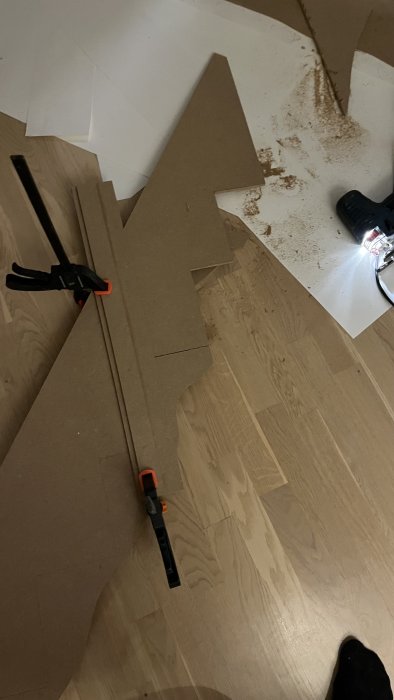
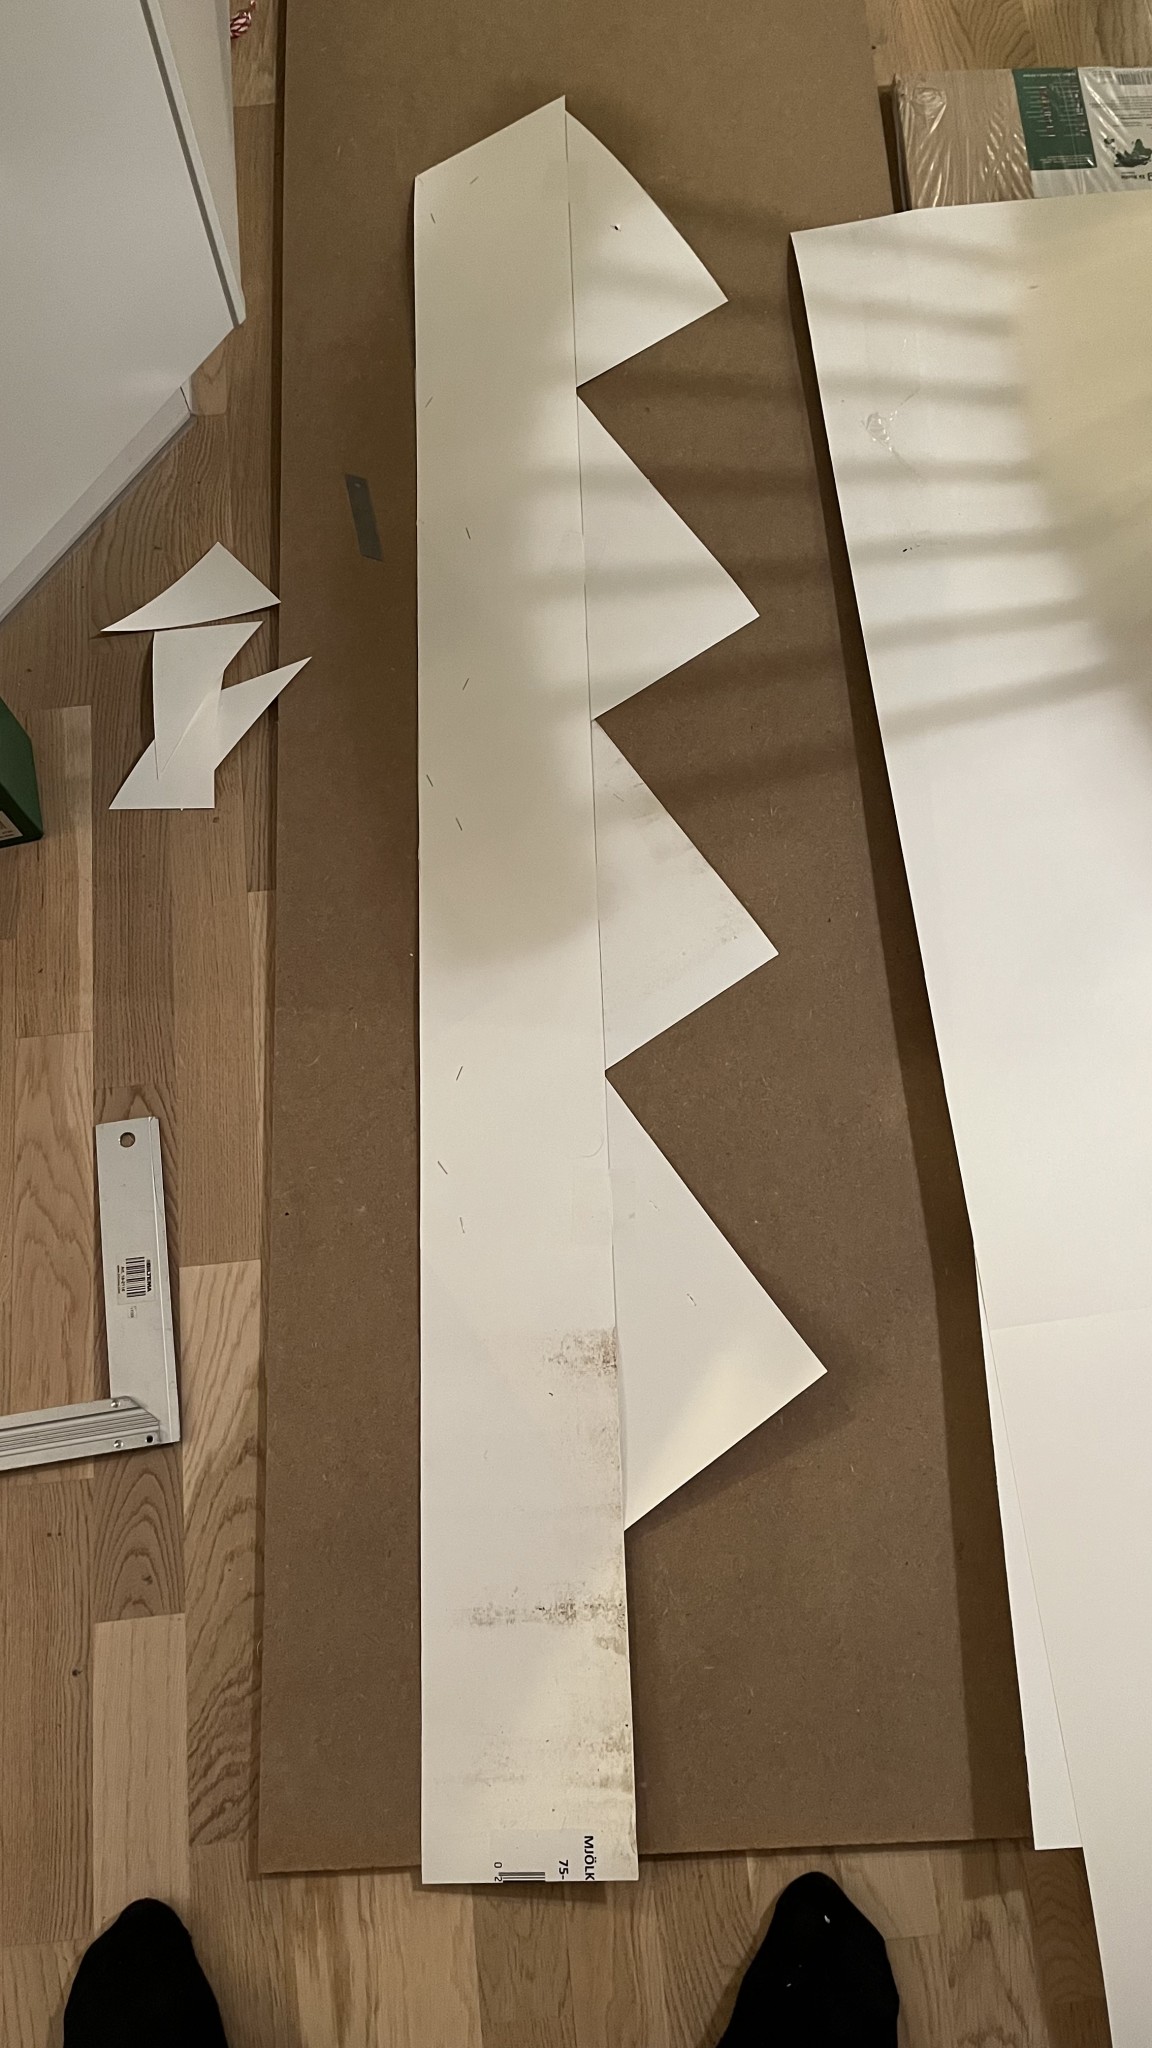
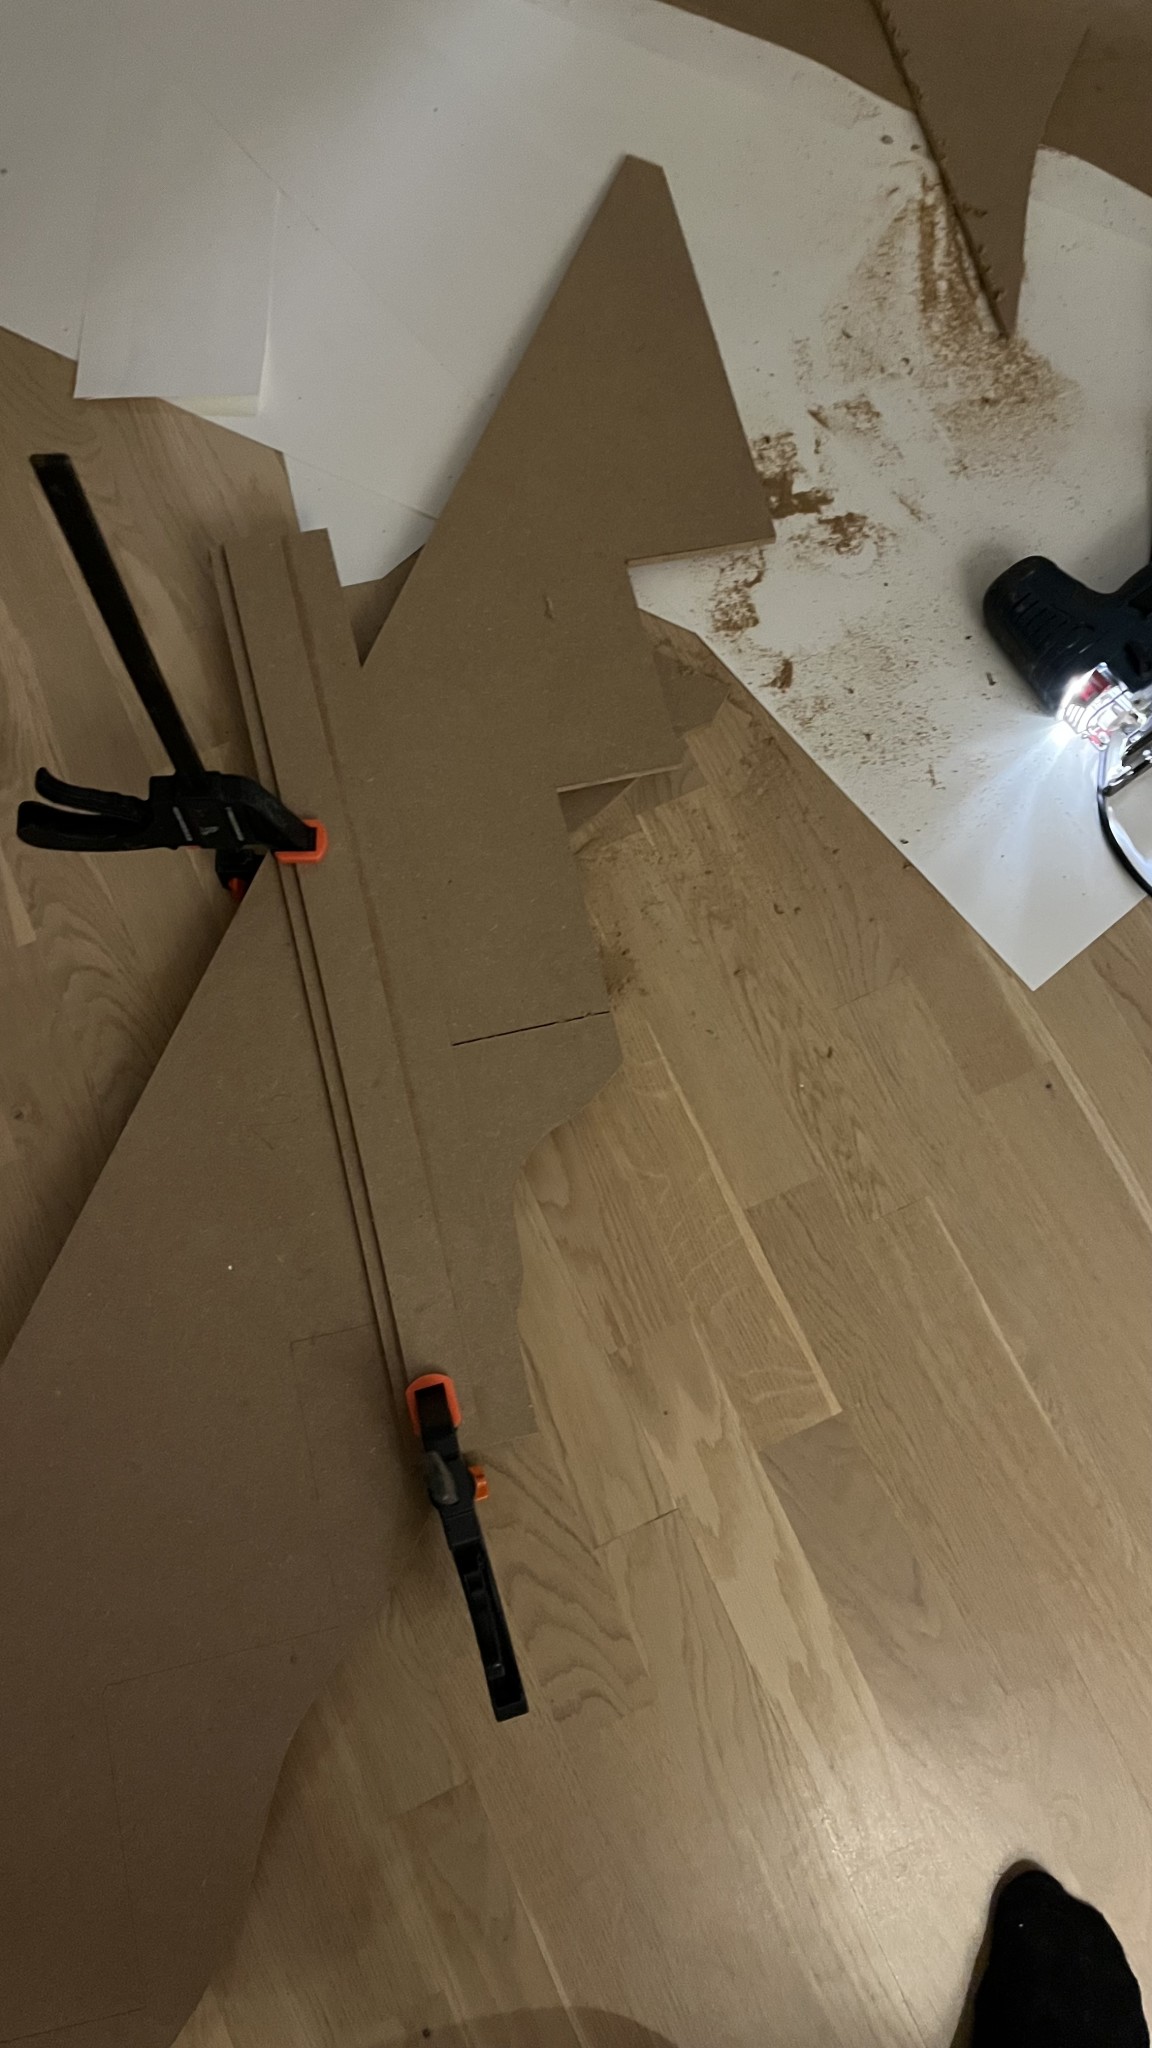
I started by creating templates for the entire staircase using milk carton paper. I cut out rectangular sheets that I then attached under each step to get the right angles. I then taped these together with a 15 cm wide strip that was as long as the stringer. This way, I got a template for each stringer.
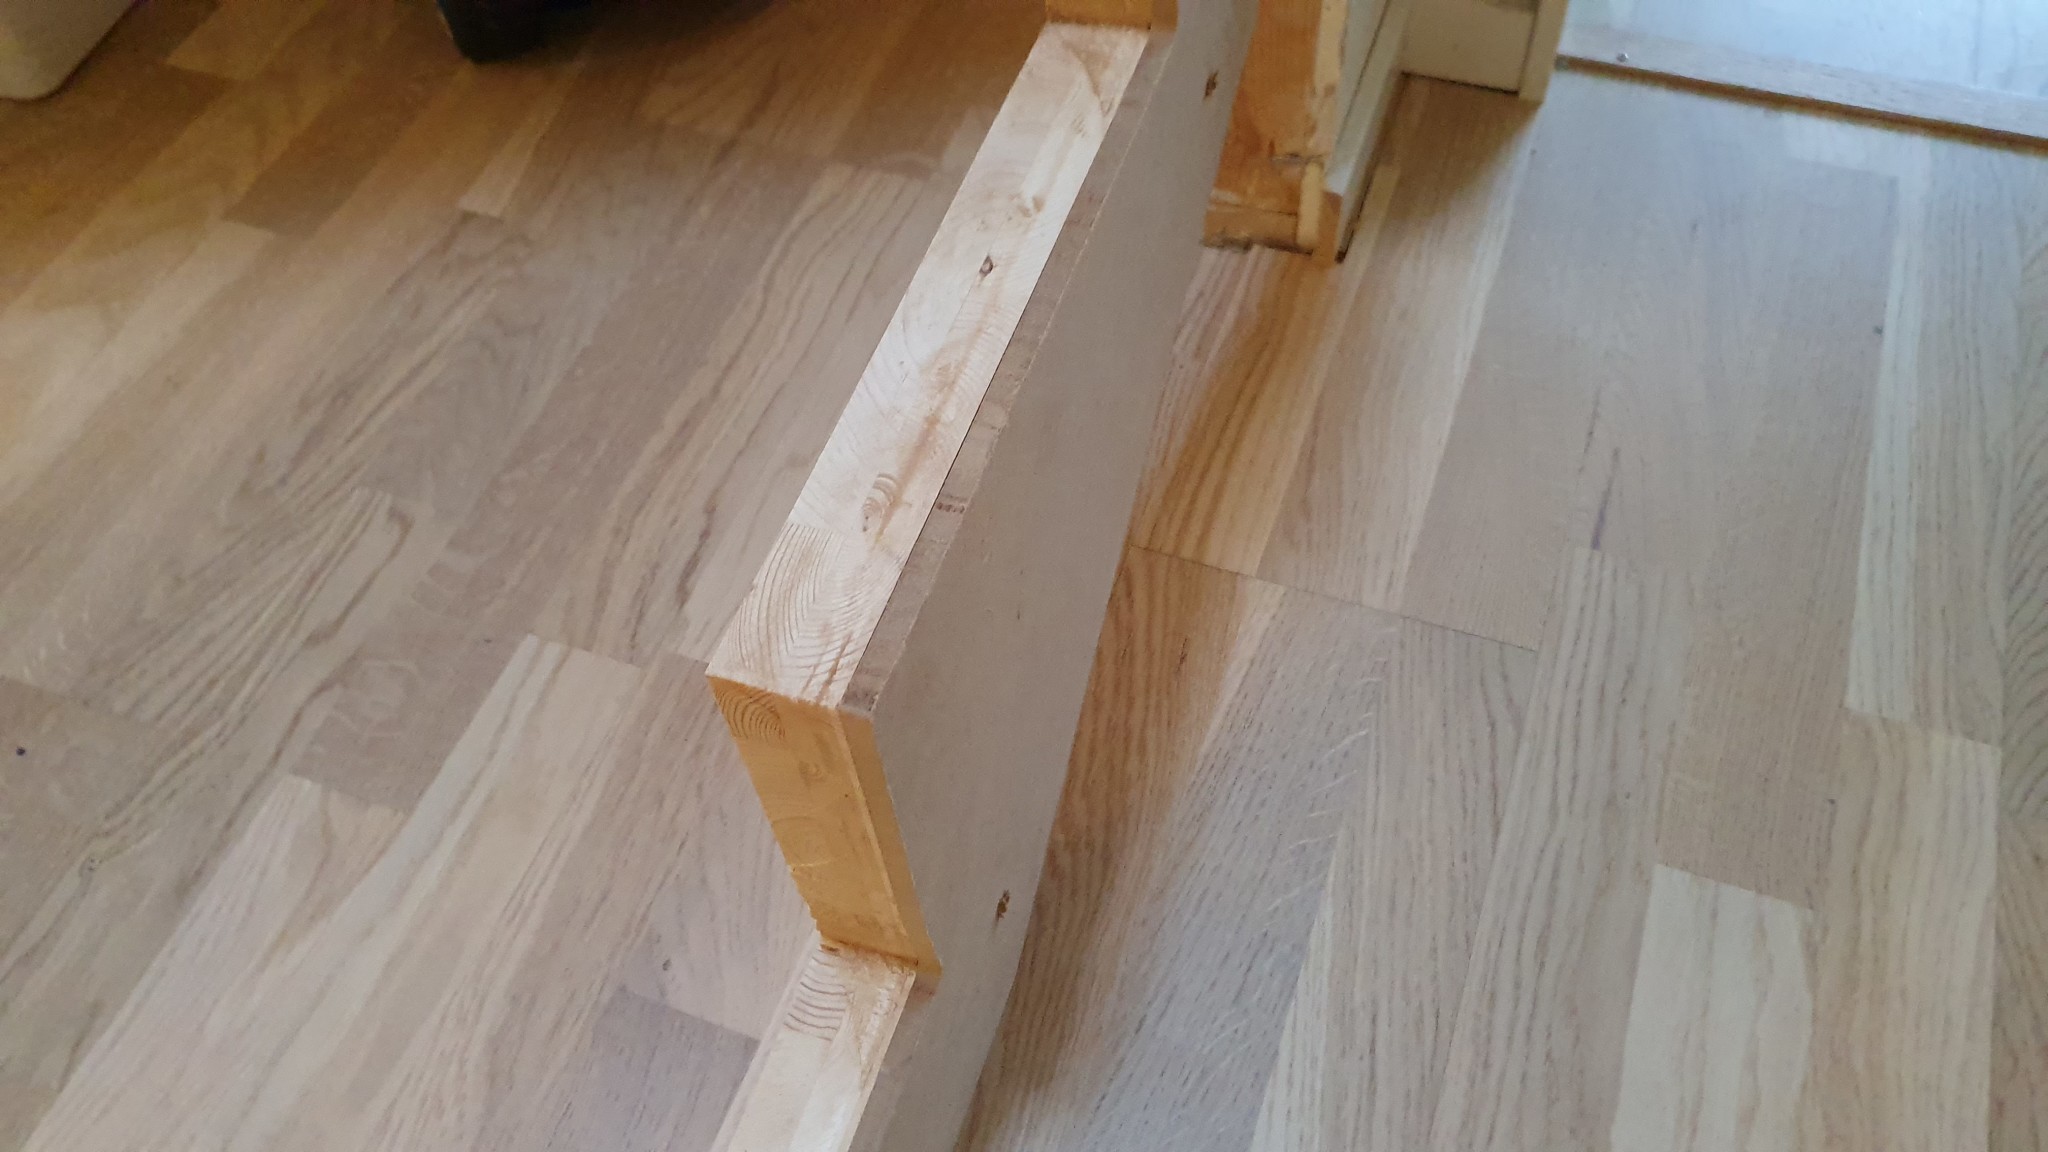
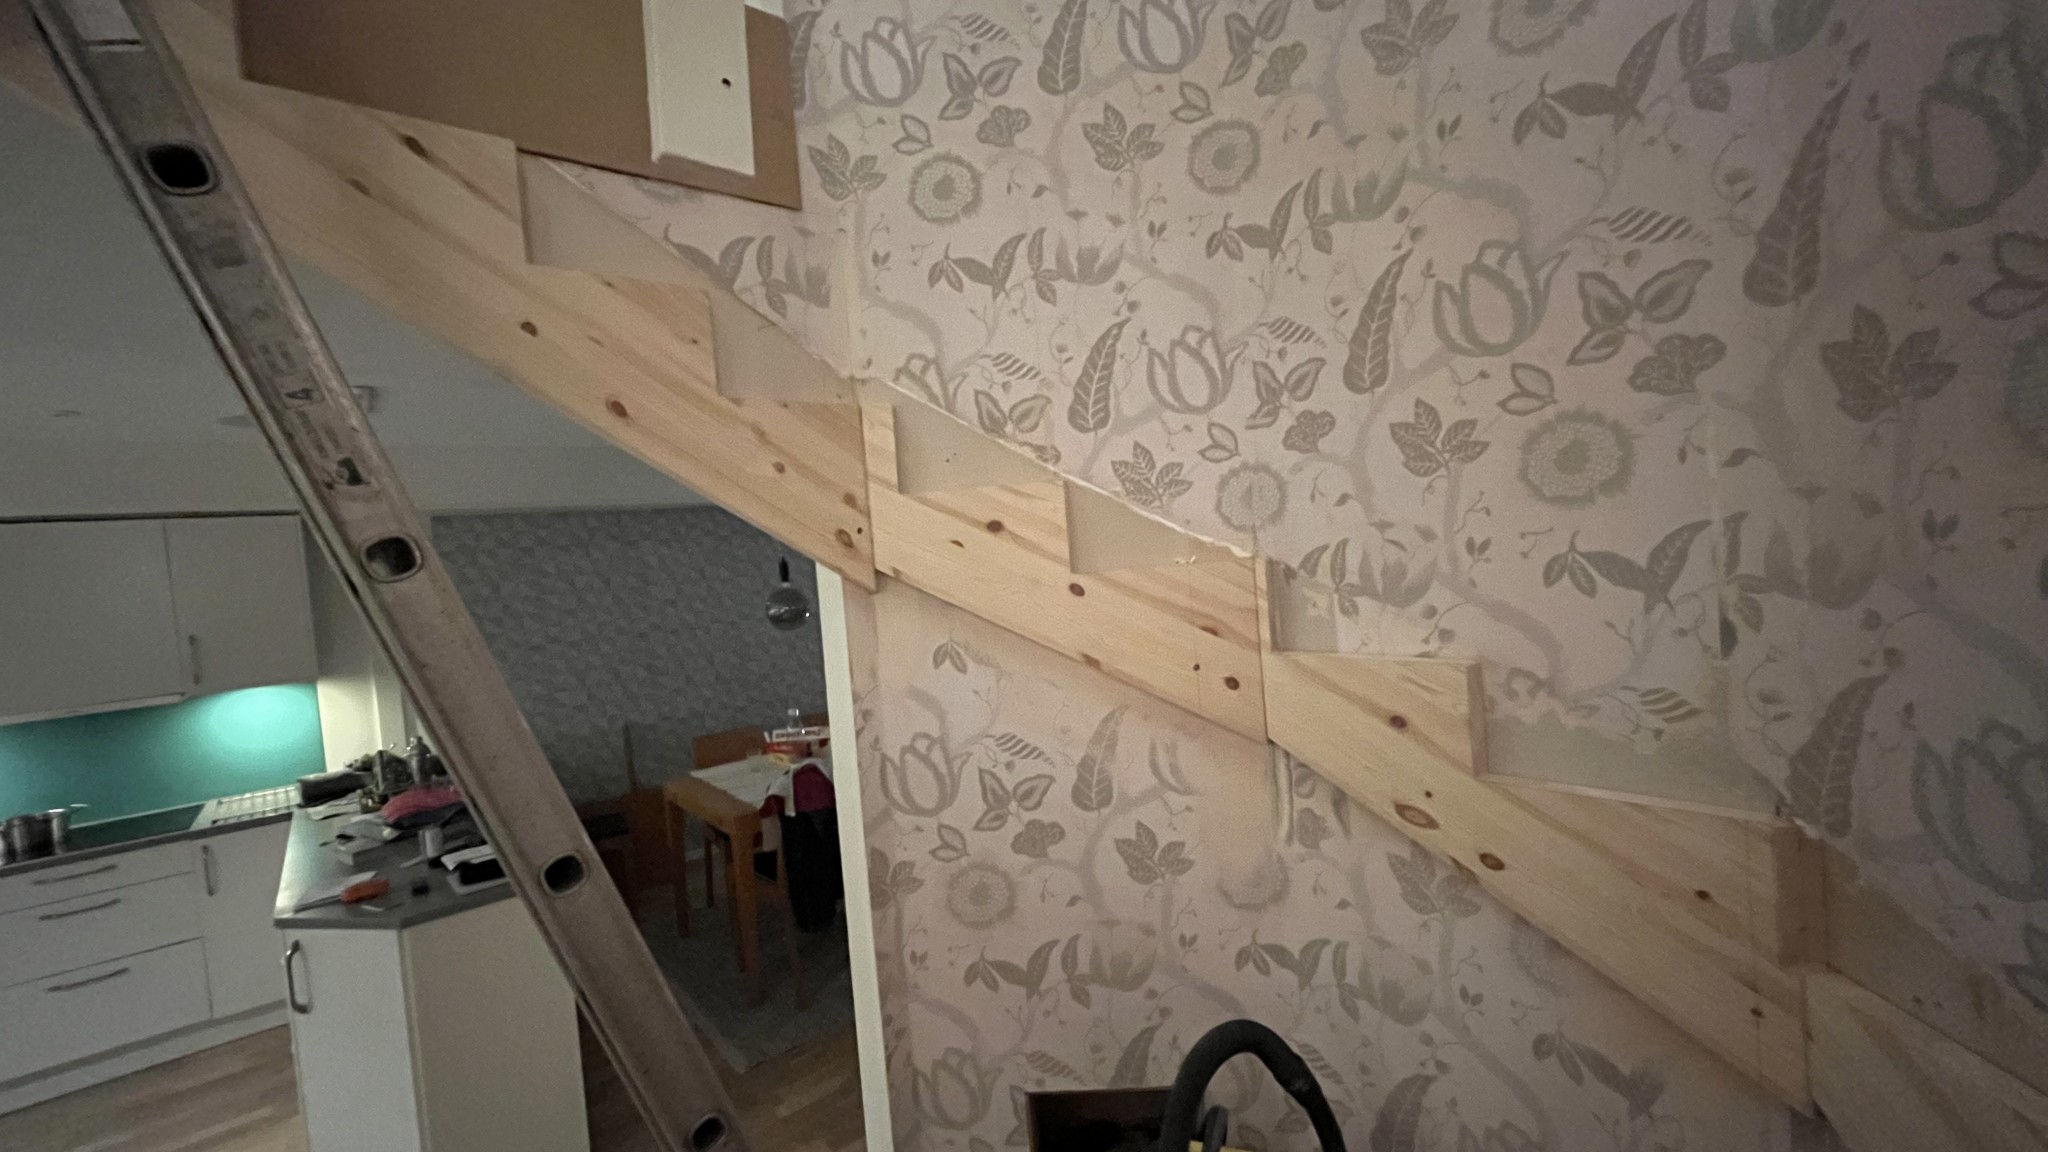
After this, I cut out templates of the stringers in 6mm MDF to check if they fit. I had gaps between the current staircase and the wall, which was due to the staircase having incorrect dimensions. So, I had to adjust the lengths of the stringers.
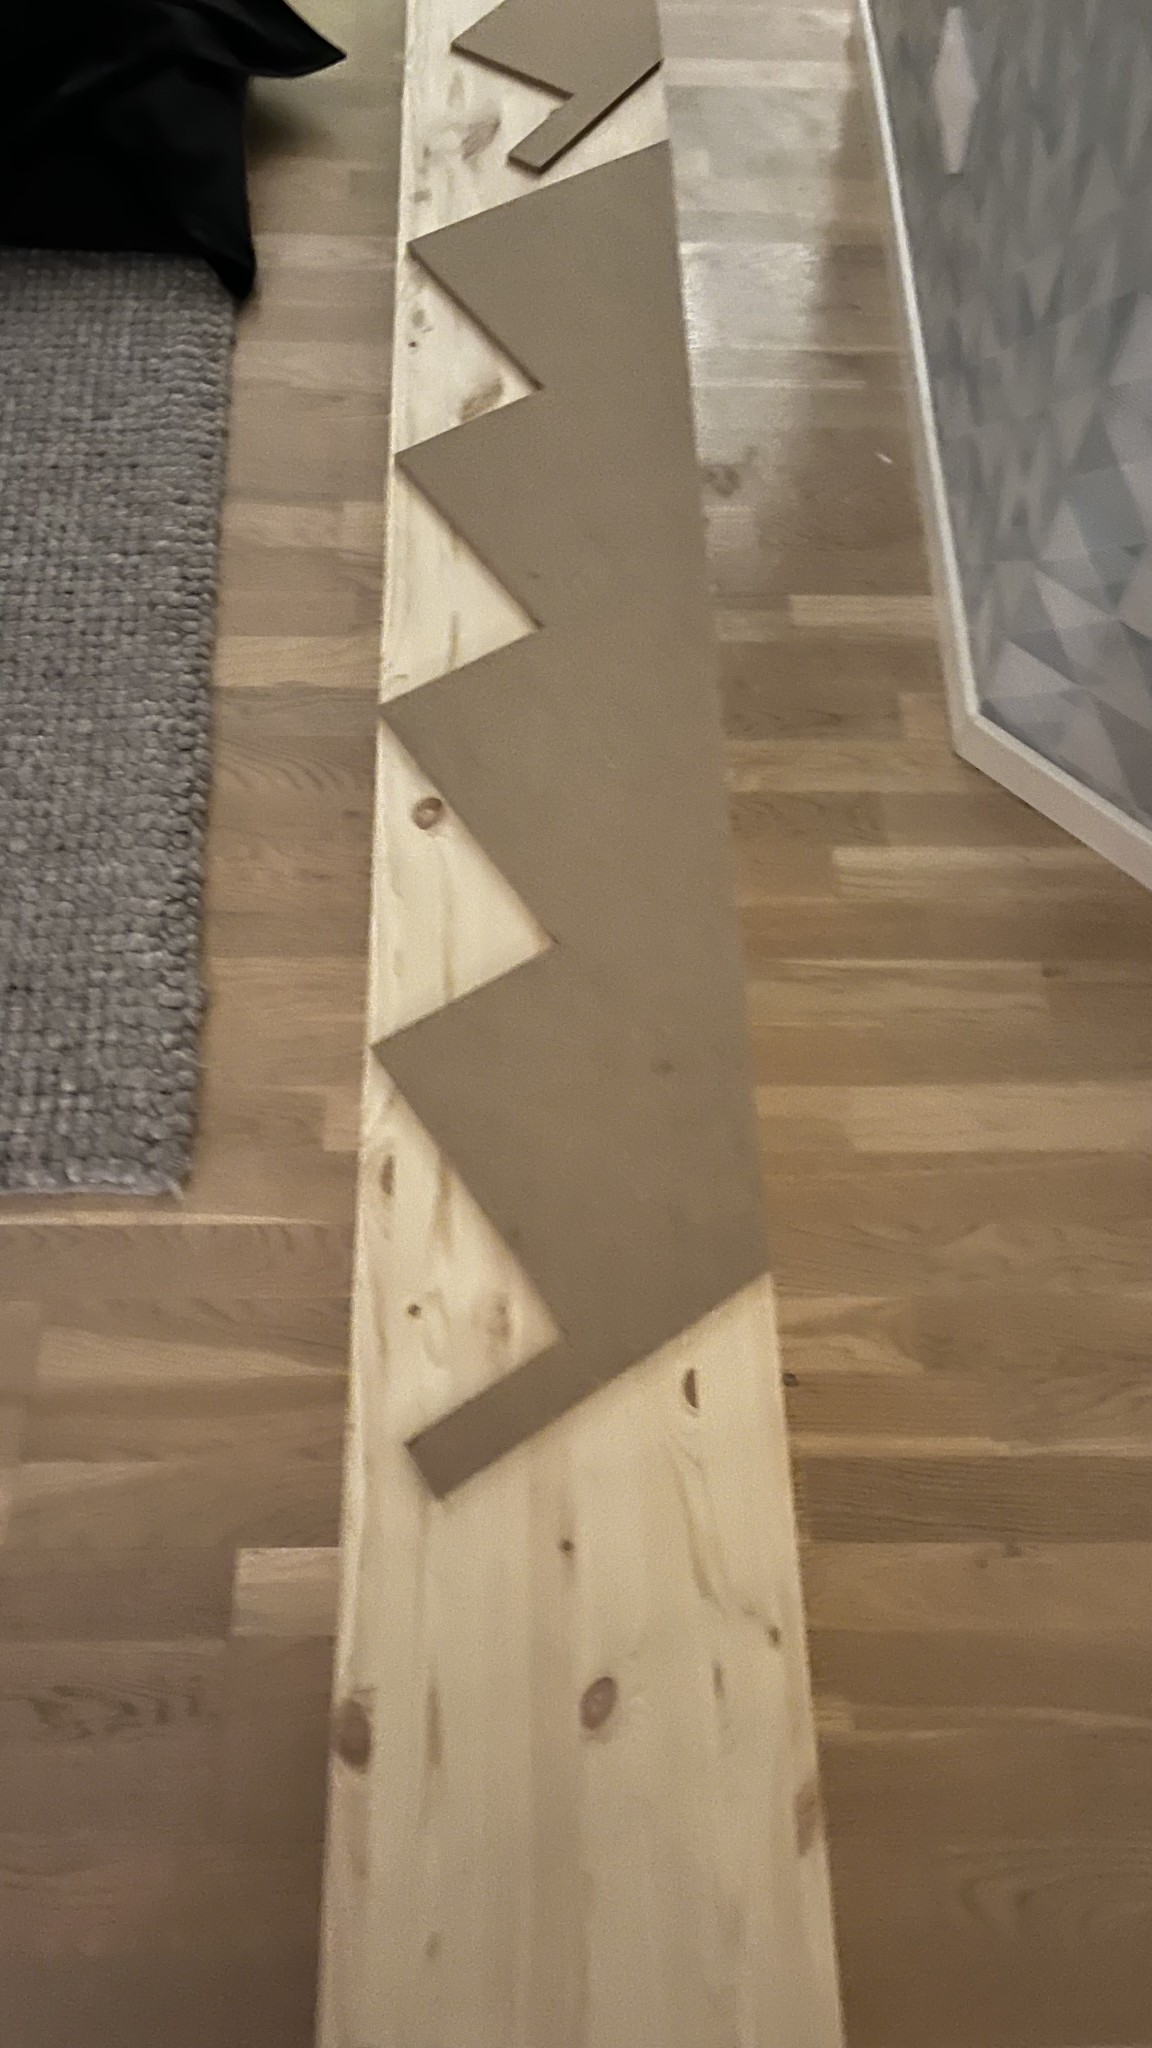
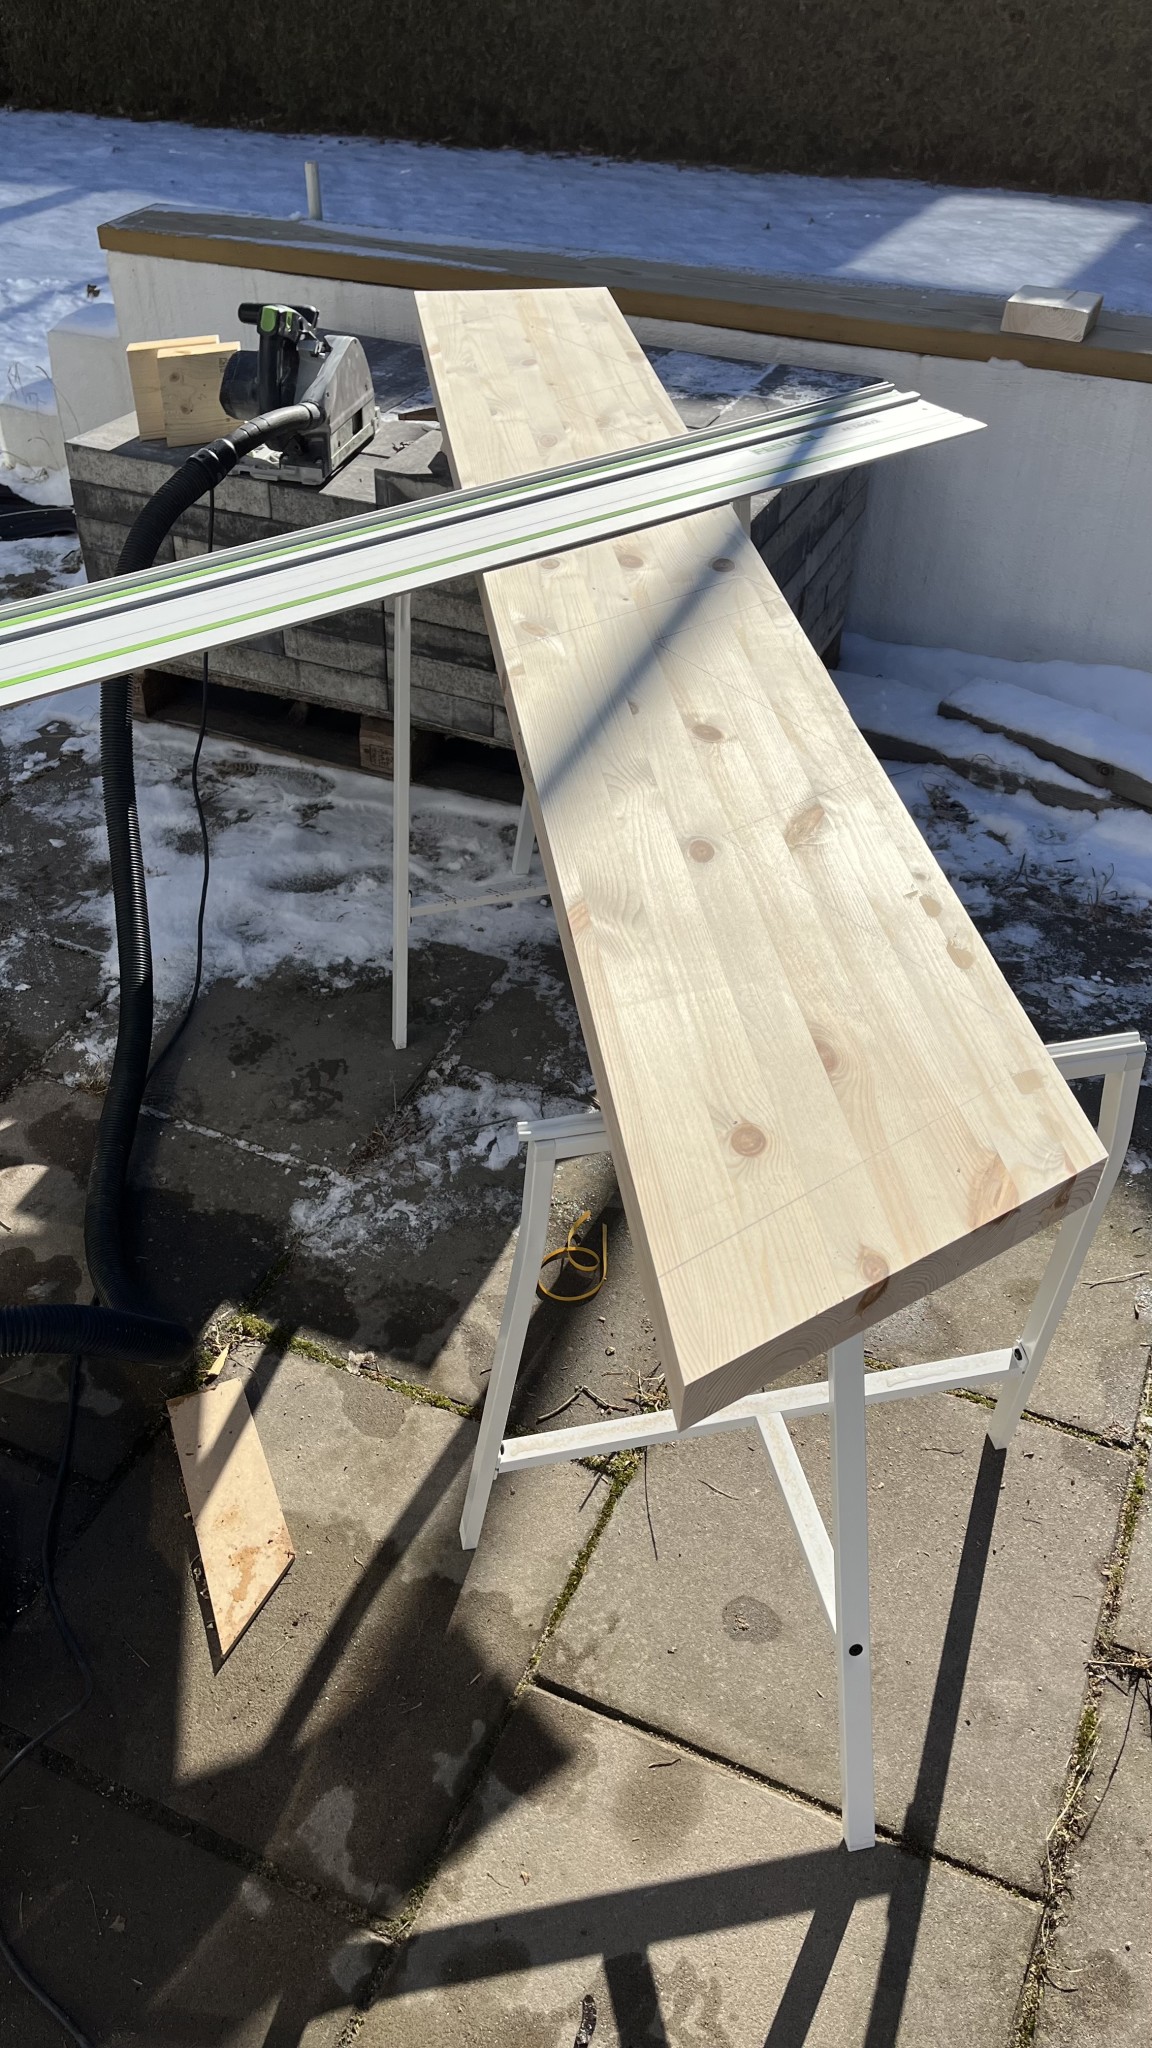
There was a change from the original plan. I didn't have the energy to glue the boards for the stringers myself, so I bought 30cm wide laminated timber beams intended for stringers.
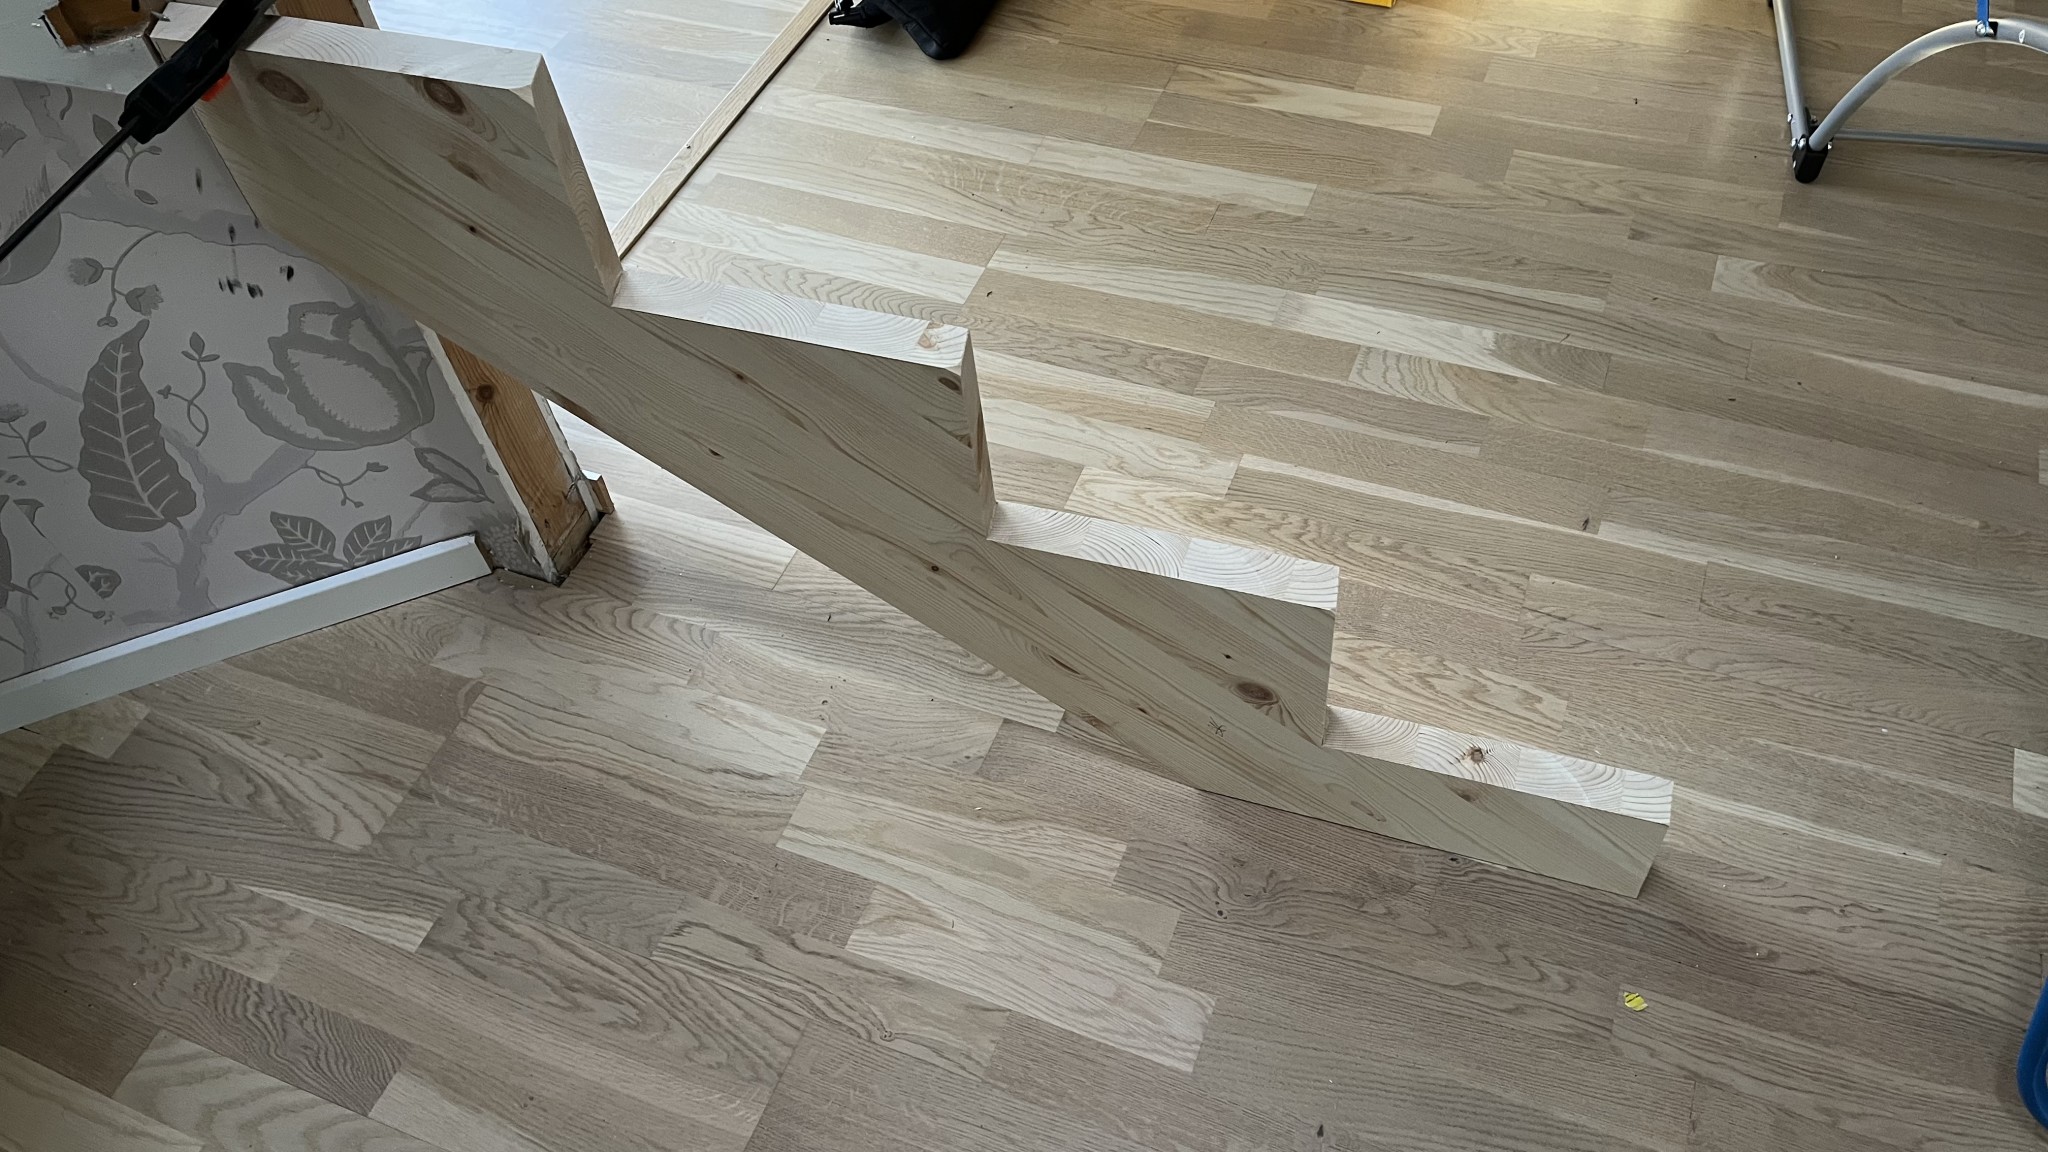
So the next step was to cut out the stringers from the laminated timber beams. The big challenge here was getting the angles right. The corners went relatively well, but I also beveled each cut for the steps, as it's a "curved" staircase, and each step twists. Since I wanted a stair nose visible from the side, I had to ensure the angle was correct. This has taken quite a bit of time and thoughtfulness ☺️
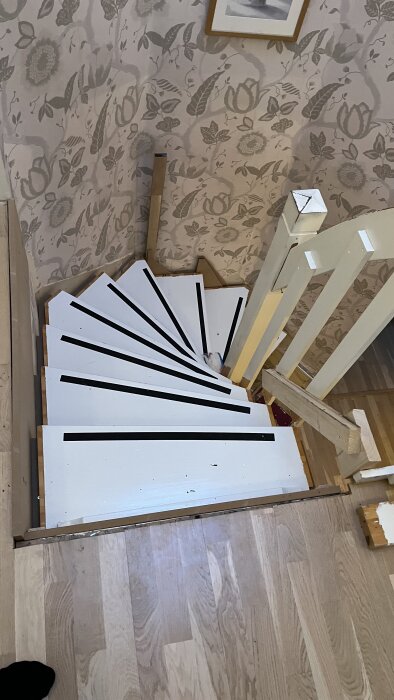
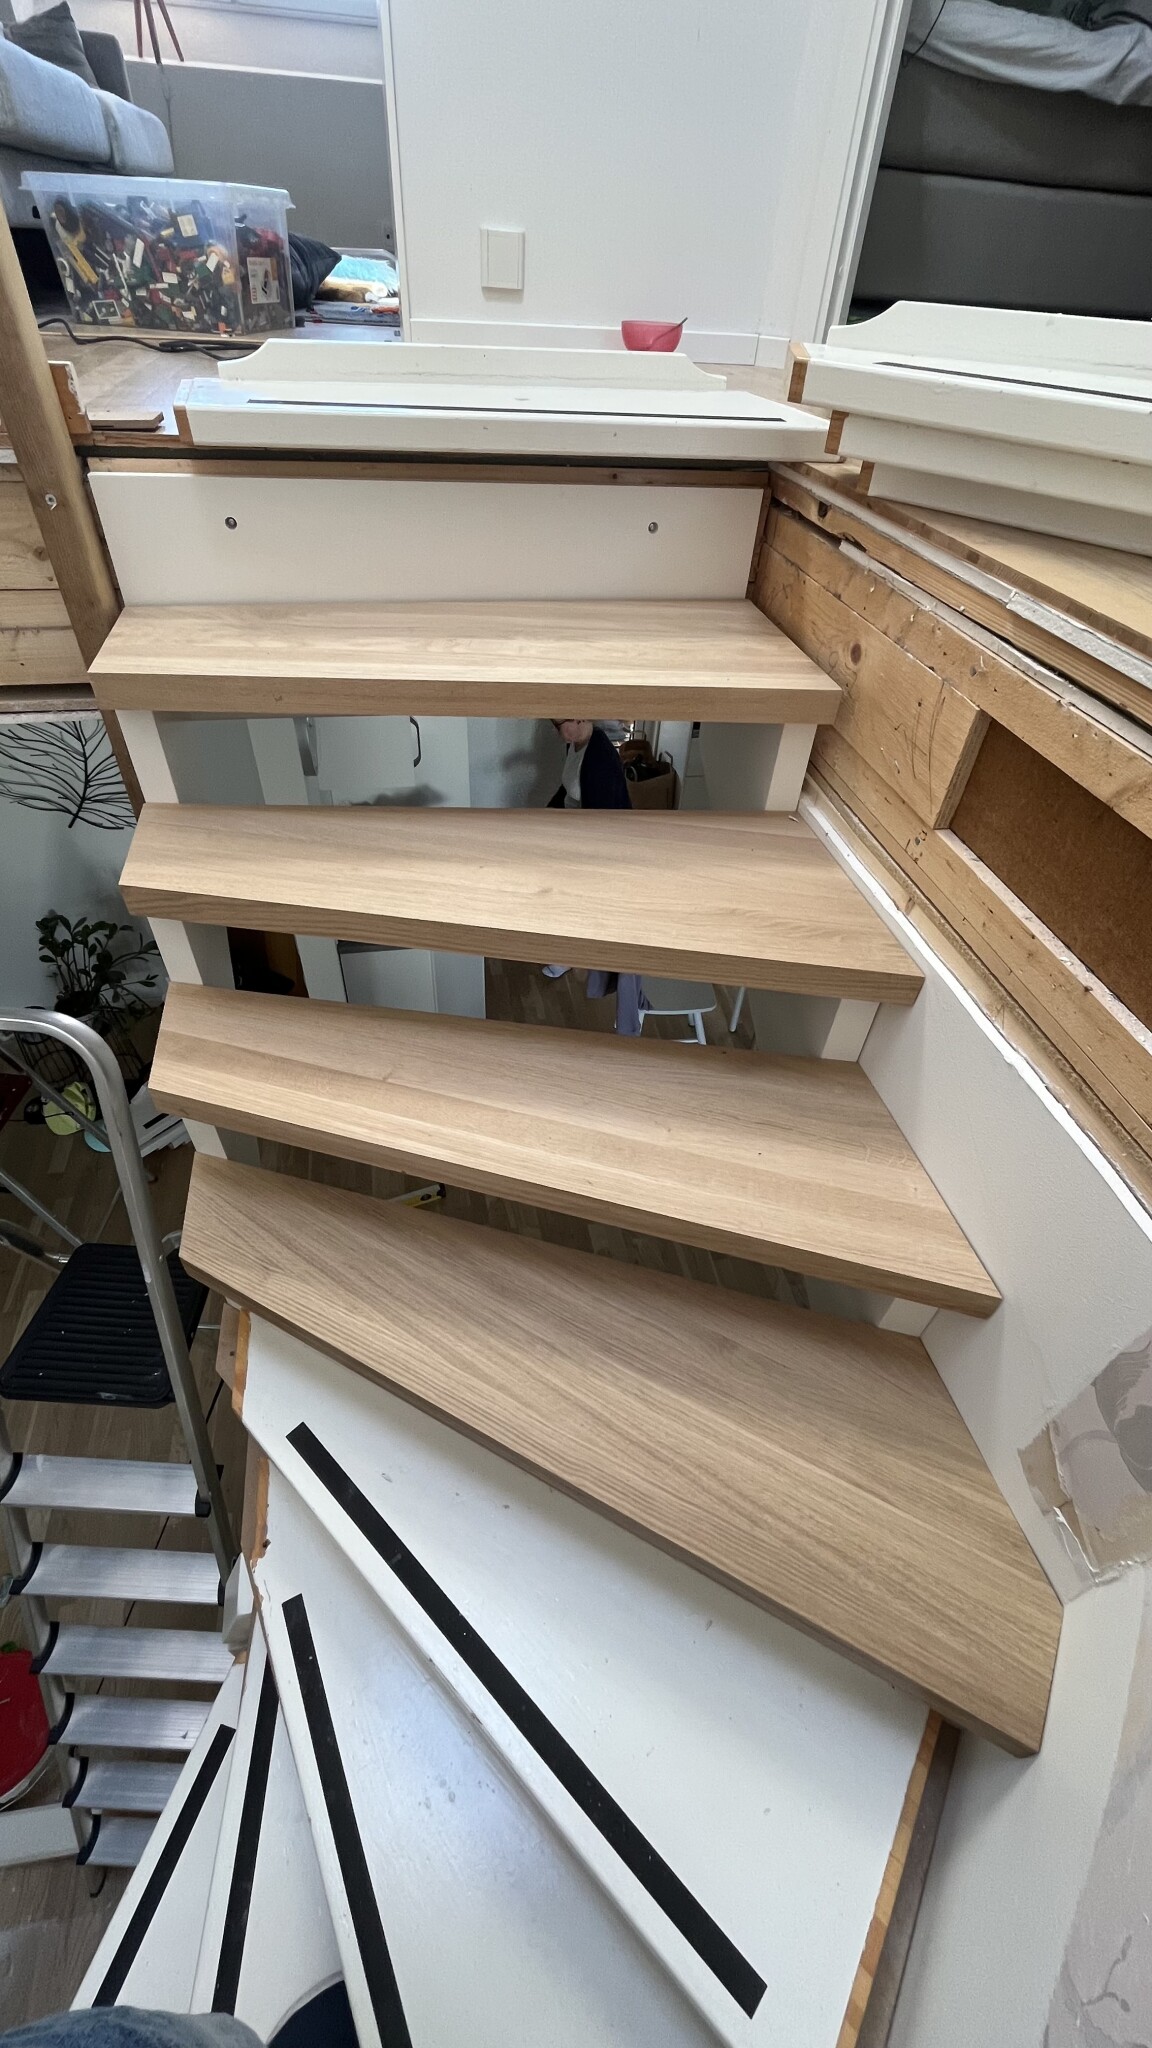
I have now installed the stringers and then templated all the steps and cut them out in MDF. I will send the stringers for lacquering this week, so there will be a break for a while.
Impressive, I have a neighbor who still hasn't finished his homemade staircase after more than 25 years. It has probably been redone three or four times from scratch (at least). Now he's in the process of finishing it (good enough?) while simultaneously building a new house again...
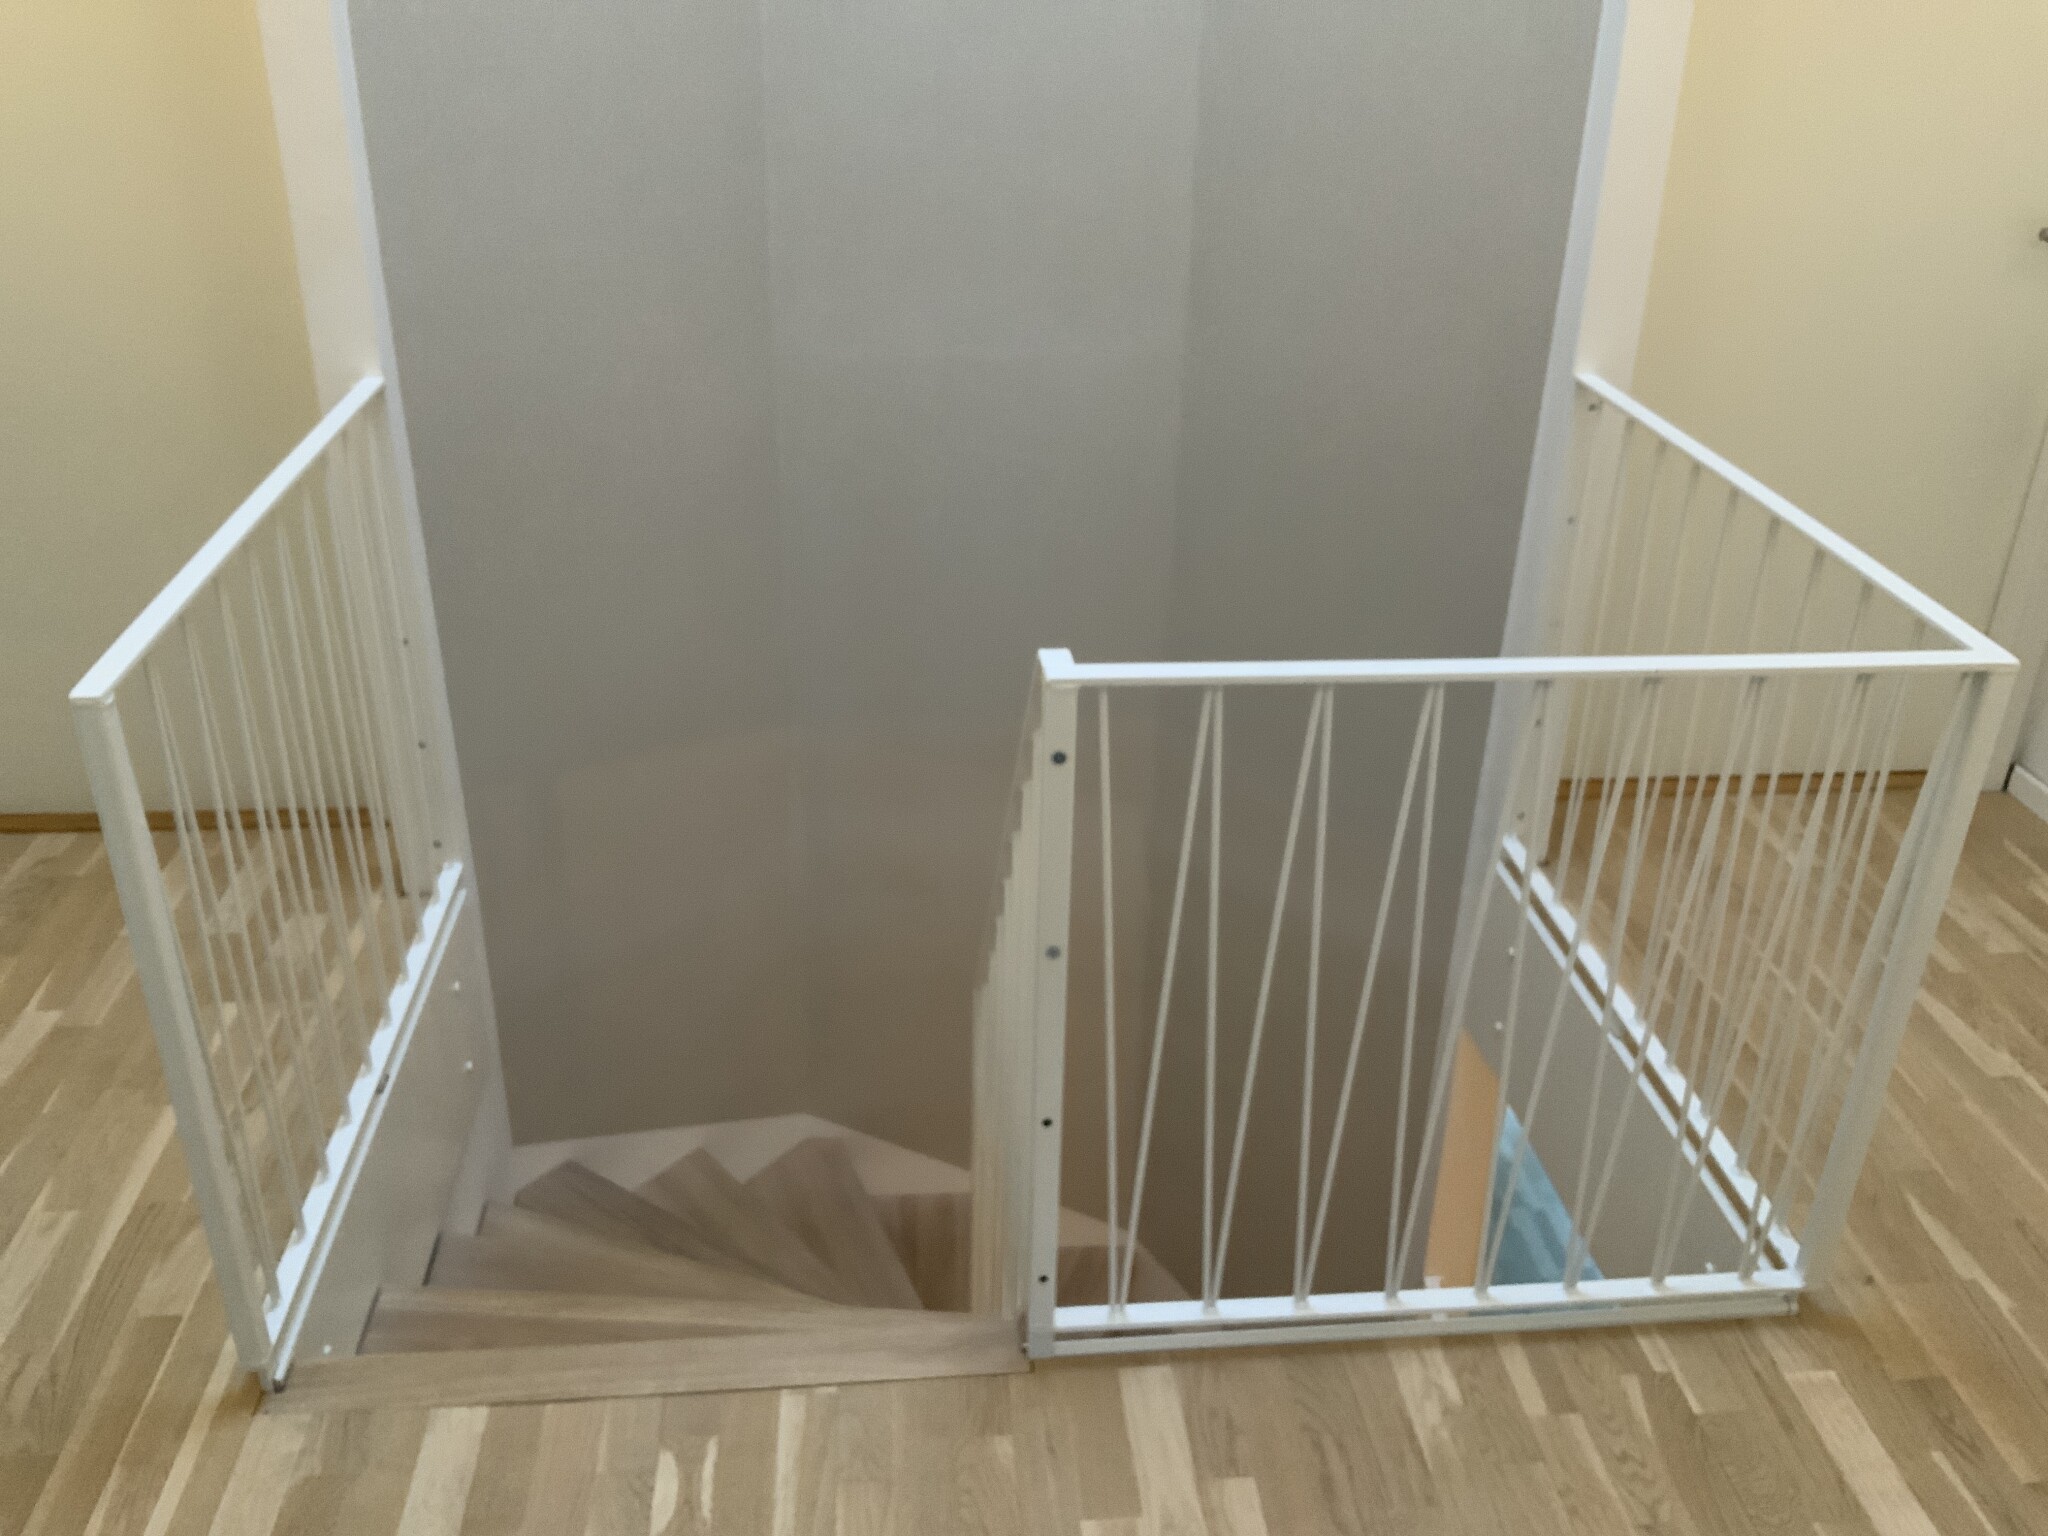
The staircase has been completed for a while, and I'm extremely satisfied with the result, so now comes the end of this construction thread.
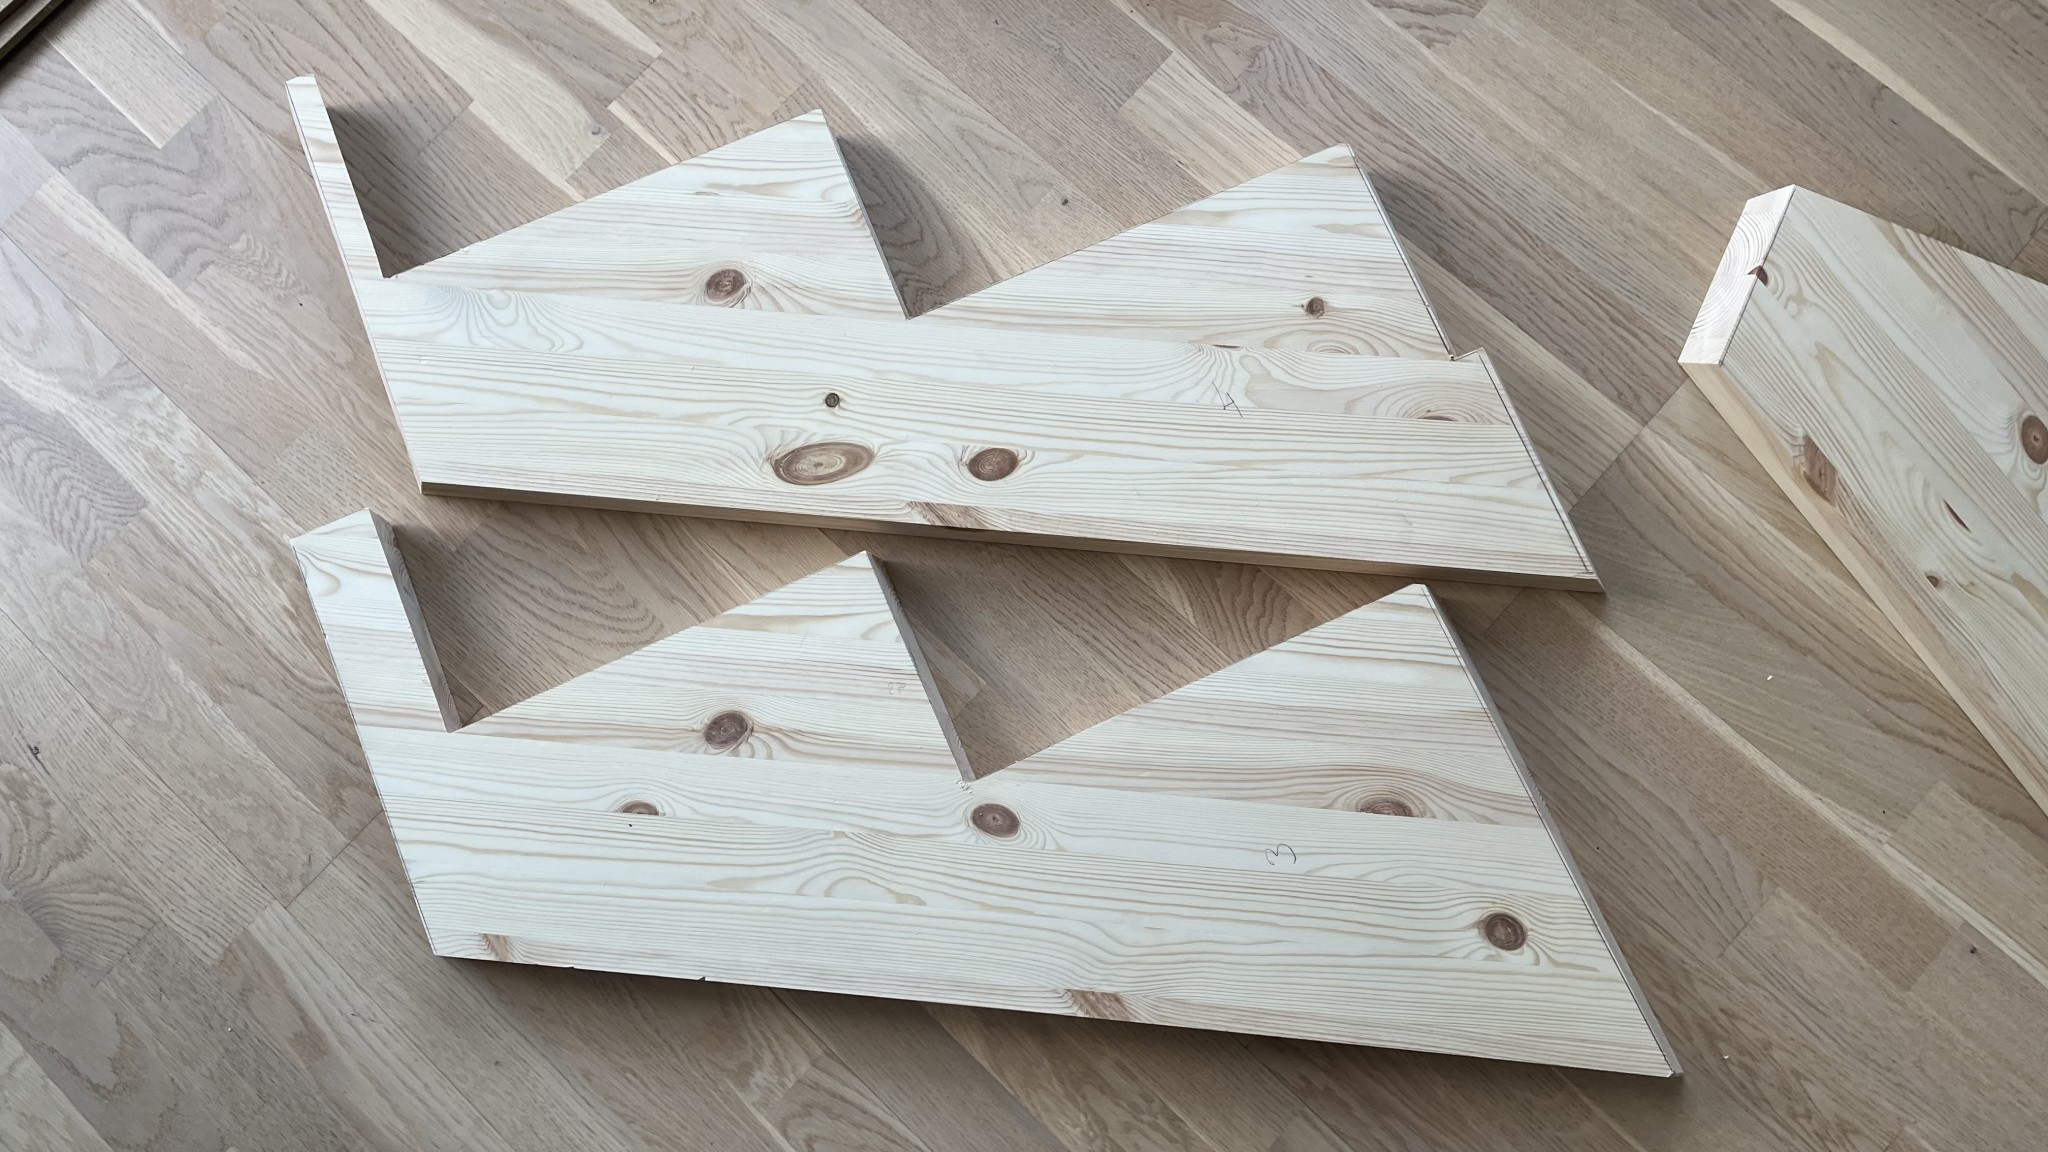
When I had finished all the stringers, I made a simple step template using leftover MDF and traced the steps based on the new stringers and the old steps.
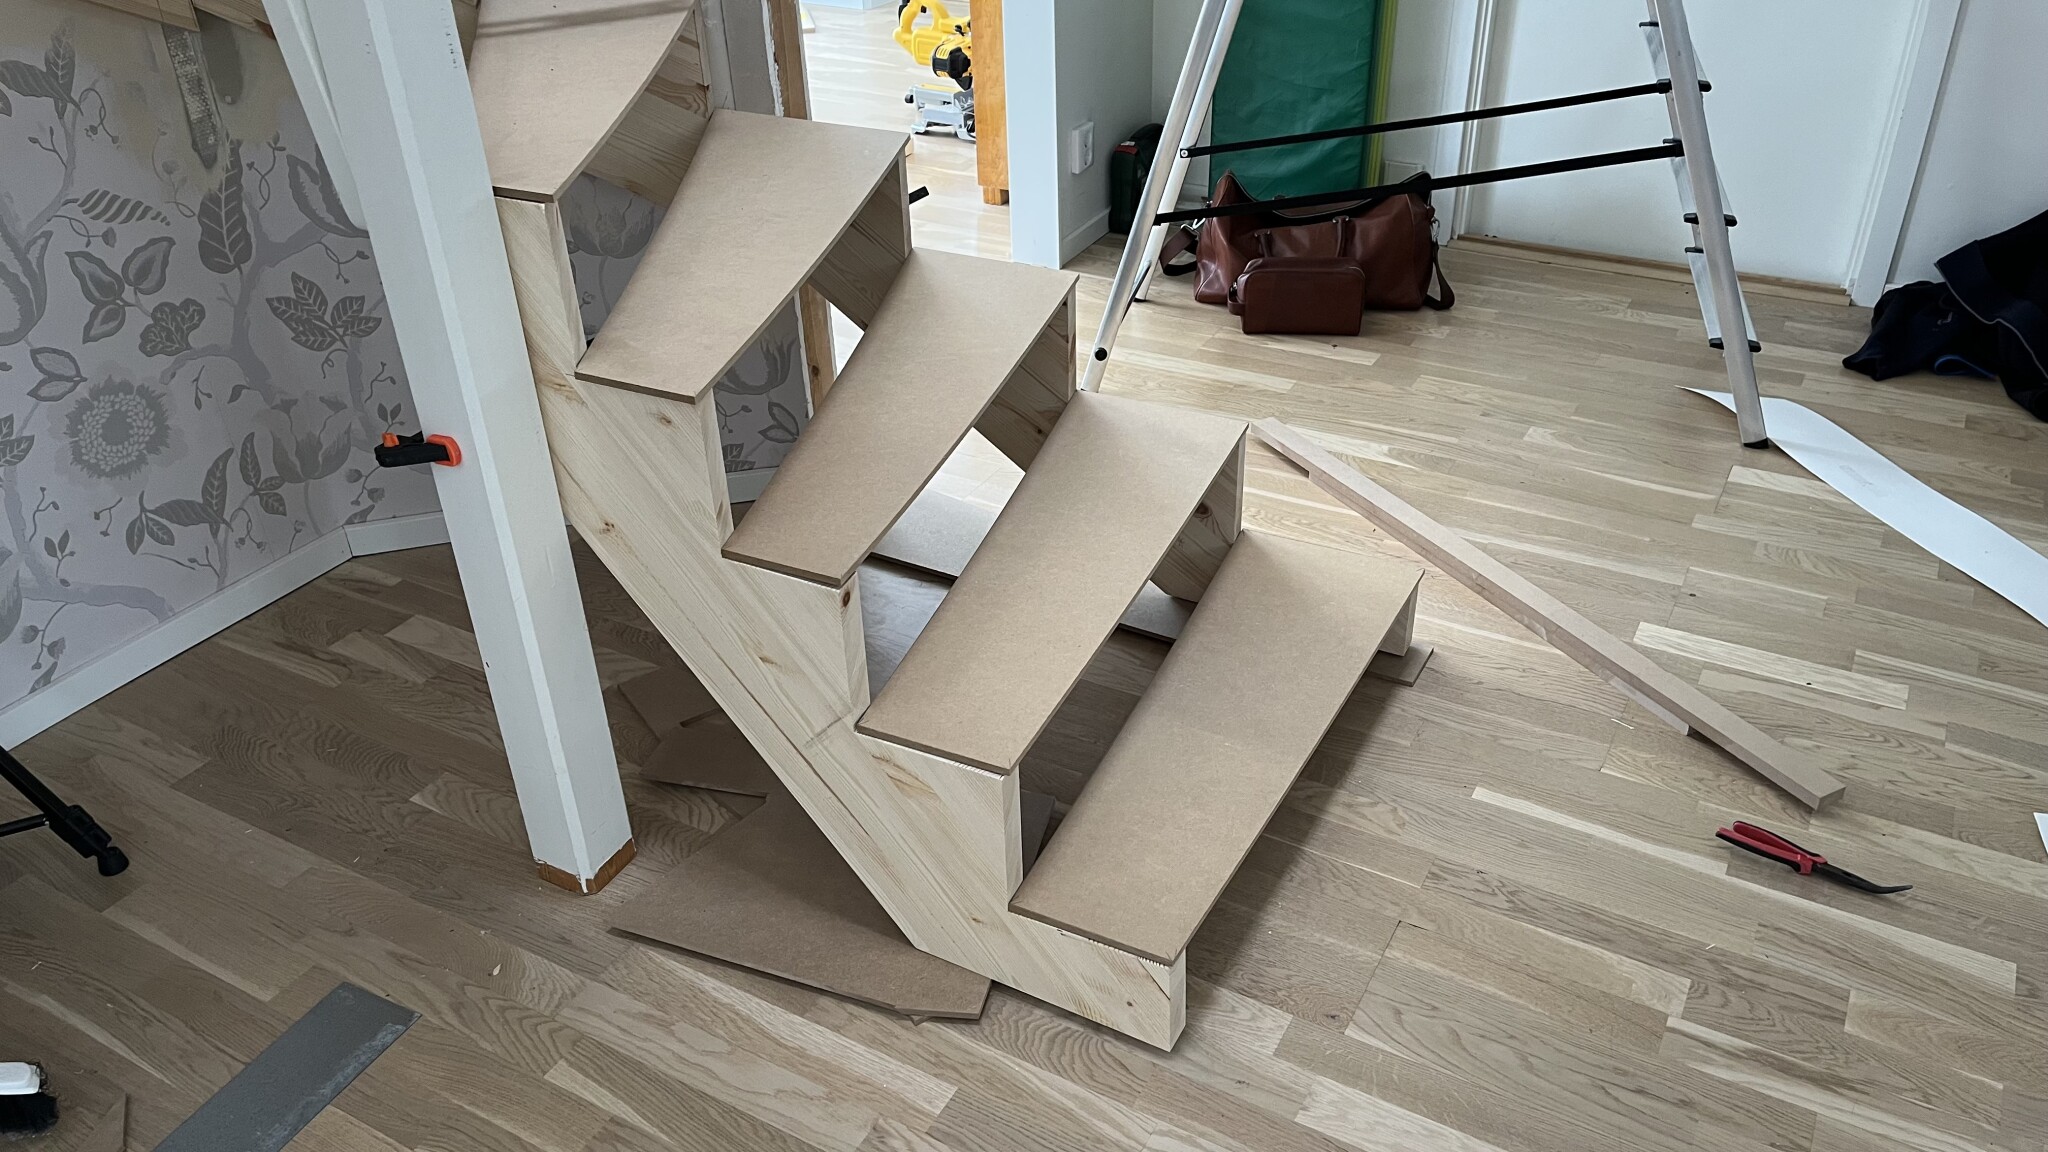
Then I cut out and made adjustments in MDF. I didn't want to risk cutting incorrectly in the solid step measurements I ordered.
Since I wanted a stair nose of the same thickness as the step, I cut pieces that I glued to the front edge.
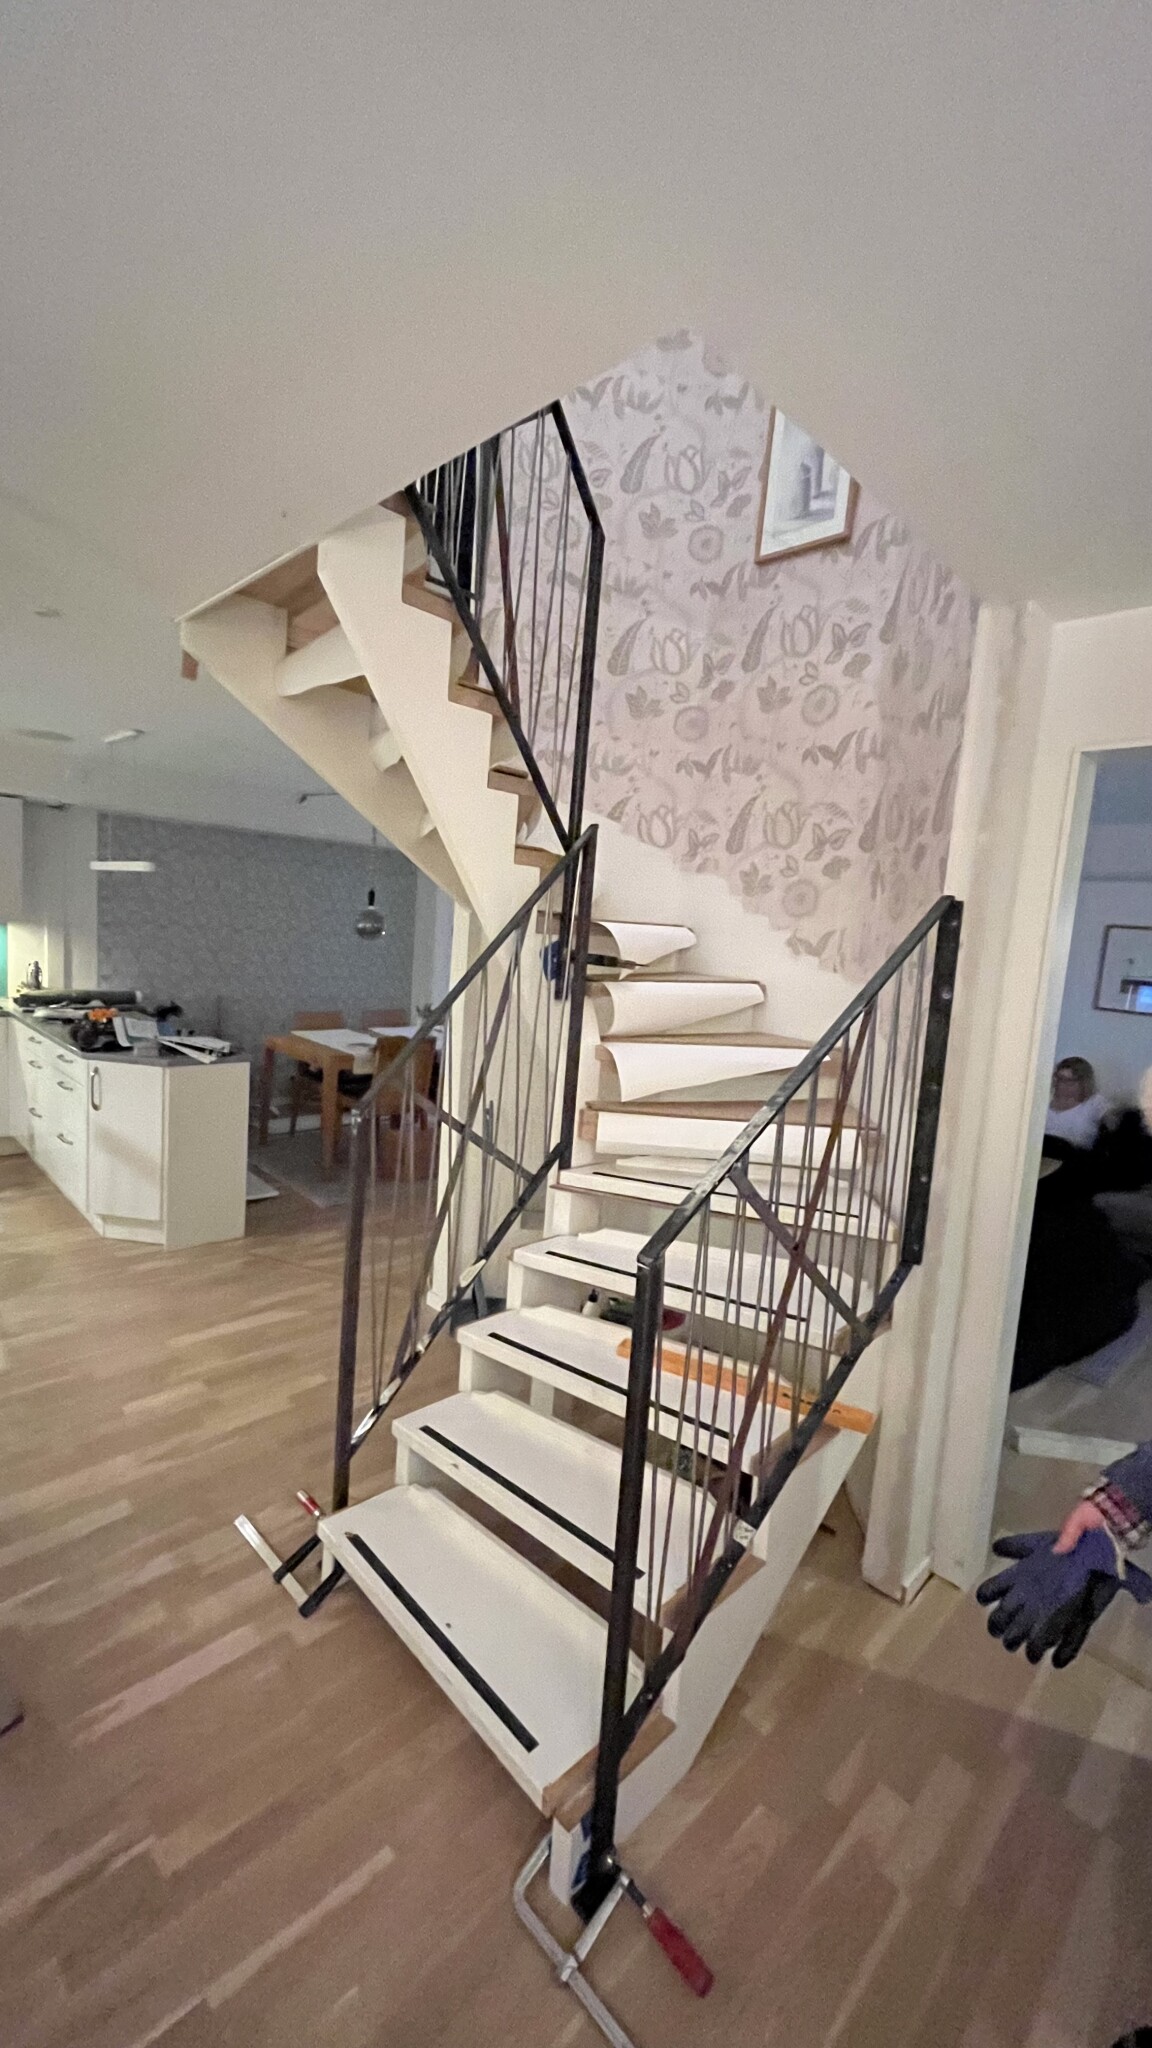
For the railing, we decided on wrought iron. I found a company in Örebro that constructed according to my specifications. This was also challenging with all the angles, but we were very pleased with the result.
While the railing was being lacquered, I completed the treatment and installation of the steps. As a surface protection, I used Osmo white-pigmented hard wax oil. I realized there are many different schools of thought regarding the installation of steps, with some advocating for screwing and/or gluing, but I decided to glue the steps with construction adhesive since I wanted completely hidden installation. I'll see in the coming years if this is something I'll regret. Here is the final result.
I can conclude in hindsight that building a staircase takes a lot of time, but I feel it's worth every minute since the result turned out exactly as I envisioned when I started. Early on, I heard from staircase companies and people with construction knowledge that a staircase is not something you build yourself. So if anyone out there has heard the same but still wants to build their own staircase, I say - it's perfectly possible to build your own staircase, but make sure you have the time and be meticulous.