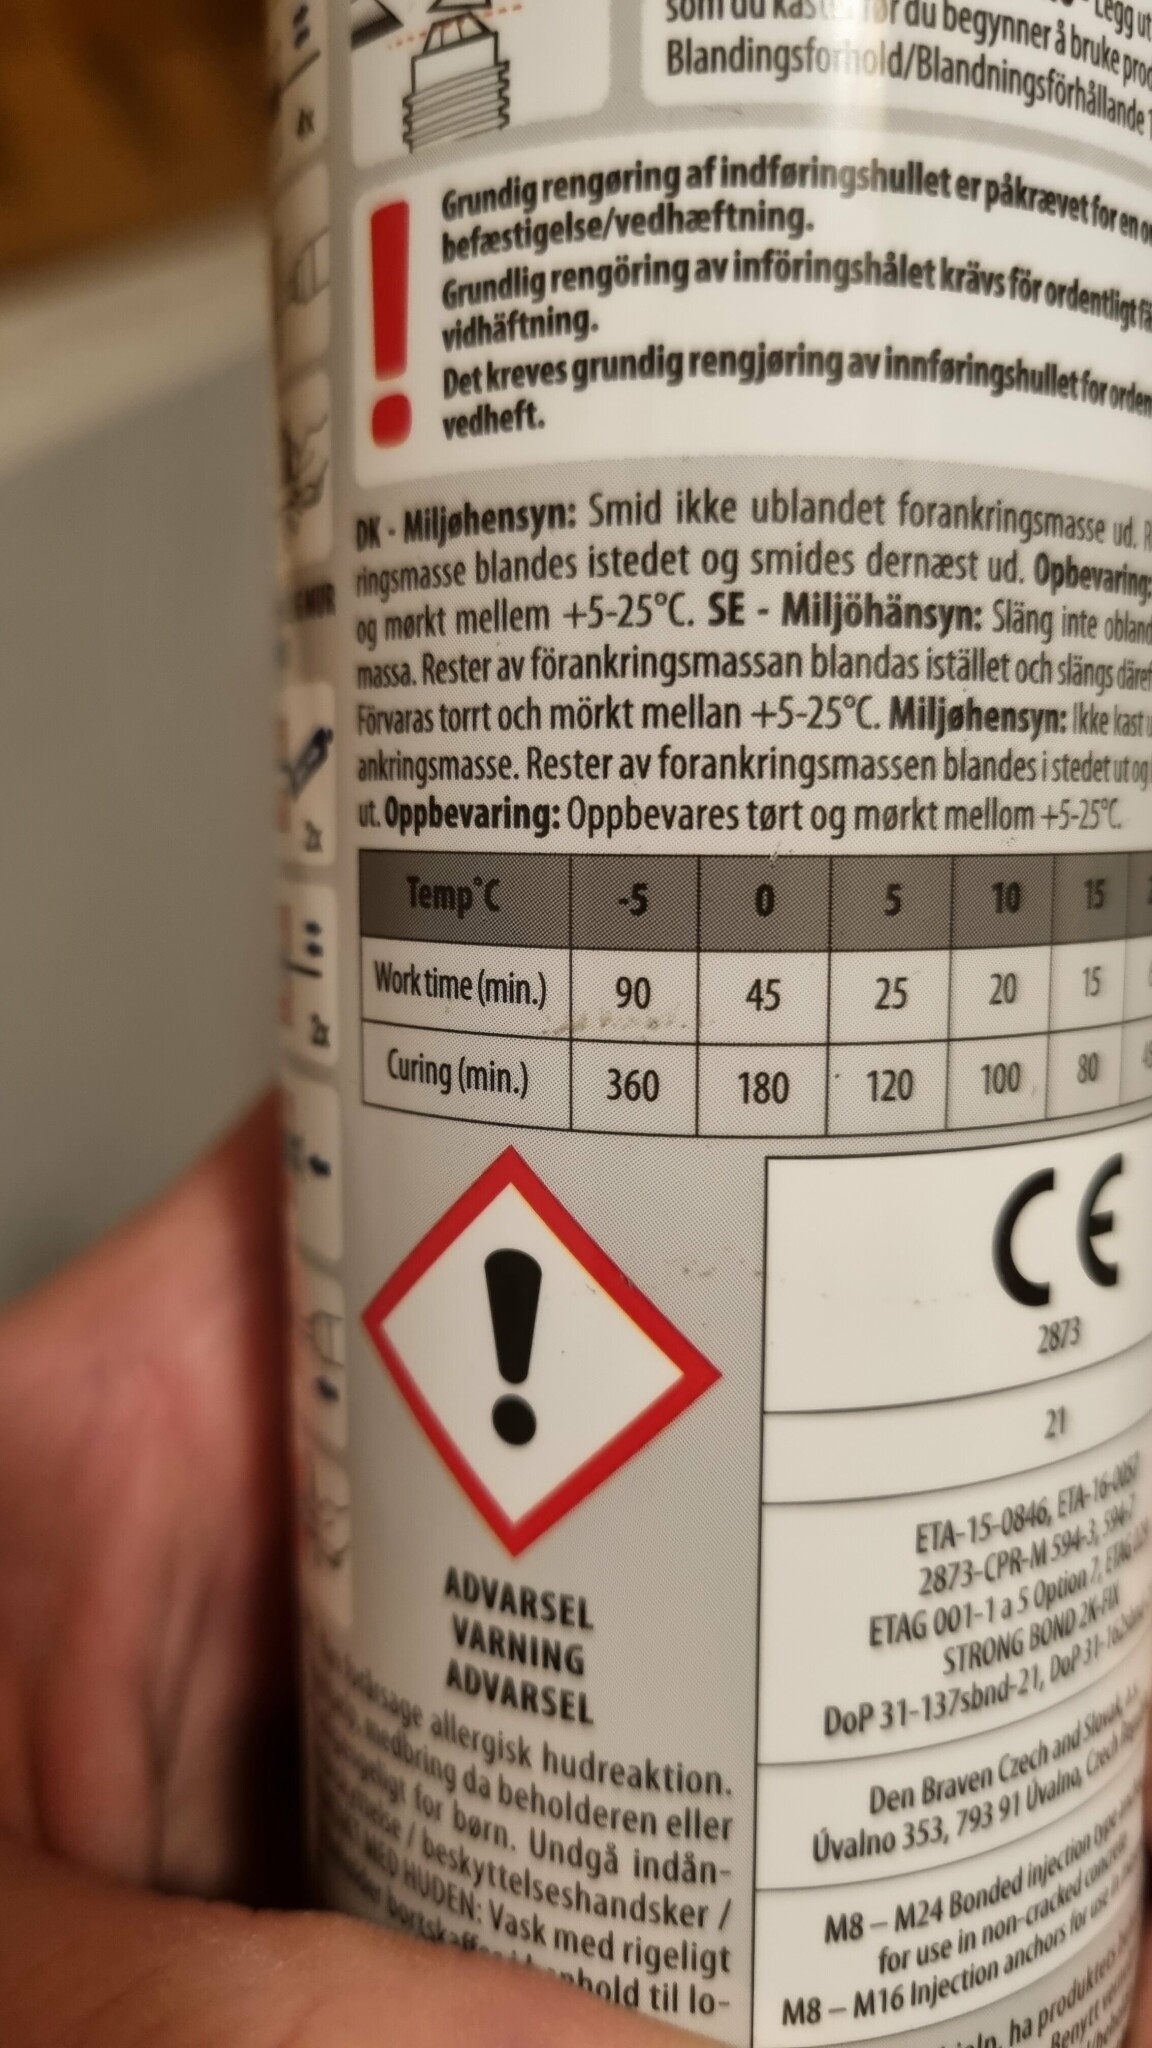
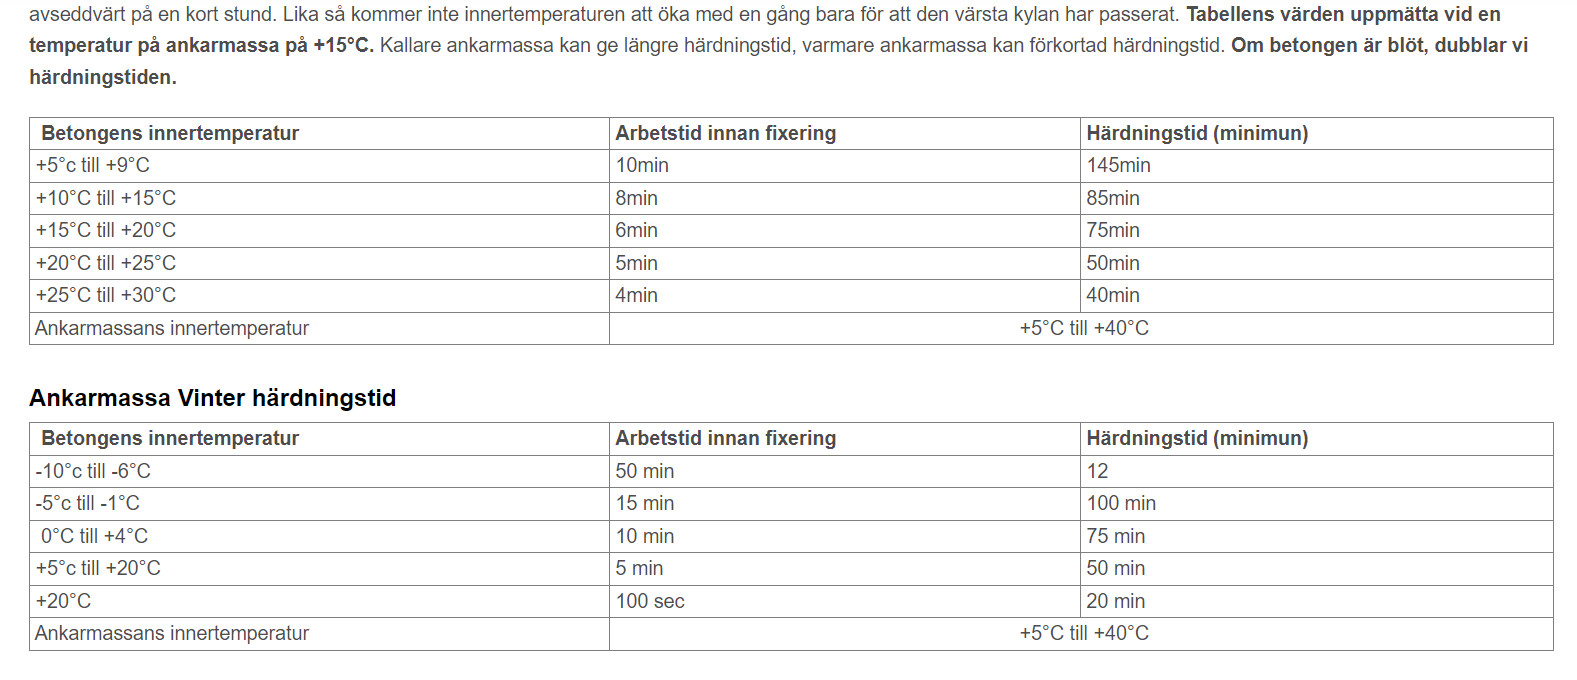
I was working on laying new flooring in the barn this summer, but some things got in the way. Now I'm planning to continue and fasten the post holders on a day when the temperature isn't colder than -3c https://www.jemfix.se/ankarmassa-k2-fix/6120/9056617/
It's clear that it can be used down to -5c. But is it enough that 360 minutes have passed under these conditions? Let's say it becomes -15c for a week thereafter, does that affect it or is it fine?
Might as well ask the guys here on the forum. I'm not experienced at all when it comes to this.
Thanks in advance!
Hey.
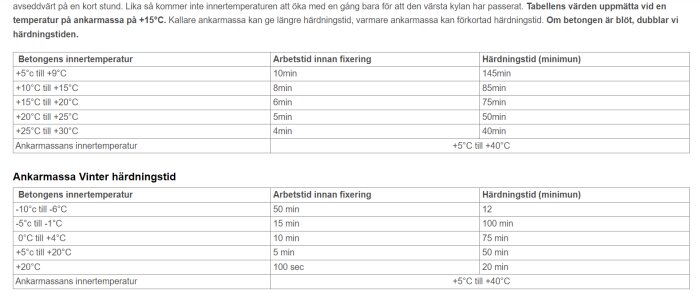
Clarification, the temperature specified for the anchor mass refers to the internal temperature of the material you are anchoring in, such as the concrete if you are anchoring in concrete.
Make sure to store the mass so that its temperature remains at room temperature before injection. A cold mass is extremely difficult to work with and affects curing time. There are special winter masses, they are usually somewhat more expensive; choose a quality brand, there is a difference in mass and mass.
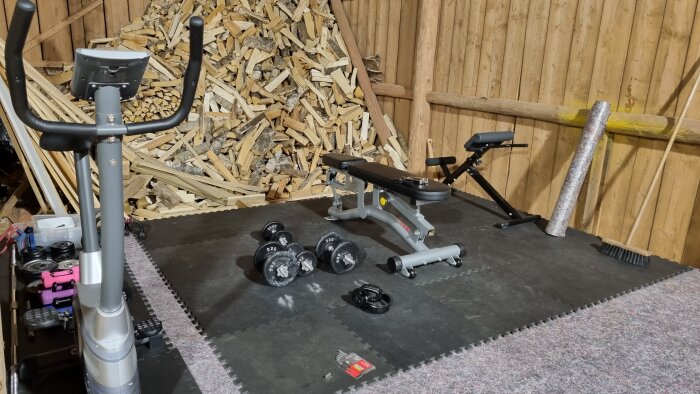
Thank you so much, Roffe! Stored the cement indoors. It's not the winter variant. No super rush to start building really, but I would have liked a dry sauna and to move the gym to the new floor instead. Build a small room inside the barn where I can start a radiator when it's really cold!
Question:
Is it only the curing time that gets longer based on the concrete temperature? Hypothetically, can it be used at -20c, it just takes a really long time?
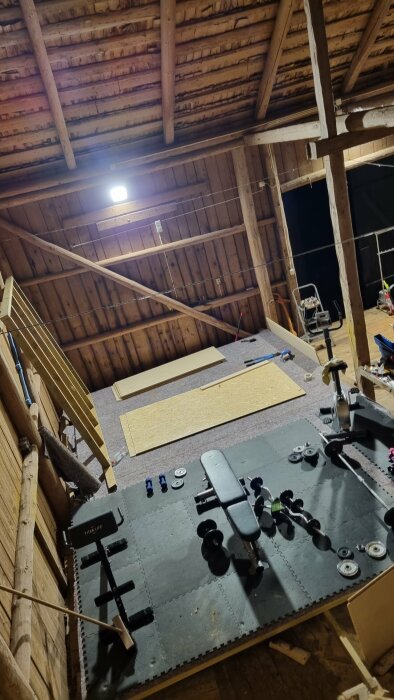
I'll probably wait until the beginning of spring anyway, because it's a bit more fun to tinker then. Built a new floor in the barn this summer so here's how it turned out (It's going to be a "carpentry floor" instead)
Was working out in -7c the other day with gloves, and it was so-so...
I'm not the type to complain, but my hands hurt like crazy! xD
Hello.
I'm not familiar with your specific mass. But generally, it's about two things: working time and curing time.
Working time is how long you have to insert what you need to attach and make adjustments. Curing time is about when you can load.
Temperature and humidity affect both. More moisture and lower temperature give longer working time and longer curing time.
Additionally, if you choose to work in a material that is moist, you will have more difficulty removing dust from the hole. It is important to remove the dust, as it affects adhesion and ultimately strength, so don't skimp on this. Blowing or brushing out the dust works when it's dry. If it's very moist, you may need to flush it out, which means you need to ensure that your mass can handle, essentially, water-filled holes. This is quite common for anchor mass but does not apply to all.
Hi.
I'm not familiar with your specific glue. But generally, it's about two things: working time and curing time.
Working time is how long you have to insert what you intend to fix and make adjustments. Curing time refers to when you can apply a load.
Temperature and humidity affect both. More humidity and lower temperature result in a longer working time and curing time.
Additionally, if you choose to work with damp material, you'll have a harder time getting the dust out of the hole. It is important to remove the dust since it affects adhesion and, in the long run, strength, so don't skimp on this. Blowing or brushing out the dust works when it's dry. If it's very humid, you might need to rinse it out, which means you need to ensure that your glue can handle, in principle, water-filled holes. This is quite common for anchor adhesives but doesn't apply to all.
Okay, I bought it at jemofix. But I'll wait until spring anyway! Thank you for the detailed info otherwise.
I've read about avoiding dust, but it's good that you emphasize it again. I'll be extra careful with this step!
I wanted to ask for further advice regarding the floor I'm going to build.
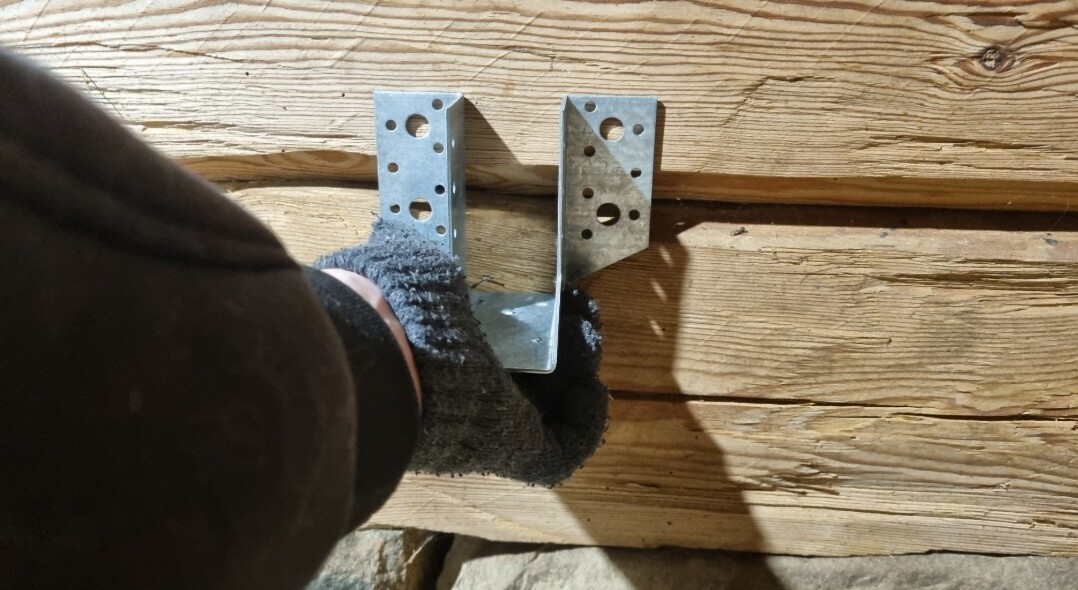
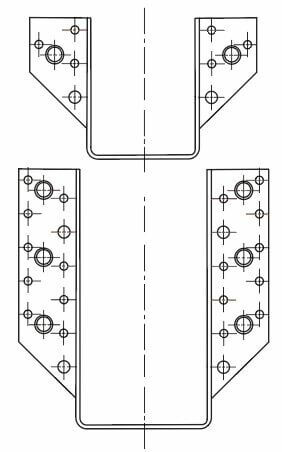
I plan to attach the beam hangers to these 45x220 joists. They will be mounted with proper French wood screws, currently there's only one in place temporarily. In the middle, I've supported them with spacers and load distribution plates that can handle 3000kg.
The other side is timber, so I thought about attaching the beam hangers directly to them (if possible).
The issue is that there are gaps between each timber log.
Suppose the beam hanger is positioned like this or even worse. Is there something I can fill the gap with? Or should I also attach a 45x220 joist on this side?
Probably set a rule along the entire wall, otherwise maybe place a rectangular sheet of plywood behind the beam shoe. As many screws as possible, you drive some through both beam shoe-plywood-timber but if it's like in your example image also some through plywood-the lower timber log.
Let's say the joist hanger ends up like this or even worse. Is there something I can fill the gap with? Or do I need to put up a 45x220 beam on this side as well?
You have chosen a small joist hanger. The larger models have both bigger and more holes. If you get more holes, you can use wood screws or construction screws at more points and still achieve sufficient strength even if some of the holes are in the gap.
Click here to reply
Vi vill skicka notiser för ämnen du bevakar och händelser som berör dig.


Roffe K said:
Hi.