Hello.
I'm sitting and planning a bit for the insulation and interior design of the upper floor of an Älvsbyhus.
By chance, I have a number of (more than enough for the entire ceiling) 3-4mm 1200x2400 Plexiglas sheets lying around with no direct use...
Apart from the unnecessary cost of using these (which are already paid for and written off a long time ago), are there any downsides to using these as air gap panels? Too tight, too heavy, too much risk of cracks, etc.?
The alternative would be oilboard, or there are thoughts of using 12-15mm plywood instead to increase the rigidity of the otherwise perhaps somewhat unstable roof structure, especially the risk of stepping through the roof and damaging the roof membrane and then possibly the ceiling during any future roof work... Maybe I'm overanalyzing too much...
I'll gladly take other tips and ideas as well, such as how to minimize waste regardless of the choice of air gap panels, since the spacing between each rafter is between 130 & 140cm...
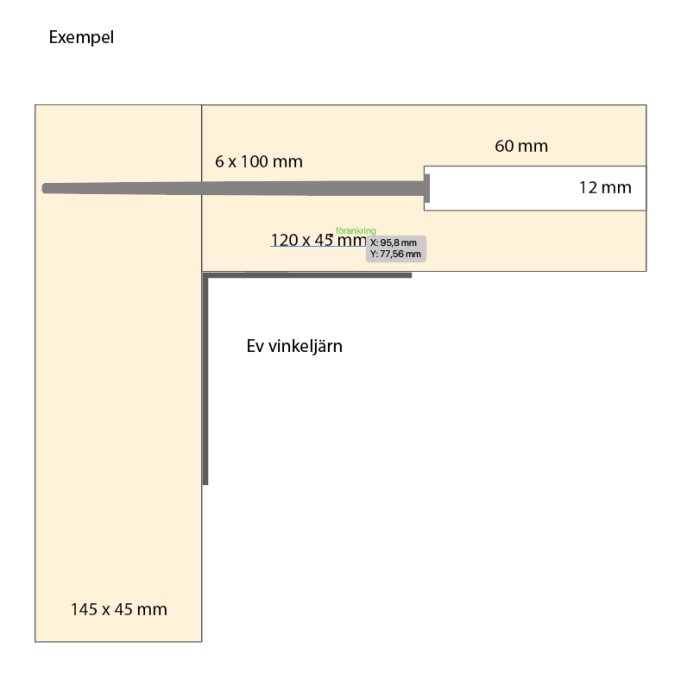
Also considering the drawbacks of using, for example, 45x120 beams against roof trusses for the air gap, instead of the recommended 45x45, to avoid splicing and hassle with boards, since you can then screw up 1220x2440 boards in all "compartments" without hassle.
I checked the measurements between the roof trusses now, and they measure from 134cm to 141cm, with most of them being 138-139cm.
It becomes both cheaper and much less work to buy wider beams than to saw, and have 30-40% waste on every board that goes there.
There's more beam (120mm instead of 45) resting against the reinforced roof plastic, but if a 45 beam can handle it, a 120 beam should be able to as well, I think. The air gap is admittedly 15 cm narrower in total, but does that matter?
No problems in my opinion! Go ahead, but I would try to clamp discs instead of screwing due to the risk of cracking as you mentioned. Best regards, fremax
I think it sounds very tight! Here you would want a diffusion-open material, right? There's a big risk that any moisture gets trapped between the acrylic and the vapor barrier on the inside.
I researched the topic further, and as you mentioned, you definitely want less vapor barrier on the outside than on the inside, so completely airtight plexiglass is out.
Plywood or other diffusion-open materials should be fine. (also makes the roof construction much more stable in itself)
Lying 45x120 battens for the air gap shouldn't be a problem either, except for the cost, and that you don't want to attach them through the roof plastic. It will be long screws to screw into the roof beams.
According to älvsbyhus, you should then use the recommended diagonal steel tension bands for the trusses, even if you significantly stiffen the construction with screwed 12-15mm plywood as air gap boards, but I guess they aren't "able" to say otherwise?
The board effect will be significantly stronger than 2x20mm steel bands crosswise.
Yes, oil-hardened masonite is probably among the most common to use. And 45 x 120 mm sounds very overkill and difficult to handle. Regular battens I think are the most common to use there, and much easier to work with, you can easily hold one with one hand
Yes, oil-hardened masonite is probably among the most common to use. And 45 x 120 mm sounds very overkill and difficult to handle. Common battens I think are most commonly used there, and it will be much easier to work with, one like that you can easily hold with one hand
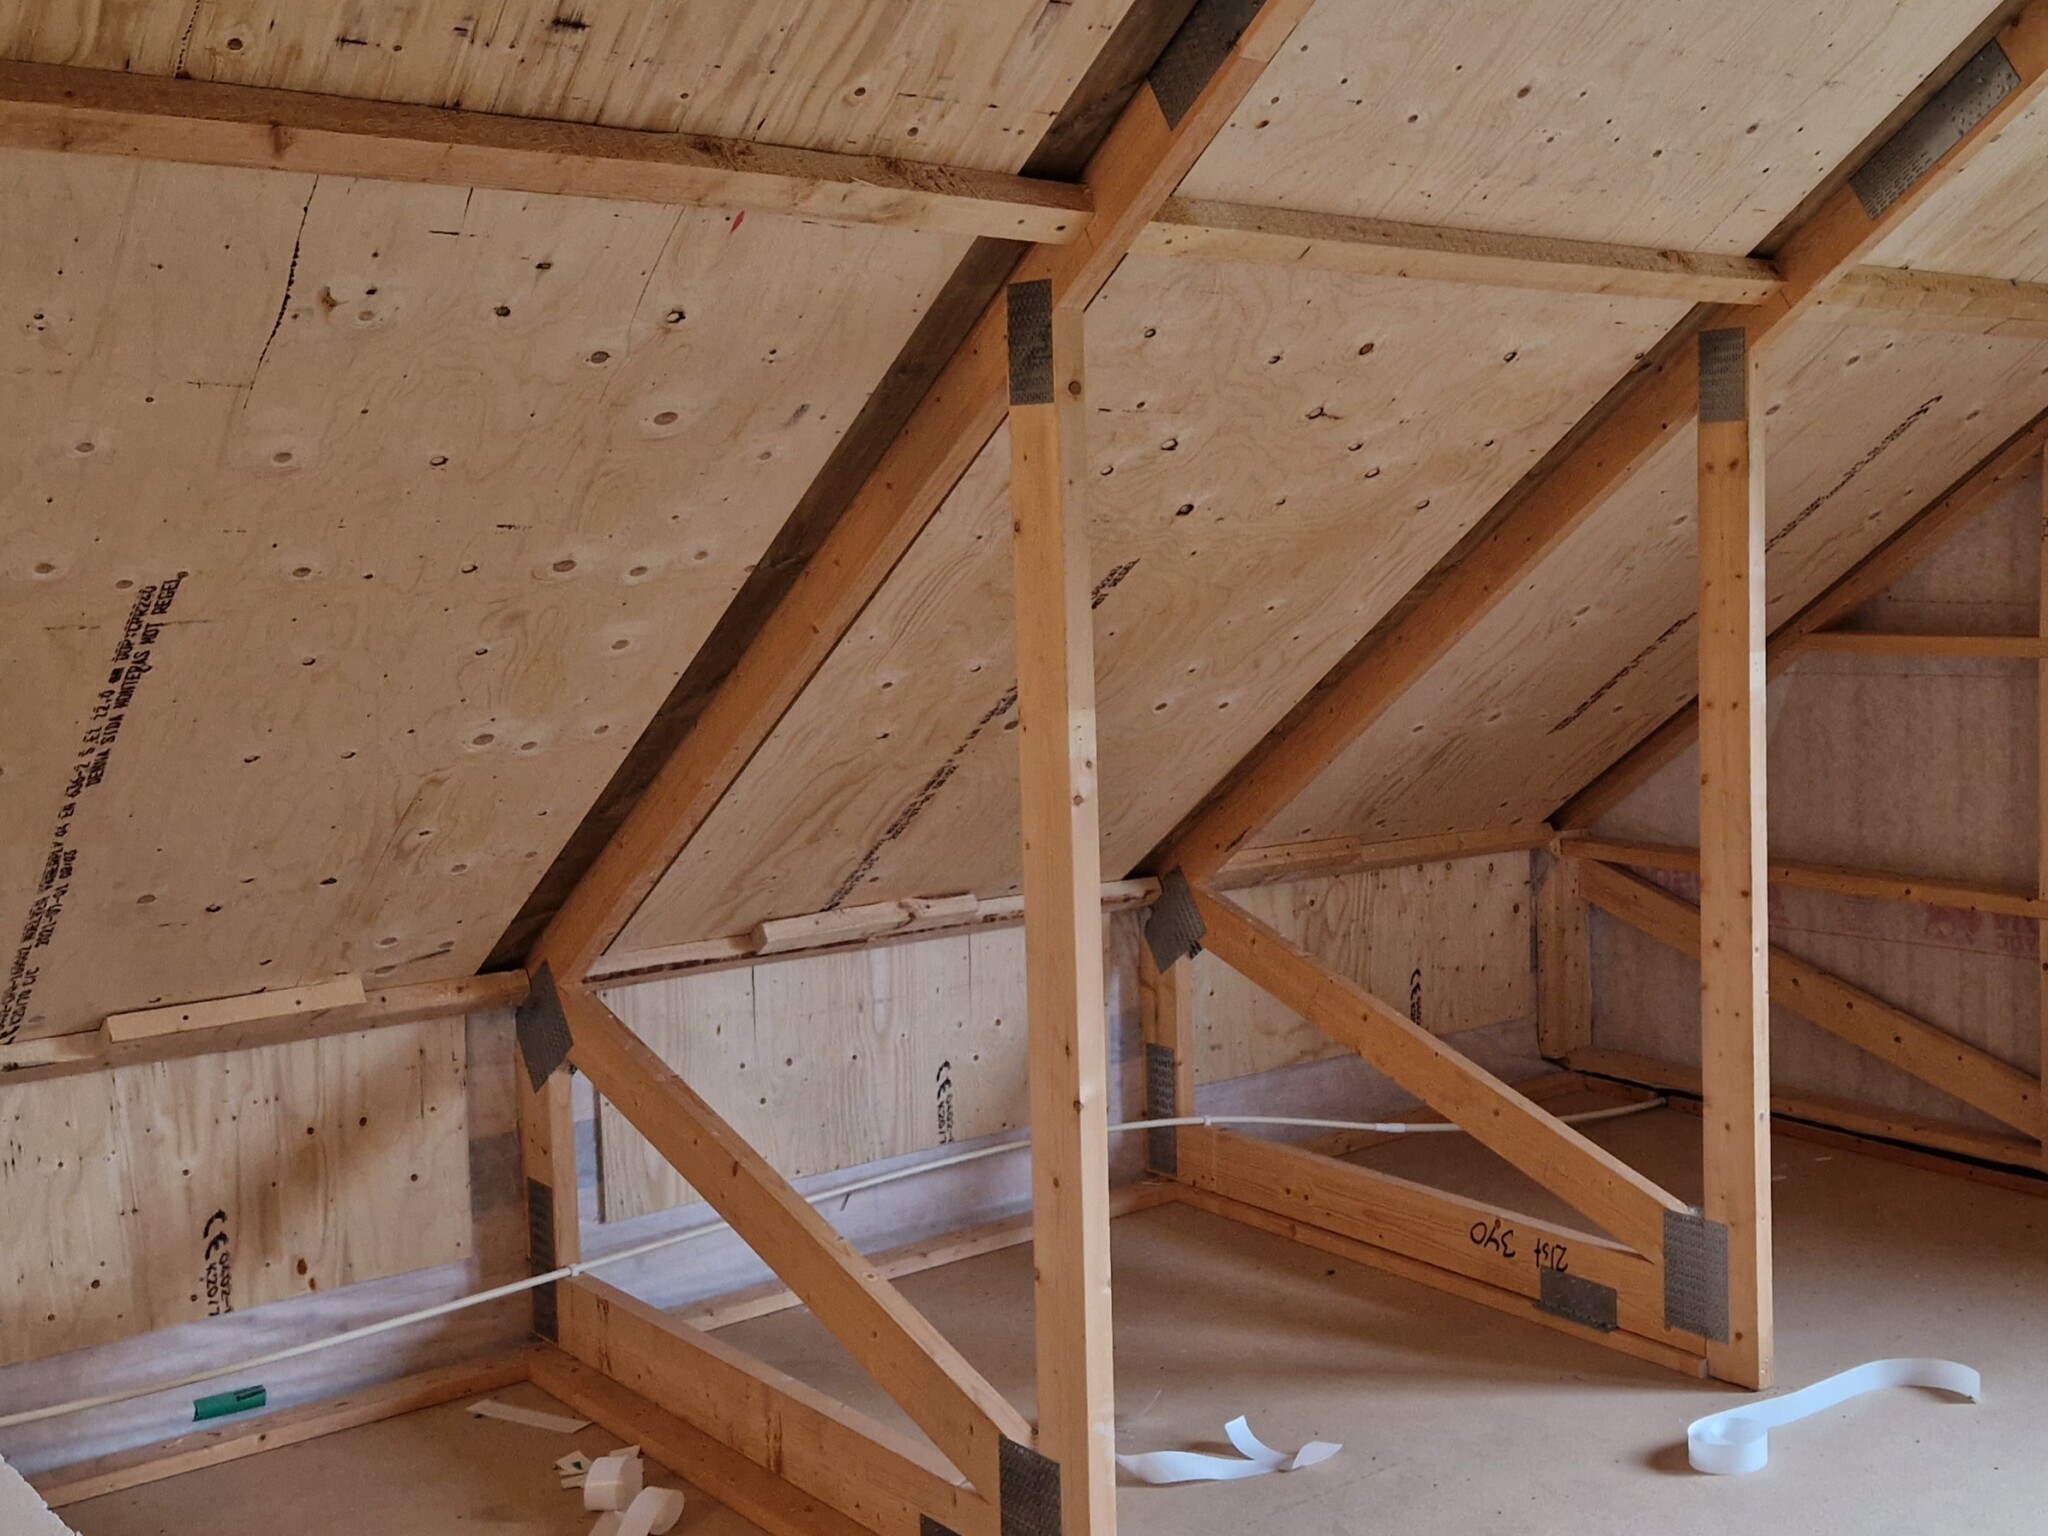
The reason for the 120 studs was to avoid cutting and having lots of waste from all the boards, since the dimensions between the rafters are between 135-140cm, and the boards around 1220x2440... Not wide enough, and in length you get 45% left of the board which is too narrow to use at all. However, got a tip that masonite is available in the dimensions 1220x2740, which would be enough to cut in half and get two suitable pieces to mount horizontally, but can't find much on where you can buy in these dimensions... The reason for choosing plywood instead of masonite/board was to then get a more stable roof construction as a bonus, the rafters are really only held in place by the battens, and some temporarily mounted diagonal supports, which are then to be replaced with diagonal steel bands when the floor is furnished.
Sorry, I hadn't read your previous posts carefully. But now I understand your thinking regarding materials and dimensions! Yes, those are undoubtedly a bit tricky measurements to deal with Then maybe 120 mm is justified after all. You can probably drill out half the width of the joist by about 15 mm, so you don't need such long screws. Maybe a bracket too, but it will probably hold well anyway.
Sorry, I hadn't read your previous posts so carefully. But now I understand how you're thinking about materials and dimensions! Yes, it's undeniably a bit tricky to deal with those measurements Then maybe 120 mm is justified after all. You can probably drill out half the width of the beam about 15 mm, so you don't need such long screws. Maybe an angle iron too, but it should hold well regardless.
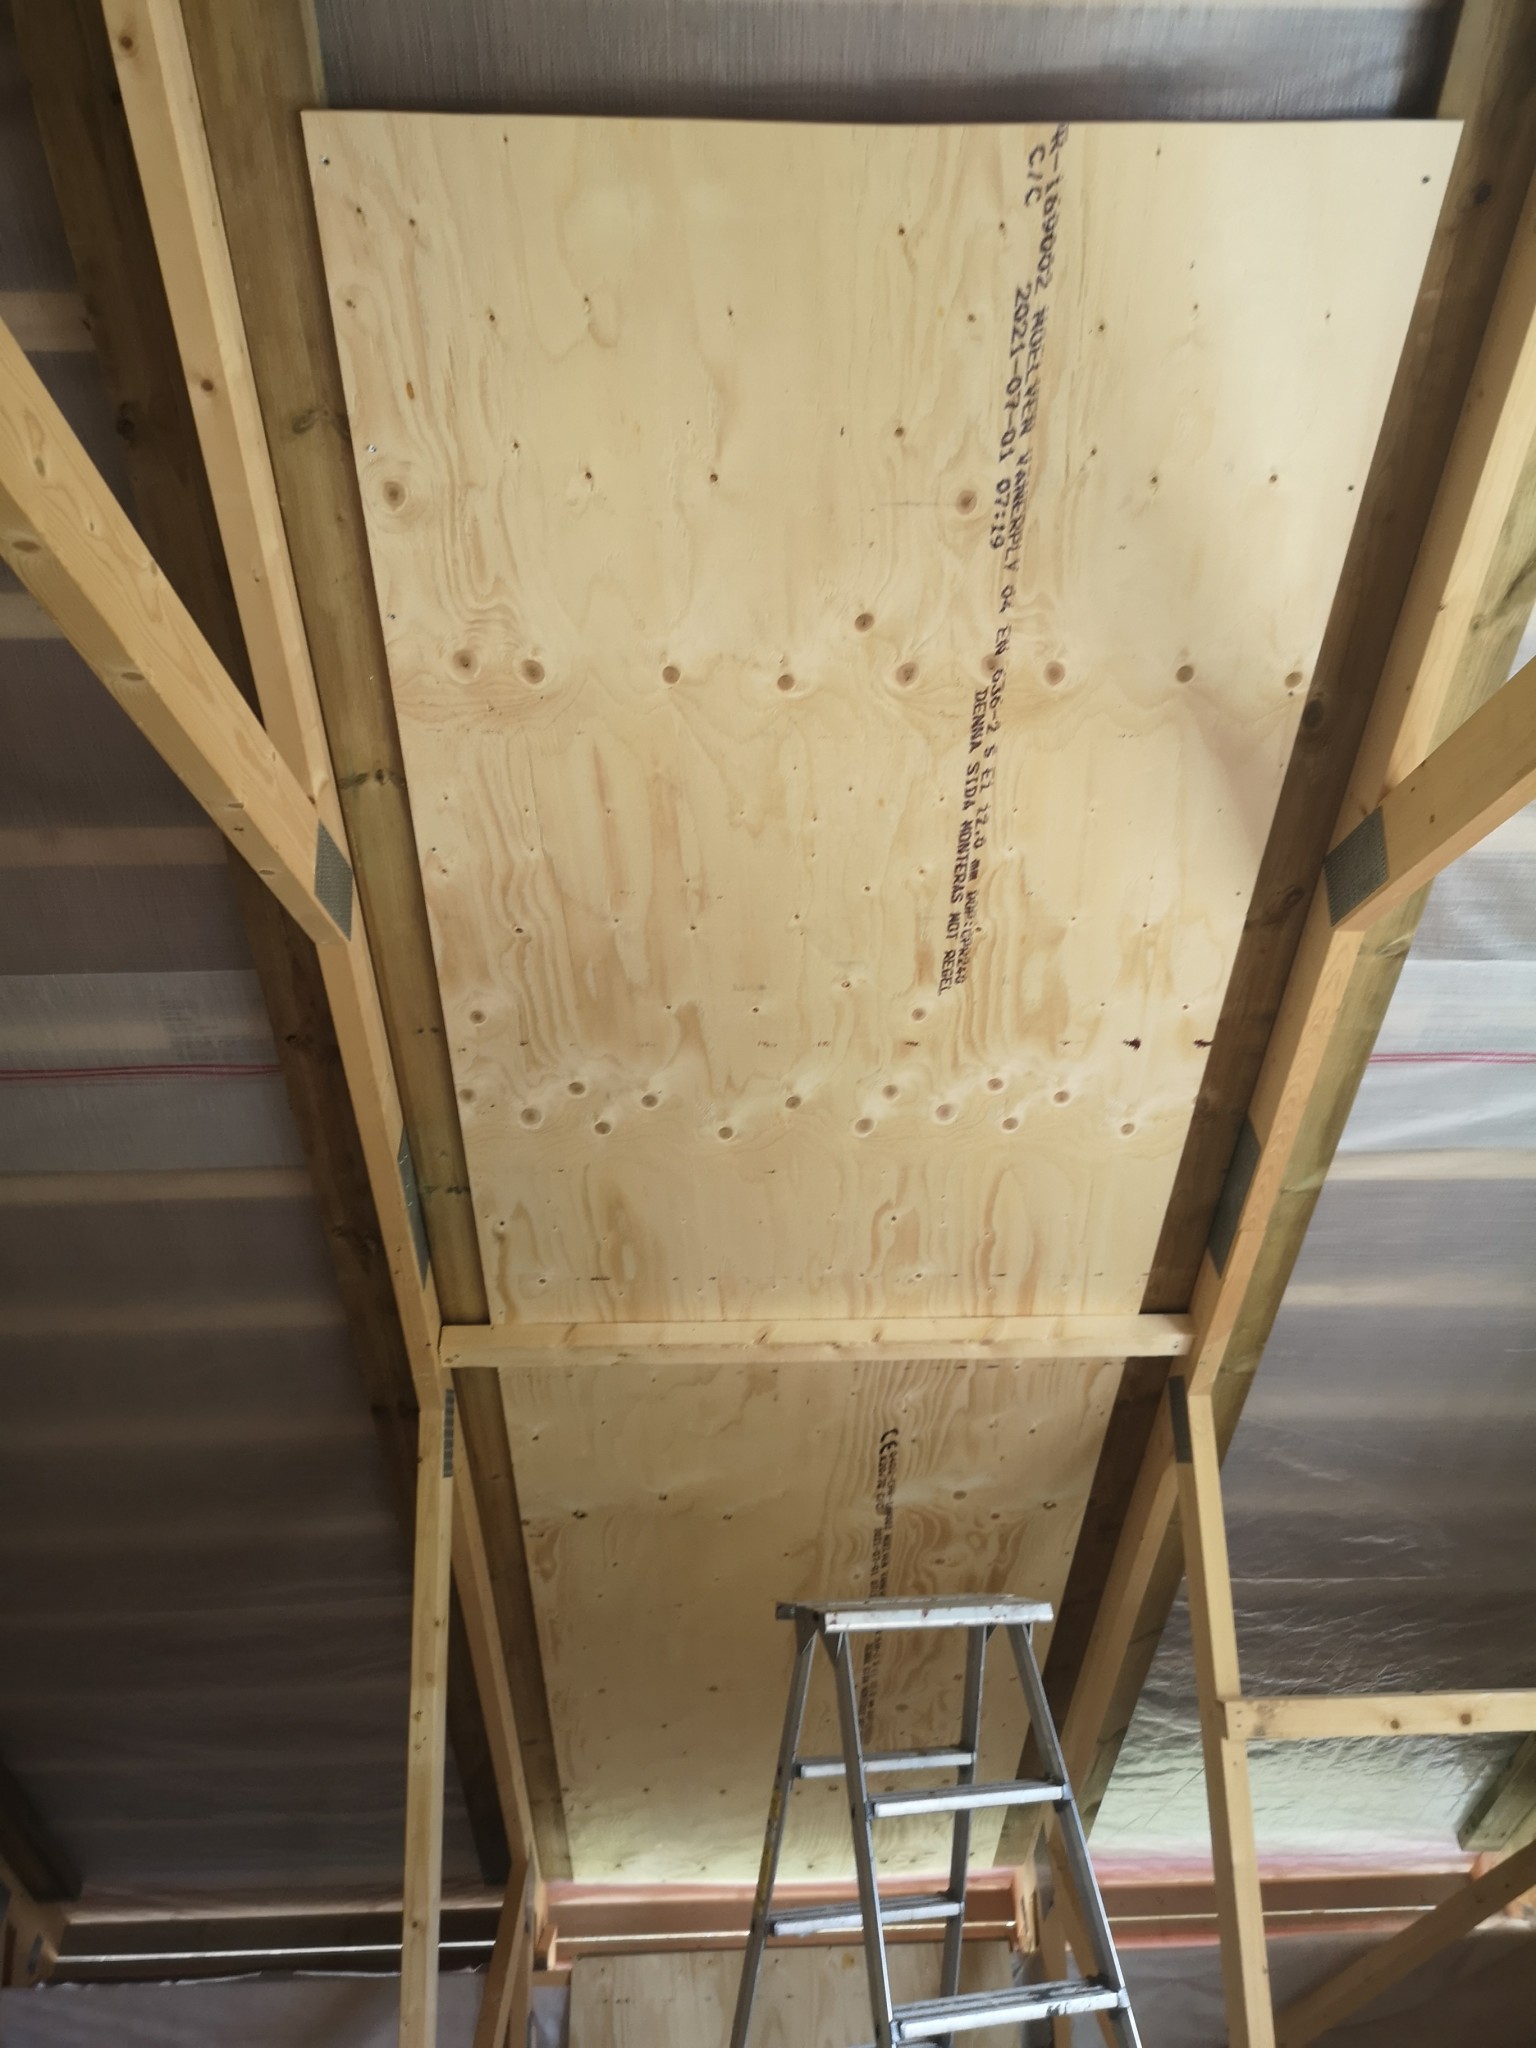
It became 120x45 timbers (had a pile of impregnated ones, so that's how it turned out) pre-drilled 20mm and screwed with 6x140mm screws.
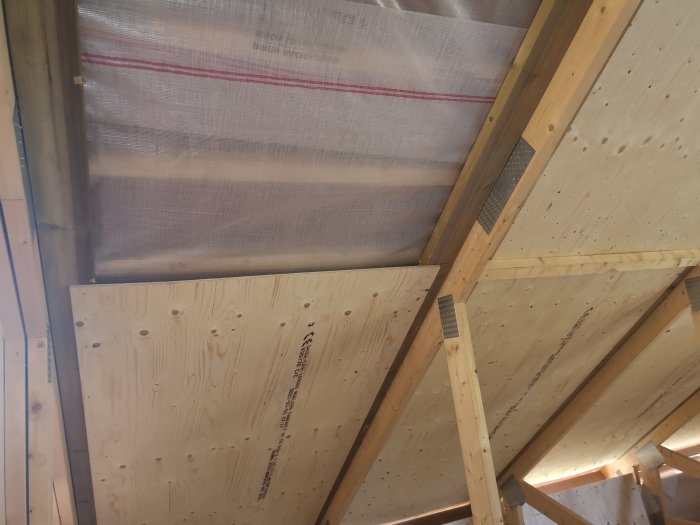
12mm plywood feels at least like a solid roof construction. Maybe overkill and unnecessarily expensive, but it saves some on framing and hassle at least...
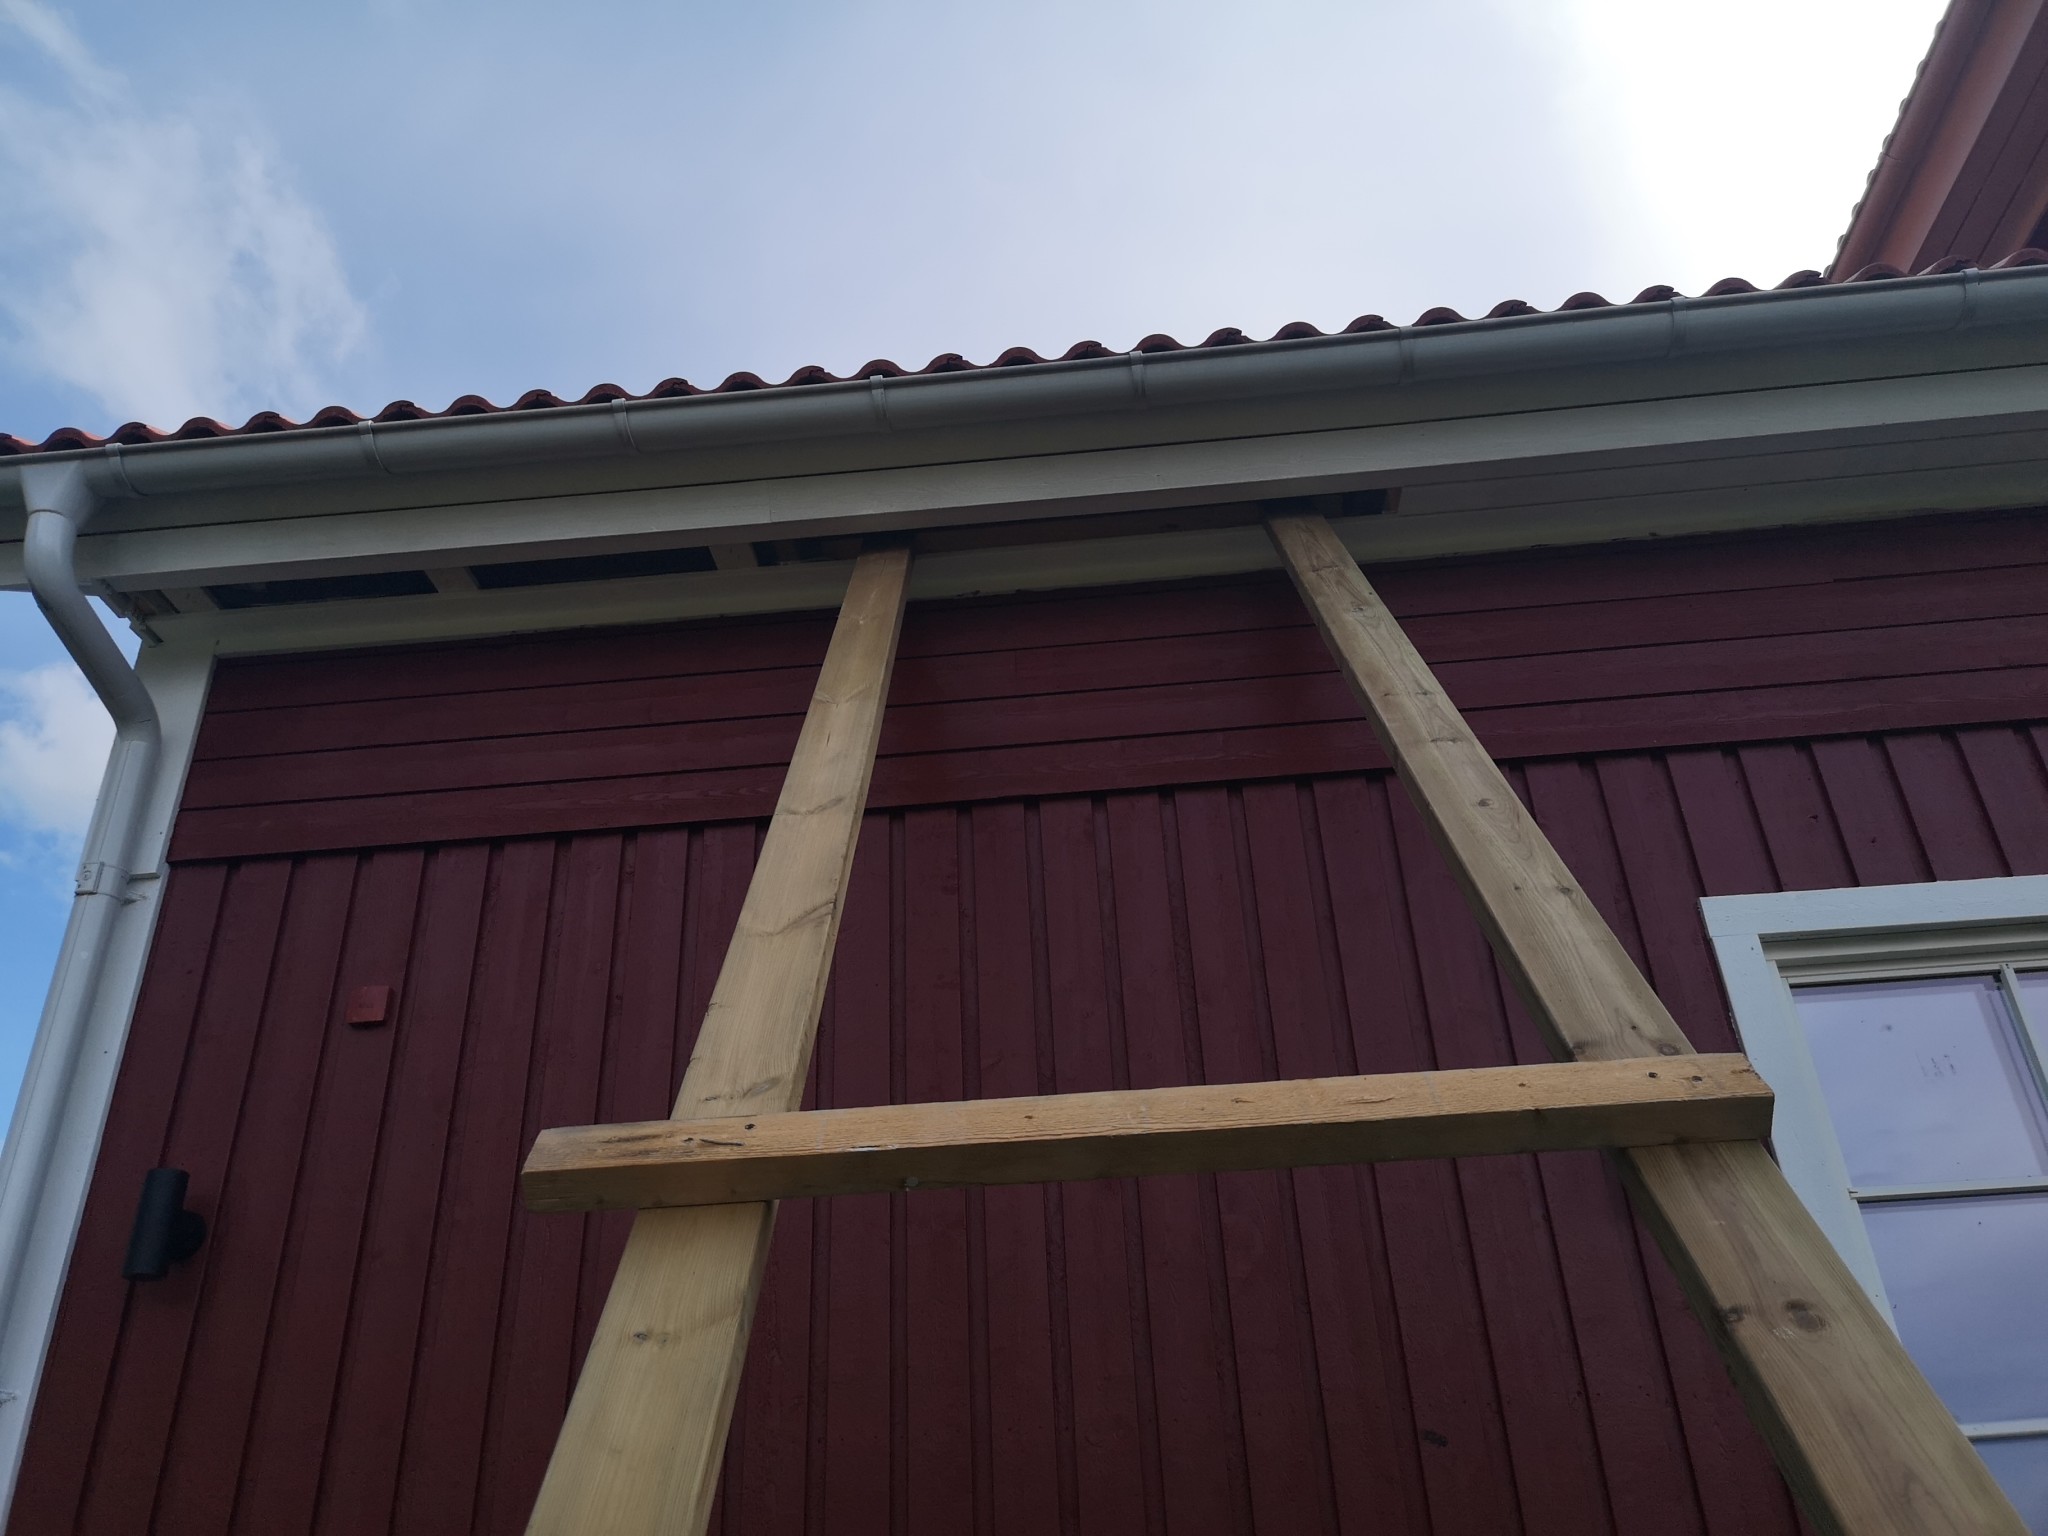
Built a simple "sheetline" to drive up all the plywood sheets via the eaves. Loosened 2 planks underneath...
Took just under an hour to send up 45 sheets.
It was 120x45 studs (had a stack of impregnated low, so that's what I used) pre-drilled 20mm and screwed with 6x140mm screws.
12mm plywood feels like a solid roof construction. Maybe overkill and unnecessarily expensive, but at least it saves some effort on framing and hassle...
Built a simple "sheetline" to run up all the plywood sheets via the eaves. Loosened 2 planks underneath..
Took just under an hour to send up 45 sheets.
Some pictures
[image] [image] [image] [image] [image] [image] [image] [image]
Hi, do you have more pictures? How did you do at the bottom by the eaves... and the insulation?
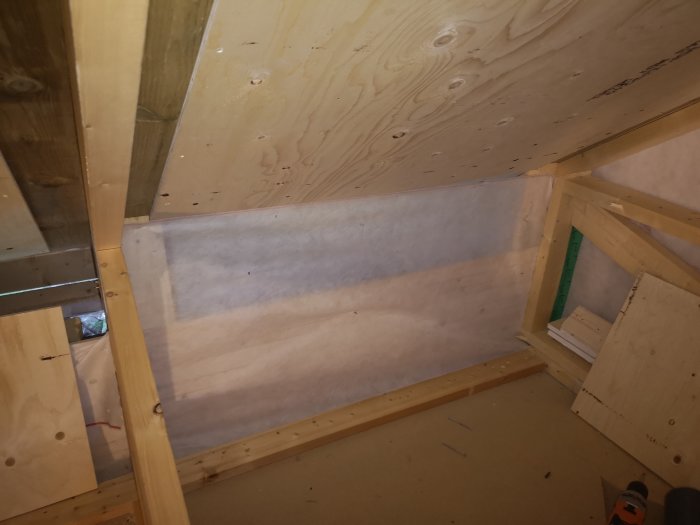
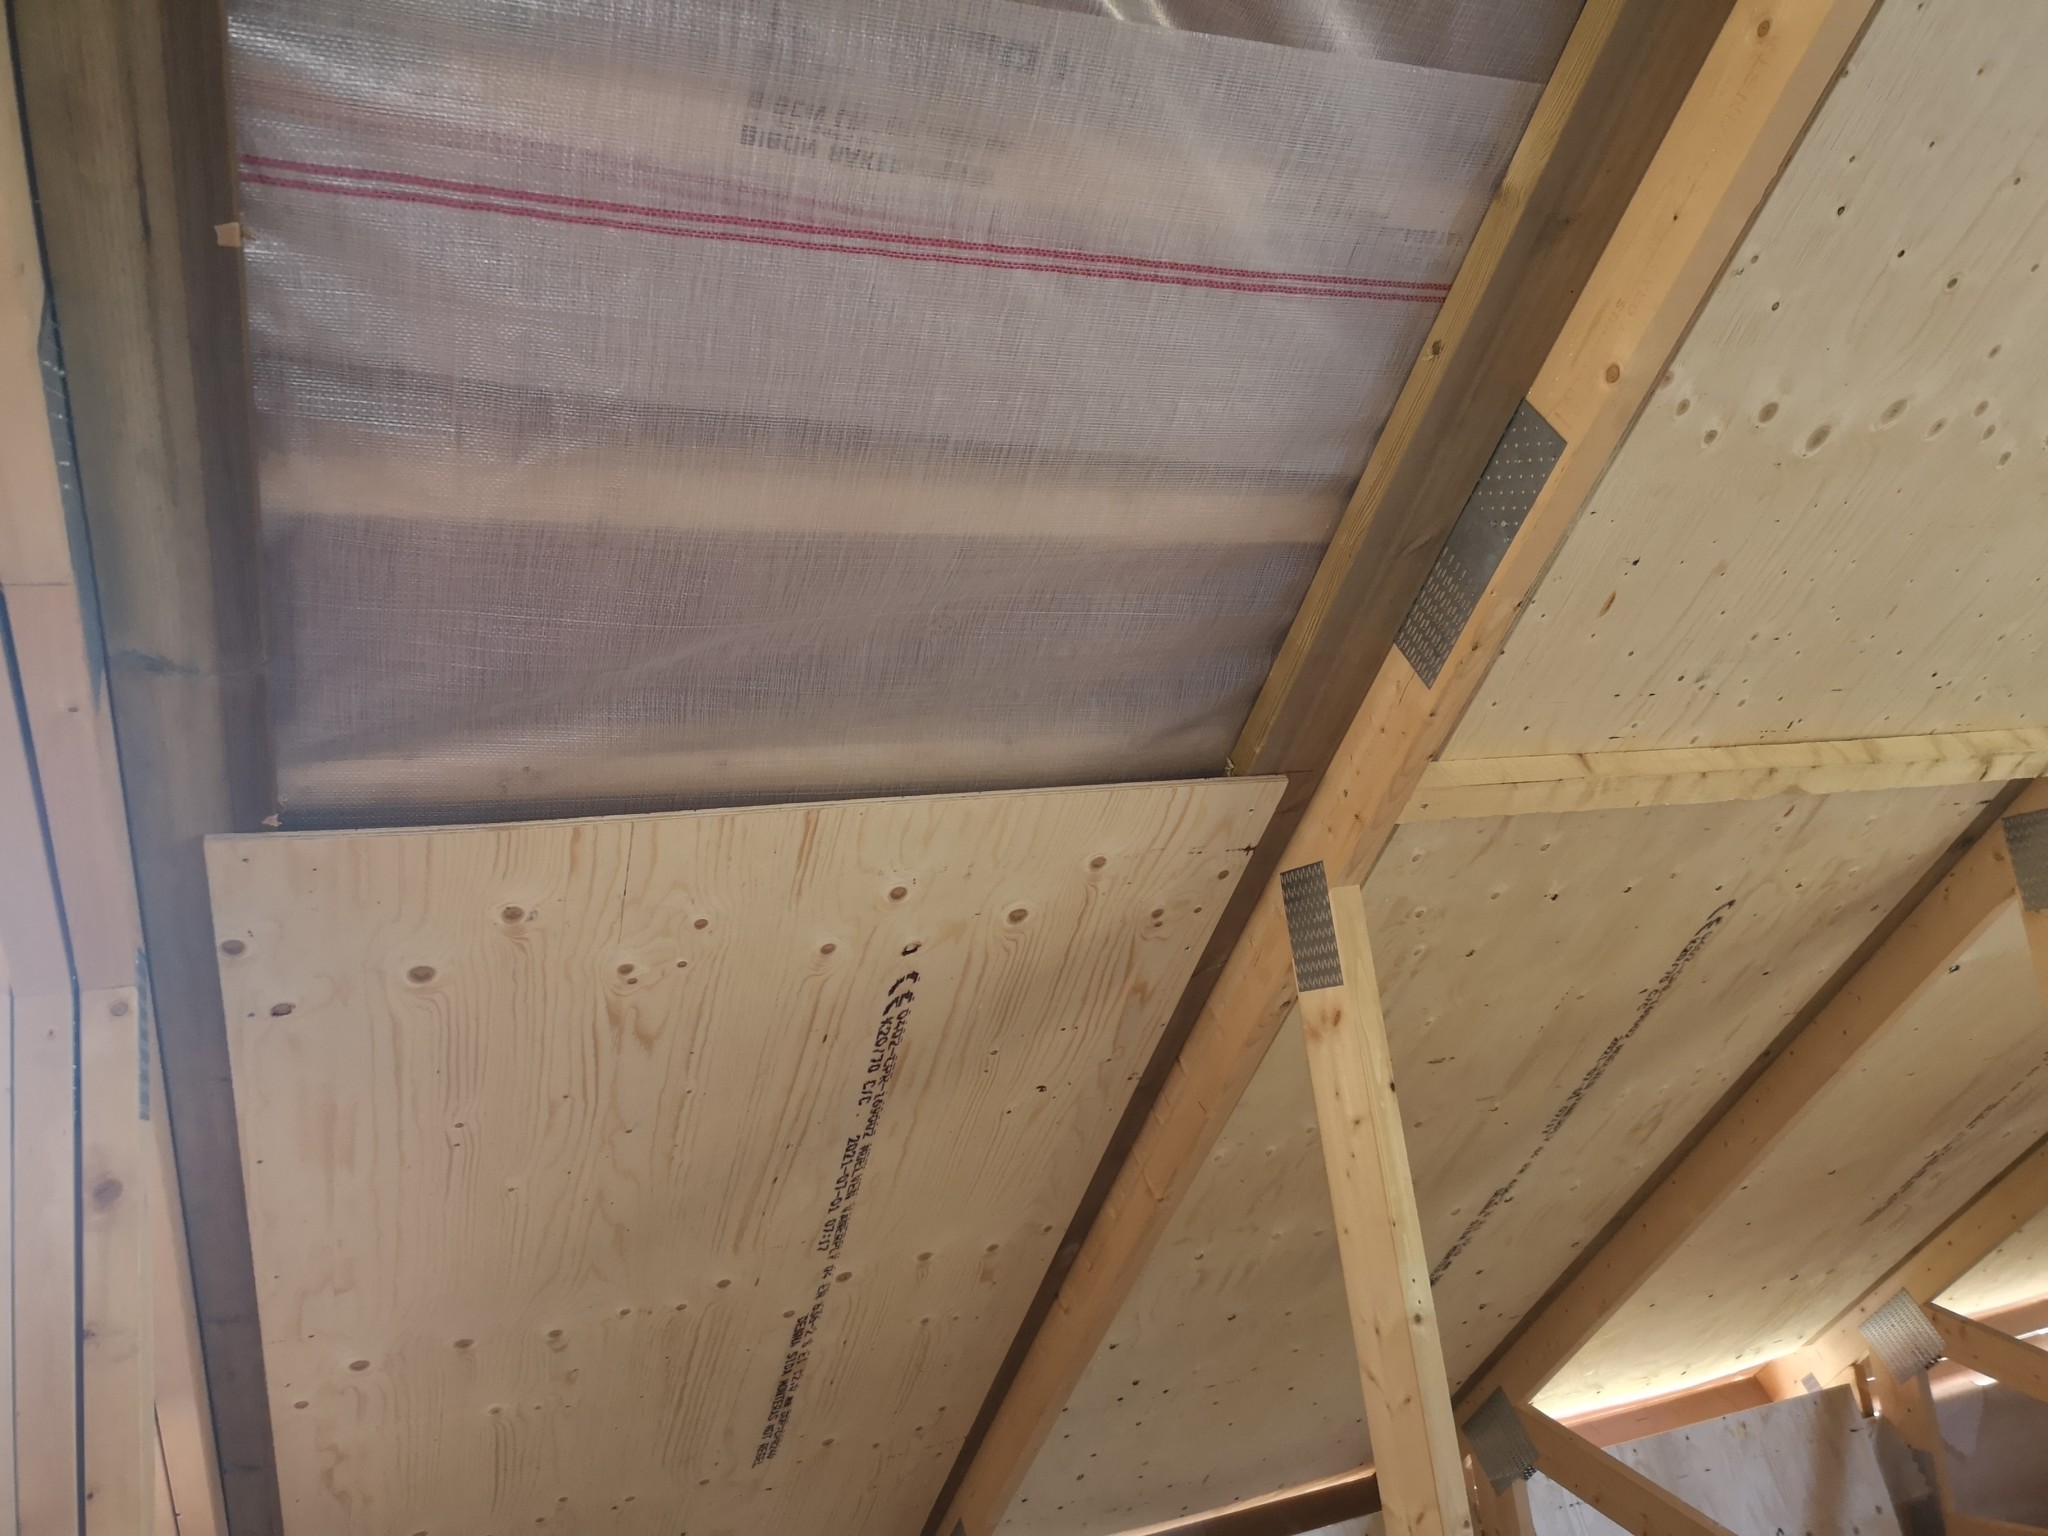
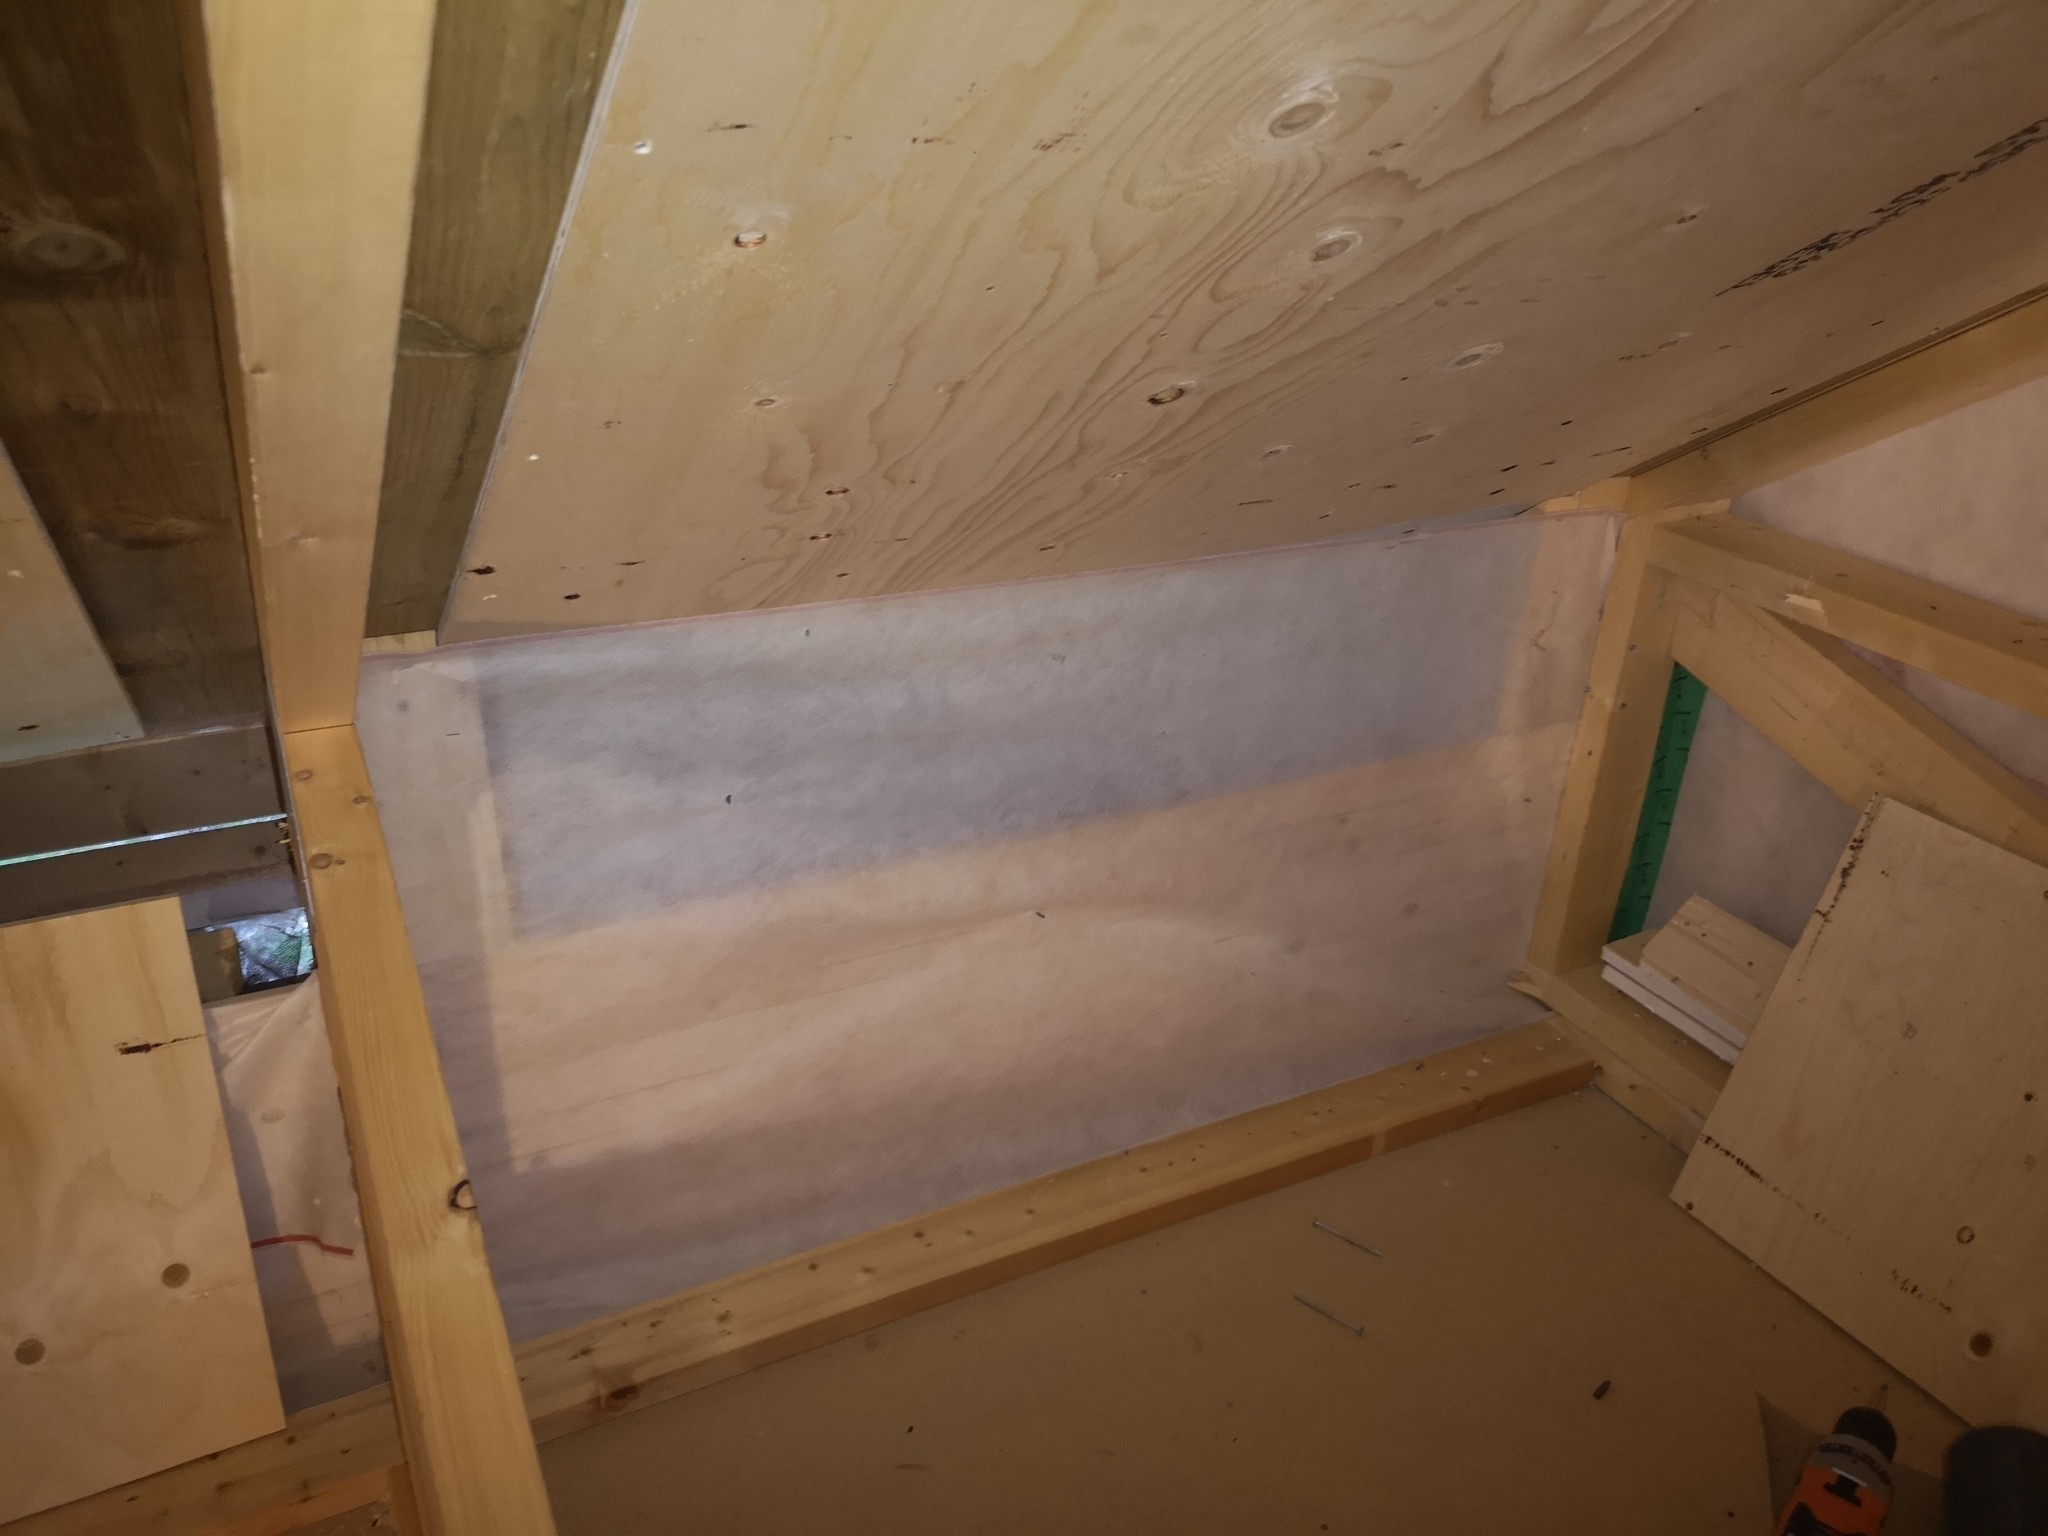
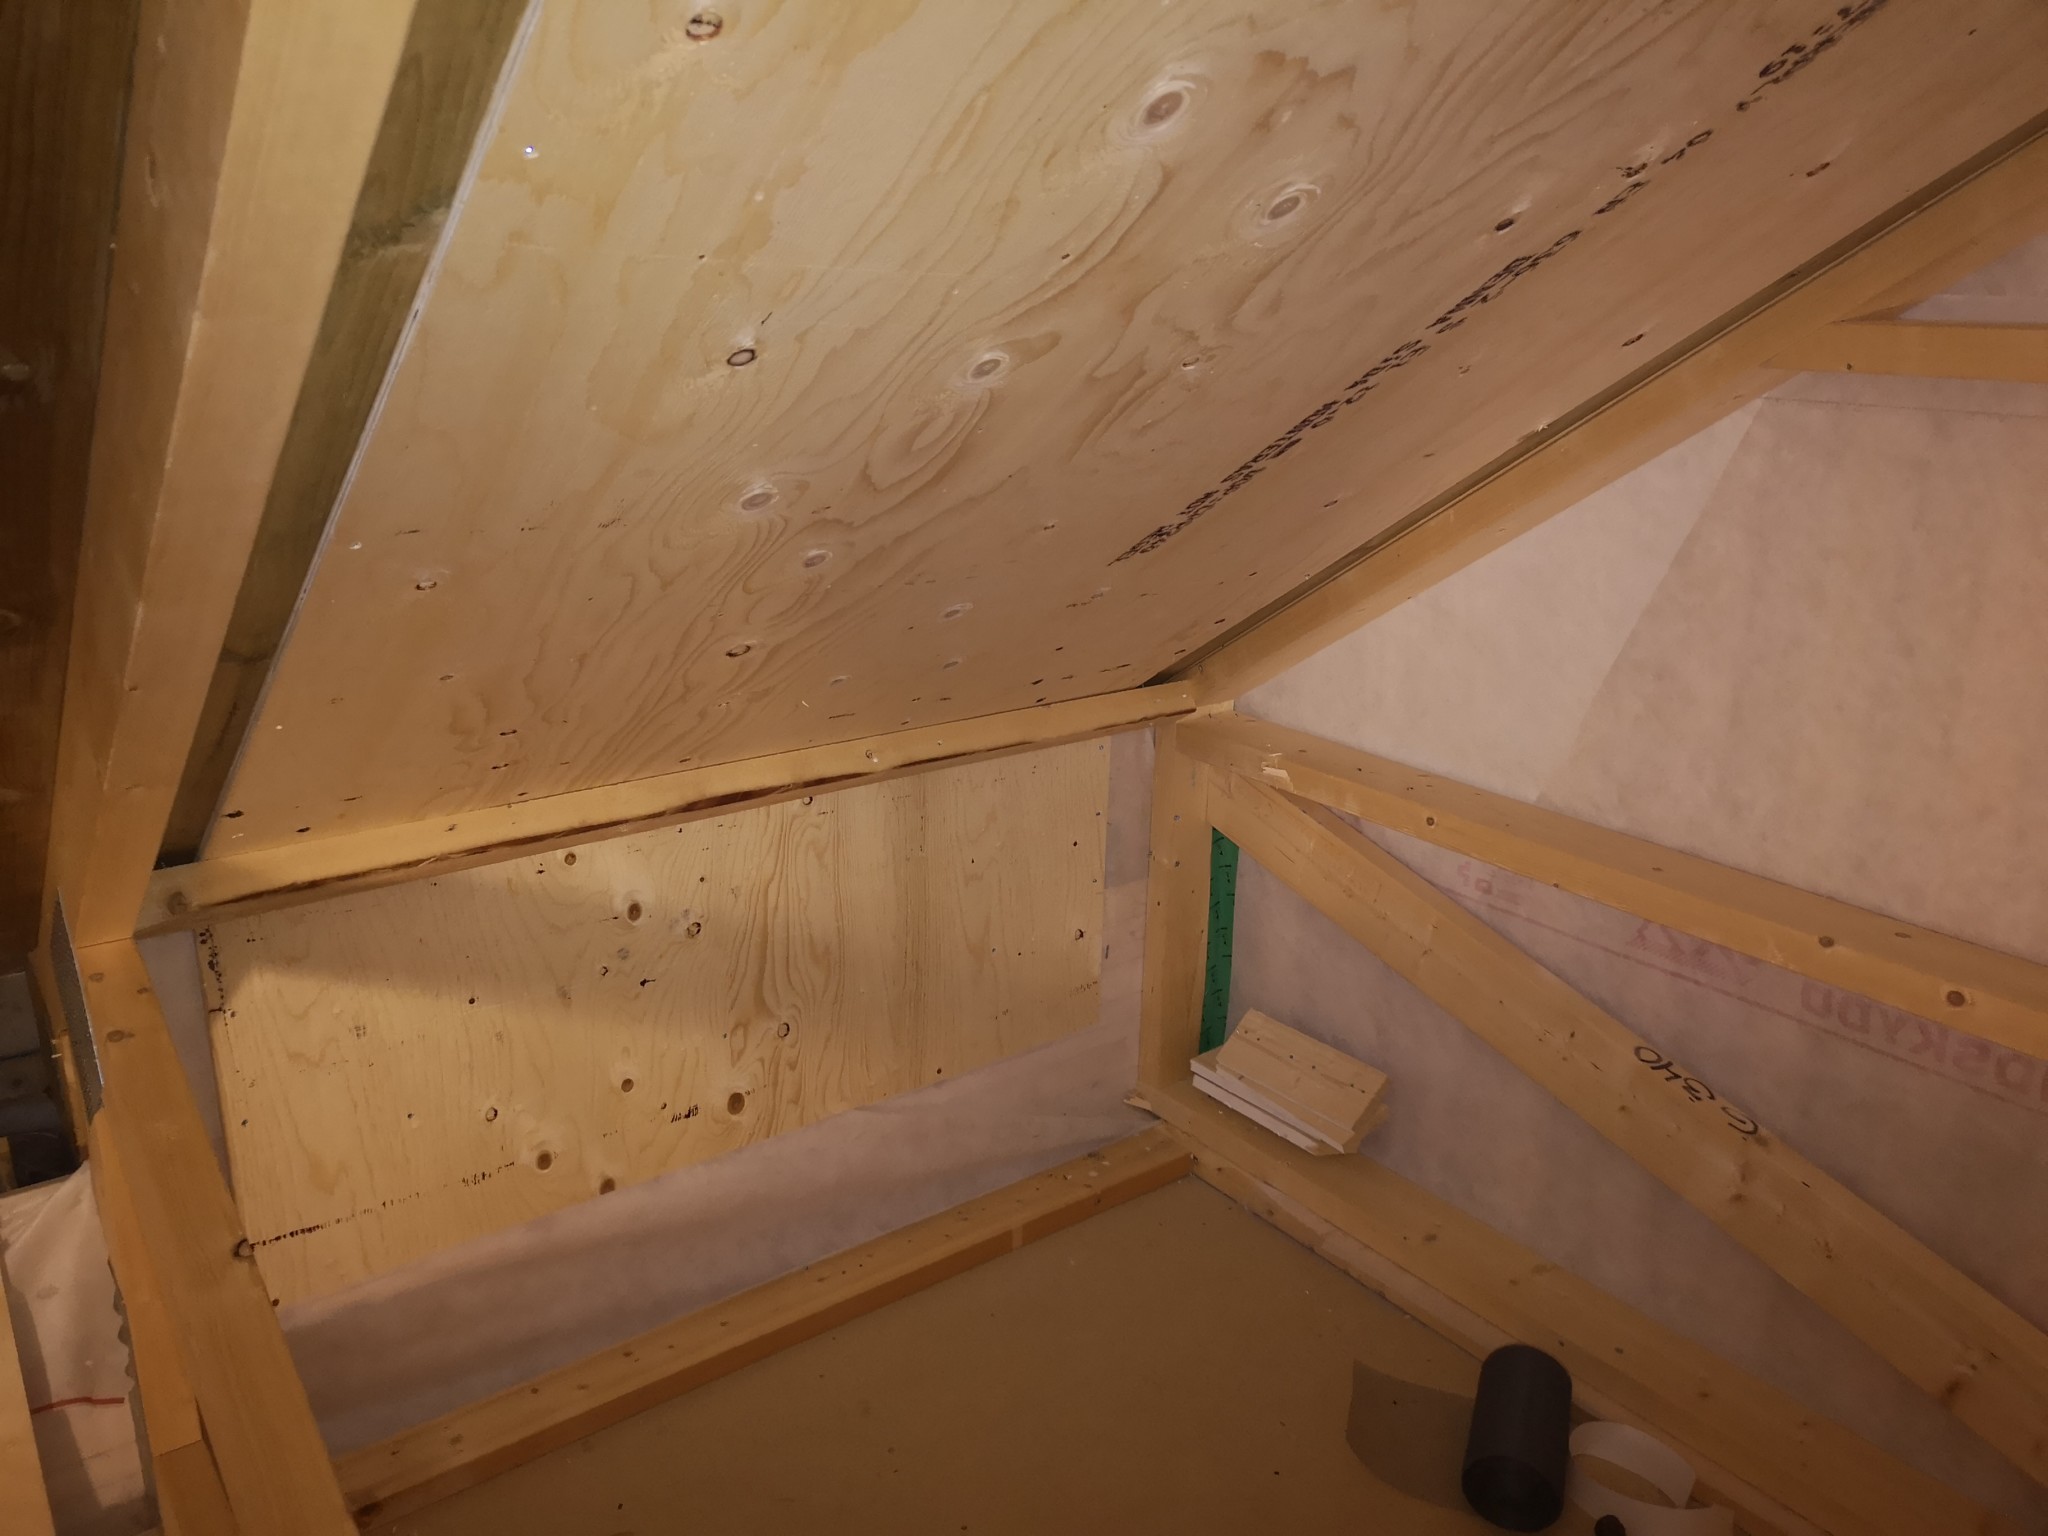
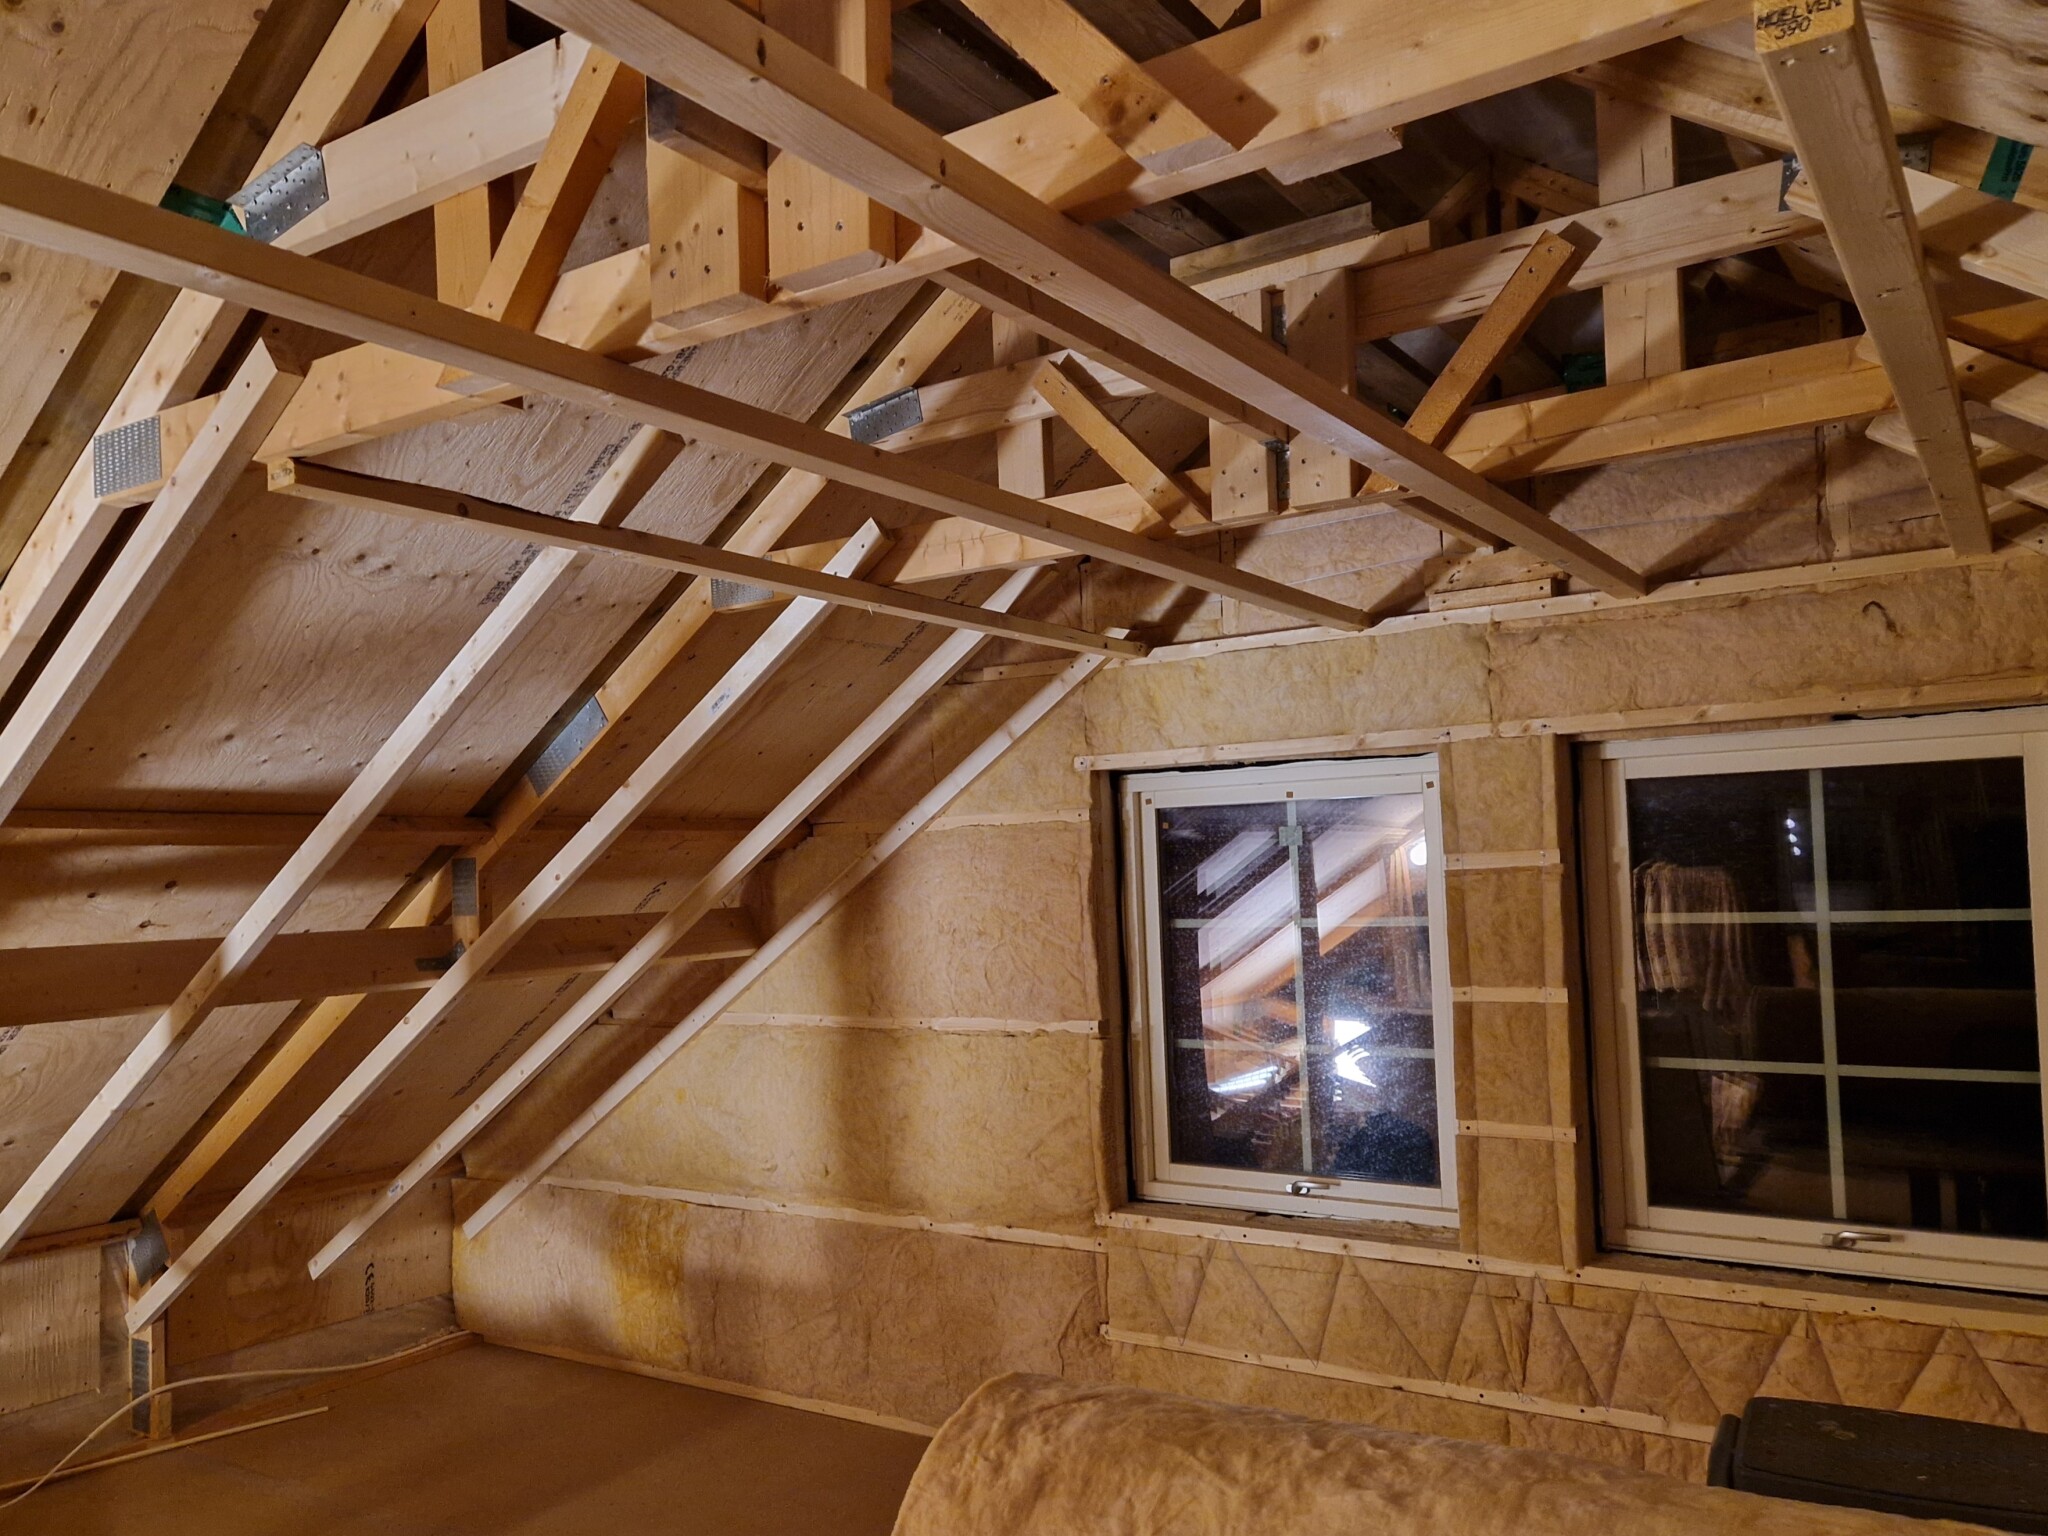
120x45 blocks against wall plate (we have elevated wall plate), staple up the wind barrier and then screw the boards... The wall plate builds up a bit, so the boards really only cover the opening towards the eave. Removed, I think it was about 45cm from a board, so what remains (about 200x120), plus a whole board (240x120) is enough to create an air gap for a "compartment".
The air gap boards extend about 25cm beyond the wall plate, and stretch upwards towards the collar well enough for 50cm of insulation in the roof then...
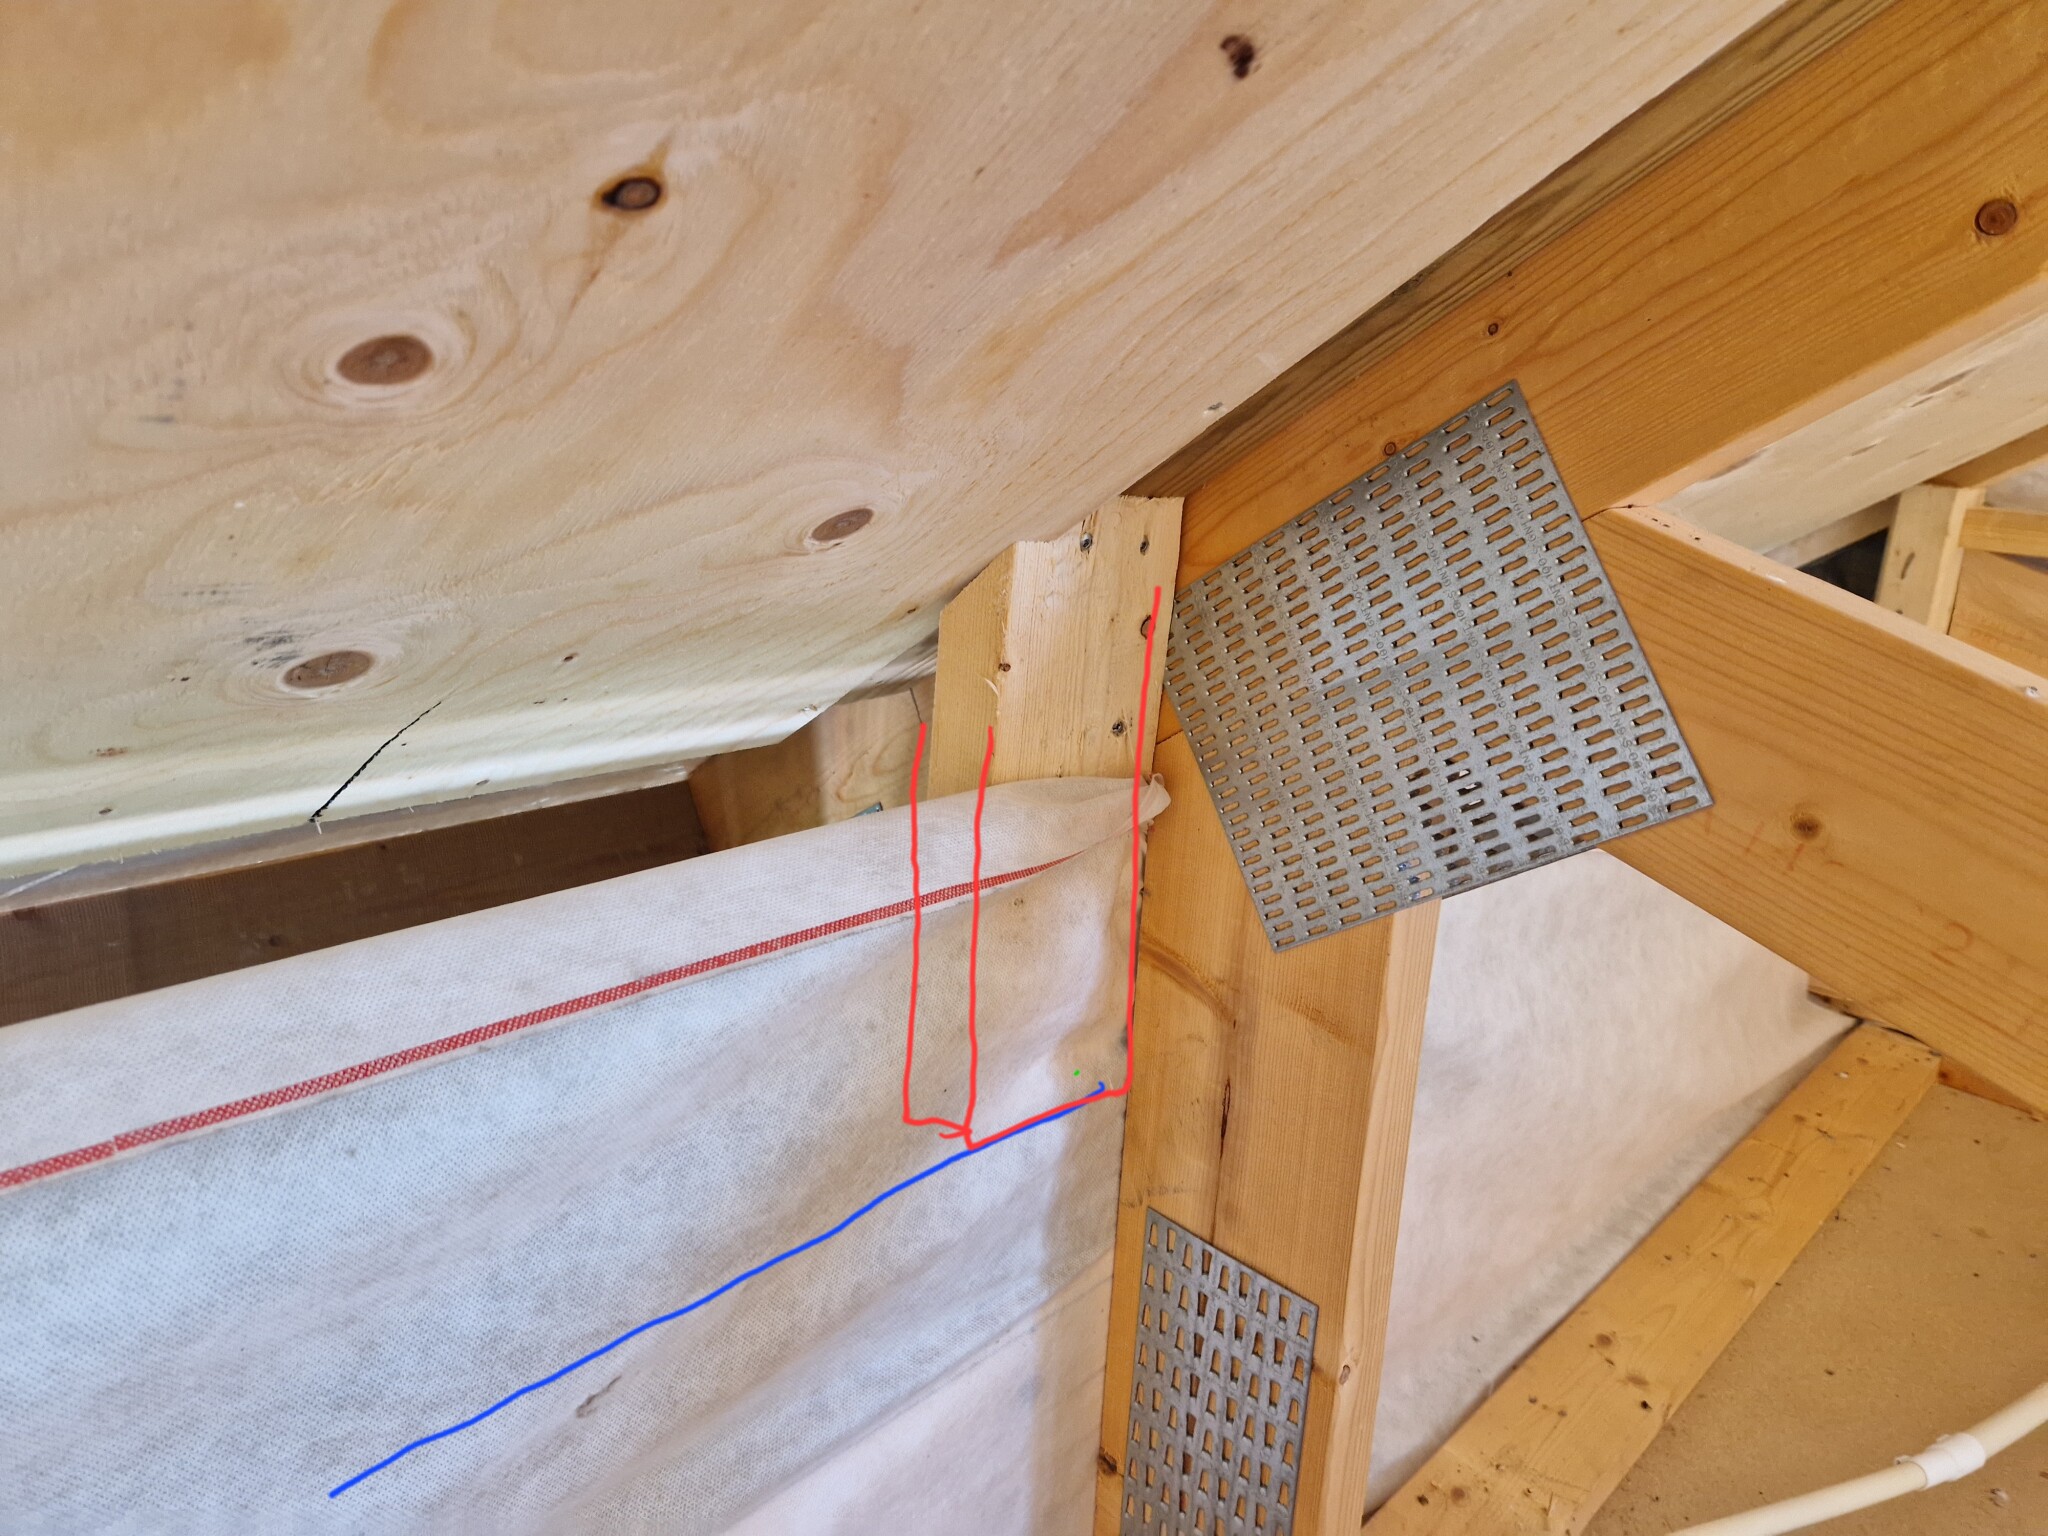
The last picture is the gable insulated in 3 layers with the floor insulation rolls Älvsbyhus provided. Started out-salvaging in rafters for plastic sheeting and spray insulation in the roof, down into the eave...
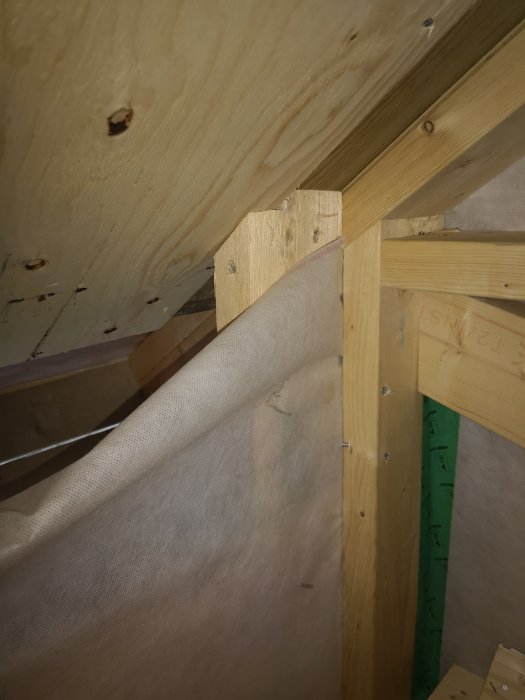
Note the removed support legs in the rafter to create a larger "compartment". This removal is on both sides of this gable, with glued laminated timber between the rafters' support legs and one in the ceiling here to reinforce the rafter that now lacks the support legs)
Last edited:
Click here to reply
Vi vill skicka notiser för ämnen du bevakar och händelser som berör dig.