12,312 views ·
40 replies
12k views
40 replies
Veranda with hipped roof. Dimensions, angles support beams etc.
Thank you very much.
I will try to be a little better than usual at taking pictures during the construction and try to give a little back to the forum, which has always been very helpful.
I am now considering replacing the tongue and groove with beadboard to get a nicer surface on the underside. Has anyone done similar solutions? Are there any pitfalls here or is it just a matter of going for it?

Considering the thickness of "traditional" beadboard, you should consider using shorter screws for the band coverage in the future and seal the staples for durability. This is to avoid visible screws on the otherwise nice underside. Also, reinforcements should be made on the underside if gutter brackets are to be mounted on the milled wood substrate from the top side.
Thanks for the tips. Easy to make a mistake and drive screws too far through.
Slätspont actually looks really nice and got the wife's approval, so we're leaning in that direction. The selection of slätspont seems a bit limited, but Beijer seems to have 27mm slätspont, though without a tongue on the short end. Do you think it's possible to make a "fresh joint" on the slätspont or does it need to be joined over the rafters in such a case? It's hardly subjected to any loads. The alternative is to buy a couple of router bits and add the tongue yourself, or do a biscuit joinery. Spontaneously, I would think a 27mm board that is joined between the rafters would hold up well, provided one avoids making major joints.
Slätspont actually looks really nice and got the wife's approval, so we're leaning in that direction. The selection of slätspont seems a bit limited, but Beijer seems to have 27mm slätspont, though without a tongue on the short end. Do you think it's possible to make a "fresh joint" on the slätspont or does it need to be joined over the rafters in such a case? It's hardly subjected to any loads. The alternative is to buy a couple of router bits and add the tongue yourself, or do a biscuit joinery. Spontaneously, I would think a 27mm board that is joined between the rafters would hold up well, provided one avoids making major joints.
Hi. Slightly off topic but what color is your facade?K knegolf said:The building permit is approved, and construction has begun.
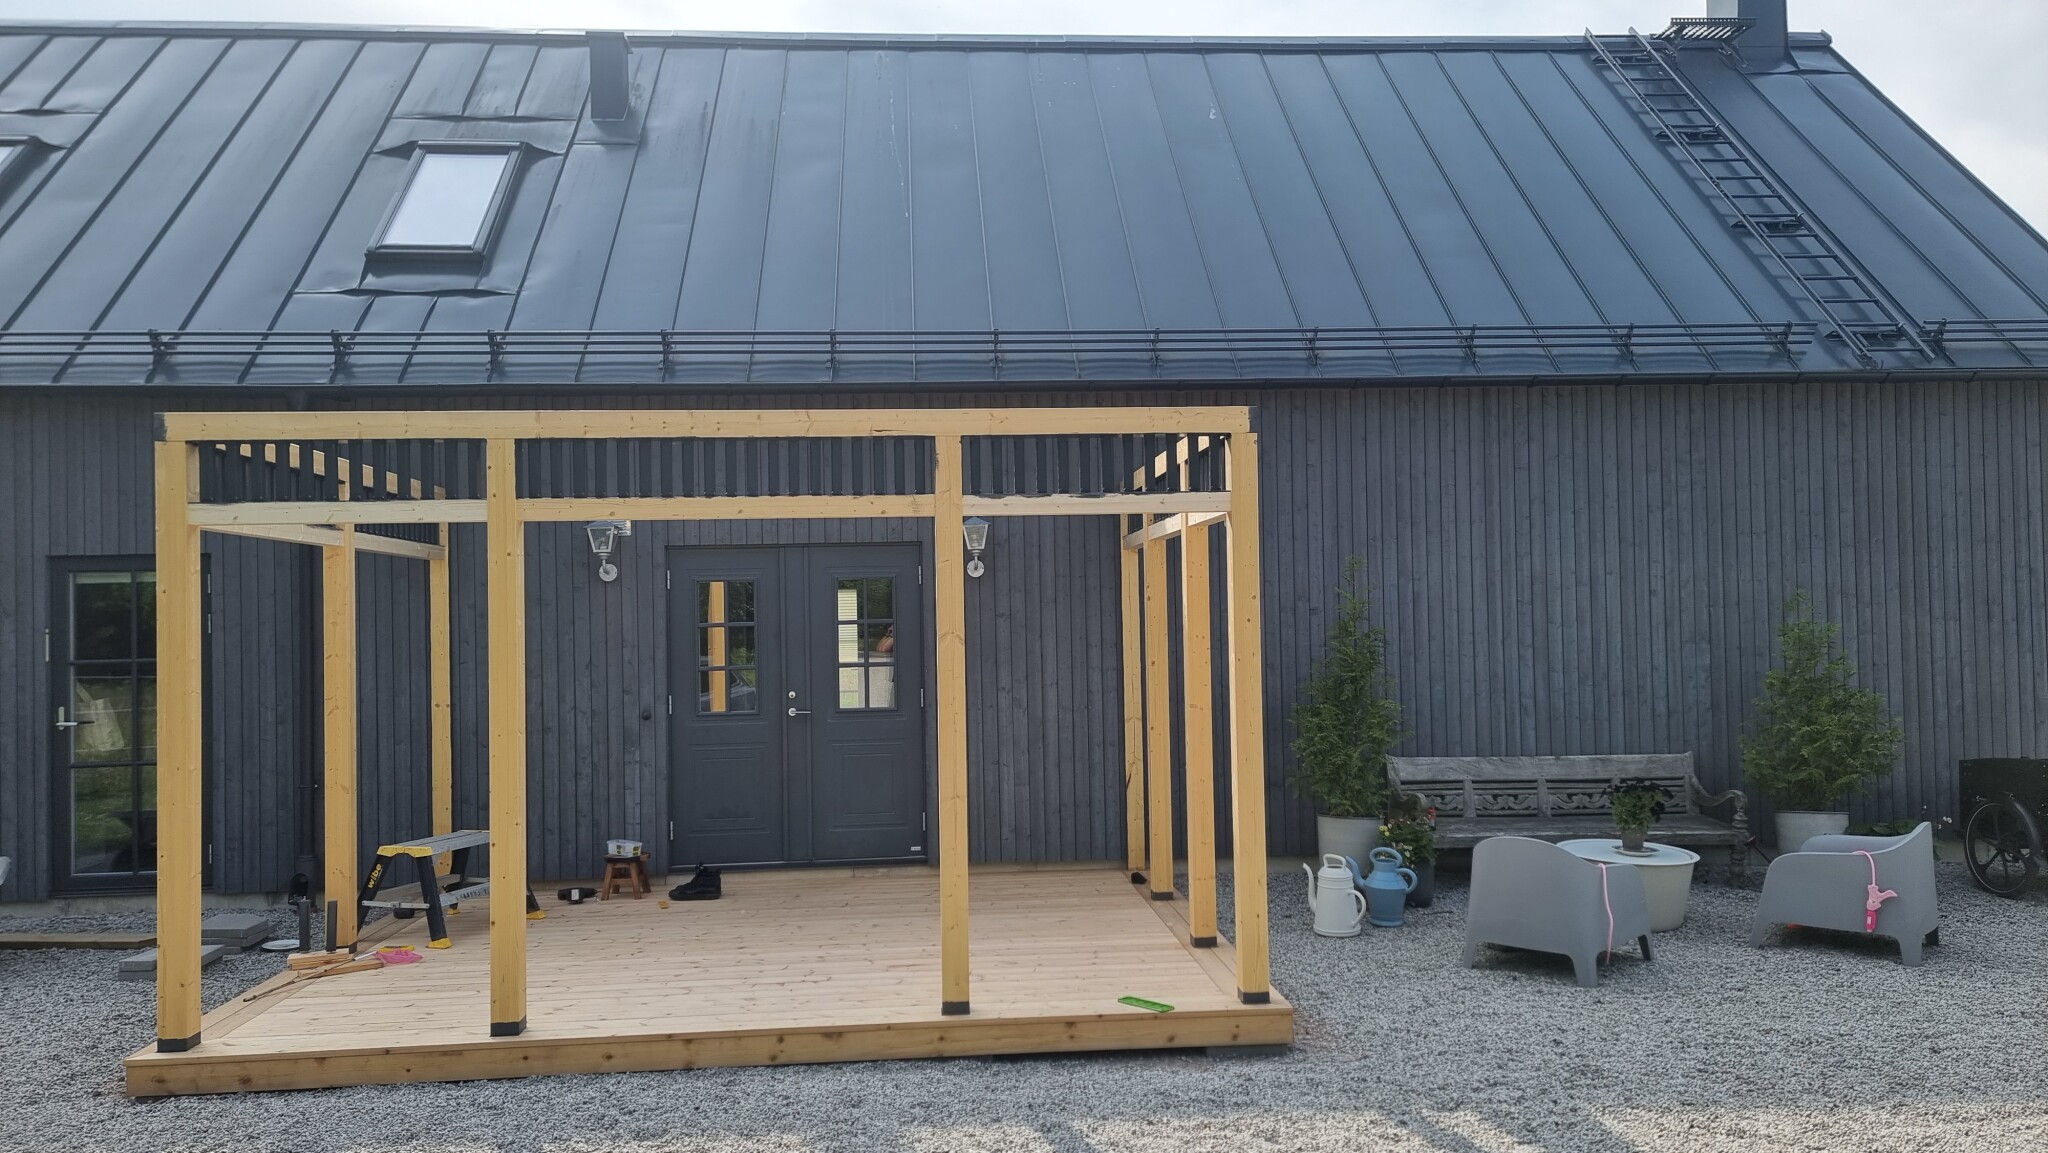
Started by building the main framework of the deck with a floating construction.
What isn't visible in the pictures is that I removed the tiles at the outer corners to then dig a hole about 30cm deep in the load-bearing layer under the corners. Here, with force and great conviction, I drove down 4 pieces of 12mm rebar at a 45-degree angle into the bottom of the hole to act like tree roots. In the hole, I then poured concrete up to a beam shoe which I fixed in the already leveled frame. The idea here is to anchor against wind load.
I've been quite bad at taking photos during the construction time but here are a few from today.
The posts are in place. All end grain is painted before assembly with tjäralin linseed oil paint.
There has been a lot of prefabrication on rainy days. I've milled and pre-drilled 118 "posts" that will act as decoration on the bearer. These are 245mm long and made from 43x43mm planed timber.
I had to build a milling jig to mass-produce these. Also bought a drill template from Amazon to get all the holes straight at the ends.
The posts are mounted with 8mm wooden dowels and wood glue between the upper and lower bearer so the tolerances on the hole pattern are quite tight.
In one of the pictures, a test arrangement of the posts is visible before drilling to get a suitable spacing.
More pictures and updates will come later.
I have to make another case for Onshape, the world's best tool for drawing in 3D. An insanely generous free version that can generate really good building permit documents in just a few minutes, not to mention all the features like being able to take measurements directly on mobile afterward as you build.
Regards,
Christian
Hello Christian.
It is tjärvitriol from Auson.
We have painted twice with a one-year interval. The panel was primed with oil upon delivery, which meant it didn't absorb much during the first coat, resulting in a somewhat uneven finish. The second year, it absorbed well.
The color varies quite a bit depending on lighting conditions, so here is a picture of the other side in direct sunlight.
Ok. Thank you very much for your answer.K knegolf said:Hi Christian.
It is tar vitriol from auson.
We painted twice with a one-year interval. The panel was primed with oil at delivery, which meant it didn't absorb much during the first coat, so the result was somewhat uneven. The second year it absorbed well.
The color changes quite a bit depending on the lighting conditions, so here is a picture of the other side in direct sunlight.
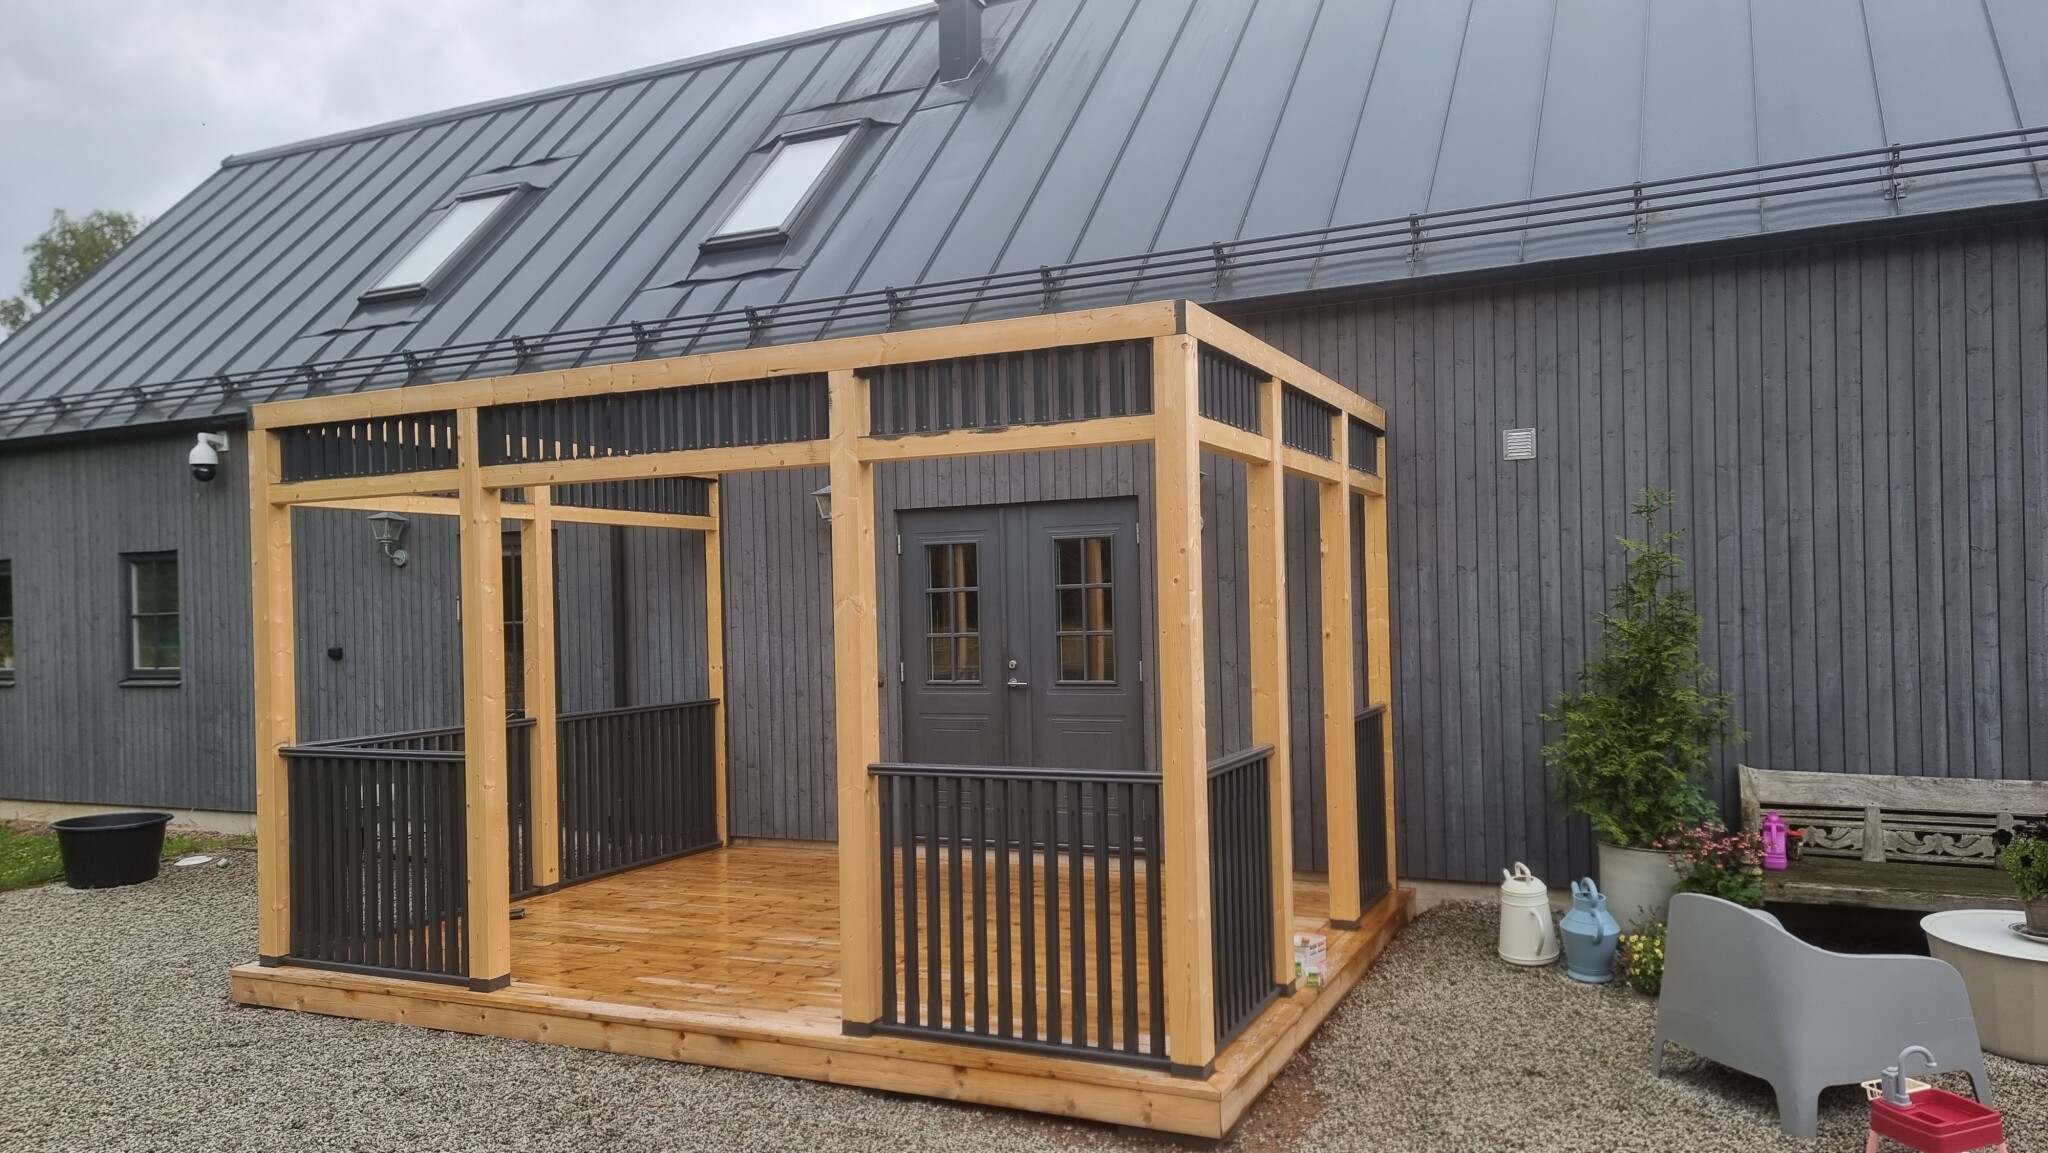
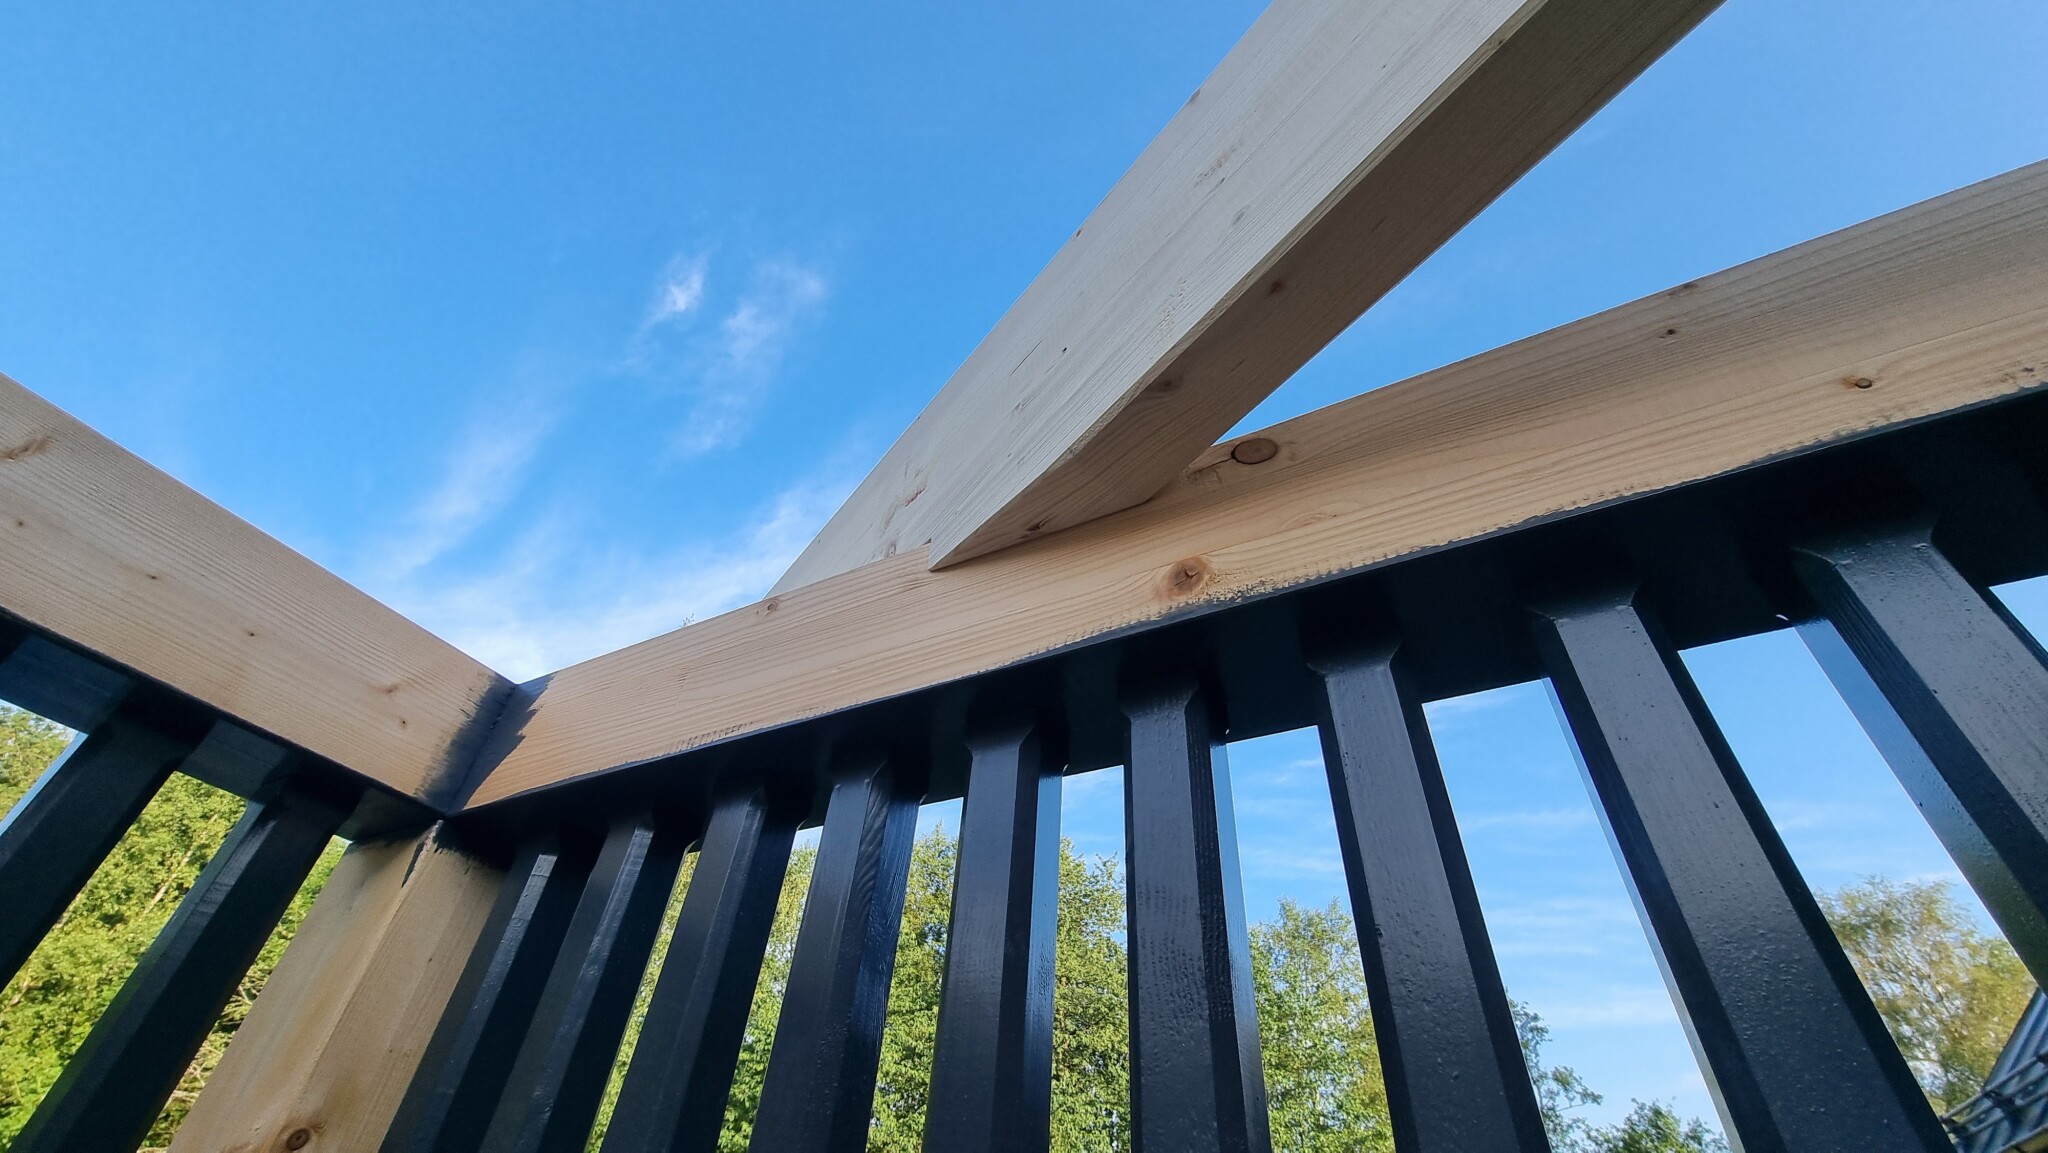
Some progress.
The decoration on the main beam is completed and installed. I chose to paint all the posts twice before installation since it becomes very tricky to reach otherwise. I also painted the underside of the main beam as well as the top side of all 95x95 beams to ensure good coverage.
The paint I used is tjäralin, a mixture of wood tar and linseed oil, so it needs a bit more time to dry, which is also why I try to paint as much as possible before assembly.
This week, a delivery will arrive from gaveldekor with posts, upper and lower rails, which also need to be coated twice before installation. After that, the roof trusses will be installed, and the final coat will be applied to cover the seams between all parts. Then follows paneling and roofing.
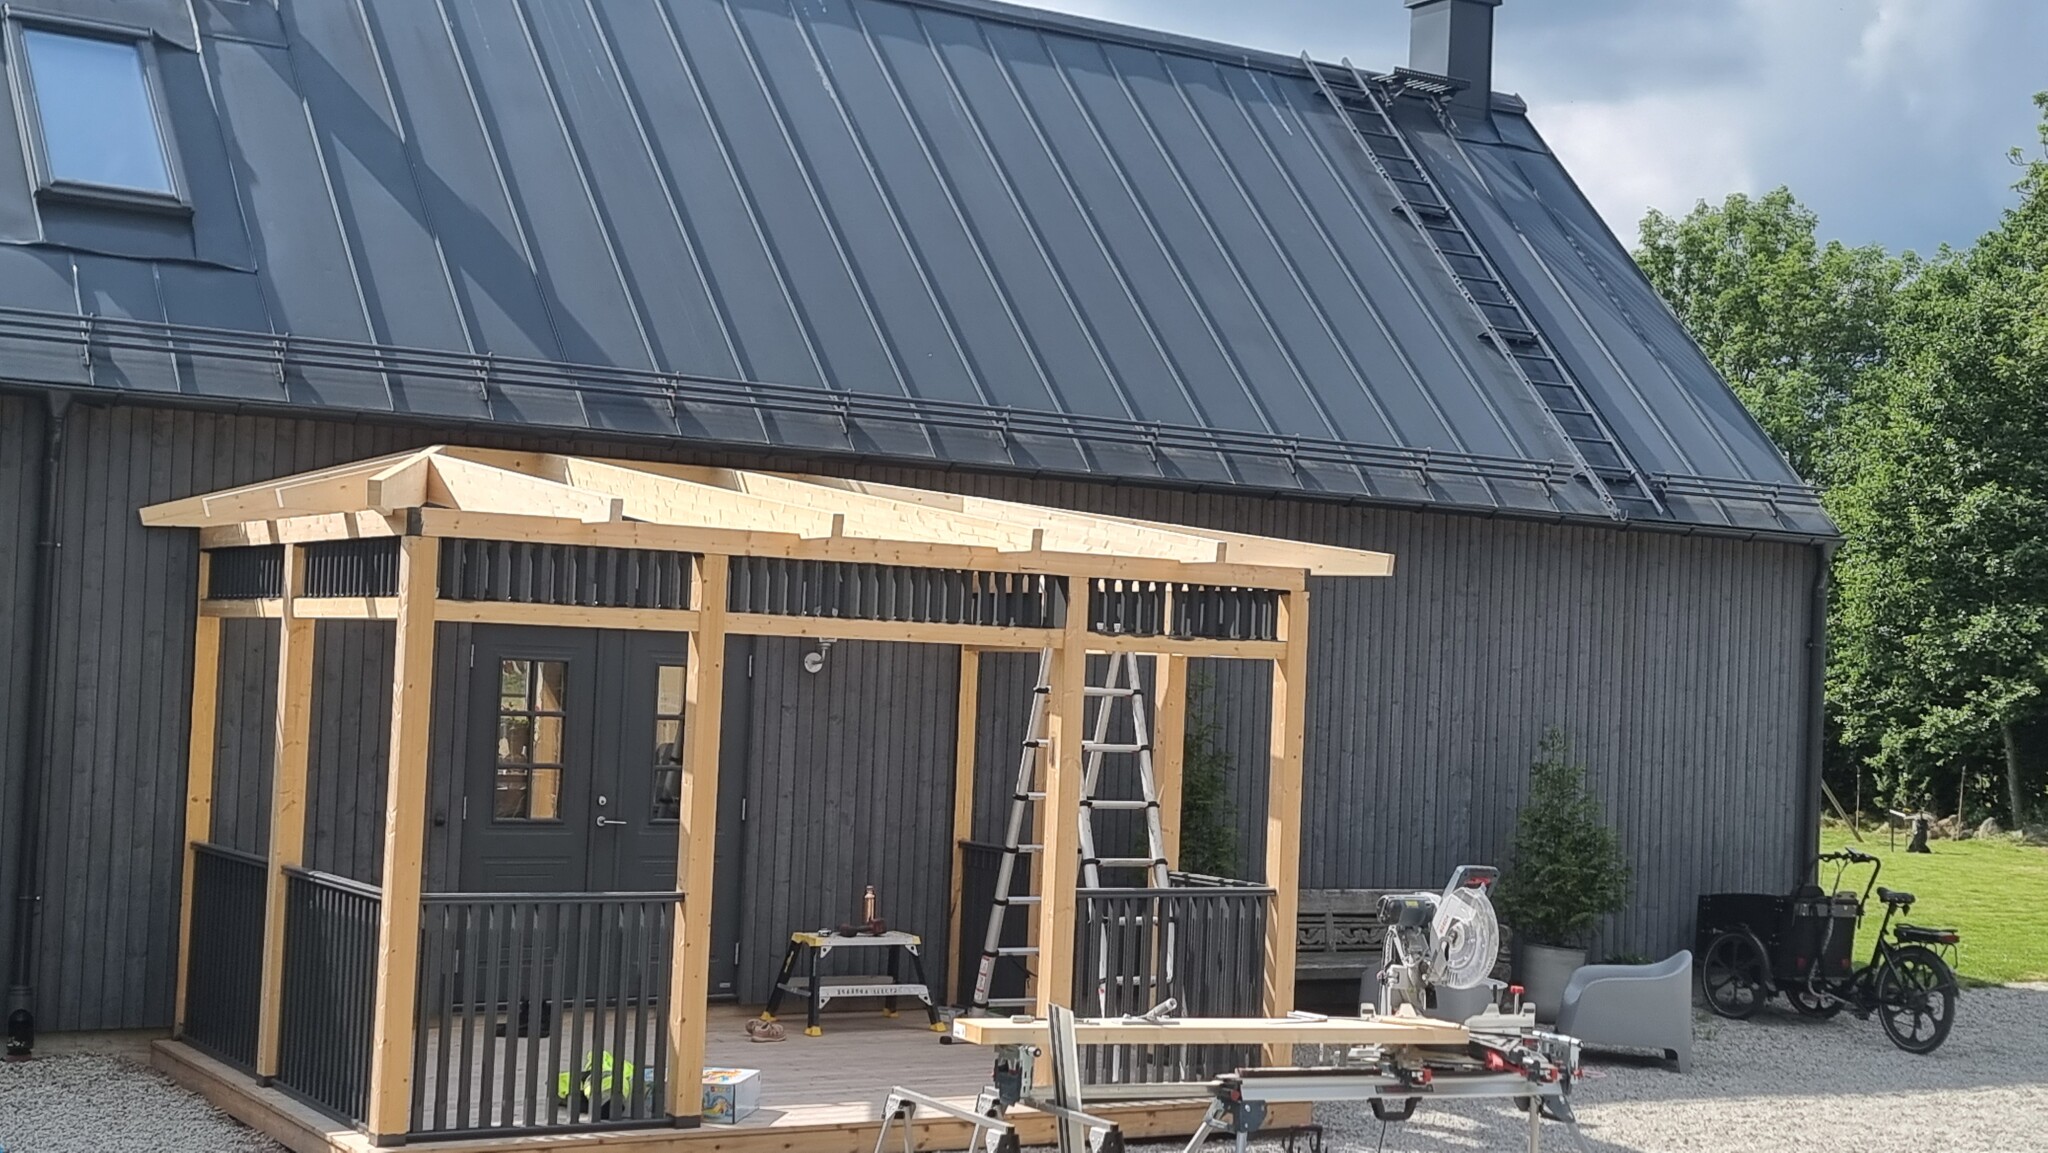
This morning's work. The roof trusses were completely prefabricated according to the model from onshape. My father came over to help lift them into place and they fit perfectly. Now I have most likely used up all my luck for this year.
The wife seen in the first picture is actually more pleased with the result than it appears in the image (wasn't supposed to be included).
The wife seen in the first picture is actually more pleased with the result than it appears in the image (wasn't supposed to be included).
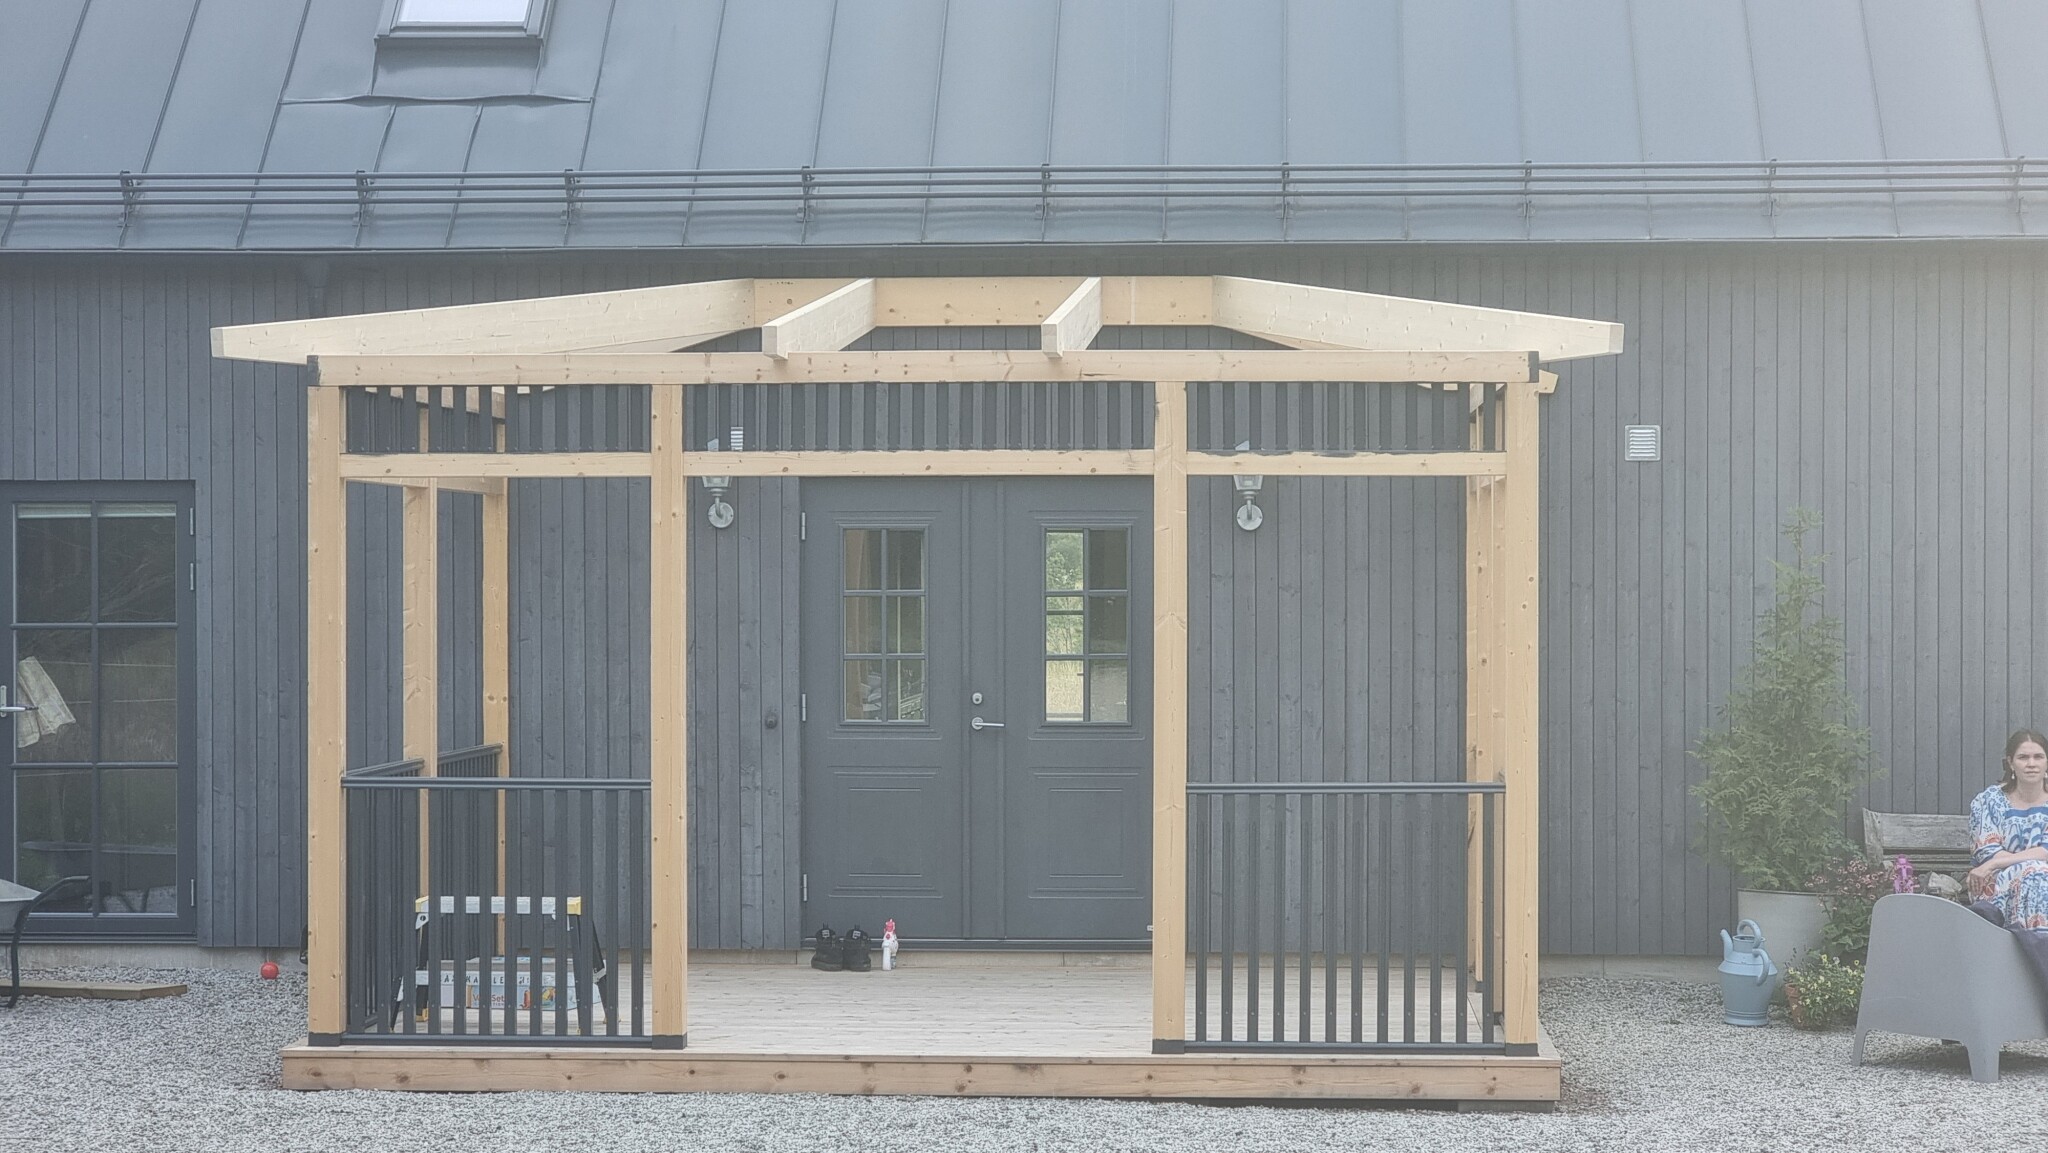
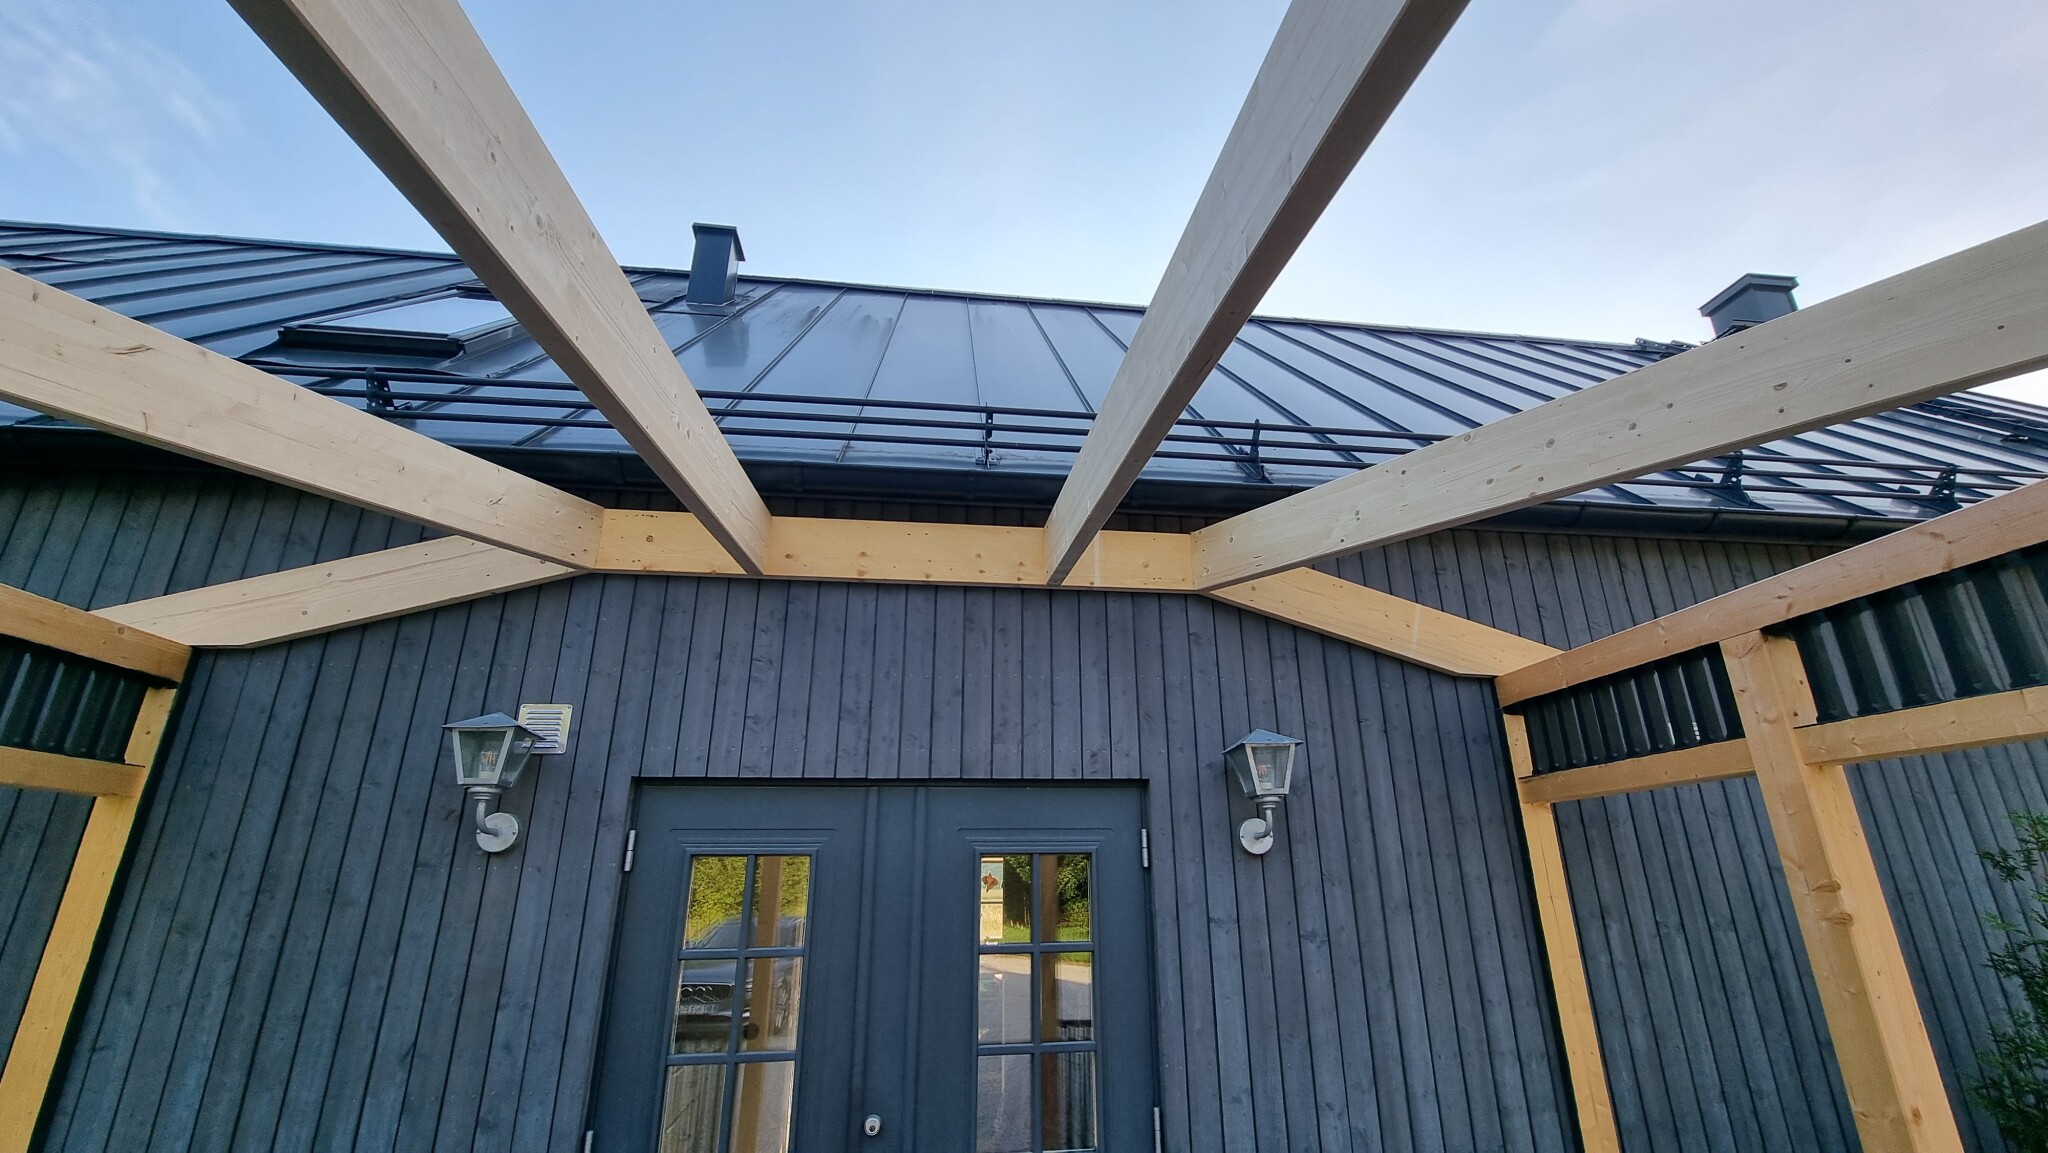

Thank you. I was actually quite satisfied myself. Now all the roof trusses are in place. The two front ones that meet the slanted trusses were not easy to cut. They are cut at 67.5 degrees in one direction and 7 degrees in the other, so I had to do some manual work with a slightly worn handsaw since my miter saw couldn't handle the cut. A bit of sanding on the cut surface afterwards gave a good result.
I'll take some more pictures tomorrow. The sky opened up shortly after I got the last trusses in place, so I had to quickly clear away the saws and other tools.
I'll take some more pictures tomorrow. The sky opened up shortly after I got the last trusses in place, so I had to quickly clear away the saws and other tools.