I am planning to renovate an older L-shaped attic staircase as we have extended a floor. My problem is that we have raised the floor on the new level by about 35mm. This makes the last step very high if I use standard renovation steps (8mm).
I had thought of saddle fitting the steps 10-20mm plus renovation steps. But then realized that they only cover about 48mm of the old step. Mine are 45mm plus saddling, so there is no room to saddle. I have considered using aluminum stair nosing strips, but the ones I found that were discreet and nice only work with thinner laminate, which I don't want.
My latest idea is therefore to make my own "renovation steps" from countertop materials. A 26mm countertop is quite a suitable height for me. Raising the first step is not an issue since I have already raised the lower floor by at least 15mm when we laid tiles there.
I am considering whether to let the steps extend 20mm longer than today and glue an oak piece underneath as a nose. This will give a massive front of around 75mm, in other words, the steps will feel ruggedly thick. This will also give me slightly longer steps than today. Which is probably just positive as the step length is a bit short today.
The next alternative is to set the plunge saw and Fein tool to work and cut off the old nosings that protrude. Then either keep the current step length or extend it. If I do this, I can mount an oak board or white MDF, parquet, etc., even at the back/riser, and the new step will only be its 26mm, which might feel thin instead.
Has anyone experienced renovating a staircase in this way or a similar way? Can a countertop board work? Would you prefer visually super thick steps at 75mm, or thin ones at 26mm? (It is possible to glue a piece here too to make it look thicker, but it's a lot of work for a doubtful gain.)
Apart from needing to solve a problem, it's also quite cost-effective. If I, for example, buy an untreated IKEA countertop, I can get 6 steps from one board for 1500:-. I have 15 steps, some large, so I will likely need 3 boards for the steps, meaning about 5-6000:- including glue, etc. Then there are boards for the back if I choose that solution. So probably regardless of which, a good solution can be made for 8-10K. If the staircase renovation companies could have resolved this with renovation steps, I would have gladly spent the 16-20K they quoted for standard staircase renovation. But those I contacted have not been able to solve this with standard steps, and everything else, according to them (and me), becomes unreasonably expensive.
Untreated cheap countertop slabs tend not to be so dense/hard and would therefore wear quickly. If you choose that route, I would not use oak on the underside but rather as the front of the entire step since the step edge is what wears the fastest. At the same time, you'll have one type of wood on the entire front instead of stripes (if I understand your plan correctly).
The plan is to varnish or oil them. When I say put an oak underneath, I mean let the whole step protrude over the old one, and glue a block under the nose that hides the lower step, in the same way as the nose on a renovation step.Z z_bumbi said:Untreated cheap benchtop sheets are usually not that dense/hard and would therefore wear out quickly. If you choose that route, I wouldn't put oak underneath but as a front on the whole step because the edge of the step wears out the fastest. At the same time, you get one kind of wood on the whole front instead of stripes (if I understand your plan correctly).
Putting a front on the whole step would, if I understand you correctly, mean a step without a nose. My short steps require a slightly protruding nose.
After some thought, I think it currently leans towards cutting off the old nose and putting a cover piece of oak or other material at the back of the riser, and letting the step stick out about the same as today plus a few extra cm. In other words, not gluing any piece on the nose. It feels like 75mm thick steps would look very odd on my small staircase that is 75cm wide.
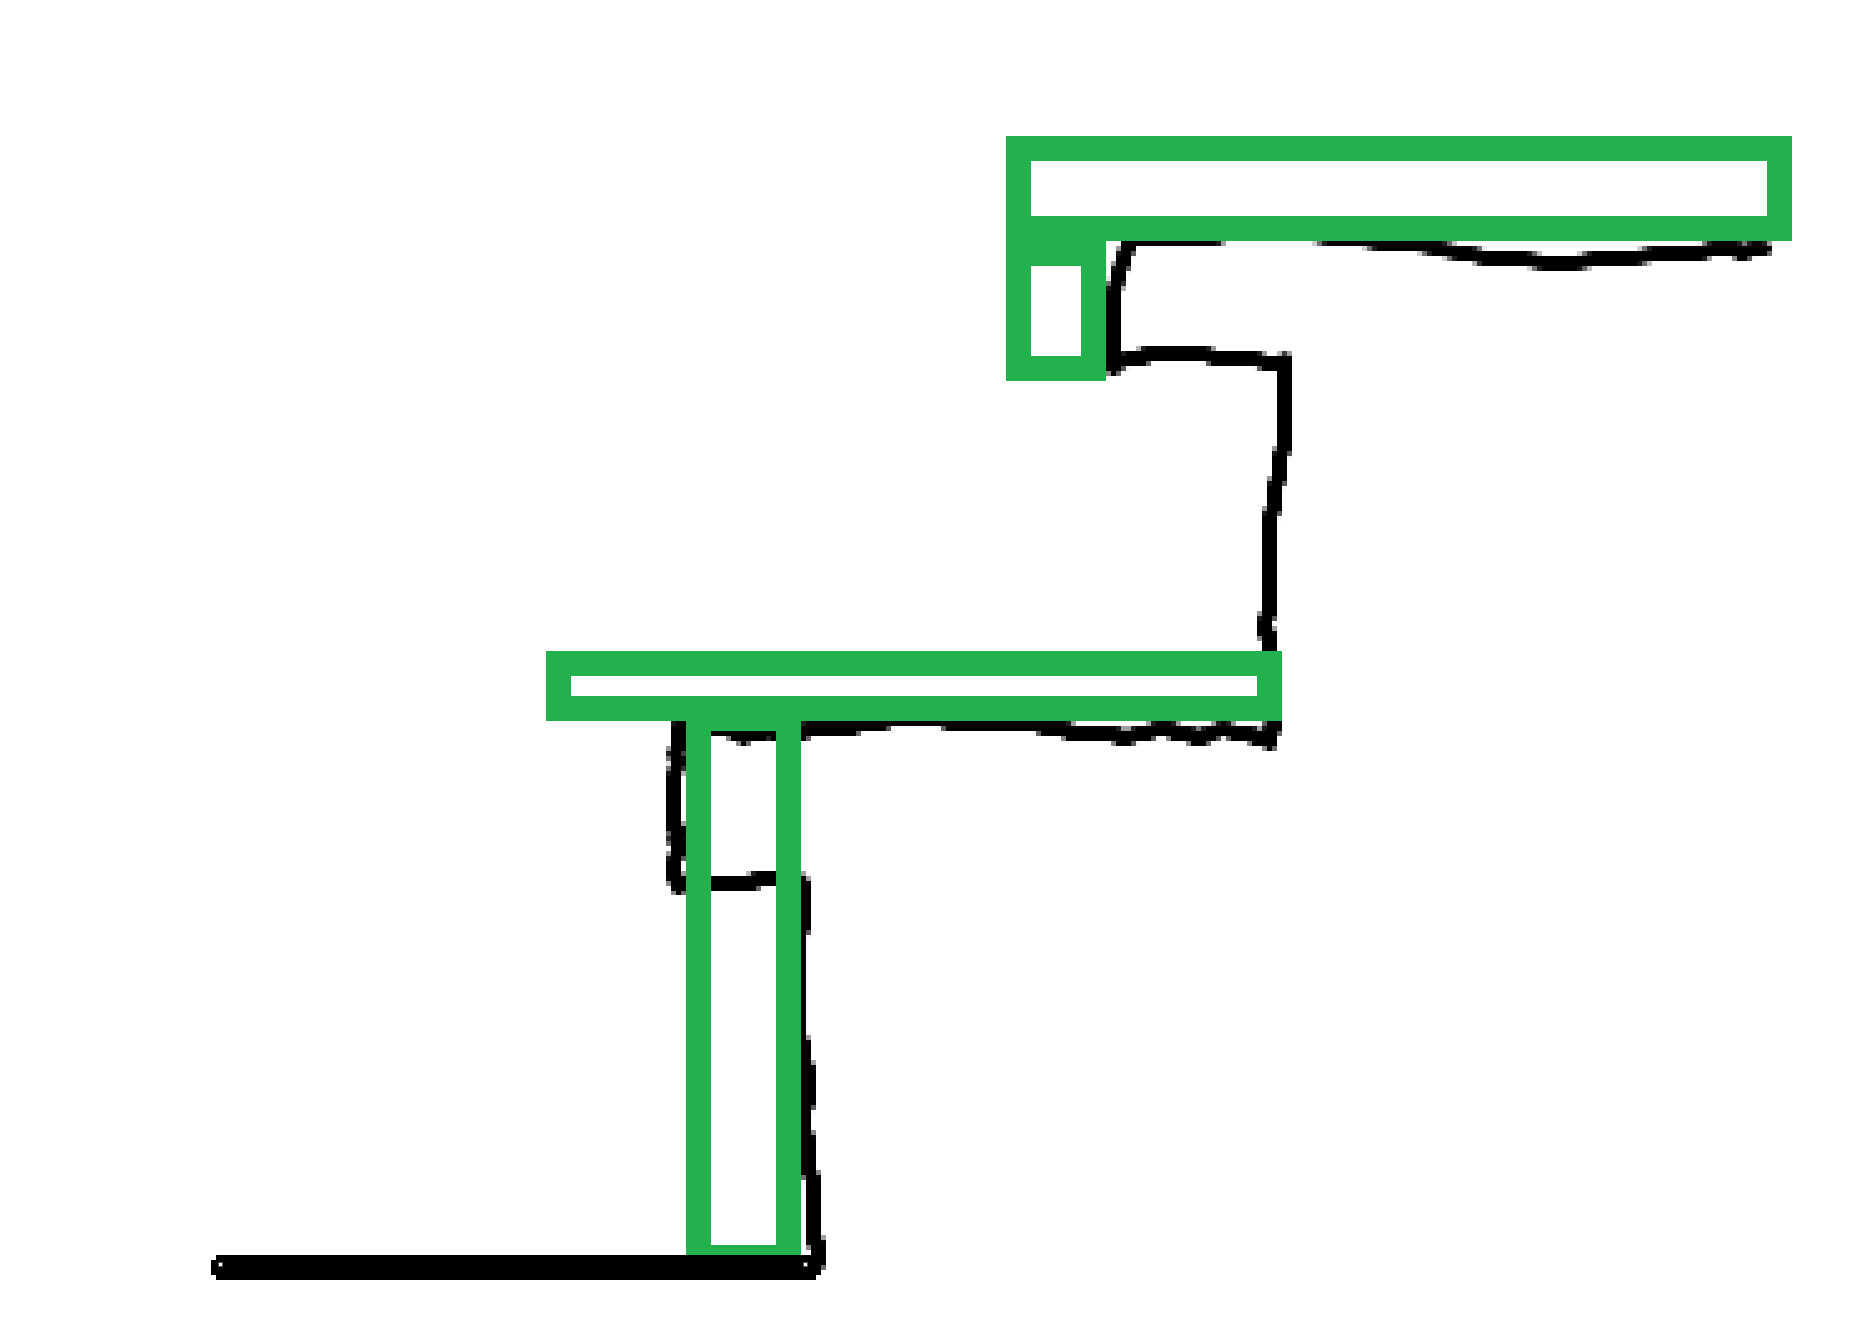
Not sure if I fully understand you, by laying flush with the old one.Z z_bumbi said:
Option 1 With a glued-on oak piece, I imagine it like the upper step. The board is placed flush with the old one. This way, the old nose is retained, and everything is laid outside.
Option 2 The lower step, I cut away the old nose and place a cover piece against the riser. I extend the new step since I still want a nose, so I retain or even increase the depth of the step.
Click here to reply