Sorry, I meant 5 mm.
You can manage with it, but why no list for your platon sheet?
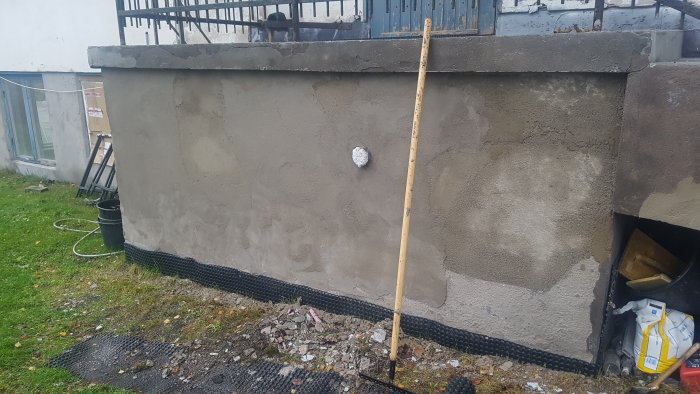
If you look at the first pictures, it went up 50cm more, dug around there 15 years ago, so I haven't had time to cut down until now... will order a list any year now
Aha but it looks better behind the plaster now that you're at it. Just need a bit of mesh over the "flärpen" and a few more cm and a round with your coarser b-bruk, then over with everything when you use 133 and it will be invisible.
Okay, maybe I should arrange for one of those then
Maybe I should fix it a bit with 133 before I do the whole thing, then I can try it out with the material.
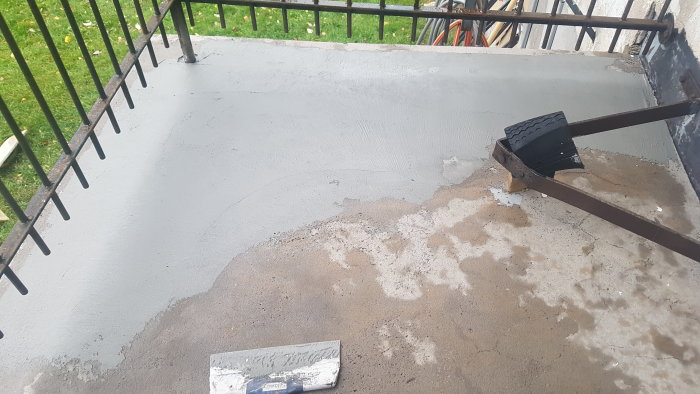
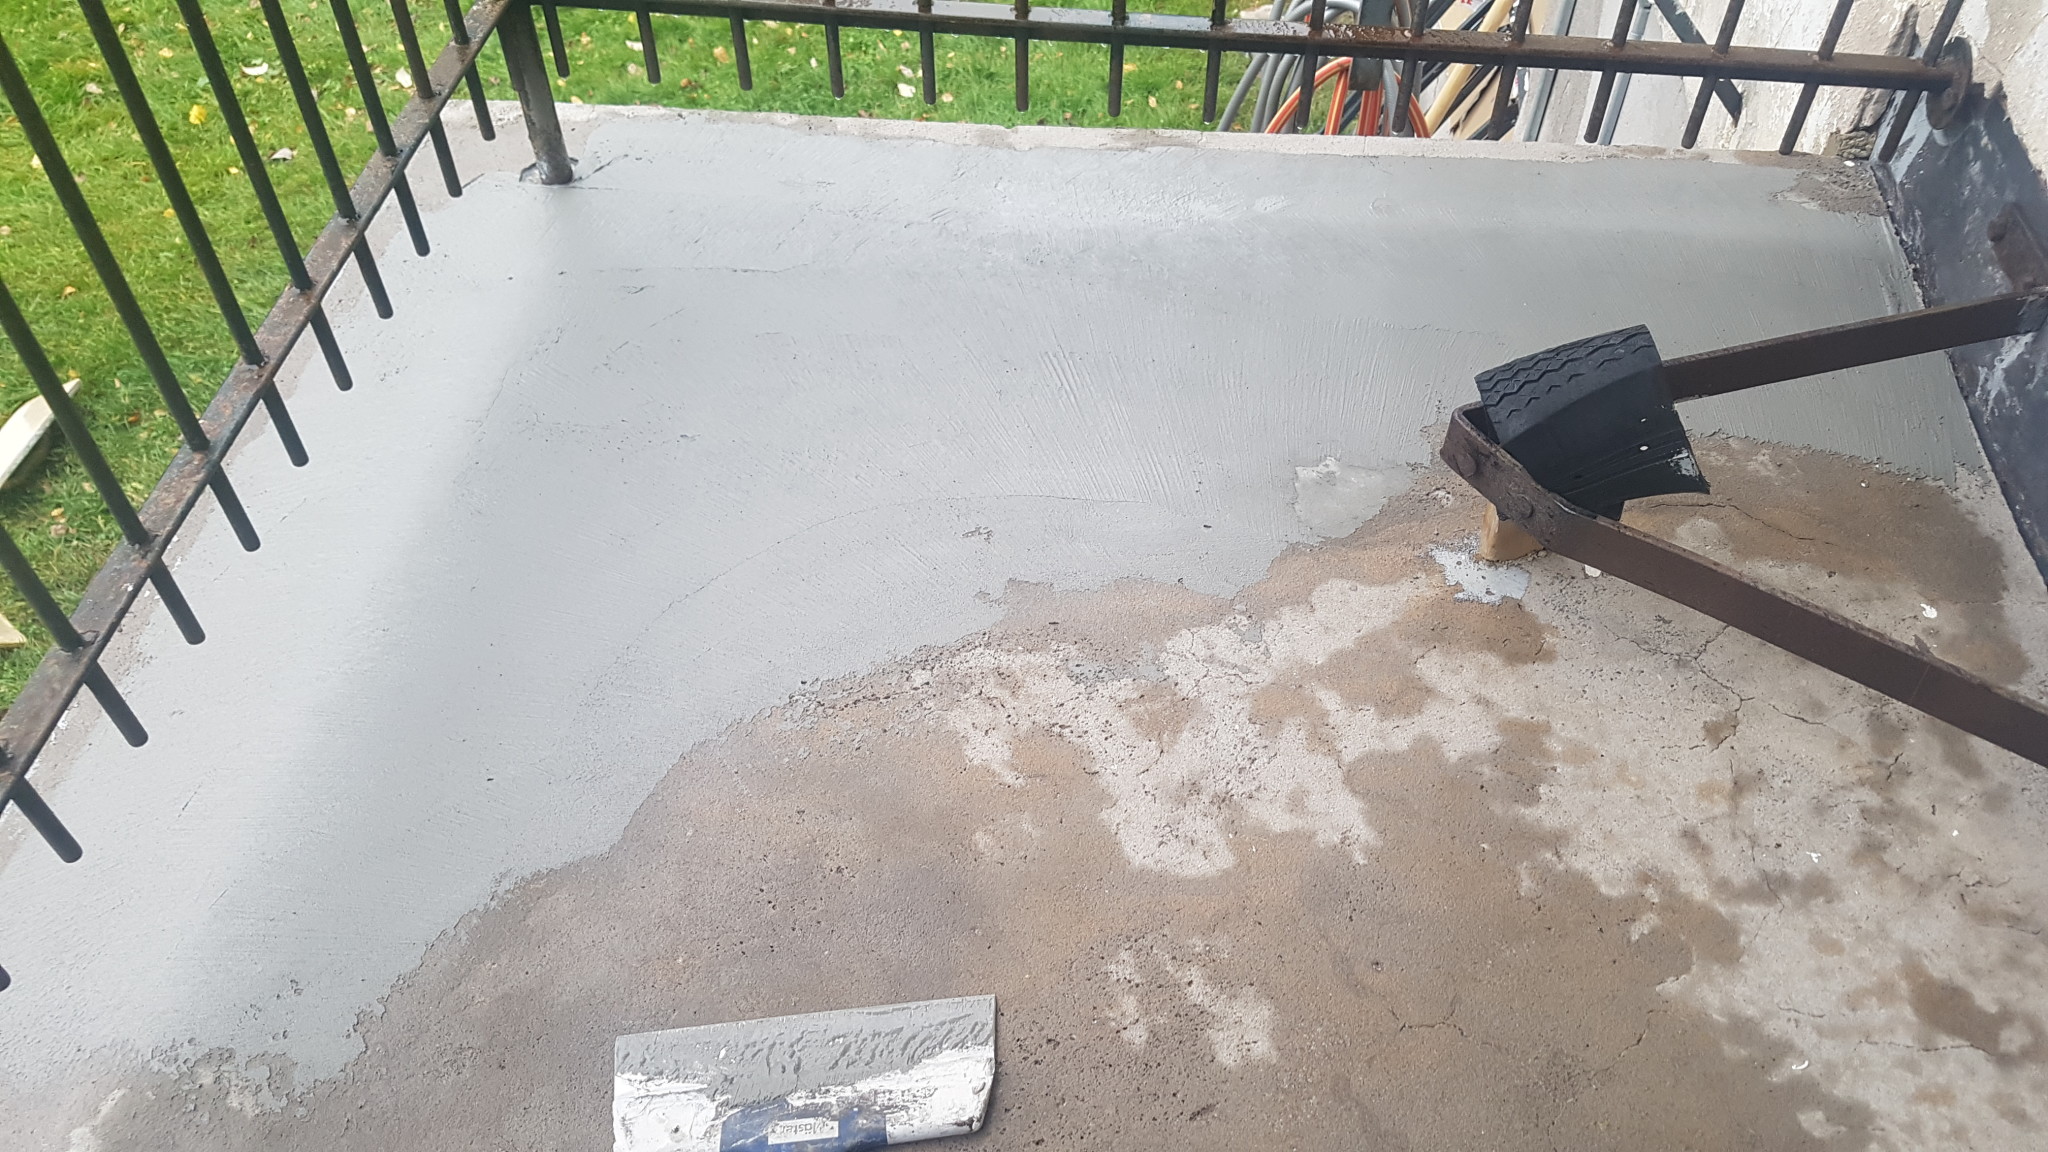
Plastered today, used around 7-8kg A46 for the first round.
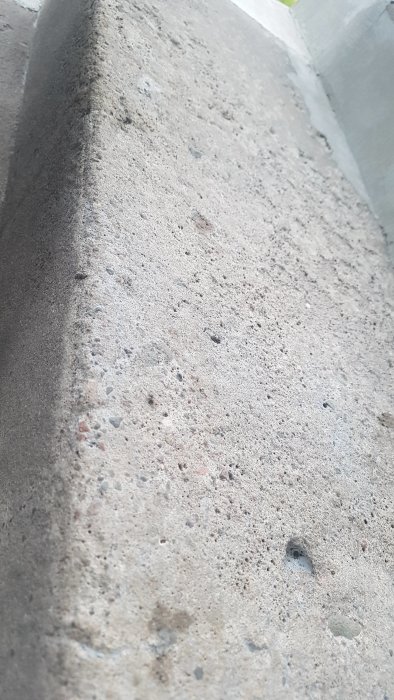
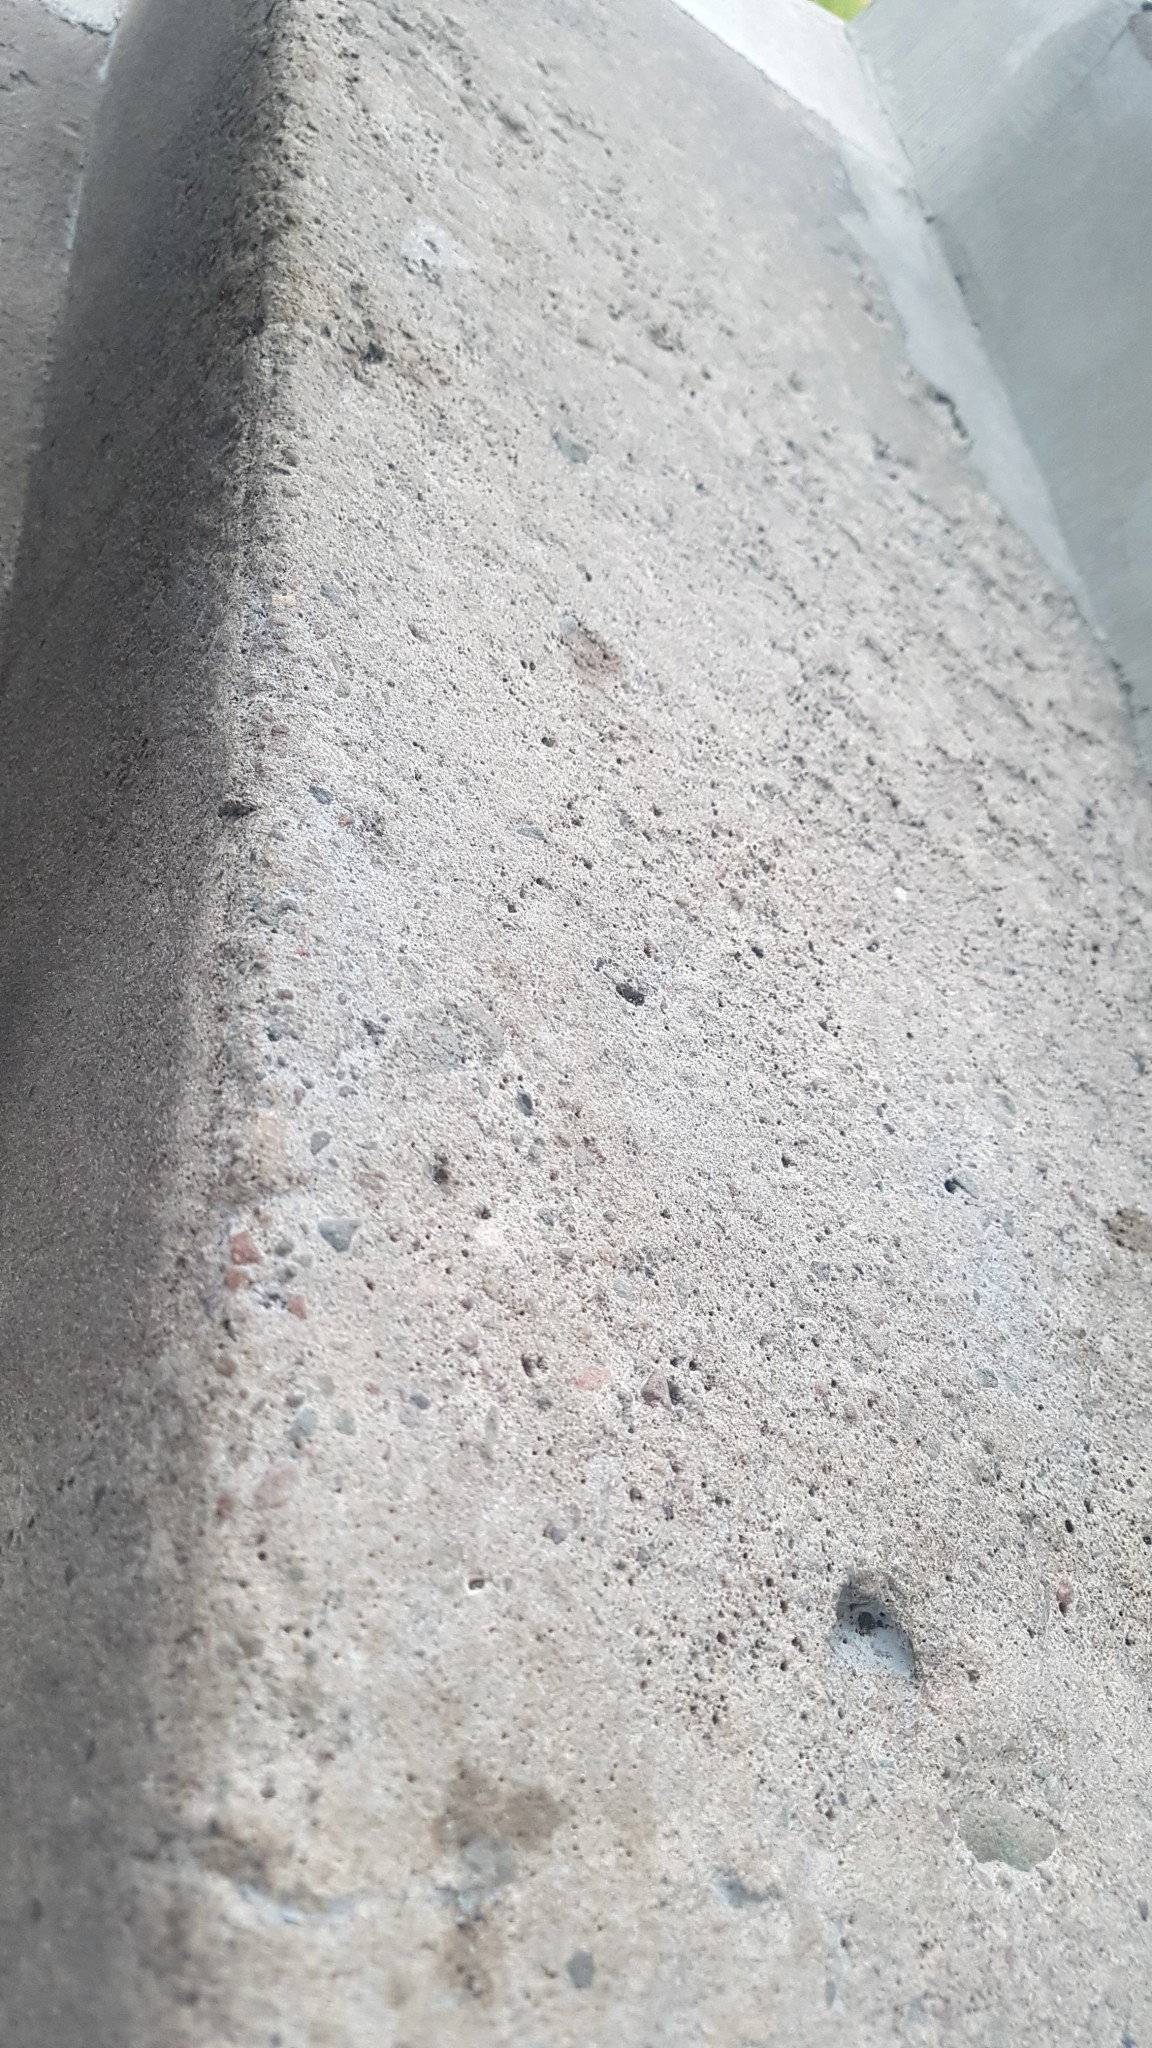
The surface was really poor so it will need at least 2 layers of plaster, close-up of one step.
Done for today, hope it dries by tonight
Seems like there was a cast channel between the last step and the big block at the bottom.
Going to clean it up and see if I can rig something....
Considered splitting a 50 pipe and casting it there
I have been thinking of treating the stairs with Betoflex as a waterproof layer/surface layer and you can get it in any color you want if I understood correctly.
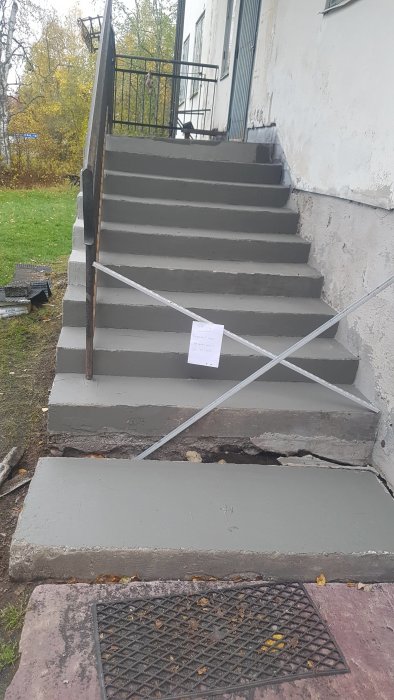
I will probably change the facade by the summer, then it will be white 145mm double facade panels, should the stairs and the foundation be the same color and should it be something like in the last picture, like concrete gray?
Tested a bit with 133 today and it worked really well.
Unfortunately, you become too meticulous when you have your eyes 20cm from what you're plastering, wanting a perfectly smooth surface without any ridges or similar, but that's difficult at least as a beginner.
If the weather is good, I'll mix a bag and smooth the entire surface.
Dried fast as heck at the bottom where I hadn't plastered anything before, even though I watered with the hose.
That's right, I will dig to the left of the stairs all the way so I will attach the strip to the Platon mat on the outside so it will be even all the way.
If the weather is on my side tomorrow, I'll apply the final layer with 133. I'm actually quite satisfied as it is, but I'll apply it anyway.
I've started on the side with the water outlet, and I think 2 layers of 133 will be enough there if I can get the outer corner right... but it will be painted so I can improve it a few times without it being noticeable.
I've chipped away loose plaster from the foundation by the stairs. We'll see if I'll repair it or patch the steps when I have time and the weather cooperates.
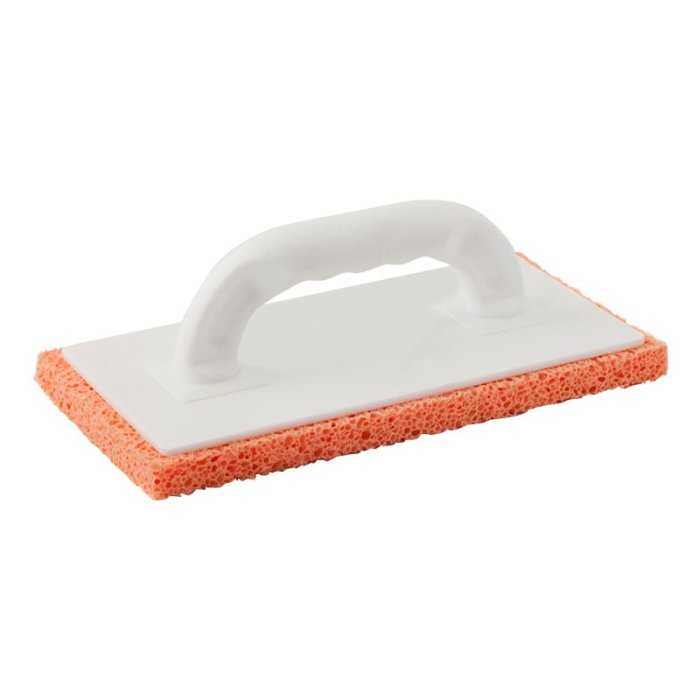
I see "roses (the coarse meshes after stones have been rolled)" in it and see a scrub board in the bucket. It becomes much easier if you use a float board.
Spread it all over and save some mortar in the bucket, then when you float, you can stop up any small holes with mortar and float them together almost immediately for a perfect surface.
Yes, I used it last to get a rougher surface when I decided to go another round on everything, thinking that the next layer would adhere better to a rough surface than a completely smooth one.
Is that the kind I should use? Strangely enough, I have one but don't know what I bought it for...
No, it's a stofilt, more for skim coating, but if you don't feel like going shopping, it will work with that too. This is how they look. There's a good one at Hornbach, 3821/52 is the article number.
Actually got hold of a felt board, I didn't expect that...
However, now the weather is against me...
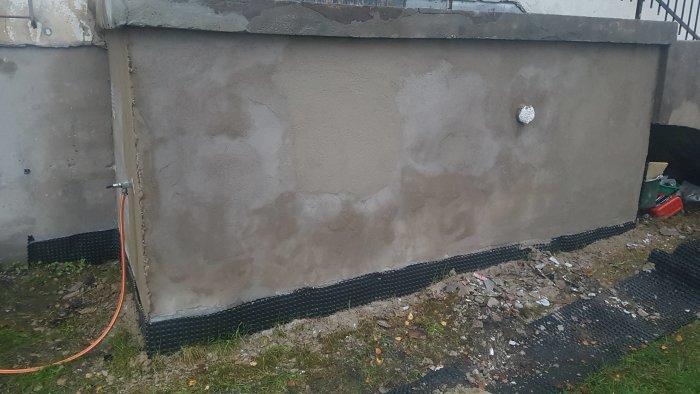
Was there today and the color is very uneven despite it being 133 over the entire surface. I thought it would be roughly the same color on the whole surface, but it might have to do with the weather. It doesn't matter anyway since it will be painted.
Should I wet the entire surface, mix 133 quite loosely, apply with the sword (the whole surface?), wait a bit, burnish then felt when it's quite hard?
Water thoroughly before mixing, then mix it fairly loosely, but you should still be able to have a lot on the steel without it running off. Water again but with a showerhead this time, wait until there are "pools" of water on the surface inside (a few minutes).
Everything up to the corners should be done at once.
If you apply everything quickly enough, you can polish again, but it's not necessary; just make it as even as you can the first time, and you can fix it with the sponge.
The sponge should be dipped in water, then wrung out; the mixture should be dried enough that there is only a weak vacuum between the sponge and the wall. Some should come off, but the sponge should not be able to stick directly to the wall by itself.
You'll get a feel for what you can fix when using the sponge; some holes can be closed, but you shouldn't try too many rounds.
If it doesn't work in about three rounds, it's better to apply a small dab on the hole and try again.
Otherwise, you'll take too much material from the sides, and the hole will disappear, but there will be a dip instead.
Vi vill skicka notiser för ämnen du bevakar och händelser som berör dig.
 to cut down until now... will order a list any year now