What plaster/mortars did you use on the staircase?
Plaster Combitherm A CS IV 20kg/bag. Can't remember how many bags, but maybe eight in total. 219 SEK each at Bauhaus.
As I mentioned, I've moved since this was done in August, but not far, and the staircase still looks great. I'll upload some pictures of the rest of the work now.
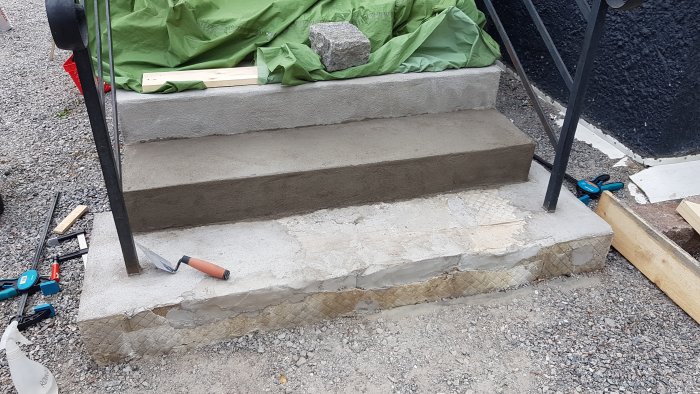
So now comes the end of the story with the staircase - the technique of using battens to render against turned out to work excellently, and it was good even when it hardened. So we continued the next day with the bottom steps while keeping the finished ones somewhat moist in the heat with a water hose and some old outdoor furniture covers.
It cured fairly quickly, but we went a few days without using the staircase just to be safe. The finish turned out as I wanted, it looks kind of handmade, so not perfect lines but natural in a way.
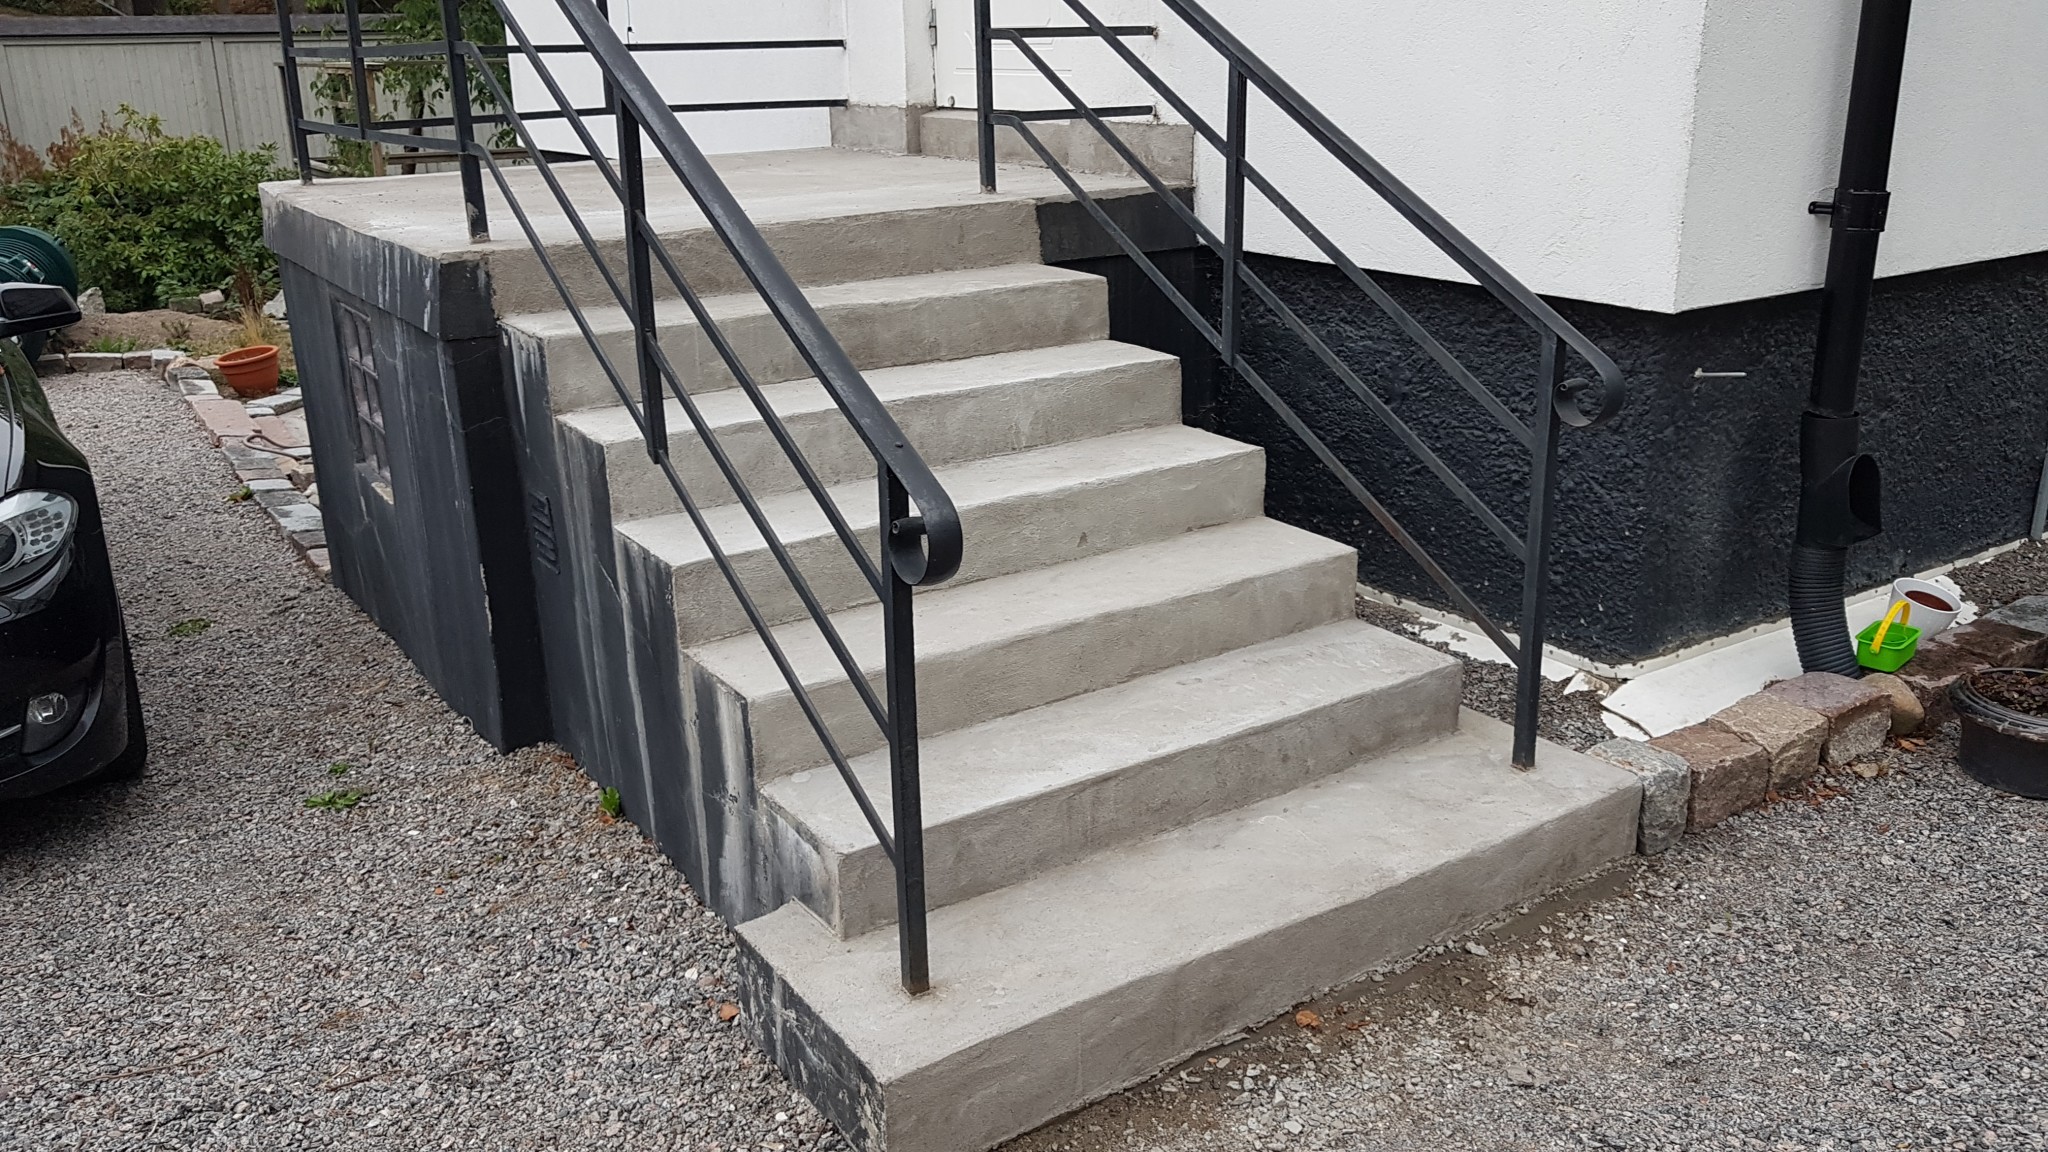
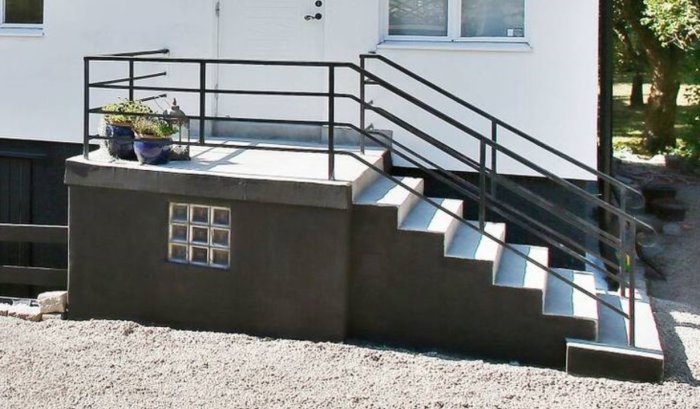
To tidy up the sides, I simply bought black silicate paint. Just wash it off and then paint. As I mentioned earlier, the house was going to be sold, so below is a clip from a real estate agent's photo for this.
I think it turned out about as I had hoped, and I hope the stucco stays nice and intact for a long time. The sides, however, will likely need to be painted now and then as debris from the house causes a lot of dirt and water to run down here. But it probably only takes an hour to touch up, and I left the silicate paint for the new owners so they have something to do if they get bored.
A clear improvement compared to the original, even if the flower pots enhance the atmosphere somewhat.
If I may offer some final success tips from an amateur who has only done this once, they would be these:
- Mix the mortar thoroughly for a long time.
- Make sure to have something to plaster against for the steps; it's difficult to make adjustments freehand.
- Have a properly damp base and not too dry mortar. It sets incredibly fast, at least for an amateur.
- Preferably, have two people working with their own trowel to increase the amount you can mix at a time.
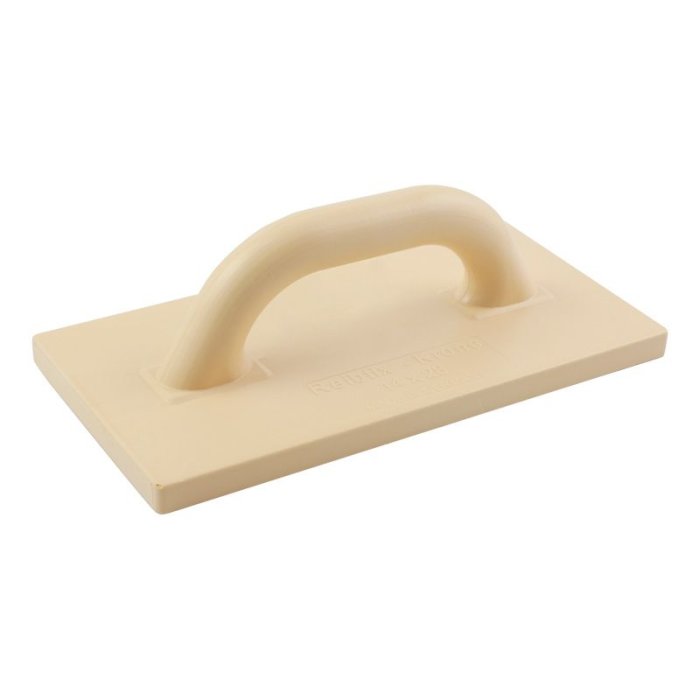
- After applying with the trowel, spray on water with a spray bottle and work it around with a float to get the right finish on all surfaces and soft edges. I bought an extremely light and good one made of plastic, which might have been my best investment for 129 kr. (picture below)
- Try to maintain the same level of moisture in the mortar so that the color remains consistent. This is important if, like me, you don't intend to paint but are after the concrete-like color. I adjusted the final moisture by spraying with the spray bottle before the final finish with the float.
- It requires more mortar than you think, despite using a thin layer of plaster. It's better to buy a few extra bags and then return them on your next visit. We had to go and buy two more bags in the middle of everything... I remember we bought six bags first, and it took eight in total.
A professional likely has different advice to offer and works in a completely different way... but I'm glad it went as well as it did!
Thank you for a detailed description and for taking the time to describe how you did it.
How has it held up to walking on it?
JustDoIt said:
May I offer some final success tips from an amateur who has only done this once, they are these:
- Mix the mortar thoroughly for a long time.
- Make sure to have something to plaster against for the steps, it's difficult to adjust by hand freely.
- Have a properly damp surface and not too dry mortar. It sets unreasonably fast, at least for an amateur.
- Preferably be two people working with their own trowel to increase the amount that can be mixed at once.
- After applying with the trowel, spray water with a spray bottle and work around with a float to get the right finish on all surfaces and soft edges. I bought an extremely light and good one in plastic which might have been my best-invested 129 kr. (picture below)
- Try to maintain the same level of moisture in the mortar so the color remains consistent. This applies if, like me, you're not planning to paint but seeking the concrete-like color. I, at least, adjusted the final moisture by what I sprayed on with the spray bottle before the final finish with the float.
- You use more mortar than you think, even with a sparingly applied layer of plaster. It's better to buy a few extra bags and return them on your next visit. We had to drive and buy two more bags in the middle of it all... I think we bought six bags the first time, and it took eight in total.
A professional probably has other advice to give and works entirely differently... but I'm glad it went as well as it did!
Thank you for a detailed description and for taking the time to explain how you did it.
How has it held up to being walked on?
Hi!
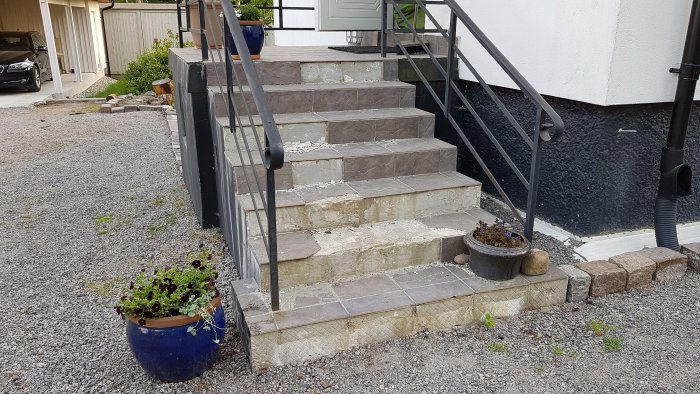
Well, we moved out of there in October 2018, so since then I haven't inspected the stairs closely. But I ran by the other day and tried to take a look, and it seems like they have applied some sort of surface layer on the plastered areas. Not sure if it could be something like DuraTrapp or something similar that I have read about before. It might be a good move that can help with a tight surface layer that seals up the small cracks that appeared in the plaster in some places. However, I personally didn't think the surface you get with small stones suited the house.
How did you do when plastering the vertical surfaces of the steps? I'm facing a similar project and am worried about how that part of the work will go to make it reasonably even. You had a rule to plaster after to get the horizontal surfaces even, but did you do the vertical ones freehand? If you remember... grateful for an answer!
@johanekenberg - I went back and looked at some pictures and I think we didn't set a rule for these. It wouldn't have worked as there was already wet plaster on the top side, so we probably did the vertical parts right after and tried to make it merge with what was on the horizontal above so that the stair nose could be shaped. It's a bit tricky to say the least, but practice makes perfect!
If you can find a way to support it, that's great, I can see we had the beams on the side at least, but that doesn't help upwards... Good luck!
TobiasDahlberg said:


JustDoIt said:
May I offer some final success tips from an amateur who has only done this once, they are these:Peguss said: