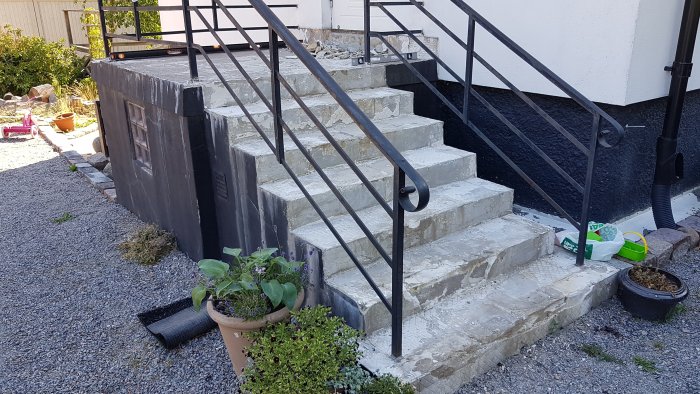
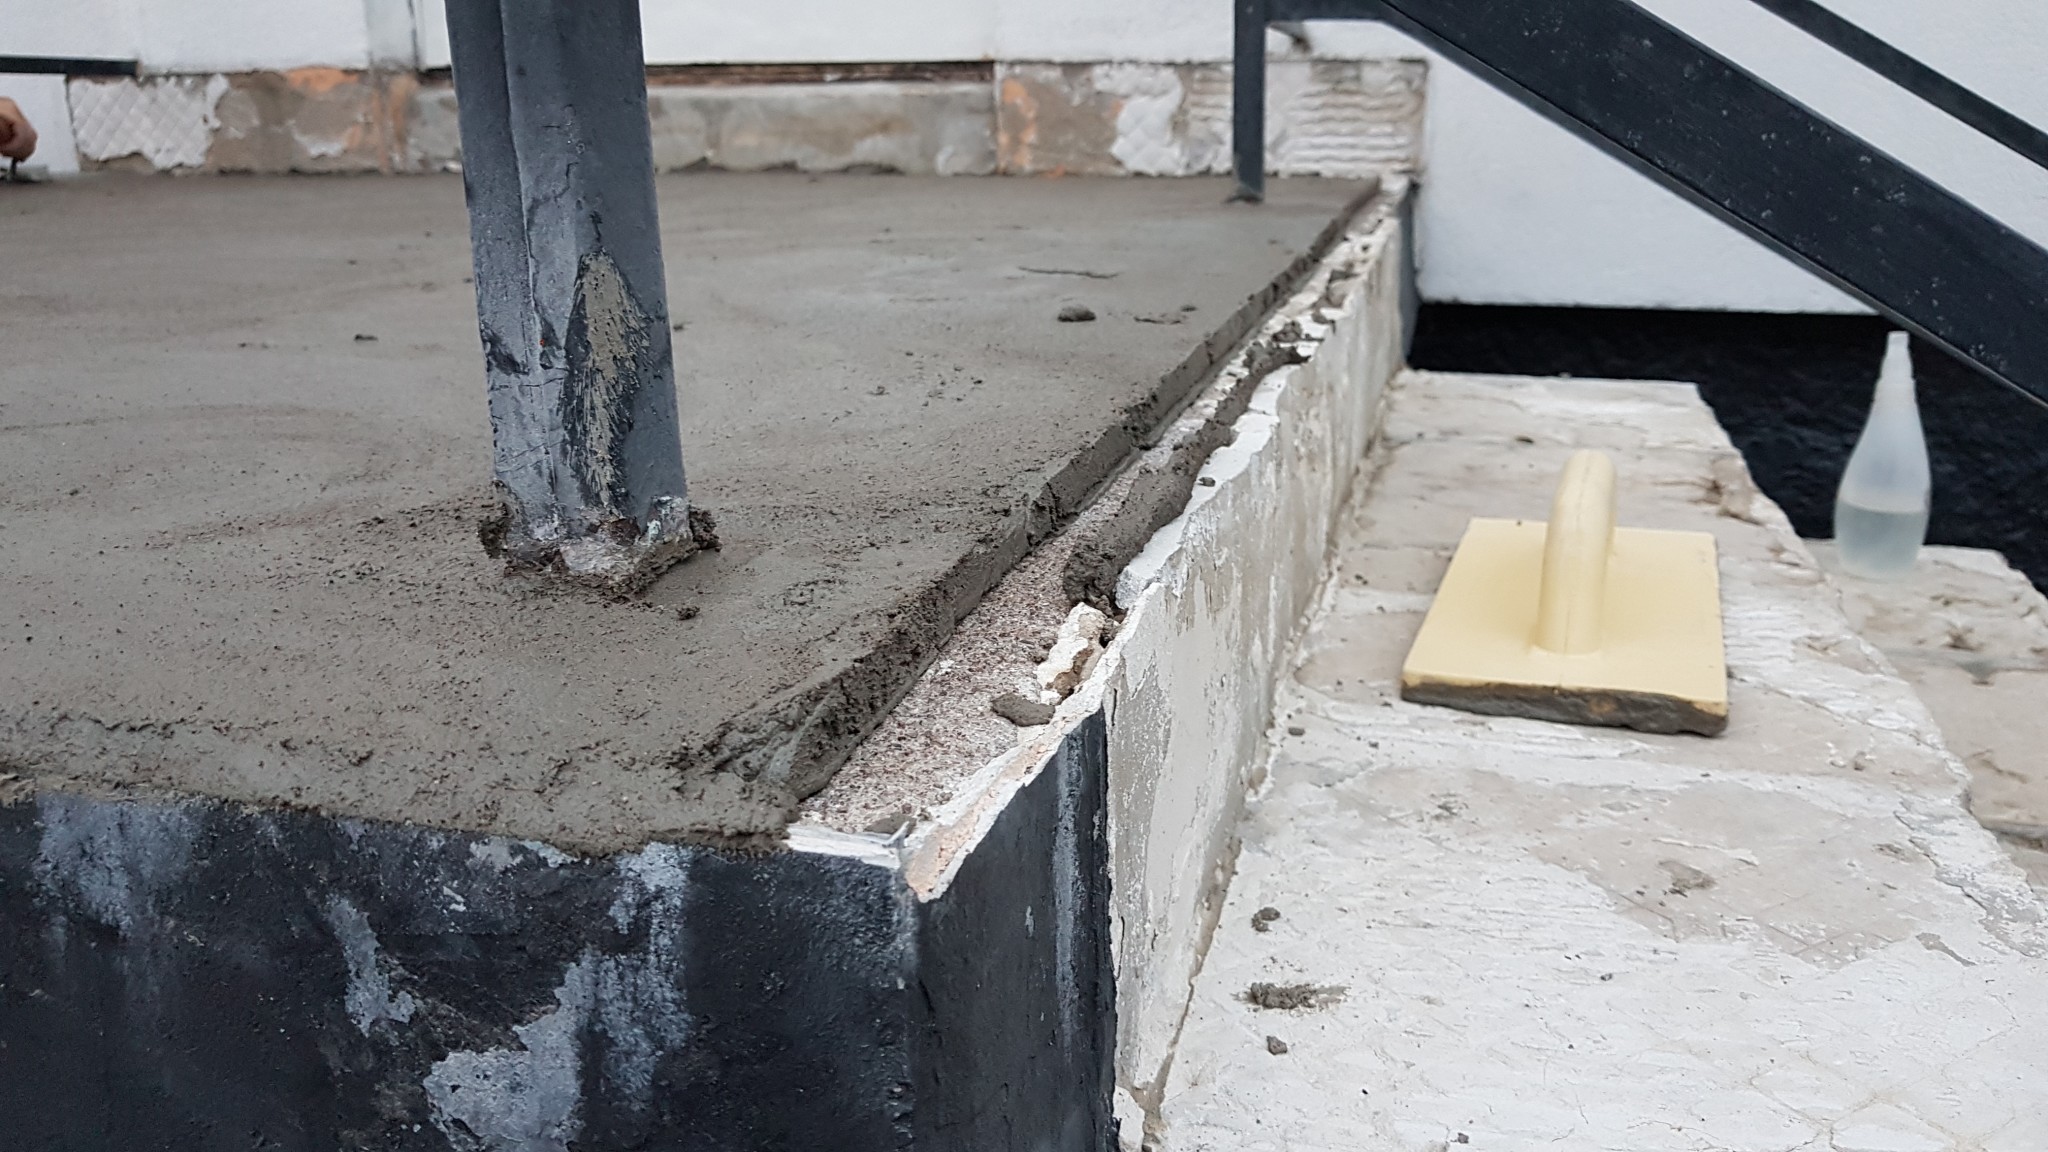
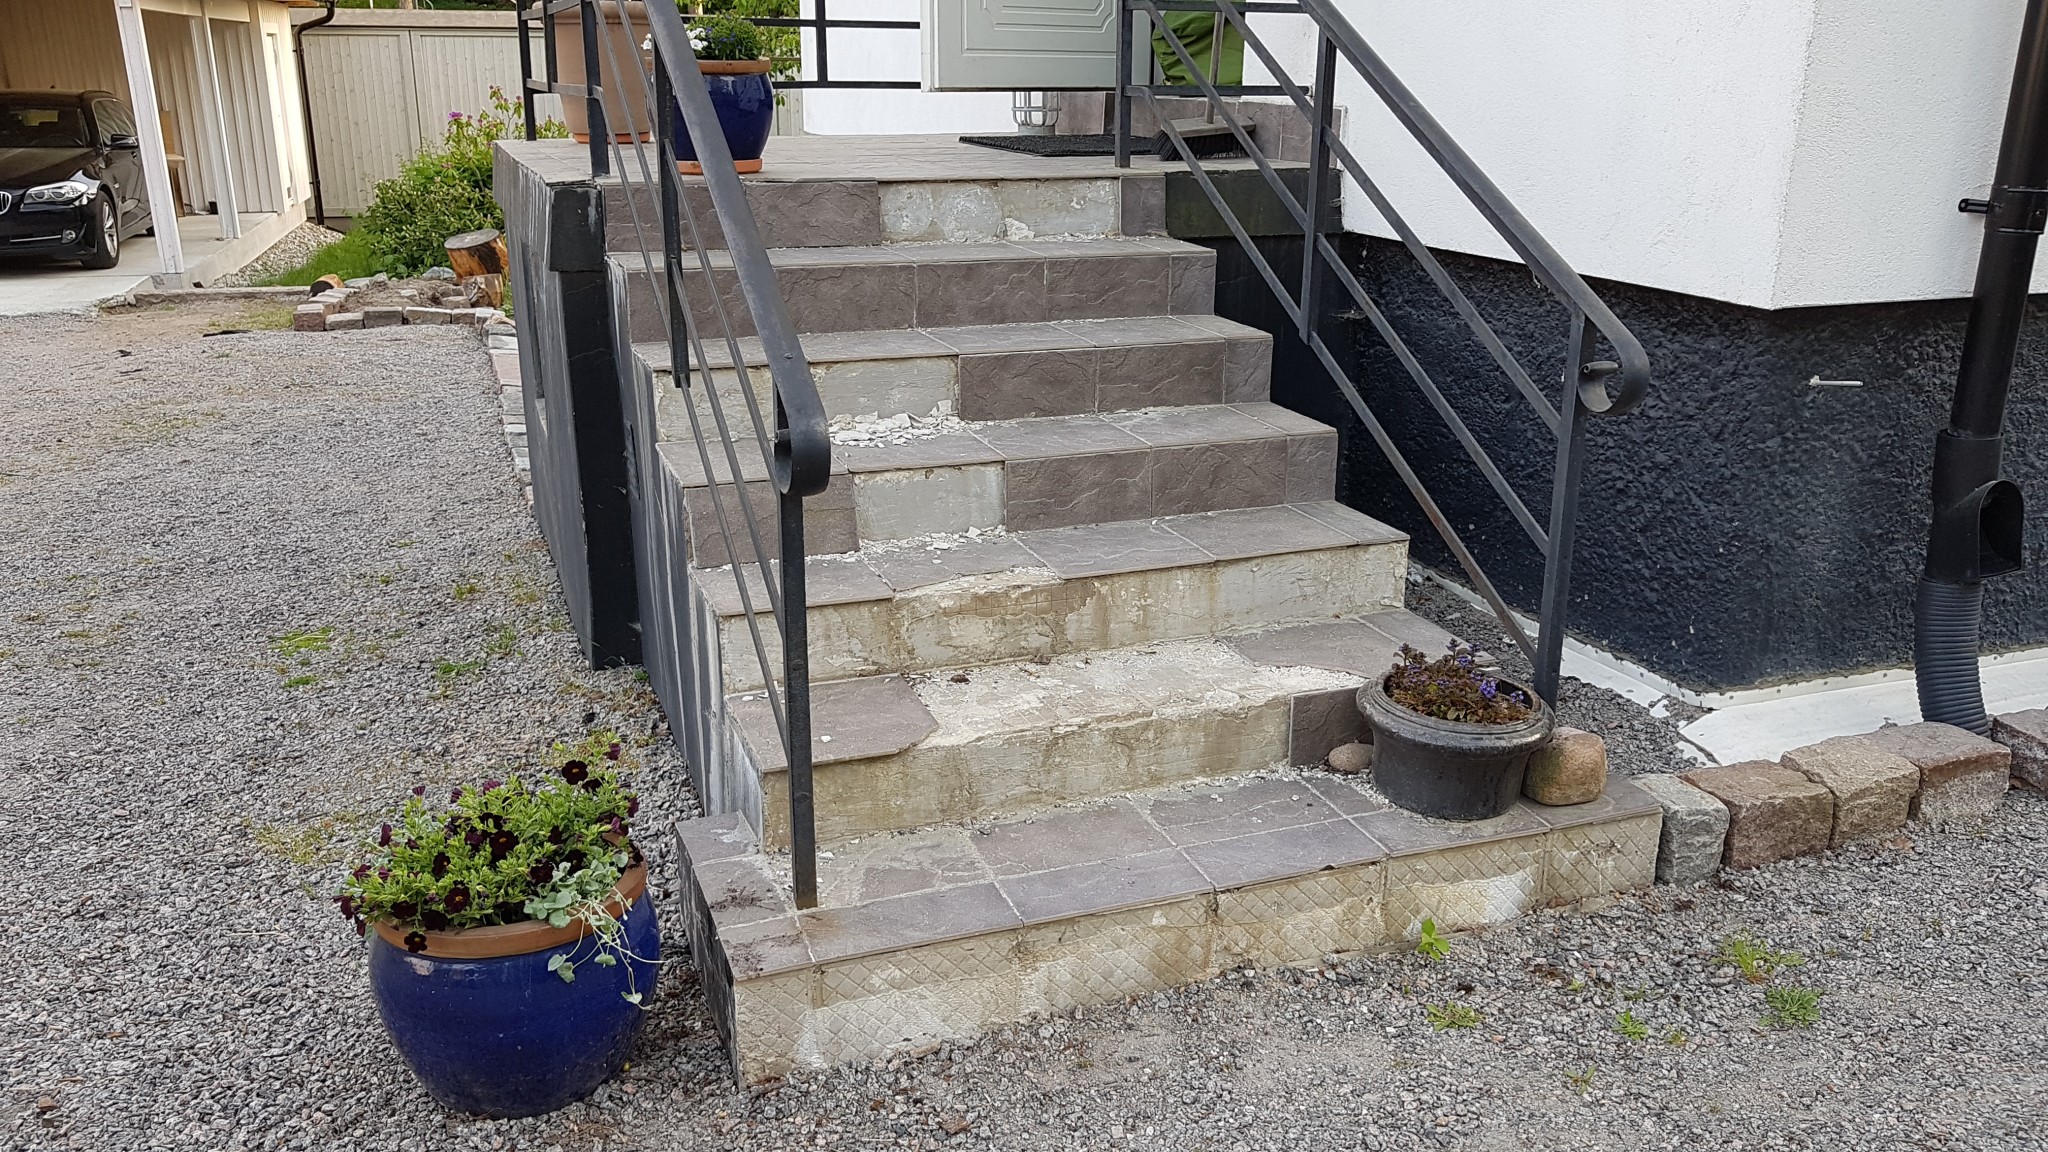
After five years in the house, the entrance stairs look anything but good. It's unclear how old they are, but they are made of concrete, and the previous owner had them covered with some type of tiles that are fixed in a way that is anything but frost-resistant. There is a lot of air behind them and the work is generally poorly done, but I believe the concrete itself may be in good condition. (see image below)
What I would like to do is remove the tiles, adhesive, and everything else loose to then plaster the stairs to achieve a look similar to raw concrete. Preferably without painting the plaster, but I can do that if needed to get the right appearance.
I found the link below, where they do exactly what I am thinking both in method and appearance, and after some repairs, they plaster the entire stairs with "fiber-reinforced concrete mortar." Does anyone know what type of mortar is meant and if it needs to be reinforced when plastering? They don't mention any special technique other than priming beforehand. https://www.dinbyggare.se/renovera-betongtrappa-sa-gor-du/
Grateful for all the advice I can get on materials, techniques, etc.! I would like to do something that lasts for a long time.
The fiber-reinforced is, as I understand it, meant for not needing reinforcement.
Thanks for the response, and I agree with you. At the same time, as I've looked at some products, I've seen fiber-reinforced mortar that's meant to be applied in two layers totaling 8-15 mm wet-on-wet with fiberglass mesh in between. Feels a bit cumbersome, and I guess I'll opt for another product.
It's just a matter of testing and hoping it holds, but it would be interesting to get tips from someone who has plastered a staircase before. It's a bit different from plastering a facade as it has to withstand being walked on...
I'm planning to describe how it develops, and the idea is to attempt with fiber-reinforced plaster and hope it holds. In the absence of better suggestions, you know...
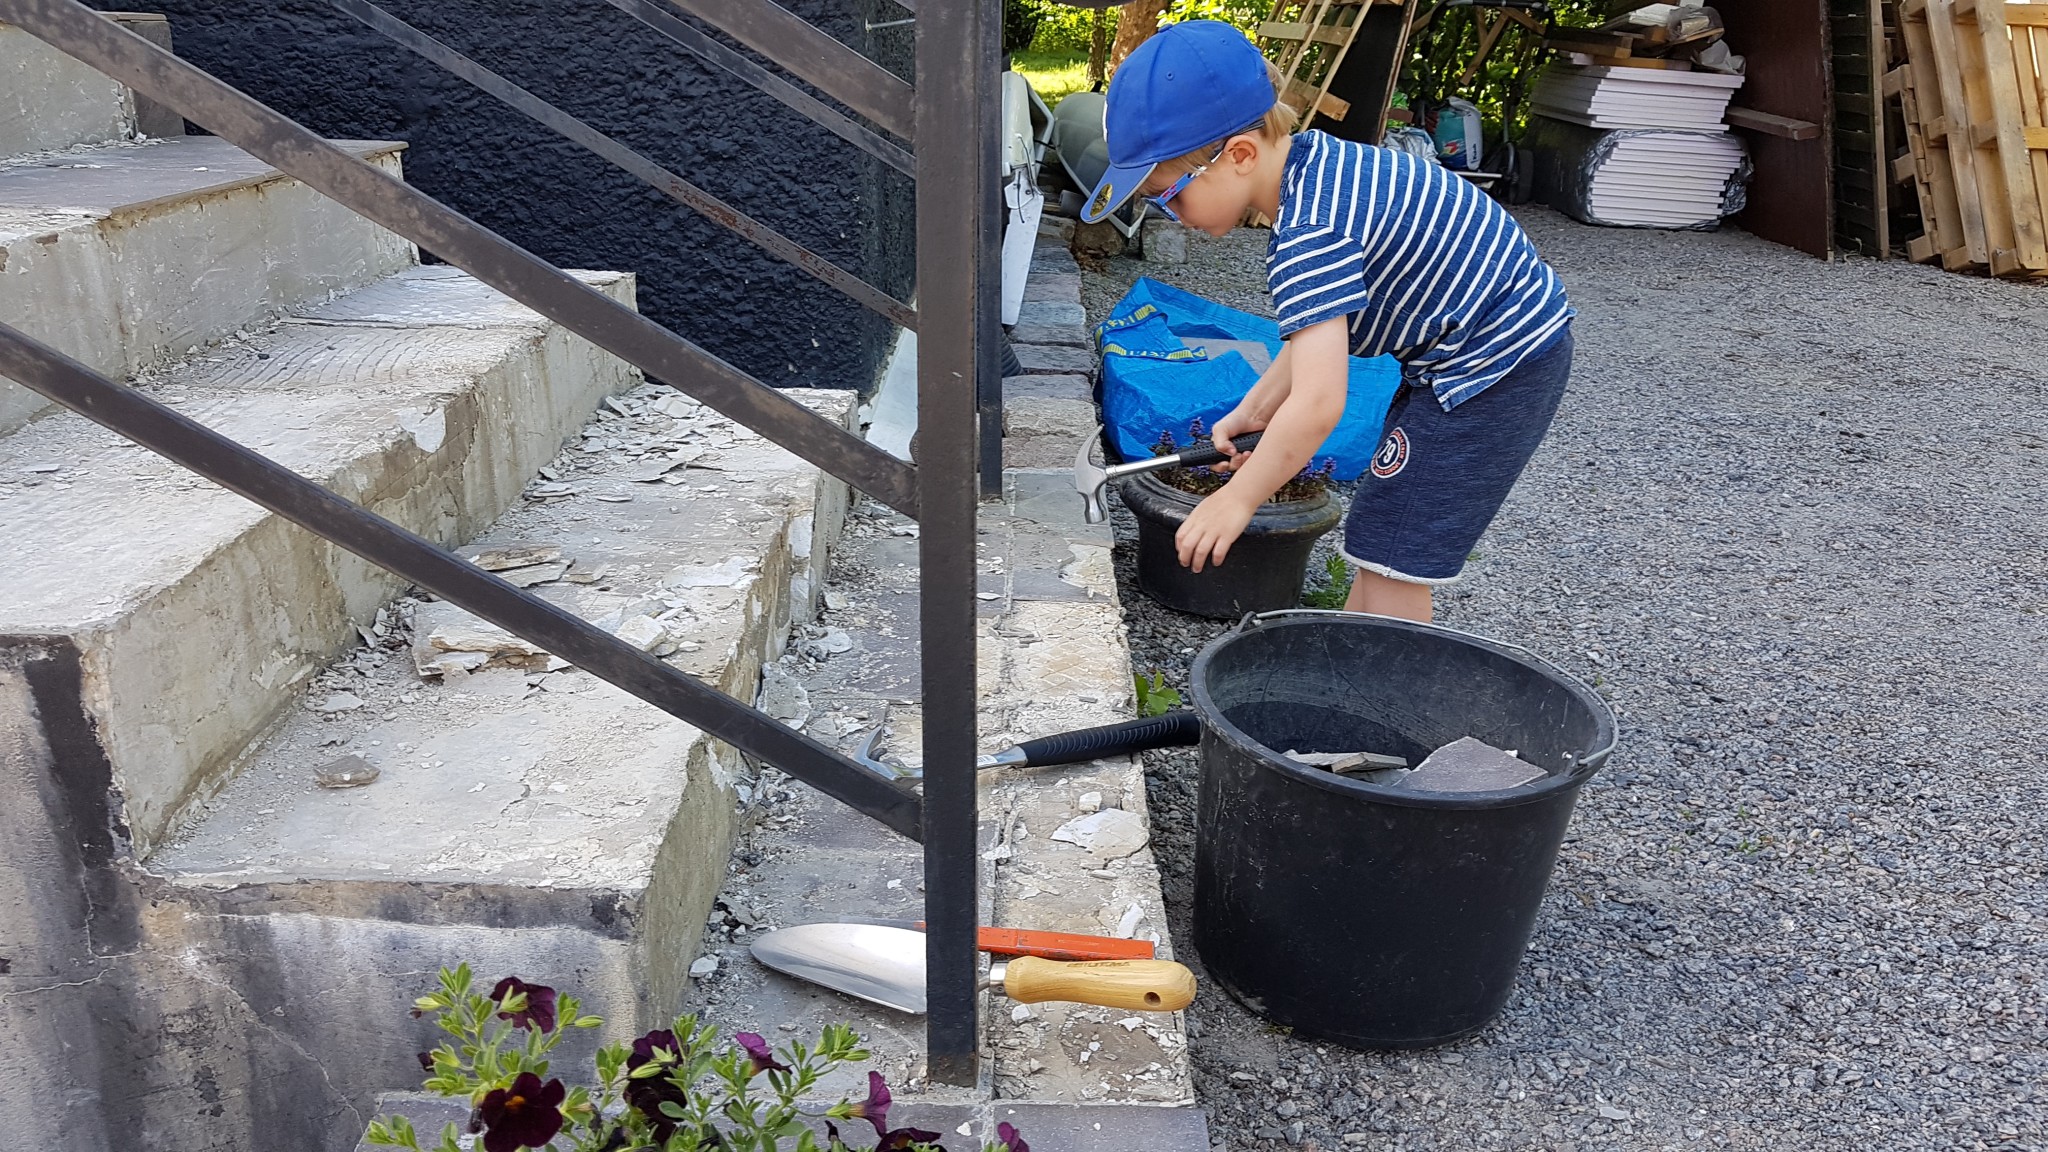
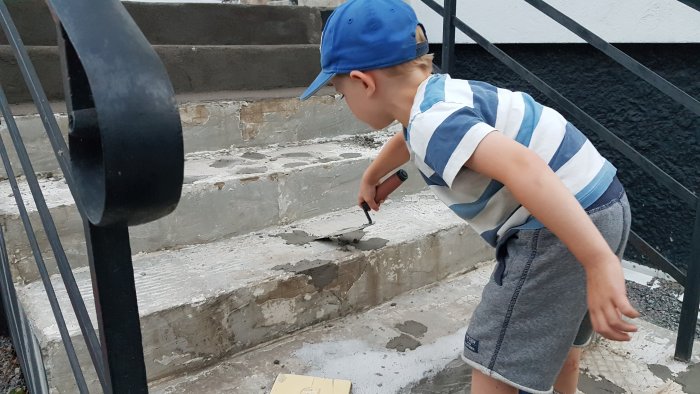
As the picture below shows, we have now, with the help of an underpaid child laborer, cleared the stairs of tiles. It went quickly, despite being a child. What's more difficult is that under these tiles are two layers with quite thick adhesive that are attached with varying degrees of firmness. Apparently, previous owners have also removed a layer of tiles and applied new adhesive on old adhesive, with limited success. The idea is to clear everything that isn't really firmly attached; it's unfeasible to chip away everything.
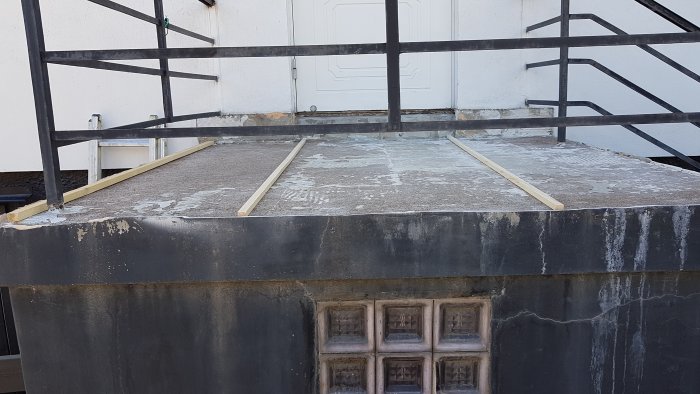
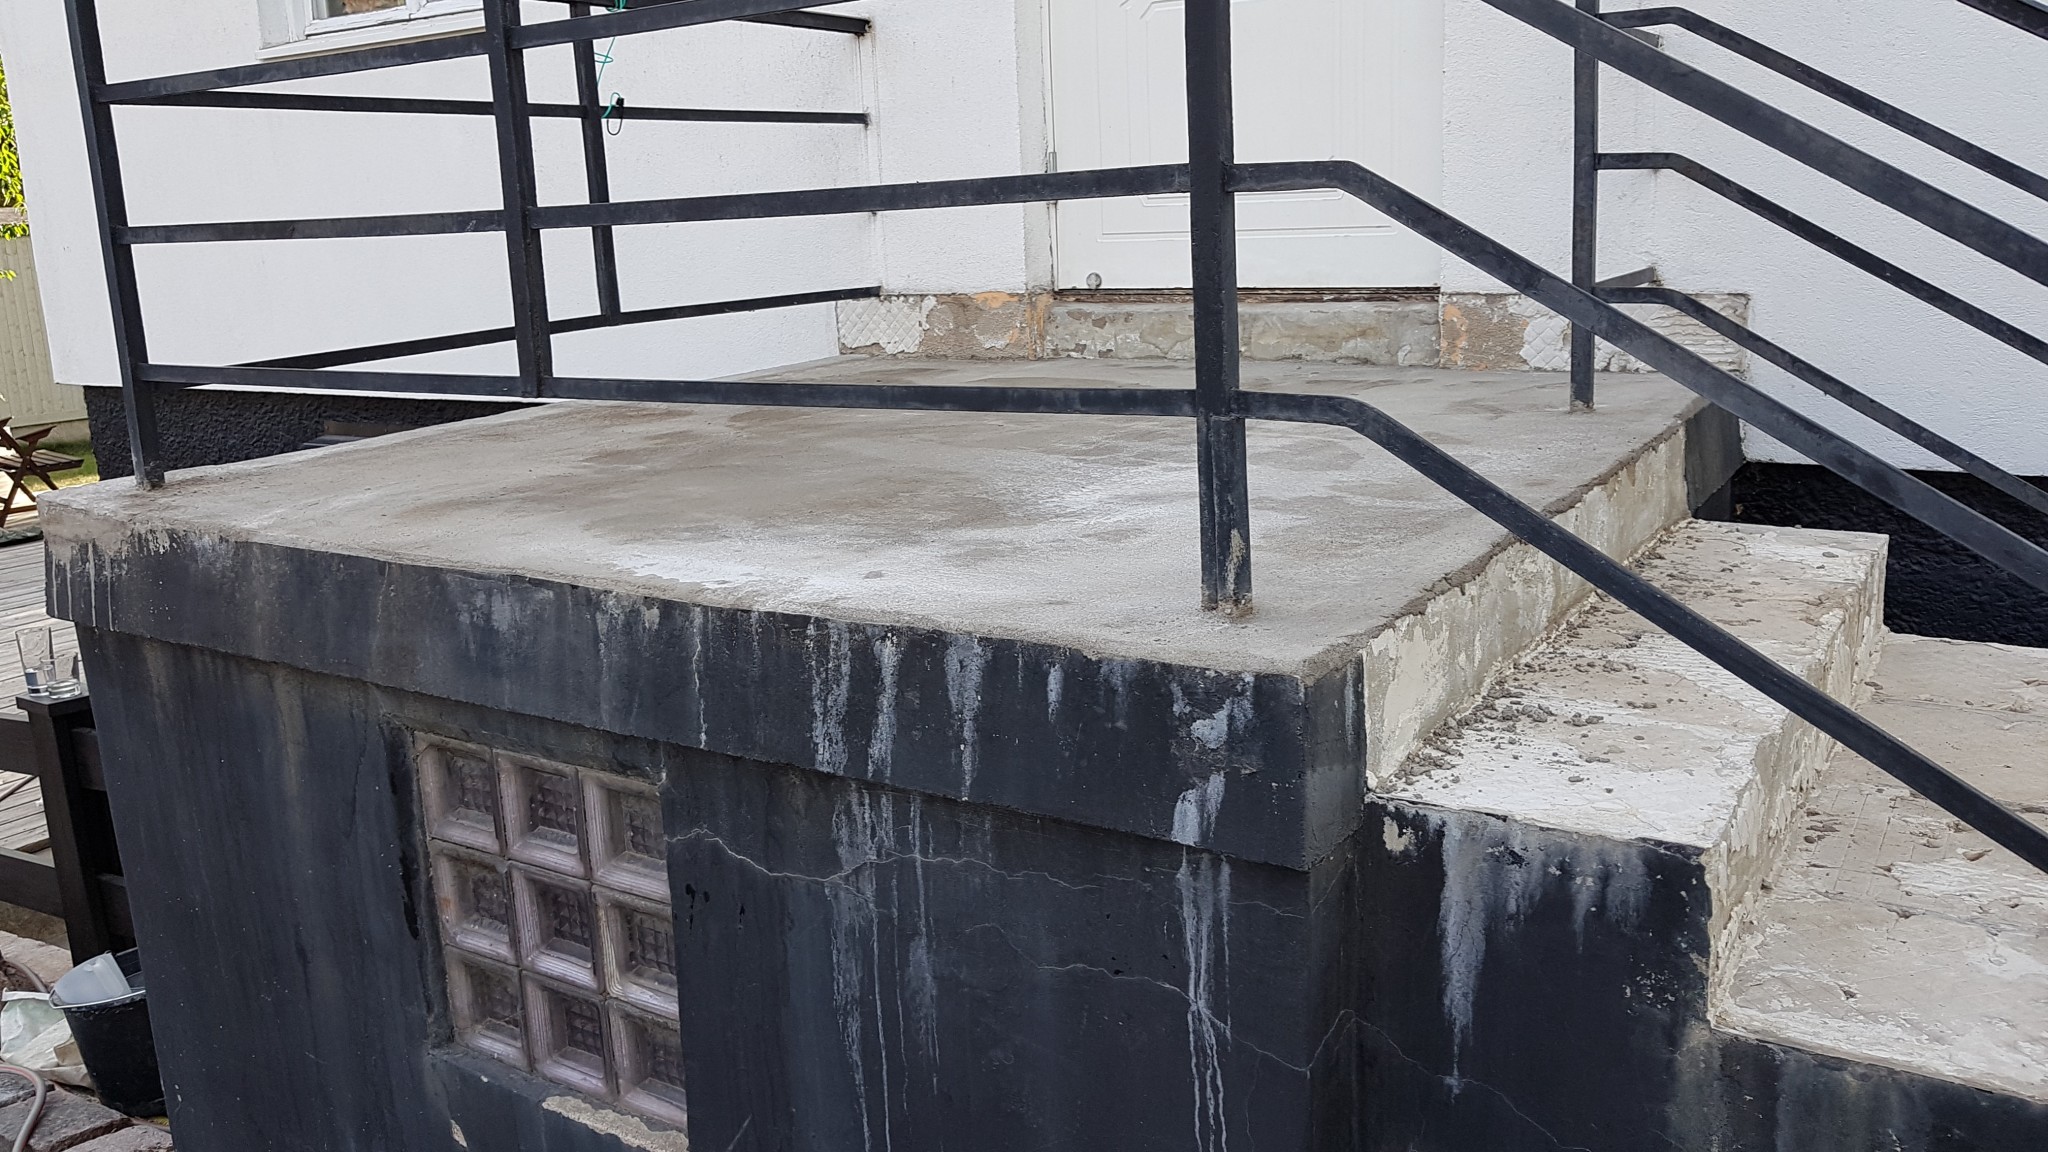
Work on the stairs has continued over the summer, and we are getting closer to some form of result, though it's a bit uncertain how it will turn out right now.
Here you can at least see some of what has been chipped away, and two spirit levels showing that it actually slopes away from the house as it should. This slope was effectively built over with adhesive and tiles...
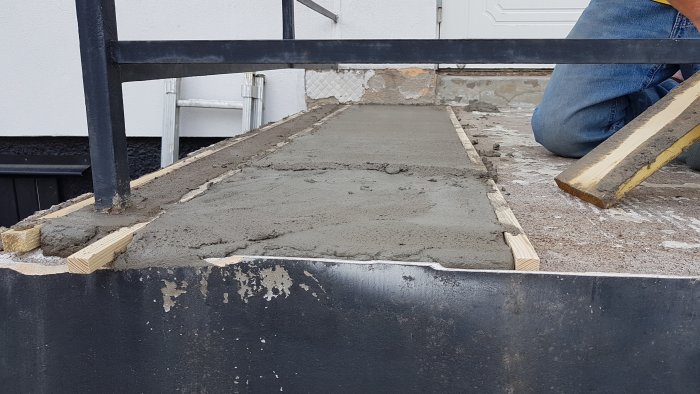
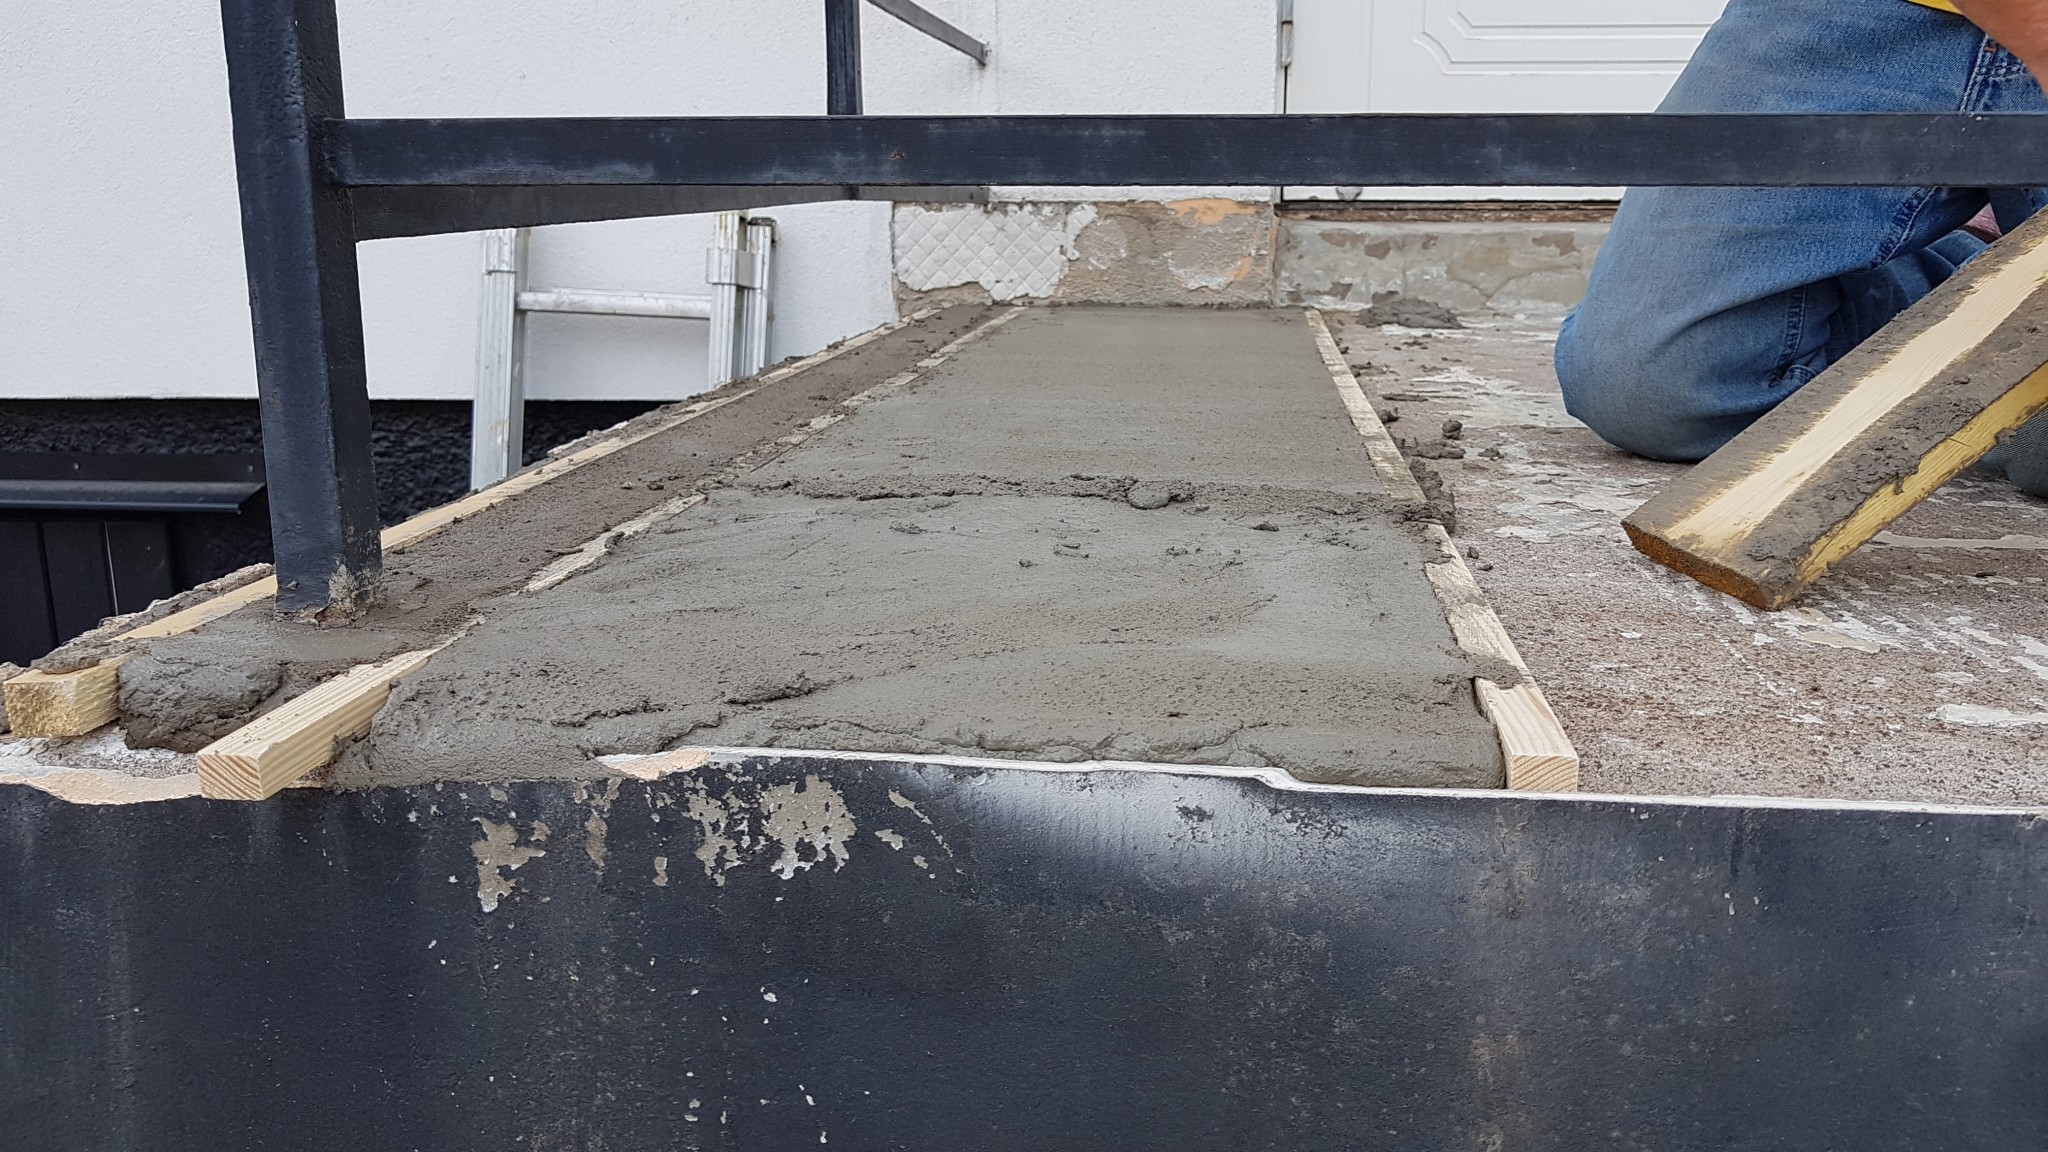
The slats were 15 mm thick, which turned out to be simply thick. But then it should hold well, one might think... It will have to be thinner on the steps.
So far so good. No problems plastering a large surface, but it is really difficult to do the edges and steps so that they turn out well.
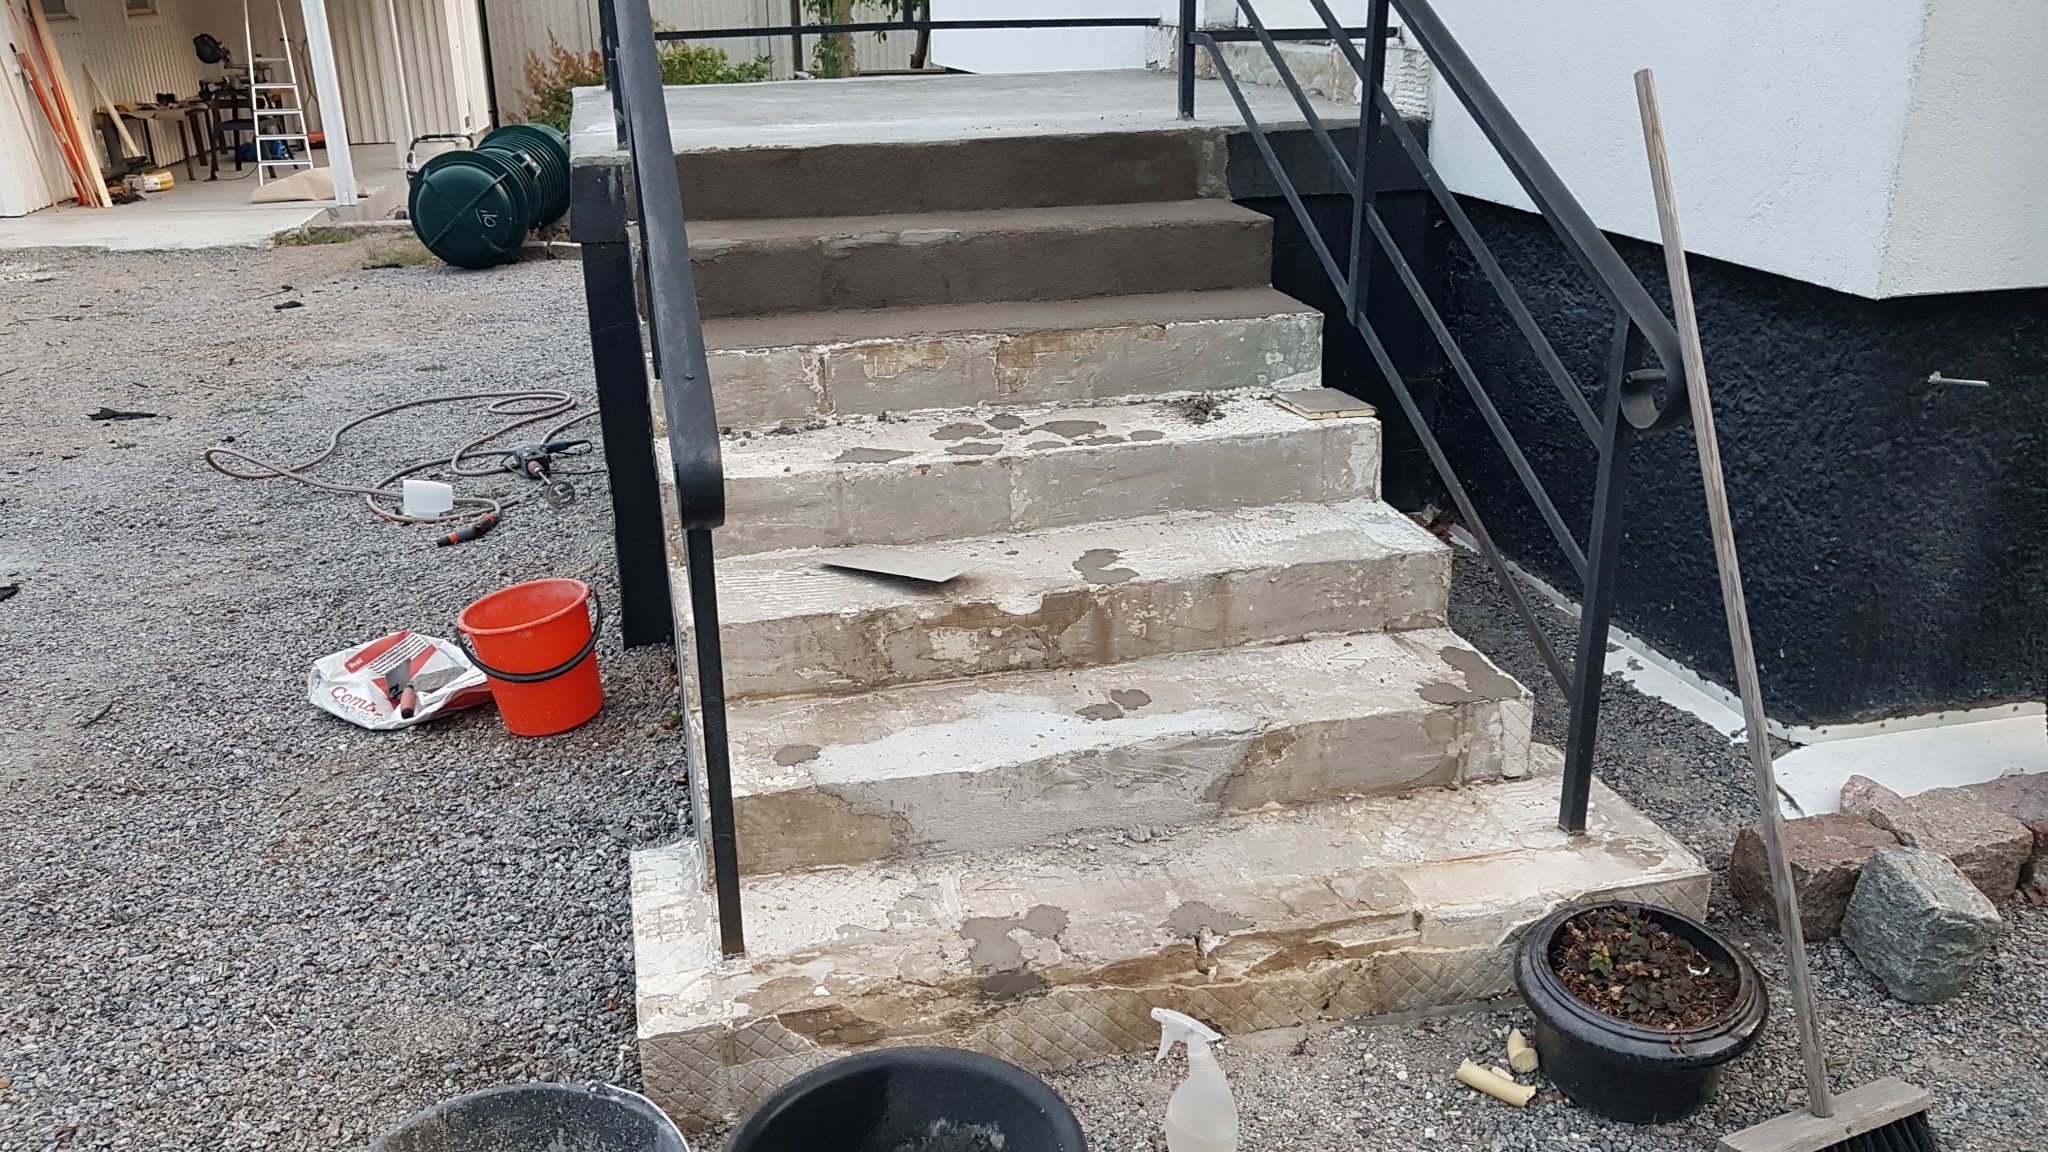
This is how it looked after the first day's plastering. Completely okay structure and thickness and such, but very uneven color due to different amounts of water in the mix, I guess, or different handling.
I started doing some freehand work with just the trowel, but you could say it didn't turn out that well... The mortar dried a bit too much, so it ended up crumbly, and at the same time, it was hard to make it straight and nice.
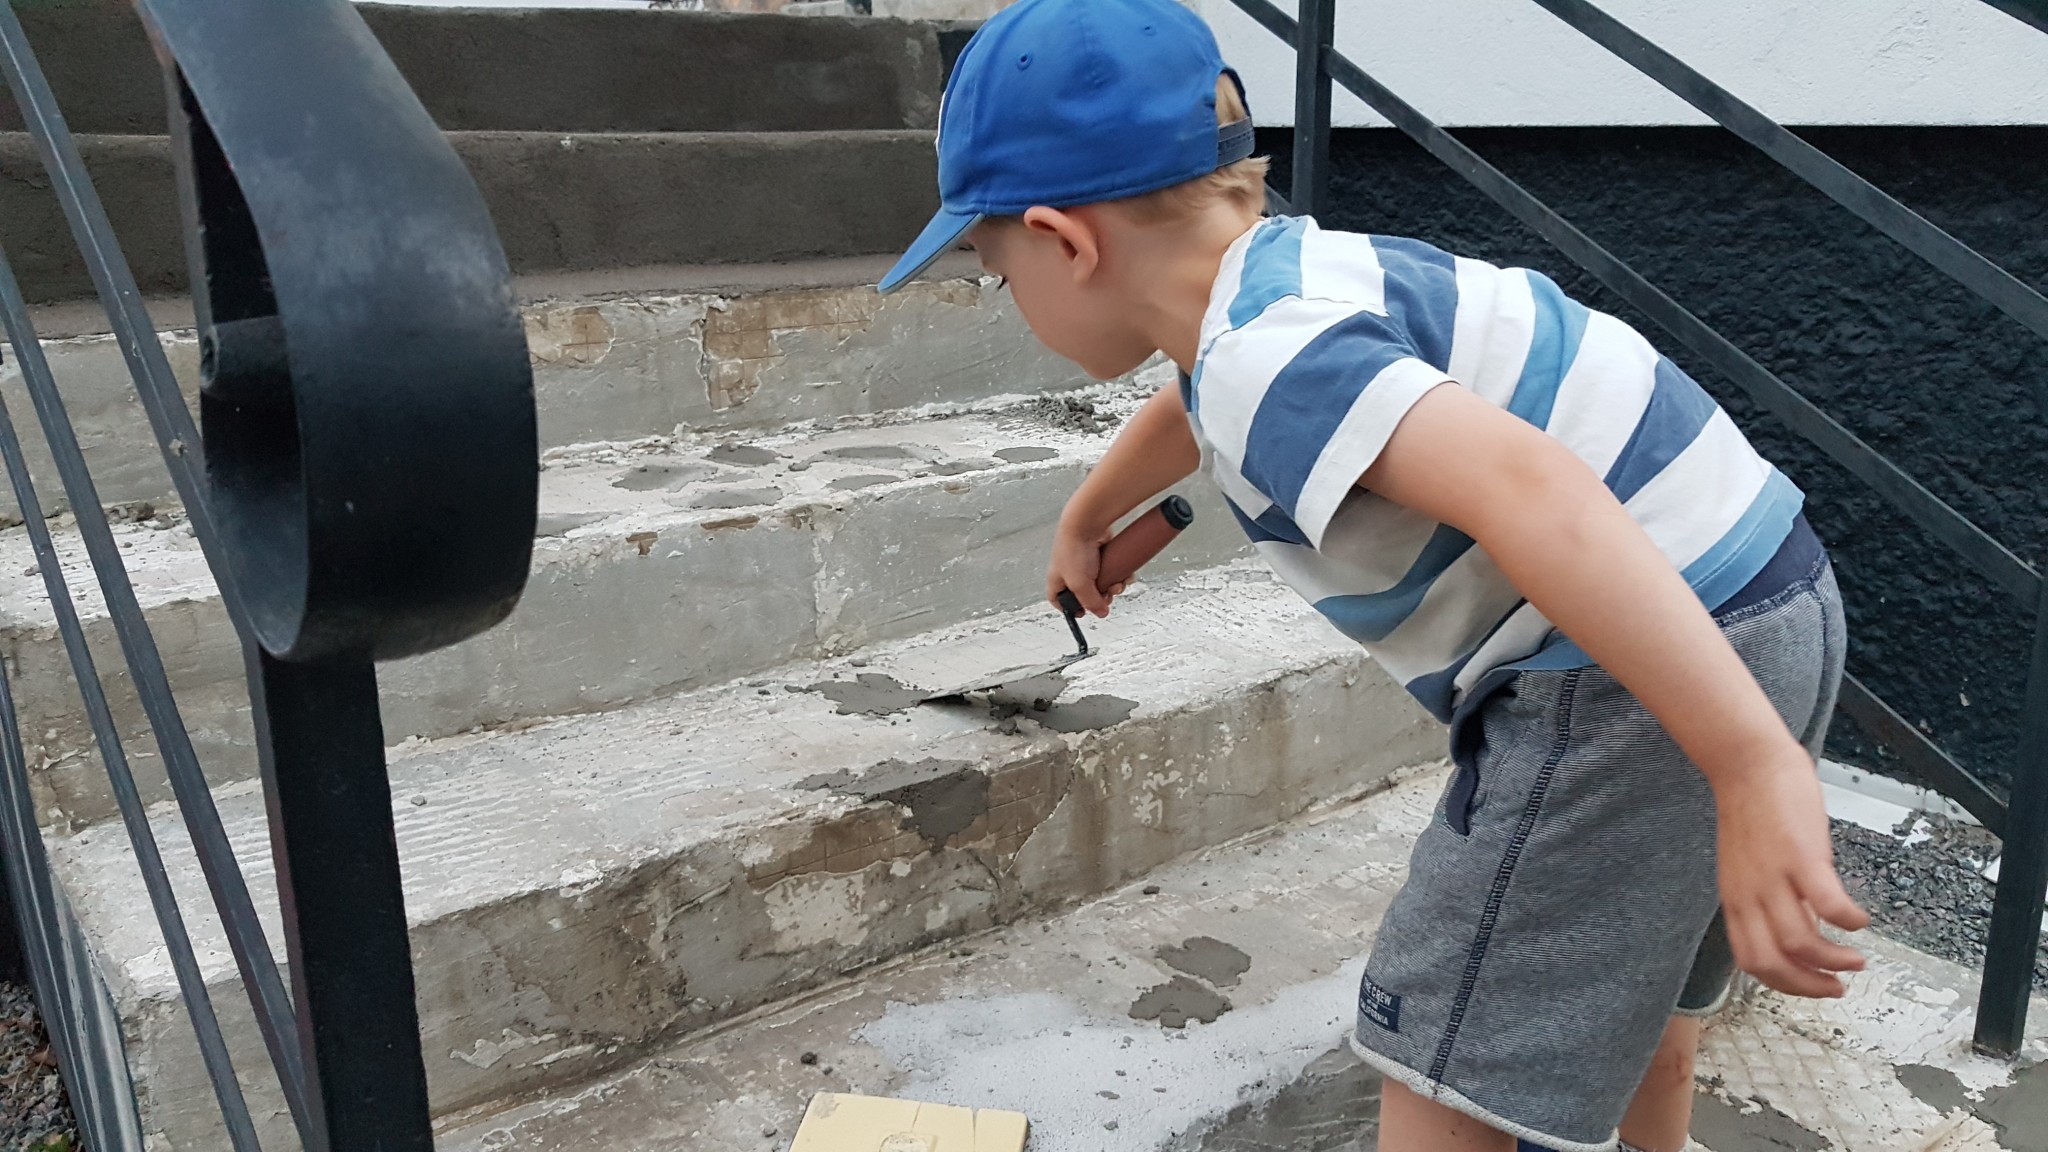
So we switched to patching up some holes instead. My 4-year-old son is doing a fantastic job. One hopes he gets inspired to become a craftsman (and not an accountant or something...) so that he can be of some use in the future.
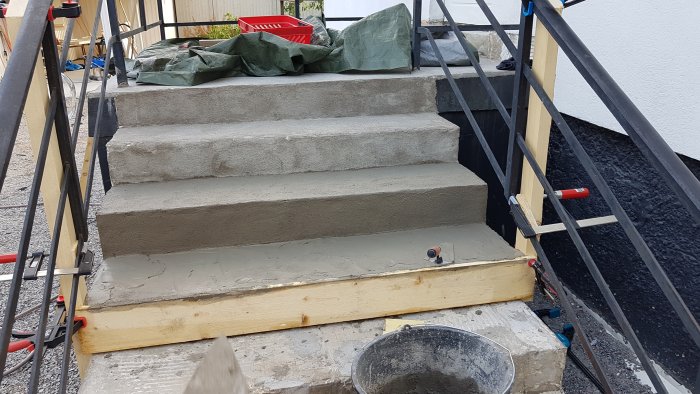
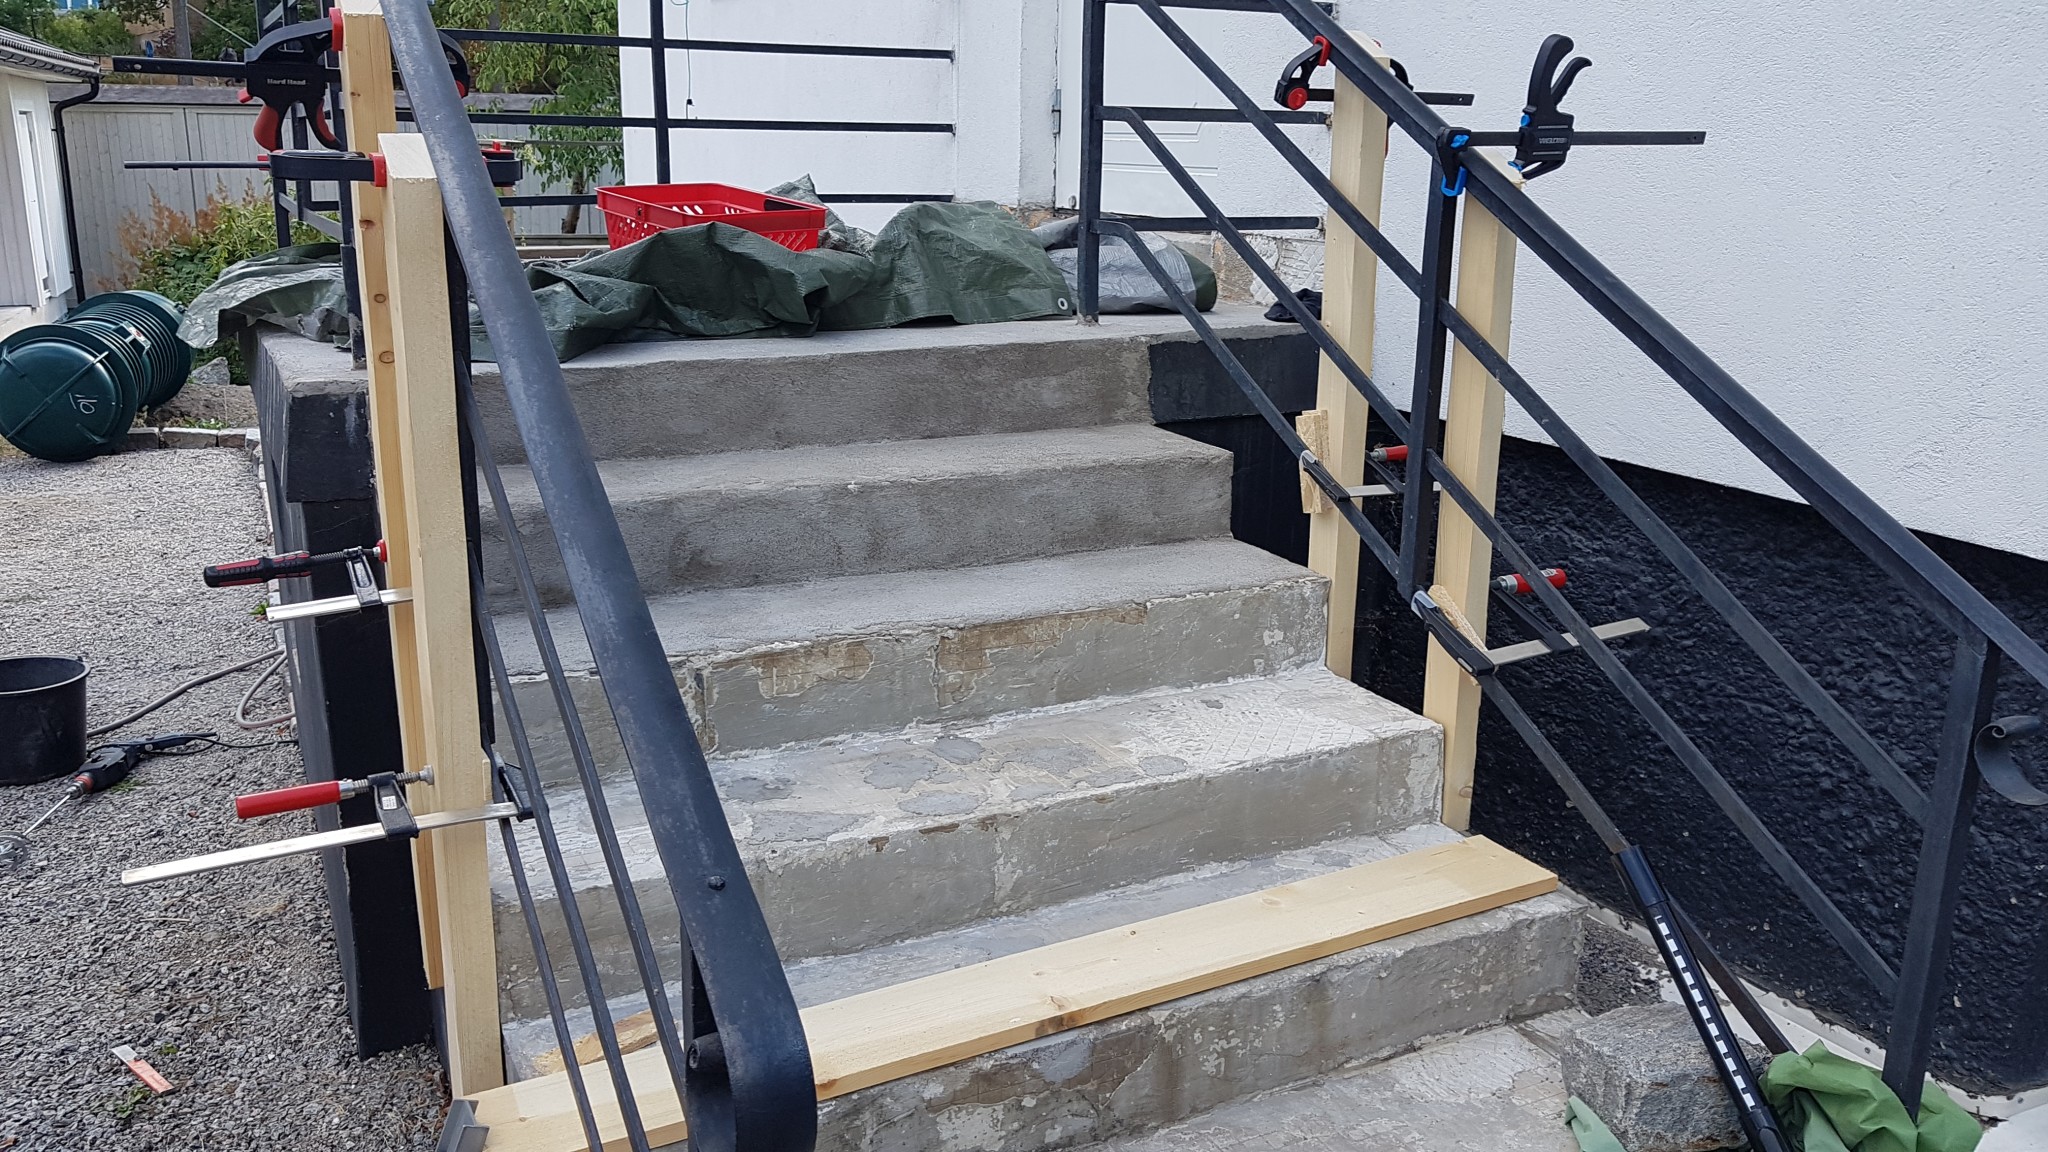
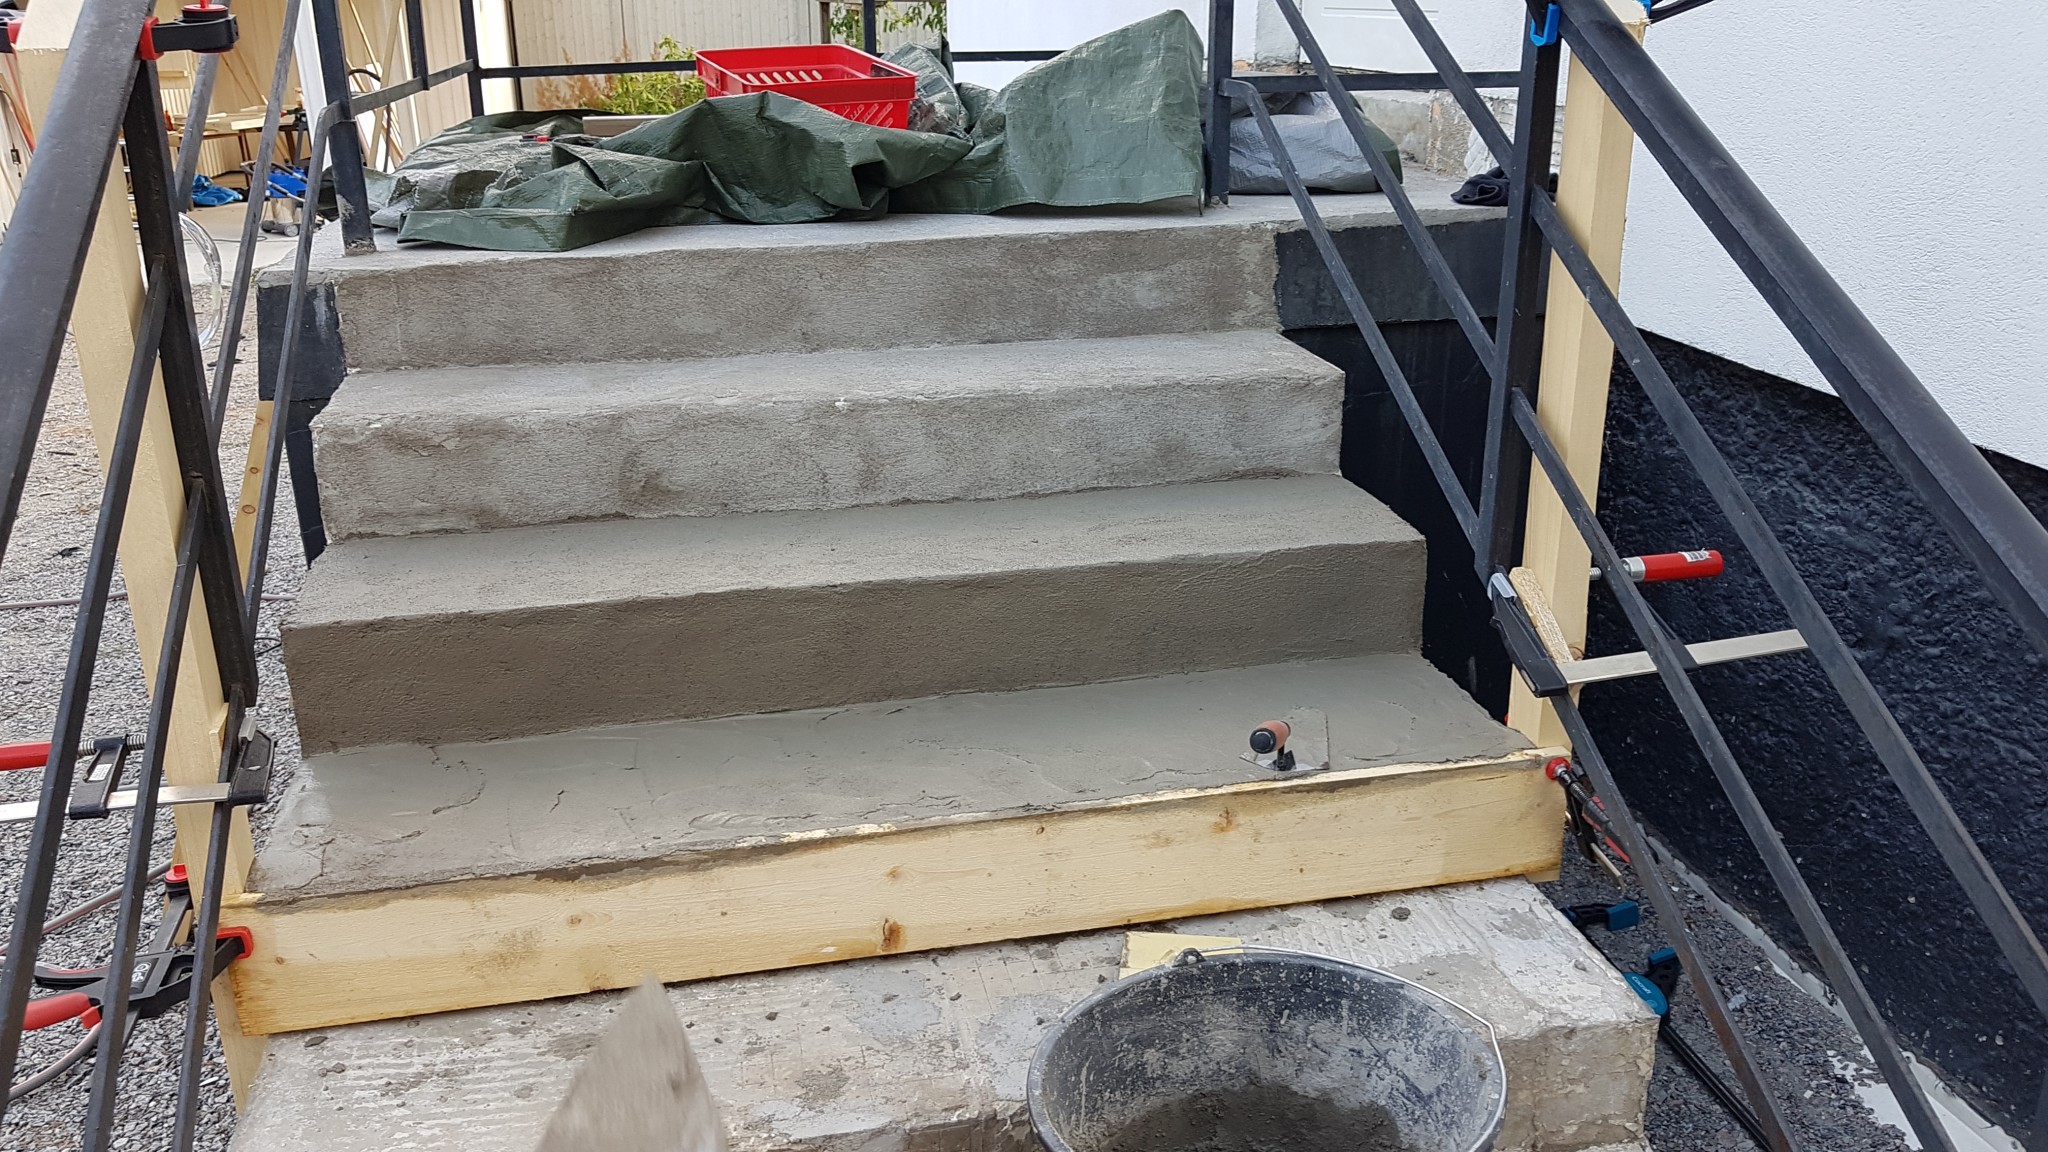
Today, my father came and helped a bit more, and things became a bit more orderly.
Studs were tightened and large clamps were used in abundance. He had found tips on how to polish stairs on the "internet".
This "internet" turned out to be quite right, as it worked better now. We also used much looser mortar to make it adhere better and have a longer working time before it becomes crumbly and generally difficult to work with.
The steps now looked more like I want them to, at least in terms of shape. The boards help to get them somewhat straight, but then it's up to the trowel and groover to get the finish right. The corner of the step (trap nose?) is quite tricky to get just the right amount of rounding with loose mortar.
We managed three steps at least, it will be exciting to see how they look tomorrow when the mortar has set.
How did it go afterwards?
Did you finish anything on the sides?
What mortar did you use?
//AA
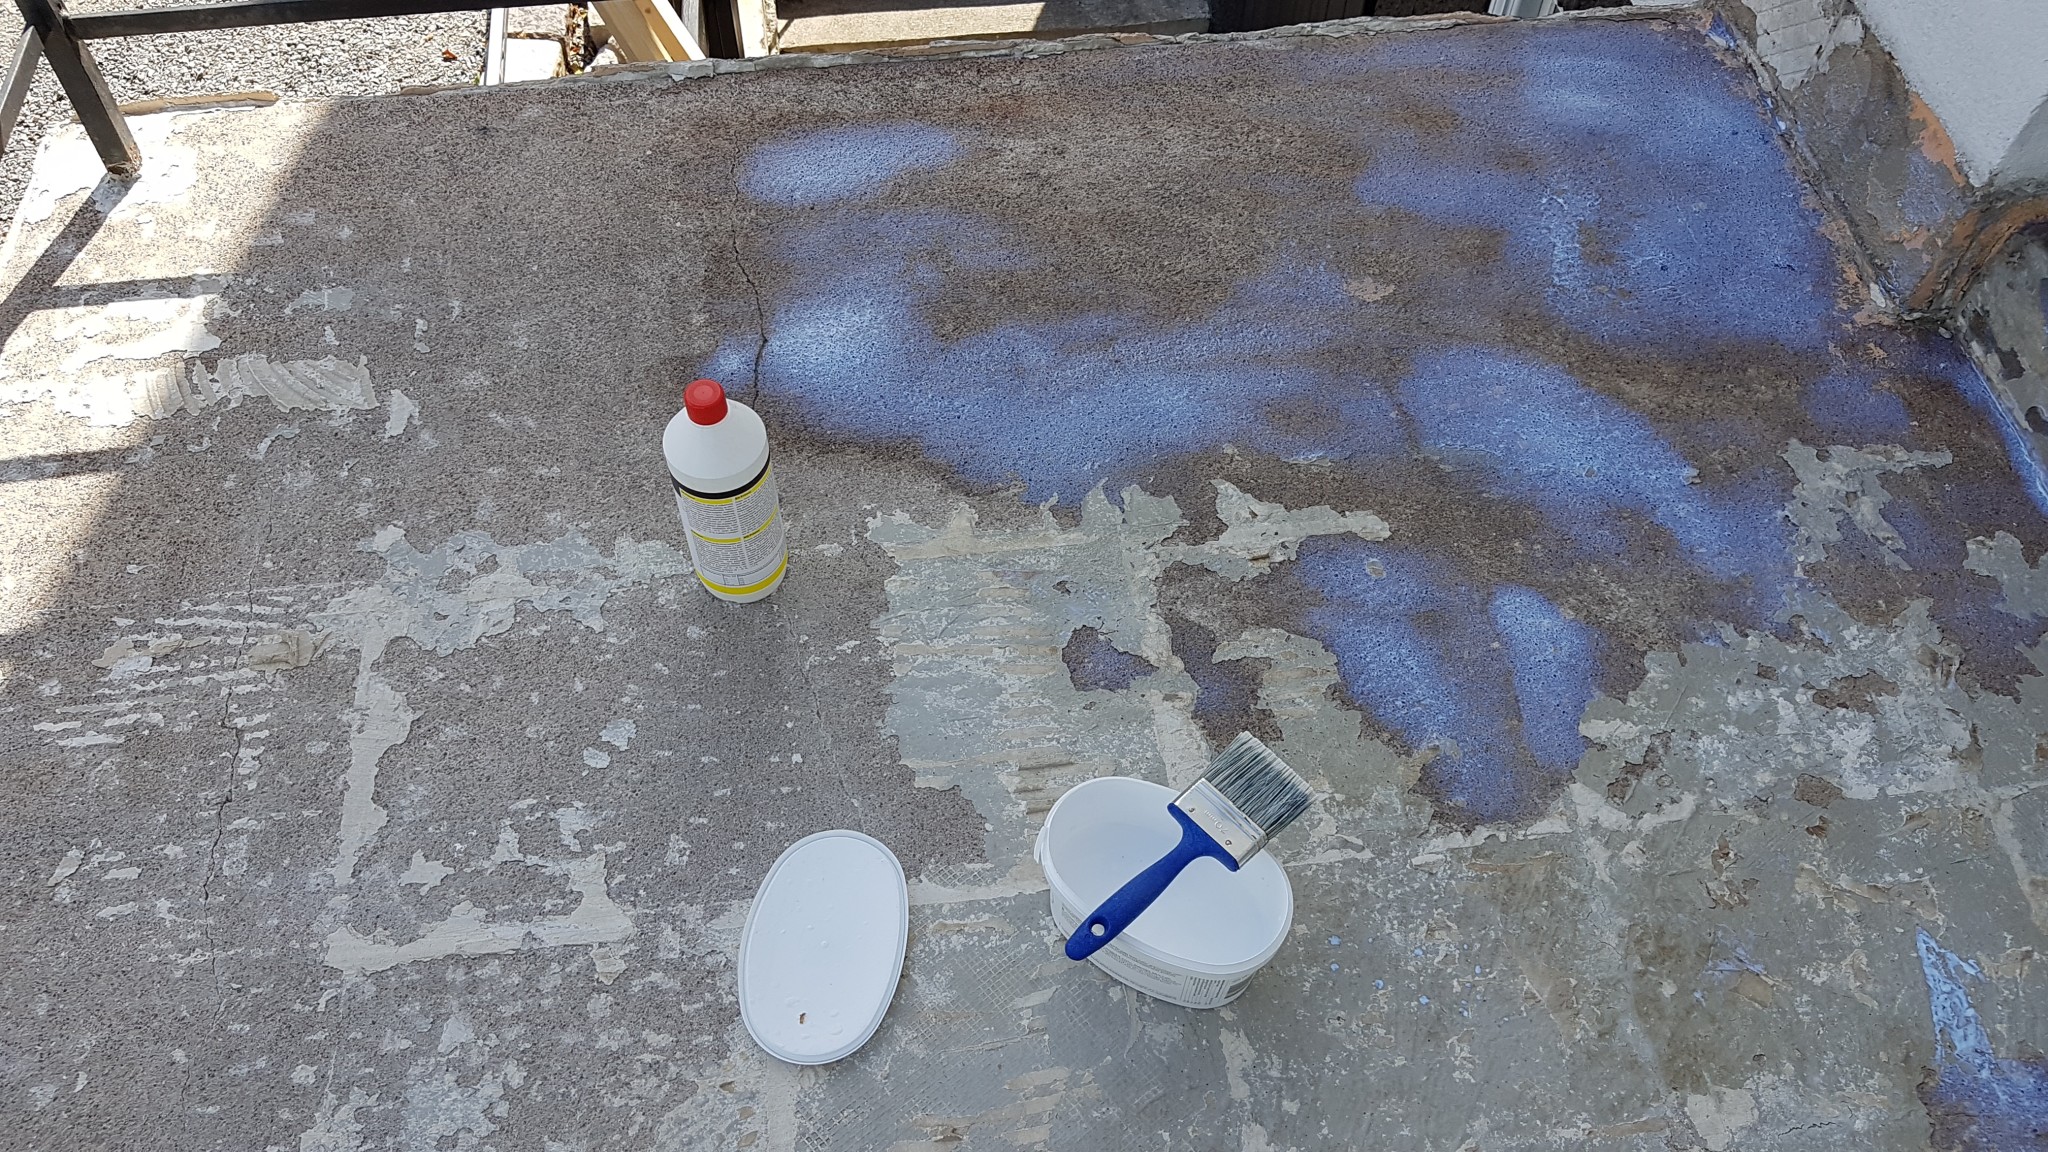
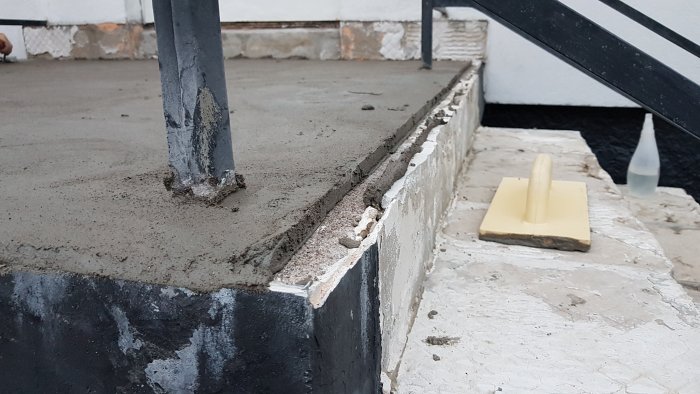
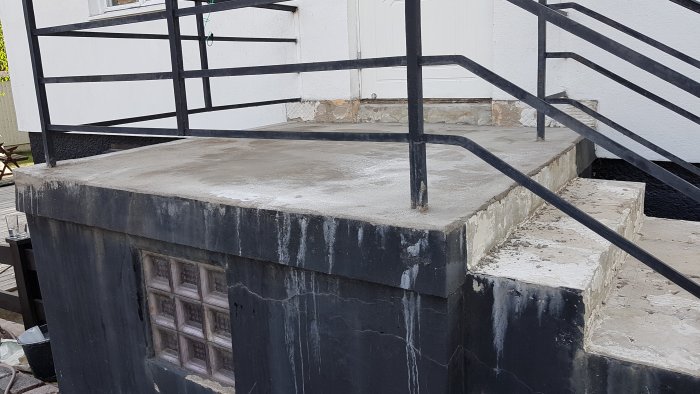
I will upload some pictures and give a final report - I've been a bit busy since I've managed to move since last time, but I do have pictures of the rest of the work anyway. I can say now that we didn't finish the actual sides of the stairs; instead, I painted them with a black silicate paint to make them look good.

ricebridge said: