31,167 views ·
7 replies
31k views
7 replies
Removing the seam when painting on wallpaper
I have now painted on wallpaper in four rooms and would like to share my experience. Since I have not painted on wallpaper before and I want a good result, I started looking for tips online, reading various brochures from paint stores, and asking colleagues at work. Regarding how to treat the seam, I found four alternatives, but all have disadvantages. In the end, I experimented with my own method and am very satisfied with the result. Below is a description of different alternatives with my comments as well as my own method.
Method 1: leave the seam as is, paint directly on the wallpaper, and the seams remain visible afterward.
Comment: Not for me, as I want painted walls to look even and smooth.
Method 2: glue a renovation wallpaper over the existing wallpaper, for example, Easy Cover, and then paint on the renovation wallpaper.
A colleague said he got very good results with this method. But the method is expensive, and I never tried it. Partly because the renovation wallpaper itself is expensive to acquire. Partly because it requires a lot of paint. My colleague said it absorbs paint, and he had to use buckets of paint.
Method 3: paint the entire wallpaper, including the seam, with a primer and then putty the seam on the primer, sand it even, and then paint with wall paint.
Experience: It required a lot of putty, a lot of sanding, and created a lot of dust at home during sanding. I never got the smooth wall I wanted. When I think about it, I wonder if it's possible to putty away the seam that bulges outward? Leveling a crack with putty is a trifle. But leveling something that bulges out?
Method 4: sand down the seam with sandpaper and then paint on the even surface.
Experience: The seam was clearly visible after painting, even though the surface felt very even and smooth before painting, probably because the sanded wallpaper and the unsanded wallpaper absorb paint differently, and the seam becomes apparent after painting. I had to rescue the result with puttying and sanding as in Method 3.
My own method: cut away the seam before painting with primer, putty, and sand, then paint with wall paint.
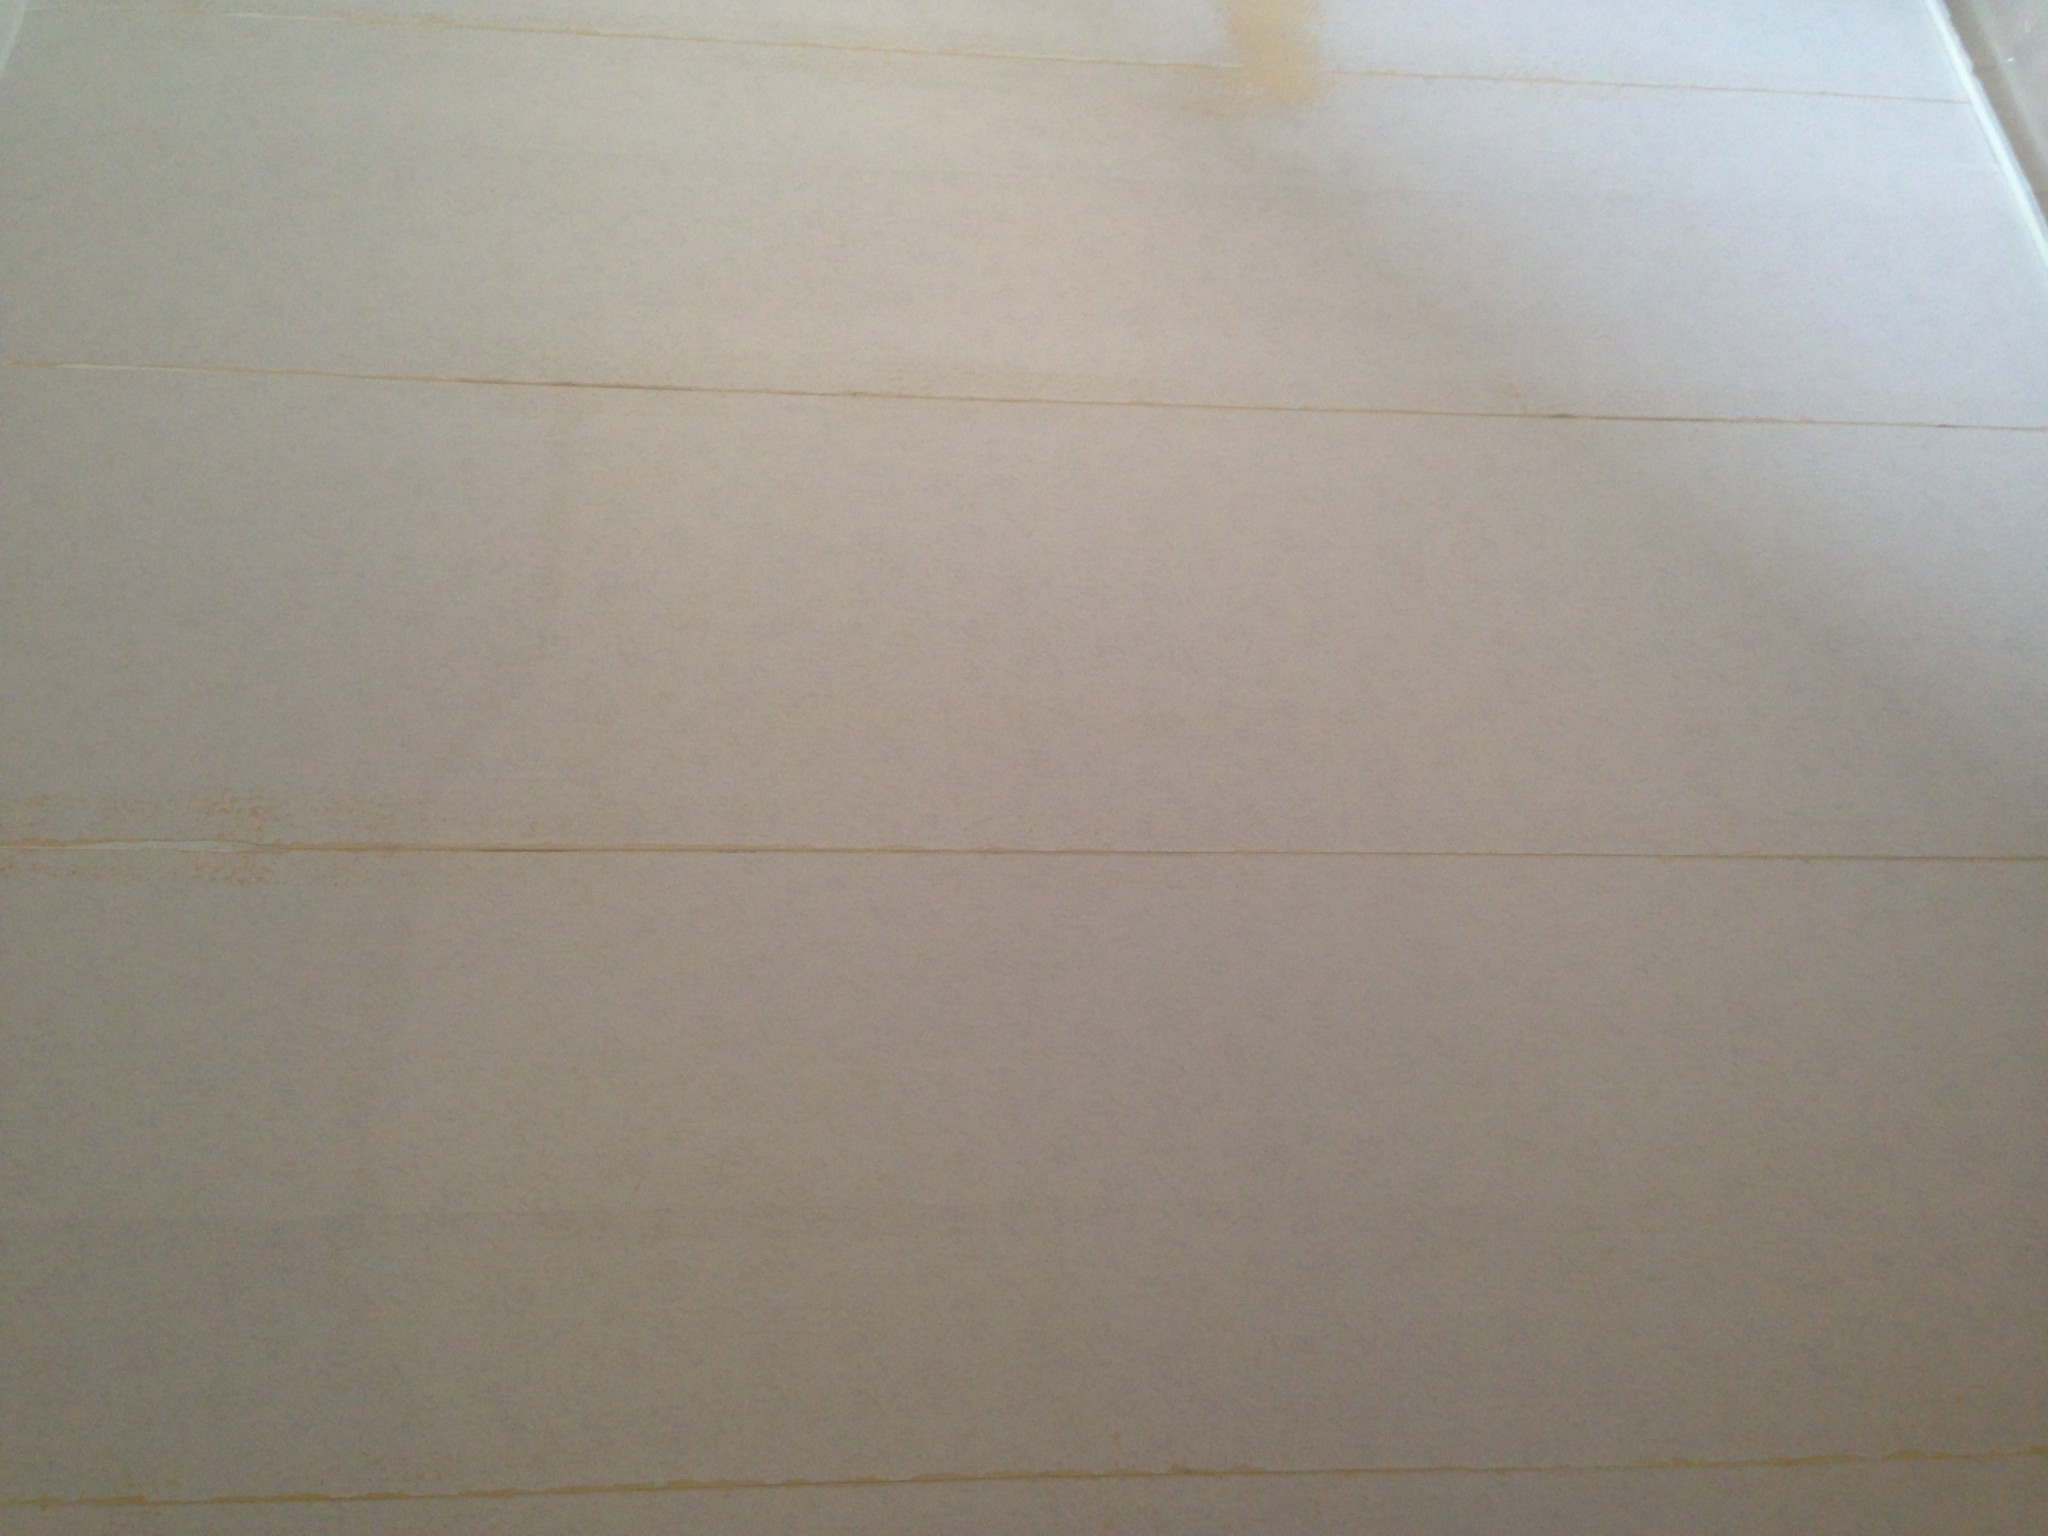
Method description: I use a sharp utility knife and a long ruler and cut a straight line along the entire seam so that the overlapping strip of wallpaper is separated from the rest of the wallpaper. Using the knife, I peel away the strip of overlapping wallpaper from the underlying wallpaper. Then I paint the wallpaper with a primer. After that, I putty the small groove left after removing the seam. Since the groove is so narrow (from a fraction of a mm to a few mm) and shallow, very little putty is required to level it out. There is minimal sanding and dust. After sanding, the wall is painted with wall paint.
Tip 1: Usually it's clear how wide the seam is and where to place the cut. But it's no problem if you make the cut wrong. If you notice that you haven't cut away the entire seam, just make a new cut. If you cut away too much wallpaper, the groove will still be leveled out with putty.
Tip 2: Paint with primer first and then putty on the primer. Otherwise, if you putty directly on the wallpaper, the groove will be visible after painting.
Tip 3: It takes a moment to peel off the overlapping wallpaper. For me, it took about 10 minutes for each seam.
I attach two pictures. One shows the groove after removing the seam, before priming. The other shows how it looks after priming, puttying, and sanding.
Method 1: leave the seam as is, paint directly on the wallpaper, and the seams remain visible afterward.
Comment: Not for me, as I want painted walls to look even and smooth.
Method 2: glue a renovation wallpaper over the existing wallpaper, for example, Easy Cover, and then paint on the renovation wallpaper.
A colleague said he got very good results with this method. But the method is expensive, and I never tried it. Partly because the renovation wallpaper itself is expensive to acquire. Partly because it requires a lot of paint. My colleague said it absorbs paint, and he had to use buckets of paint.
Method 3: paint the entire wallpaper, including the seam, with a primer and then putty the seam on the primer, sand it even, and then paint with wall paint.
Experience: It required a lot of putty, a lot of sanding, and created a lot of dust at home during sanding. I never got the smooth wall I wanted. When I think about it, I wonder if it's possible to putty away the seam that bulges outward? Leveling a crack with putty is a trifle. But leveling something that bulges out?
Method 4: sand down the seam with sandpaper and then paint on the even surface.
Experience: The seam was clearly visible after painting, even though the surface felt very even and smooth before painting, probably because the sanded wallpaper and the unsanded wallpaper absorb paint differently, and the seam becomes apparent after painting. I had to rescue the result with puttying and sanding as in Method 3.
My own method: cut away the seam before painting with primer, putty, and sand, then paint with wall paint.
Method description: I use a sharp utility knife and a long ruler and cut a straight line along the entire seam so that the overlapping strip of wallpaper is separated from the rest of the wallpaper. Using the knife, I peel away the strip of overlapping wallpaper from the underlying wallpaper. Then I paint the wallpaper with a primer. After that, I putty the small groove left after removing the seam. Since the groove is so narrow (from a fraction of a mm to a few mm) and shallow, very little putty is required to level it out. There is minimal sanding and dust. After sanding, the wall is painted with wall paint.
Tip 1: Usually it's clear how wide the seam is and where to place the cut. But it's no problem if you make the cut wrong. If you notice that you haven't cut away the entire seam, just make a new cut. If you cut away too much wallpaper, the groove will still be leveled out with putty.
Tip 2: Paint with primer first and then putty on the primer. Otherwise, if you putty directly on the wallpaper, the groove will be visible after painting.
Tip 3: It takes a moment to peel off the overlapping wallpaper. For me, it took about 10 minutes for each seam.
I attach two pictures. One shows the groove after removing the seam, before priming. The other shows how it looks after priming, puttying, and sanding.

Hi!S Stefan9 said:Now I have painted over wallpaper in four rooms and would like to share my experience. Since I hadn't painted over wallpaper before and I wanted a good result, I started looking for tips online, reading various brochures from paint dealers, and asking colleagues at work. Regarding how to treat seams, I found four options but all have drawbacks. Finally, I experimented with my own method and I'm very pleased with the result. The following is a description of different options with my comments as well as my own method.
Method 1: leave the seam as is, paint directly on the wallpaper, and the seam remains visible afterward.
Comment: It's not for me because I want painted walls to look even and smooth.
Method 2: apply a renovation wallpaper on top of the existing wallpaper, such as Easy Cover, and then paint on the renovation wallpaper.
A colleague said he got very good results with that method. But the method is expensive and I never tried it. Partly because the renovation wallpaper itself is expensive to acquire. It also requires a lot of paint. My colleague said it absorbs paint and he had to use paint by the buckets.
Method 3: paint over the entire wallpaper including the seam with a primer and then putty the seam on the primer, sand evenly, and then paint the wall color.
Experience: A lot of putty was needed, there was a lot of sanding, and there was a lot of dust at home during sanding. I never got the even and smooth wall I wanted. When I think about it, I wonder if it's possible to putty away a seam that bulges outward? Leveling a crack with putty is a cinch. But to level something that bulges out?
Method 4: sand away the seam with sandpaper and then paint on the even surface.
Experience: The seam was clearly visible after painting, even though the surface felt very even and smooth before painting, probably because the sanded wallpaper and the unsanded wallpaper absorb the paint differently, and the seam becomes visible after painting. I had to rescue the result with putty and sanding as in Method 3.
My own method: cut away the seam before painting with a primer, putty and sand, and then paint with wall color.
Method description: I use a sharp craft knife and a long ruler to make a straight cut along the entire seam so that the overlapping strip of wallpaper is separated from the rest of the wallpaper. With the knife, I peel away that strip of overlapping wallpaper from the underlying wallpaper. Then I paint the wallpaper with a primer. After that, I fill in the small groove left behind after removing the seam with putty. Since the groove is so narrow (from a fraction of a mm to a couple of mm) and shallow, it requires very little putty to level it out. There's minimal sanding and dust. After sanding, the wall is painted with wall color.
Tip 1: Often it's clear how wide the seam is and where to place the cut. But it's not a problem if you place the cut wrong. If you notice you haven't cut away the entire seam, just make a new cut. If you cut away too much of the wallpaper, the groove will be evened out with putty anyway.
Tip 2: Paint with primer first and then putty on the primer. Otherwise, if you putty directly on the wallpaper, the groove will show after painting.
Tip 3: It takes a while to peel away the overlapping wallpaper. For me, it took about 10 minutes for each seam.
I attach two pictures. One shows the groove after removing the seam, before painting with primer. The other shows what it looks like after painting with the primer, puttying, and sanding.
Old post I see but found it when I was searching for removing wallpaper seams.
One question - why do you prime before puttying?
If it doesn't look good after one coat, which it hardly will, you have to sand and paint again. If that doesn't help, you have to sand and paint again, and again, until it's good.S Stefan9 said:Method 4: sand away the seam with sandpaper and then paint on the smooth surface.
Experience: The seam was clearly visible after painting, even though the surface felt very even and smooth before painting, probably because the sanded wallpaper and the unsanded wallpaper absorb the paint differently, and the seam becomes apparent after painting. I had to rescue the result with spackling and sanding as
You can skip the primer. Just go ahead with the finish paint directly.M MoNa1379 said:
- If it turns out well, you're done
- If it doesn't turn out well, you've already "primed" and can do another coat
Click here to reply