
32,313 views ·
32 replies
32k views
32 replies
Putting up moldings?
Yes, I've noticed that latex usually doesn't look very nice if you don't paint over it, especially if you don't manage to get a smooth, even surface.Jörgen Ö said:Regarding sealing against wallpaper, you have a dilemma since you have to do things in the wrong order. Sealing against wallpaper is difficult if you're not used to it, how difficult depends a little on the wallpaper and sealant. A latex sealant is the most common, but it is done before painting/wallpapering, it is not meant to be a finished surface product. Another type is construction sealant or silicone in the desired color, but I advise you to practice before you start in places that are not visible. You only have one chance. Have a spray bottle with water and a little bit of soap that you spray gently on the sealant, then smooth it with your finger or a sealant stick. It's best if you have wallpaper that you can mask on first, where the masking tape doesn't stick too tightly to the wallpaper.
Tec7 feels just as difficult as silicone, the advantage with Tec7 is, however, that it glues and can be painted over.
The wallpaper is a more expensive variant from Cole & Son, I accidentally got a little Tec7 on it already but it was quite easy to remove with the sealant scrapers (rubber) that I have. But if you use it on the whole kitchen, you can be sure that it will turn out poorly in a couple of places.

I have a Ryobi that works okay. It barely leaves any marks, but it is indeed heavy. I still like it because it's perfect to just "get out" and start nailing. However, note the price you mentioned is without the battery, but maybe you have other tools from Ryobi?
Working in houses that are not square in any way is something I have experience with now, as most of the renovation is behind me. I'll try to get a photo when I get home, but to FÖRKROPPA moldings is not particularly difficult, and even if they move a little, there won’t be a gap straight in since the first molding that is cut straight hides a lot. See the link, it is very illustrative.
Working in houses that are not square in any way is something I have experience with now, as most of the renovation is behind me. I'll try to get a photo when I get home, but to FÖRKROPPA moldings is not particularly difficult, and even if they move a little, there won’t be a gap straight in since the first molding that is cut straight hides a lot. See the link, it is very illustrative.
Aha, unfortunately, I don't think it looks that nice in the corner, however, it looks really nice when the baseboard juts out a bit on the molding!FreQa said:I have a Ryobi that works okay. It barely leaves any marks, but sure, it's heavy. I still like it because it's perfect for just bringing out and getting to work. However, note the price you mentioned; it's without a battery, but maybe you have other Ryobi machines?
Working in houses that aren't aligned at right angles in any way is something I have experience with now, with most of the renovation behind me. I'll try to get some photos when I get home, but to FÖRKROPPA moldings isn't particularly difficult, and if they move a bit, there won't be a gap directly into the first molding that is cut straight and hides a lot. See the link; it's very illustrative.
M
Marcussjogren
Member
· Västra Götaland
· 3 081 posts
Marcussjogren
Member
- Västra Götaland
- 3,081 posts
Regardless of how you choose to use a hammer, it's all about precision whether or not you use a punch. Ugly marks can result even if you miss with it.
But don't hit too hard, that's probably what many people do wrong when they accidentally make marks in the moldings. The last bit is tapped very gently.
A brad nailer, as mentioned earlier, tends to drive the brad too deeply.
But don't hit too hard, that's probably what many people do wrong when they accidentally make marks in the moldings. The last bit is tapped very gently.
A brad nailer, as mentioned earlier, tends to drive the brad too deeply.
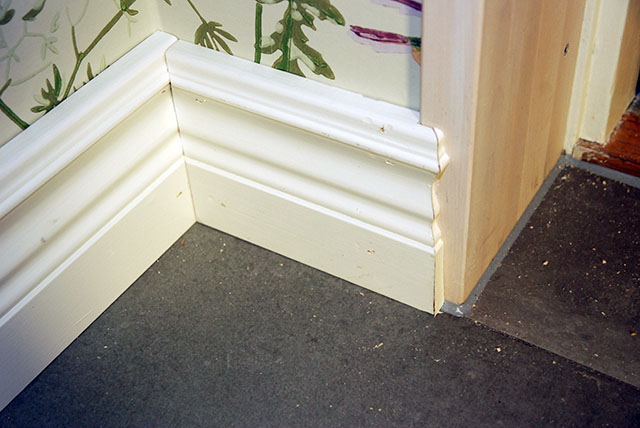
You can mitre, but a tip is to let the upper part of the right trim continue over the left trim. On the left trim, carve away the upper corner. Otherwise, this might work http://www.carpentry-tips-and-tricks.com/scribe-skirting-board.htmlsnowjim said:
Otherwise, you usually let profiled baseboards and moldings meet in a molding base/shoe block to avoid awkward joints.

The nail set (?) you have seems to be for rougher materials than trim/finishing nails.
It is extremely important that the nail set (countersink) is of good quality and not worn out. Otherwise, the nail set will slip off the nail and leave marks on the trim.
It is extremely important that the nail set (countersink) is of good quality and not worn out. Otherwise, the nail set will slip off the nail and leave marks on the trim.
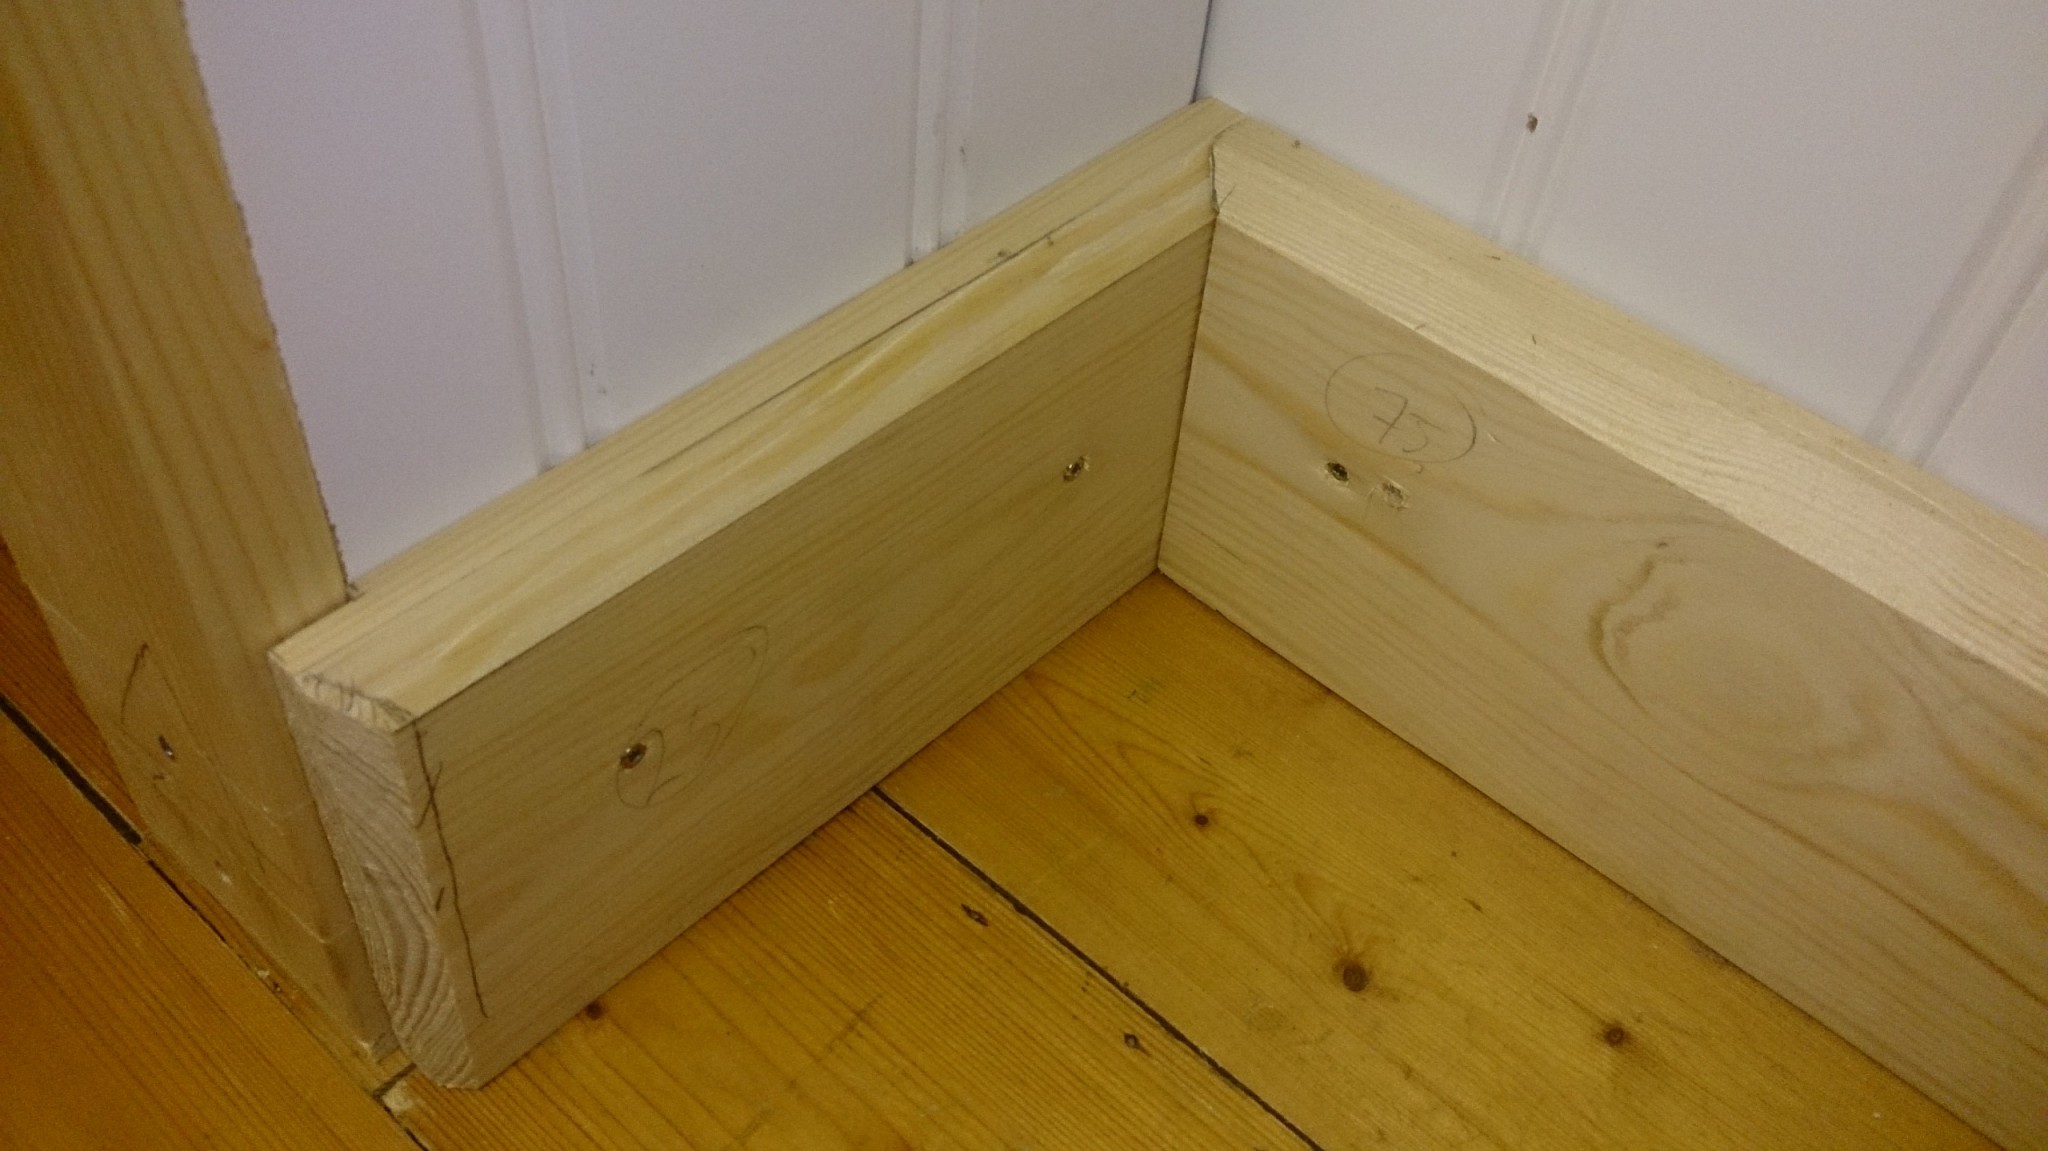
An embodiment of a single-faced baseboard. The advantage of an embodiment is that it is easy to connect in inner corners, even if it slopes in all directions. Put up the straight end, measure with a bevel square, and cut the angled one. Done!
Hello,
I have installed some moldings and trims and unfortunately ended up with small gaps that look like this:


One might consider moving the trim down a bit, but now that it's in place, it's not so fun to remove it and then put it back again.
Should I use Tec7 here? Or should I go with regular putty or latex sealant? I've got the impression that Tec7 holds together much better and is more elastic, reducing the risk of cracking later. Almost all the latex sealant I've used so far has cracked, and putty tends to shrink quite a bit, which requires more work.
I have installed some moldings and trims and unfortunately ended up with small gaps that look like this:
One might consider moving the trim down a bit, but now that it's in place, it's not so fun to remove it and then put it back again.
Should I use Tec7 here? Or should I go with regular putty or latex sealant? I've got the impression that Tec7 holds together much better and is more elastic, reducing the risk of cracking later. Almost all the latex sealant I've used so far has cracked, and putty tends to shrink quite a bit, which requires more work.
That's exactly what you avoid with back beveling, and you measure angles with a sliding bevel. Most likely, your inside corner is not square, and it might not be vertical either.snowjim said:Hi,
I have now installed some trim and moldings and unfortunately have small gaps that look like this:
[bild]
[bild]
One might think of moving the molding down a bit, but now that it's installed, it's not so nice to remove it and then put it back.
Is Tec7 the solution here? Or should I use regular spackle or latex sealant? I've gotten the impression that Tec7 holds together much better and is more elastic, which minimizes the risk of cracks later. Almost all the latex sealant I've used so far has cracked, and spackle tends to sink quite a bit, requiring more work.
The trim is too short. I've made that mistake myself. Tec7 should work.
Regarding the brad nail, you shouldn't drive it so hard. Adjust the depth setting on the nailer.
Last edited:
No, the corner is anything but straight. I first tried to compensate for it with the saw, but it didn't improve much, so I ended up with a 45-degree cut.FreQa said:That's exactly what you avoid with cladding, and you measure angles with a bevel gauge. Your inner corner is probably not right-angled, and maybe not vertical either.
The trim is too short. I've made that mistake myself. Tec7 will probably work.
Regarding the brad nailer, you shouldn't fire it so hard. Adjust the depth level on the nailer.
Yes, I really don't want to remove the trim again; there's a big risk that something will suffer. By the way, how should you look at moldings? Should there always be joints, or is it okay to seal over them completely?
Yes, the hardness of the gun is not simple; different materials offer varying resistance. In most cases, the nail ends up at the right level. In some cases, the nail doesn't go in completely, in others, they go a bit too deep.
I can imagine it’s good if the nail is slightly below the surface if you're going to fill and paint over it later. If it's flush with the surface, painting might be enough, but you'll probably always see it.
If desired, there are protractors made to transfer half the angle to miter saws. Otherwise, I'm back to my tracks: coped joints. It can hide a lot on all sides and edges.snowjim said:No, the corner is anything but straight, initially tried to compensate on the saw but it didn't get much better, so I ended up doing 45-degree cuts.
Yes, I don't really want to remove the trim again, there's a high risk something will suffer. Otherwise, how does one view moldings? Should there always be joints, or is it okay to completely fill over them?
Yes, the hardness of the gun isn't easy, different materials provide different resistance, in most cases, the nail ends up at the right level. In some cases, the nail doesn't go in completely, in others, they go in a little too deep.
I imagine it's good if the nail is slightly below the surface if you then fill and paint over it. If it's flush with the surface, it might be enough to paint, but you'll likely always see it.
See and see. Well-made joints need no filling. That's what we're all aiming for!
 If everything is fitted, you can insert a plug or domino for better hold. I saw you've aimed to get the trim parallel with the frame. If it's not 100% vertical and horizontal, you have a few mm to correct.
Keep practicing. I fired a bit again yesterday and still just as fun!
The day before yesterday I wondered why the light started blinking. Is it broken, I thought in haste and was about to curse it, but oh right, it just wanted to remind me to change the battery.I see details (job hazard) but a painted-over brad nail is hardly noticeable.

Yes, embodiment solves the problem with the plinth. When I set casings, I usually do everything on the side as a package by setting a domino and gluing the corners together before I take the whole package and nail it up where it should be. The domino is placed as close to the inner corner of the miter as possible. Of course, I am aware that this is somewhat of an exaggeration. But it turns out well. Otherwise, I do the same thing with window linings and window sills, but with pocket screws. Then the casing as mentioned above.
I'm going to give a tip that is absolutely the best for hiding nail holes and small gaps.
First and foremost, you should glue all the miters.
Then, to get the final touch on finished painted moldings, rub with a white wax pencil.
One like this...
http://www.lindqvist-msk.se/produkt.php?art=89330
In the other hand, have wet wipes/baby wipes and wipe off after you've waxed the gap or nail hole.
Voilà! Done!
First and foremost, you should glue all the miters.
Then, to get the final touch on finished painted moldings, rub with a white wax pencil.
One like this...
http://www.lindqvist-msk.se/produkt.php?art=89330
In the other hand, have wet wipes/baby wipes and wipe off after you've waxed the gap or nail hole.
Voilà! Done!