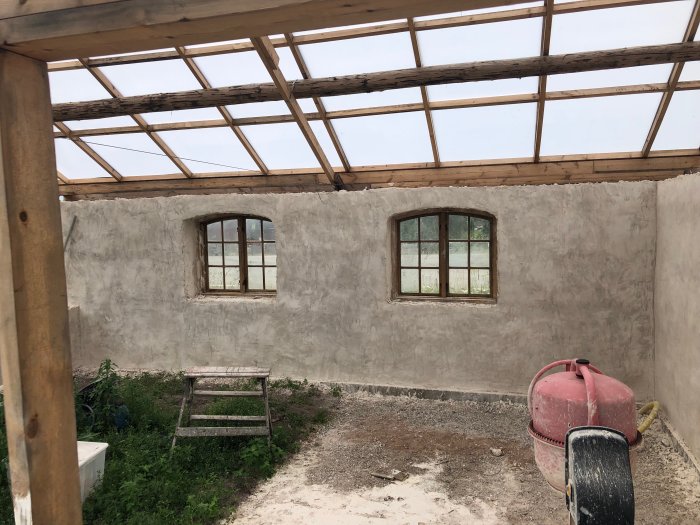
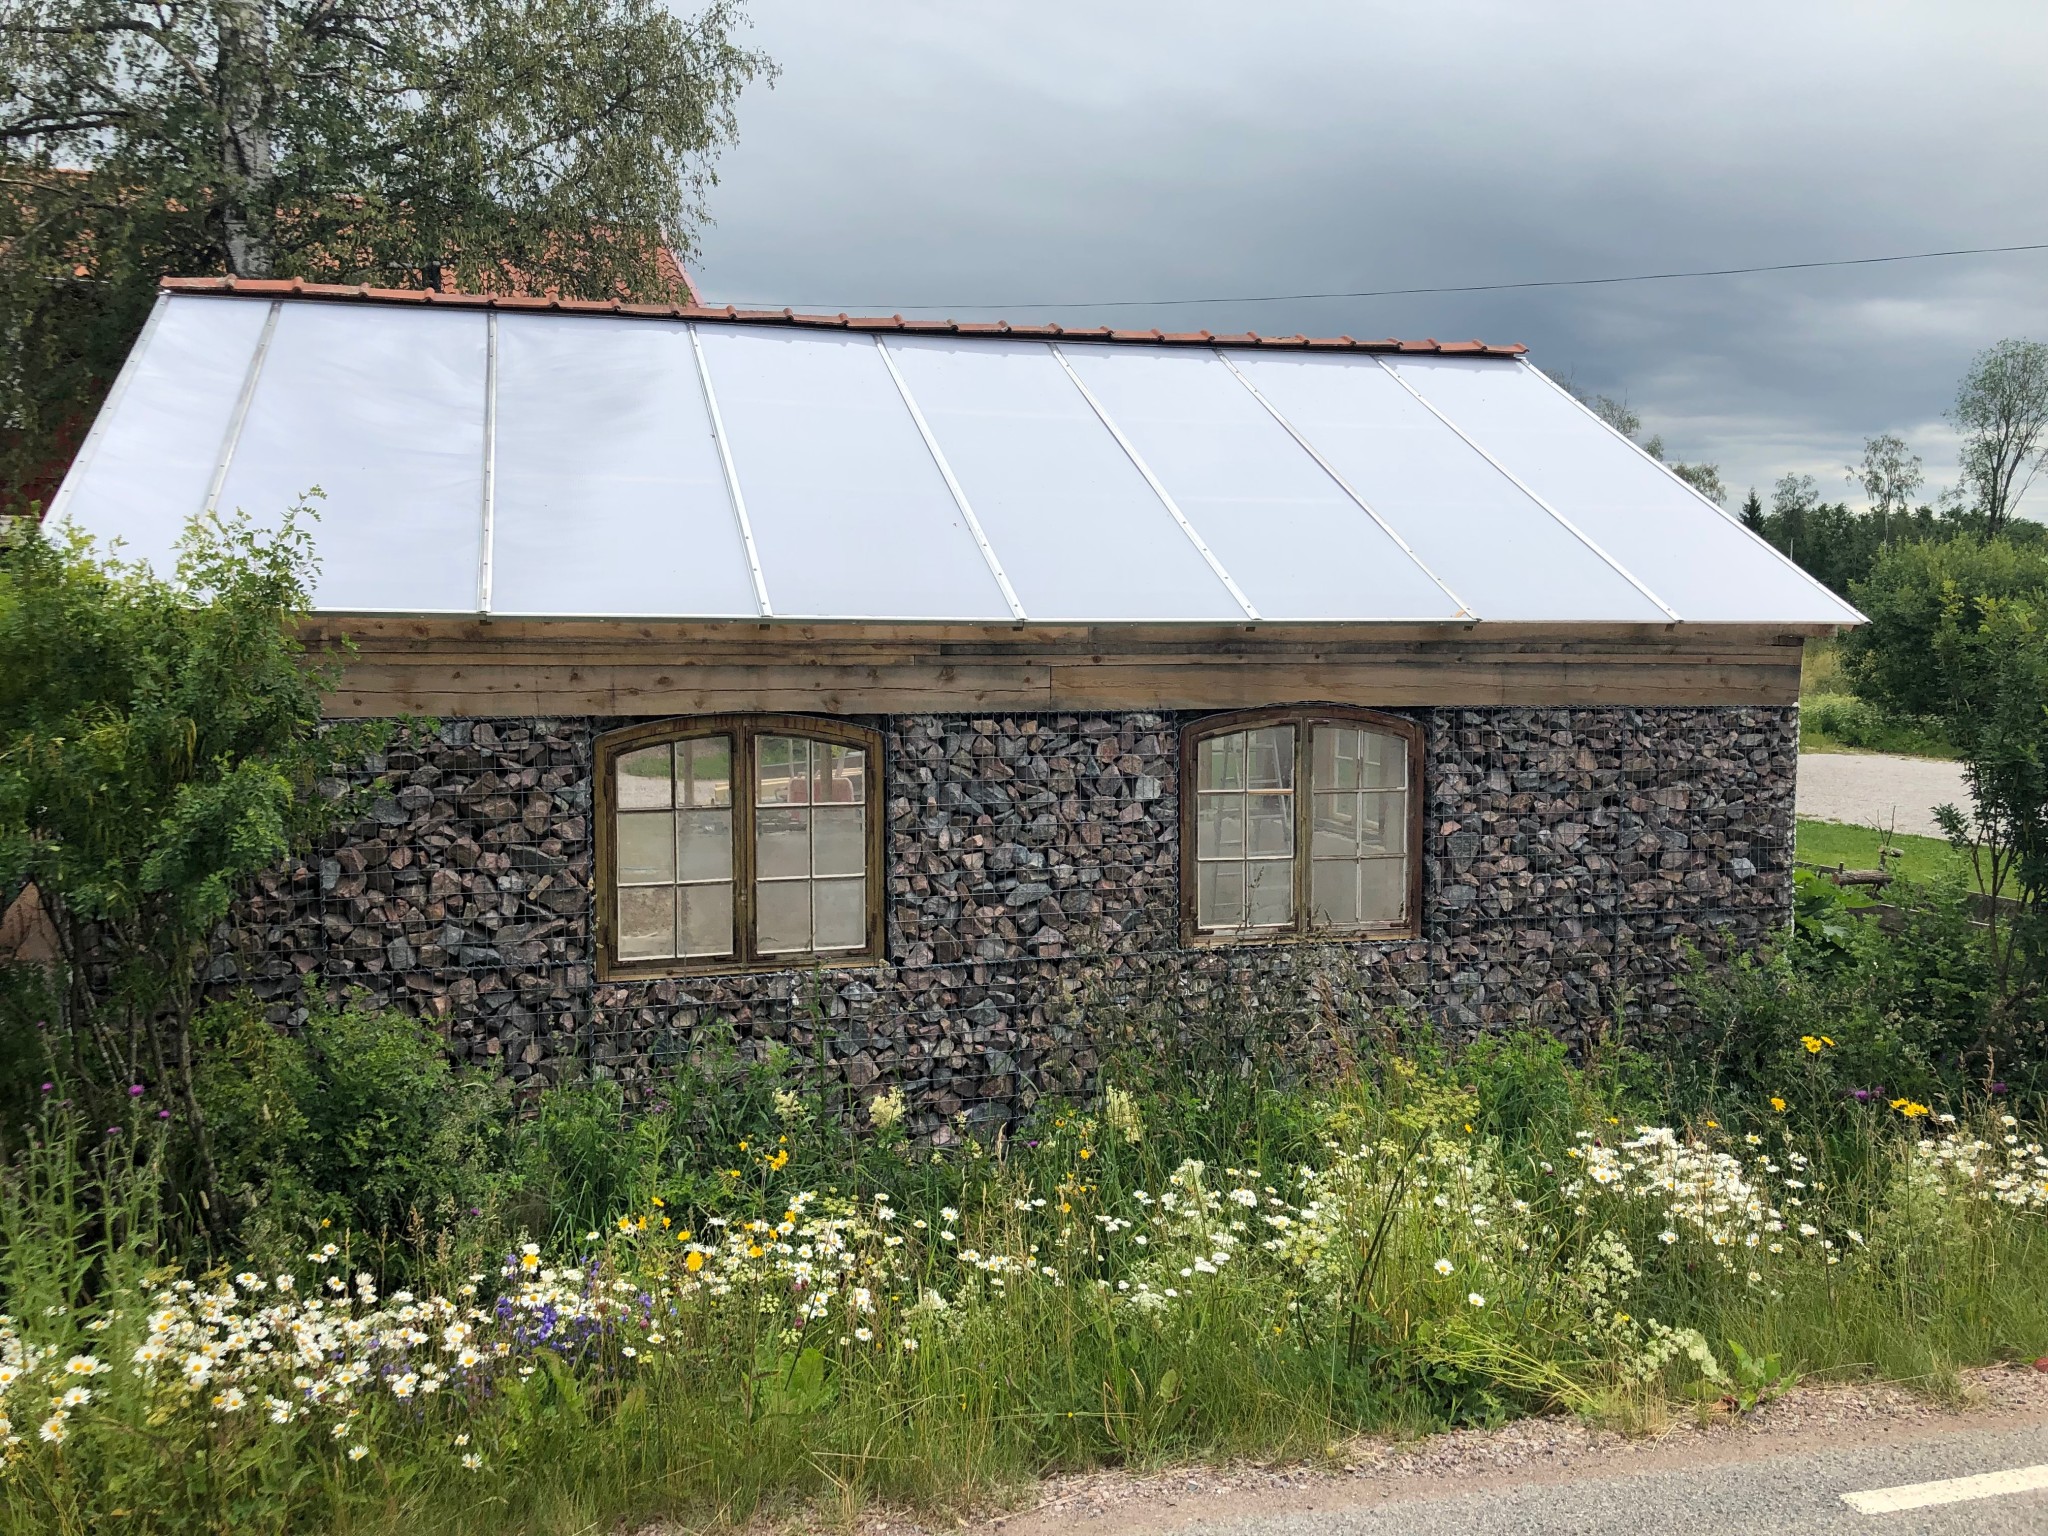
I'm finishing up an educational greenhouse project and thought I'd share some thoughts on the production of lime plaster. We’re building a greenhouse of about 40sqm with a somewhat different structure. We chose to build the base and walls with stone-filled gabion baskets as the framework, mainly because it's much cheaper compared to, for example, bricks, and you get an extremely high weight that evens out the temperature in autumn and spring. In this case, it took over 20 tons of stone to fill the gabions. I then plastered and coated the walls with lime mortar. The reason we started contemplating making the plaster ourselves is because it takes enormous amounts of plaster to fill all the cavities between the stones before you can even put up plaster mesh and start working on the surface. The total plaster thickness can be up to 10cm in places, and I estimate it's taken about 2.5 tons of plaster, and lime mortar is quite expensive to buy.
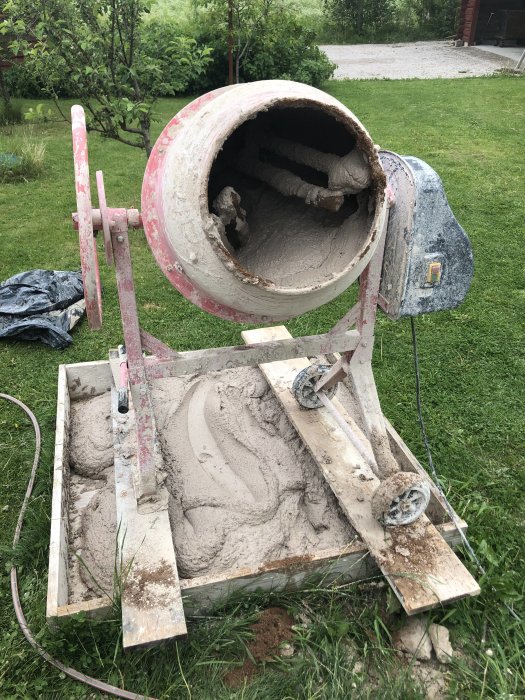
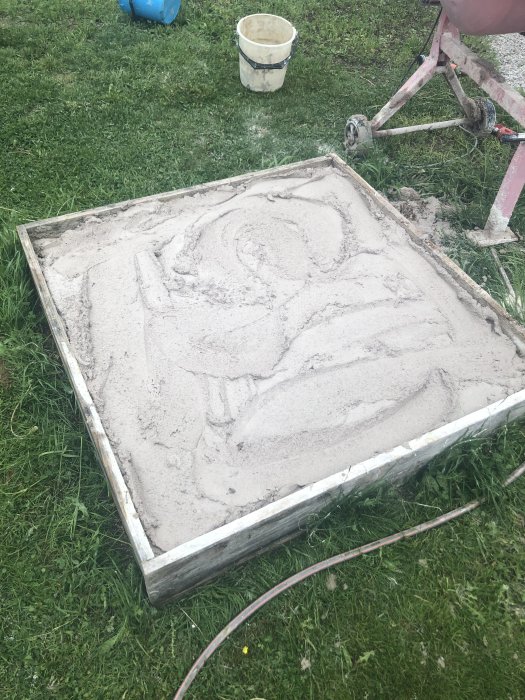
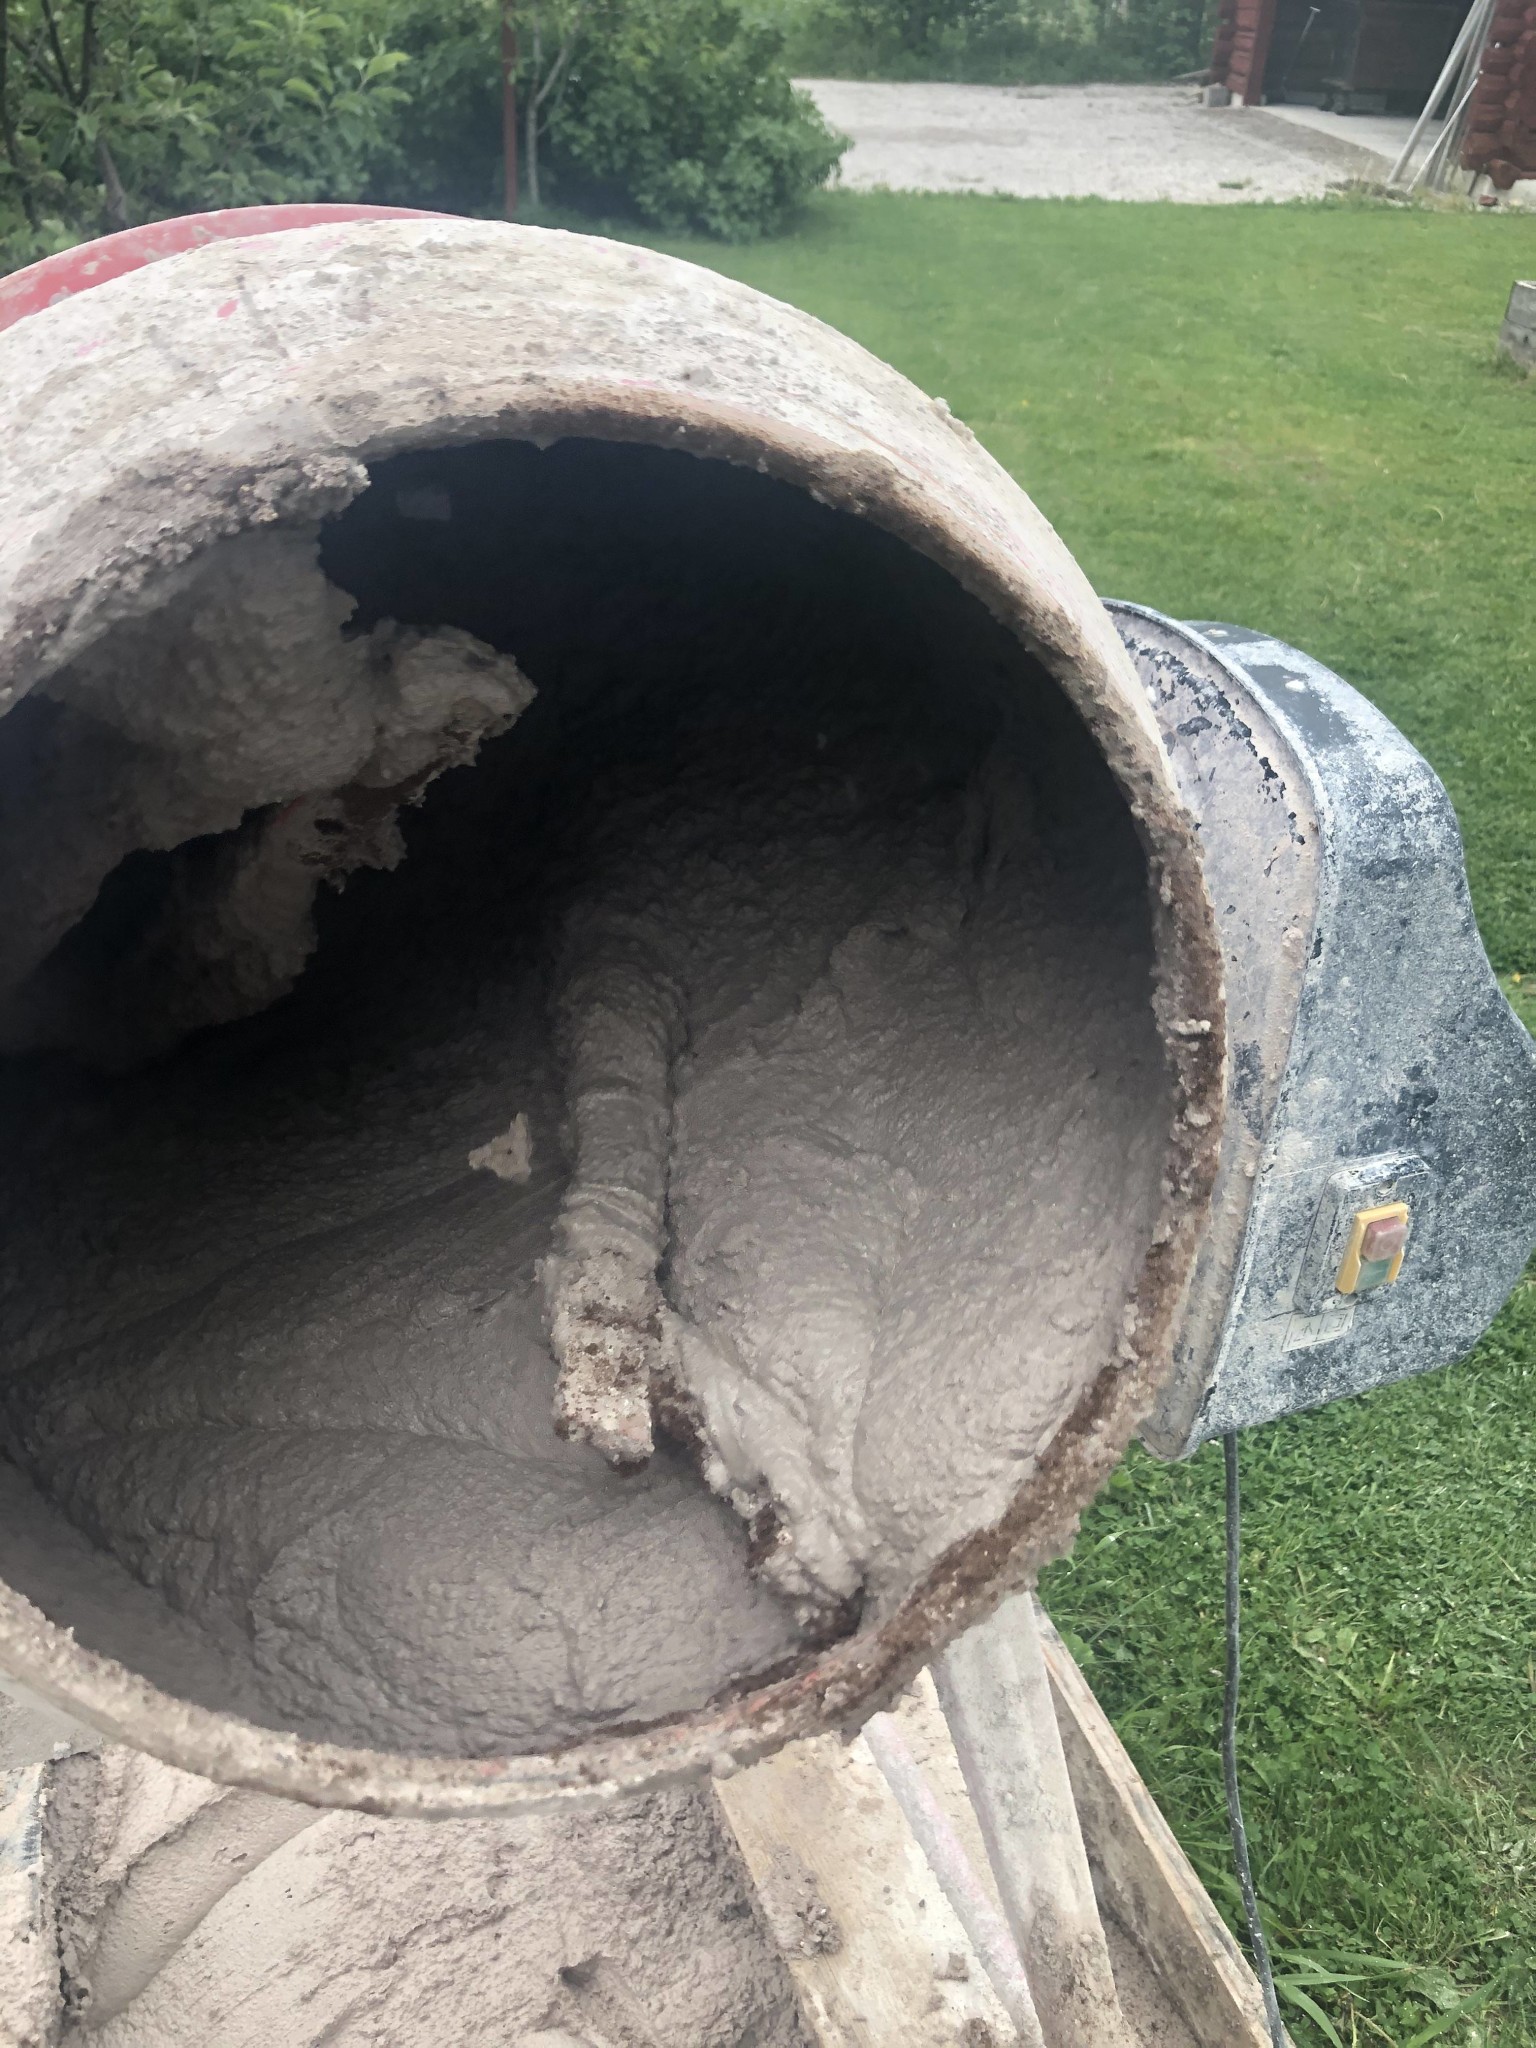
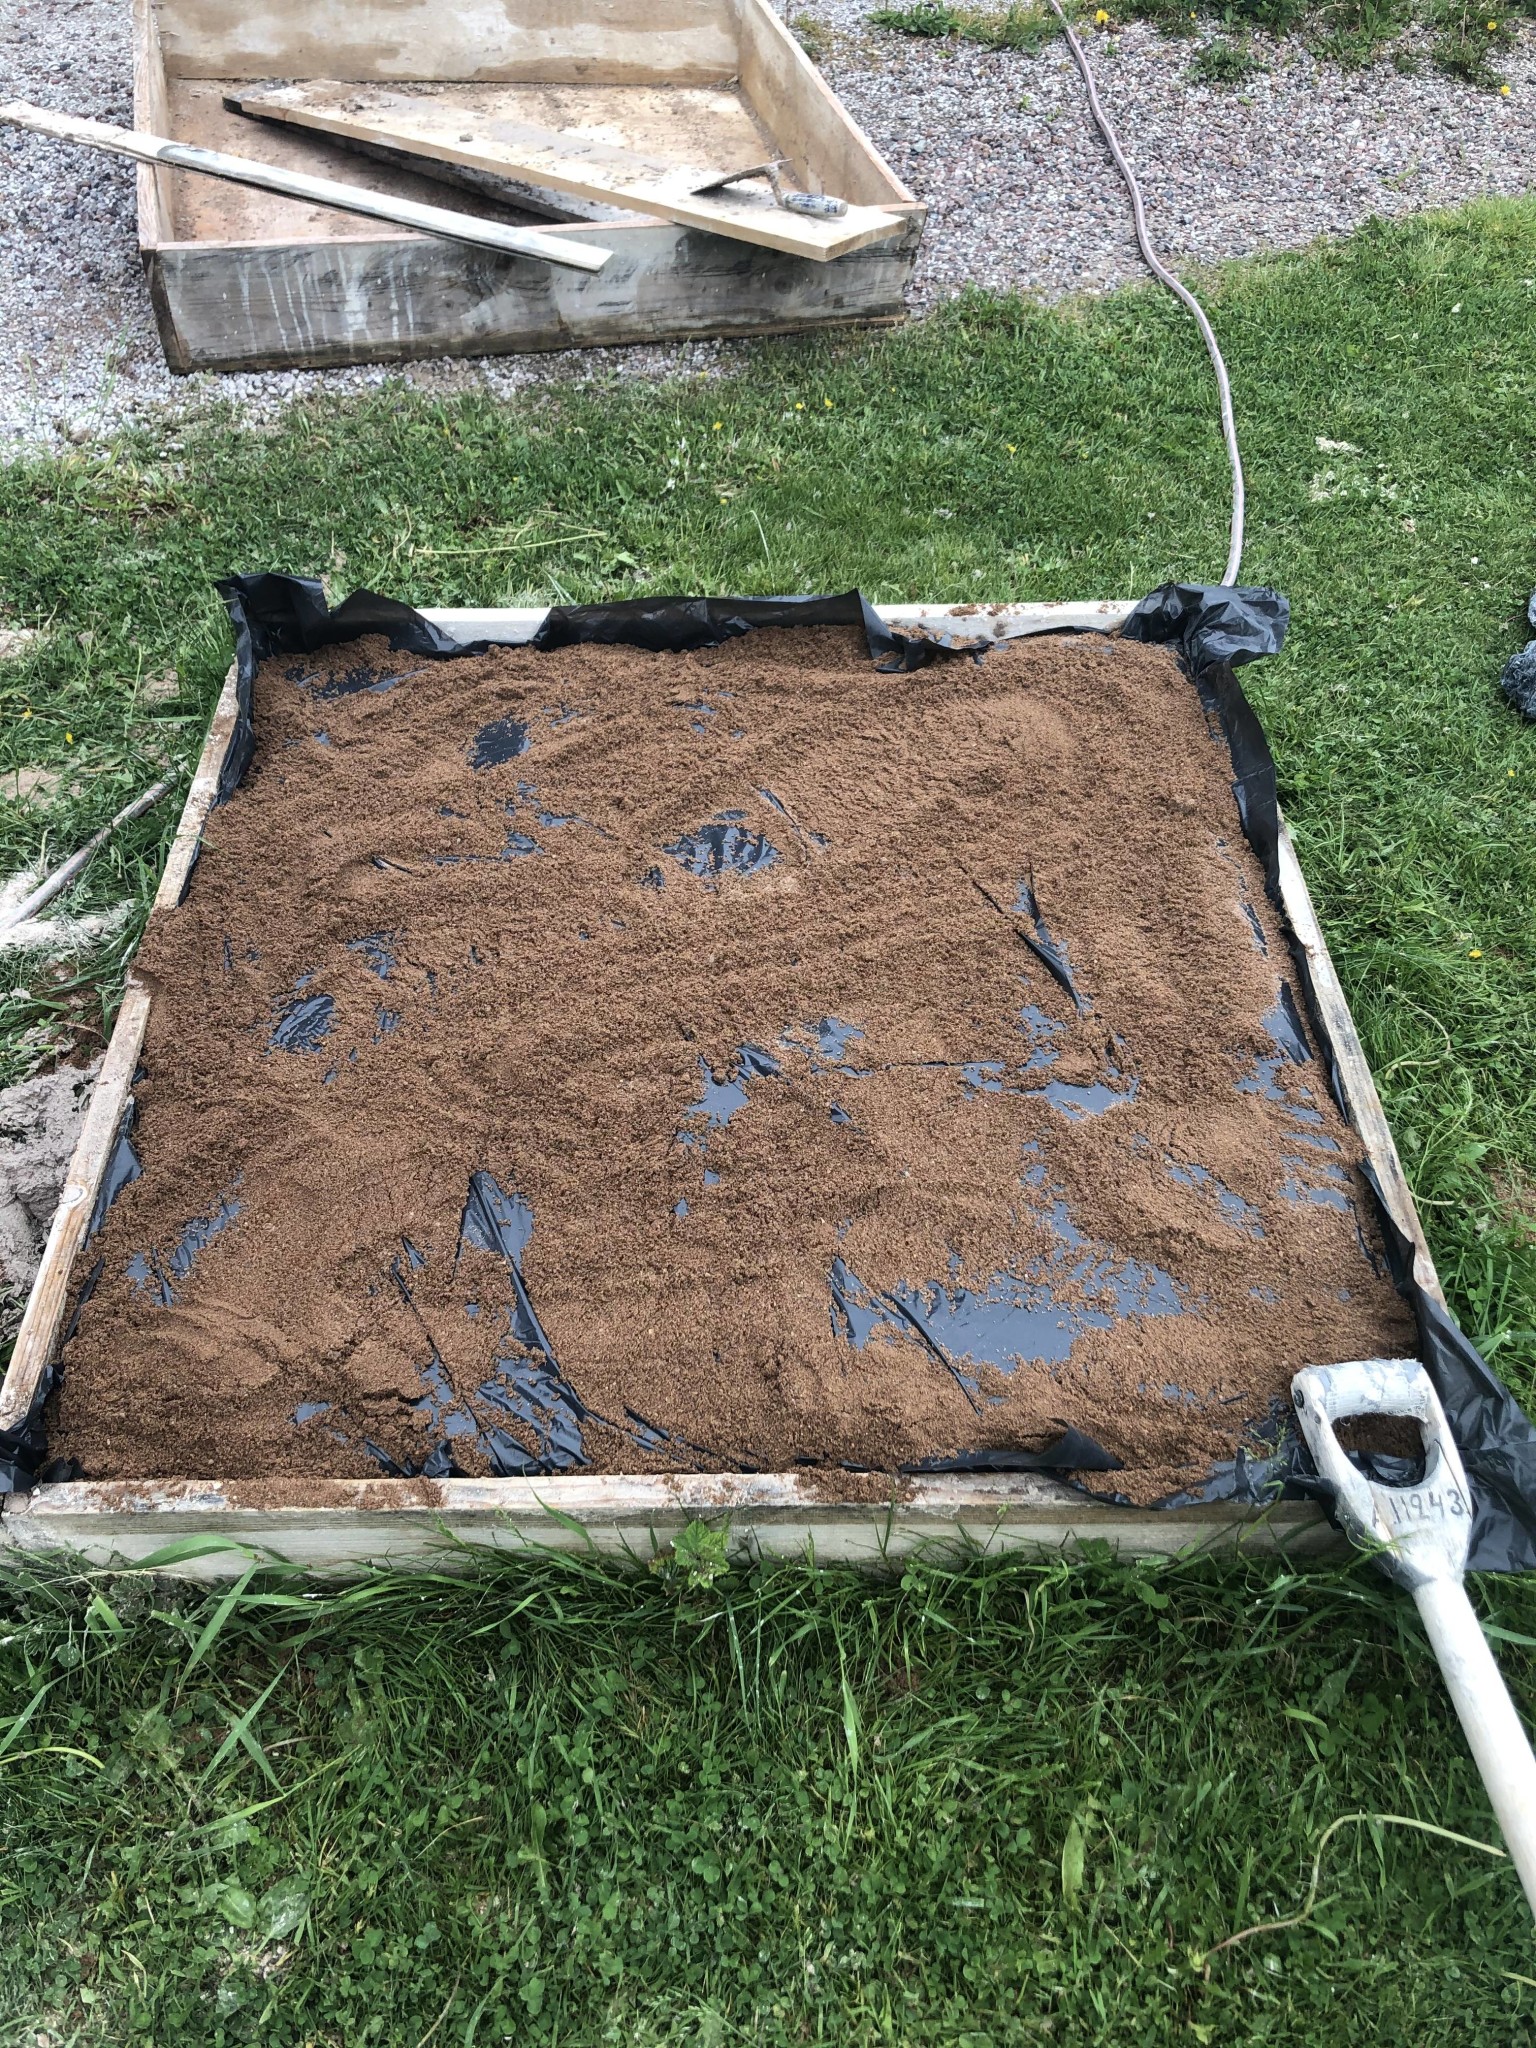
We managed to get quicklime in bulk very cheaply from a local lime plant, which we fetched with a tractor and trailer. I then started experimenting with how best to slake the lime and prepare the mortar with the tools I had at home. In hindsight, a professional mixer would have been worth acquiring, but I made do with my usual tumble mixer. One thing I quickly noticed when it comes to wet slaking lime is that you absolutely must not add too little water at the beginning. Once the reaction gets going, it goes very fast, and you risk ending up with hard and very hot lumps at the bottom of the mixer that must be chiseled off before you can continue. If necessary, add more water while the reaction is ongoing. The lime paste should never be thicker than the consistency of whipped cream. Once the slaking process starts to feel complete and the mixture doesn’t thicken anymore, you can add masonry sand, let it mix a bit longer, and then tip the finished plaster into some kind of tub. I made two using a plywood sheet with sides of 21x170 boards. I then set the mixer on top of everything to make it easier to tip the mortar into the tub. My mortar tubs hold about 6 full mixer loads of mortar. Then, just cover the mortar with plastic, throw some sand on top, and let the mortar "mature." This is to ensure the slaking is completely finished. The mortar thickens quite a bit over a few days, which might indicate that the slaking takes a while before it’s completely done. When it’s time to plaster, the mortar might feel very hard, but after 10-15 minutes in a mixer, it softens up properly, and you often don’t need to add more water even if it seems like it. It's as if it needs to be kneaded back to life after sitting still for a while.
The "recipe" that has worked best for me is the following:
1 part quicklime
just under 2 parts water
4 parts masonry sand (unless you want a fatter mortar; then reduce the amount)
I'll add some pictures of the project. As for the actual plastering, I avoid giving tips, as I'm far from an expert. There are probably others here who are much more competent in plaster work than I am.
Setting up the mixer like this made emptying much easier.
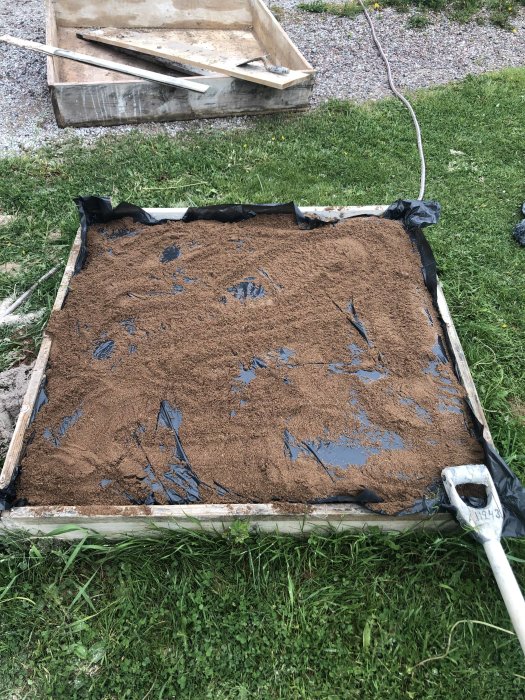
Covering the mortar with plastic keeps it fresh almost indefinitely. I water the board sides occasionally if it’s dry outside.
Here are some pictures of the project.
Unplastered wall. We chose to save one wall like this, mainly because it looks a bit fun.
Finished plastered wall
We have just started using the greenhouse and furnished it. If you want, I can post some pictures of how it looks now both outside and inside.
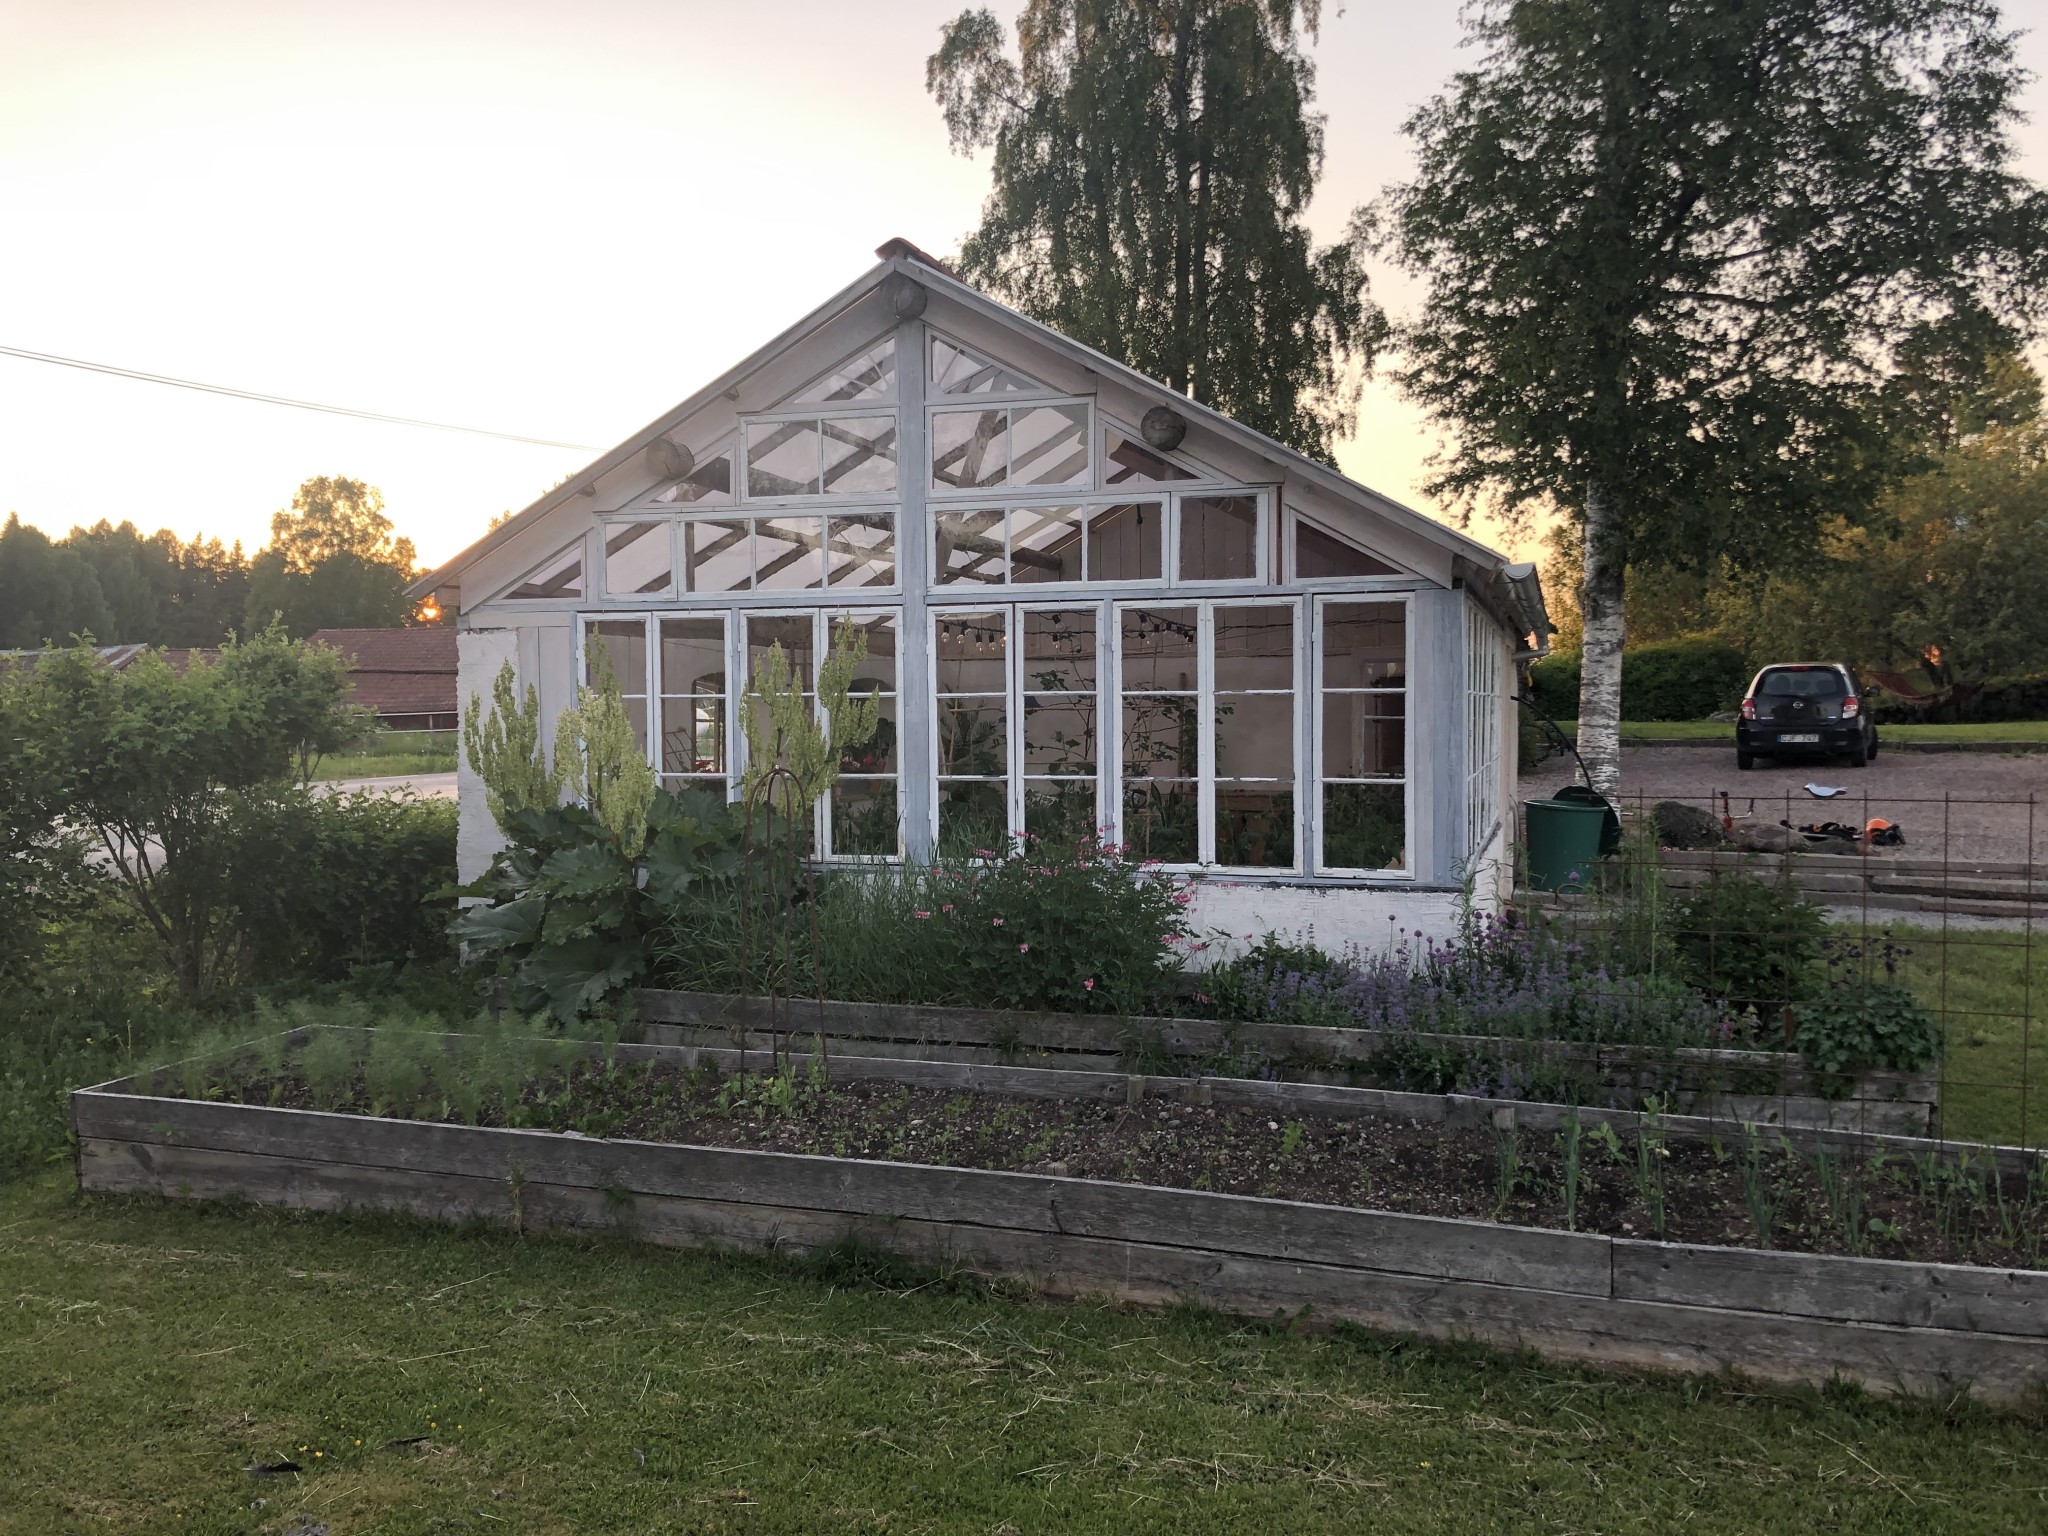
Here is a picture of the south gable, which is entirely made of glass. The north side is made of stone and doesn't have any windows at all.
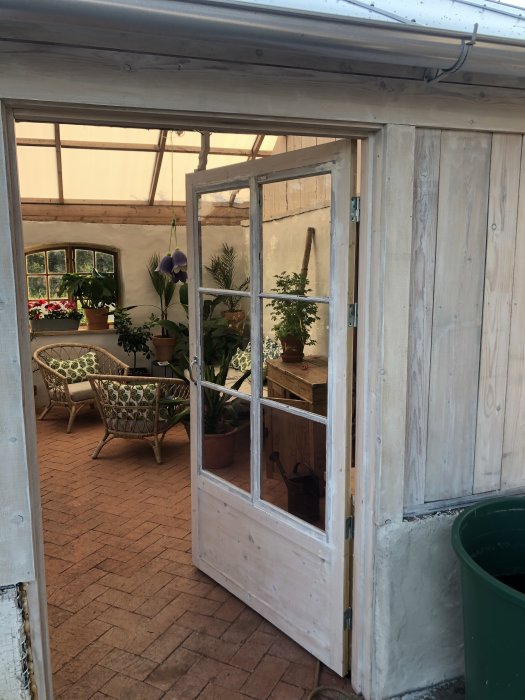
The entrance door is built from old window frames that I got for free. The same frames are used on the rest of the house.
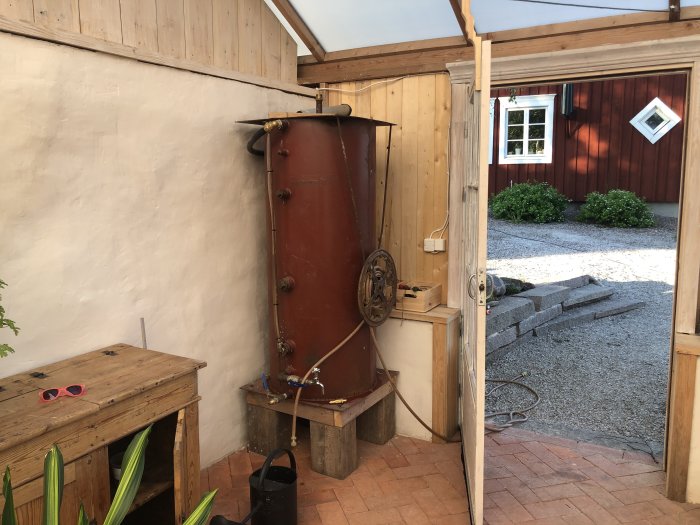
It's a bit too far to the nearest water outlet, so to avoid dragging hoses across the entire yard every day, there's an old accumulator tank of 500l that collects rainwater. On top of the tank, you can see a downspout that leads in water from the gutter. To avoid flooding, a 32mm PEM hose is connected at the top outlet, leading water out when the tank is full. Since it stands a few decimeters above the floor, there is enough pressure to water using a hose. Despite a dry early summer, the tank hasn't been empty of water.
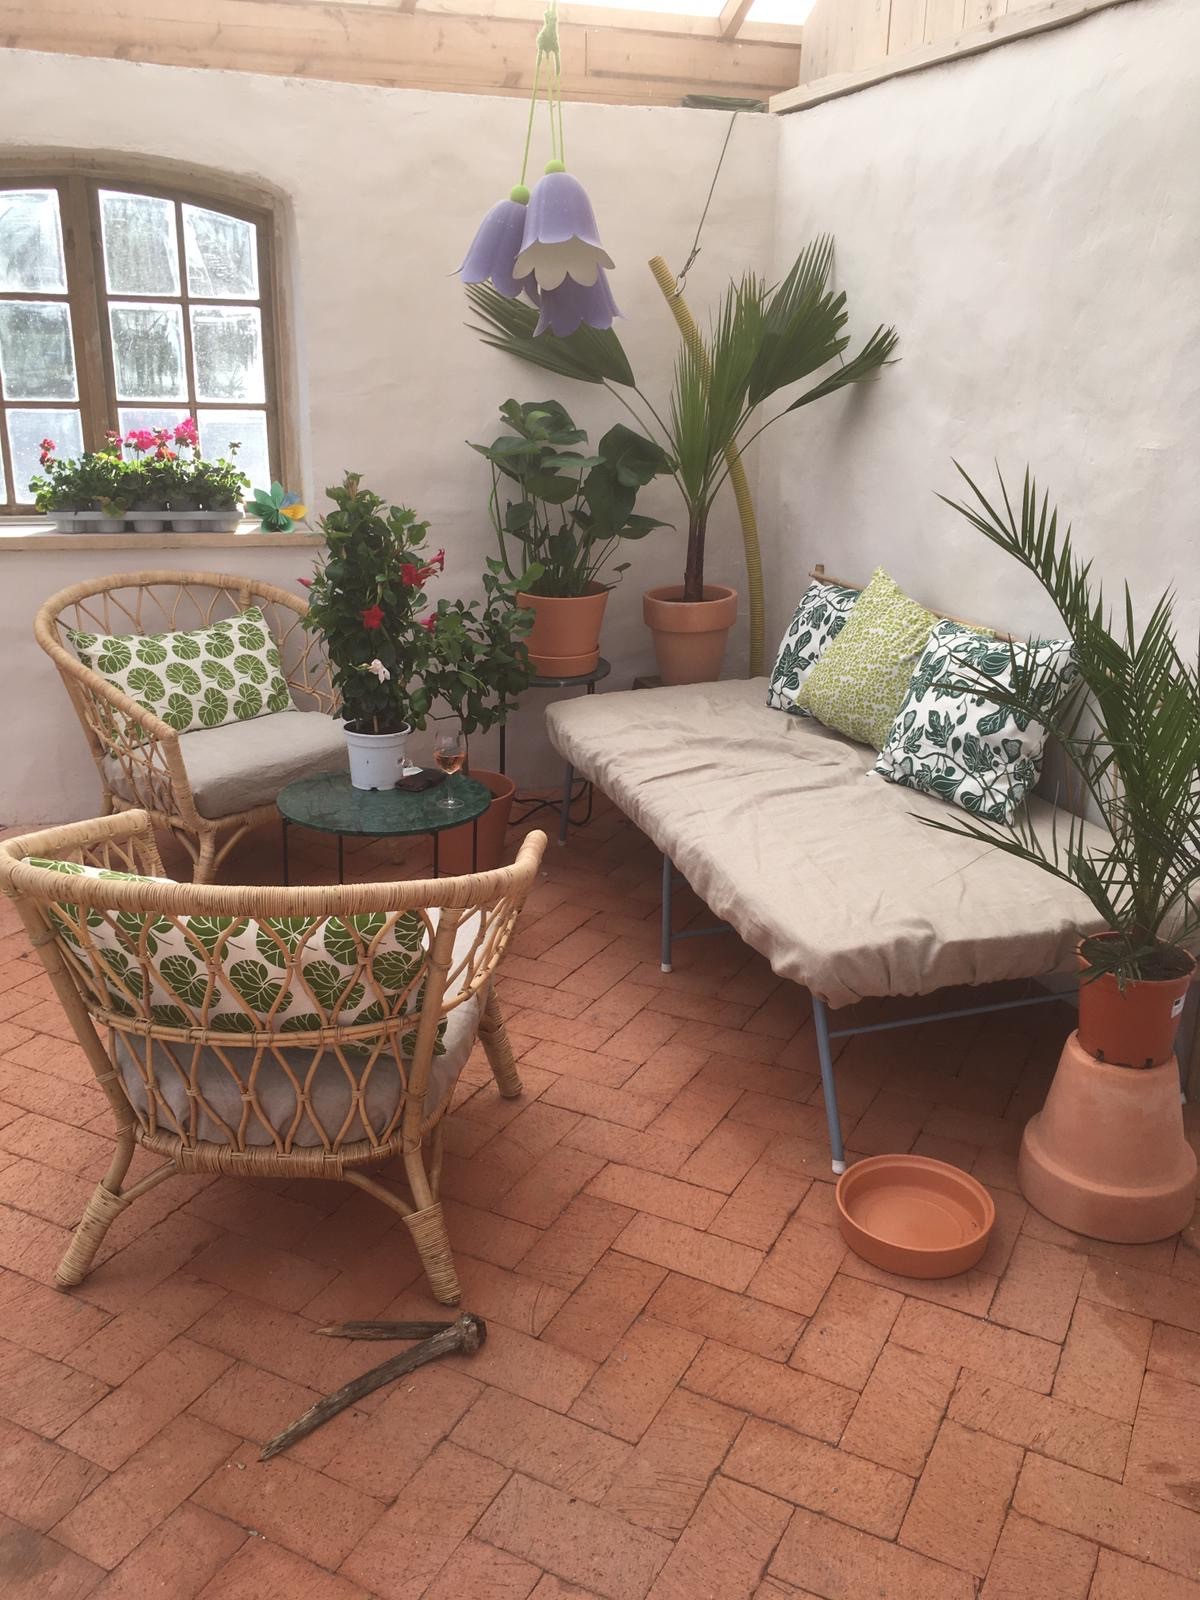
A cozy corner is a must in the evenings.
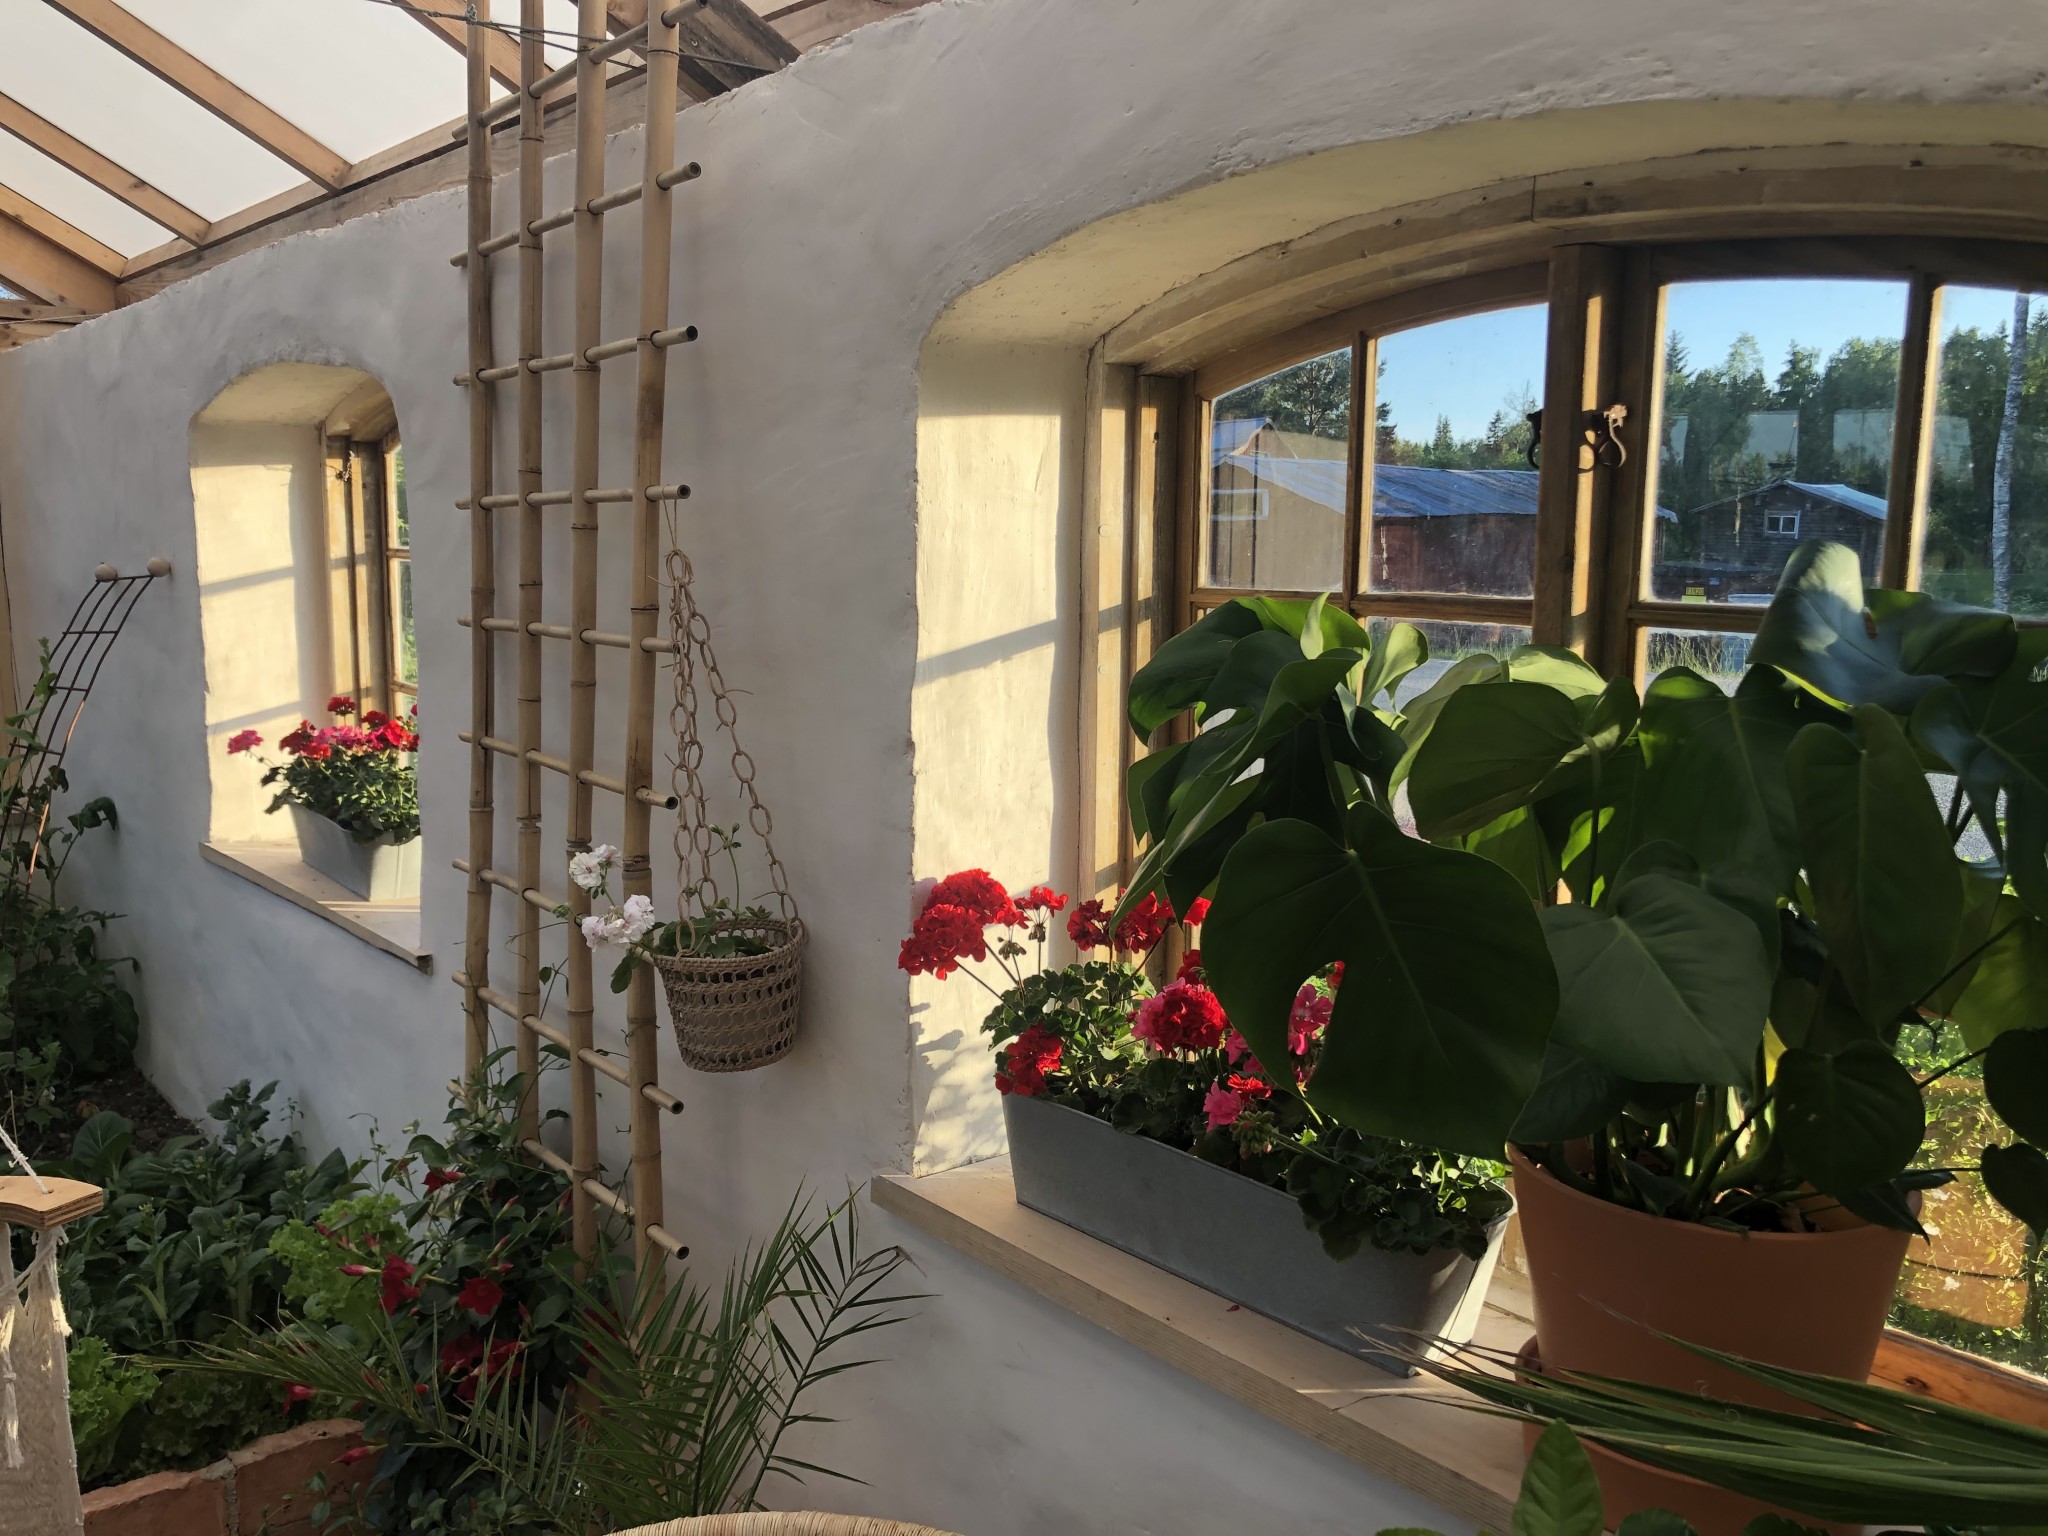
The walls are quite uneven, which is due to the fact that stones tend to stick out slightly through the mesh of the gabions. The plaster thickness would have been enormous if I had insisted on making the wall smooth. Now, instead, the plaster follows the stones, and in hindsight, it turned out quite nice anyway.
After much pondering, it finally ended up with a brick floor. It was actually not as complicated as I thought to lay. Once the first row was perfectly straight, the rest was quite simple. Over the planting bed in the middle hangs a frame of rebar that will hopefully be easy to cover with bubble wrap to overwinter sensitive plants inside.
Very nice greenhouse. Is it purely for aesthetic reasons that you plaster the walls, or is it also for the climate inside?
Well, since the walls consist of stone-filled baskets, the wind would have blown right through otherwise. We considered for a while putting some form of boards, but it felt so dull and it would have been difficult to make it reasonably airtight.
There are three 8-meter logs between the gables (visible in image 1). The ridge beam has a diagonal brace down to the post it rests on at each end (visible in the first and also in the last image if you look closely). Then, because I am a "belt and suspenders" person, I retrofitted a truss in the middle, where a steel wire joins the sides. I also added a turnbuckle to the wire so that it can be retightened if necessary.
Well, since the walls consist of stone-filled cages, the wind would have blown right through otherwise. We considered for a while putting some form of boards, but it felt so boring, and besides, it would have been difficult to make it reasonably tight.
It turned out so nice and I've been considering the building method myself!
What kind of gabions with what size of holes?
How did you tie the gabions together sideways and lengthways?
How did you lay the foundation?
How did you fill and pack the stones?
Did you use any wire or tension straps to reinforce the stones and keep the gabions together?
When you plastered the wall, why did you also plaster the inside?
Isn't it enough with one side?
Are there stainless steel gabions? Did you choose hot-dip galvanized?
Vi vill skicka notiser för ämnen du bevakar och händelser som berör dig.


")


apotekarnes said: