Looks like plinth block, i.e., L-shaped.
Place with the painted side down or prop up so the trim is flat, this way you avoid the double angle that occurs when the trim leans in the saw.
Otherwise, you might have tilted the blade as well when mitering.
In other words, the best thing is to redo it...
Place with the painted side down or prop up so the trim is flat, this way you avoid the double angle that occurs when the trim leans in the saw.
Otherwise, you might have tilted the blade as well when mitering.
In other words, the best thing is to redo it...
Thank you so much, guys!Mazen said:
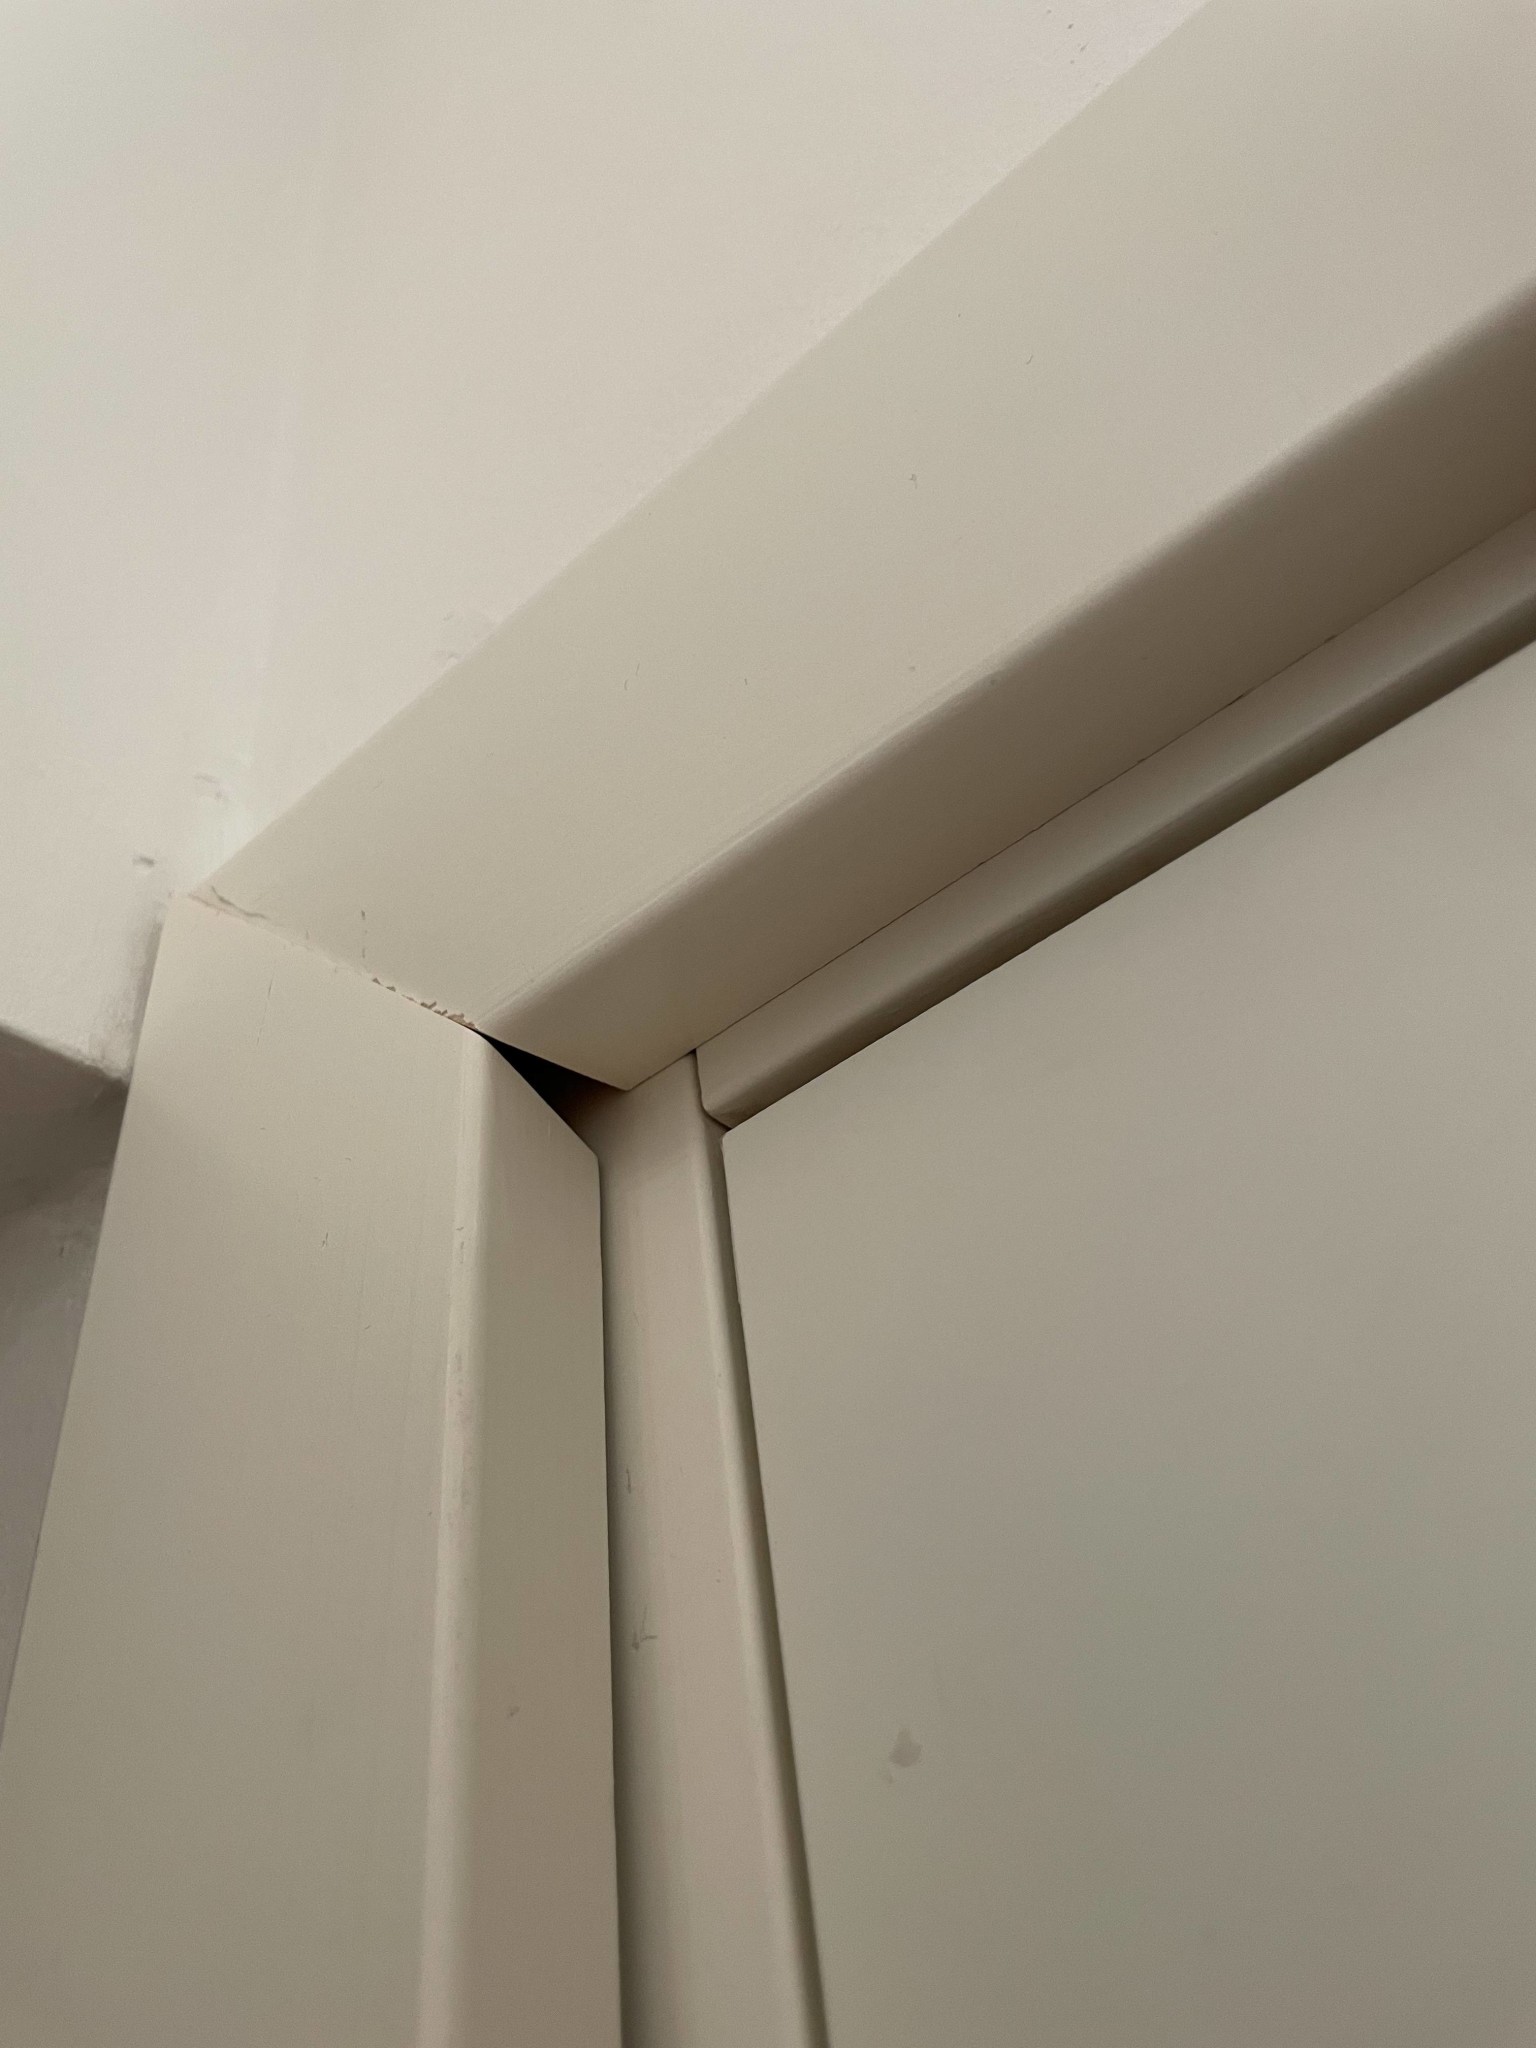
Looks like it's threshold molding, i.e., L-shaped.
Place it with the painted side down or elevate it so the molding is flat, to avoid the double bevel that occurs when the molding tilts in the saw.
Otherwise, you have unintentionally tilted the blade when mitering.
In other words, it's best to redo it..
Thank you so much for this, suspected it was an operational error during cutting. The molding is not in place, hence it looks very crooked!Looks like it's threshold molding, i.e., L-shaped.
Place it with the painted side down or elevate it so the molding is flat, to avoid the double bevel that occurs when the molding tilts in the saw.
Otherwise, you have unintentionally tilted the blade when mitering.
In other words, it's best to redo it..
You may have a step between the frame and wall that the trim must even out. Take a short piece of the trim and check if it does so both on the top side and the side part. If not, you're pretty much out of luck.
Make sure all the angles on the miter saw are correct.
Many people first test with short pieces (e.g., 10 cm) to see if the corner turns out as desired. This can save some meters. Once you know how it should really look, you can cut/miter properly.
Make sure all the angles on the miter saw are correct.
Many people first test with short pieces (e.g., 10 cm) to see if the corner turns out as desired. This can save some meters. Once you know how it should really look, you can cut/miter properly.
The door is not completely straight nor is the wall. Not the best conditions to do a good job. I have an idea to put a small smyg, plane it out to handle the height differences between the frame and the wall?T Thomas_Blekinge said:You might have a step between the frame and the wall that the trim needs to even out. Take a short piece of the trim and check if it does this both on the top side and on the side part. If not, you're pretty much screwed.
Make sure all angles on the miter saw are correct.
Many first try with short pieces (e.g., 10 cm) to see if the corner is as desired. This can save some meters. Once you find out how it should really look, you can cut/miter for real.
If you have a height difference where the frame sits deeper in the wall, you can use so-called klackfoder (which I thought it was in the pictures) and plane the "klacken" so it sits tight against the frame.
https://www.hornbach.se/p/klackfode...MIp8HgoaH7-wIVDmYYCh2S7gkIEAQYBCABEgItwPD_BwE
Alternatively, as you write, to saw a rimpa from, for example, plywood and adjust to wall level.
https://www.hornbach.se/p/klackfode...MIp8HgoaH7-wIVDmYYCh2S7gkIEAQYBCABEgItwPD_BwE
Alternatively, as you write, to saw a rimpa from, for example, plywood and adjust to wall level.
Absolutely! It's klackfoder currently, I thought of building a smyg to get a tighter miterIf you have a height difference where the frame sits deeper in the wall, you can use so-called klackfoder (which I thought it was in the pictures) and plane the "klacken" so it sits tight against the frame.
[link]
Alternatively, as you write, saw a strip of, for example, plyfa and level out to wall height.
")
Click here to reply