I used a steel trowel when plastering, I couldn't get the right flick when I threw it, so I "applied" all the plaster instead, it went great. I think the tool you call a long trowel sounds more like a float that you should use afterwards to get a good surface.
I painted with lime paint in my basement. Had KC mortar. It turned out great! If you're plastering with lime mortar, I definitely think you should use lime paint as well. It's cheap, white, and very good at absorbing and releasing moisture. Don't forget to moisten during curing!
Yeah, throwing on the plaster didn't go well - especially higher up on the wall. I got as much in my hair as on the wall. In the end, I used a wide putty knife to spread the plaster. I apparently bought a float that Bauhaus calls a long trowel. But whatever, it worked with the putty knife.
Thanks for the tip about lime paint, sounds perfect!
Before I plaster the next layer, how long should it cure? Can it cure for too long? I'm using hydraulic mortar, so what I did this morning is already hard (at least on the surface).
You can plaster up to 3 cm at the same time. However, 2 cm is more optimal, and if it's not too cold, i.e. below two degrees, you can apply the next layer after just one day. Just remember that the plaster must be somewhat looser for the final layer so that it fills in well. For a smooth finish, let it set slightly, and then scrub the surface.
You can plaster up to 3 cm at the same time. But 2 cm is more optimal and if it is not too cold, i.e., below two degrees, you can apply the next layer after just one day. Just remember that the plaster needs to be slightly looser on the last layer so it fills well. For a smooth finish, let it set a bit and then scrub the surface.
Thanks for the tips! Now it should go well with the rest! The first "segment" I plastered I did in full thickness (leveled against the ribs). Then I just "base plastered" up to the net on the rest of the wall. Unfortunately, the first segment didn't turn out well as I noticed this morning, it's as if the plaster has moved a bit after I leveled it. So it's a bit "bumpy" at the bottom. I think I can live with it, because I assume you can't sand it down where it bulges out? It was probably just too thick and heavy.
Unfortunately, the rest of the plastering will have to wait a bit, my wrists are completely worn out today after dragging down half a ton of plaster into the basement. My hands are completely numb..
It's quite doable to remove the bulge by rubbing a little with a grater or a regular board, especially if you have support with ribs unless you wait until it has completely settled. Then sanding is all that remains, and that's not fun in unventilated spaces. Feel free to upload some pictures. Always fun to look at. Rest your wrists now.
I usually do some initial skimming and priming with a putty knife first. Then I get to work with the trowel. Then lånkskånska, scrape it off with a straight edge. There’s usually about 10 percent waste per section. But if the floor is clean, you can reuse most of it. However, I have acquired a rendering machine since I have 200 square meters that need new render. I did a 40 square meter gable last summer. My throwing arm is starting to weaken.
For the crack, you can use a chisel and gently tap it, then apply fairly wet plaster. A groove that is 0.5 cm deep and 2 cm wide is sufficient. Preferably a bit V-shaped. 2 cm wide on the surface. Don't forget to water. It's not unusual for unevenness to occur. If you look at a wall in raking light made by seasoned craftsmen, it's the same there. You'll soon get the hang of it.
For the crack, you can use a chisel and tap gently and apply fairly wet plaster. A groove that is 0.5 cm deep and two cm wide is enough. Preferably a bit V-shaped. 2 cm wide on the surface. Don't forget to water it. It's not unusual for there to be unevenness. If you look at a wall in side light made by experienced craftsmen, it's the same there. You'll soon get the hang of it.
Thanks for the chisel tip! I'll tackle the crack after work
Now the crack is fixed and the rest of the wall plastered. But it has been a cavalcade of lessons and swearwords. I think lime mortar is quite different from regular plaster mortar.
1. Don't mix the mortar thinner than what is stated on the package. I was tempted to mix in one more liter of water / 25 kg. It became a lovely mousse that was easy to plaster. But when I came back after a coffee break, half the section had fallen to the floor. Had to mix new mortar and redo it.
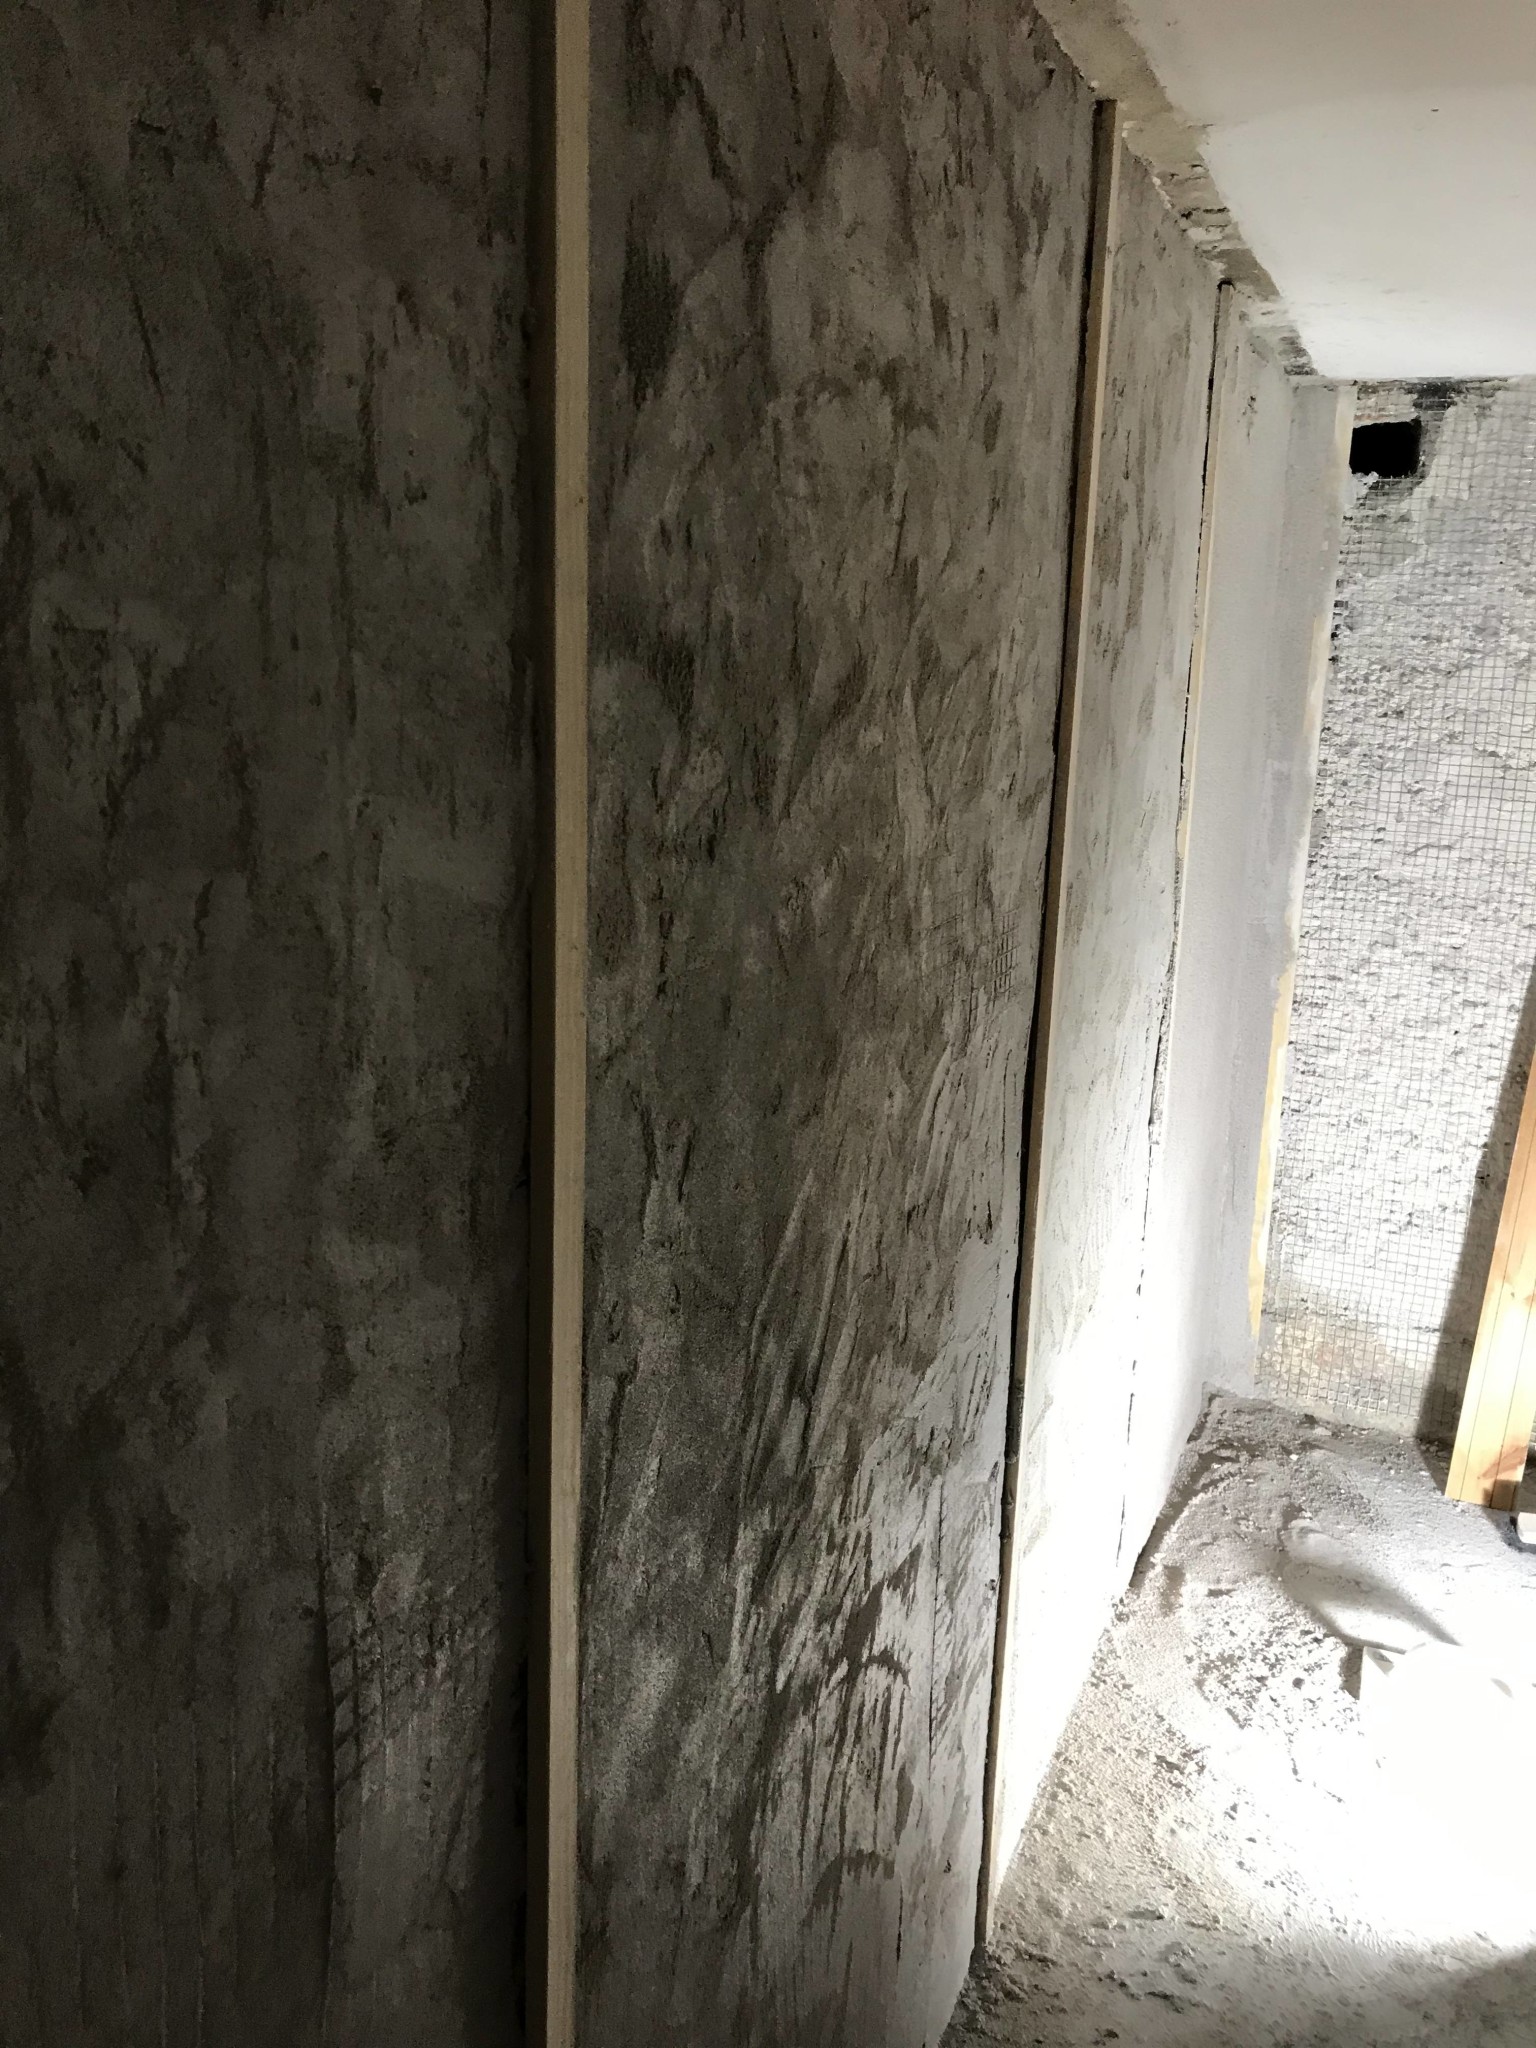
2. Plastering guides are not very useful with lime mortar. It just cracks when you pull them off. You can use them for measuring so you’re not completely off track.
3. The curing time is very long. I removed a plastering guide after 12 hours, and accidentally pulled down half a wall. Brushing the wall works after about 48 hours. And it needs to be watered a lot during this time.
Now the crack is fixed and the rest of the wall is plastered. But it has been a cavalcade of lessons and swear words. I think lime mortar is quite different from regular plaster mortar..
1. Do not mix the mortar looser than what it says on the package. I was tempted to mix in a liter more water / 25 kg. It became a lovely mousse that was easy to plaster. But when I came down after coffee, half of the section had collapsed onto the floor. Had to mix new mortar and do it again.
2. Plaster battens are not very useful with lime mortar. It just cracks when you pull off. You can use them for measuring so you’re not totally off.
3. The curing time is very long. I removed a plaster batten after 12 hours, and pulled down half the wall in the process. Scrubbing the wall works after about 48 hours. And it must be watered a lot in the meantime.
It sounds like there was quite a bit of moisture in the air. Plaster cures normally about 1 cm per day. The more lime, the greater the mobility and hygroscopic lime transports more water than regular lime. In your case, the substrate behind was surely too wet.
Plaster battens can be hard to remove. Removing them after 12 hours is very early. At least a day, and then you have to rub up and down along the edge with a putty knife to create a little space.
Scrubbing is done when the plaster has set a bit. If it took 48 hours, there has been a high water loss down there with a lot of moisture in the air that has become saturated. It becomes a bit of a catch-22 when the moisture ends up in the air. You need ventilation to set.
You need to water quite a bit. How much depends on water loss and absorbing substrate, heat, etc.
I should have said something about the moisture and how to get the sticks out as they become larger because they have absorbed moisture. Sorry. But if it's any consolation, there are a lot of swear words from my side too, and I still have quite a bit of experience with plastering.
Most of the problems were because I had never plastered before and didn't have the knowledge/feel for the craft!
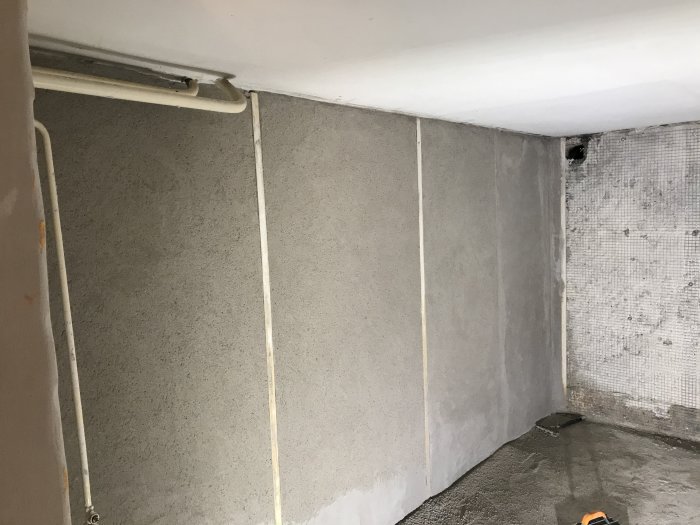
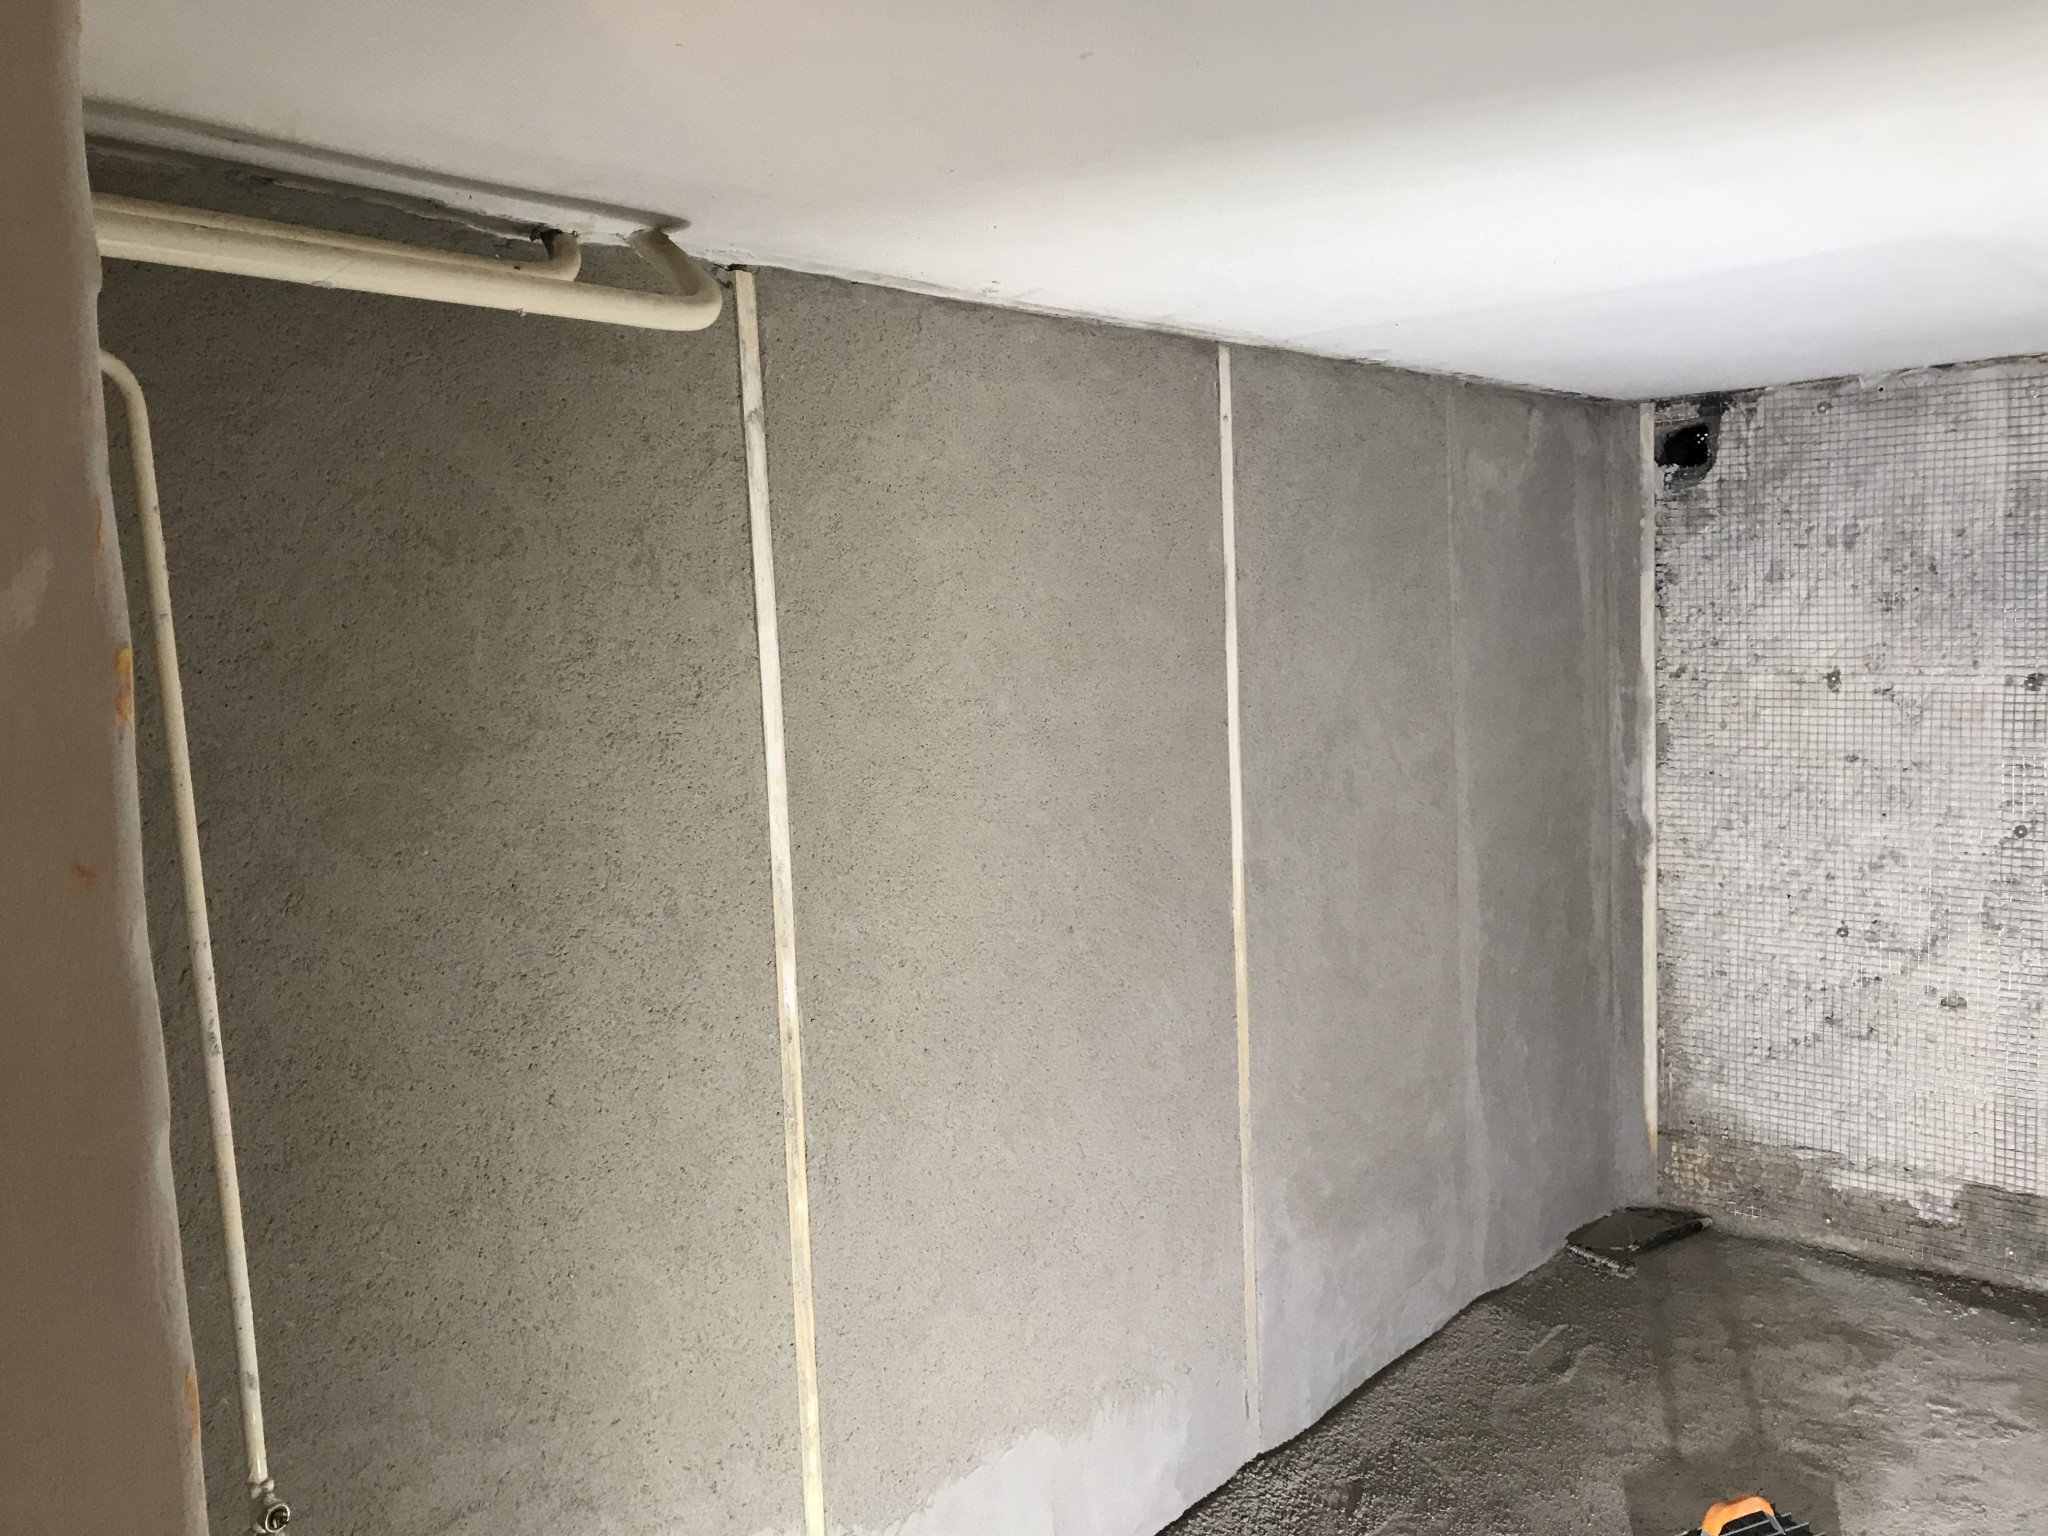
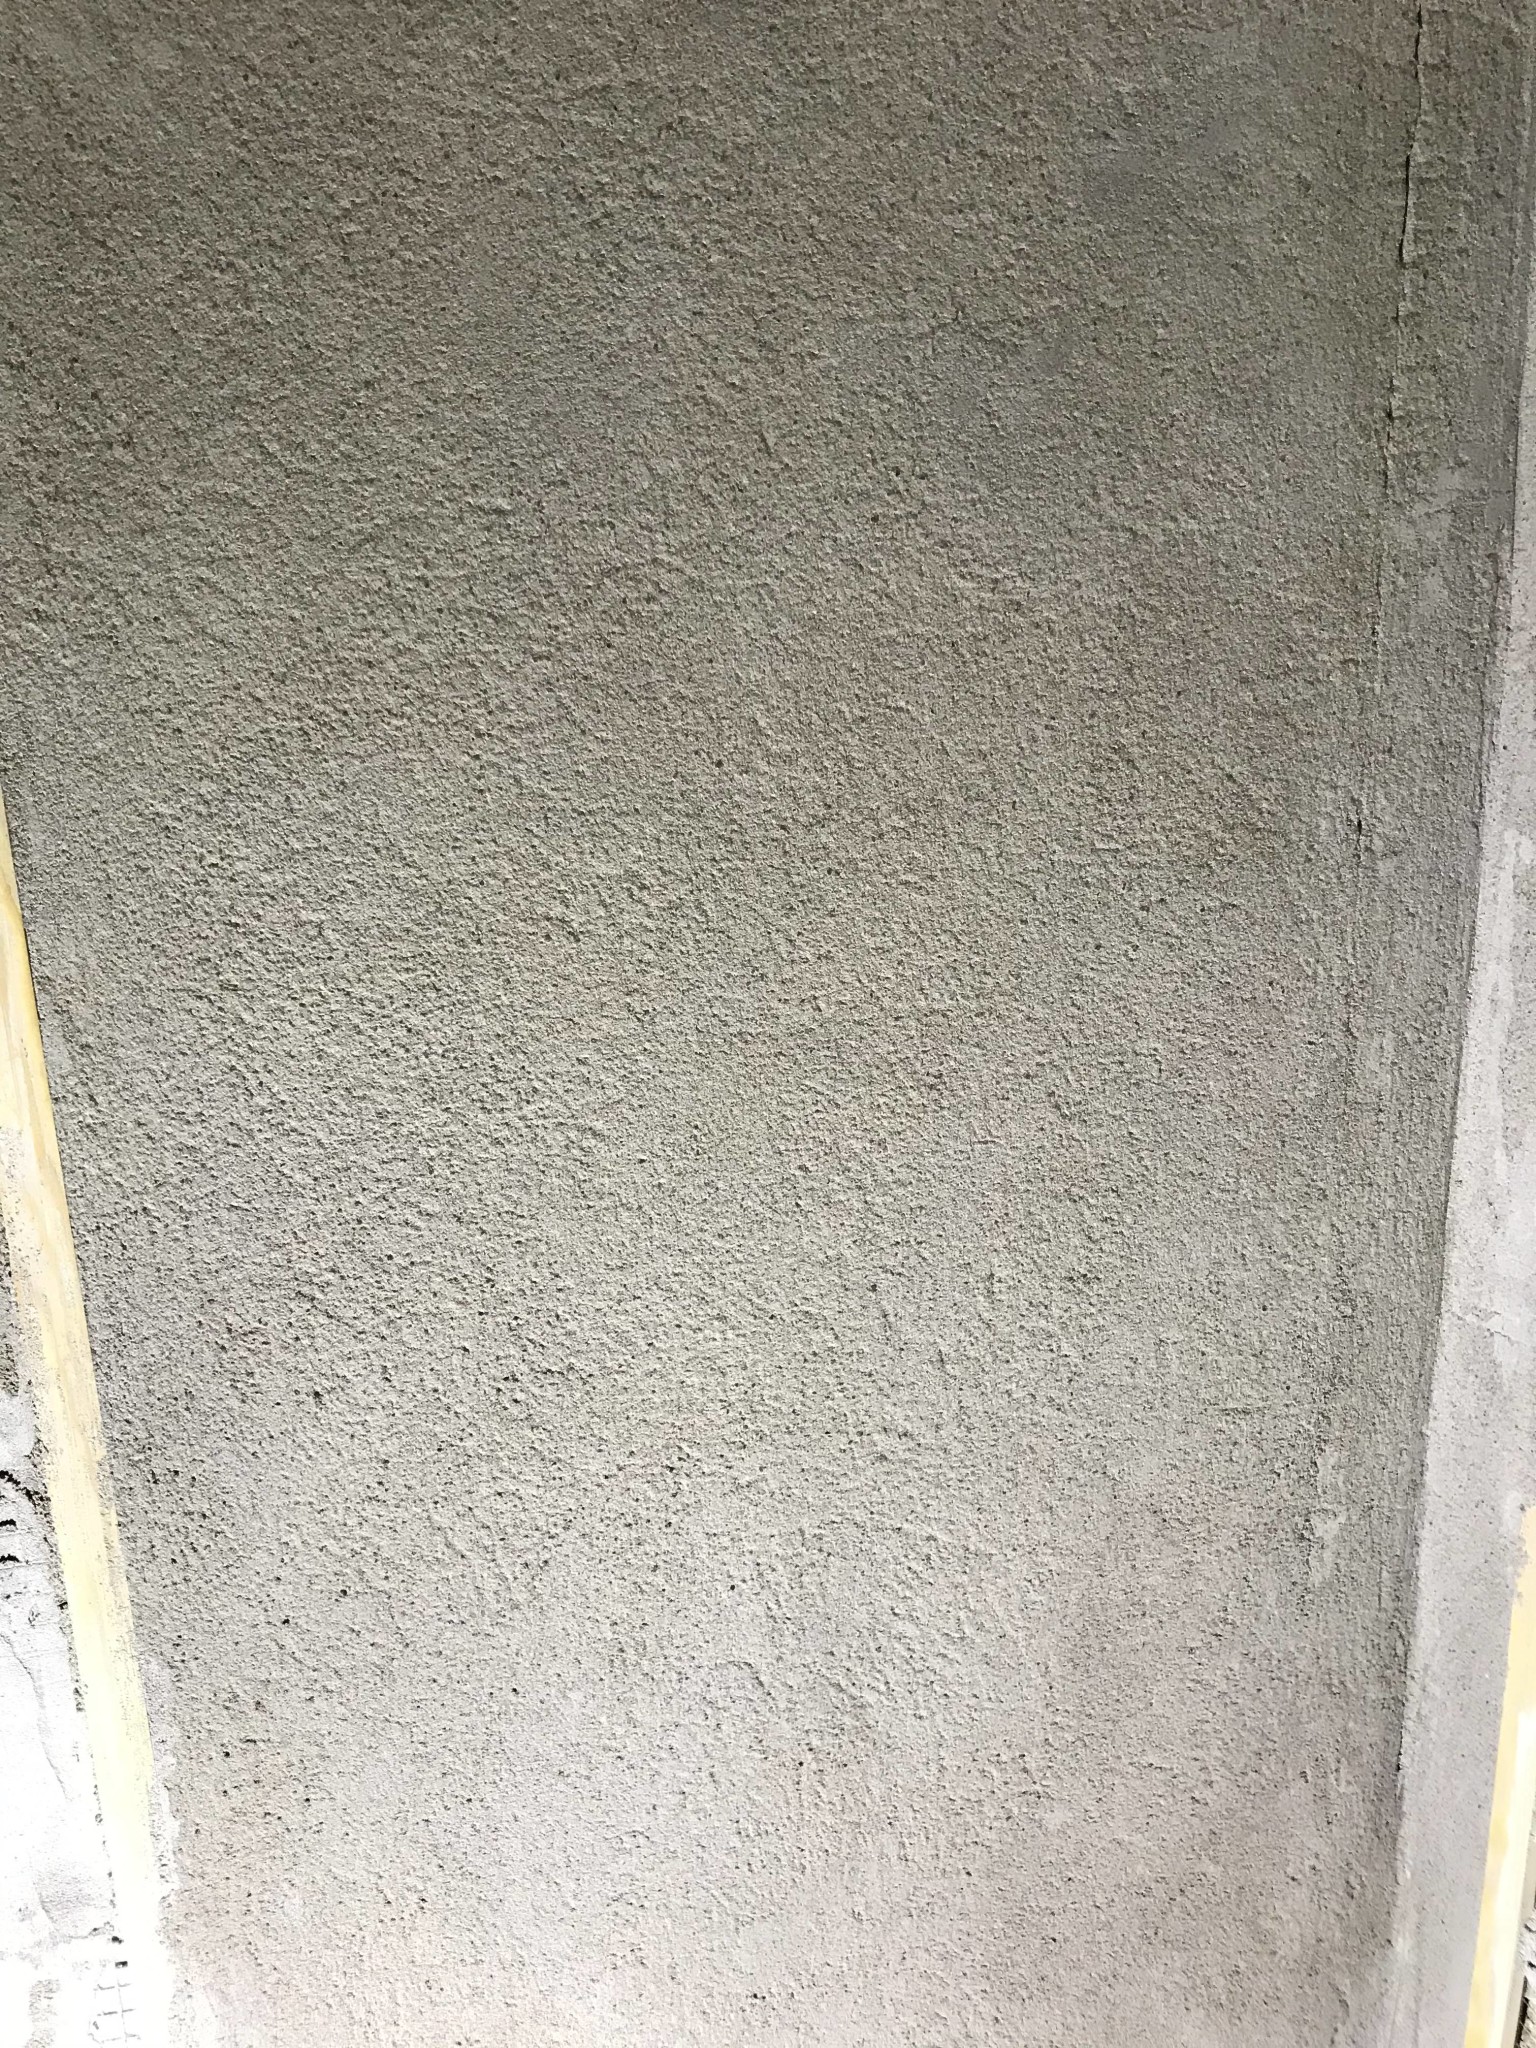
This is how it looks now. I'm gently "scrubbing" with a piece of plaster mesh. I find it gives a nice texture to the surface, a bit rougher. I'm not removing the strips until tomorrow. Thanks for the tip about cutting a bit around the strips!
I just want to interject with a thank you for an educational thread. It's very valuable to take part in another beginner's experiences. I have a similar project ahead of me. Basement built in 1933. I will probably skip the netting and plaster directly on.
Vi vill skicka notiser för ämnen du bevakar och händelser som berör dig.
ylven said:
I used a steel trowel when plastering, I couldn't get the right flick when I threw it, so I "applied" all the plaster instead, it went great. I think the tool you call a long trowel sounds more like a float that you should use afterwards to get a good surface.Silver78 said:
You can plaster up to 3 cm at the same time. But 2 cm is more optimal and if it is not too cold, i.e., below two degrees, you can apply the next layer after just one day. Just remember that the plaster needs to be slightly looser on the last layer so it fills well. For a smooth finish, let it set a bit and then scrub the surface.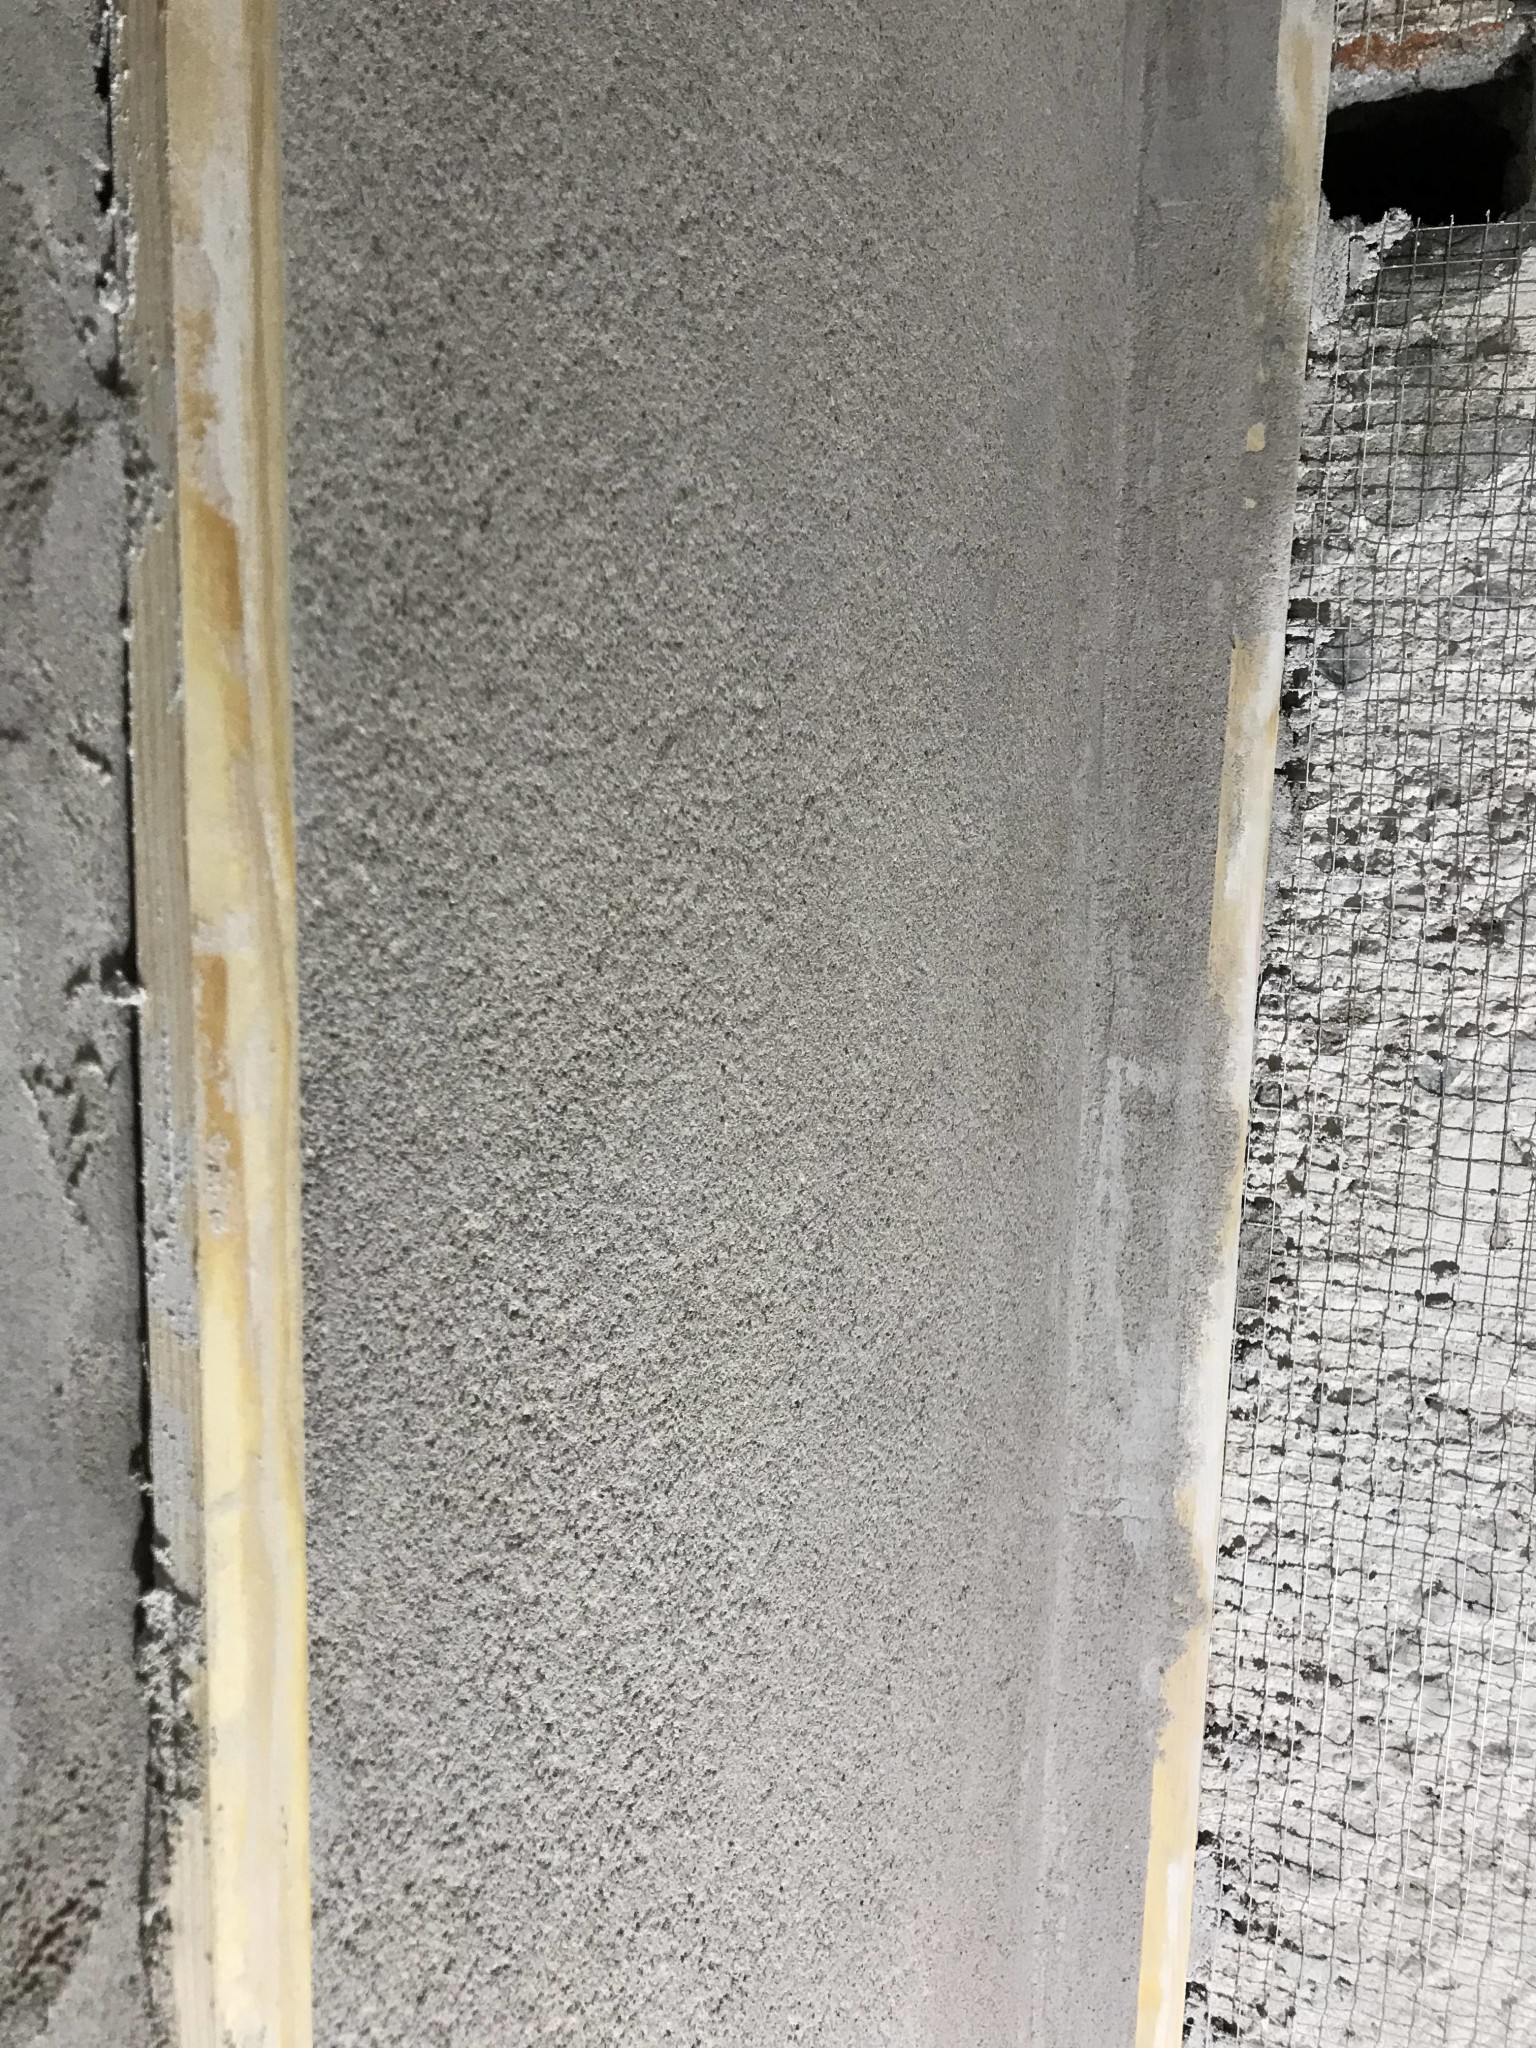
")