20,794 views ·
61 replies
21k views
61 replies
Lime plaster raw basement walls
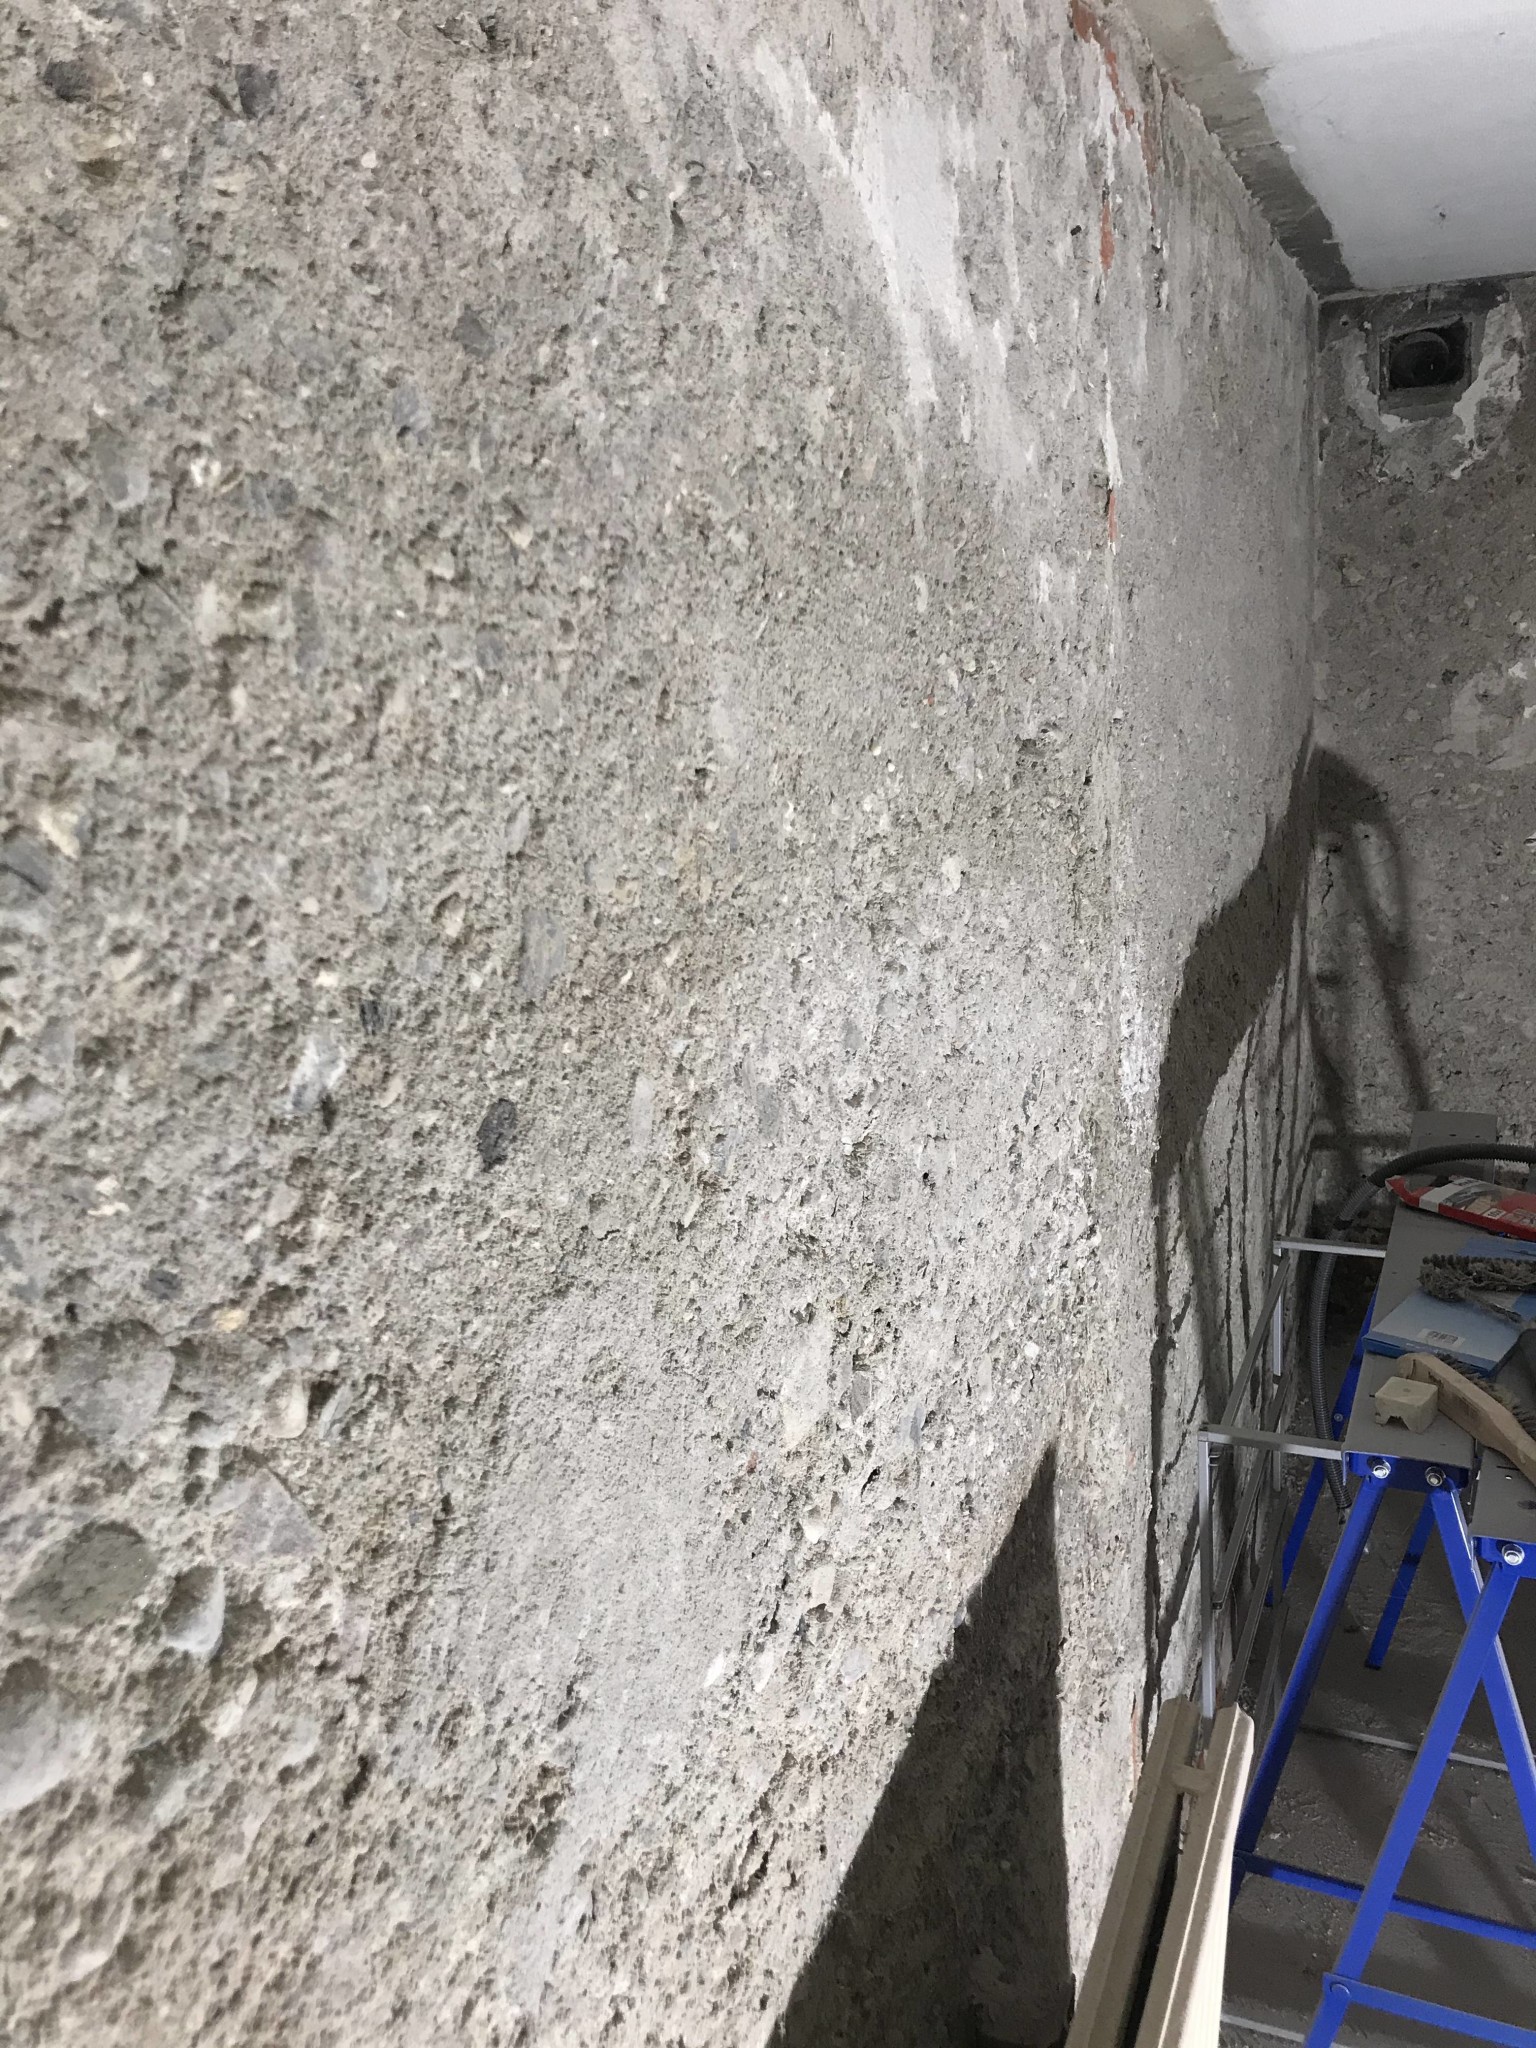
I have knocked down all the old cement plaster on the exterior basement walls and now have a rough surface of bare concrete, which I plan to lime plaster due to moisture exposure.
I thought about putting up plaster mesh (or is that overkill?) and then applying the lime plaster. Are there any other tricks I should know besides what's on the package (I've bought Combimix Kalkbruk D Grov, hope it's the right kind)?
I want a "rustic" look and the wall doesn't need to be even.
I thought about putting up plaster mesh (or is that overkill?) and then applying the lime plaster. Are there any other tricks I should know besides what's on the package (I've bought Combimix Kalkbruk D Grov, hope it's the right kind)?
I want a "rustic" look and the wall doesn't need to be even.
Reinforcement mesh strengthens the wall. But the most important thing is that you need to prime first if you don't intend to measure everything. Old concrete adheres poorly to plaster. Keep in mind that you need to apply at least 2 layers from the inner layer. Concrete at the bottom. For example, one layer b plaster - one layer c plaster. This is to prevent cracks that are not absorbed by the plaster. If you want more lime plaster, simply opt for a mortar that contains less cement. The principle is still harder at the bottom and softer further out.
Thanks! I hadn't thought about primer!Silver78 said:
Reinforcement mesh strengthens the wall. But the most important thing is that you must prime first if you haven't planned to measure everything. Old concrete adheres poorly to plaster. Remember that you need to apply at least 2 layers from the inner layer. Concrete at the bottom. Like one layer b plaster - one layer c plaster. This is to avoid cracks not being absorbed by the plaster. If you want more lime plaster, you simply choose a mortar that doesn't contain as much cement. The principle is still harder at the bottom and softer further out.
I understand that lime plaster doesn't contain any cement at all and is very soft (at least with regular plaster)?
Lime plaster contains lime and 25% sand. There are advantages and disadvantages to such plaster. It easily absorbs moisture but also releases it easily. It is very soft and can accommodate large movements. Personally, I prefer kc bruk better. Because it is a bit of a mix of different properties. It is harder but still absorbs some movements.
In my case, I want to avoid plaster detachment even if moisture comes from outside, and I understand that hydraulic lime plaster is the safest.
As a complete novice with plaster, what’s the best way to attach the plaster mesh? Biltema sells plaster mesh cheaply (about half the price of Byggmax) and offers hooks as an attachment method. I'm a bit unsure if you can hammer these directly into concrete. However, my concrete walls are quite porous; they probably skimped on cement in 1936. With these hooks, the mesh should be flush against the wall.
I have seen other more advanced fastening systems with spacers that are screwed into the wall, maybe that’s a better choice?
Now I have no idea what it looks like. But if it is lime plaster from before, there are a few different ways to make it look nice.G Galten said:
If you want to do it properly, the foundation is to knock everything down, brush and wash the walls, let it dry, apply primer, mesh with spacers. Double mesh in all corners and vulnerable points like door jambs, etc. Apply a layer of kc mortar, plaster mortar d, or lime mortar if you want the wall to breathe better. Then paint with silicate paint or limestone paint. Both paint types have their advantages and disadvantages, but mainly it’s about the aesthetic look. If you choose hygroscopic lime plaster, limestone paint is preferable as it doesn't crack as easily if you have some movement in the wall.
Alternative 2 is to knock down everything that is "bom," i.e., where the plaster has come loose. Wash and brush the entire wall, prime the whole wall and plaster, with similar plaster mortar to what the rest of the wall consists of, where you have knocked down. Paint the entire wall. Just keep in mind to paint a whole wall at once; otherwise, there will be color shifts. If the paint runs out and isn't enough for the other side, go with a completely new mix.

I understand that I should attach the plaster mesh with spacers that are securely attached to the wall (i.e. plug and screw).
Moisten the wall and then apply lime mortar or kc-mortar. And then even it out as best as possible with a longskånska. The wall is quite uneven as it is, but I don't mind if it becomes a little "rough".
Moisten the wall and then apply lime mortar or kc-mortar. And then even it out as best as possible with a longskånska. The wall is quite uneven as it is, but I don't mind if it becomes a little "rough".
What is the red I see at the bottom of the image? Hard to see. But it looks like it's a different material.
So much of the plaster is gone anyway. If you use mesh, you remove the movement effect that occurs where two different materials meet each other.
So much of the plaster is gone anyway. If you use mesh, you remove the movement effect that occurs where two different materials meet each other.
After taking a closer look, I would have done it like this. Wash and brush. Apply primer or a thin base coat. Mesh with staples/screw plugs at exposed points. All corners. If you want it straight, put up ascending boards that you can level against every two meters. Apply a layer of plaster c. But leave about two cm for the top layer. Let it cure for at least a stitch. Apply the finishing coat. Let cure for two days. Remove the boards and fill in first with plaster c on the inside and then the finishing coat. Absolutely do not rush painting. If you are doing it freehand, a straightedge is very practical to have in various lengths. Preferably with a level. Having lengths over 2 meters is rarely necessary.
Thanks for all the tips!
The red in the picture is old plaster with paint on it, that should also be removed before I start. I simply slacked a bit.
I haven't measured the wall's angle, but it looks perpendicular by eye. It's mostly uneven because I've used the sander unevenly.
The red in the picture is old plaster with paint on it, that should also be removed before I start. I simply slacked a bit.
I haven't measured the wall's angle, but it looks perpendicular by eye. It's mostly uneven because I've used the sander unevenly.

It's not going fast, but now I have coated the walls with "kalkvatten" to bind the wall so it doesn't collapse upon touching (saw some tips about it on a blog, hope it's correct).
and put up plaster netting. Now I'm looking for suitable plaster battens. I guess I need around 15 mm thick so the straight edge moves freely. But where do you find that? The thinnest batten at byggmax is 28 mm thick, feels unnecessarily thick to plaster?