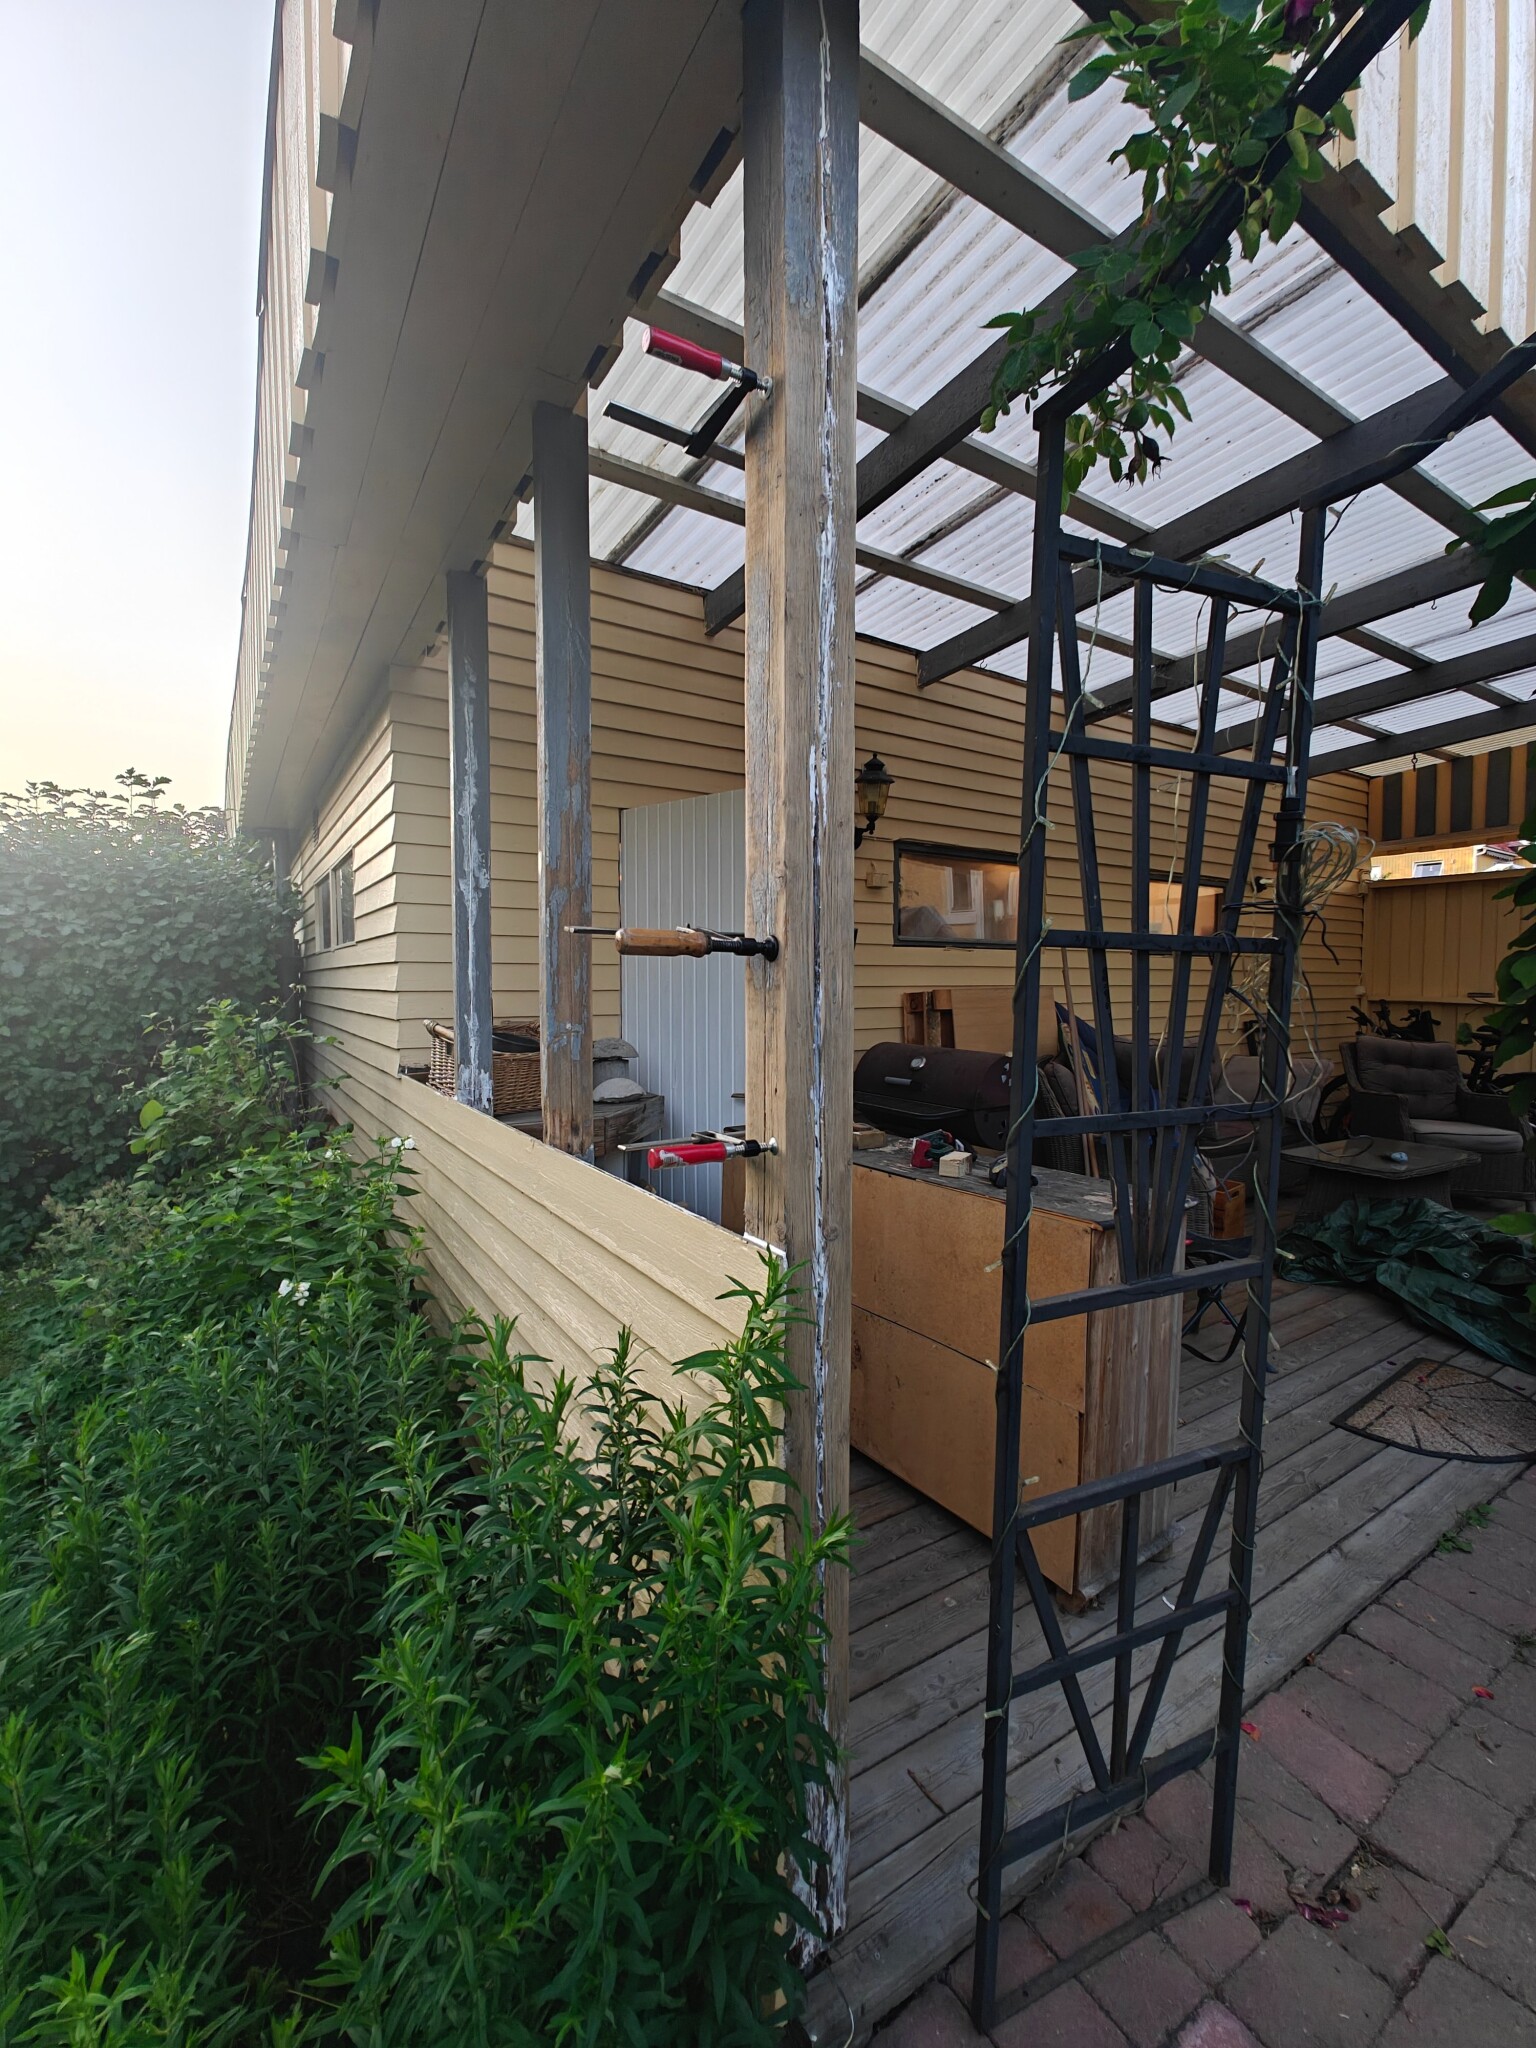
I need help understanding how to even go about replacing the post I've circled in the attached image (ignore the weeds hiding the brackets - the picture is from last summer. It's pouring rain outside, so I didn't want to go out and take a new one).
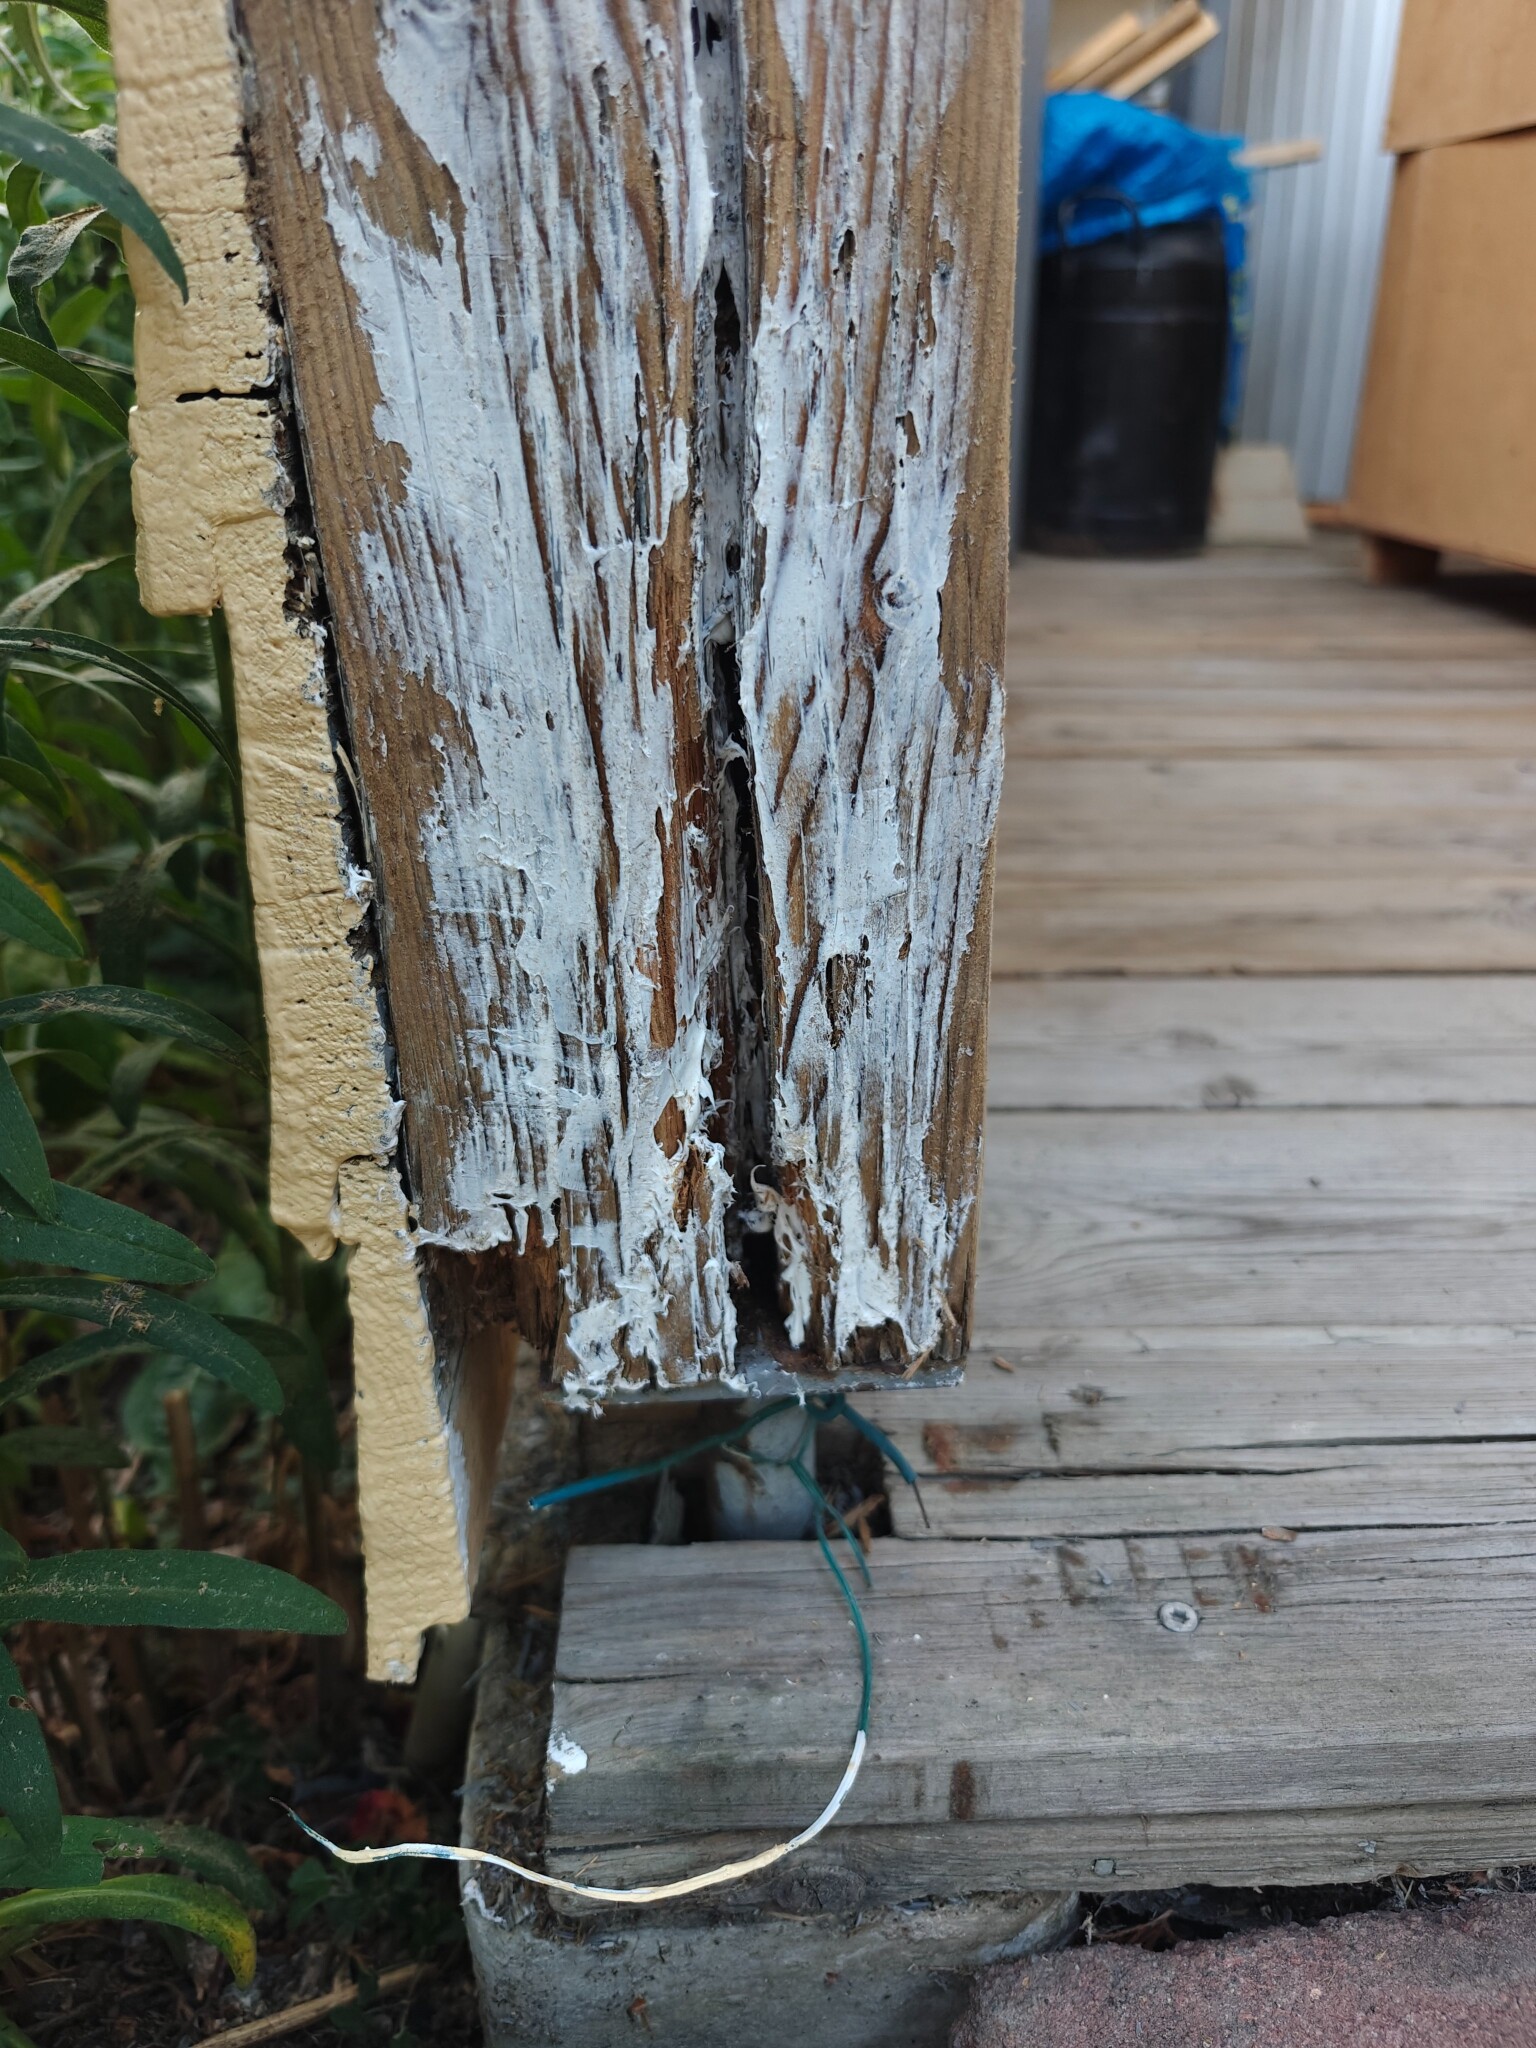
The post seems to have started rotting at the bottom, probably because the wood has had direct contact with the concrete footing.
I strongly suspect that the post is load-bearing, which makes me extra unsure of how to proceed.
I'm reasonably handy but haven't done anything like this before, so any tips on how to temporarily support, replace the post, or if it's even a job you can do yourself would be greatly appreciated.
Yes, it is load-bearing. You just go to the nearest rental depot, like Cramo, and rent a so-called support post that you set up to brace while you replace the post at your own pace.
Make sure to include a crown (fork) at the top that fits onto the beam running from the post towards the house gable.
Place the support post on a sturdy plank to distribute the ground pressure. Secure the foot of the support post to the plank for safety's sake and check with a level to ensure the support post is plumb. You screw up the support post until you notice there is no pressure on the post.
Yes, it is load-bearing. Just go to the nearest rental depot, like Cramo, and rent what's called a shore (stämple in Swedish) that you set up to support while you replace the post at your leisure.
[image]
Make sure to get a "crown" (fork) at the top that then fits onto the beam going from the post into the house gable.
Place the shore on a sturdy plank to distribute the ground pressure. Screw the base of the shore into the plank for safety's sake and use a level to ensure the shore is vertical. You screw up the shore until you notice there's no pressure on the post.
EDIT: Clarified
Thank you very much! Now I know how to do it without tearing down the whole house.
I'm having similar issues. Started scraping and tinkering ahead of filling a large crack and repainting, then I discovered the same thing. Rotten at the bottom.
I have a similar problem. Started scraping and fiddling before filling a large crack and repainting, then I discovered the same thing. Rotten at the bottom.
If you don't feel like renting a stamp, you can use a jack and a beam or post.
Place the new one on a piece of roofing felt/ foundation felt.
Bauhaus has laminated timber posts in spruce, and equivalent ones in pressure-treated pine. Which one should you choose for a post that will be exposed to sun and weather? Pressure-treated pine also requires waiting a couple of seasons before I can paint it, if I understand correctly. I want to paint it in any case, to match. The post will be an outer corner for a plastic roof over a patio, but the frame of the roof is wood, so there is still some load. Especially in winter with snow.
The white is adhesive/sealant (dana). I thought about filling the crack to increase its lifespan, but it turned out to be already too late, unfortunately. Another post worked fine, though, as it was not rotten.
If you're going to paint, avoid pressure-treated wood. You can also buy, for example, 2 standard 45x95 and glue them together with PL400 adhesive.
Be sure to place a sill gasket between the support and the end grain of the post—or even better, leave a small gap. Otherwise, water is absorbed capillary into the end grain and significantly shortens the lifespan.
It is also a good idea to dip the end grain in primer oil overnight before installation.
Make sure to place roofing felt between the shoe and the end grain of the post - or even better, leave a small gap. Otherwise, water is absorbed capillarily into the end grain and significantly shortens its lifespan.
You're not supposed to leave a gap when it comes to load-bearing posts, right? Then the screw would have to take the entire load.
I was thinking of filling the crack to extend its lifespan, but it turned out to be hopeless already, unfortunately.
The cracks are due to the post having pithwood - completely normal, the crack was there when it was installed. Trying to fill them is likely futile, the cracks open and close with the season. One usually tries to turn the cracked side so it at least doesn't lie on the most exposed side.
If you want to avoid them, you have to use laminated veneer lumber/glued laminated timber.
The cracks are due to the post having heartwood - completely normal, the crack was already there when it was set up. Trying to fill them is likely to be futile; the cracks open and close with the season. The usual practice is to orient the cracked side so that it's at least not on the most exposed side.
If you want to avoid them, use veneered/laminated wood.
Aha, good insight, thanks. These cracks are very large, about 1-3 cm on a 10x10 cm post though. Perhaps original, I don't know of course. The worst wood is inside the post through the crack.
Click here to reply
Vi vill skicka notiser för ämnen du bevakar och händelser som berör dig.


mexitegel said:
Yes, it is load-bearing. Just go to the nearest rental depot, like Cramo, and rent what's called a shore (stämple in Swedish) that you set up to support while you replace the post at your leisure.slothy said: