32,375 views ·
73 replies
32k views
73 replies
Glue the riser (step kit)

Sounds goodscar69 said:The template is fixed and it turned out perfect after a little tweaking and the Japanese saw was working hard
However, it pinched a little in the cheek, so I sanded the cutting surface with the mouse until it slid into place with minimal gap. I'm really happy that it went well and will proceed in earnest tomorrow.
It's a shame that the template can't be used for more than one step, as even the slightest deviation between steps shows up immediately.
I'll have to continue working without a template on the other steps, otherwise it will probably take too long before I finish
I'll definitely come back with new questions and thoughts....
") Keep in mind not to have too little gap if your stairs/house move a lot.
Keep in mind not to have too little gap if your stairs/house move a lot.I have no clue how much the staircase moves but maybe it's quite a bit since I don't have a single stone in the house, apart from the foundation
Maybe I should increase the gap a little since it's currently estimated to be 0.1-0.2 mm on each side.
Maybe I should increase the gap a little since it's currently estimated to be 0.1-0.2 mm on each side.
Keep in mind that wood moves over time, and if you have a normally wide staircase, the step can easily swell with increased humidity and cause creaking against the stringers. Aim for a larger even gap and then latex caulking. If you paint the stringers and use latex caulking, it's difficult to reveal the latex caulking unless you're nose-first in the staircase.
A tip might also be to achieve the perfect fit with a plane, even though it takes some work.
A tip might also be to achieve the perfect fit with a plane, even though it takes some work.
Then the first step was completed. Took about an hour. I had a bit to think about what I should saw with. It ended up being a circular saw to split the step in half and a Japanese saw to get the right length.
Hope it goes a bit faster as I get warmed up
Now I just need to find a babysitter as the little girl comes home from daycare so the work can resume in the afternoon
Hope it goes a bit faster as I get warmed up
Now I just need to find a babysitter as the little girl comes home from daycare so the work can resume in the afternoon
Hmm... saw that the nose was about 1-1.5 mm shorter than the tread surface at one step. What do you think is best, to try to sand down the excess along the entire edge or place the compass a bit in so that you have to saw off the step at both ends?
I personally think it would be best to saw at both ends but I'm unsure. How would you have done it?
I personally think it would be best to saw at both ends but I'm unsure. How would you have done it?
I don't quite understand what you mean. Are you talking about the existing step in the staircase? A picture would have been perfect.scar69 said:Hmm... saw that on one step the nose was about 1-1.5 mm shorter than the tread. What do you think is best, to try to sand down the excess along the entire edge or place the compass a bit in so that you cut off the step at both ends?
I myself think it would be best to cut at both ends but am unsure. How would you have done it?
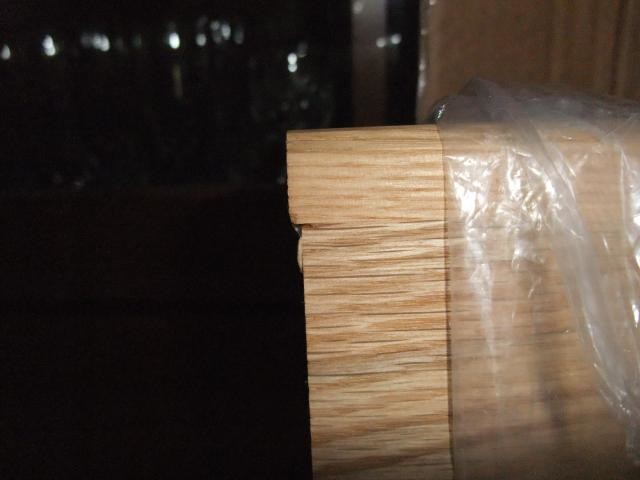
No, I mean the stepkit step. The stair nose on a step is about 1mm longer than the actual surface you step on. They apparently were a bit careless in manufacturing
Attached is an image of the actual problem.
My question was whether you had placed the compass so that you had to saw the step at both ends due to the manufacturing error, or if you had tried to sand down the problem so that the edge was straight and nice from the start?
Attached is an image of the actual problem.
My question was whether you had placed the compass so that you had to saw the step at both ends due to the manufacturing error, or if you had tried to sand down the problem so that the edge was straight and nice from the start?
Then I'm following along. I would definitely have placed the compass to ensure cutting on both ends, that yields the best results. Additionally, you will soon notice that many steps are not exactly 90° against the stringer, which means cutting on both ends will be necessary anyway.
By the way, it looked sloppy from the Step-kit, I haven't noticed that before. Check to make sure the step looks nice otherwise, without blemishes etc.
By the way, it looked sloppy from the Step-kit, I haven't noticed that before. Check to make sure the step looks nice otherwise, without blemishes etc.
Mmm... probably need to cut at both ends, might as well do it sooner or later. But it would have been nice to avoid it on certain steps.
The step in question is to be claimed as the stair nose was full of dents. It was also full of splinters and should have been stopped at quality control.
What feels a bit frustrating right now is that it's sloppily mounted between the stair nose and the actual step. Seems to be the same with several of the steps. It will probably be fine in the end, but I had higher expectations regarding the quality:S
Well, step no. 2 is to be started within 30 minutes. Hope that turns out well too
Now I'm clean and tidy after adding two more steps
I'm now sawing the steps at both ends due to poor manufacturing. I'm really satisfied with the result. Better than I had dared to hope for
It takes some time and hand sawing, but it feels safe and you have good control over things. However, the Japanese saw tends to catch and jump. It must be because the steps are so extremely hard, as it didn't do that when I tested with pine.
Now there's just one step left to lay, and it might take a few days before I get it home. I did have a complaint.
Then, of course, the rear edge lists are still left, but it doesn't require much effort for that work
Overall, it was much easier to lay than I had dared to hope for, and I wouldn't be afraid to do it again; I was terribly worried before I started
Then, of course, the rear edge lists are still left, but it doesn't require much effort for that work
Overall, it was much easier to lay than I had dared to hope for, and I wouldn't be afraid to do it again; I was terribly worried before I started
Glad to hear! Now we're of course curious for some pictures!scar69 said:Now there's only one step left to lay, and it might take a few days before I get it home. I had a reclamation.
Then, of course, the back edge lists are left, but it's not a significant effort required for that work
Overall, it was much easier to lay than I had dared to hope, and I wouldn't be afraid to do it again, I was terribly worried before I started
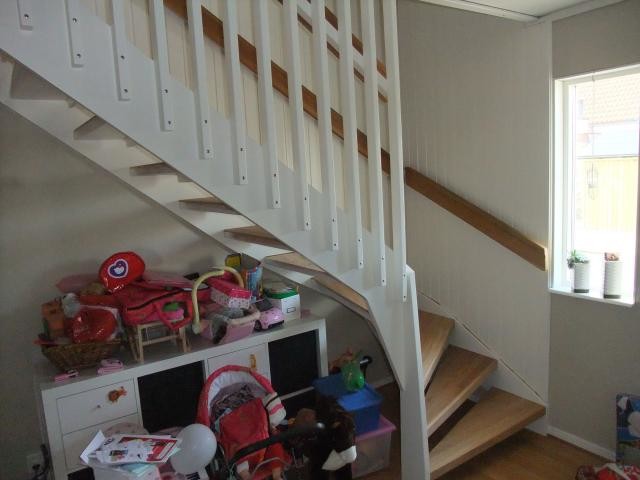
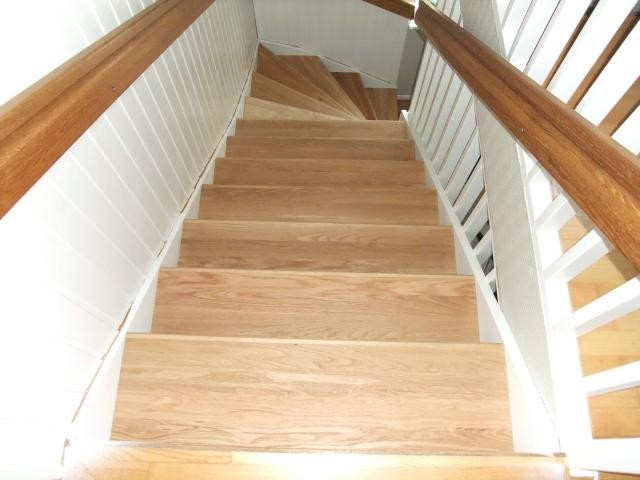
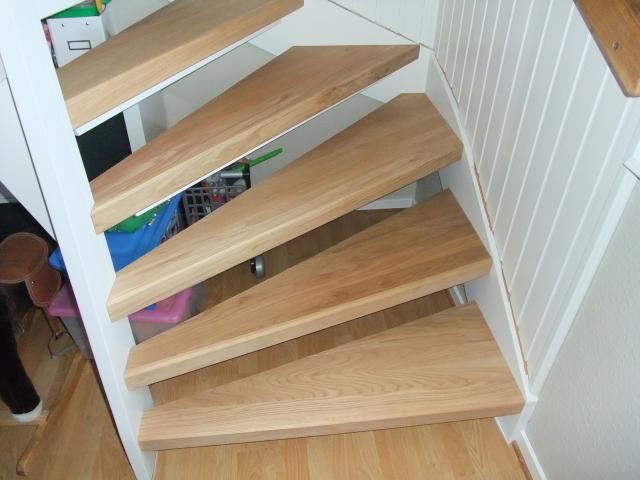
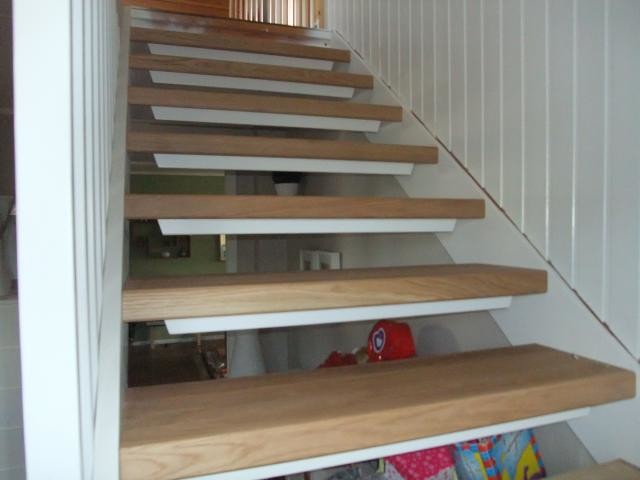
Here are some pictures. As mentioned, one more step will be installed shortly. Also, the skirting will start being installed tonight.
Finally, a small white trim will be put up on the stringer to fit tightly against the paneling
Originally, it was a pine staircase with carpeted steps. The staircase was spray-painted in Nov/Dec and the steps were put in place now
Finally, a small white trim will be put up on the stringer to fit tightly against the paneling
Originally, it was a pine staircase with carpeted steps. The staircase was spray-painted in Nov/Dec and the steps were put in place now