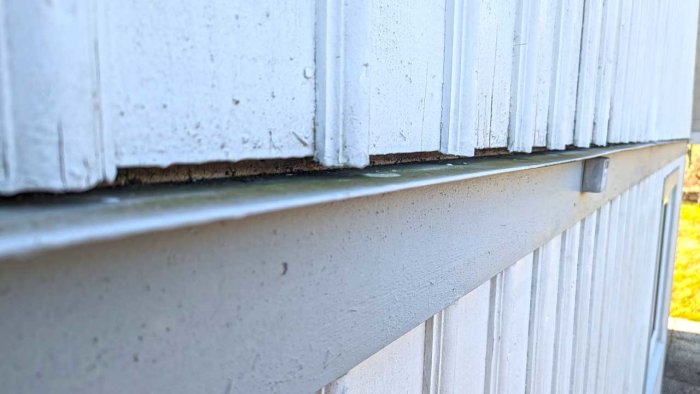
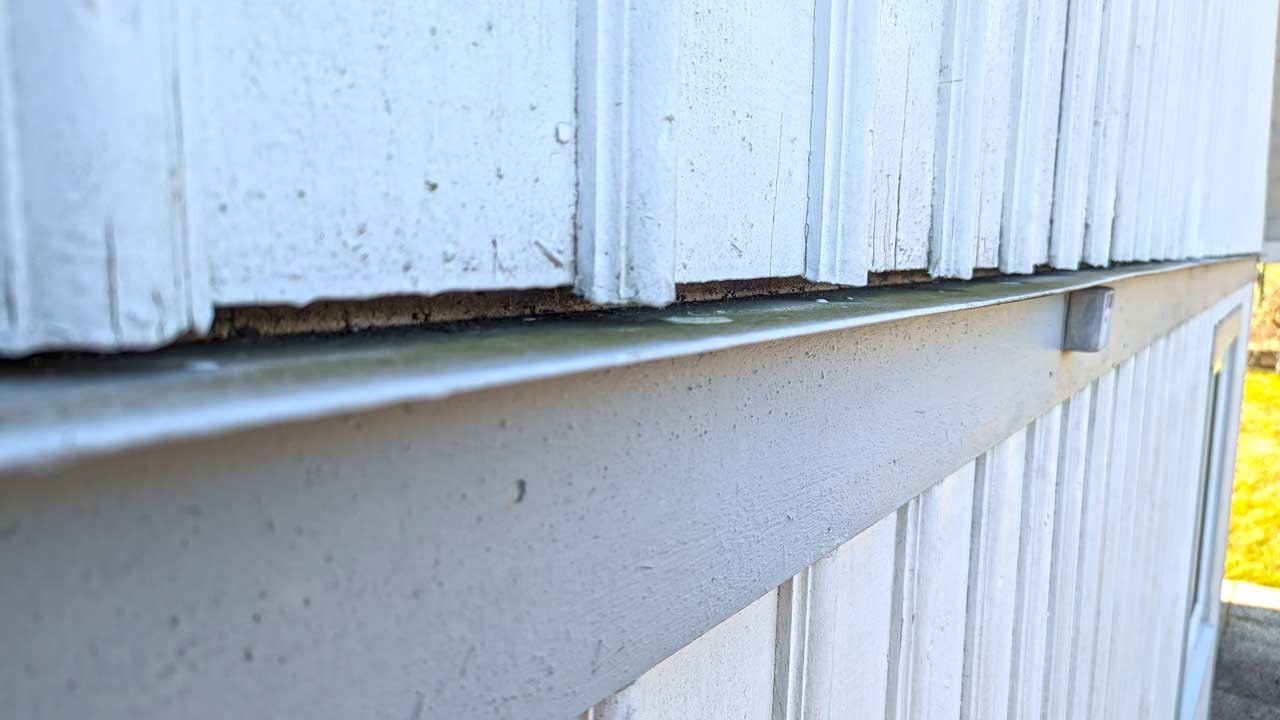
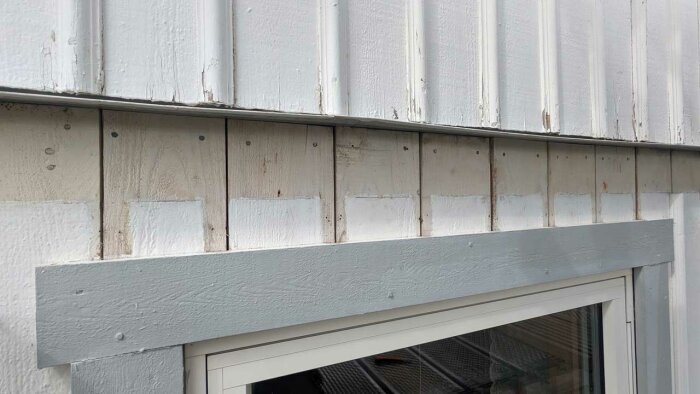
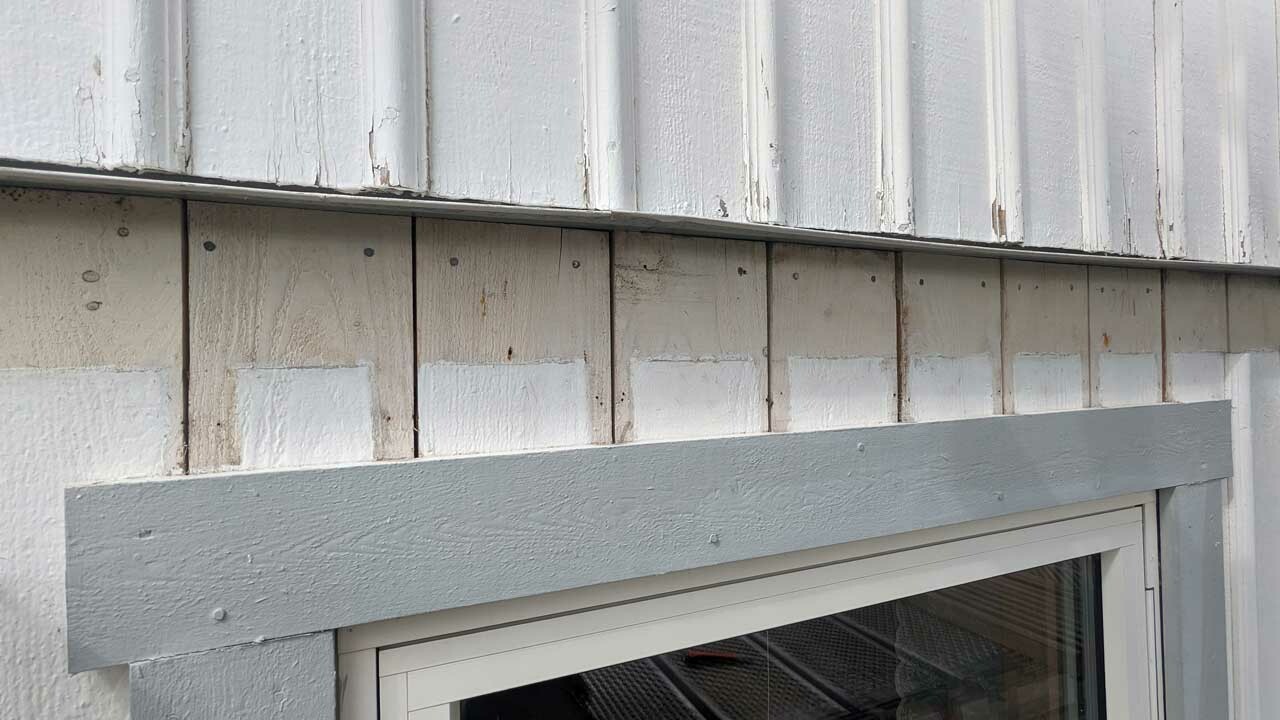
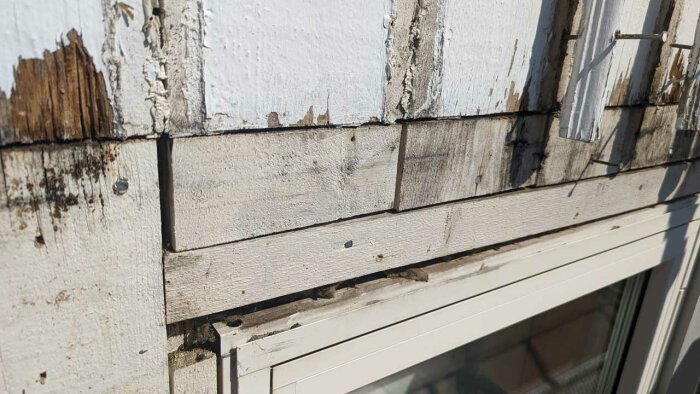
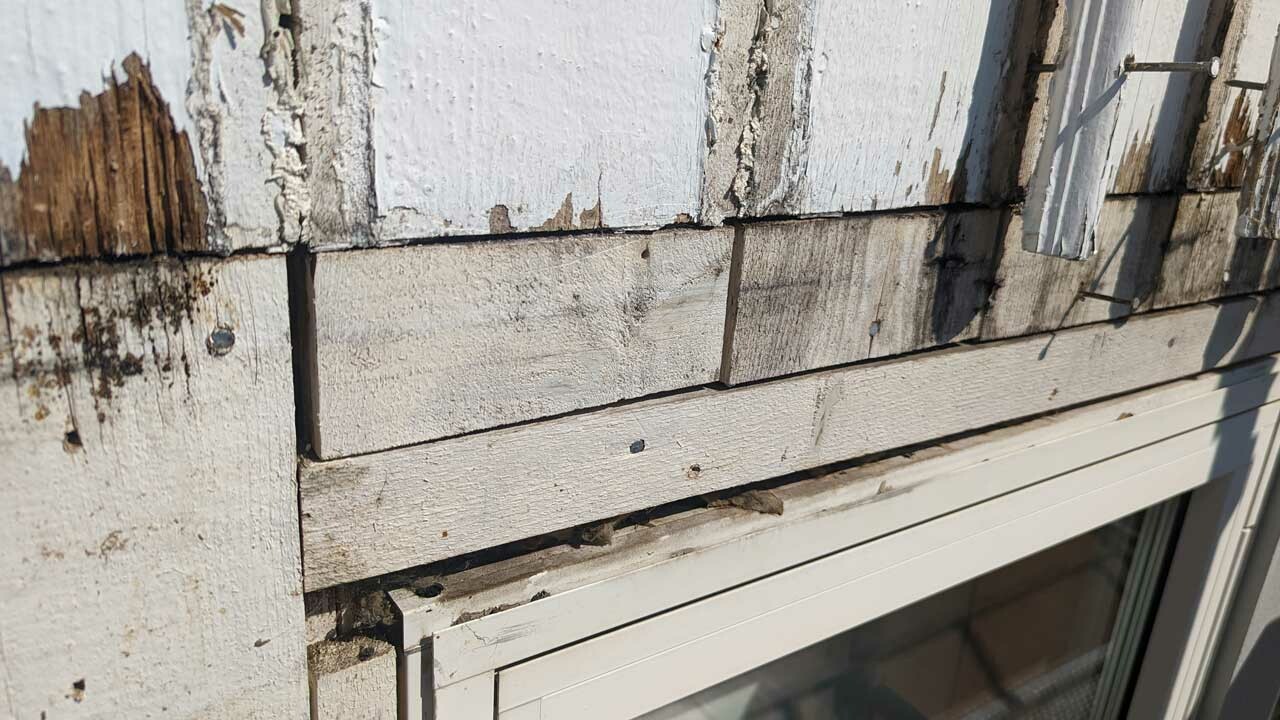
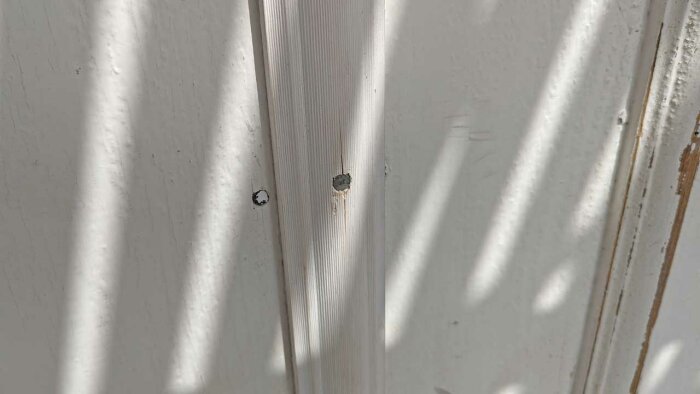
I was thinking of tackling one of the facades this spring. The facade is the one facing south and also the one that has taken the most damage and been repainted the most times. The problem is the waist of the house where the craftsmen made a real blunder. As it stands now, the end grain is difficult to access, severely damaged, and the metal points straight out at best, and at worst tilts IN towards the house. This is the first and only time I'm going to erect a scaffolding, so it's now or never.
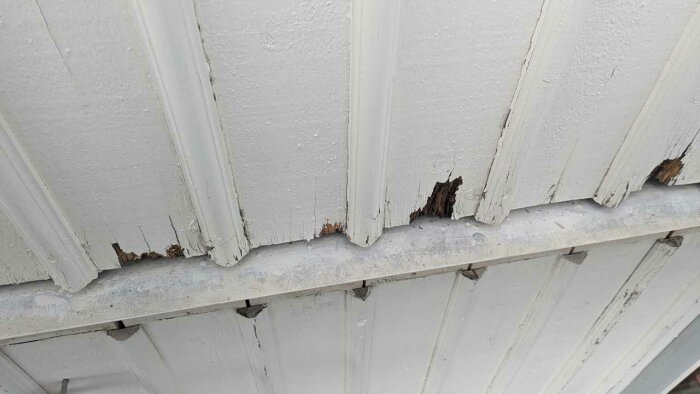
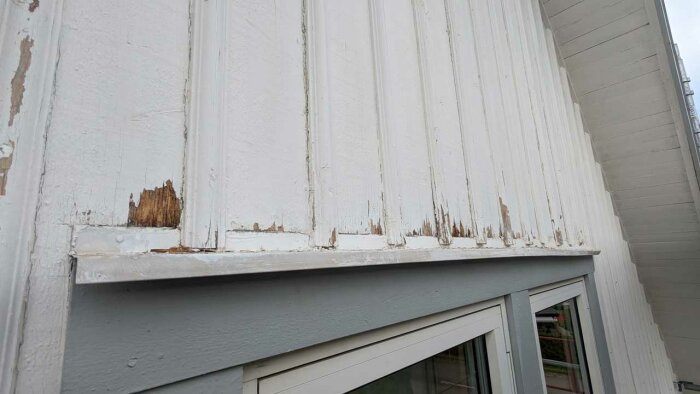
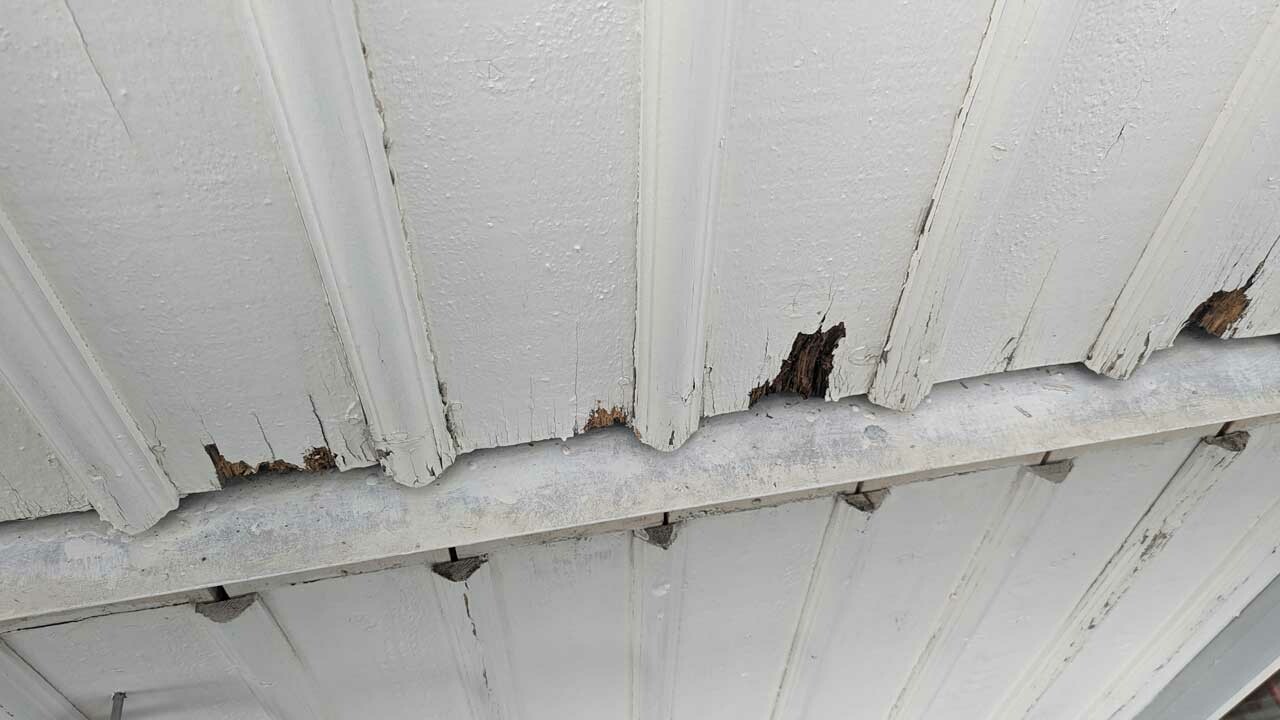
This is what it looks like anyway. Note that the pictures were taken of the north facade as I simply can't get up on the south facade. The construction is the same, but the amount of cracks, peeling, and rotten wood is higher on the south side.
How do I solve this as easily and cheaply as possible? I had been thinking in terms of loosening the panel and battens at the bottom all the way, bending them out as much as possible, cutting everything off with a circular saw to get more space and new fresh wood at the end to treat, possibly replacing the metal with a better profile and loosening the cross board under the metal and reducing its width if the metal doesn't fit well enough. I assume it will be a nightmare to remove and fit a new metal piece without completely removing the facade boards.
Alternatively, if one could leave the old metal in place and just cut off the panel boards, and reduce the width of the cross board so that the metal can be bent down a bit.
Just like the rest of the house, it has the cursed hat-profile locking battens. There are few things I hate with such passion as this worthless cosmetic batten, but now it is what it is, and I have at least ensured to buy grooved hat battens when buying new ones so that the paint sticks a little better.
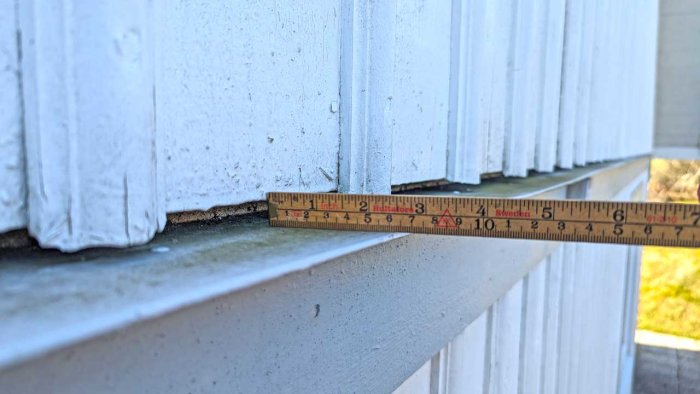
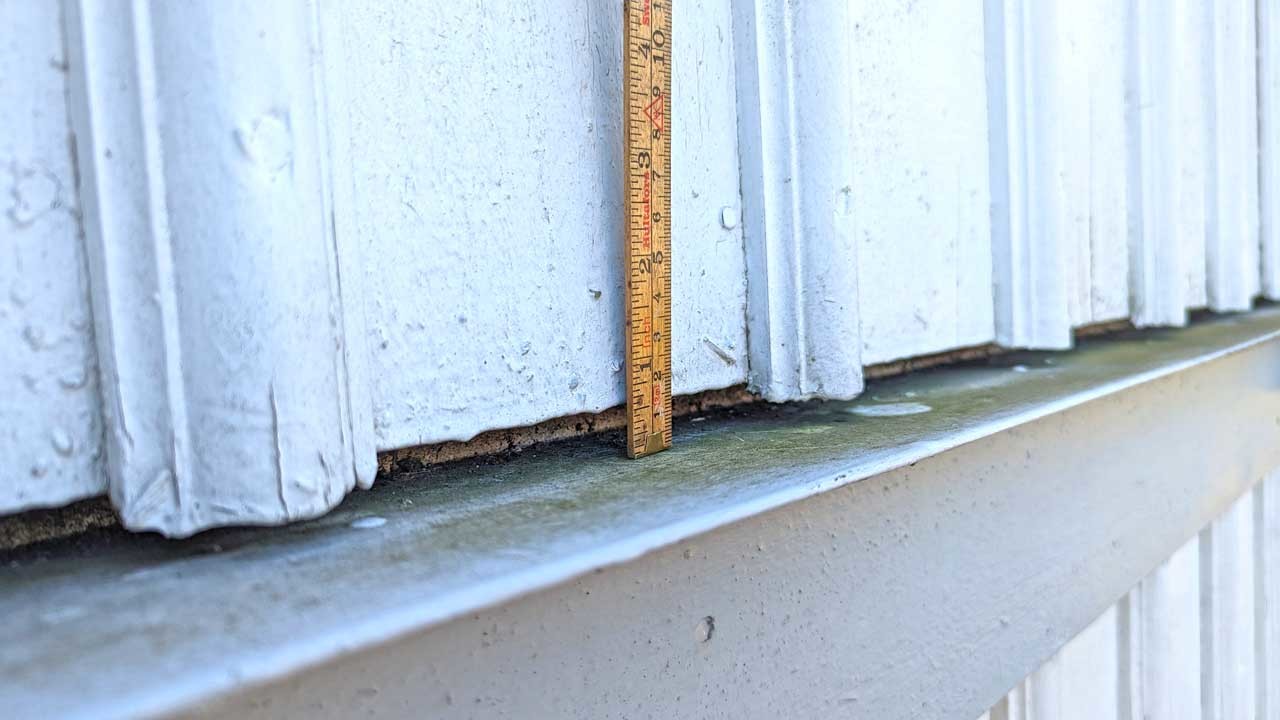
I've been in a similar situation where the distance between the panel end and the sheet metal was too small. I have two midjes around the entire house, totaling about 100 meters of midja. At first, I tried using a circular saw and attempting to screw up a board for support/guidance, but the sheet metal was in the way. I cut everything with a Bosch multi-saw but with good Bosch blades with large teeth. Of course, I went through a few 5-packs for the whole house, as some nails were close to where I was cutting and it's easy to scrape the sheet metal once you've cut through the wood. During painting afterward, the sheet metal was painted the same color as the panel. I sawed with new blades almost up to the sheet metal and switched to an old one to save the blades. I chose a distance of about 3 - 3.5 cm, which allowed me to save almost all of the panel, as the beginning rot was at the very bottom. Now you will be able to oil/paint the ends better.
When it comes to the sheet metal, I don't know, maybe you need to replace/split the midjebrädor to 1 cm smaller or something ...?
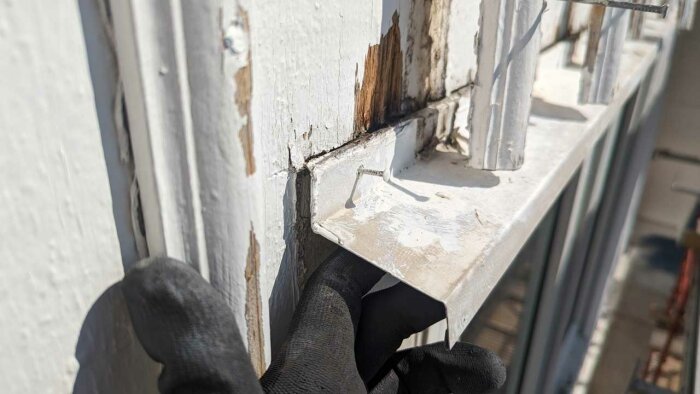
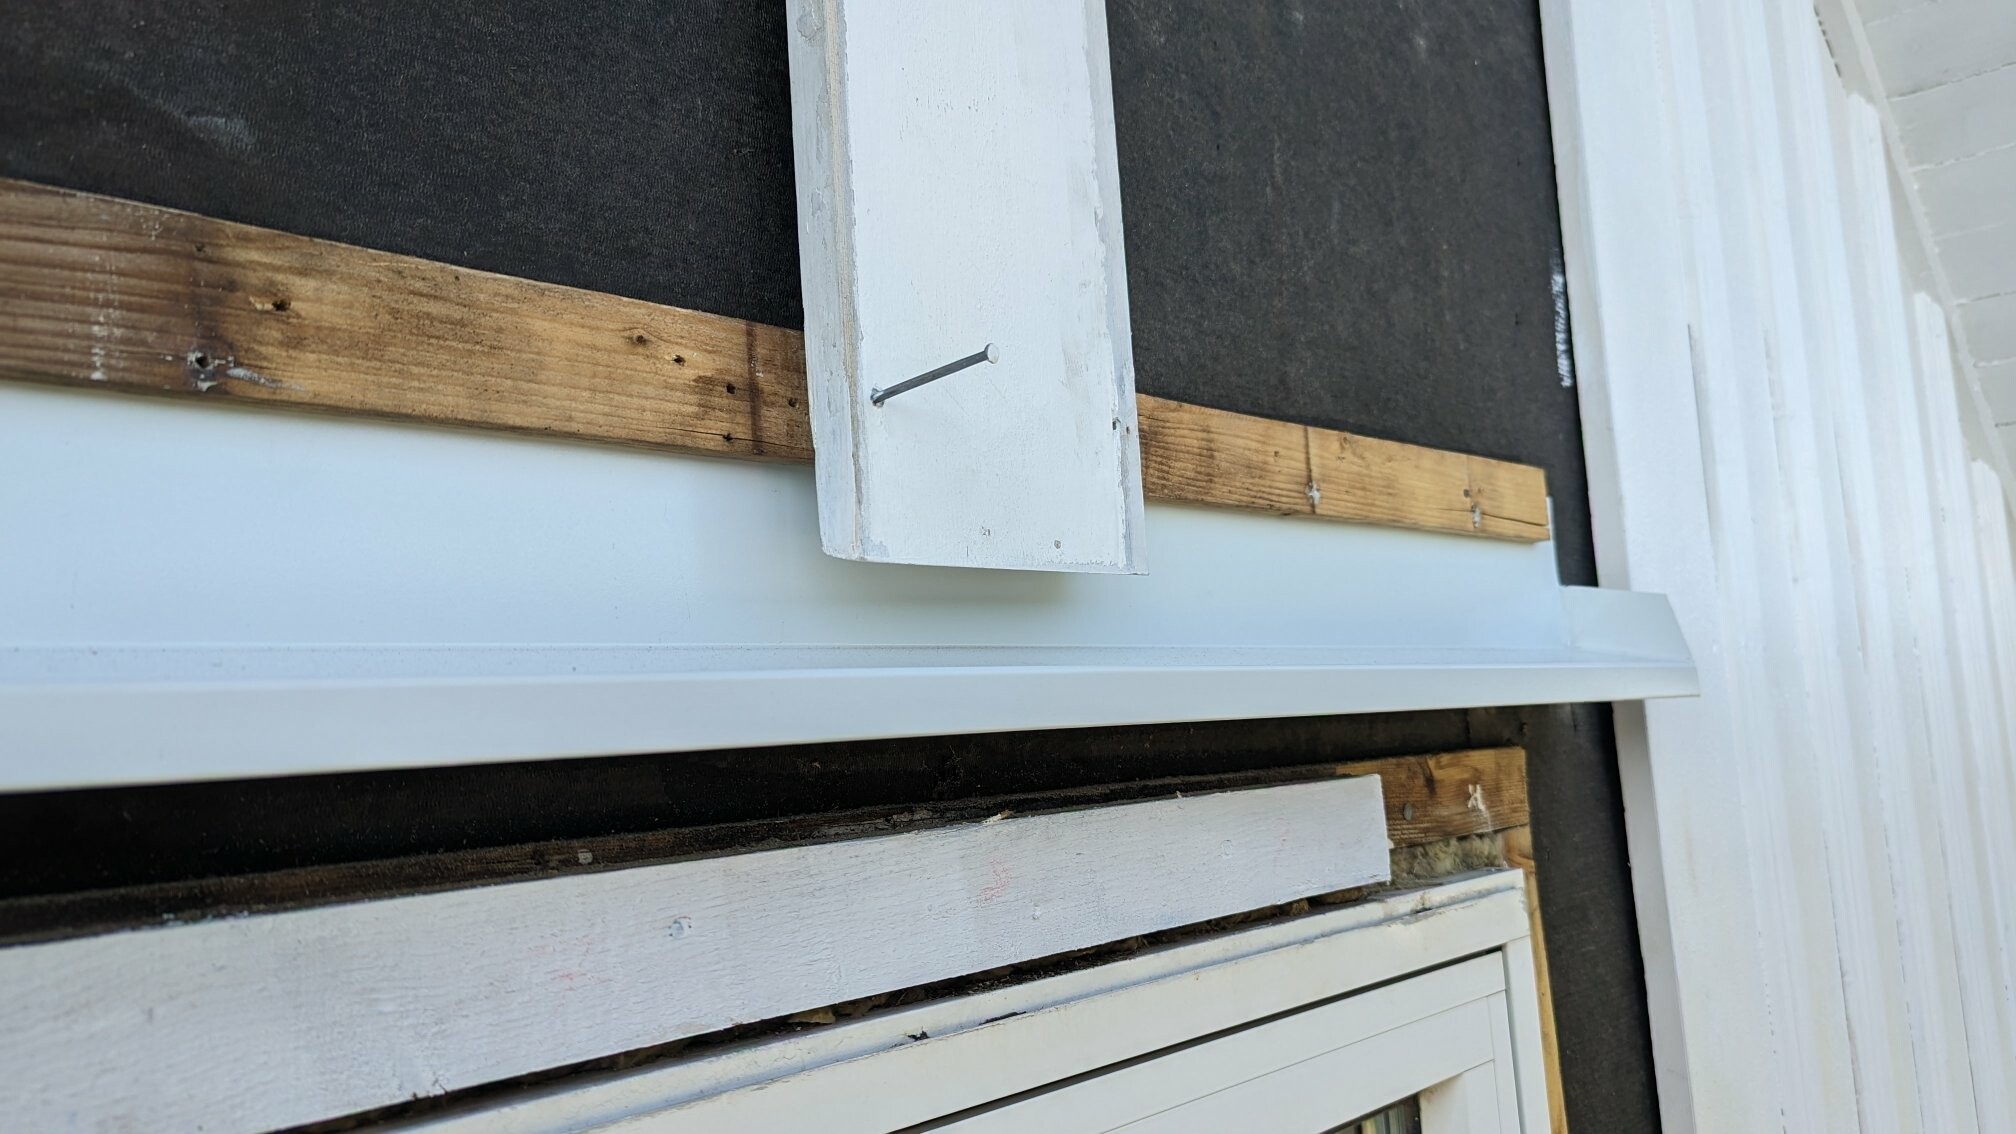
I have now set up the scaffold and started looking at the wall. Took down the waist board and reduced the width so that I can bend down the sheet metal and get a better slope. I will see if I can also get a little more air between the panel above and the sheet metal.
Started sifting through the timber and it was a bit worse than I had expected. I plan to cut and splice panel boards wherever I can. Saves a lot of material and maybe some work (at least when it comes to hauling timber home).
I probably can't splice the battens as I don't have the exact same profile as back in 1999. Pretty close side by side, but not close enough to splice without it showing, I believe. Additionally, the new battens are grooved, which will hopefully provide a better grip for the paint.
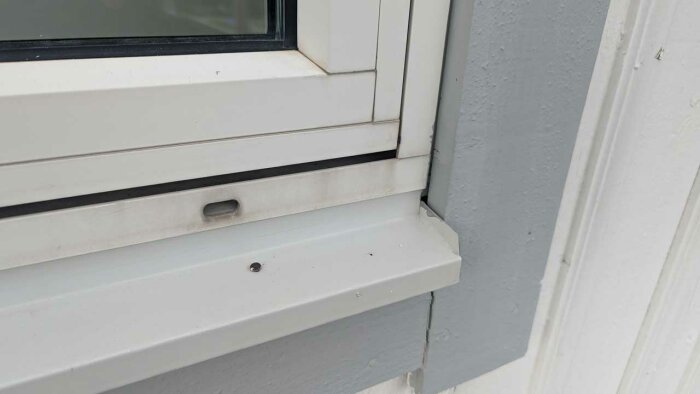
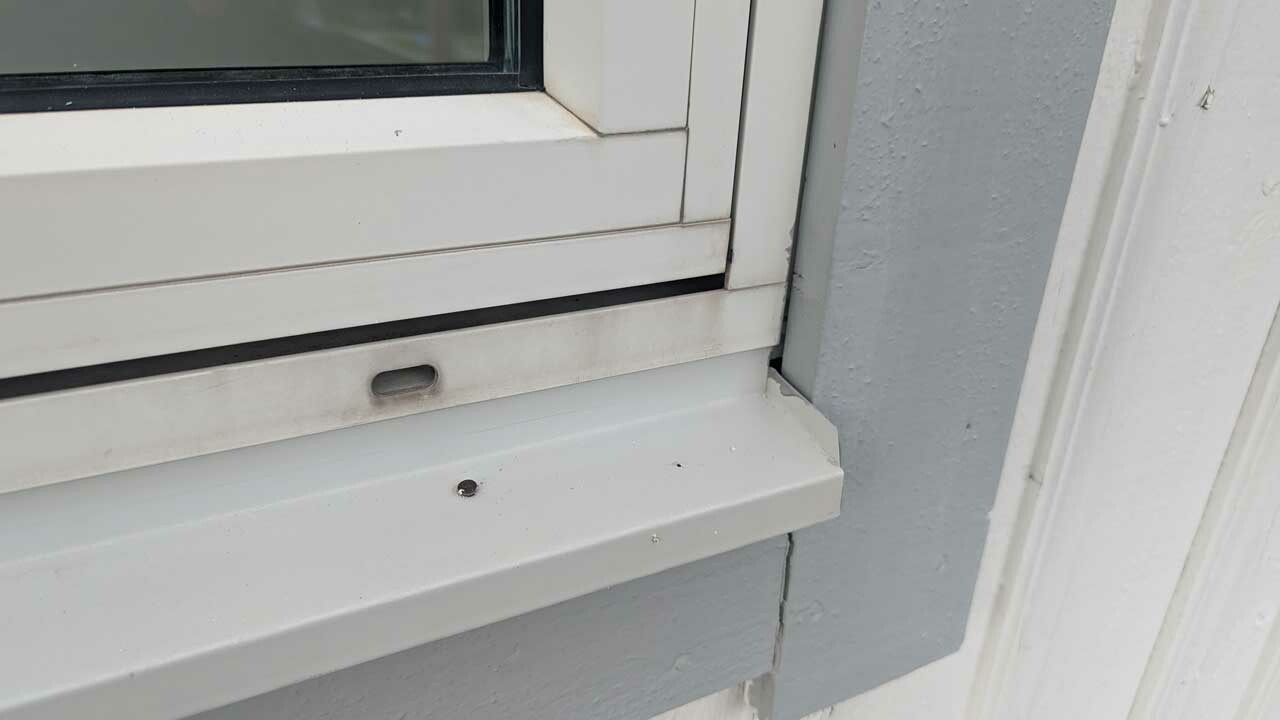
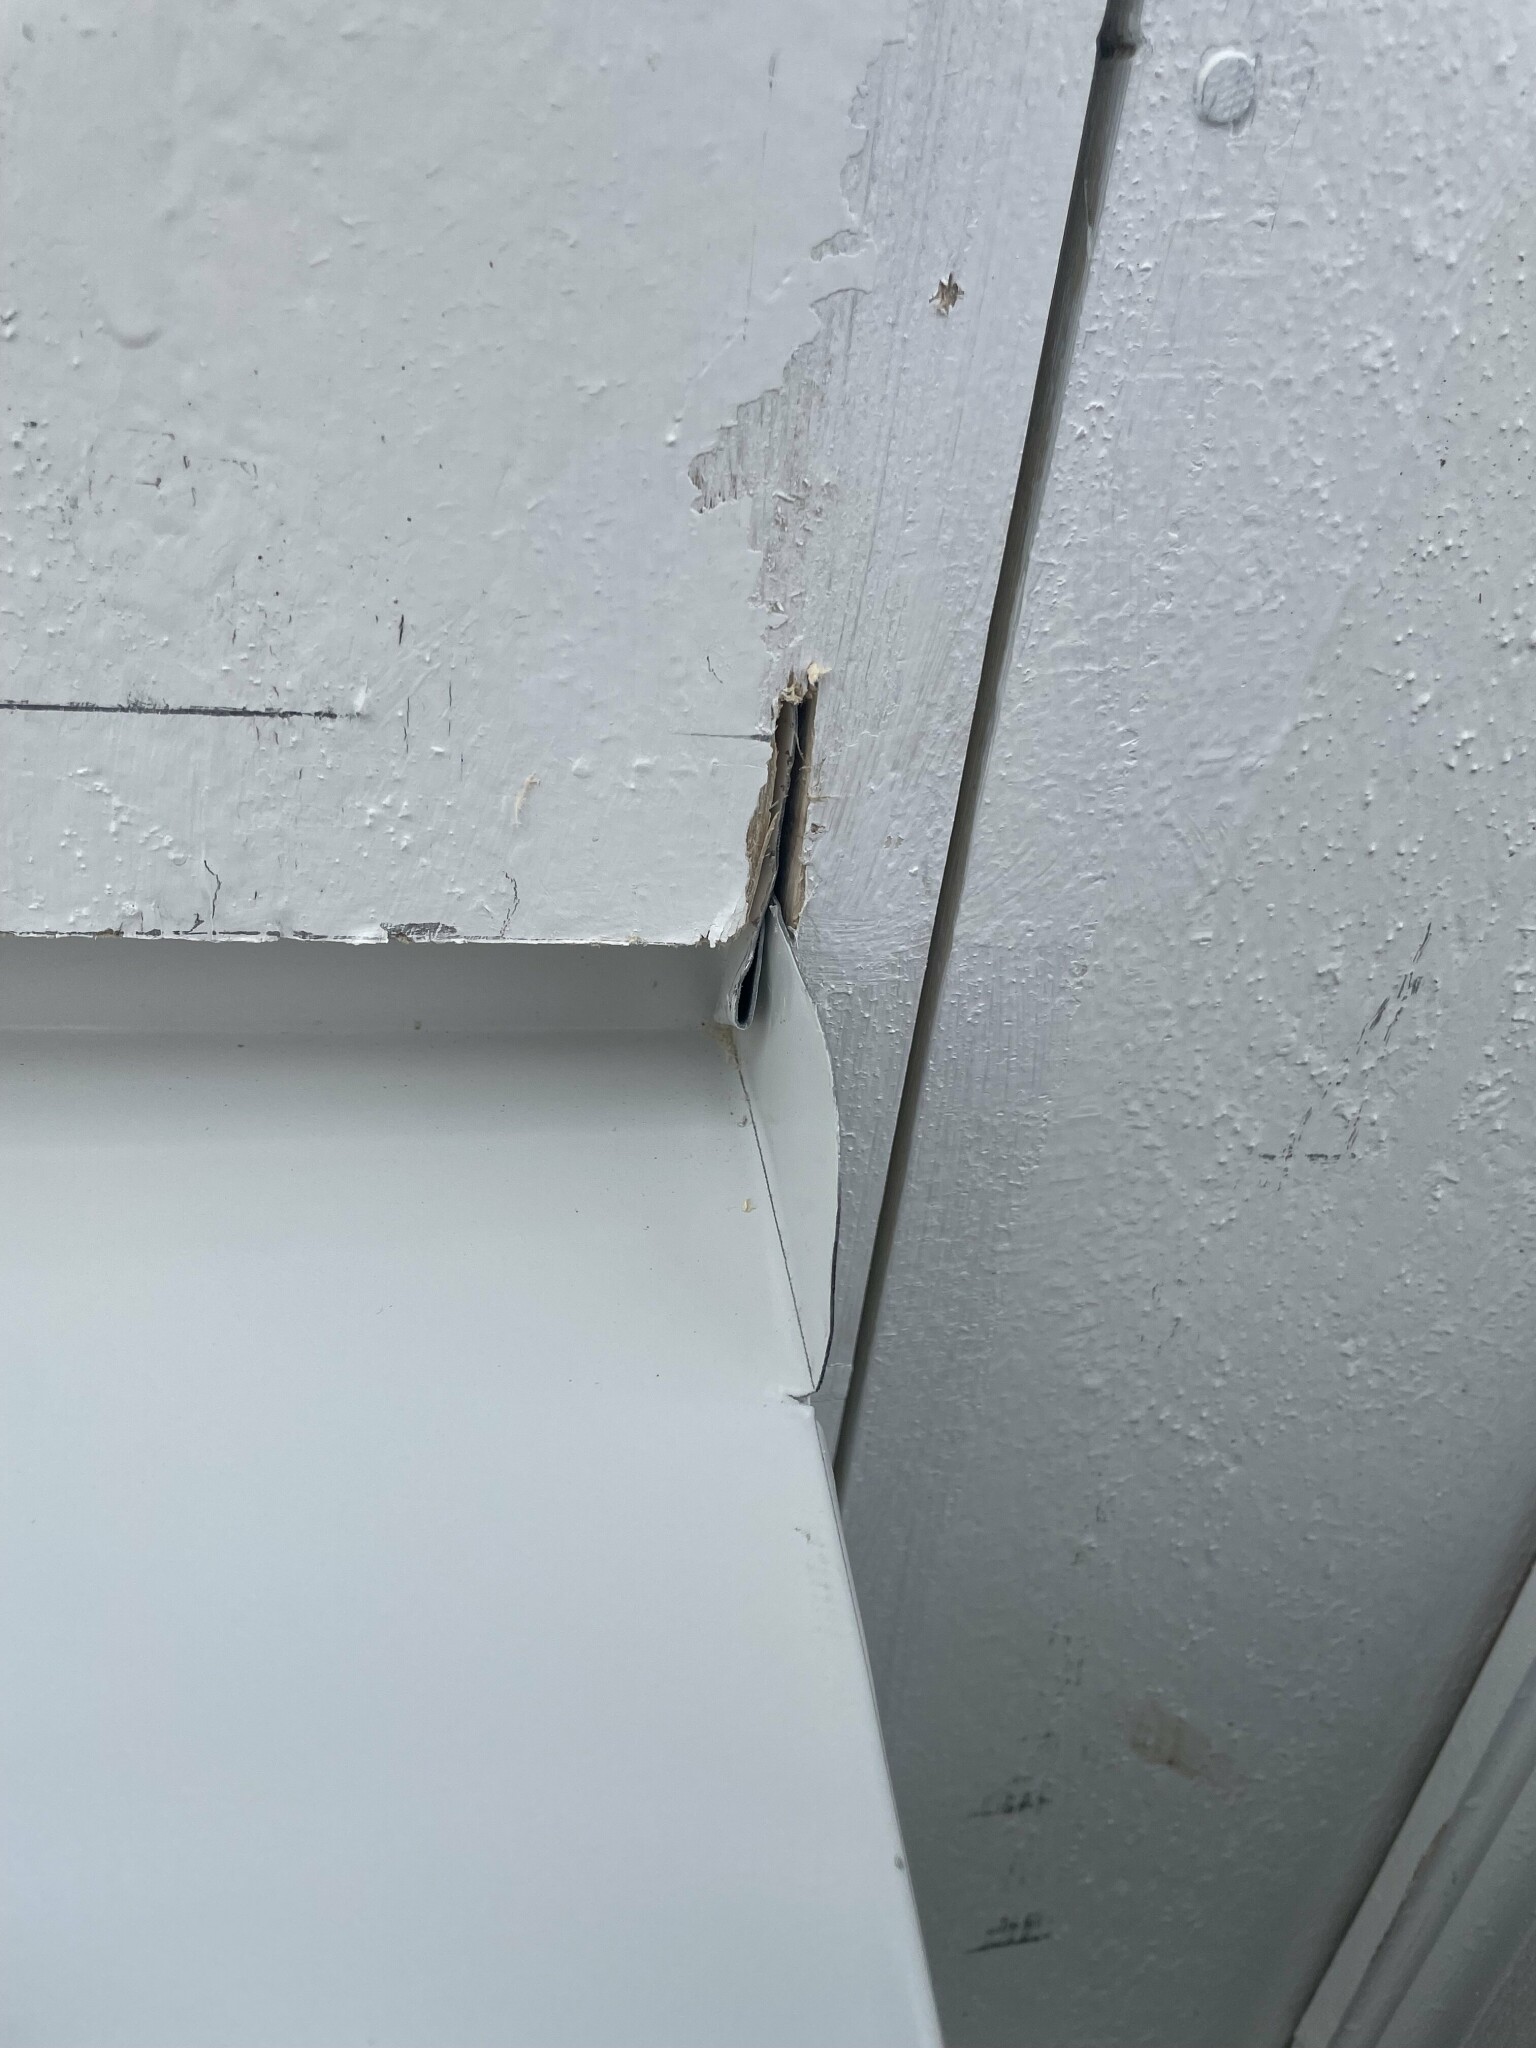
The window flashing doesn't feel haphazardly installed. Just need to make four new pieces, I assume, properly folded, mounted, and recessed. If there is anything to screw into horizontally behind. The vertical nailing currently makes the strips sit loosely.
Drip cap also not optimal. Should it be redone to fold in on the sides? Otherwise seems sealed enough against the panel (with silicone behind), but there was leakage a number of years ago when the battens failed further up. It would have been handy to have another solution that dealt with the possibility of water running behind the battens or panel.
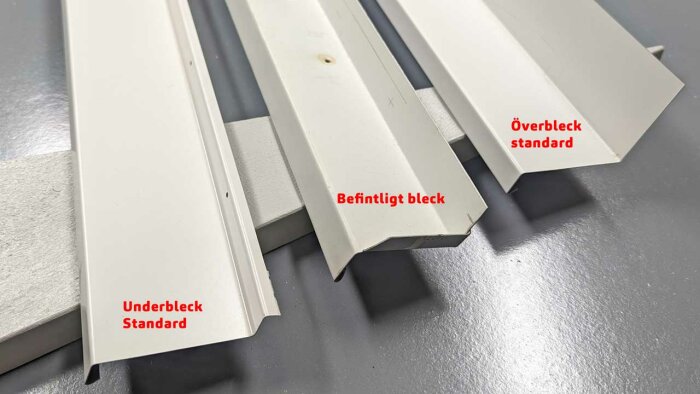
Bought some different flashing at the hardware store. Then noticed that the under flashing (left) won't work because the back doesn't go up far enough, it doesn't fit the window's profile, and the factory-made holes end up too high anyway.
The question is whether you might as well use an over flashing (right). The only difference will be that about 2.5 cm more of the back is visible, which is trivial since it's the second floor and not visible from the ground.
Might need to consider having a sheet metal worker manufacture several meters for the future since all the window flashing on the house looks the same. Same bad folding, same incorrect installation right against the trim.
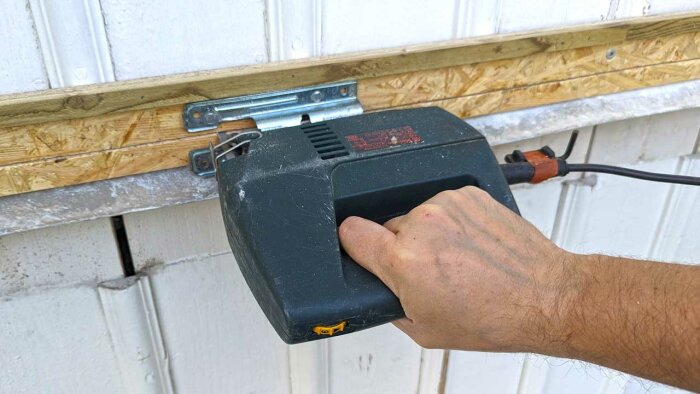
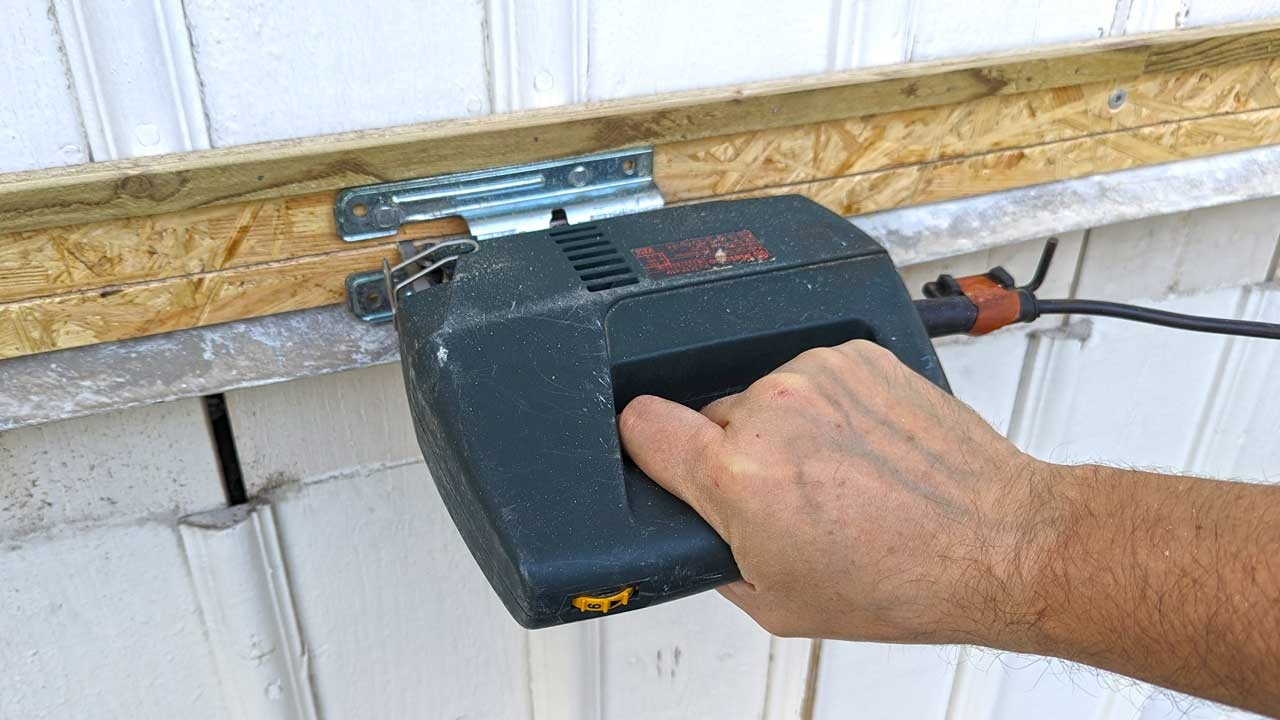
Finally found a way to shorten the panel to allow more air to the sheet metal. I removed the waist board, bent down the sheet metal, and made a guide for the jigsaw to follow. It turned out that the blade angled at 15 degrees went right through 12mm OSB + battens + panel without hitting the sheet metal on the back. The nail rule was the margin needed for the jigsaw blade to pass freely.
I also tried using a multi-tool, but it seemed sluggish and became really crooked. The circular saw's base, on the other hand, was far too big to fit. The jigsaw just barely grazes the sheet metal. If you were doing this every day, you should have a permanent guide or a special base for the saw that allows the machine to cut closer to the edge.
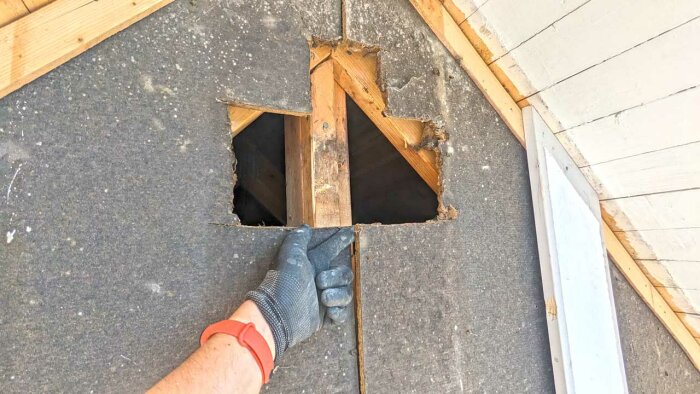
How would you handle the ventilation for the cold attic? There were originally two vents installed, not perfectly. I think it was only intended to be one, but then it was changed to two, hence the poor cutout in the asphaboard.
How do you fix the unnecessarily large gap between the boards, and how do you repair the board so the hole matches the vents? Glue or tape? I was recommended Isola FLEX2 tape. Will it stick to the asphaboard? I initially thought of gluing on sheets of asphaboard from the inside but that might be impossible?
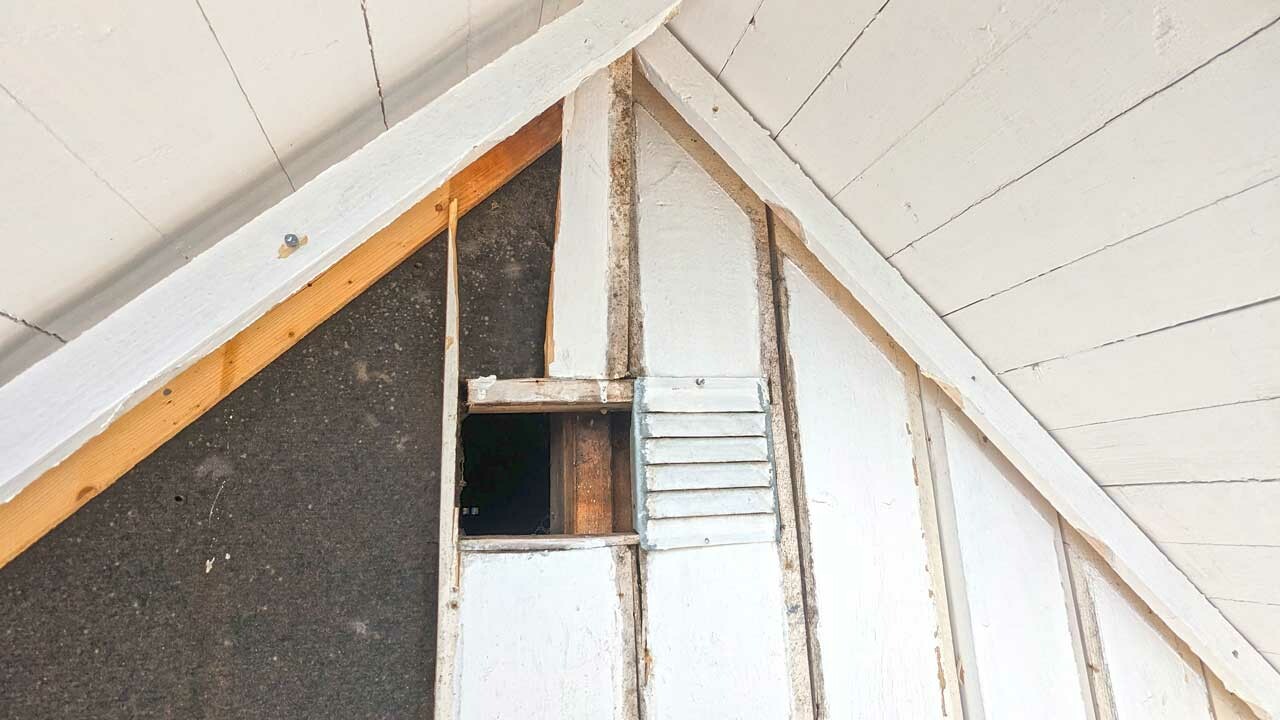
You can also see a band of moisture and partially mold extending from behind the vents all the way down to the window. It's as if moist air has come out and condensed. The width is exactly that of the vents. How should one view this? Acceptable? Too much ventilation? Can sealing around the existing vents work? Or should you gamble with installing only one vent? I experience moisture problems in the attic as well. About 100% humidity during winter. I’ll look into the vapor barrier in the attic eventually, but I imagine it's about as well done as everything else.
This is also the last chance to do something, so to speak. First time since 1999 I've been up here since it's 9.5m above ground, and I don't expect to have another opportunity. So it has to be right.
It would have been convenient with a vent you could adjust the opening from the inside.
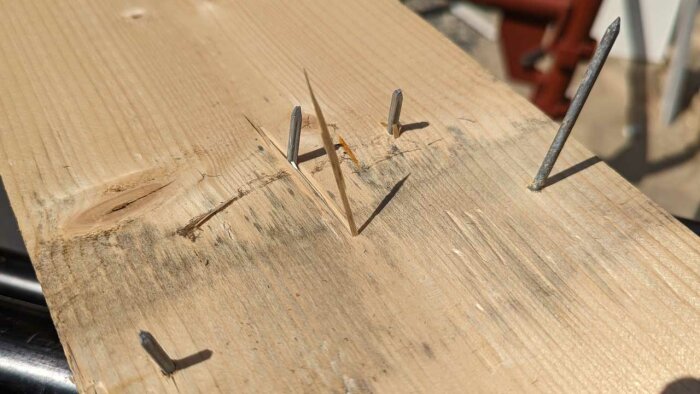
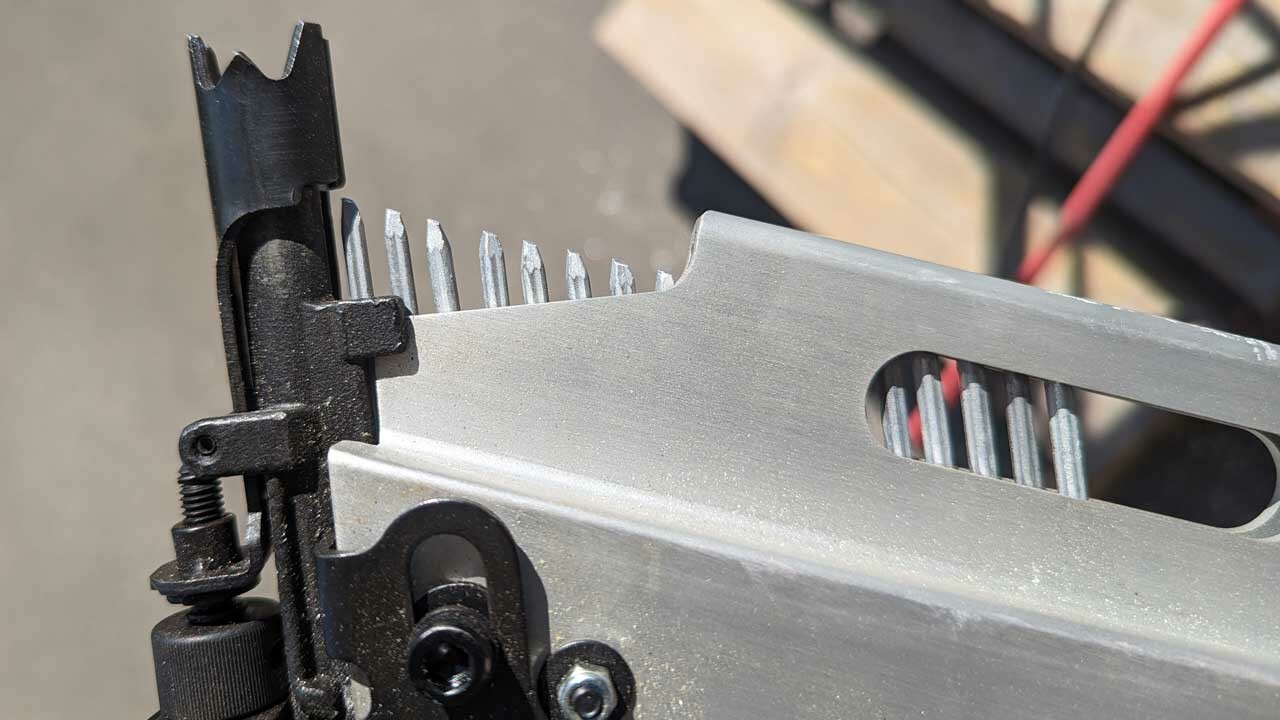
Some tips for fastening hat battens / moulding battens with 90mm nails? Is it even possible without too much risk and waste? I went back to nailing manually with 100mm nails and also pre-drilled before, as I don't have time for additional work from purchasing and priming battens.
I also tried grinding down the tip of the nail with an angle grinder. Preliminary, it seems to work better, but I haven't dared to test it on the wall. A potential downside is a larger breakout on the backside. I also don't know how it affects the holding capacity, especially in combination with a 10mm shorter nail.
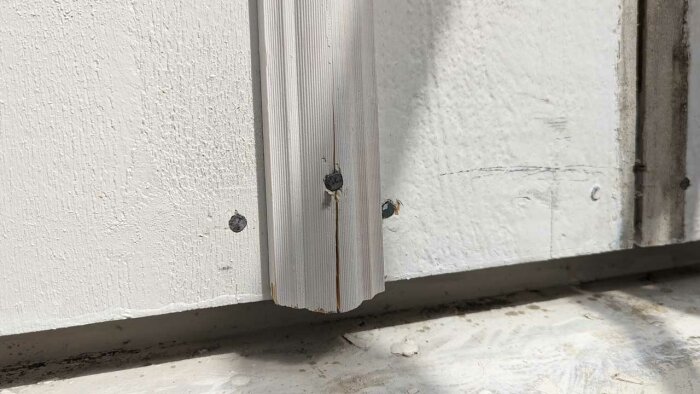
Now it's been a year, so you've probably already solved everything. But I did exactly the same. At the same time, with the same cover strip 😊
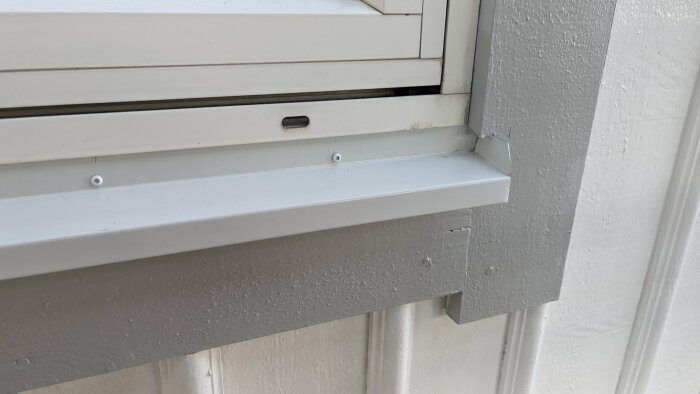
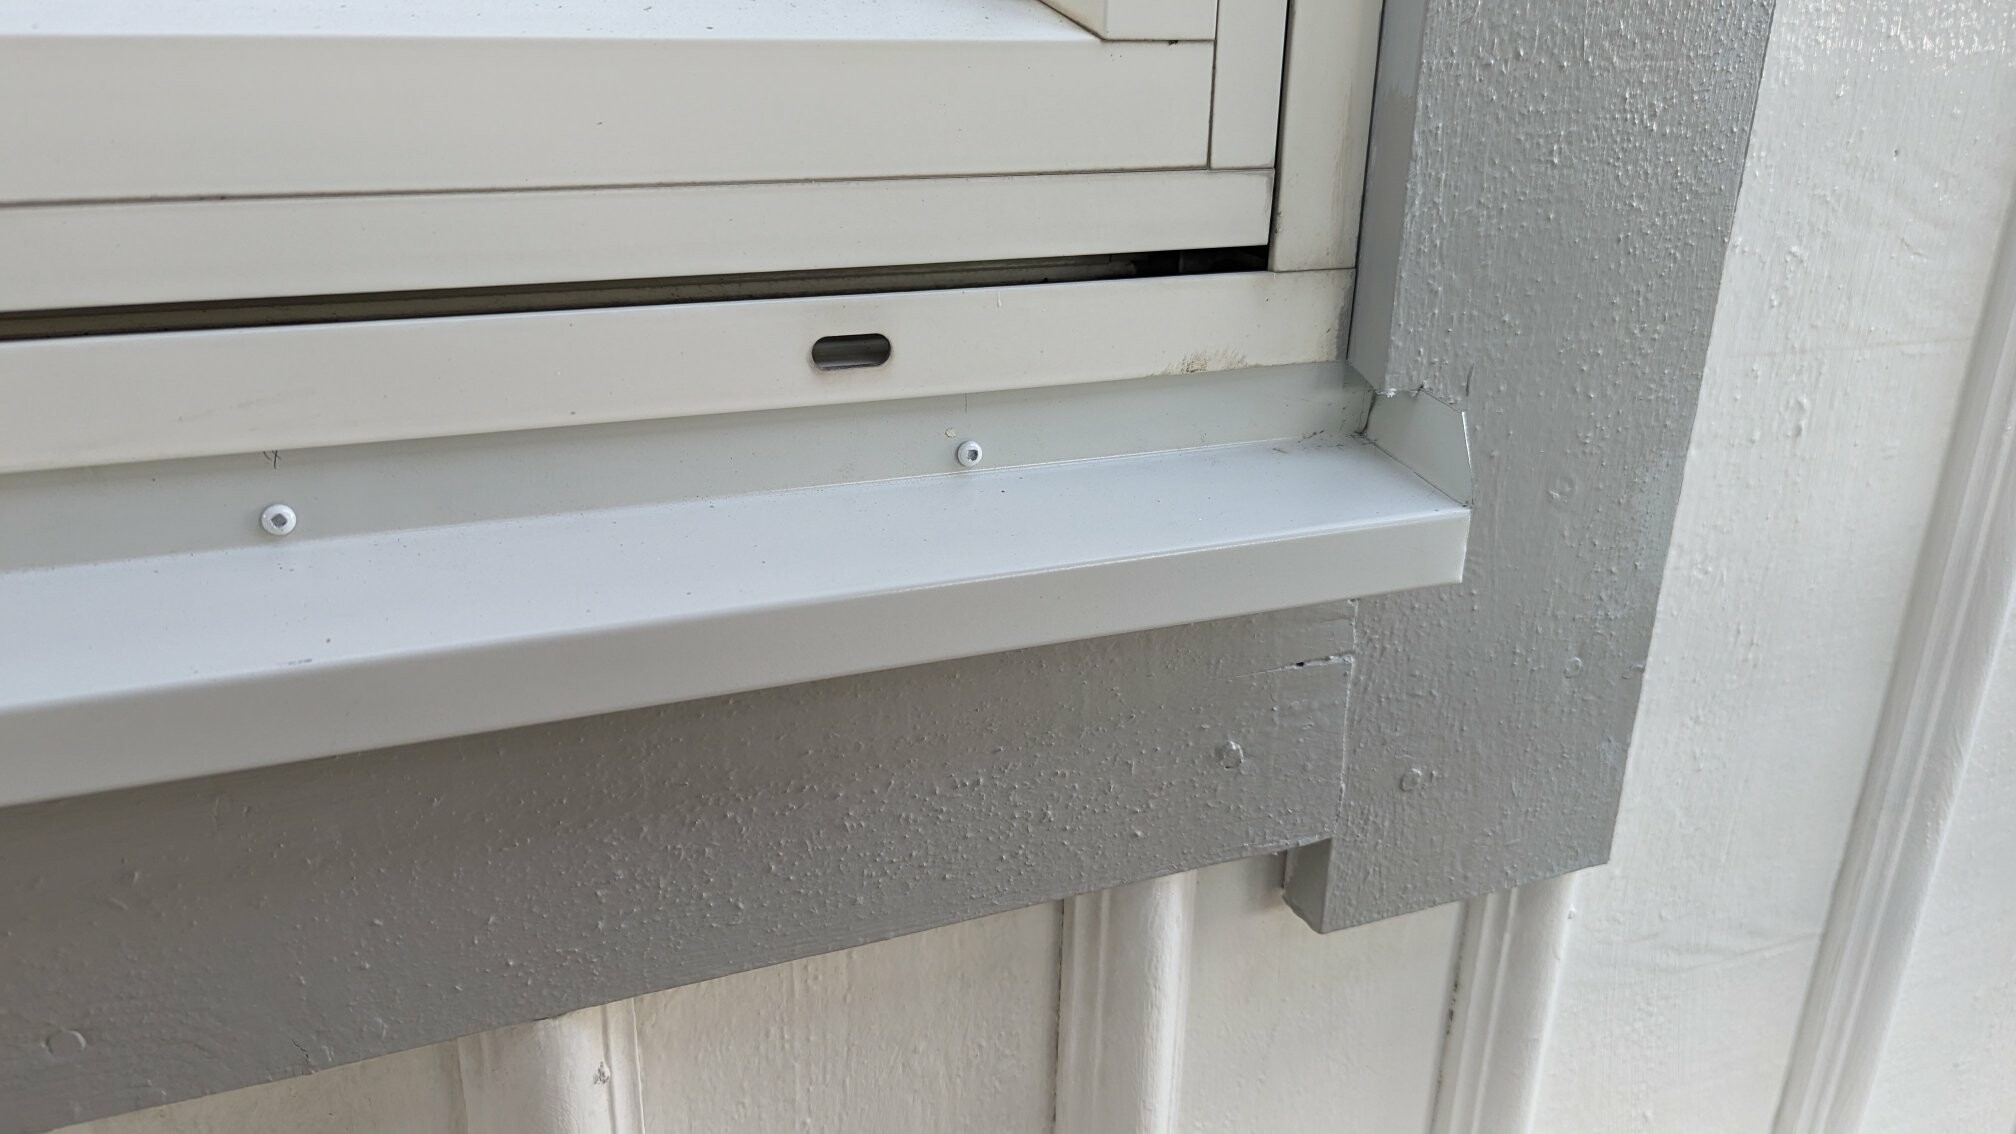
I installed the flashing by cutting out space between the window and the panel with a multitool and then inserted the flashing behind the panel. Not entirely correct since it ended up outside the tar paper. But better than before!
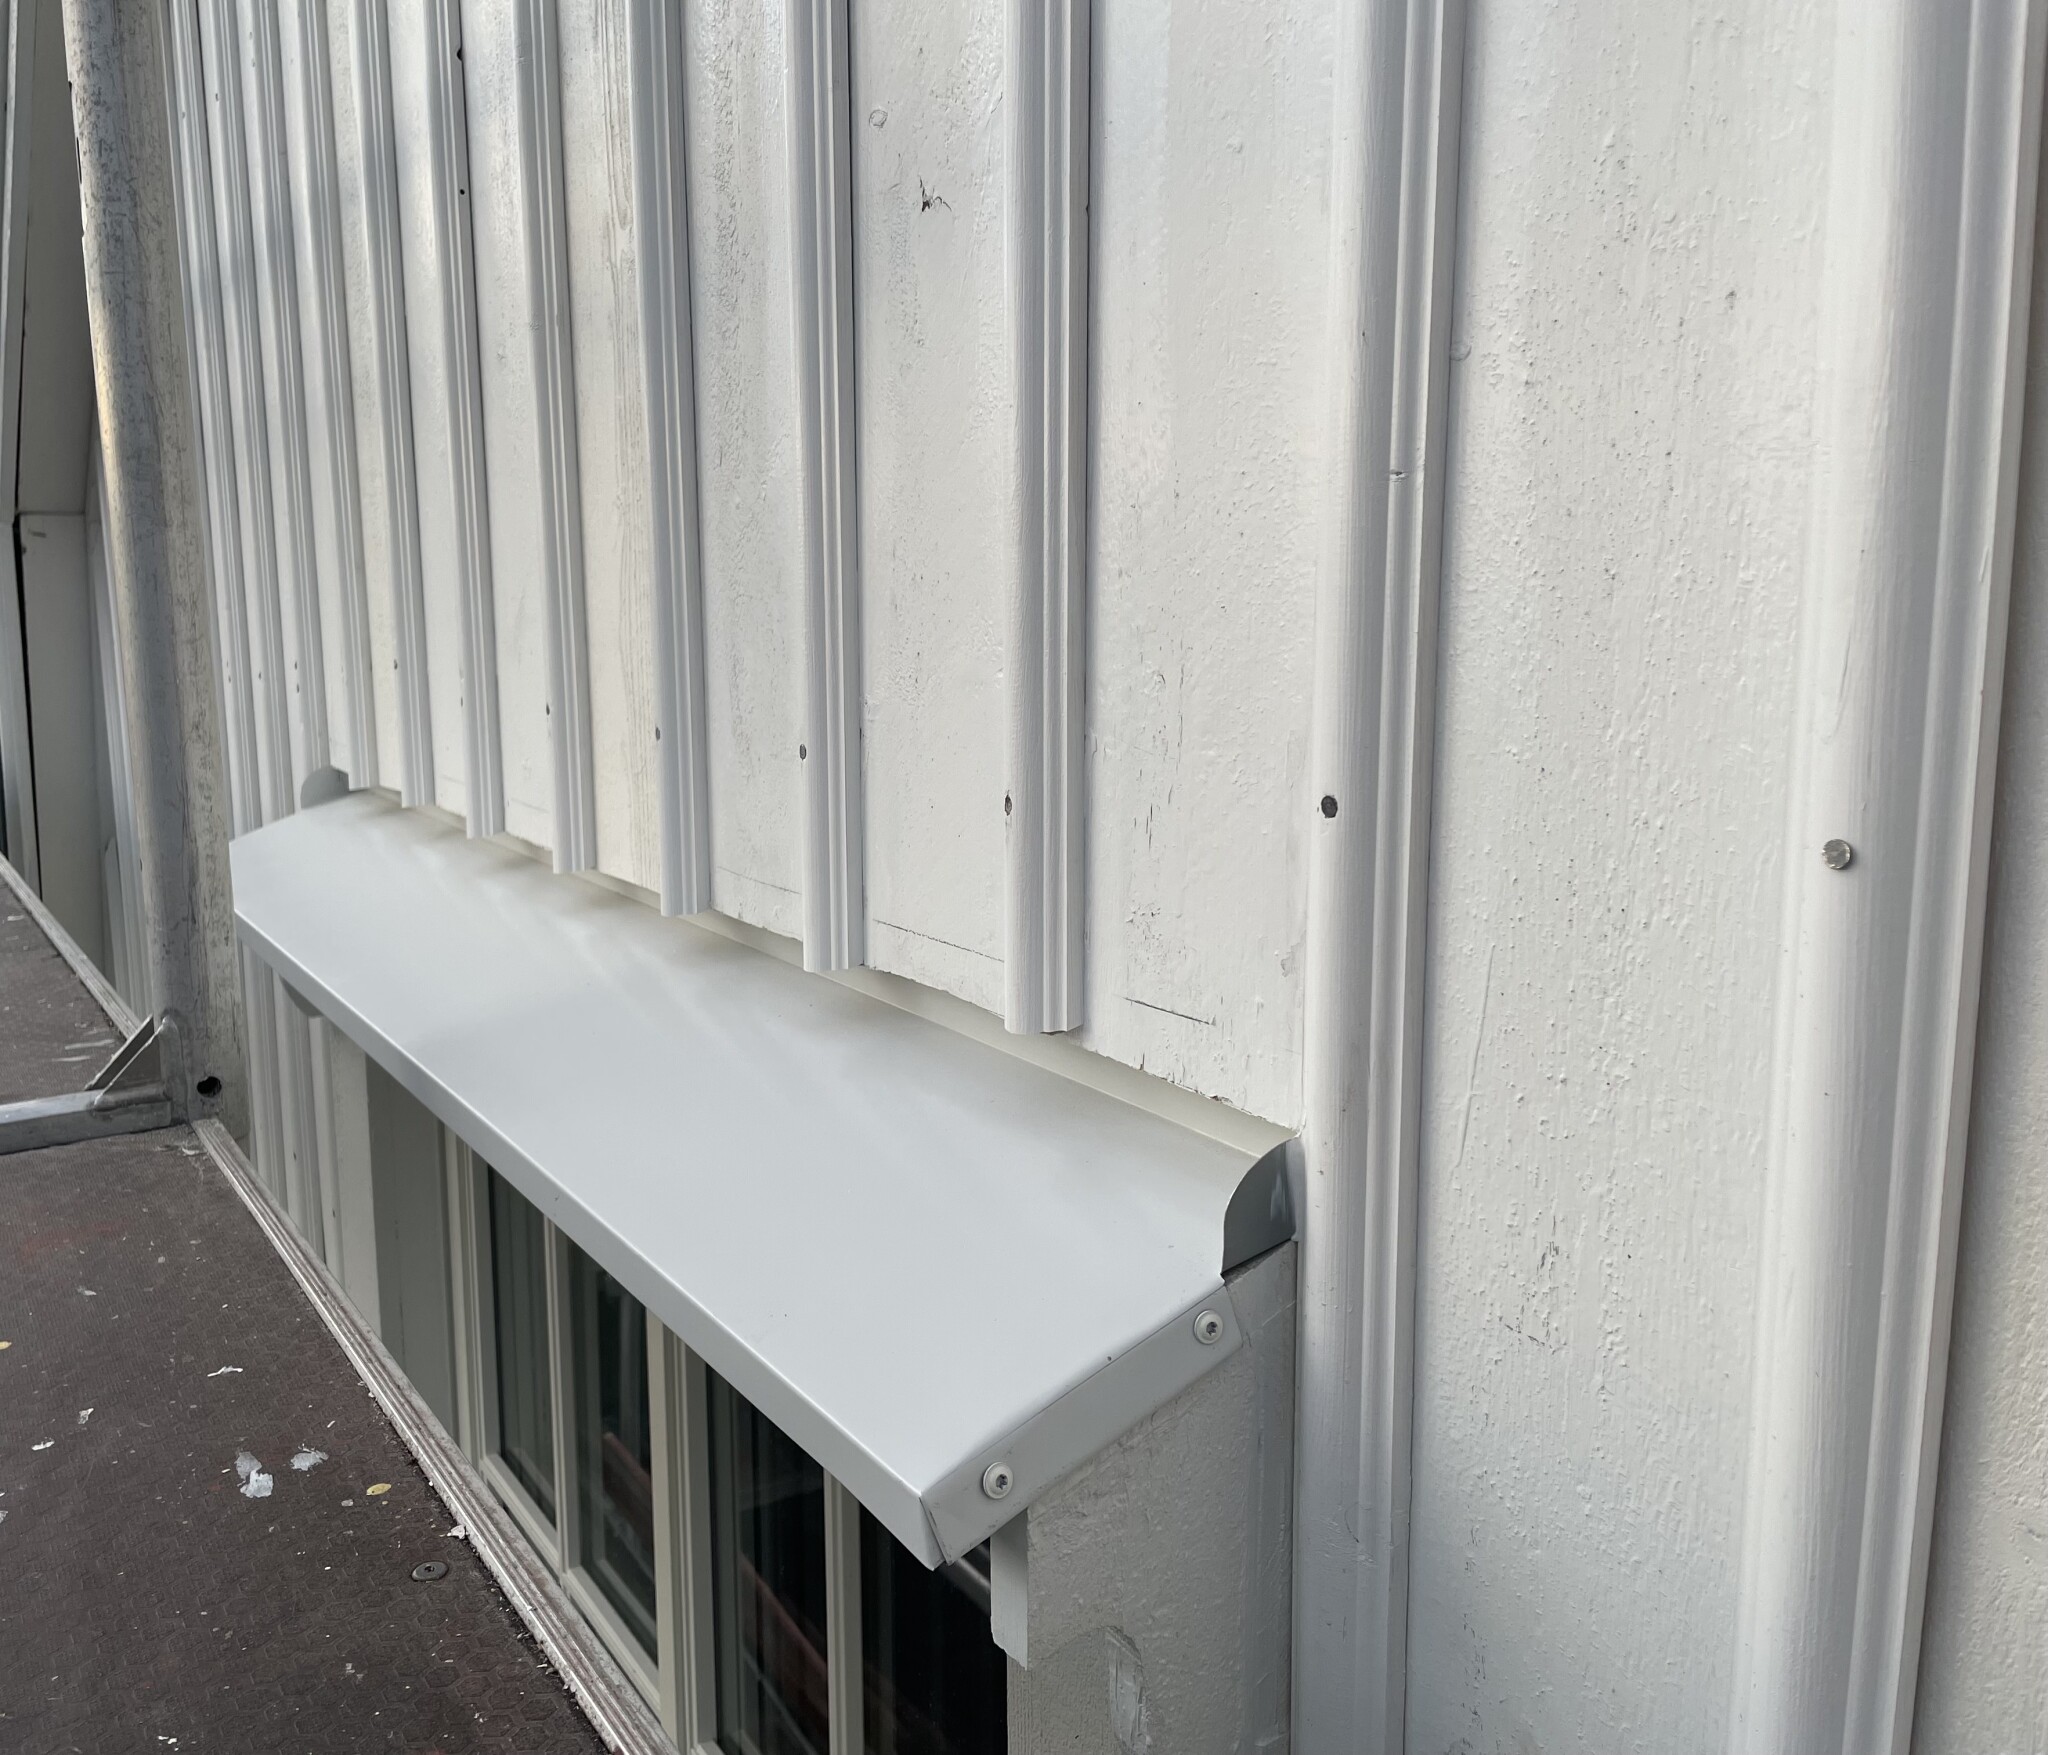
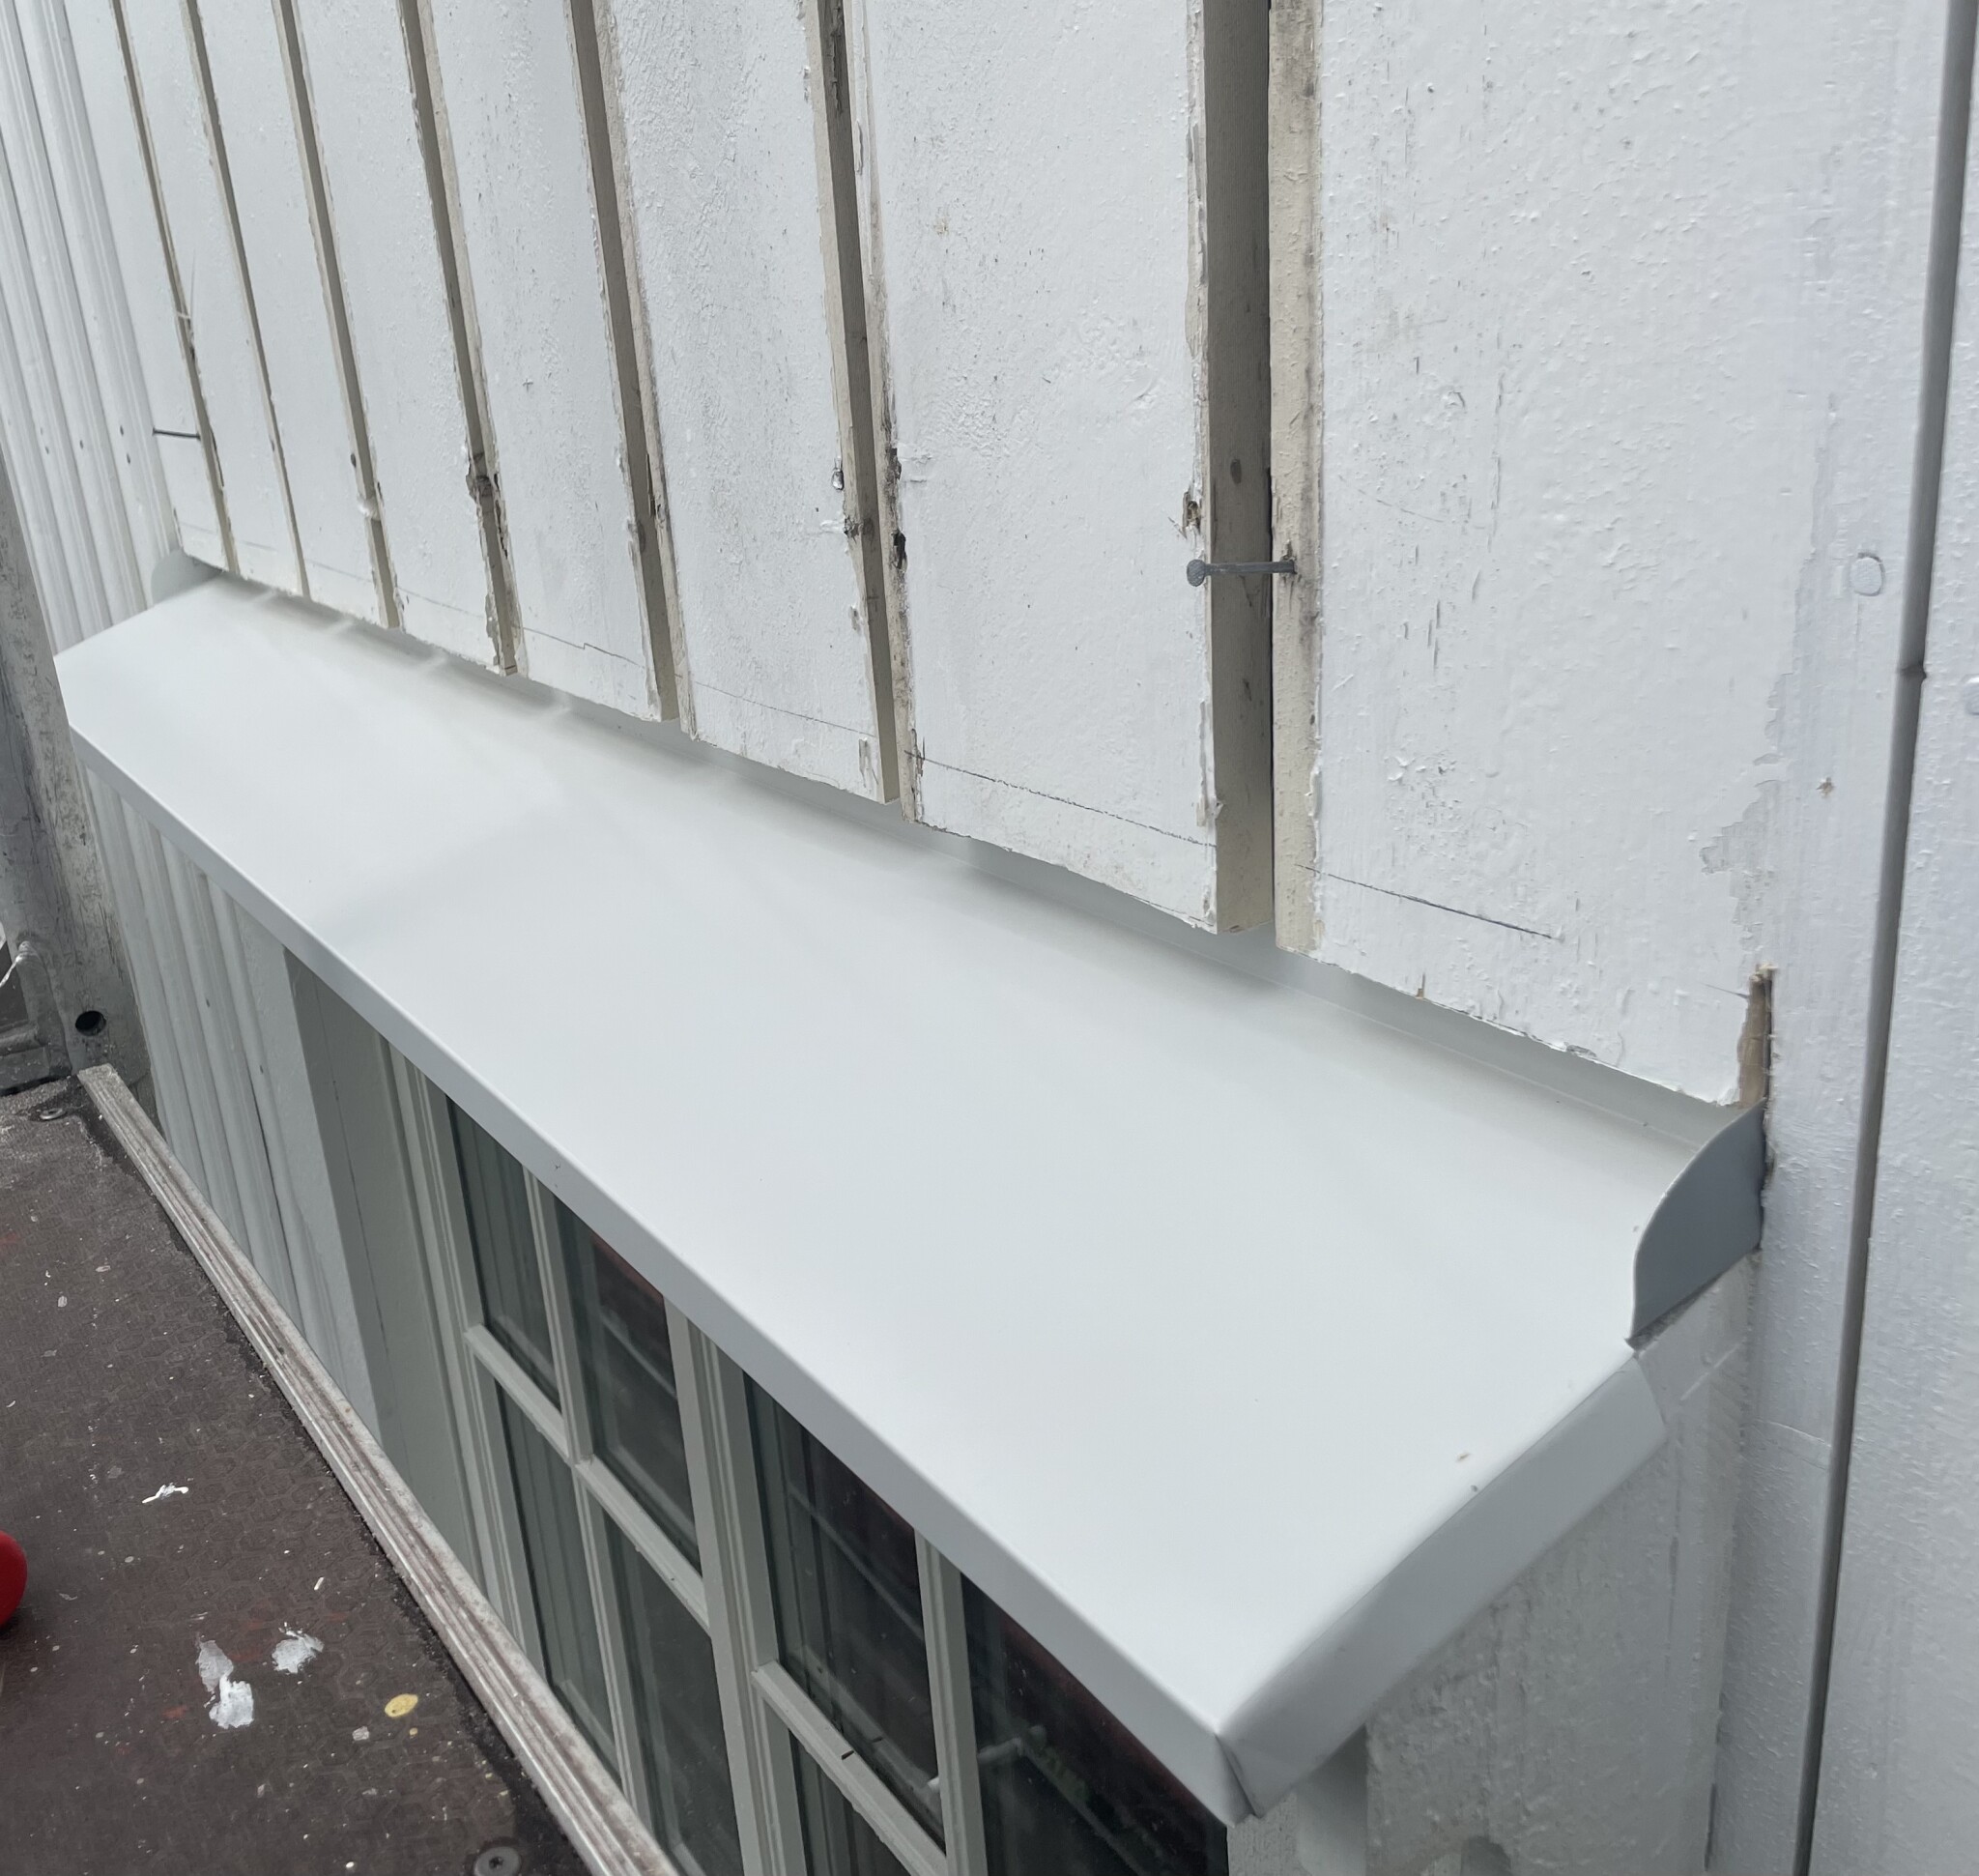
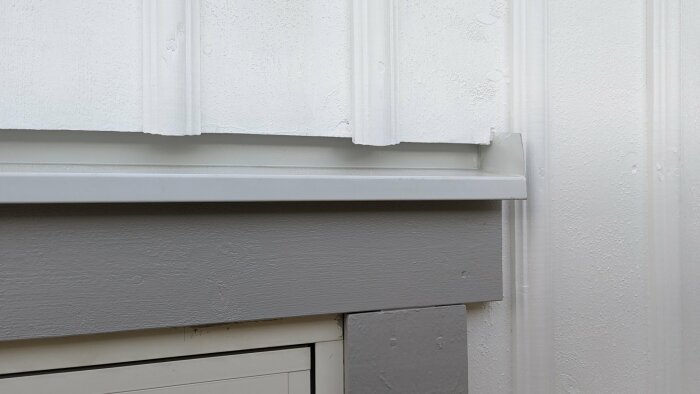
Here are some more pictures of how it was installed and how it turned out. I changed almost all the panel anyway, so I placed the sheet metal like this:
I think the worst was Biltema's screws for window flashing. One should have had something better for the future. Both screws for fascia boards and flashing.
Here are some more pictures of how it was installed and how it turned out. I replaced almost all the panel anyway, so I placed the sheet metal like this:
[image][image][image]
The worst, I think, was Biltema's screws for window sills. For the future, something better would have been needed. Both screws for fascia and sill.
Looks good, in retrospect I should have also replaced more panels. Especially above the windows where I put metal, it would have saved at least a day's work. But being stingy as I am…
This year I will take the east facade. Scaffold rented for week 29...then I will never replace paneling again!
Click here to reply
Vi vill skicka notiser för ämnen du bevakar och händelser som berör dig.


bjornhallberg said:
Here are some more pictures of how it was installed and how it turned out. I replaced almost all the panel anyway, so I placed the sheet metal like this: