Currently renovating our upper floor and starting to see the end. However, I still have this project below left. It feels completely impossible right now and I need advice on how to proceed.
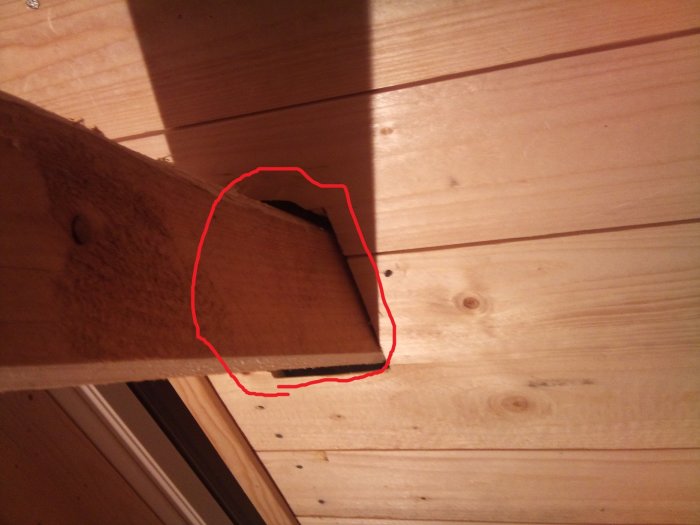
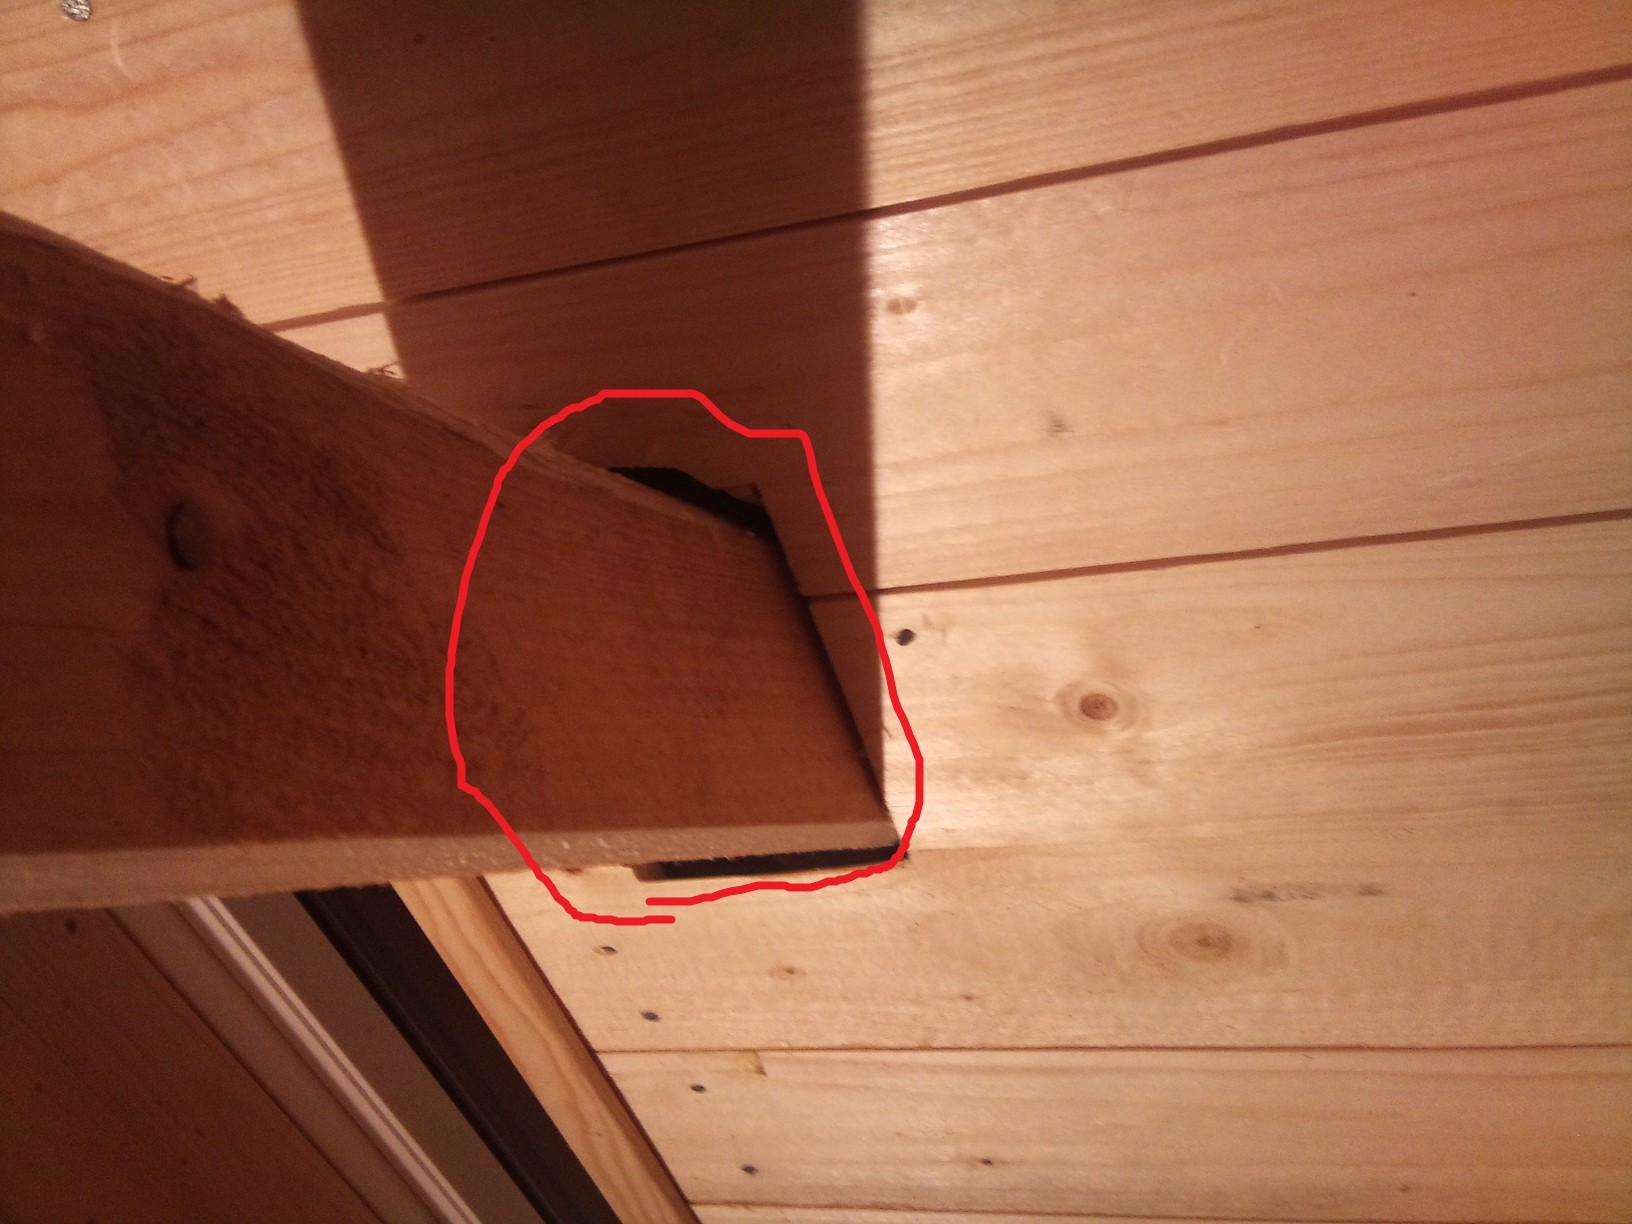
There are 13 trusses and thus 26 "holes" to try to make look nice. I've tried with mouldings (8x33) which works somewhat but it took about 20 minutes to do one side of a truss. It's incredibly tight up there and since we're talking about wood, it's not possible to glue (uneven) and when I try to nail in the edges, the moulding just cracks. Plus, the angles aren't straightforward, i.e., not exactly 45 degrees around because if one is slightly tilted it might be 42 instead, which means each has to be custom cut = lots of waste.
Illustrated in the picture.
Does anyone have ideas on how I can do this? All ideas are welcome at this point.
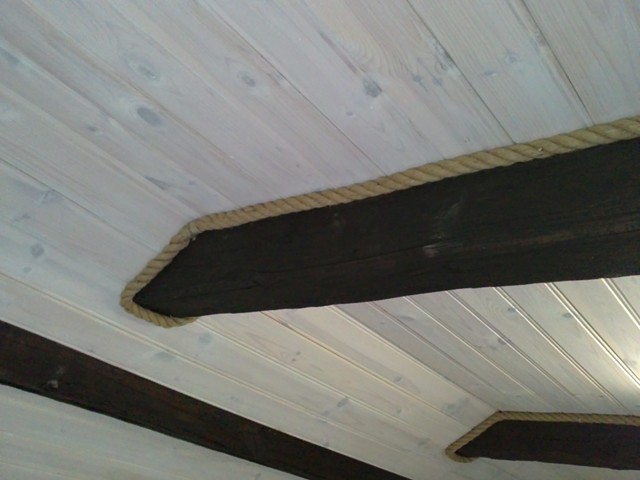
We had the same problem but realized that rope was very compliant.
At the top left, you can glimpse the ends of the rope. We tied them together with a string and nailed everything with a nail that had a slightly nicer head.
At the in-laws', the carpenters have jigsawed moldings out of thinner MDF. Looks very good. Then the piece is just painted white. I can guess that the molding is around 3-5mm thin and around 25-35mm around the stud. Good luck!
kioskdavid: I hadn't thought about the rope option! However, that type of rope won't quite fit in with our upstairs, but the idea is very good! We'll see if I can find an alternative.
fgo: To cut shapes probably requires a skilled carpenter to make it look nice. I have a jigsaw available and it feels like I need a finer saw (in addition to better technique) if I'm going to make it look good. It would also take a heck of a time to saw around all the moldings, i.e., 26 pieces. I somewhat assume that what you're describing is like what kioskdavid has, i.e., their beams are against the ceiling. As you can see in my picture, the molding has to go around the roof truss since my ceiling goes all the way to the ridge. In that case, I still have to create a "lid," which complicates things.
It is actually better with a wider joint as you get a larger width that becomes more flexible. Choose the soft joint sealant that has the best flexibility, usually indicated as a percentage on the tubes, that is, not the cheapest painter's caulk, which usually has quite poor flexibility. And prime before you apply the caulk so it adheres better.
If you use white caulk and it is painted white, you probably won't see any potential cracking in the paint up by the rafters. However, if you caulk afterwards, there may be a color difference, and it will be more noticeable, as caulk and paint age differently and can result in variations. So start by priming, caulking, and painting, as caulking is quite a simple and quick task to perform. If it turns out later that you are not satisfied, you can consider a more advanced solution if needed.