Fun to follow how the record is coming along step by step
I think it might be good to remove all the loose material around the holes and "spackle" with fine cement / brown to get rid of the holes,
Is it the surface that became so porous against the formply?
If you have a finished mold with dimensions, I would cast a new slab
Oil the mold, caulk all the corners to get smooth edges
During casting, you can vibrate the concrete by tapping with a hammer on the side so it bubbles in the pudding
Fun to follow how the slab develops step by step
I think it might be good to remove everything loose around the holes and “patch” with fine cement / brown to get rid of the holes.
Is it the surface that became so holey against the formply?
If you have a finished mold with dimensions, I would cast a new slab
Oil the form, seal all the corners to get soft edges
During casting, you can vibrate the concrete by hitting with a hammer on the side so it bubbles in the pudding
Thanks for your response and tips! Yes, exactly it was the surface against the formply that became holey. I made my own makeshift vibrator with my hammer drill with a plank on it. I thought I got good vibration and many air bubbles that popped up. I wondered if I made the concrete too dry or if I vibrated for too short a time. Since I've now discovered more cracks in it at the sink and stovetop holes, I’m going to recast it today. I will also use a 2m rebar on the front and back edge to strengthen it more.
Regarding pigments, for a disc that I'm not satisfied with and just want to fill in, I would try something fun and colorful. If it turns out well, that's great; otherwise, there's another side to test on, and in the end, you either have a surface for a planting table or you can bring out the sledgehammer and have some fun.
For an entire concrete slab, use concrete pigment.
I think you should let it cure a bit longer before you start twisting the disc with thin edges. Maybe avoid lifting the disc completely without additional reinforcements.
I think you should let it cure a bit longer before you start turning the slab with thin edges. Maybe avoid lifting the slab entirely without additional reinforcements.
Thanks for the reply! How do you mean I should practically lift the slab? Right now I have cast the slab in front of my kitchen units and plan to stand it on its side and then lift it up. What extra reinforcements can I use and how? This time I'm waiting 10 days instead of 5 as I did last time for longer curing. What I think I did wrong was being a bit rough when I was removing the casting frame for the sink and stovetop. I should have been much more careful and not tried to pry them loose.
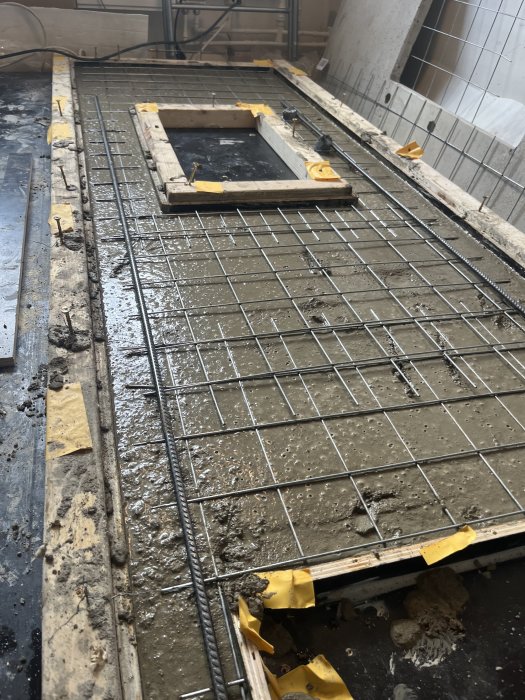
This time the casting went better. I was calmer and more methodical. I also used the maximum allowed amount of water, which made it feel easier to remove air bubbles and make the slab even. I also used 2 straight reinforcing bars to strengthen the front and back edges as you can see in the picture. I used the same vibration method with a hammer drill and batten, which gave a good result. I also lifted and dropped the mold a bit which I think had a good effect because it bubbled quite a lot.
Hope it turns out well
I didn't succeed with casting myself as there were too many bubbles, so I gave up and used microcement instead. The advantage is that you do everything on-site and you can have practically any length slab without having to splice.
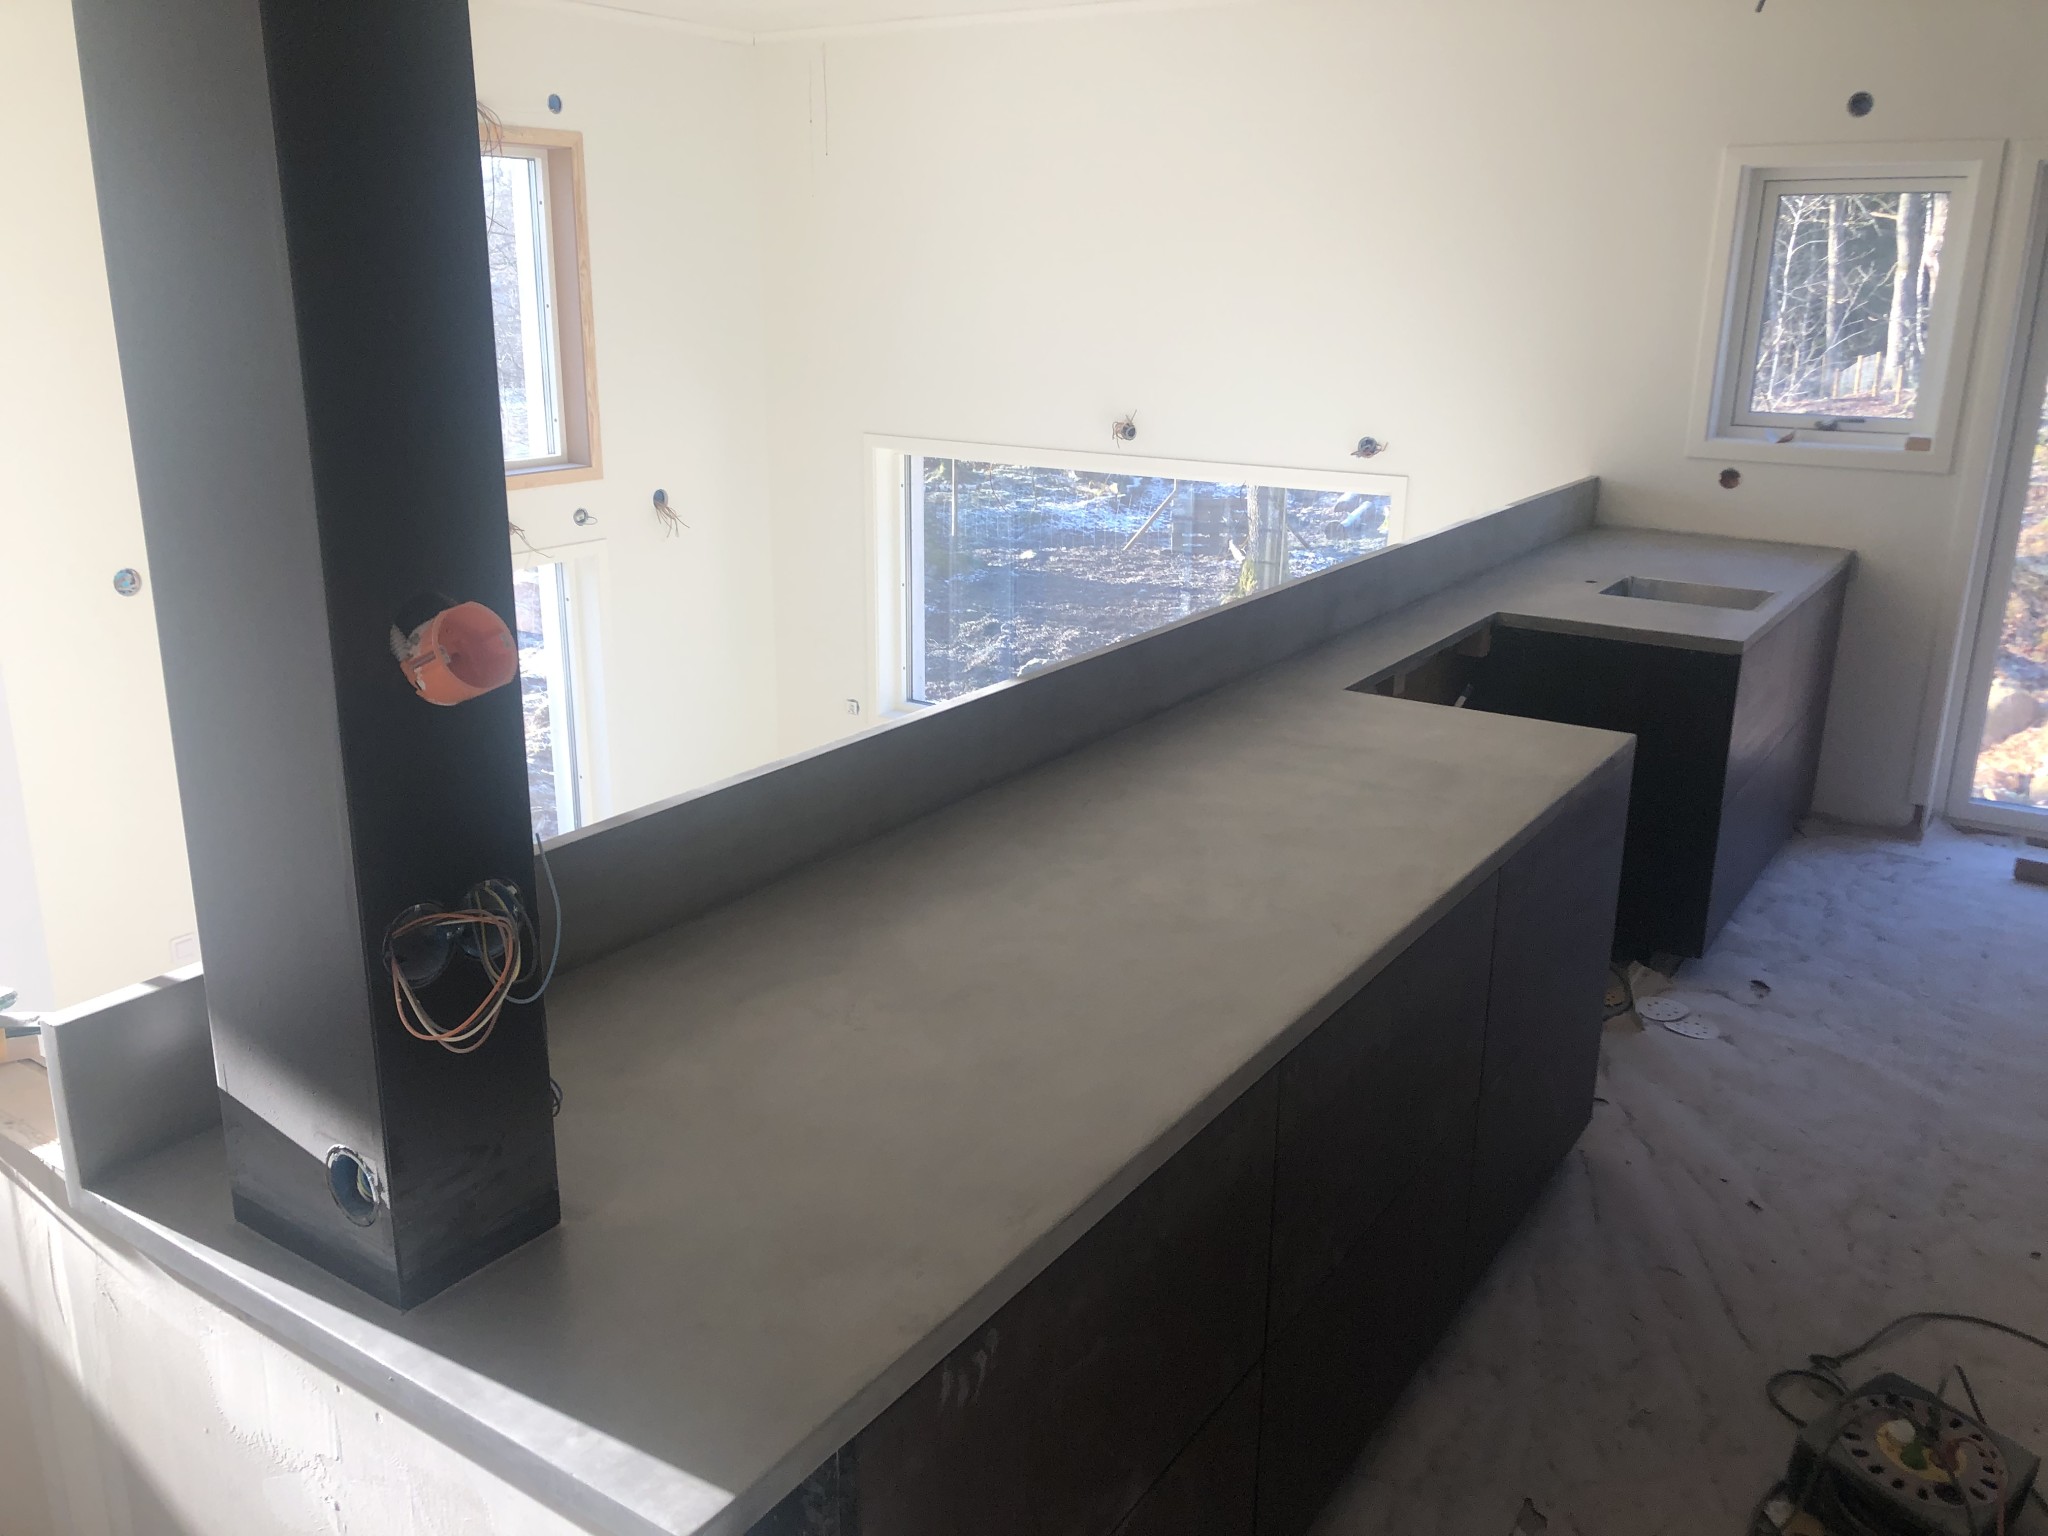
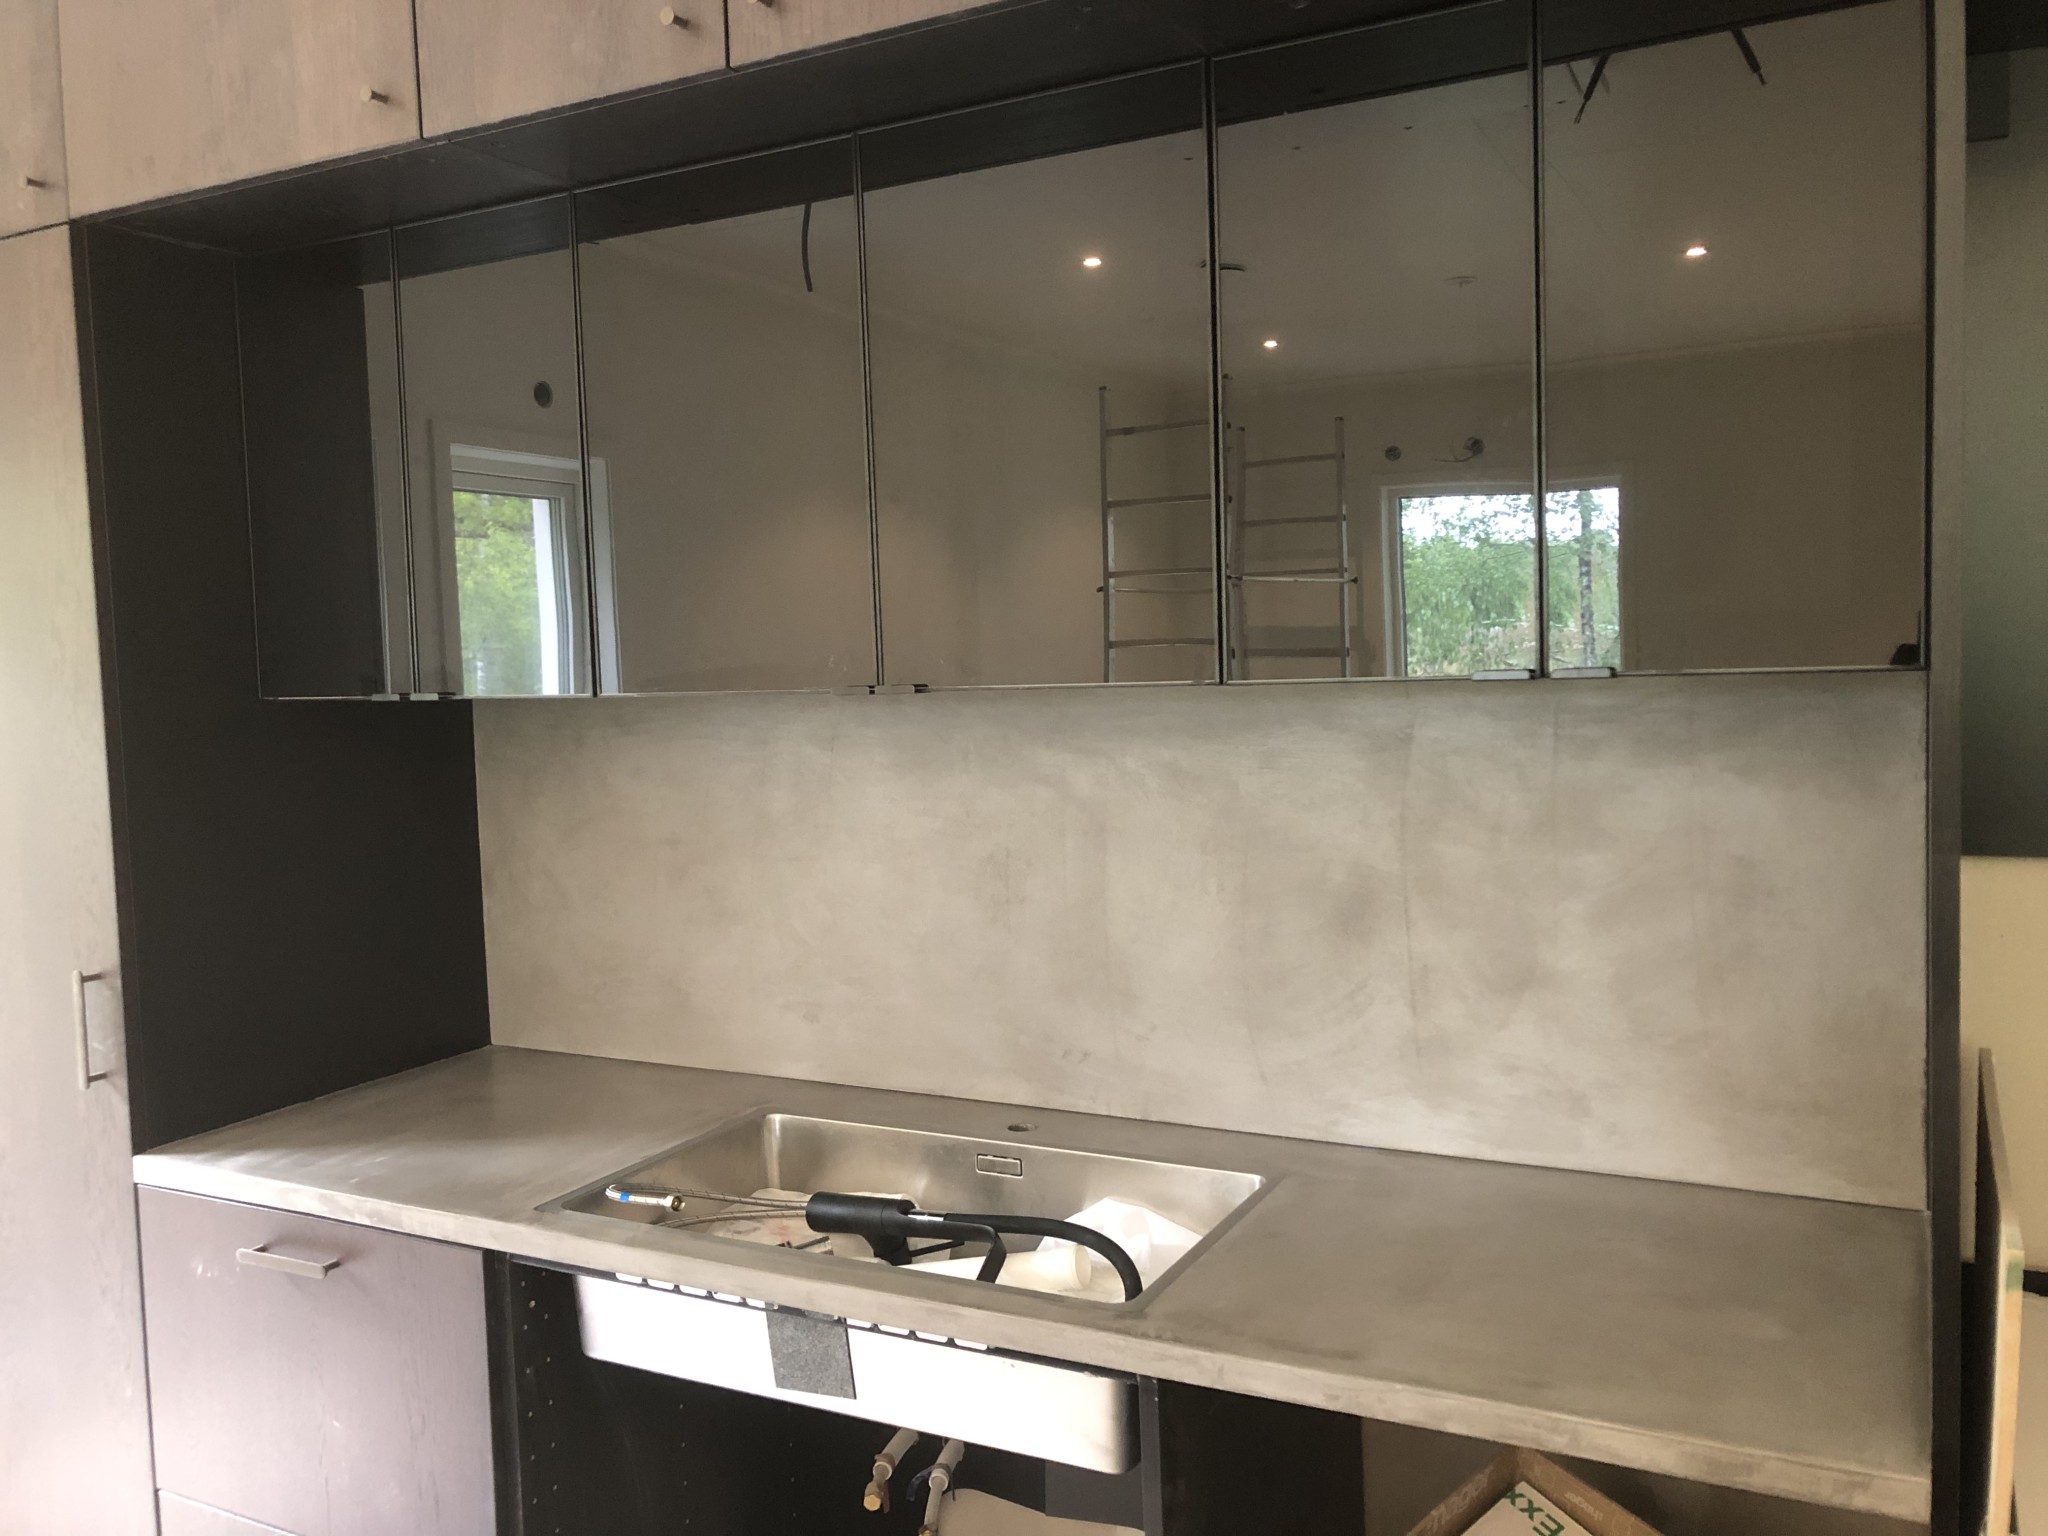
I also made a backsplash on the wall behind and the edge towards the living room so everything looks like it's in one piece.
Hope it turns out well
I didn't succeed with casting myself as there were too many bubbles, so I gave up and used microcement instead. The advantage is that you do everything on site and you can get practically any length of slab without needing to seam.
Also made a splash guard on the wall behind and the edge out towards the living room so everything looks joined together in one piece.
Nice! I was considering microcement mostly to avoid seams as you mention, but was a bit too tempted by terrazzo and used coarse concrete. By the way, I learned a lesson this time and taped all the screws.
Click here to reply
Vi vill skicka notiser för ämnen du bevakar och händelser som berör dig.

")
Heij83 said:
Hope it turns out well