4,658 views ·
21 replies
5k views
21 replies
Casting/insulating pizza oven with perlite and...?
Hello,
I'm in the process of building a pizza oven with the help of an 85cm Pilates ball like many others, and I need some wise input.
1. I plan to buy enough perlite for a 7cm thick layer (hydrophobic perlite, so it withstands frost, source: https://norrlandseko.se/skillnaden-mellan-perlite-och-perlite/), and now I'm wondering which mortar to mix it with. From what I understand, regular Portland cement can't withstand these high temperatures over time without deteriorating, which I want to avoid. At the same time, I want decent strength, which refractory mortar (e.g.: https://shorturl.at/TLfff) doesn't seem to have in the same way. What should I mix with? Many different opinions online and in guides. There's also refractory cement, such as this one that seems to hold up better: https://shorturl.at/4WHjM. Thoughts?
2. I then plan to insulate the dome with about 5 cm of mineral wool, and finally apply a few cm of rendering on chicken wire. I understand that ceramic insulation is generally recommended instead of mineral wool for this. However, it is more expensive. I've read that mineral wool itself is not damaged by higher temperatures, but the binder breaks down at 200-250 degrees over time. I will, however, be encasing the mineral wool, so I don't quite understand what impact this has on the insulating capability of the mineral wool? Is anything else at risk? I'm not knowledgeable in the area.
Grateful for guidance.
Know-It-All
· Västra götaland
· 10 917 posts
https://community.fornobravo.com/fo...ass-homebrew-cob-experience-wanted#post466264
Kind of the same question, with a good answer.. 🙂
As for stone wool, it loses its shape when the binder ceases to exist... In the long term, it will collapse and insulate very poorly...
Kind of the same question, with a good answer.. 🙂
As for stone wool, it loses its shape when the binder ceases to exist... In the long term, it will collapse and insulate very poorly...
Great, thanks!
Good forum. I will go with homebrew as the inner layer. But, what is "fire clay" translated to in Swedish?
Then I read that a layer of perlite mixed with regular cement on top of the homebrew layer should work as insulation, as the heat mostly stays in the homebrew layer and therefore shouldn't rise to 300 where regular cement fails. Any opinions on how thick the homebrew layer should be for this to work? Or am I off track? It would be nice to avoid buying aluminatbruk, which costs a lot, for the perlite layer.
Know-It-All
· Västra götaland
· 10 917 posts
Sounds reasonable, with the caveat that I have built a wood-fired oven with fireproof stone...
The thickness is always a trade-off between heat retention and wood consumption... The more mass to heat up, the longer it takes.
If you are only going to bake Neapolitan pizza, relatively little mass is needed since you have to keep the fire burning to maintain the temperature. If you are going to bake bread, more mass is needed... You can make pizza with plenty of mass, but bread becomes difficult with little...
Hi!N naaaf said:Great, thanks!
Good forum. I'll go with homebrew as the inner layer. But, what is "fire clay" translated to in Swedish?
Then I read that a layer of perlite mixed with regular cement outside the homebrew layer should work as insulation, as the heat mostly stays in the homebrew layer and therefore should not rise to 300 where regular cement fails. Any opinions on how thick the homebrew layer should be for this to work? Or am I off track? It would be nice to avoid buying aluminat cement which costs a fortune for the perlite layer.
A bit late to the party here. Have you built your oven or will it be a project for 2026?
I built an oven myself in 2023 roughly according to your ideas, but on a sand core instead of a Pilates ball. ~60 mm homebrew, ~60 mm rock wool, and 10-20 mm plaster. If you have questions, go ahead, but if you've already built one, then there's no point. 😀
Hello! Even later to the party here, but that's right, we postponed it until this summer! And I've also decided to build on sand instead of a ball to avoid moving the dome when it's finished.gazzton said:
Hello!
A bit late to the party here. Have you built your oven, or is it a project for 2026?
I built an oven myself in 2023 roughly according to your ideas, but on a sand core instead of a pilates ball. ~60 mm homebrew, ~60 mm stone wool, and 10-20 mm plaster. If you have questions, go ahead, but if you've already built it, there's no point. 😀
Your oven looks great! Has it worked well? Anything you would have done differently in hindsight?
A few questions:
What did you do to ensure the sand held its shape when you cast on it? Just water or some other binder? Did you use plastic wrap or something else between the sand and the homebrew?
What is your inner diameter?
Where did you buy fire clay and slaked lime for your homebrew, and approximately in what quantities did it take for your thickness, do you remember that?
How long does the oven hold heat approximately?
I'm wondering if it's a good idea to add a layer of perlite in addition to the blanket, so it would be homebrew -> perlite -> blanket -> plaster. Any thoughts on that? Overkill? Can I use either ceramic blanket (I'm probably considering that instead of stone wool) or perlite?
Did you cast perlite as a base under/around the firebricks?
A thousand questions
") .
.Many thanks in advance.
Last edited:
Hello!
So, you have both a fun and challenging project ahead. Many evenings I was quite sore...
12 cm of perlite under the biscotti stones, which in turn rest in a bed of sand. The concrete slab doesn't even get warm on the underside. I read before building that firebrick easily gets too hot and burns the pizza crust. Unfortunately, biscotti stone is rather expensive, but a dream to bake on compared to the ceramic stone I have in my gas oven.
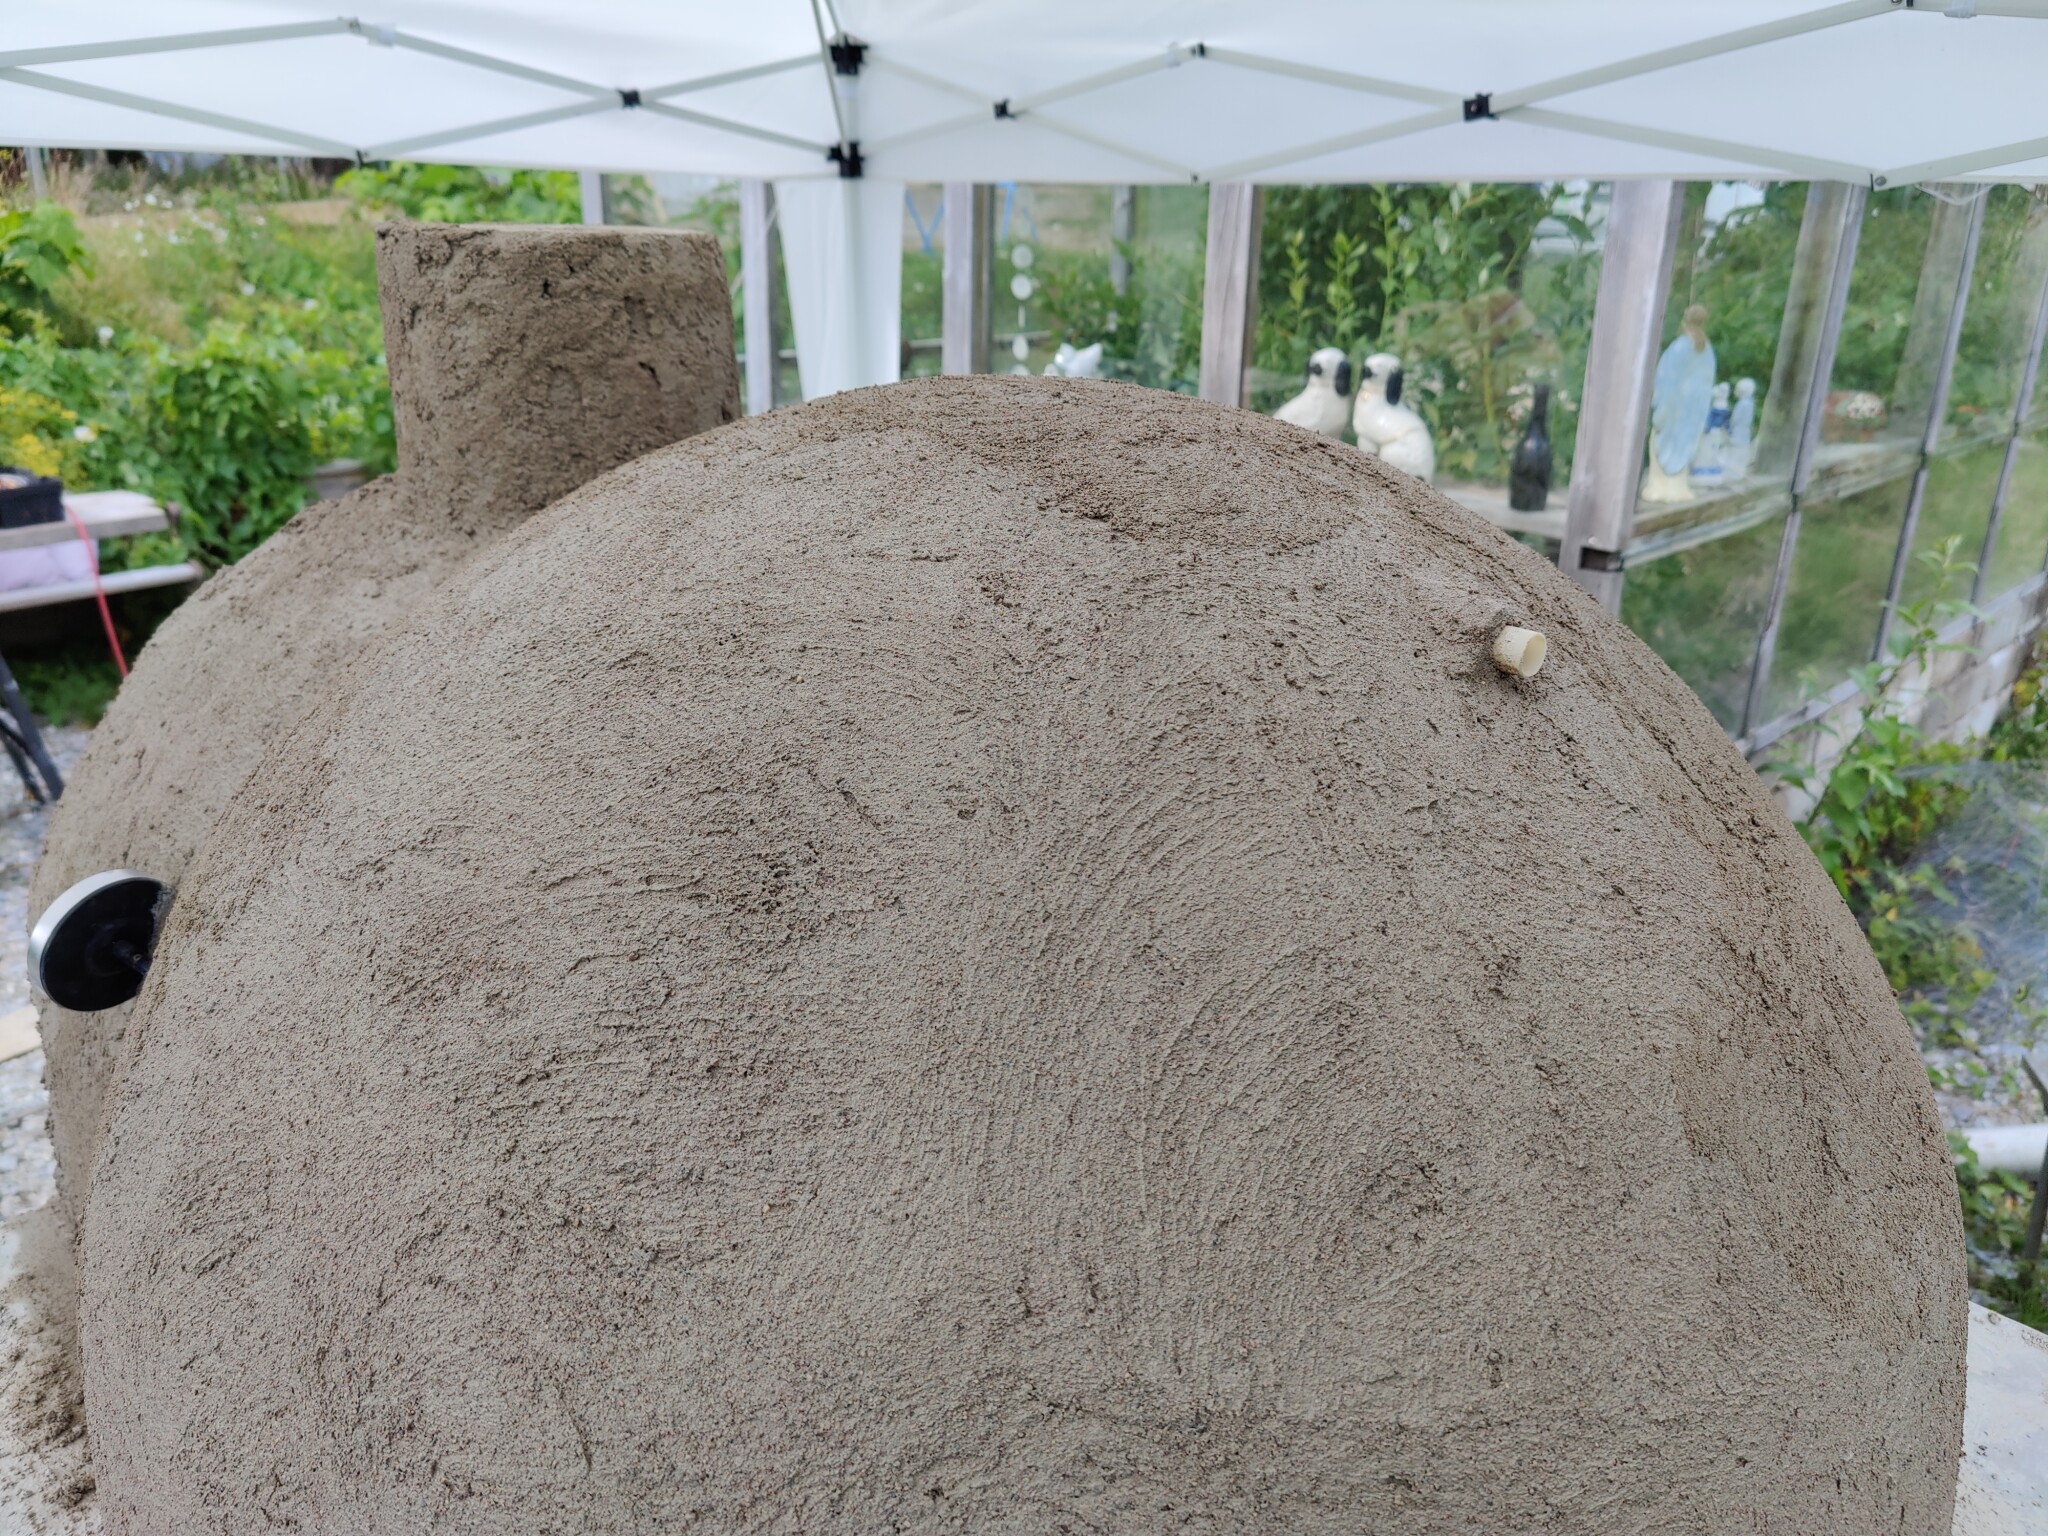
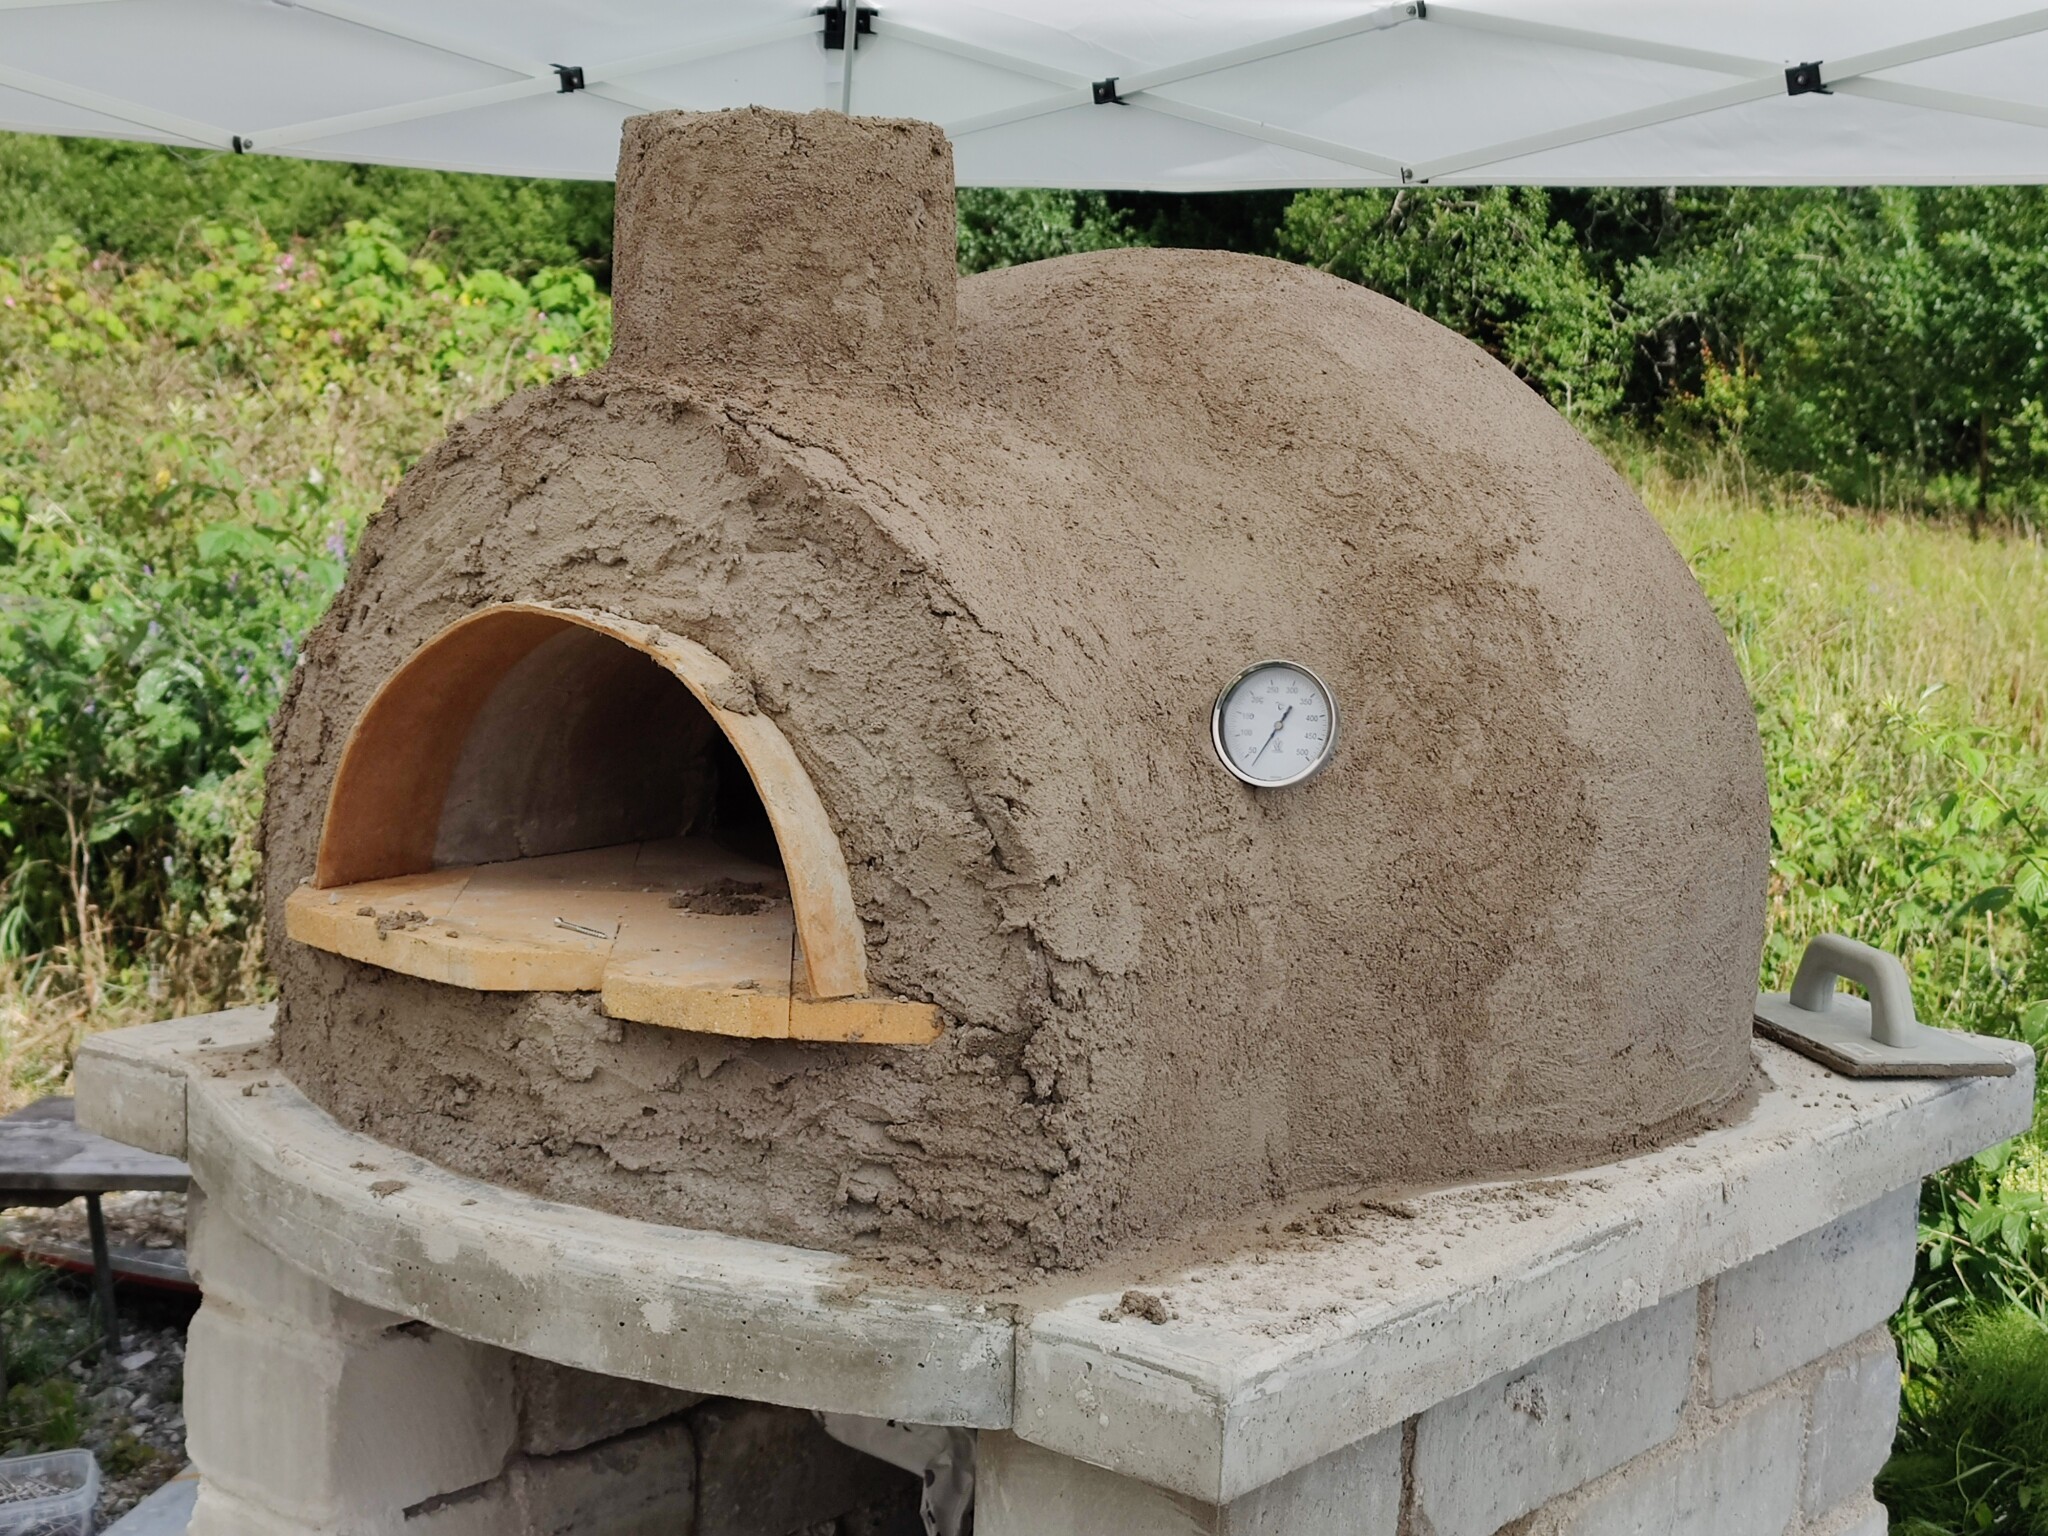
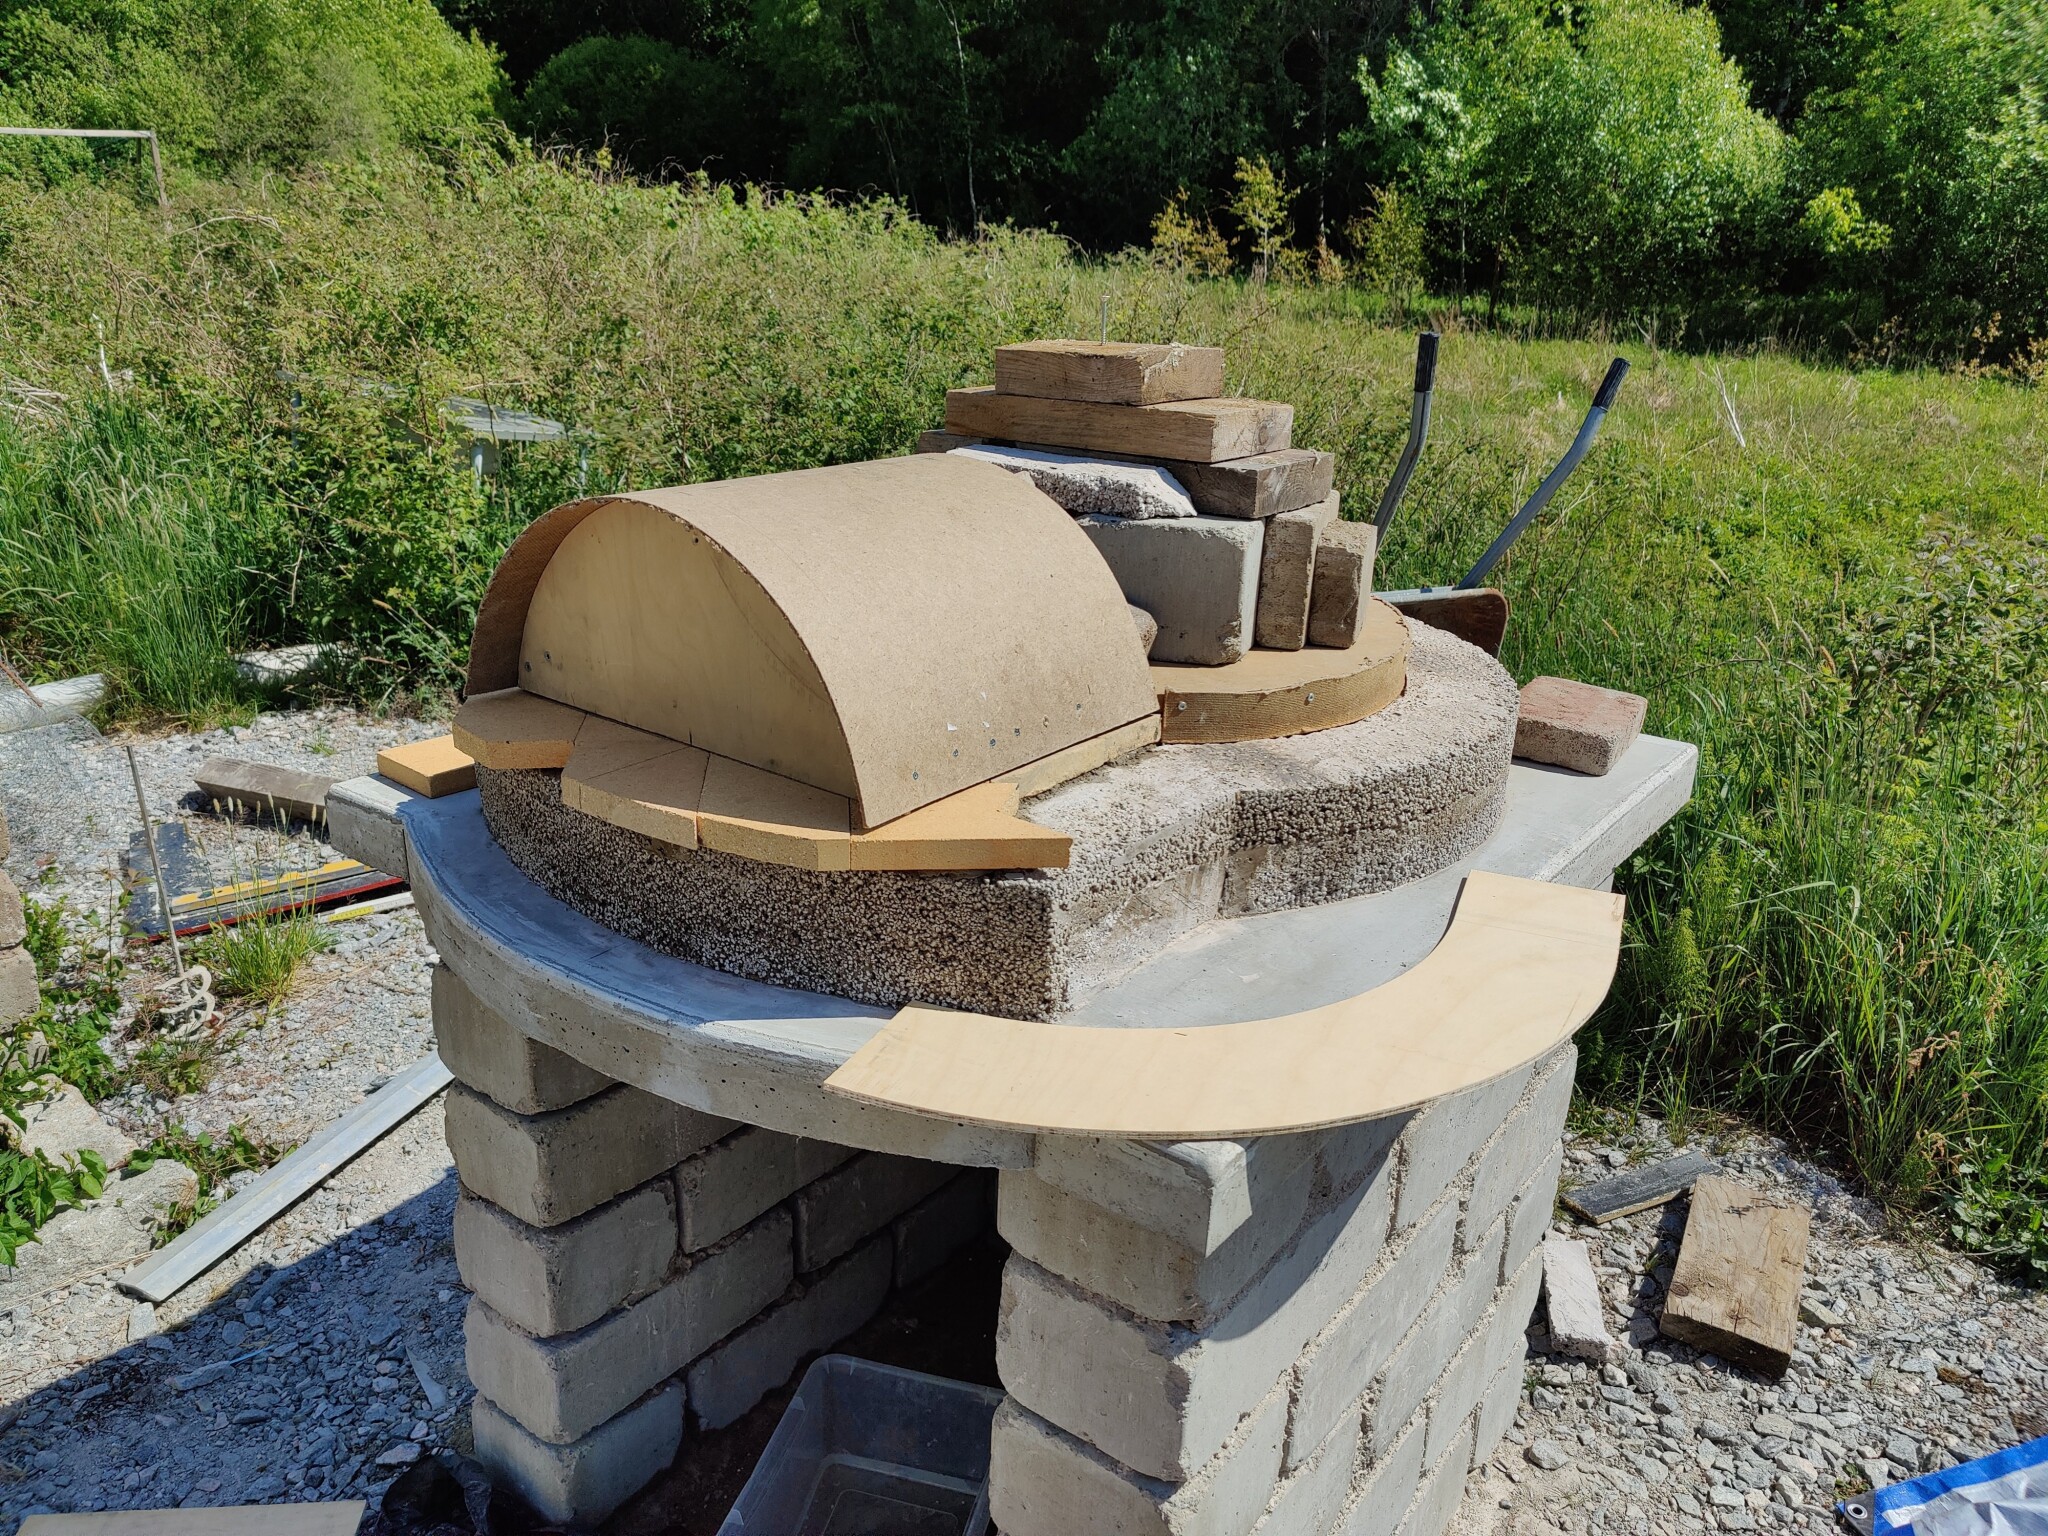
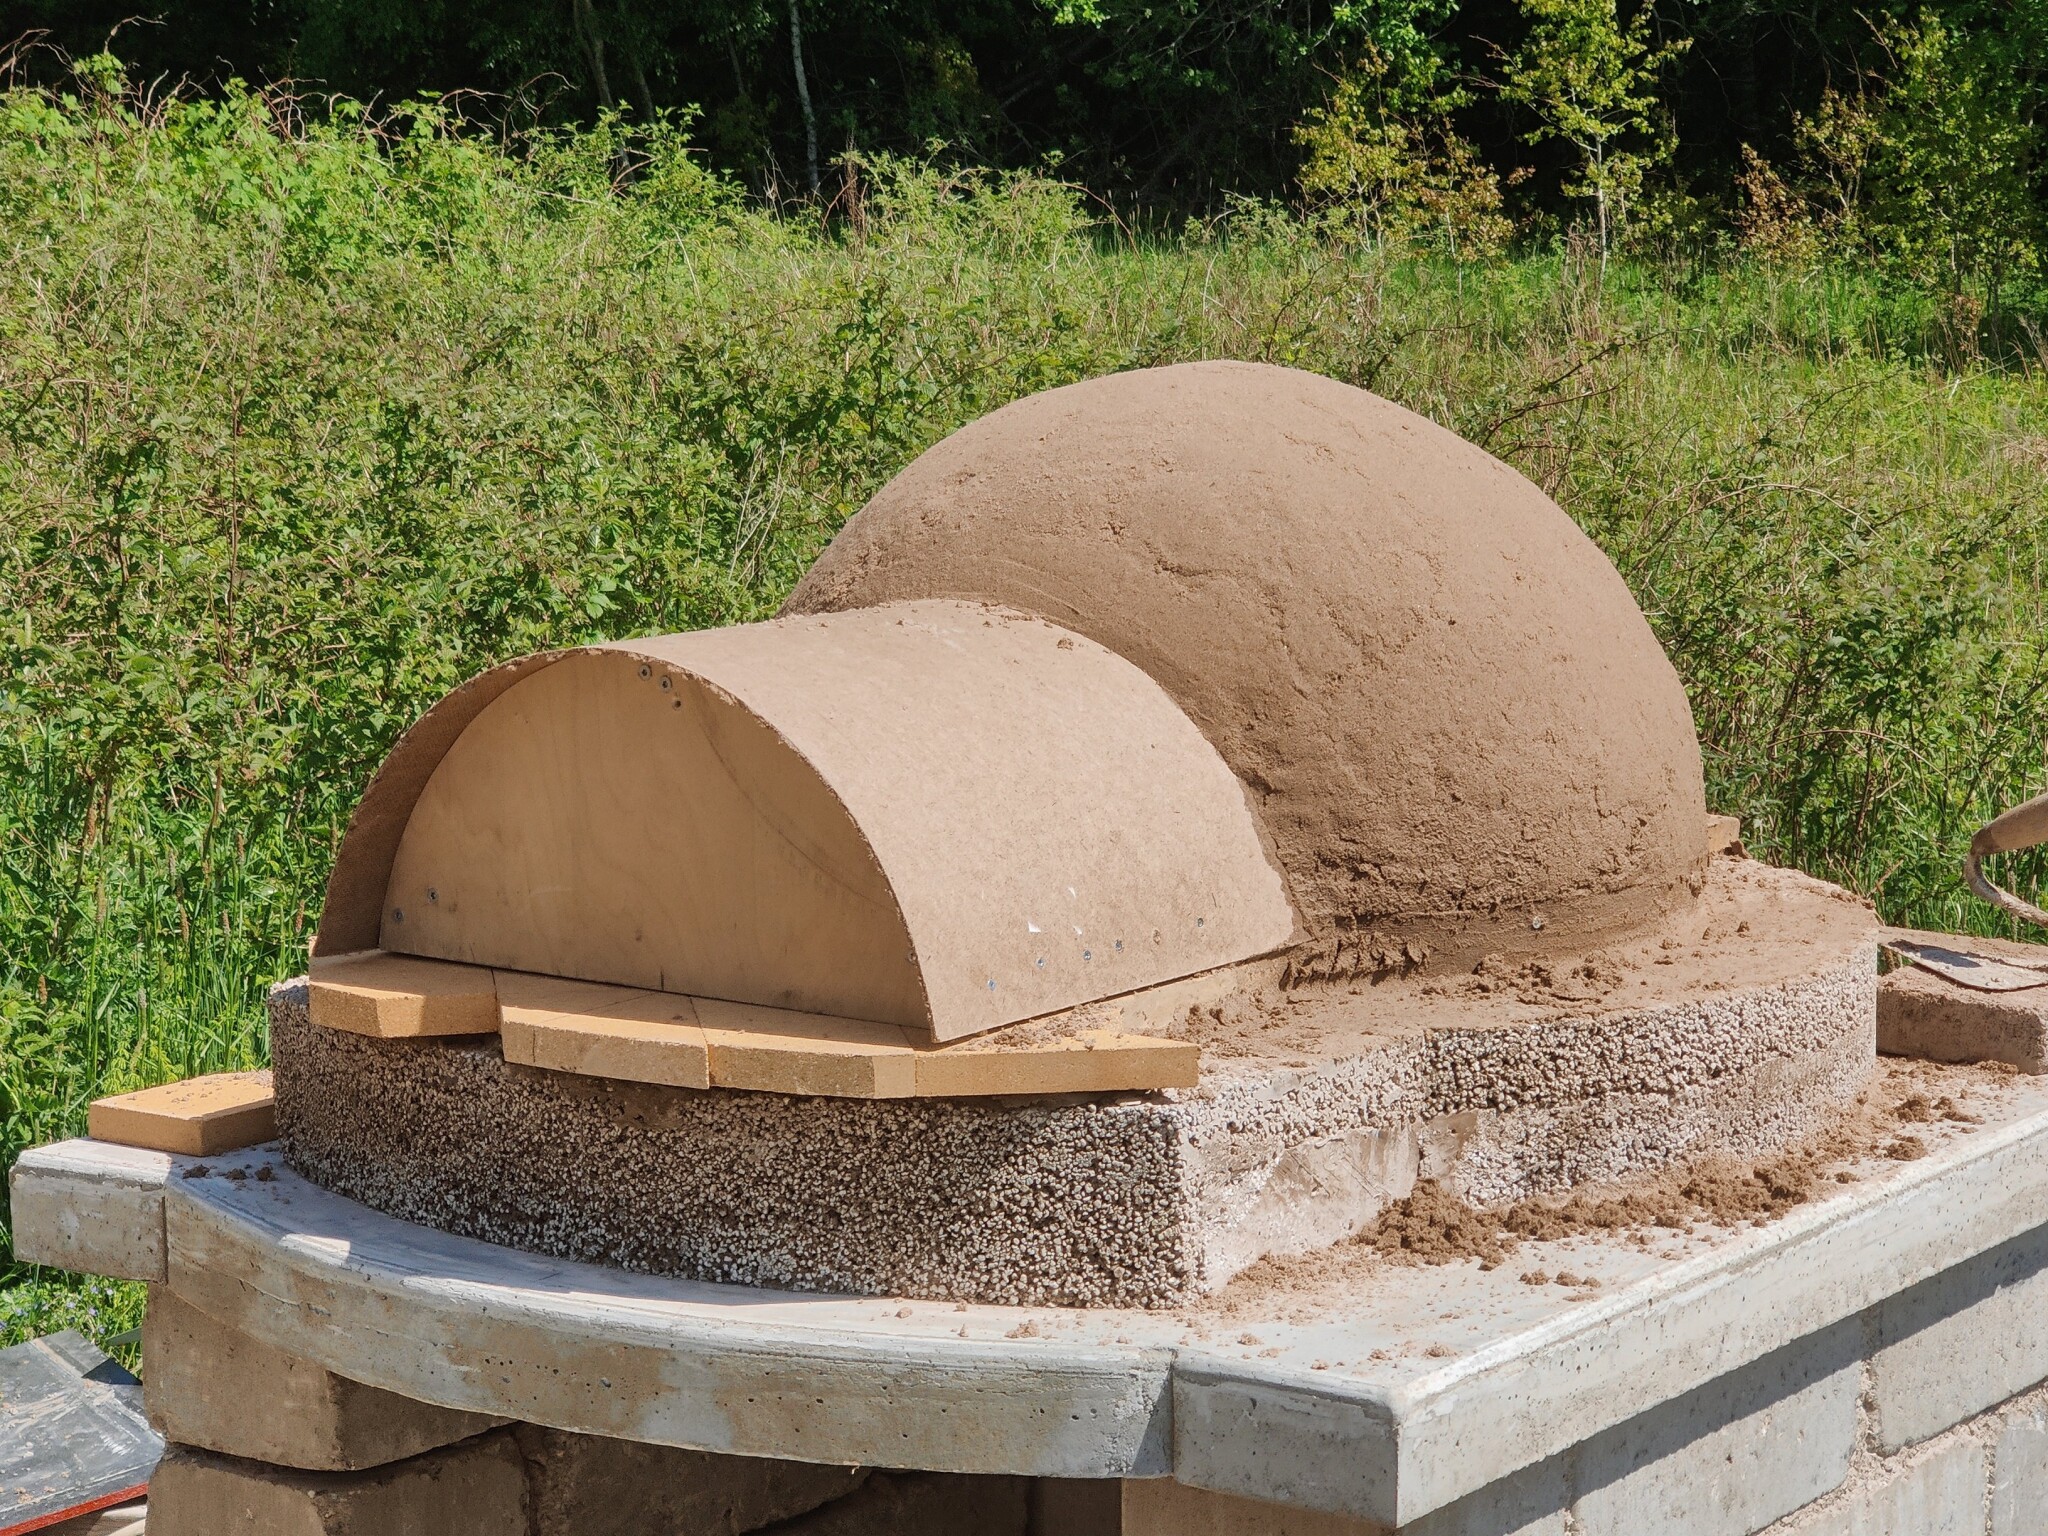
70 cm in diameter, probably shouldn't be smaller than that. Perhaps I should have chosen 80 cm instead? Built the dome shape from concrete blocks, wooden pieces, and dampened sand. Soaked newspaper sheets between homebrew and sand. Chose a spherical shape because I want to bake bread in the oven as well. A hardcore Neapolitan oven should have a lower, flatter dome. Note the screw that marks the top of the dome. On it, I placed a sawn-out template in plywood and scraped off the excess sand around it. This way, I achieved a fairly even shape.
Clay powder was a bit tricky to find. Finally, I contacted a mason who fixed tile stoves and bought a sack. However, I needed another half a sack. There I was lucky and found a few bags at Beijers. Slaked lime was purchased at Granngården. Thus, two sacks each of cement, lime, and clay powder (but not all of it was used). Plus 5-6 sacks of sand.
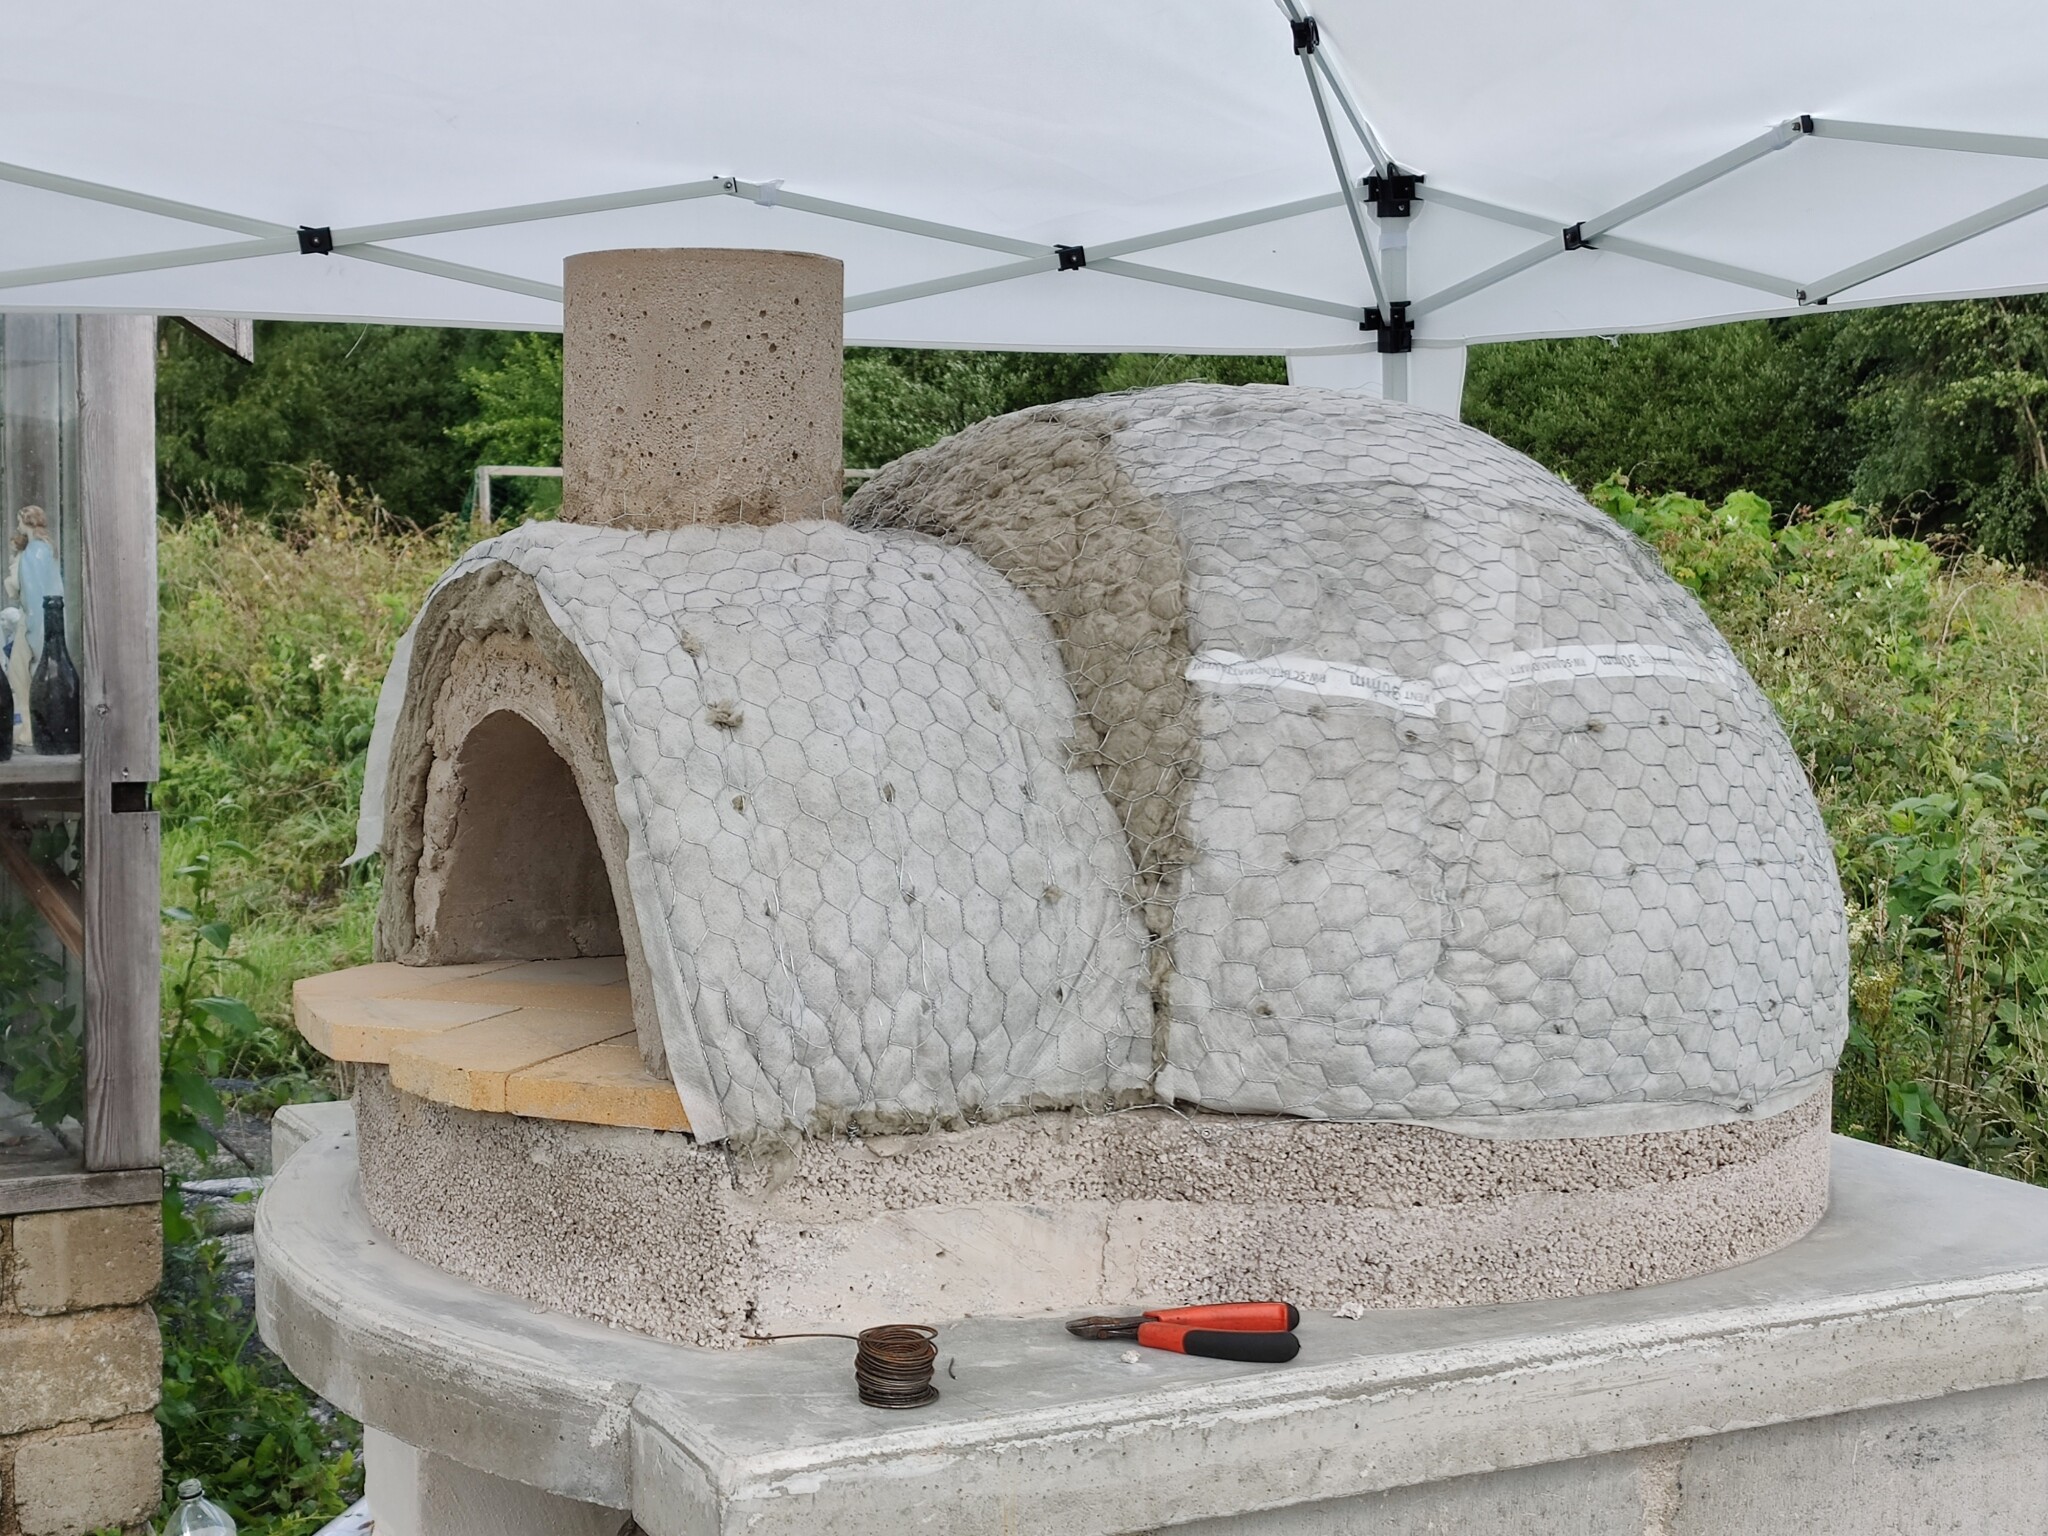
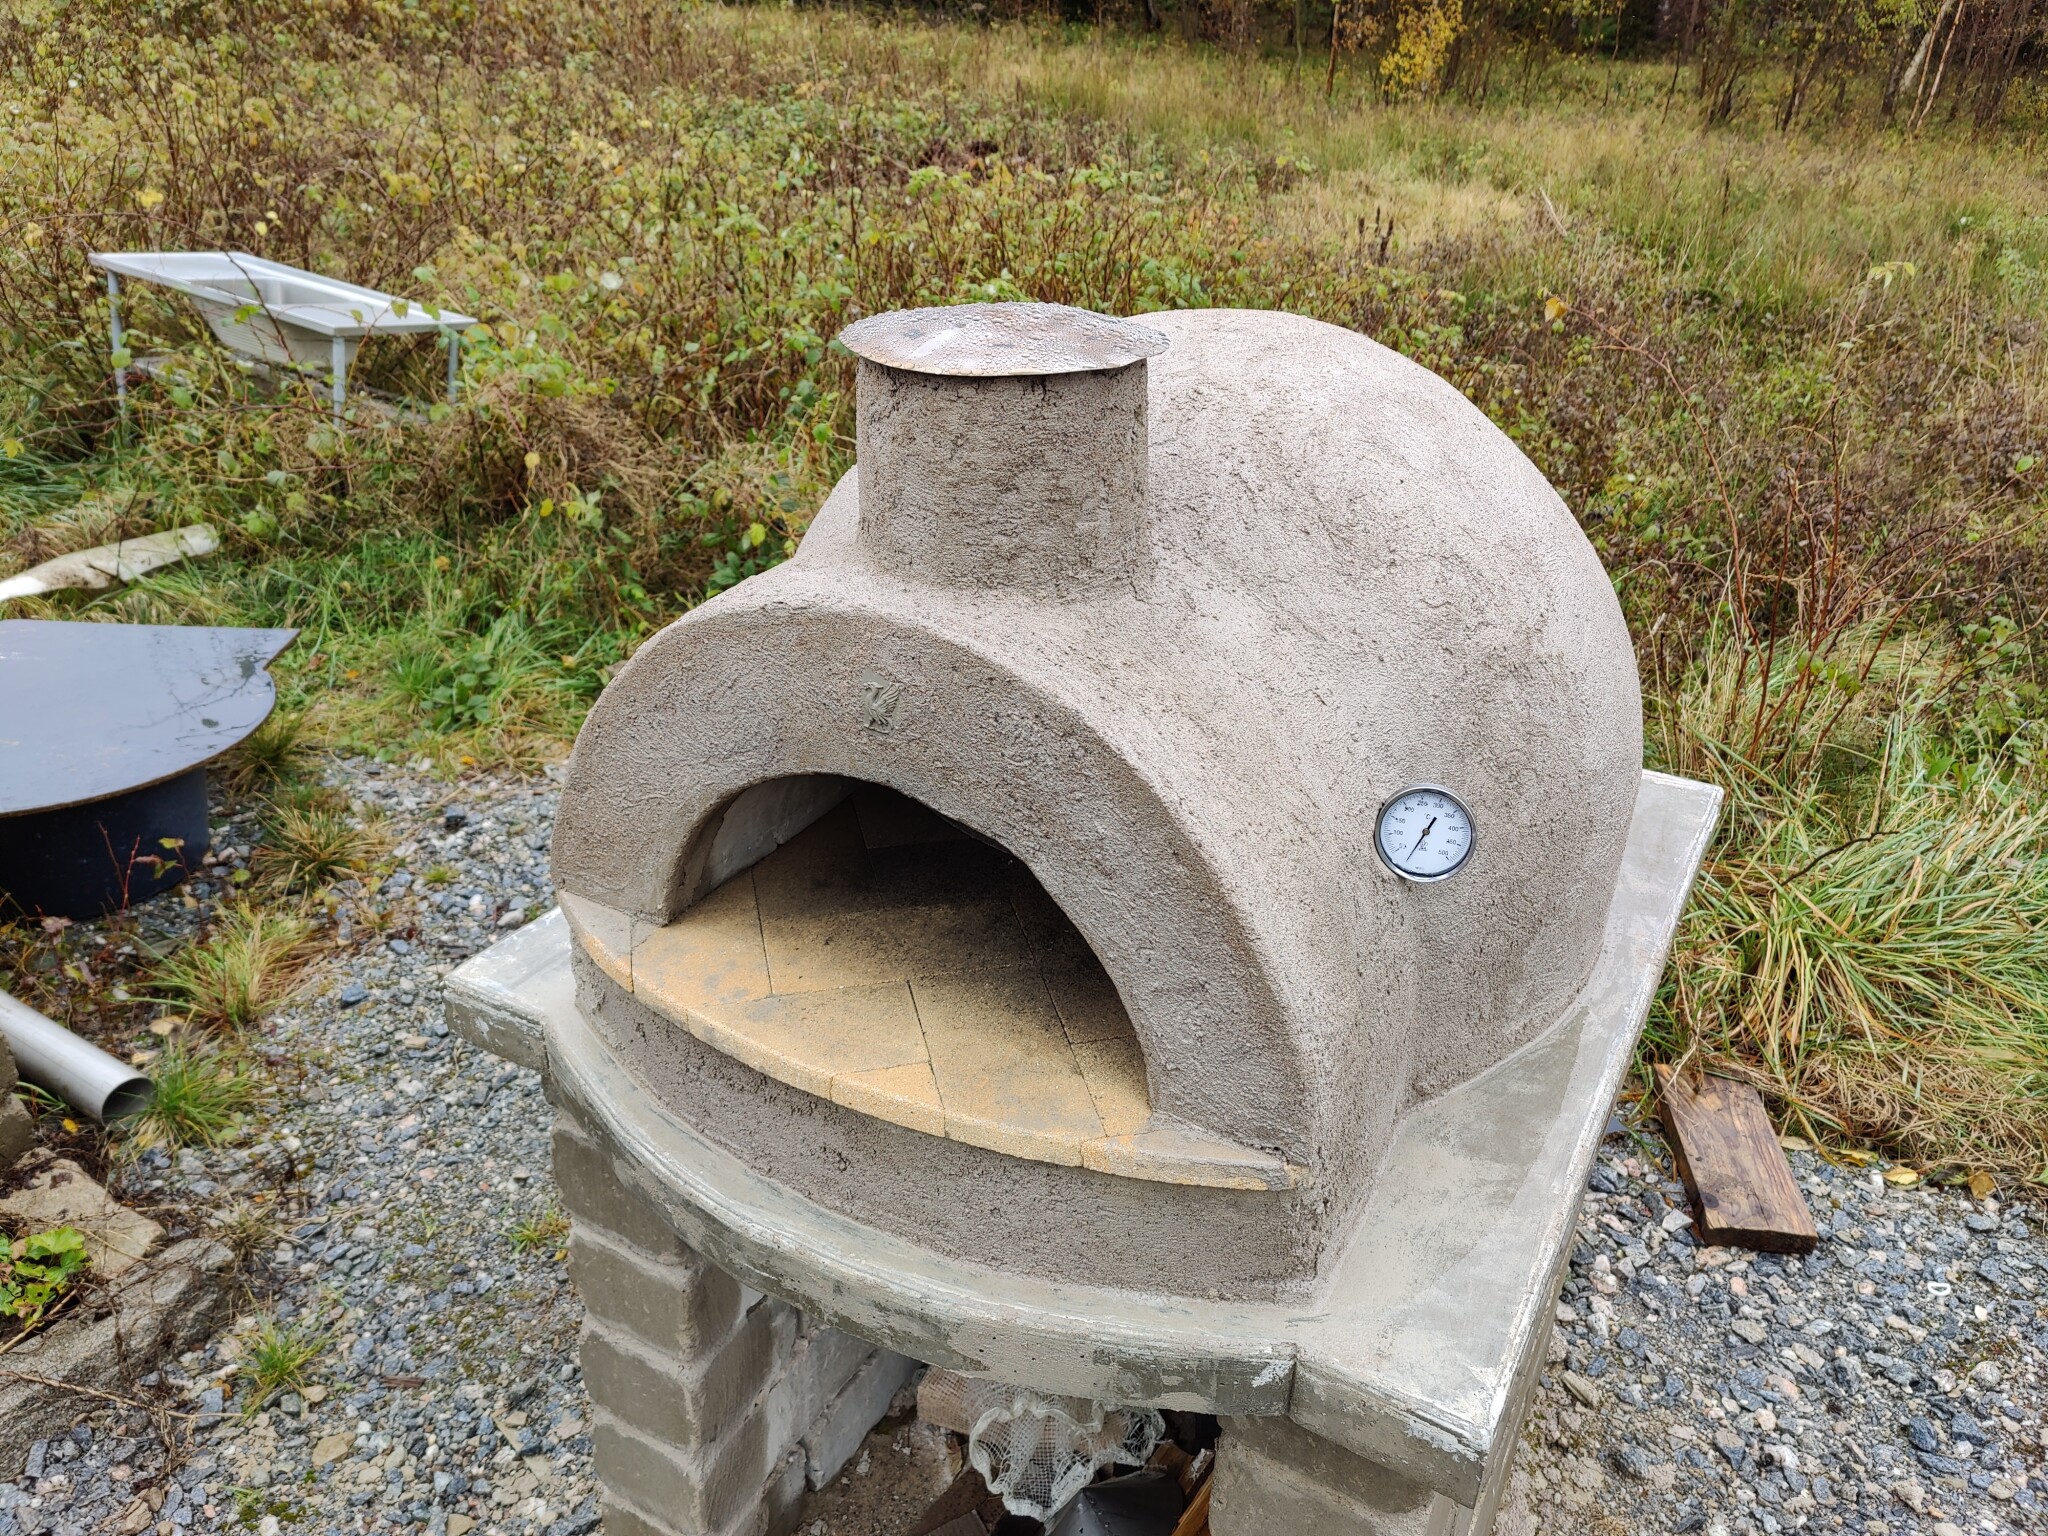
As can be seen, rock wool was used as insulation. I read that it breaks down over time, but it's hard to know how it looks under the plaster. Anyway, after two summers of baking, the top of the oven reaches about 40° on the outside at 500° inside. Unfortunately, I have no direct idea of how long it stays warm. I need to fix an insulated door, then I should be able to bake breakfast bread the following morning...
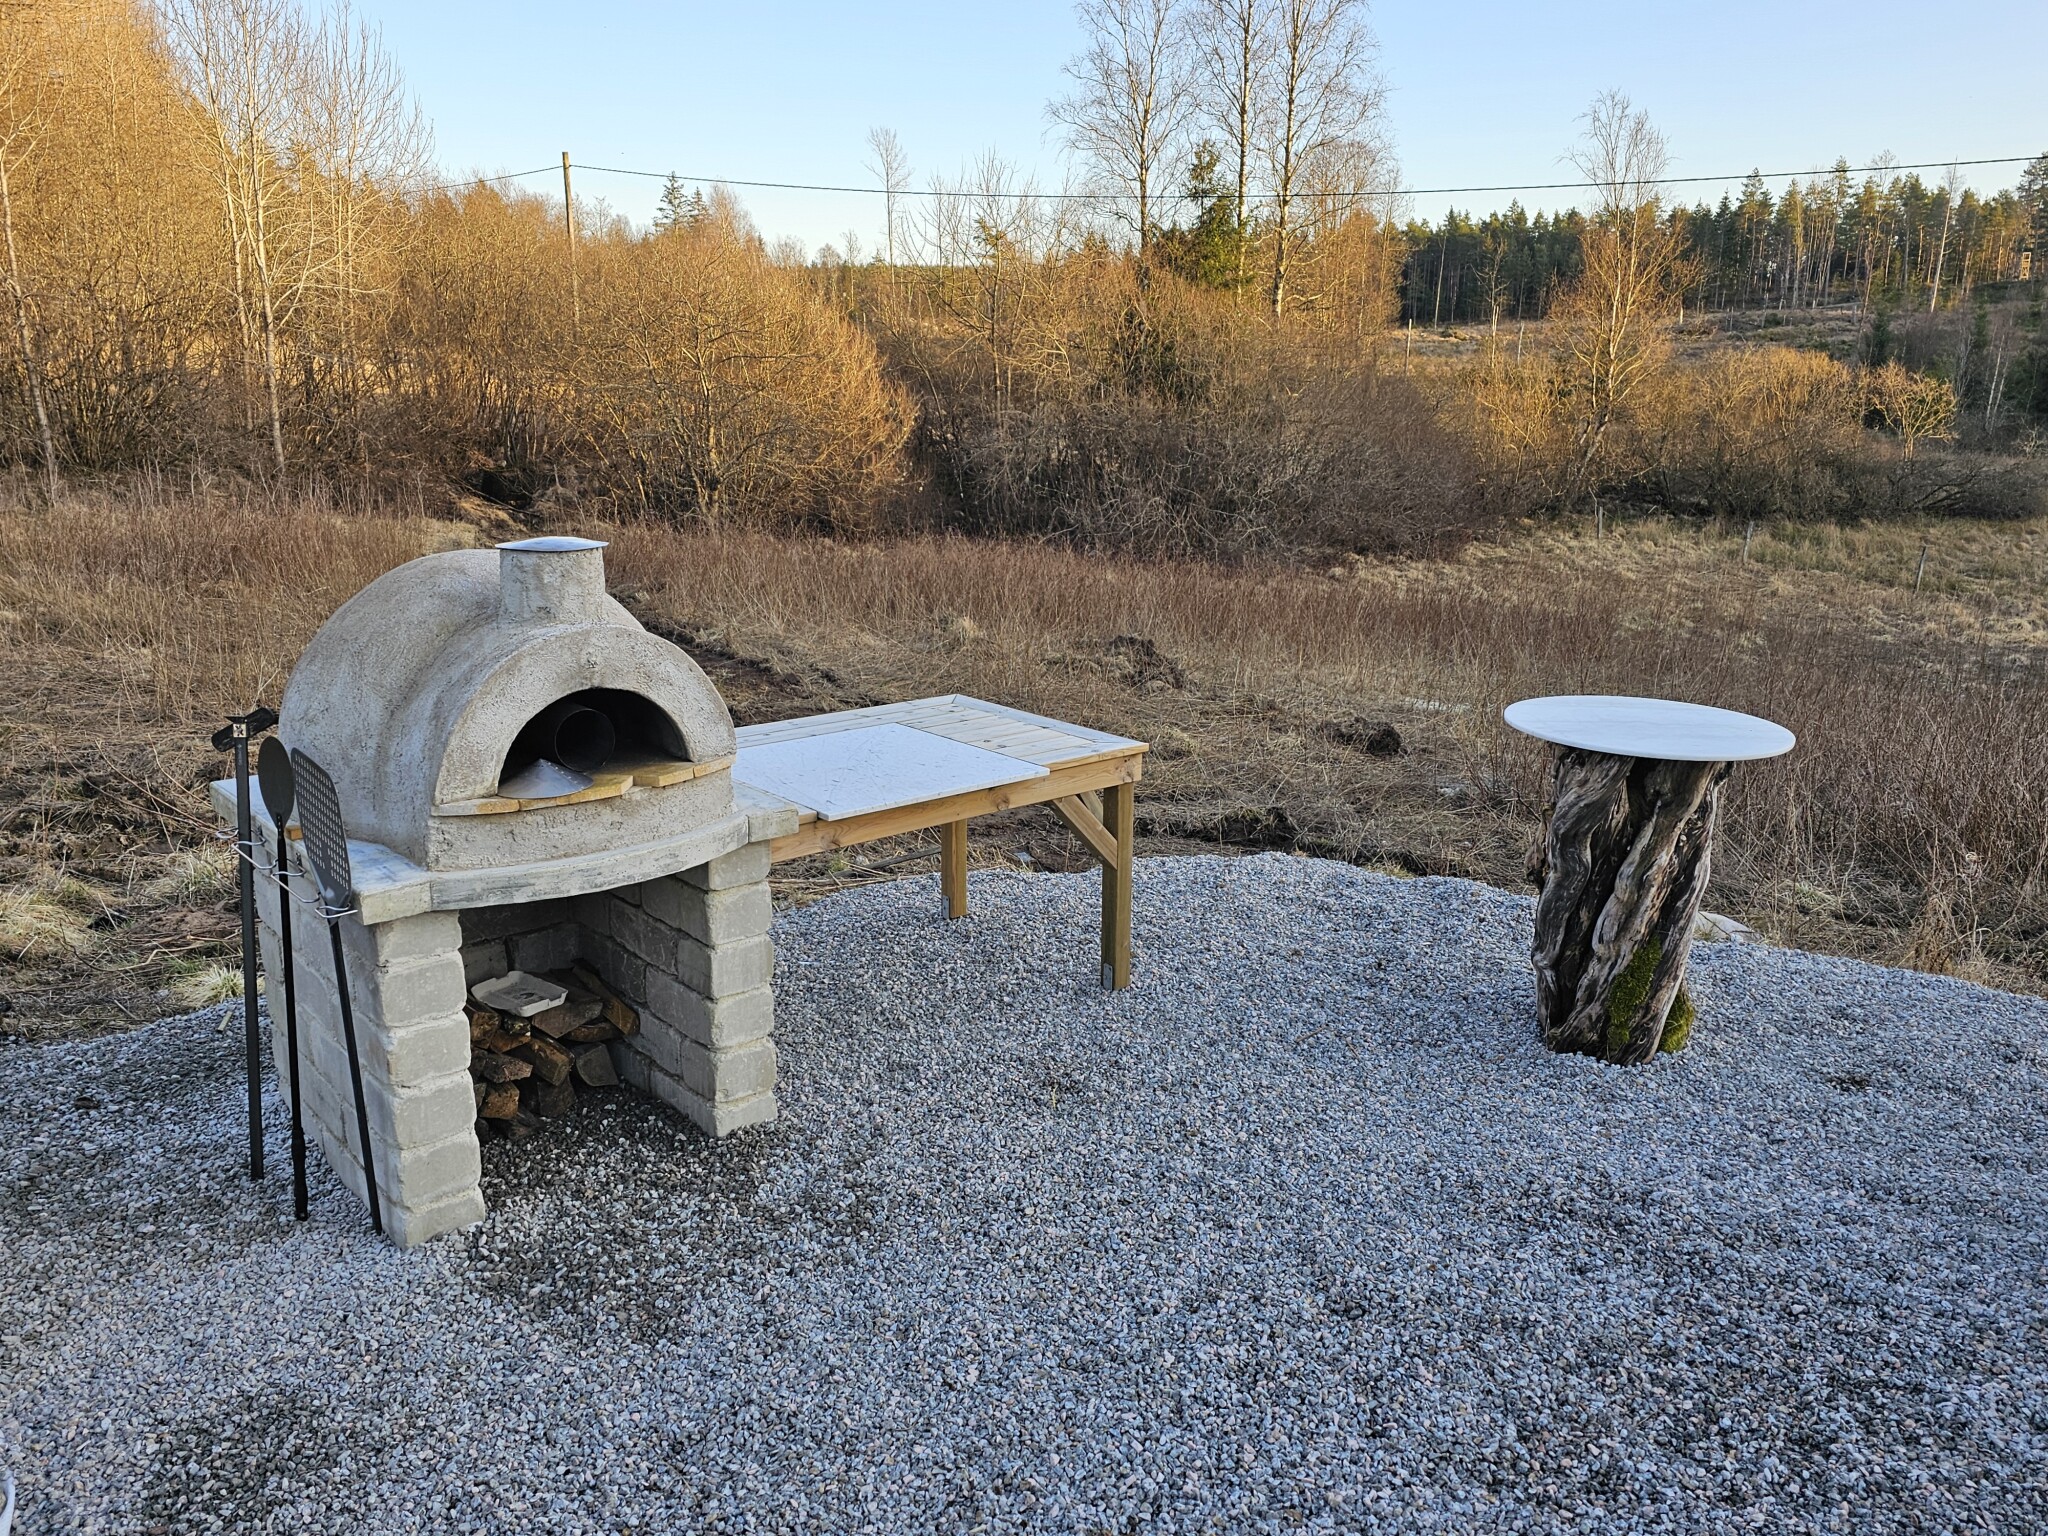
If I built the oven today, I would probably choose an Ø80 cm floor. 70 cm works, but it can get a bit cramped between the wood and the wall. I also miss a "shelf" outside the opening, but that's probably a matter of taste. Some might think it would mostly be in the way?
So, you have both a fun and challenging project ahead. Many evenings I was quite sore...
12 cm of perlite under the biscotti stones, which in turn rest in a bed of sand. The concrete slab doesn't even get warm on the underside. I read before building that firebrick easily gets too hot and burns the pizza crust. Unfortunately, biscotti stone is rather expensive, but a dream to bake on compared to the ceramic stone I have in my gas oven.
70 cm in diameter, probably shouldn't be smaller than that. Perhaps I should have chosen 80 cm instead? Built the dome shape from concrete blocks, wooden pieces, and dampened sand. Soaked newspaper sheets between homebrew and sand. Chose a spherical shape because I want to bake bread in the oven as well. A hardcore Neapolitan oven should have a lower, flatter dome. Note the screw that marks the top of the dome. On it, I placed a sawn-out template in plywood and scraped off the excess sand around it. This way, I achieved a fairly even shape.
Clay powder was a bit tricky to find. Finally, I contacted a mason who fixed tile stoves and bought a sack. However, I needed another half a sack. There I was lucky and found a few bags at Beijers. Slaked lime was purchased at Granngården. Thus, two sacks each of cement, lime, and clay powder (but not all of it was used). Plus 5-6 sacks of sand.
As can be seen, rock wool was used as insulation. I read that it breaks down over time, but it's hard to know how it looks under the plaster. Anyway, after two summers of baking, the top of the oven reaches about 40° on the outside at 500° inside. Unfortunately, I have no direct idea of how long it stays warm. I need to fix an insulated door, then I should be able to bake breakfast bread the following morning...
If I built the oven today, I would probably choose an Ø80 cm floor. 70 cm works, but it can get a bit cramped between the wood and the wall. I also miss a "shelf" outside the opening, but that's probably a matter of taste. Some might think it would mostly be in the way?
Last edited:
Great, thanks for the information and great pictures! Many good small details that I pick up on, will save me trouble and hopefully lead to a better oven! I’ve decided to make a perlite base, about as thick as you did. I've already bought 3cm thick firebricks that I’ll use between the perlite and the pizzas, unfortunately not biscotti but it should work anyway I think.
I found this, seems to be refractory stove clay, it should work I think for my homebrew -> https://sl1nk.com/bmp27vq
The dome itself will consist of 6cm homebrew, 2.5cm ceramic fiber, 3cm perlite (I overzealously bought a lot last year when I thought I would make the whole dome in perlite on a pilates ball, so I figured I might as well use it for some extra insulation, considering that the fiber is relatively thin) and then finish with a couple of centimeters of render.
I also have a meter-high Ø18cm stovepipe that I will use as a chimney. Perhaps on the thicker side, but some seem to prefer a slightly larger diameter, so I hope it works out well. I'll be casting a base for it to stand on.
I see in an earlier thread you wrote in that you bought 20kg of clay for your oven and had a little left over, was there enough left for a 6cm homebrew layer if I instead make the oven Ø75cm would you think?
What are the dimensions of your opening? Width, height, depth?
My flue pipe is Ø150 mm and it works well. The pipe doesn't have the same function as a chimney, for instance in an open fireplace, which helps to draw the fire. Here it's solely about keeping the smoke out of the cook's face. In that case, I think rather too large than the opposite. 180 mm will work excellently.N naaaf said:Great, thanks for the information and good pictures! Many good little details that I'm picking up, will save me hassle and hopefully lead to a better oven! I'm going to make a perlite bottom, roughly as thick as you did. Then I already bought 3cm thick chamotte stones which I will use between the perlite and the pizzas, unfortunately not biscotti but it should work anyway, I think.
I looked this up, seems to be refractory tile stove clay, it should work I think for my homebrew -> [link]
The dome itself will consist of 6cm homebrew, 2.5cm ceramic fiber, 3cm perlite (I impulsively bought a lot last year when I thought of making the whole dome out of perlite on a pilates ball, so I thought I might as well use it for a bit of extra insulation, since the fiber is relatively thin) and then finish with a couple of cm render.
I also have a meter-high Ø18cm flue pipe that I'll use as a chimney. Maybe a bit large, but some seem to prefer a larger diameter, so I hope it will be good. Planning to cast a base that it all stands on.
I see in an earlier thread you wrote in that you bought 20kg of clay for your oven and that there was some left over, was it enough left over to get a homebrew layer of 6cm if I instead make the oven Ø75cm would you think?
What is the size of your entrance? Width, height, depth?
I have no experience with chamotte stones. You'll surely "learn" your oven and find temperatures that work for you.
I managed to crack the flange for the flue pipe not less than twice, so it took a bit more homebrew than planned. I would guess that 20 kg is enough for a slightly larger dome than mine.
That's right. The opening is 48x21 cm. That is, not strictly semicircular but like a segment. The length of the tunnel is 28 cm at the bottom (see picture) and 32 cm at the top.
I read somewhere that the height of the tunnel roof should be 60% of the dome height. It meant the opening would have been unnecessarily narrow if I had made it as a semicircle, so I widened it a bit.
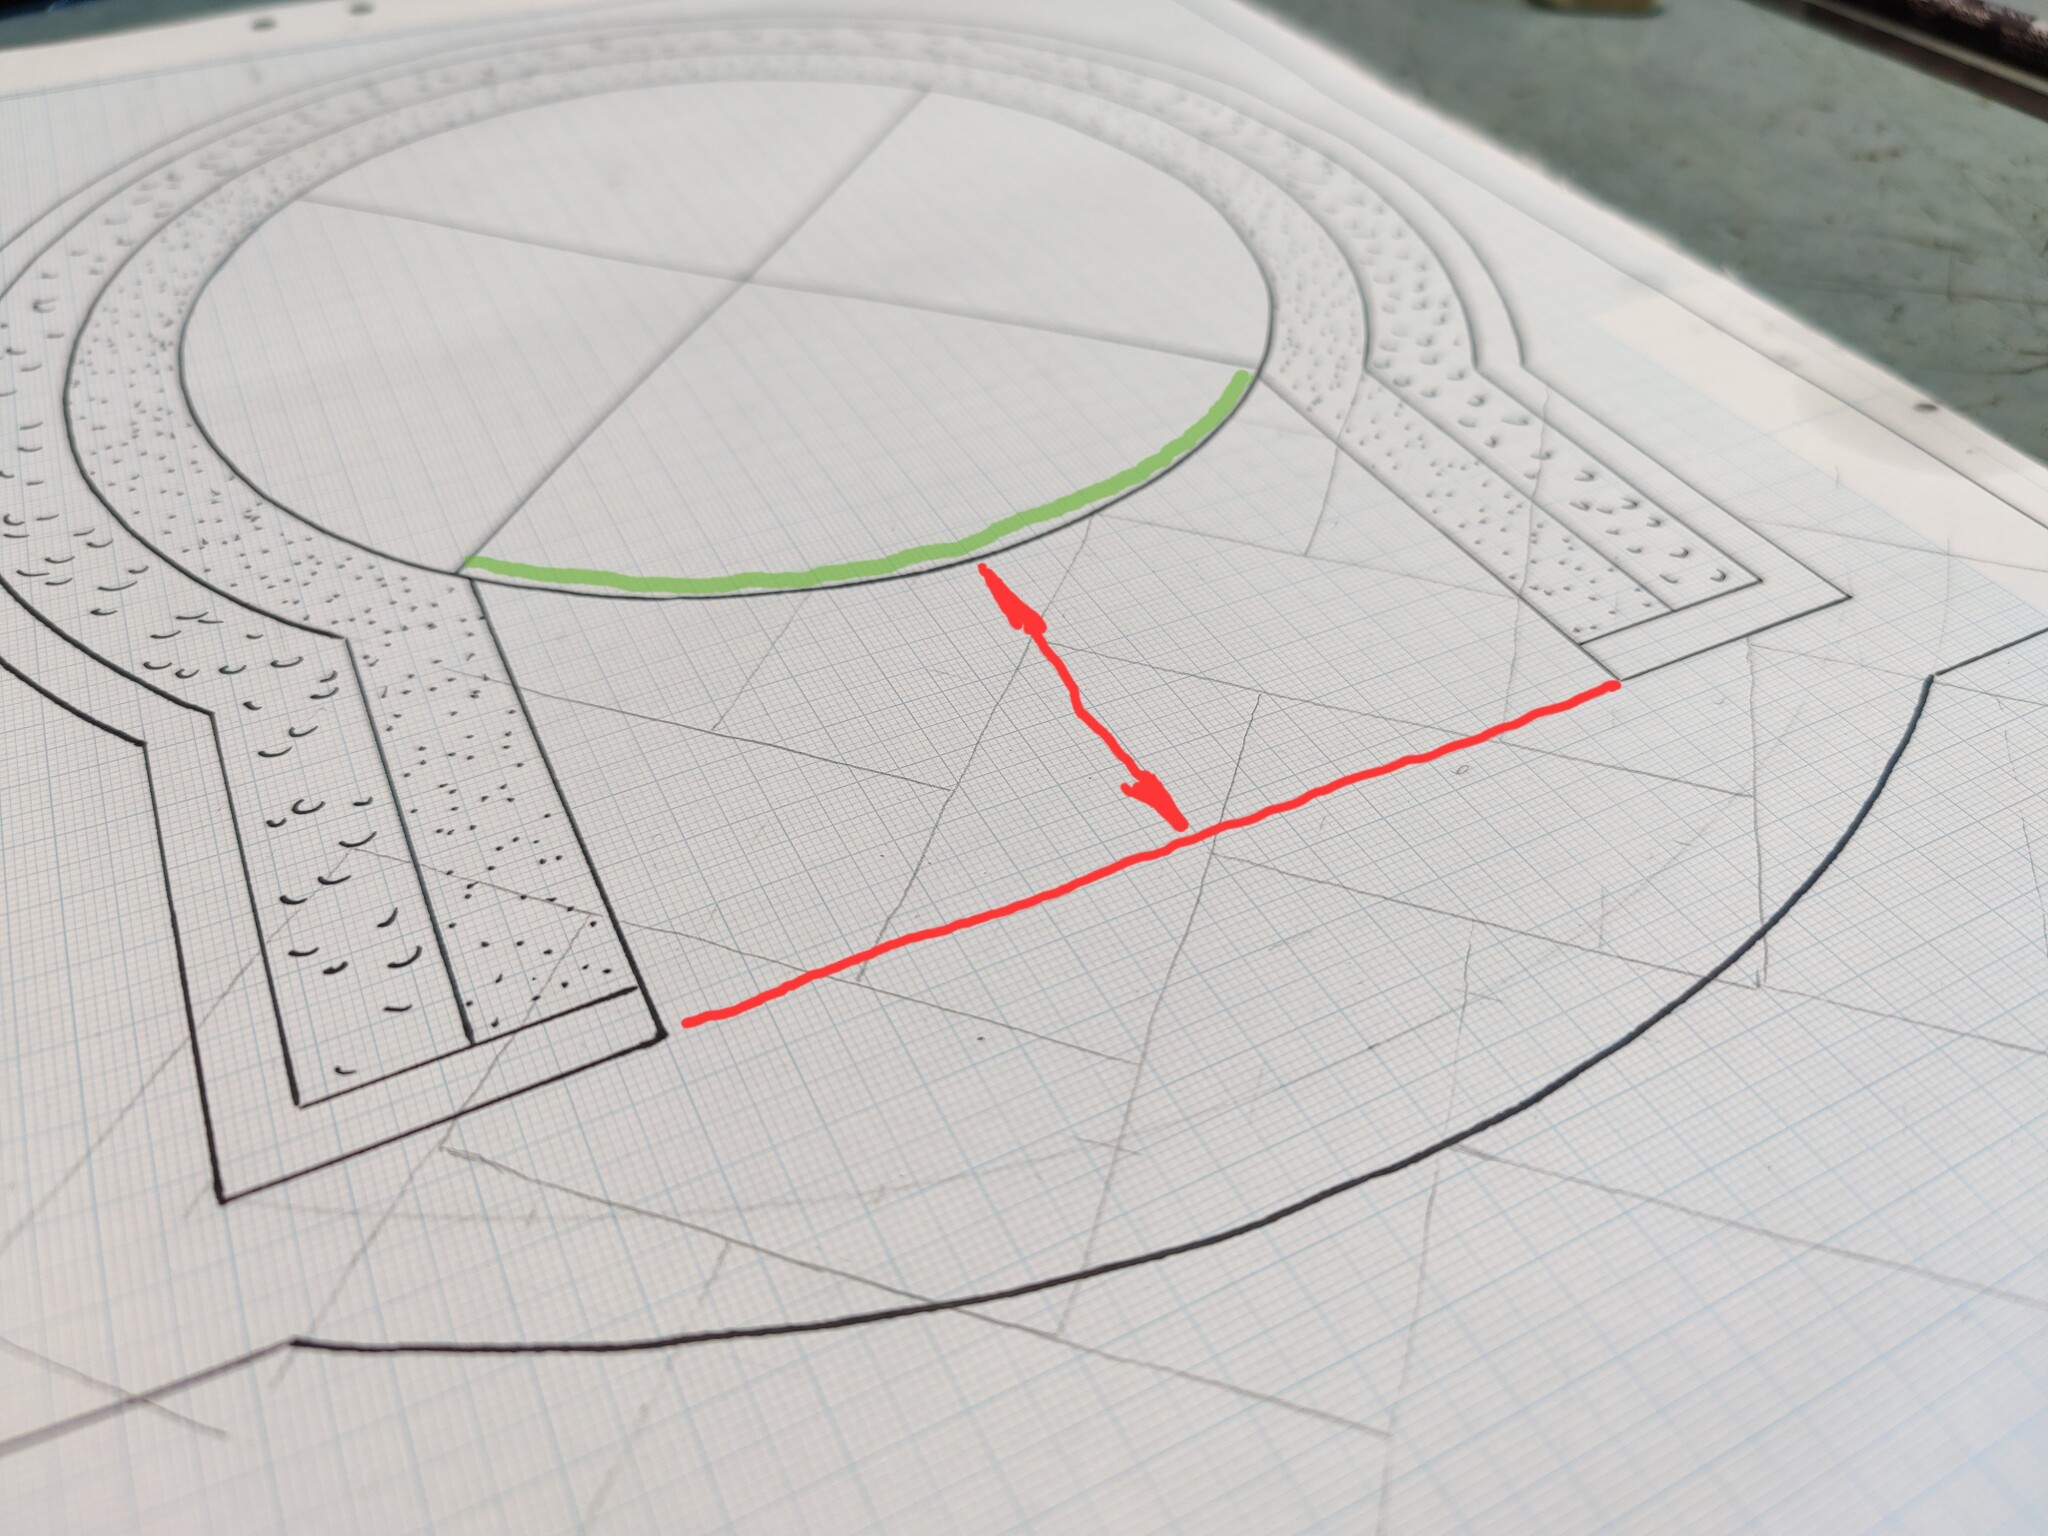
Remember to lay the stones in the floor so that none of them end up "crosswise." The stones that inevitably end up crosswise (marked in green on the picture) should be laid a few millimeters lower. If the shovel gets stuck when you're sliding in the pizza, it won't be a pleasant dinner...
I read somewhere that the height of the tunnel roof should be 60% of the dome height. It meant the opening would have been unnecessarily narrow if I had made it as a semicircle, so I widened it a bit.
Remember to lay the stones in the floor so that none of them end up "crosswise." The stones that inevitably end up crosswise (marked in green on the picture) should be laid a few millimeters lower. If the shovel gets stuck when you're sliding in the pizza, it won't be a pleasant dinner...
Last edited:
Great, thanks! Yes, I also read that about 60% was a good height for the tunnel. I'll aim to widen it a bit then, it makes it easier to maneuver as well.Exactly. The opening is 48x21 cm. That is, not strictly semi-circular but rather like a segment. The length of the tunnel is 28 cm at the bottom (see image) and 32 cm at the top.
I read somewhere that the height of the tunnel roof should be 60% of the dome height. This meant the opening would have been unnecessarily narrow if I had made it as a semi-circle, so I widened it a bit.
Remember to lay the stones on the floor so none of them end up "crossways." The stones that inevitably end up crossways (marked in green on the image) you lay a millimeter lower. If the shovel gets stuck when you're trying to slide in the pizza, it won't be a pleasant dinner...
Good point about the height difference, yet another detail that's incredibly frustrating to realize when everything is in place
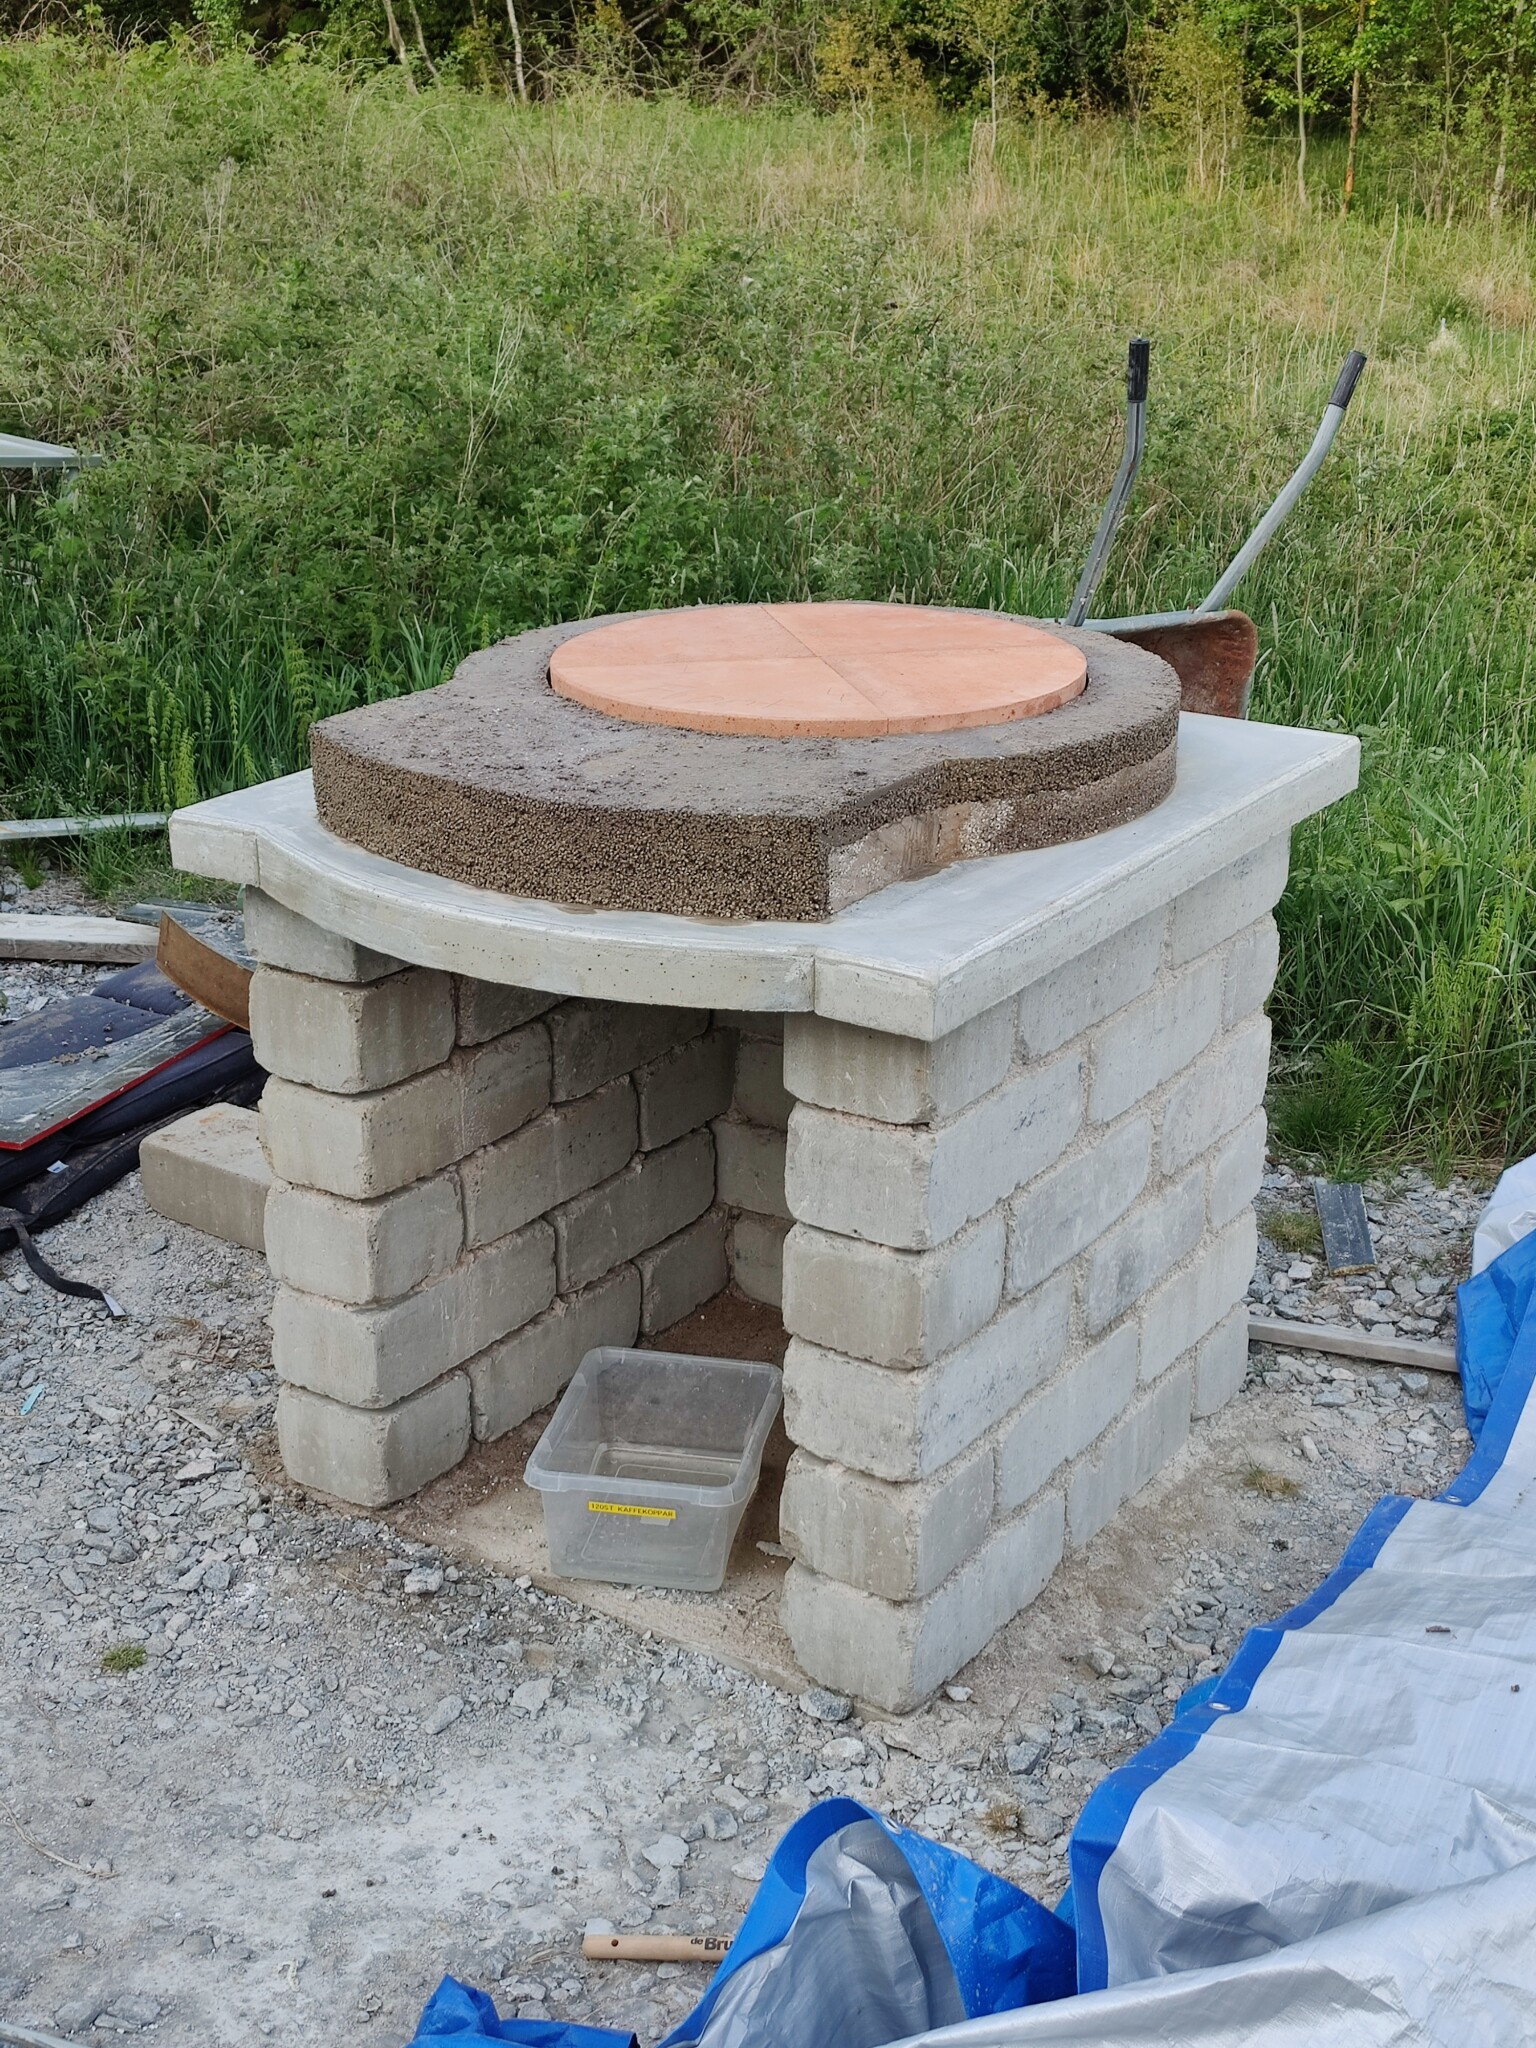
.I'll try casting the perlite base over the weekend if I have time. Let's see if I can get a good picture!
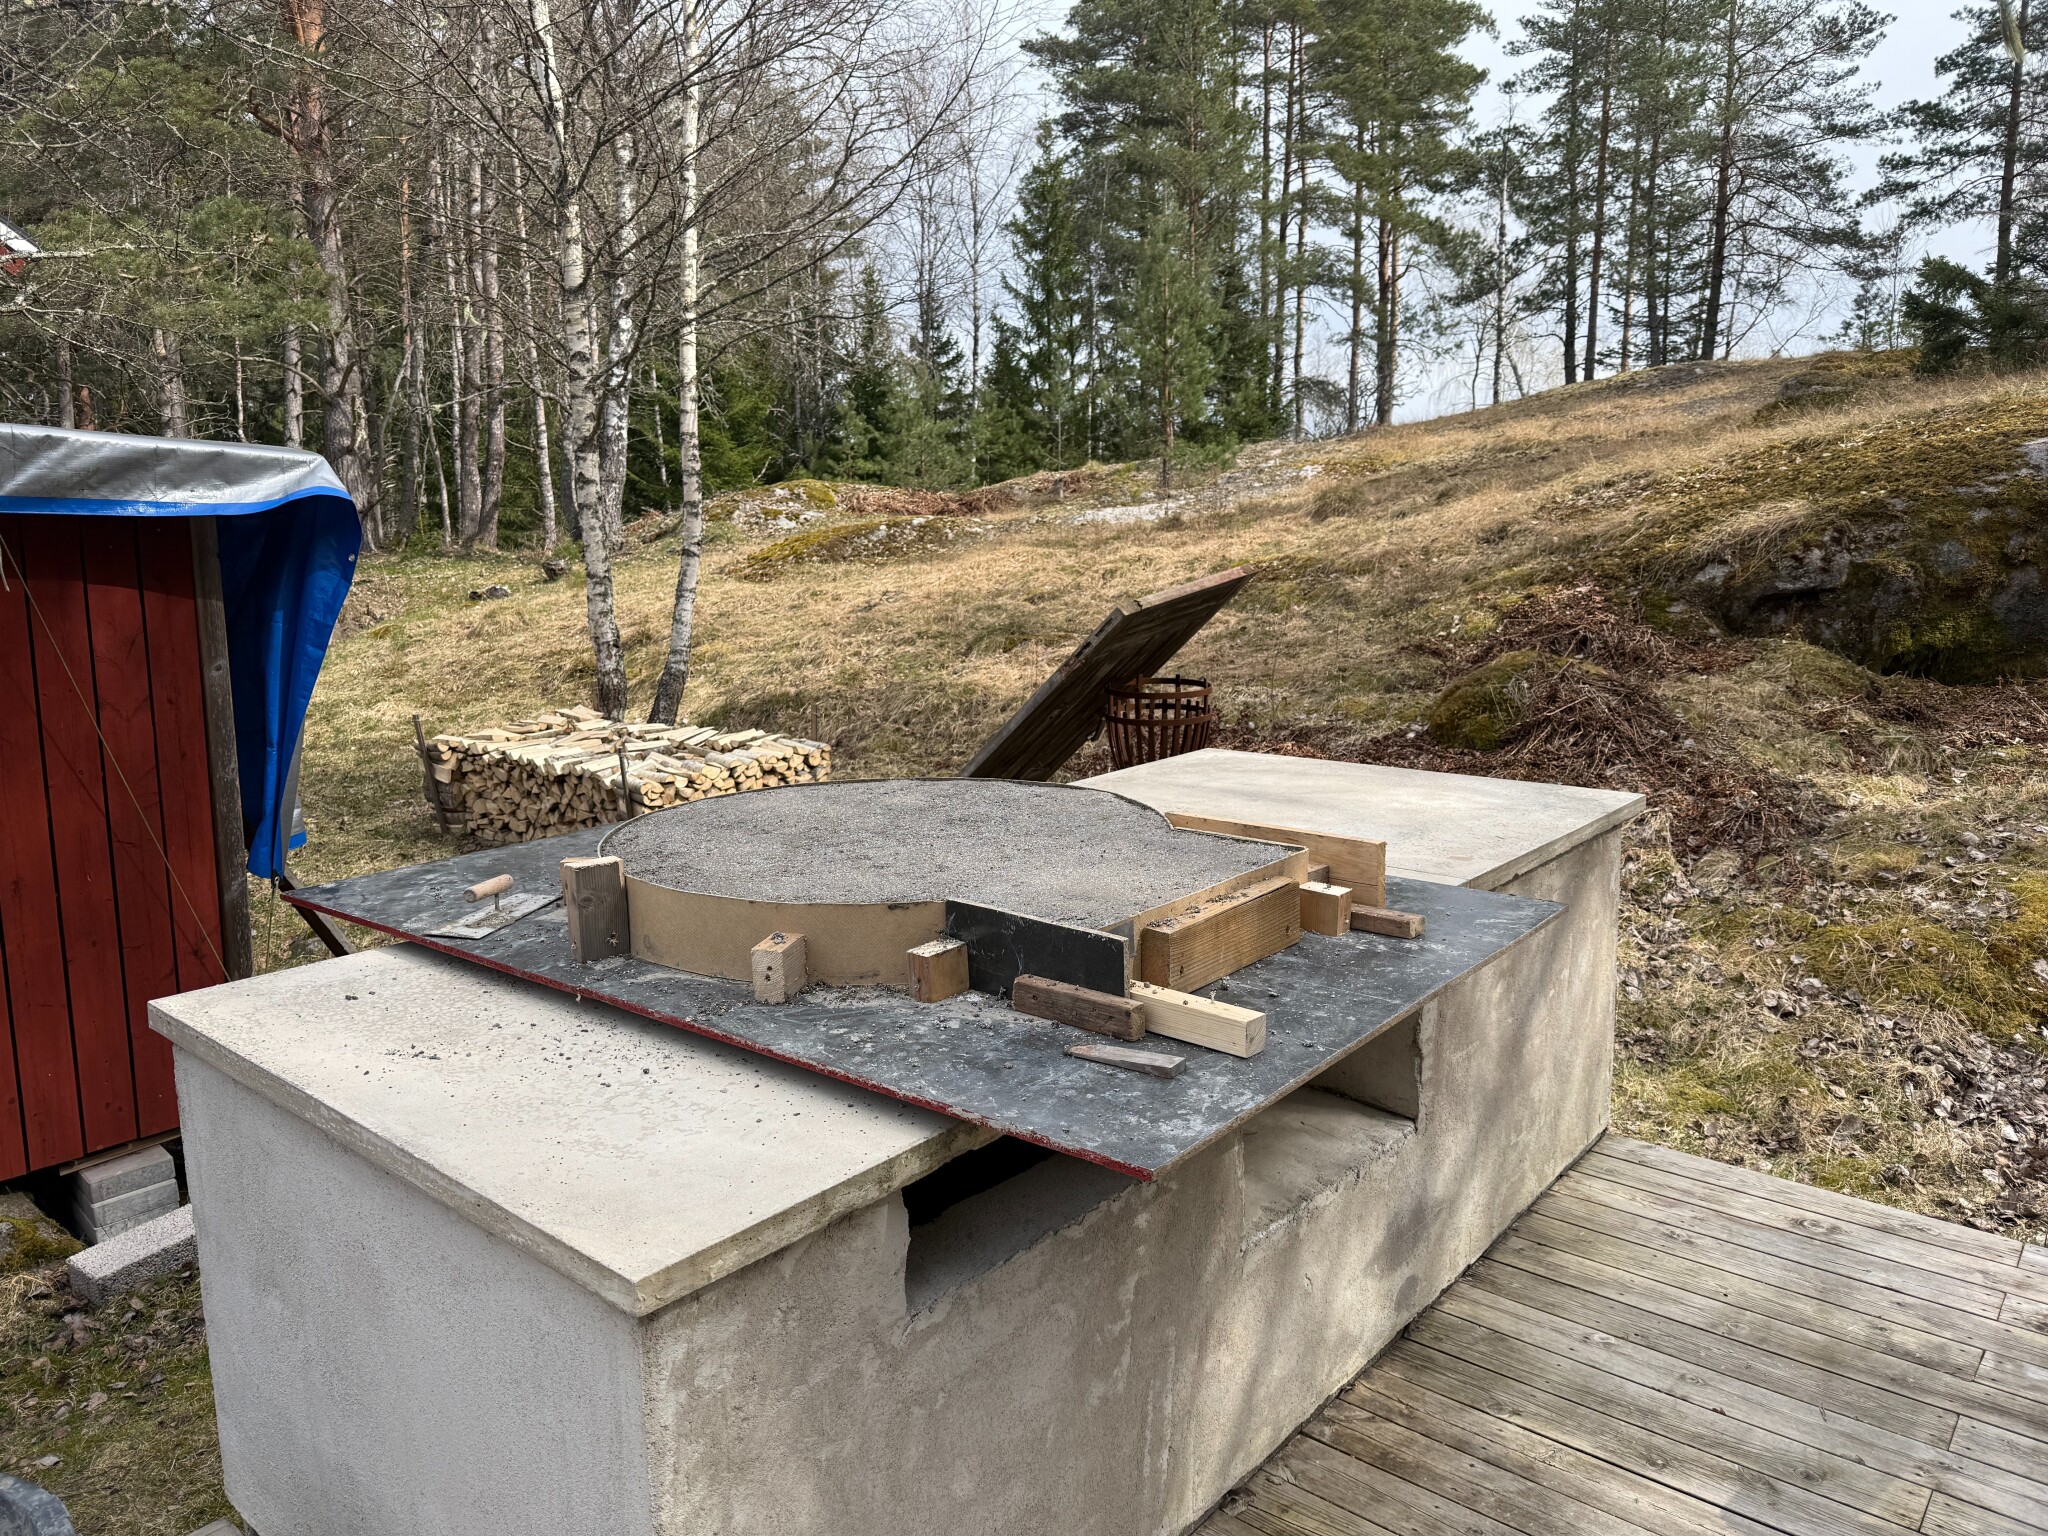
Det blev till att gjuta perlitbotten i helgen ändå! 10cm tjockt, 5:1 perlit:cement, ungefär. Den ligger och härdar nu på betongfundamentet (se bild) som vi gjöt, murade och putsade för ett par somrar sedan för att ha som grund för ett utekök. Pizzaugnen kommer att stå längst ut till höger.
Landade till slut i / ritade på en innerdiameter på 75cm. Totalt blir ugnen ungefär en meter i diameter då vi siktar på 12cm tjocka väggar.
Kommer försöka bli klar i sommar med bygget, men det blir till att jobba mellan varven med småbarn, semesterbestyr och livet i övrigt, så får se hur frekvent det uppdateras här.
Landade till slut i / ritade på en innerdiameter på 75cm. Totalt blir ugnen ungefär en meter i diameter då vi siktar på 12cm tjocka väggar.
Kommer försöka bli klar i sommar med bygget, men det blir till att jobba mellan varven med småbarn, semesterbestyr och livet i övrigt, så får se hur frekvent det uppdateras här
.
Förresten @gazzton, har du möjligen någon guide att peka på kring hur homebrew-bruket bäst bör blandas och hanteras? Eller bara några fler goda råd? Har alla komponenter nu och tänker försöka få den delen gjord inom ett par veckor.
Om du också har lite mer detaljer kring hur du gjorde med skorstenen och stos till den så vore det toppen!
Tack på förhand!
Har alla komponenter nu och tänker försöka få den delen gjord inom ett par veckor.Om du också har lite mer detaljer kring hur du gjorde med skorstenen och stos till den så vore det toppen!
Tack på förhand!
Last edited:
Jag får leta lite i minnet nu, det är trots allt tre år sedan...N naaaf said:
Jag blandade sand, cement, lerpulver och kalk enligt 3:1:1:1 per volym. Sedan mixade jag allt med lagom mycket vatten. Konsistensen skall vara relativt hård. Jag plockade sedan upp "mockor" med näven och placerade på sandformen, använd gärna diskhandskar. Först ett skift längst ner och jobbade mig därefter uppåt. När jag portionerat ut allt jämnade jag till så gott det gick med blöta handskar.
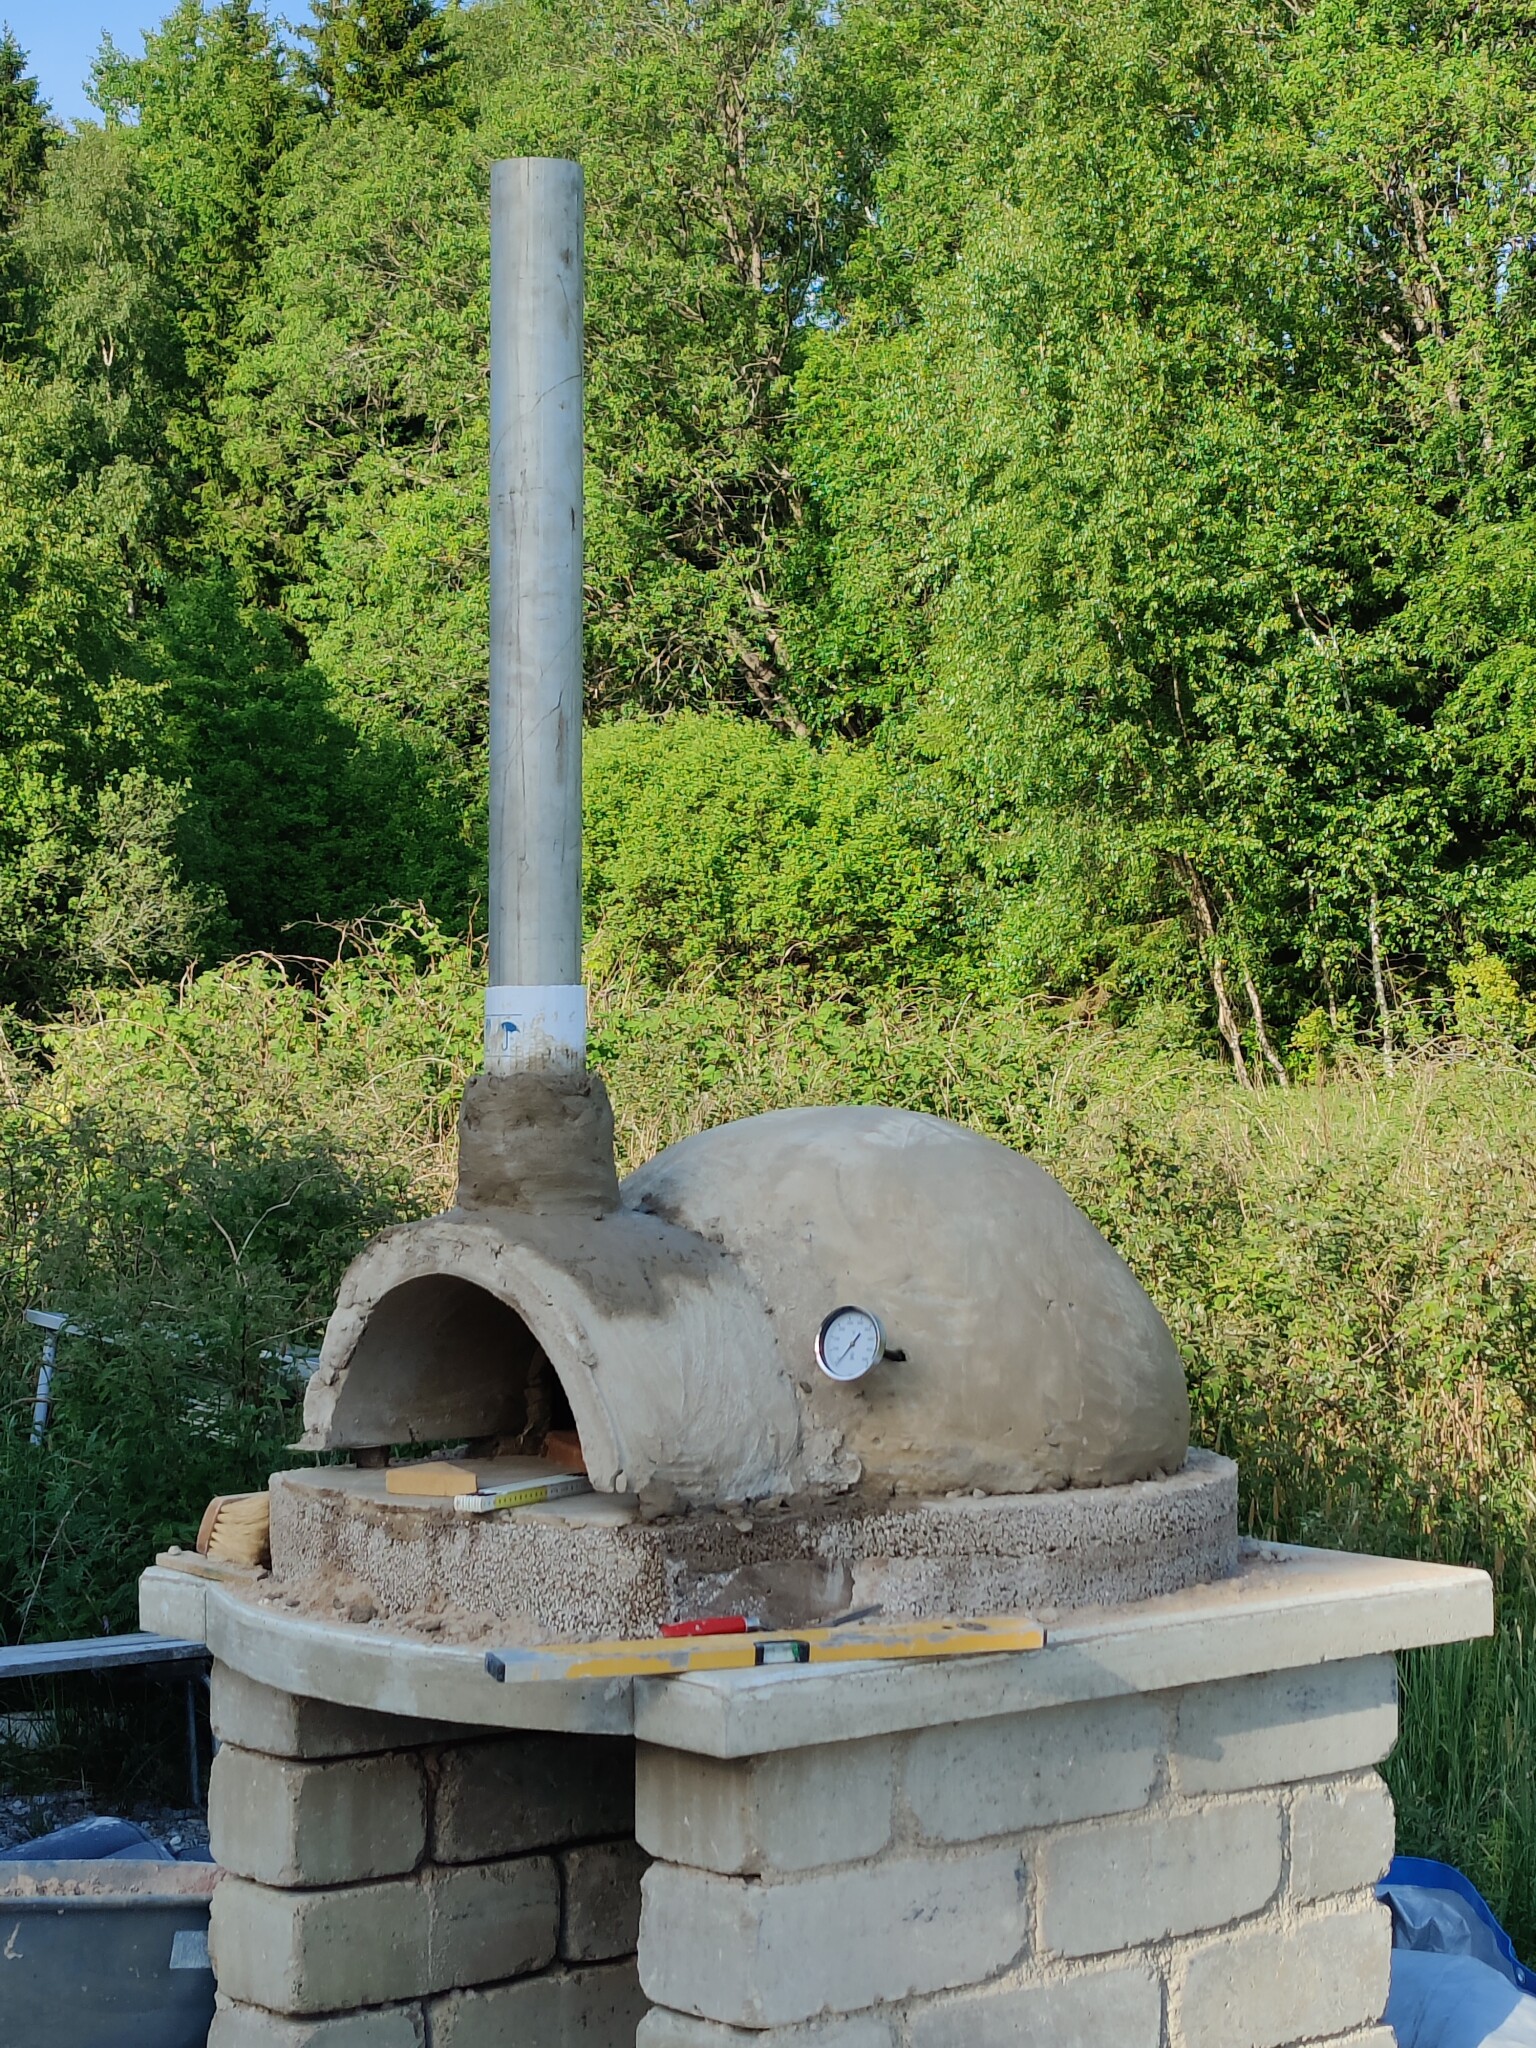
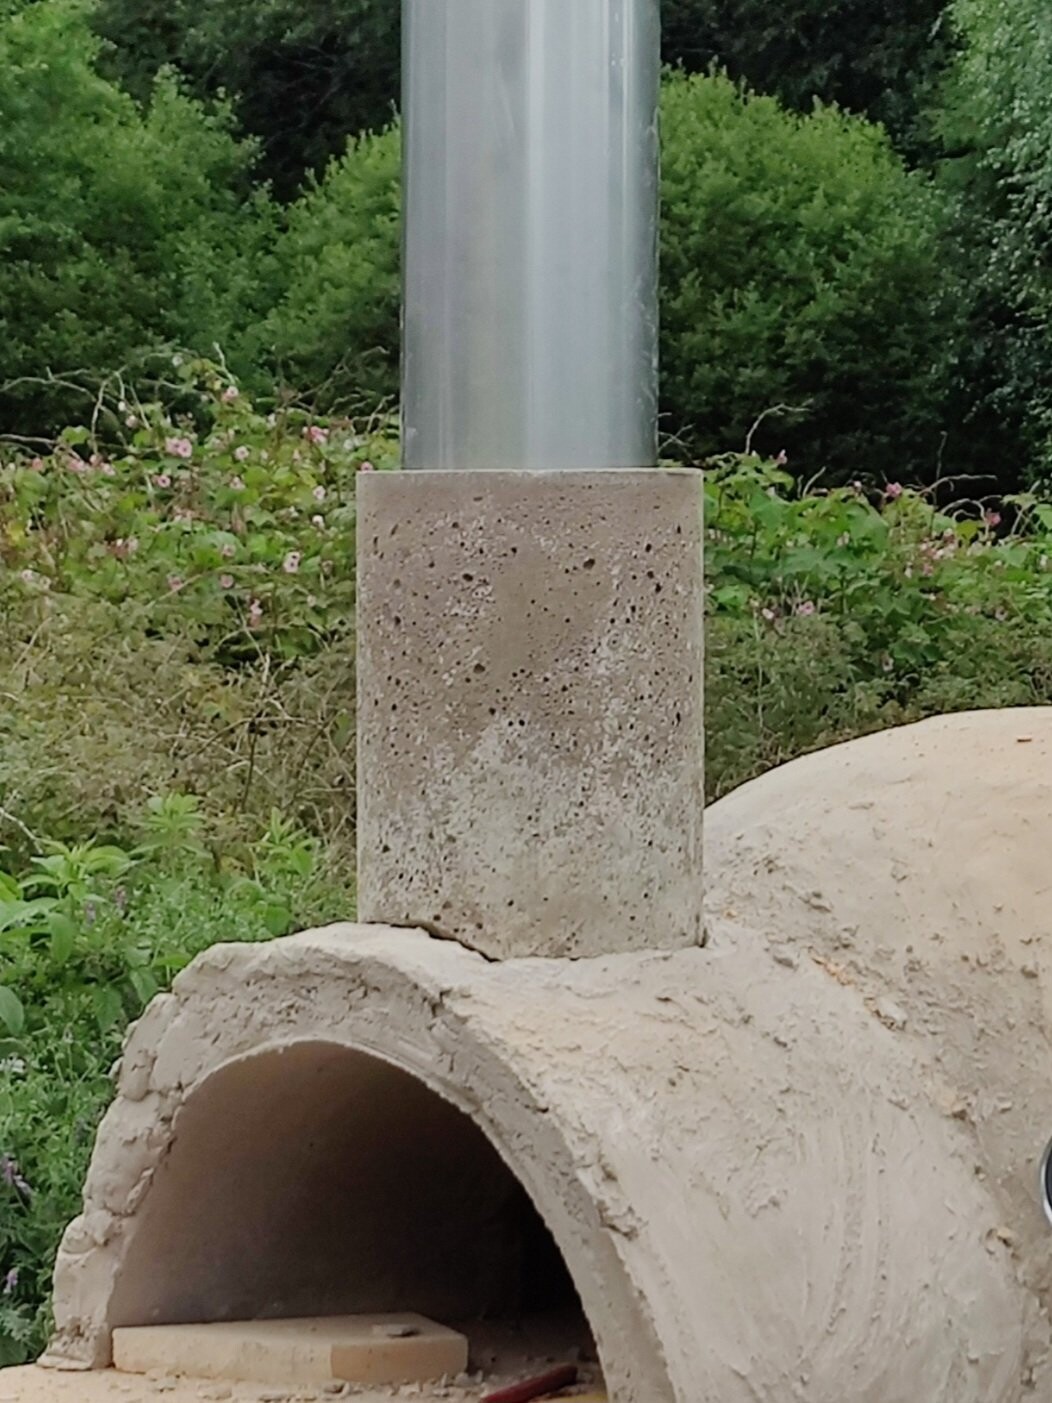
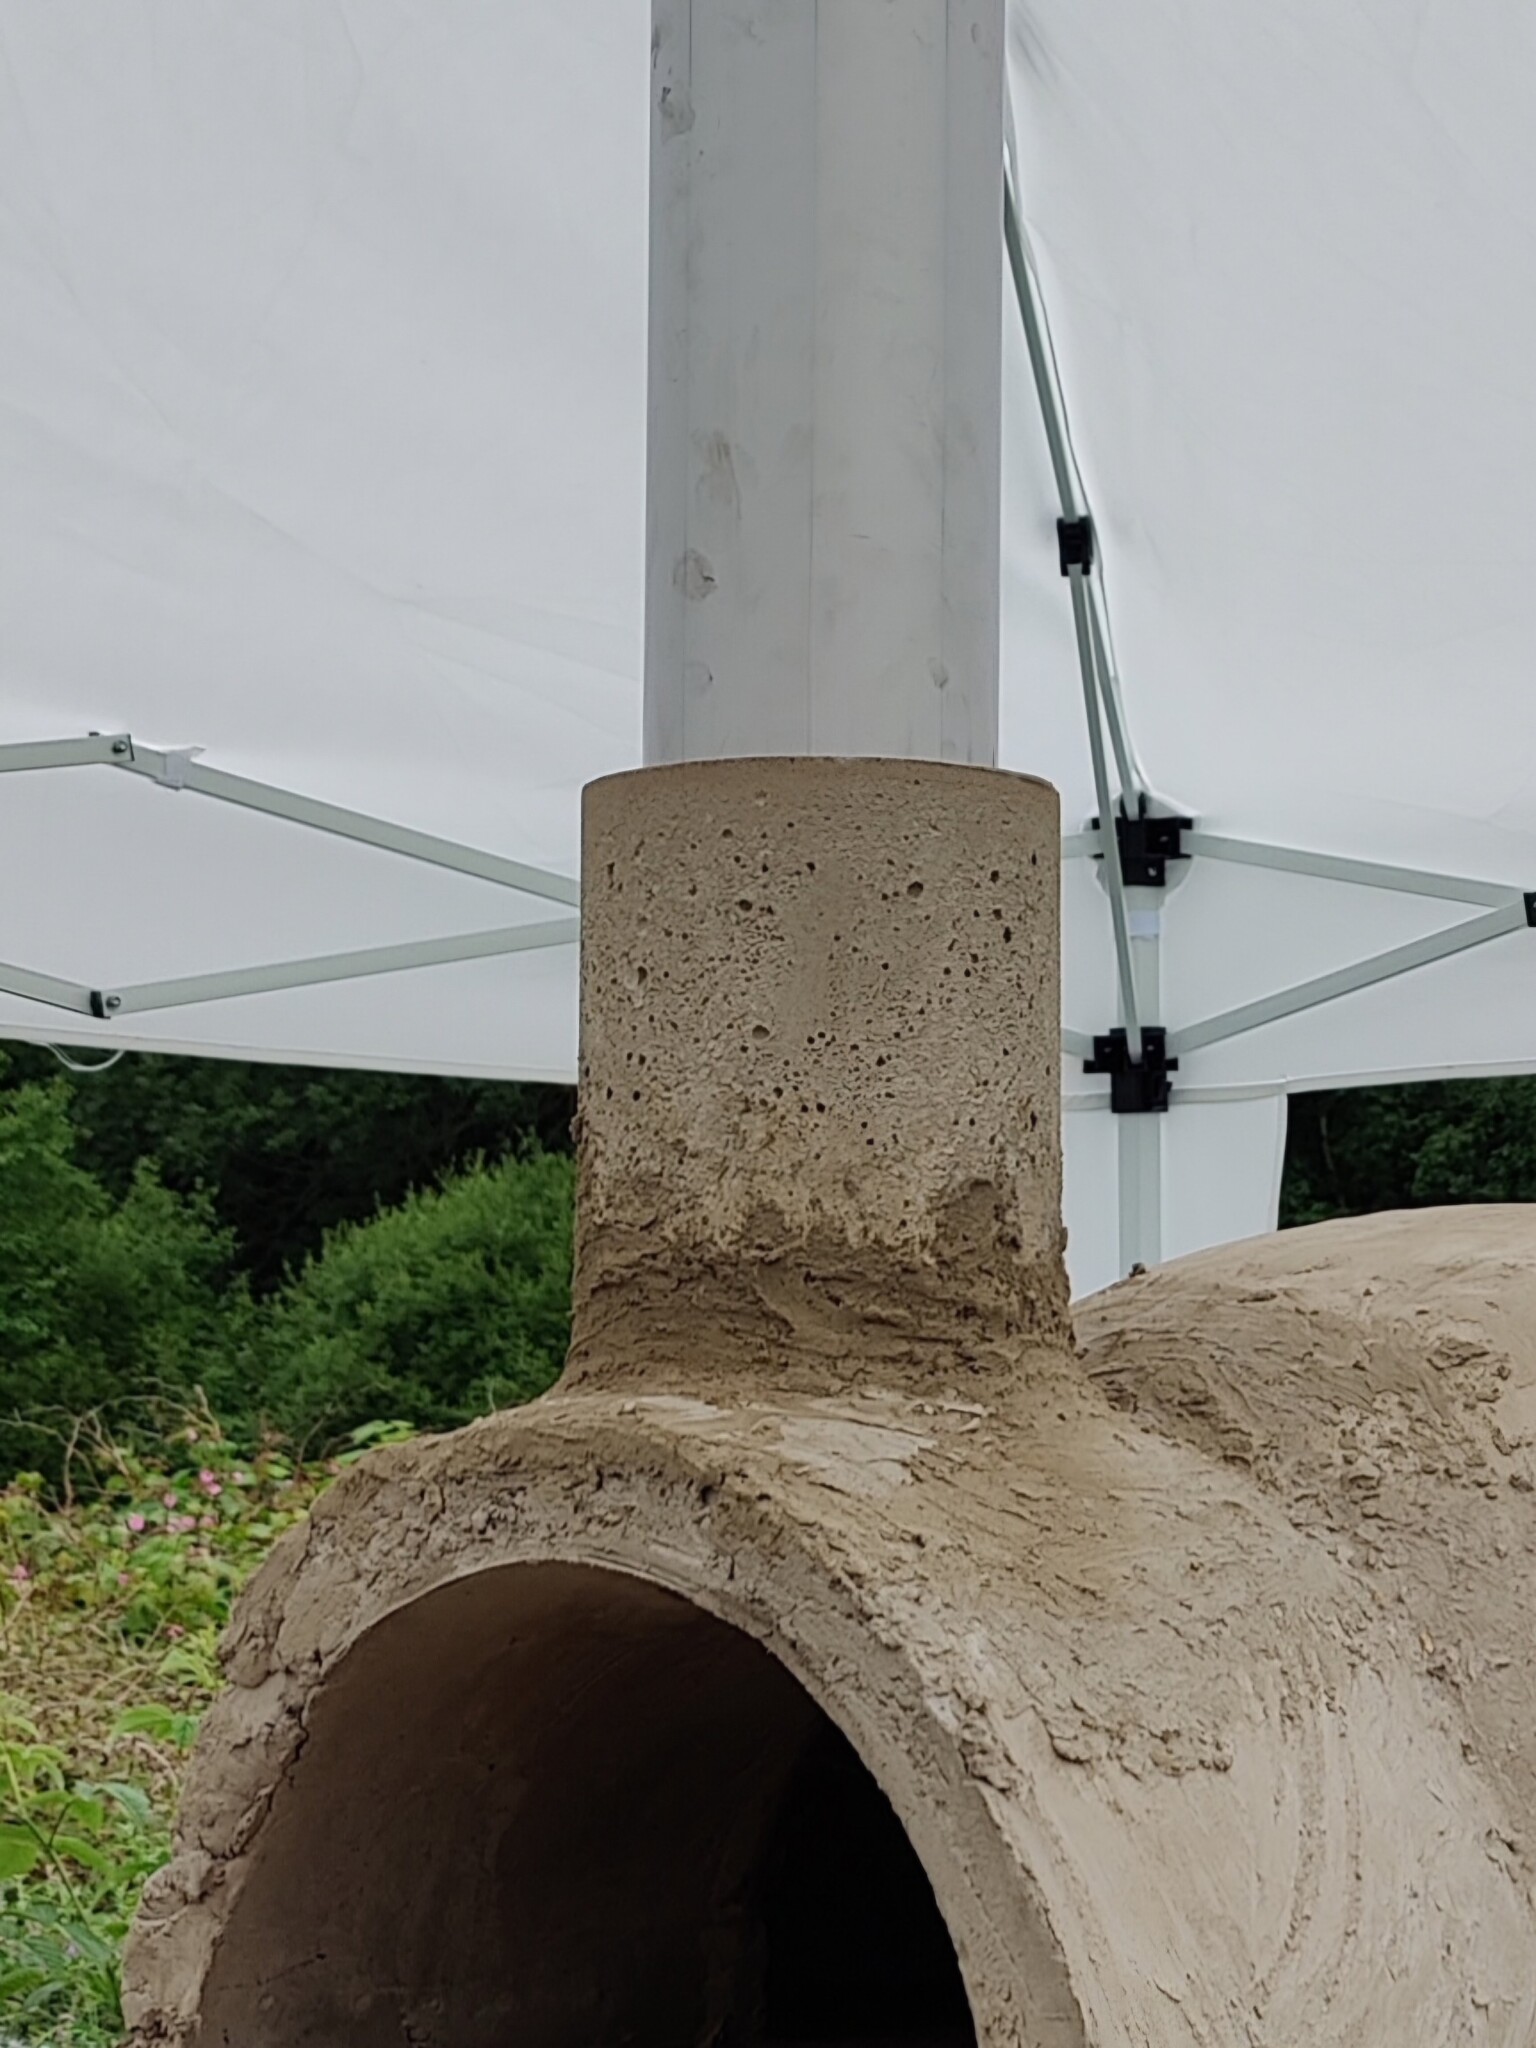
När gjutningen utfördes visade det sig att jag använt för snävt utrymme mellan rör och stos. Röret satt fast och jag fick helt enkelt knäcka loss det med stos och allt.
Jag gjöt sedan en separat stos med generösare utrymme till röret. Denna slipades till och formades efter bästa förmåga och "limmades" på plats med ny homebrew. Det blev bra men det bästa är nog att få till stosen ihop med kupolen i en och samma gjutning.
Förstår detJag får leta lite i minnet nu, det är trots allt tre år sedan...
Jag blandade sand, cement, lerpulver och kalk enligt 3:1:1:1 per volym. Sedan mixade jag allt med lagom mycket vatten. Konsistensen skall vara relativt hård. Jag plockade sedan upp "mockor" med näven och placerade på sandformen, använd gärna diskhandskar. Först ett skift längst ner och jobbade mig därefter uppåt. När jag portionerat ut allt jämnade jag till så gott det gick med blöta handskar.
När gjutningen utfördes visade det sig att jag använt för snävt utrymme mellan rör och stos. Röret satt fast och jag fick helt enkelt knäcka loss det med stos och allt.
Jag gjöt sedan en separat stos med generösare utrymme till röret. Denna slipades till och formades efter bästa förmåga och "limmades" på plats med ny homebrew. Det blev bra men det bästa är nog att få till stosen ihop med kupolen i en och samma gjutning.
Toppen, tack! En sista fråga, vilken grovlek använde du till sanden? Läser mig till att man bör undvika sandlådesand i homebrew, så... 0-4mm borde väl funka då?
Last edited: