I found a nice thread about this, but it was so long and had a bit too much discussion, so I'm starting a new one.
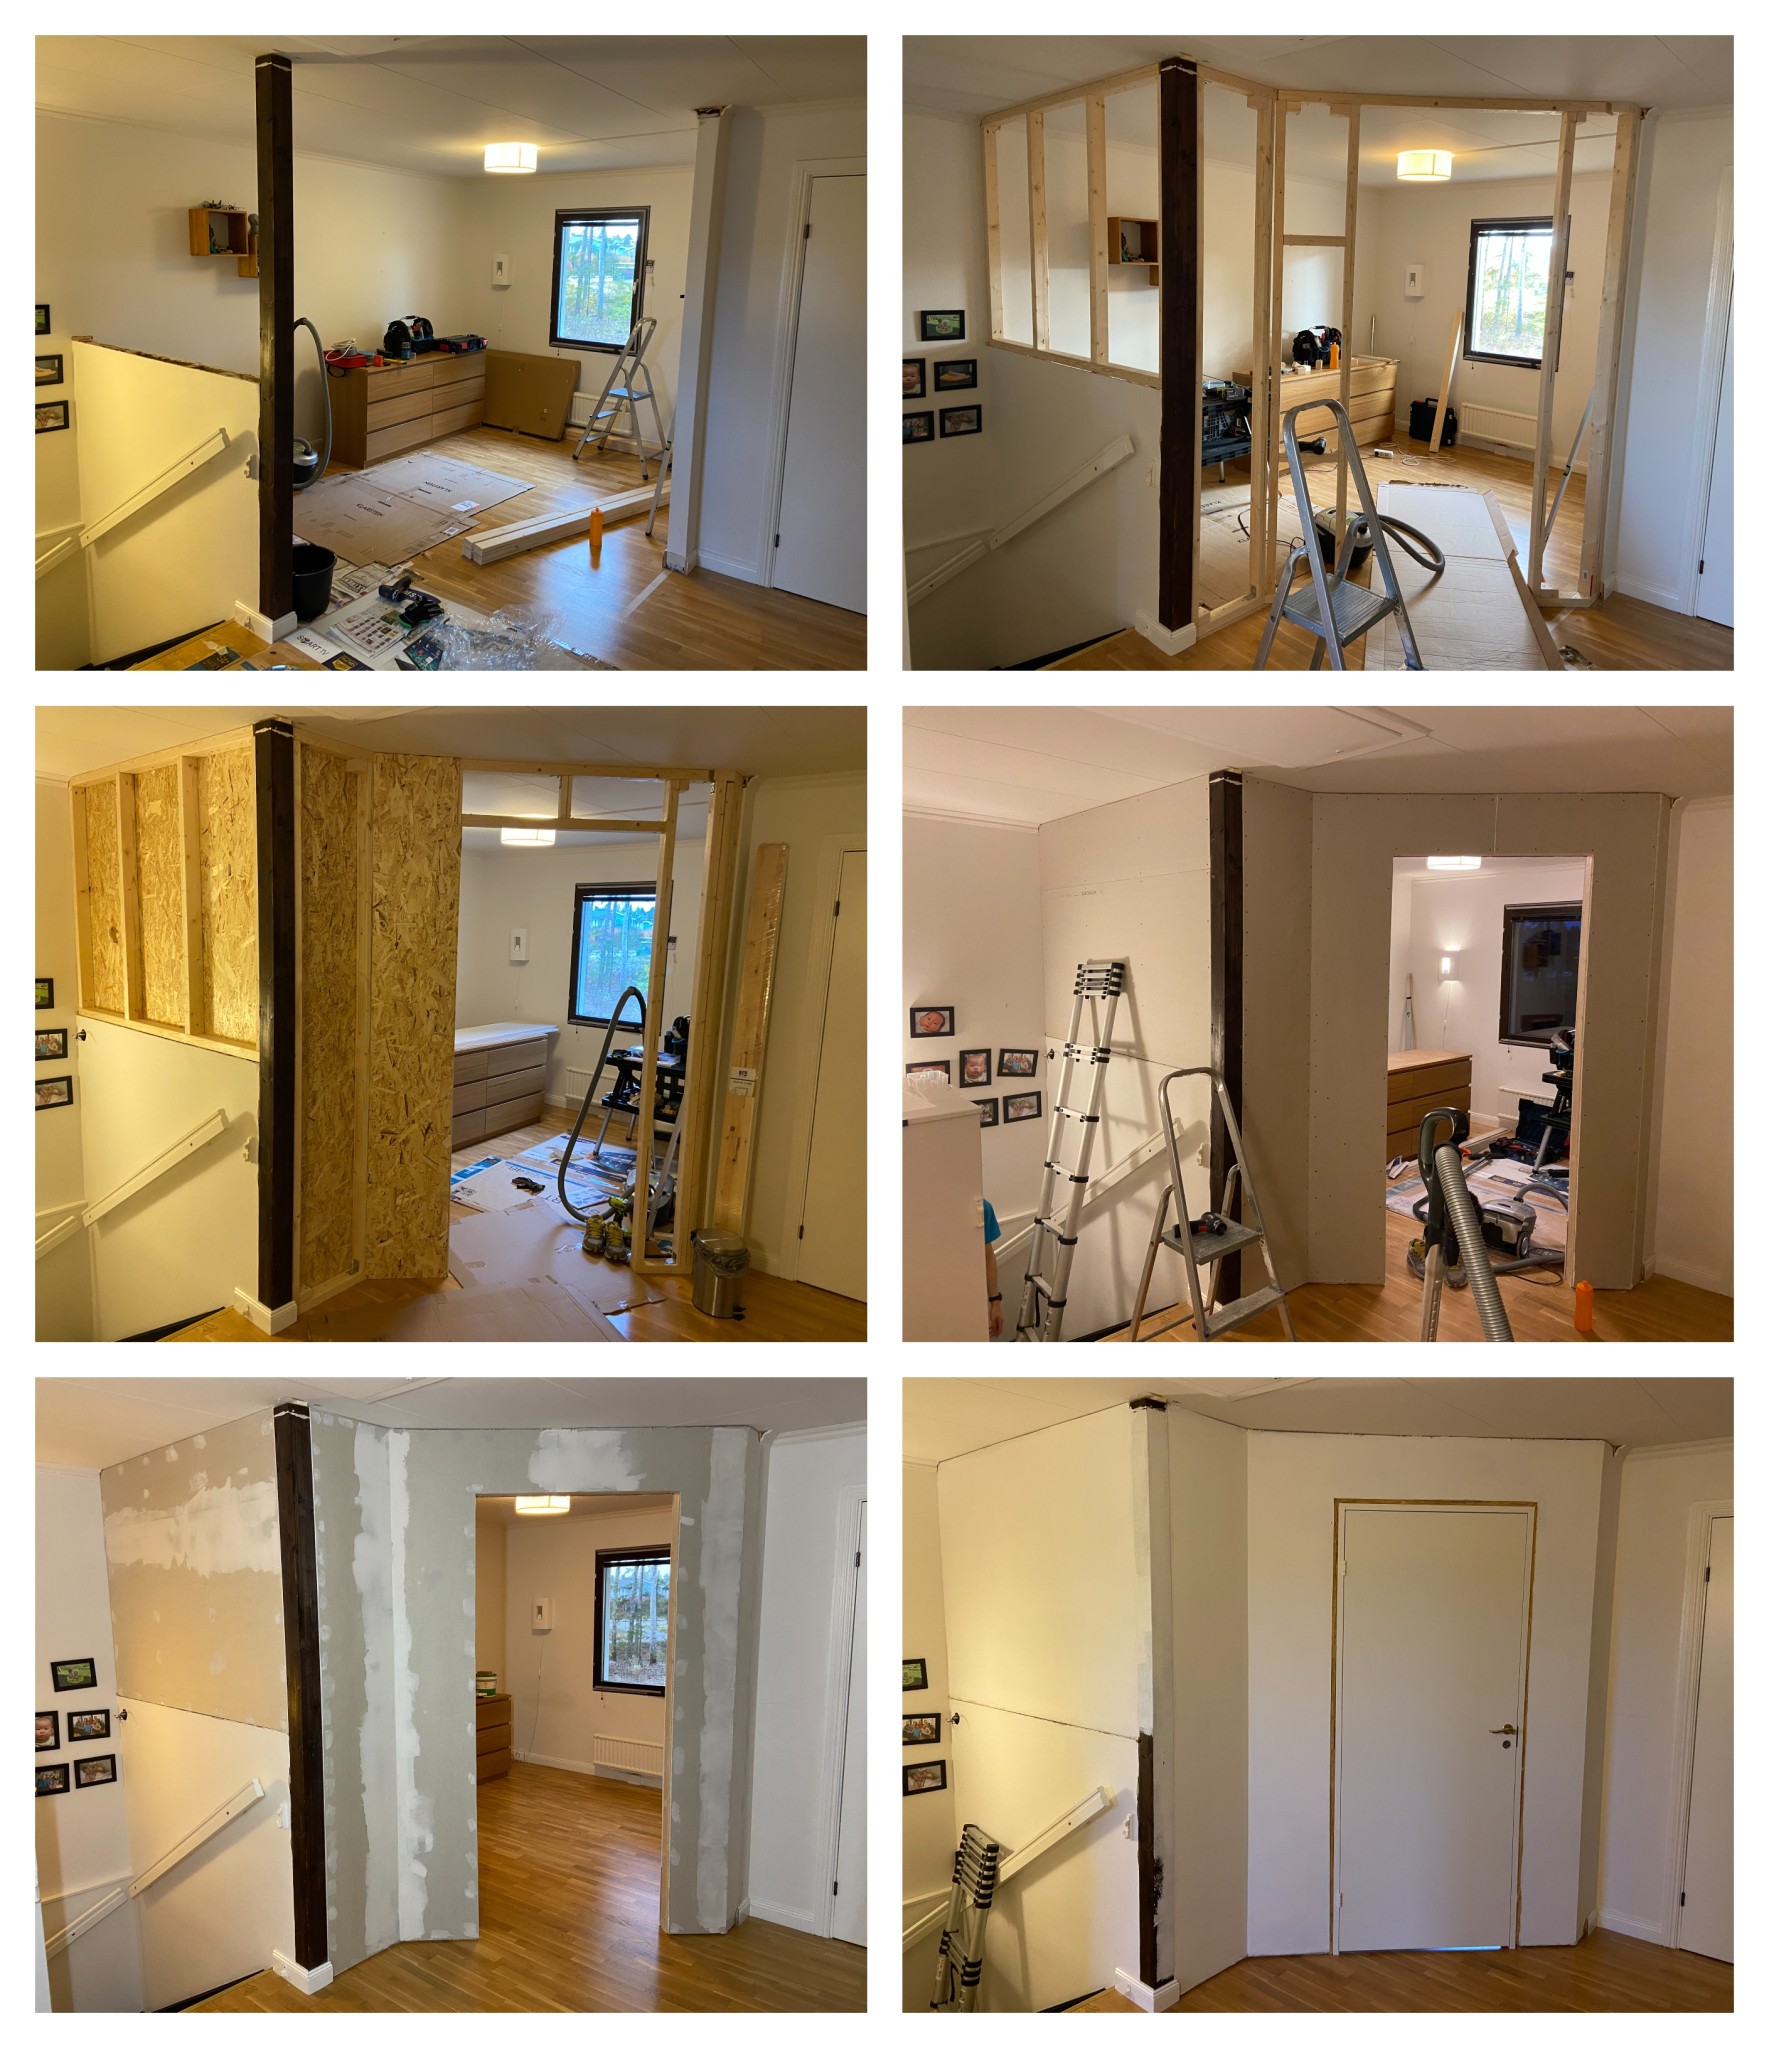
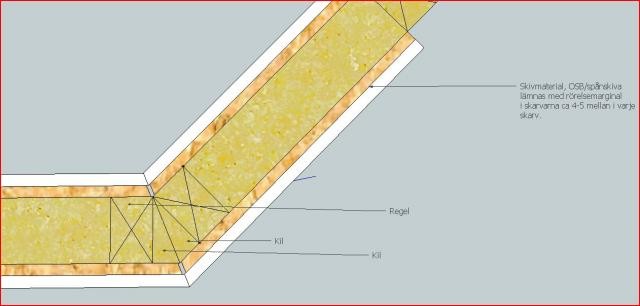
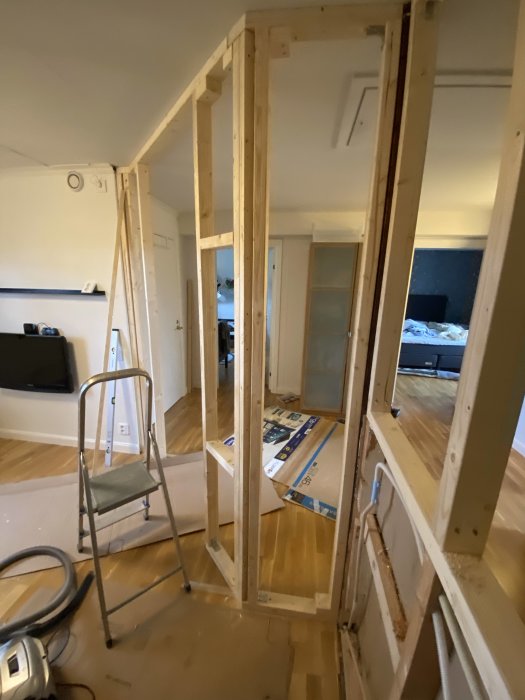
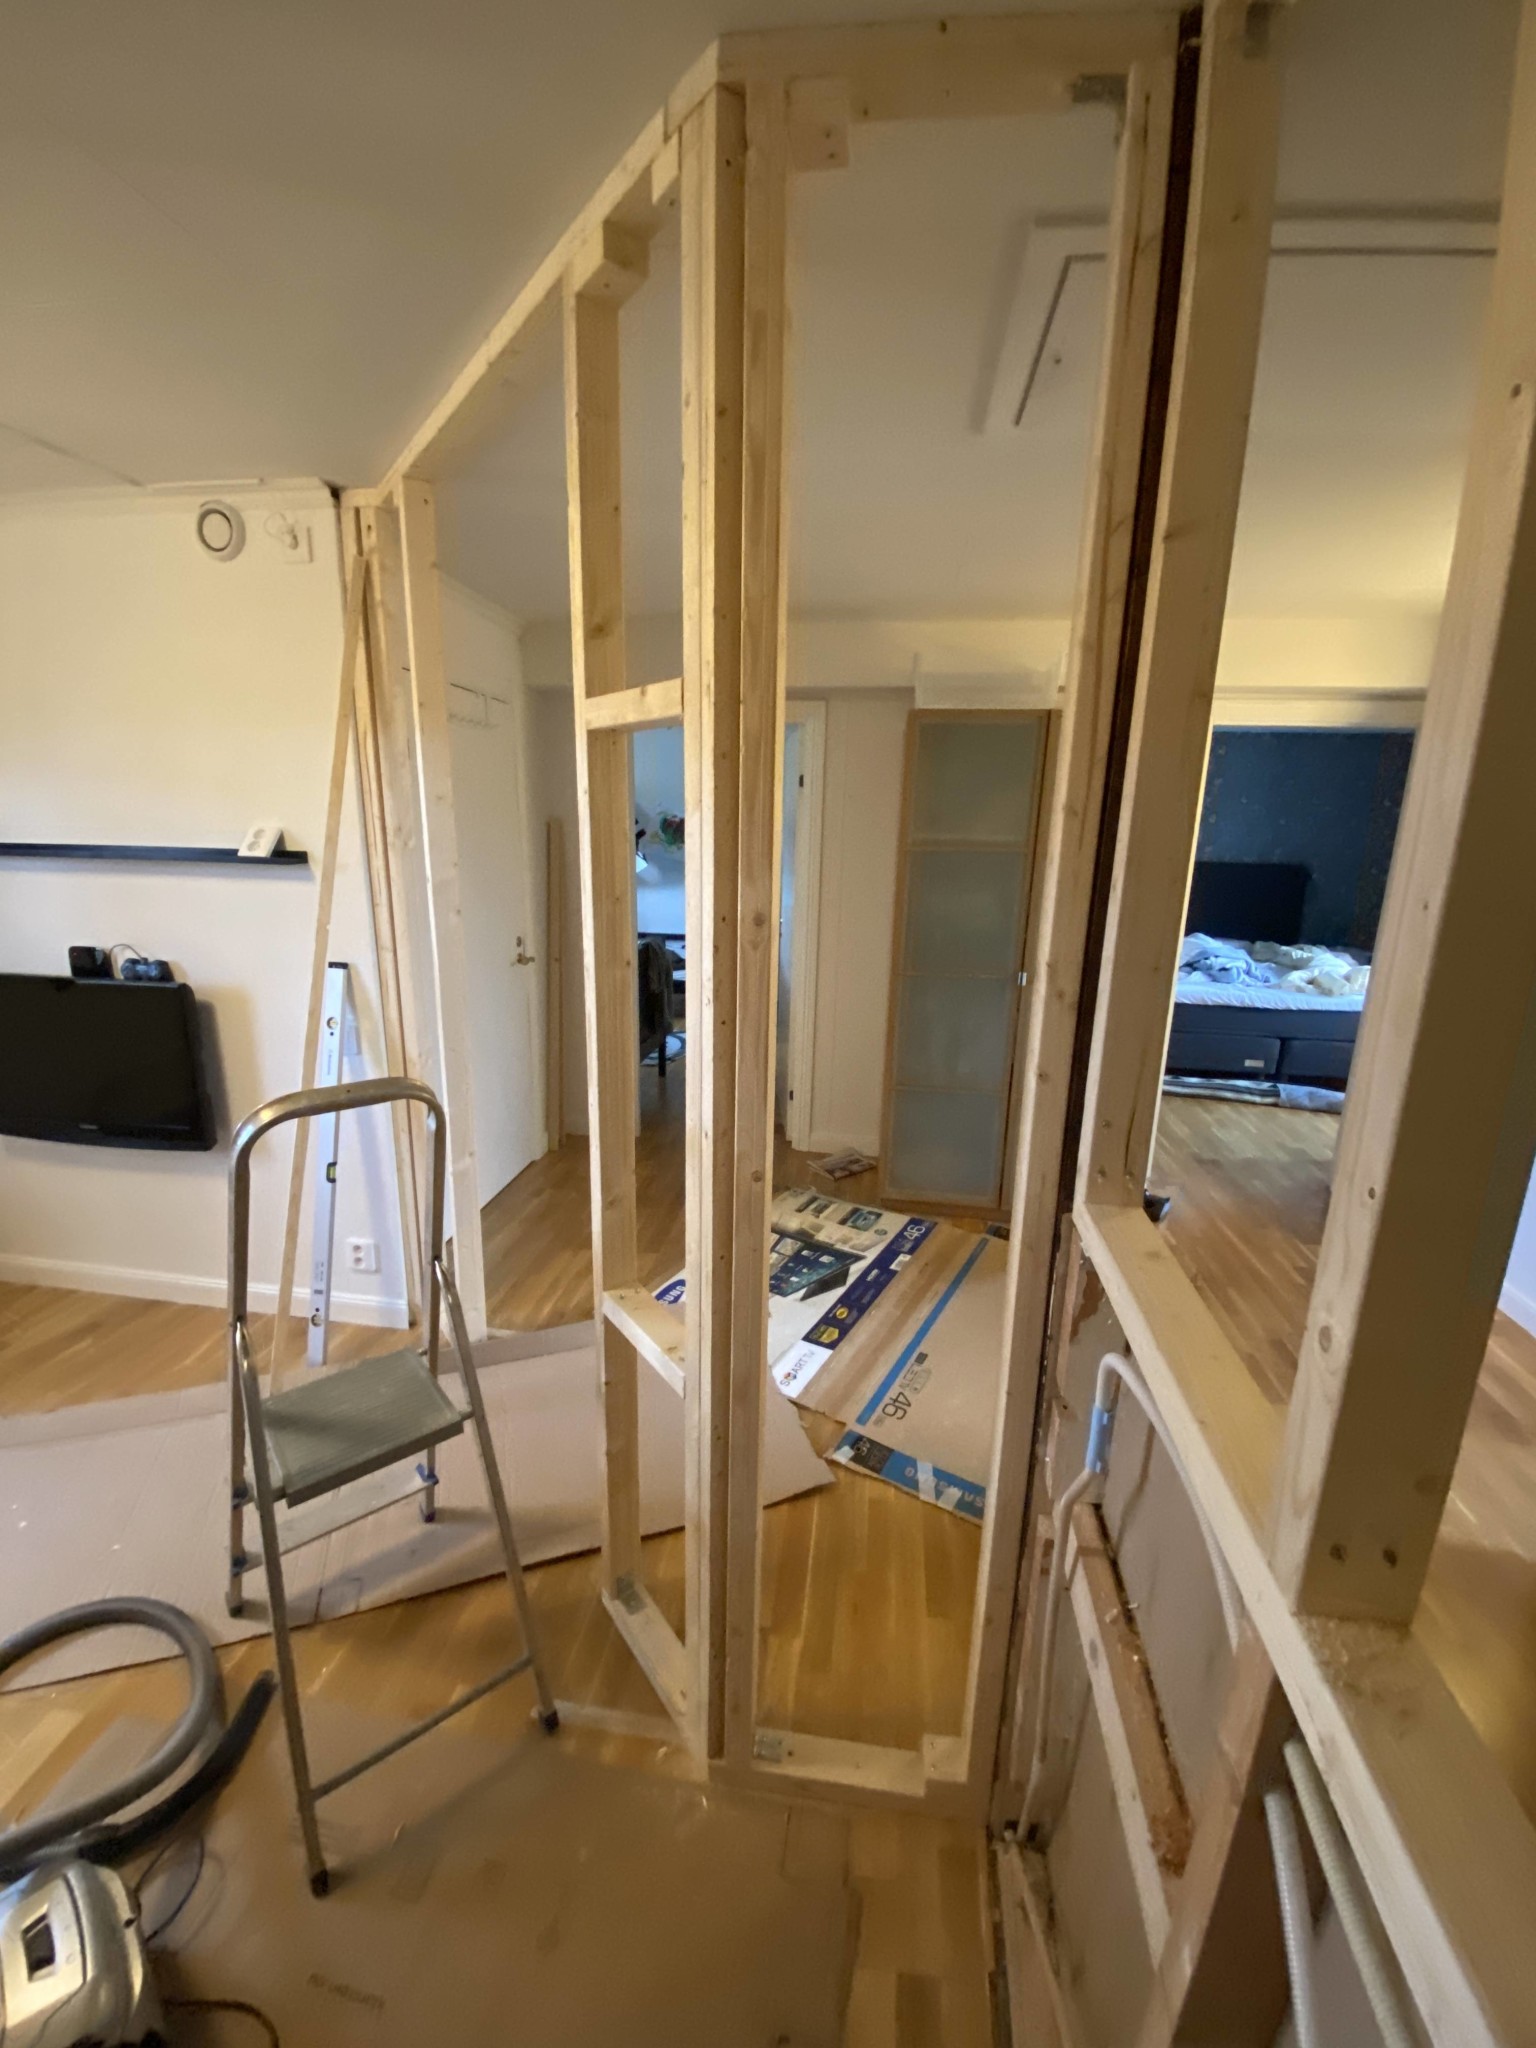
I'm going to build a non-load-bearing interior wall in the living room, and the wish is to have angled sides instead of right angles. I've seen some on YouTube, and most seem to make "wedges" to cover the empty space, and according to the image below, a wedge should also be used. Is it really needed? With or without OSB...
How do you join the corners then? That is, the obtuse corner? Is paper tape and joint compound used?
Then I thought about the installation of nogging or vertical studs, in case angle brackets can be used. Why not use cut studs as "angle brackets" and attach them to the sill and then attach the stud to it (instead of angle brackets)? It's frugality talking... but it should be the same. However, it does require some cutting?
A third question. Under the sill, should some "sill material" be used as soundproofing, or is it just nonsense?
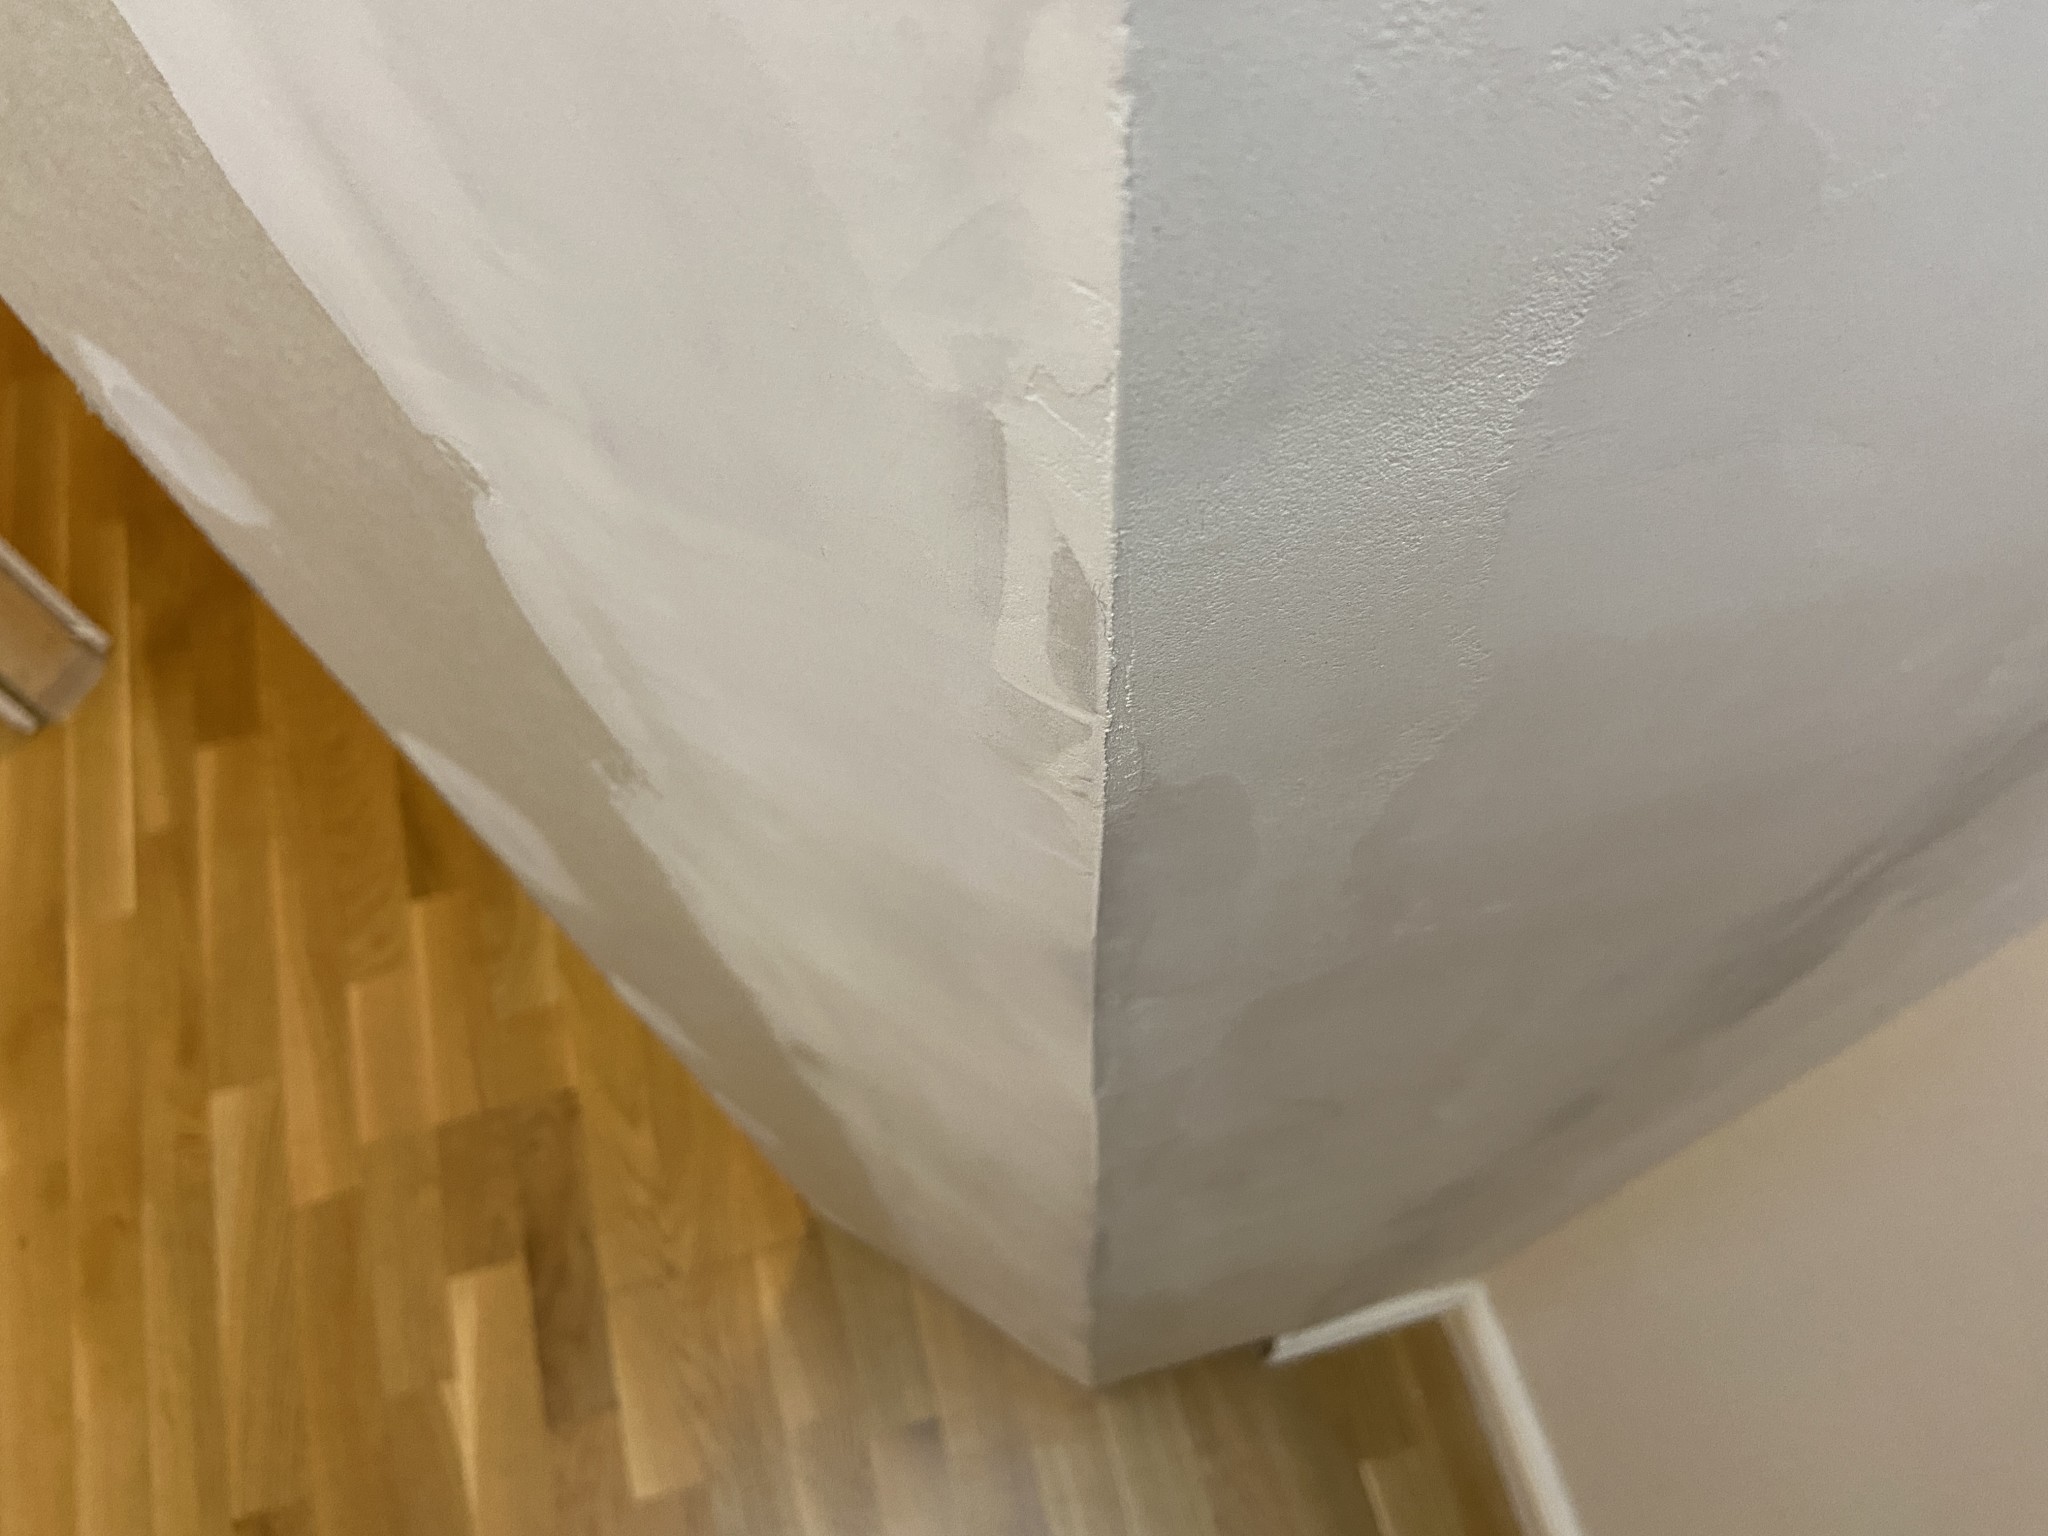
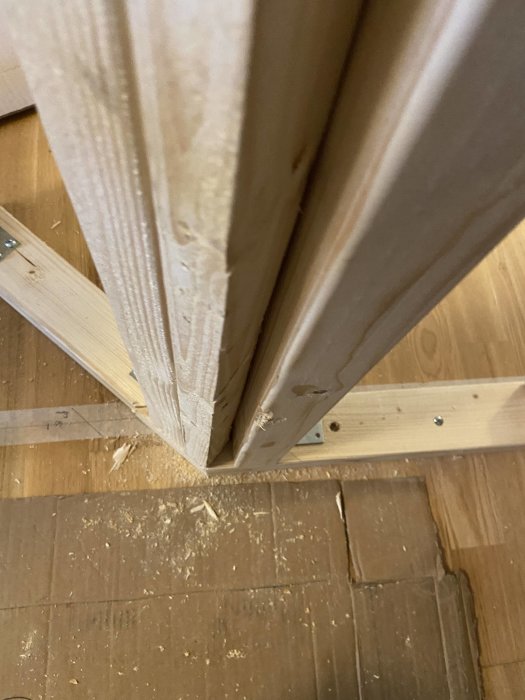
With just plaster, something is probably needed in the corner... The simplest solution must be to angle the blade on the circular saw and rip two 45x70 studs lengthwise, instead of having two studs and two wedges as in the picture...
The angle irons cost nothing to buy, the time you save by using them is worth it...
I agree with Dan. You need something in the corner where the boards meet.
As for the noggins, it depends a bit. If they're for something specific, like a door frame or window, I would make sure they're secured properly, meaning it's not wrong to use brackets. Otherwise, I don't think you actually need noggins. The boards are meant to absorb lateral and shear forces.
A good thing to consider for external corners might be to plaster in a metal strip for strength.
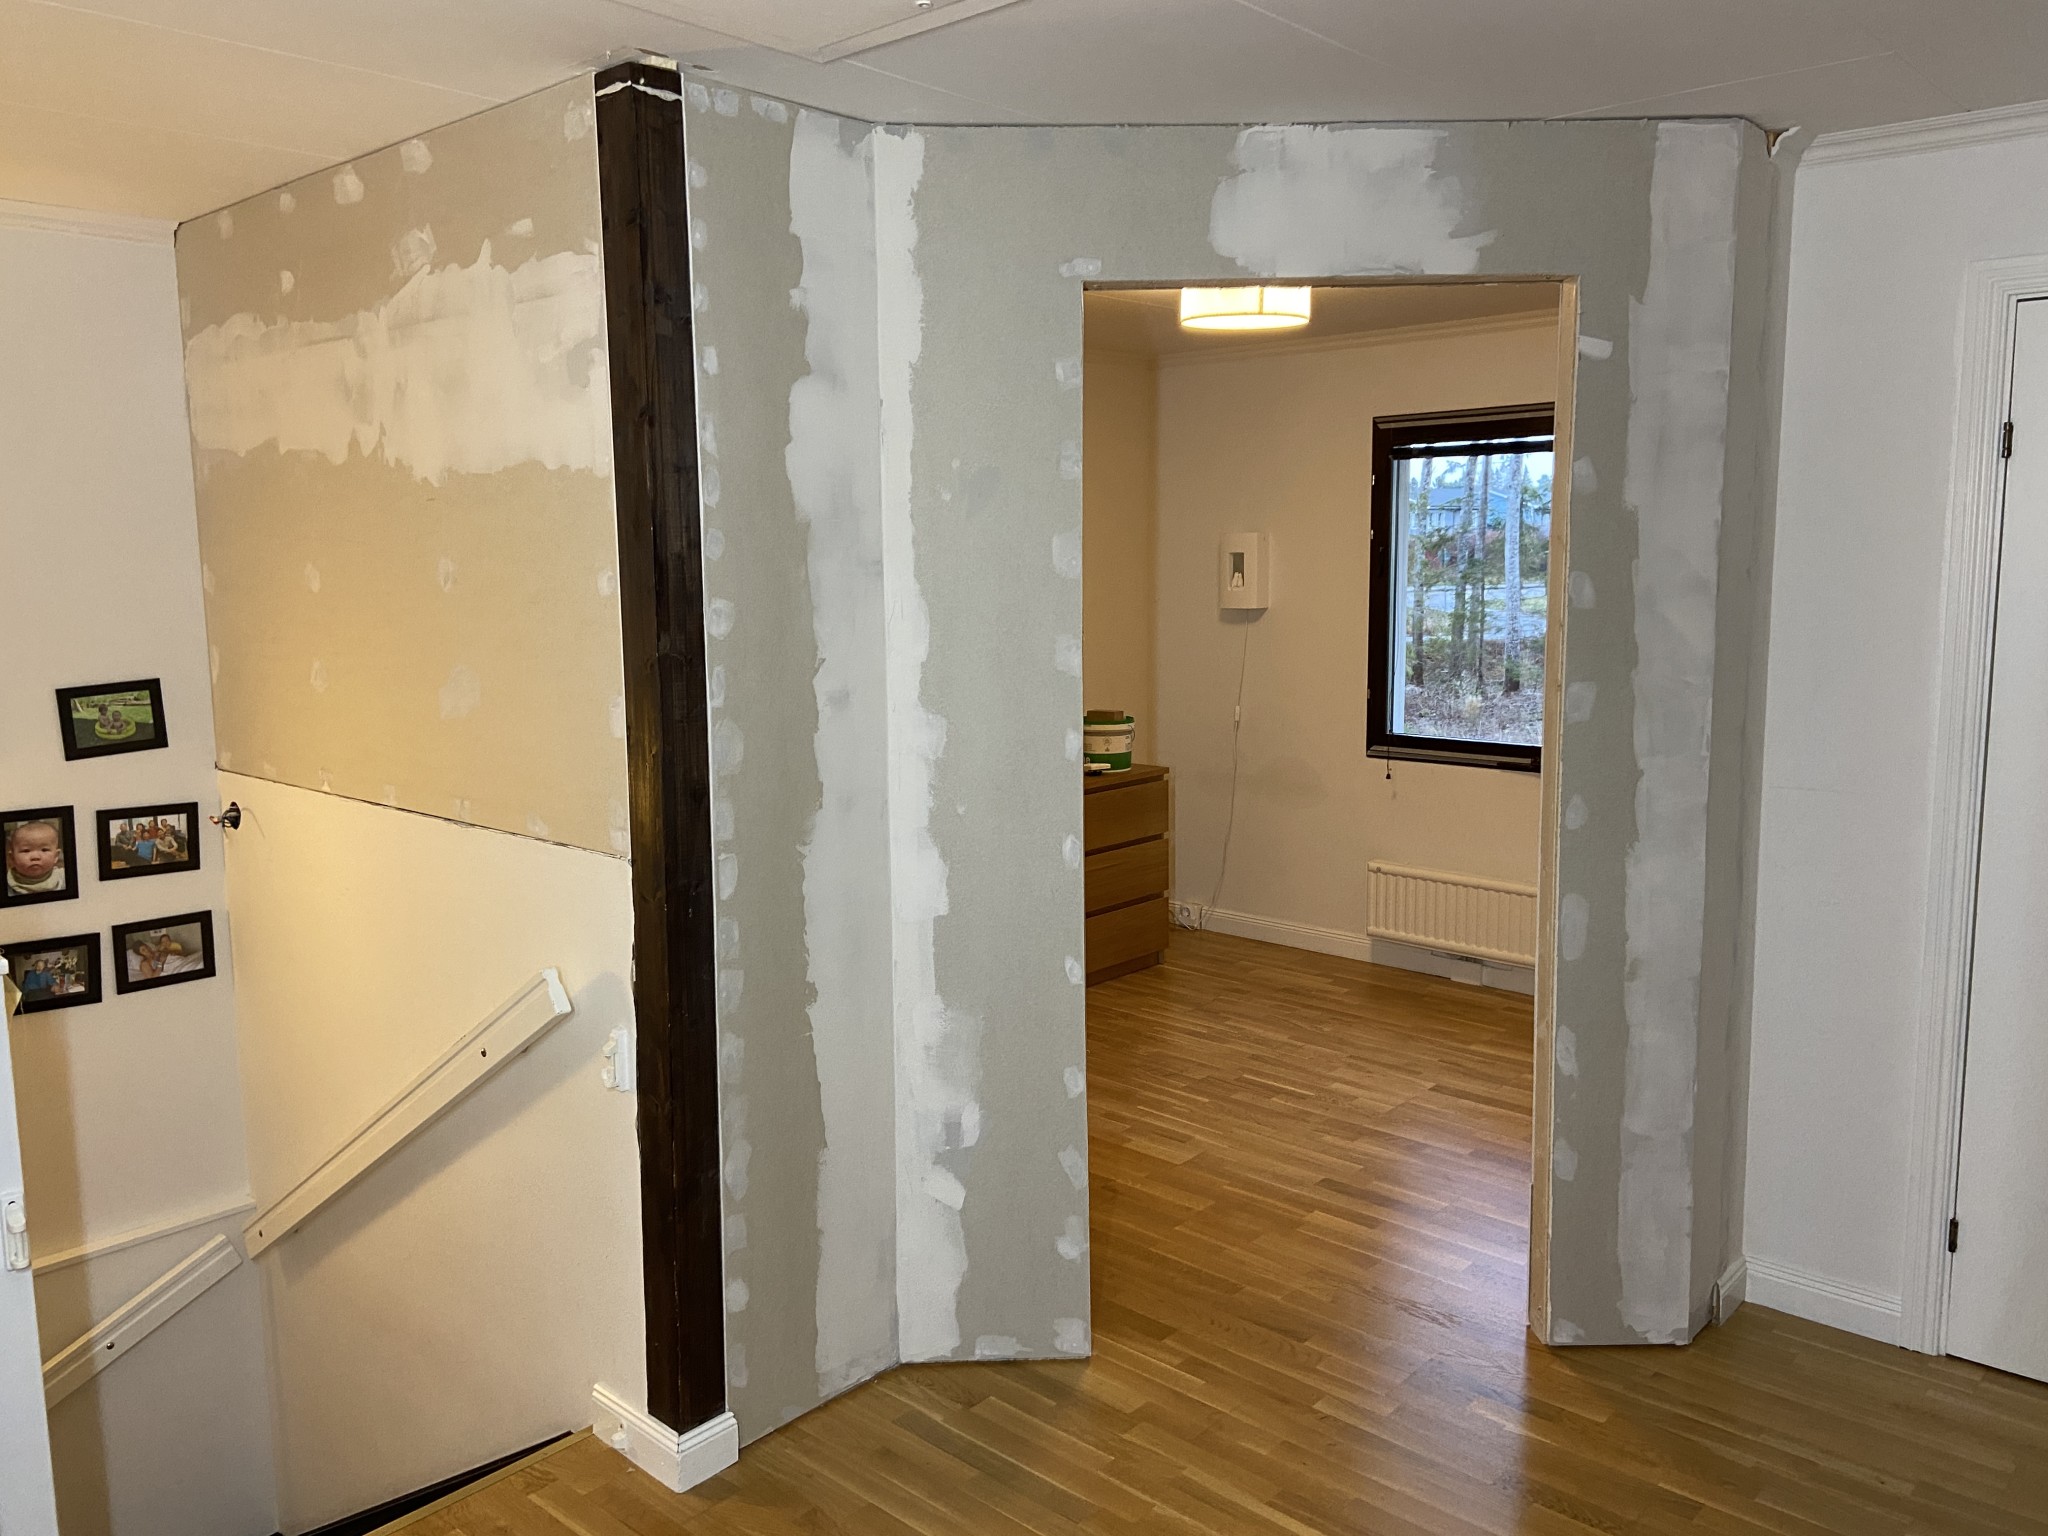
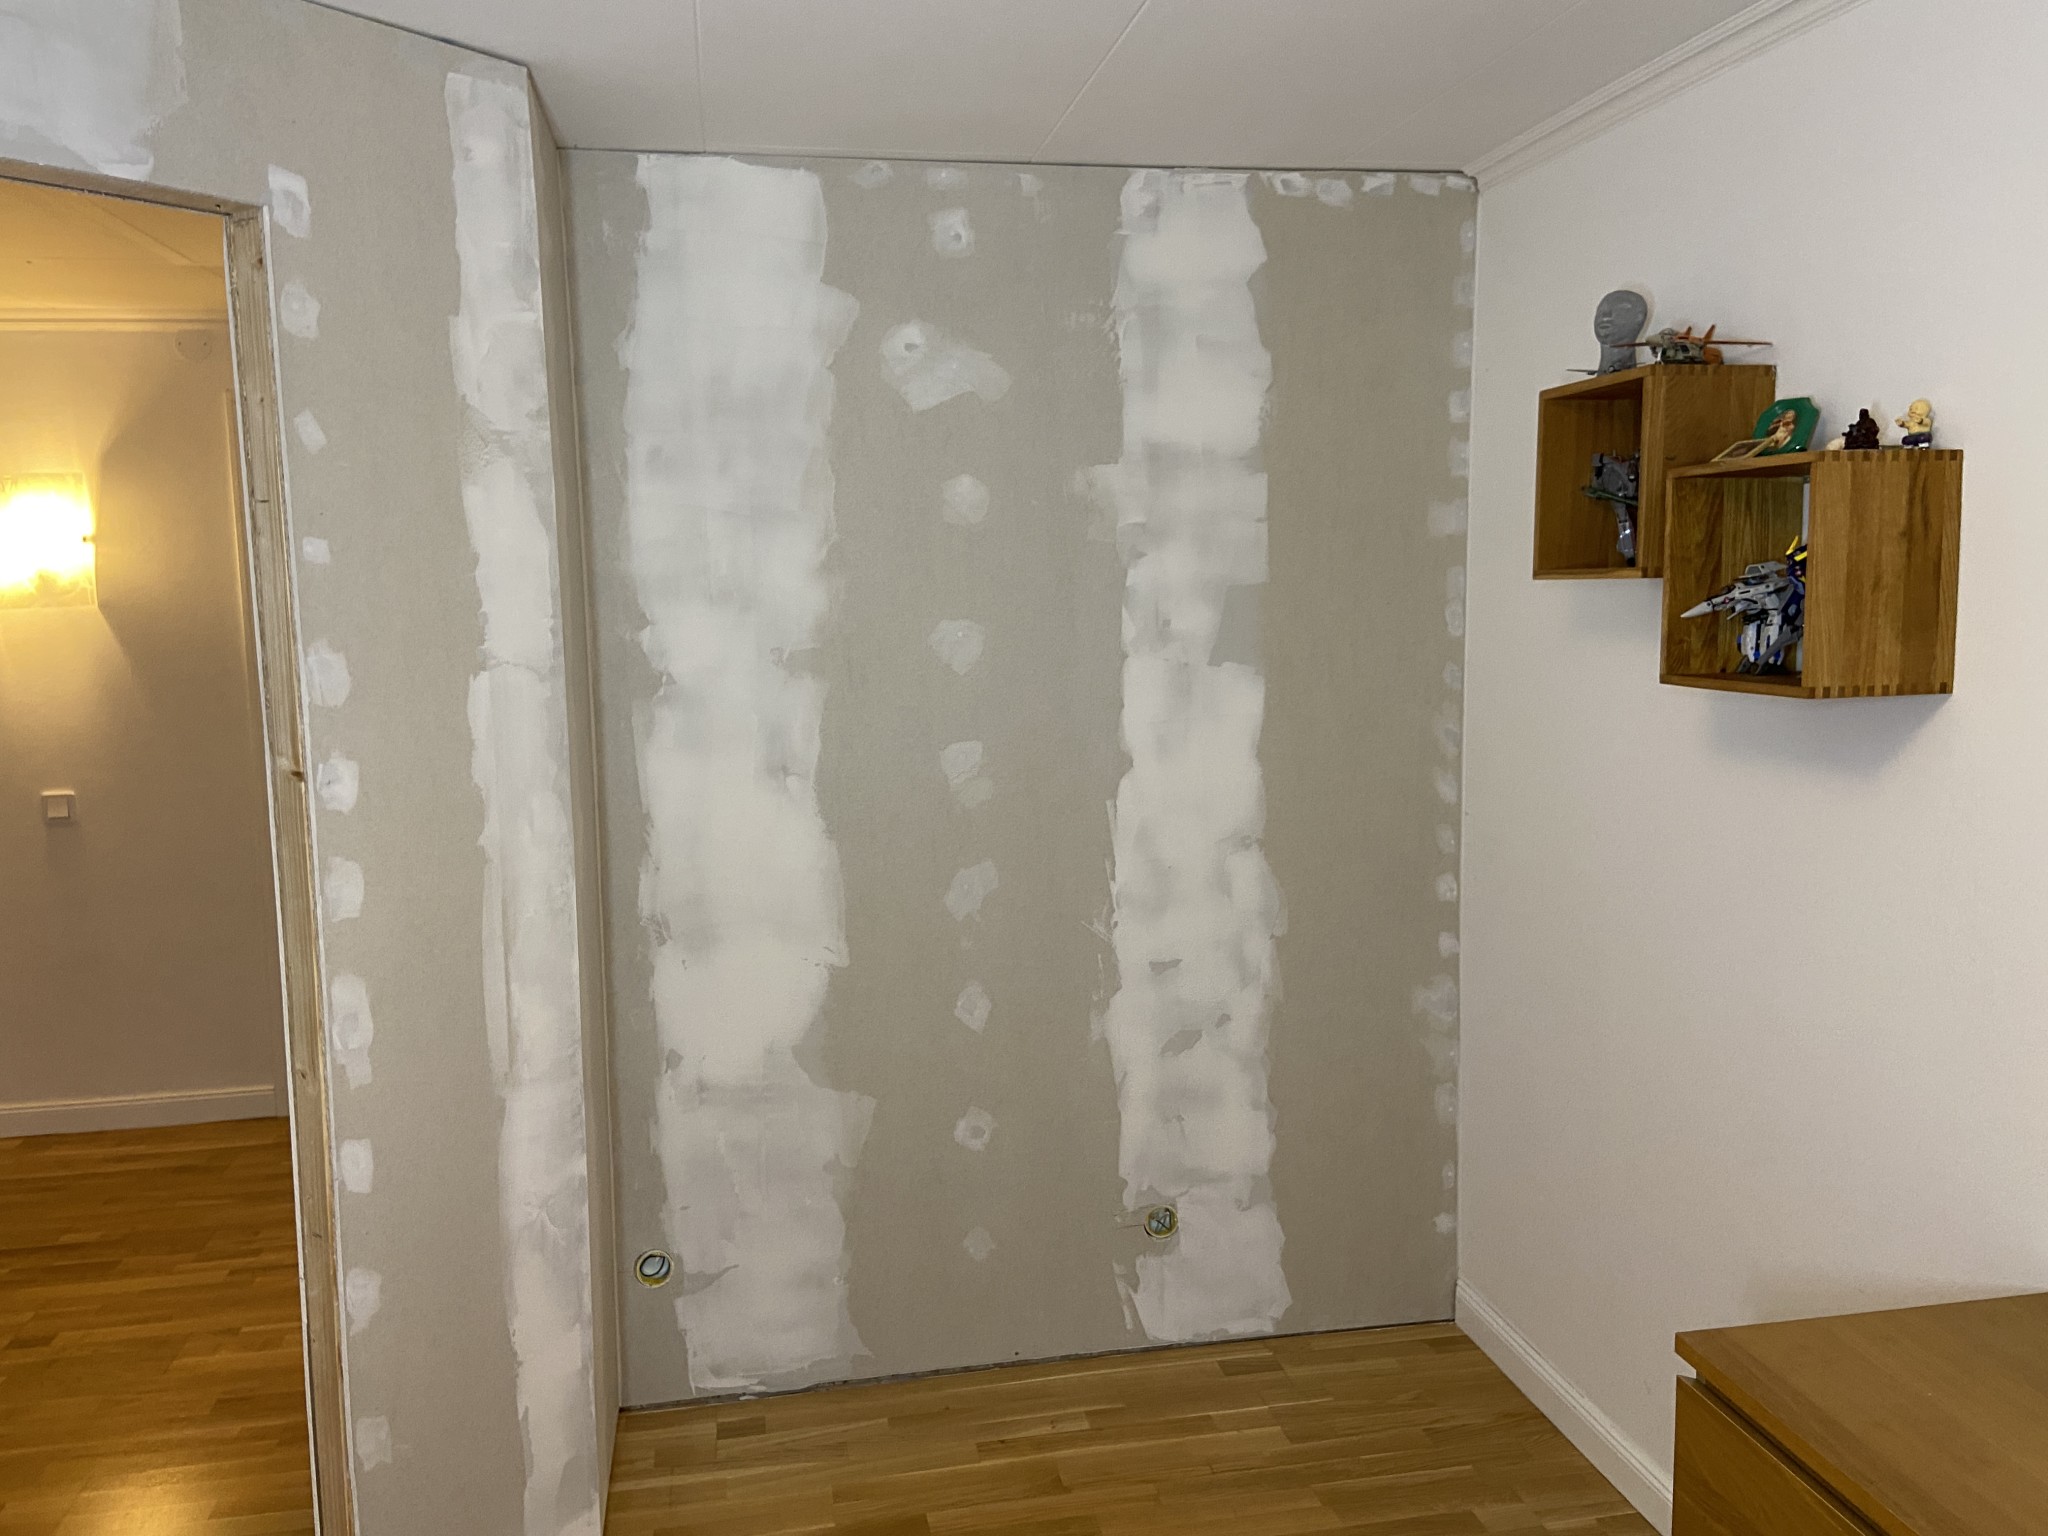
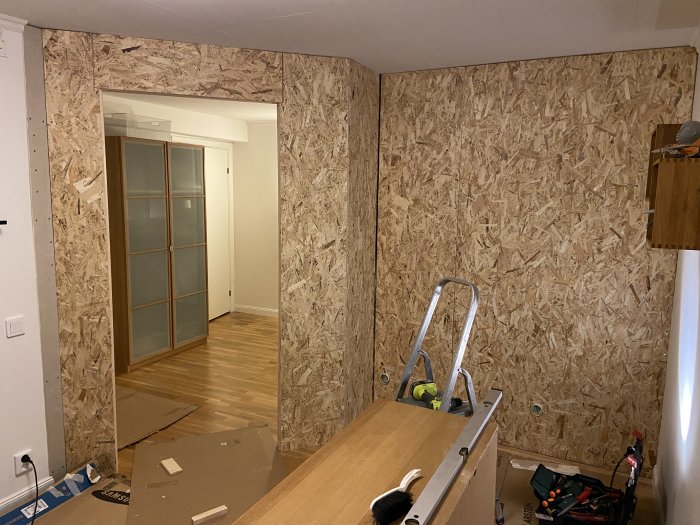
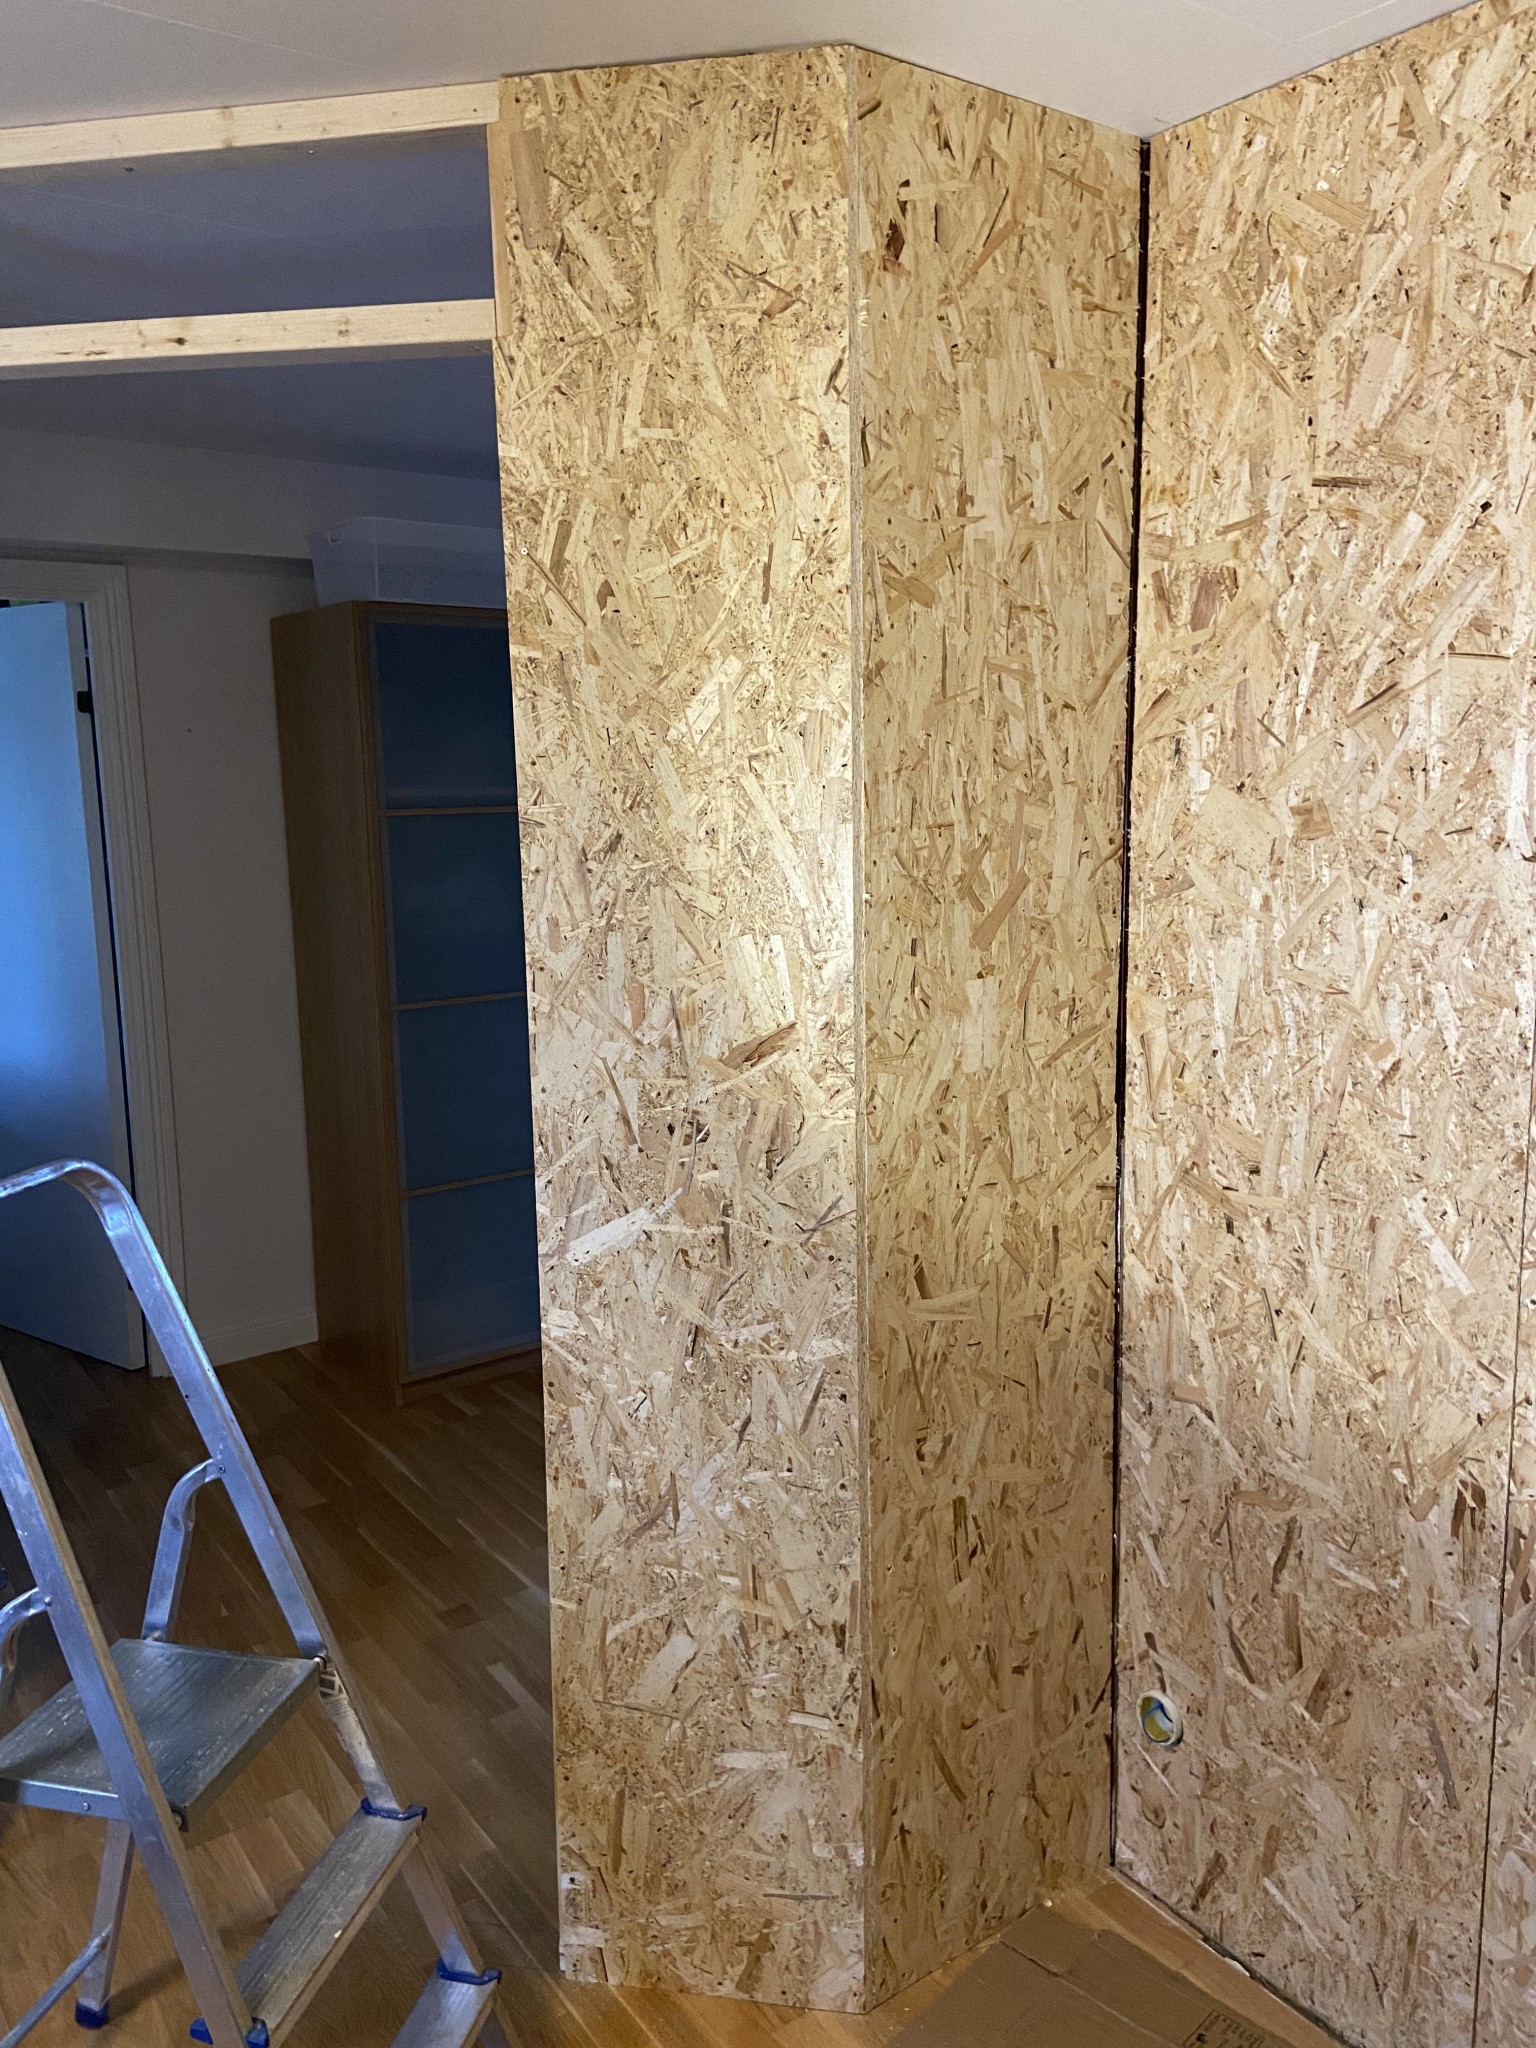
Now a bit of progress has been made and the worst is over.
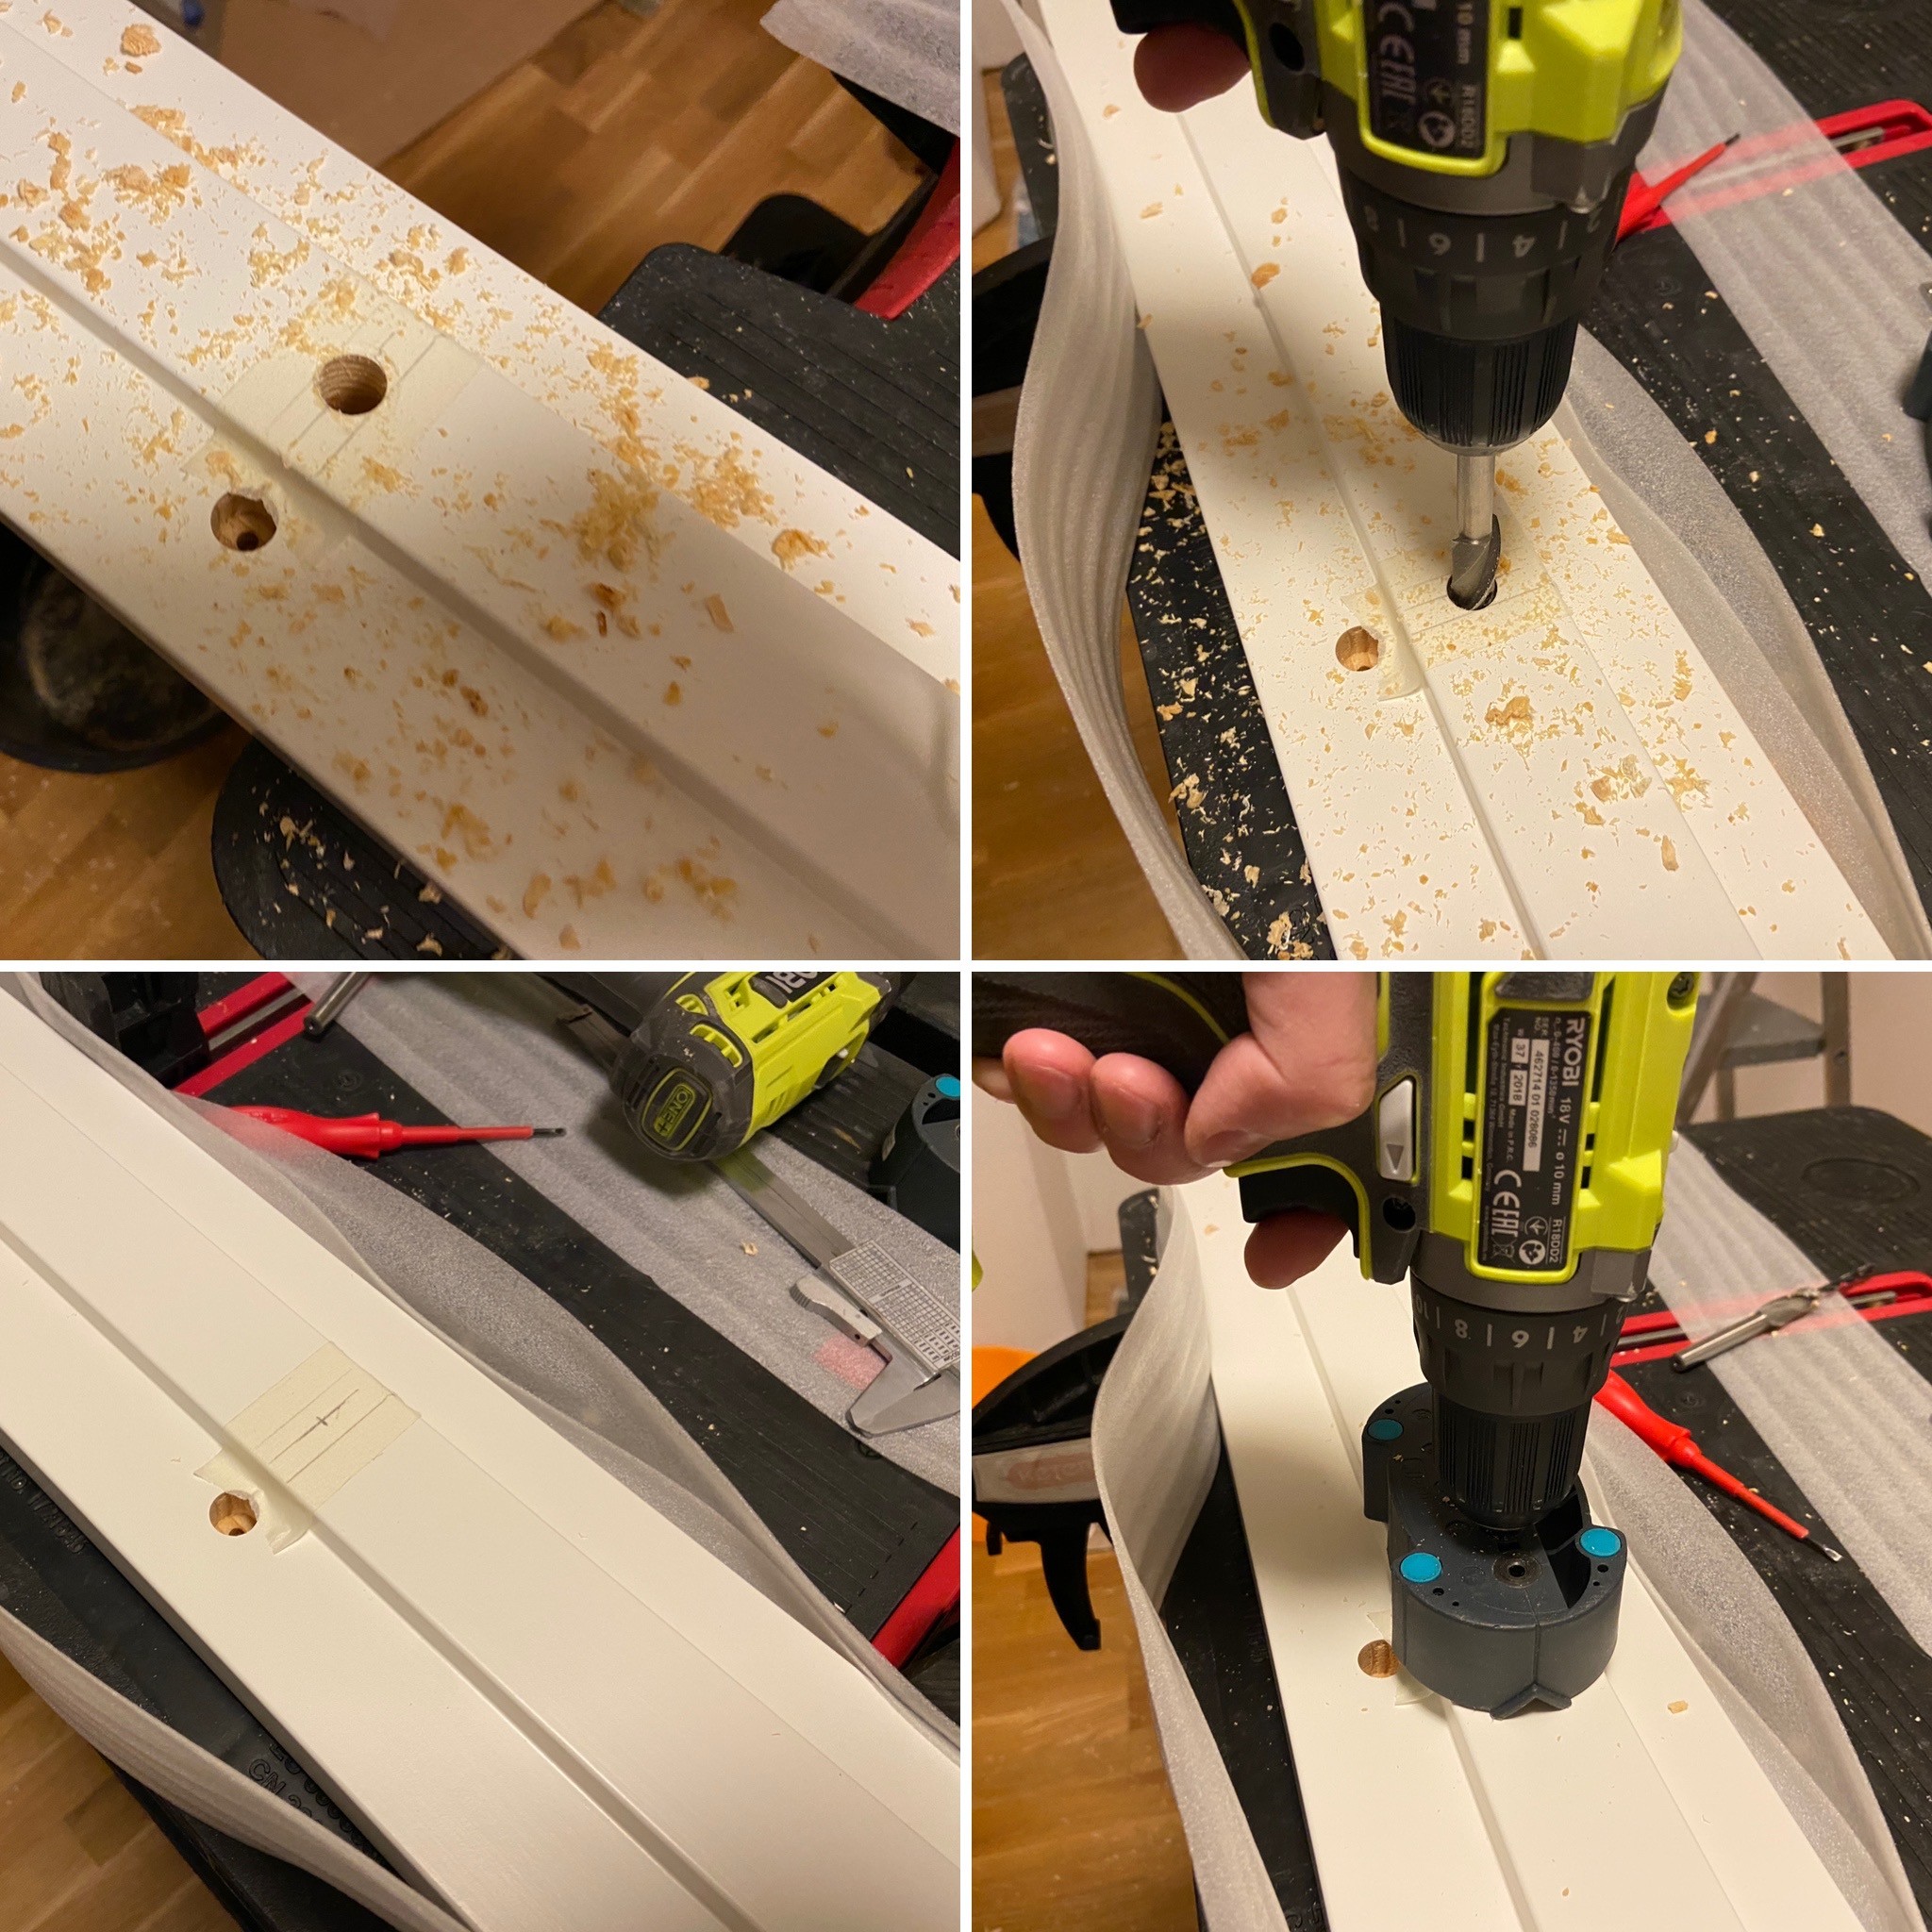
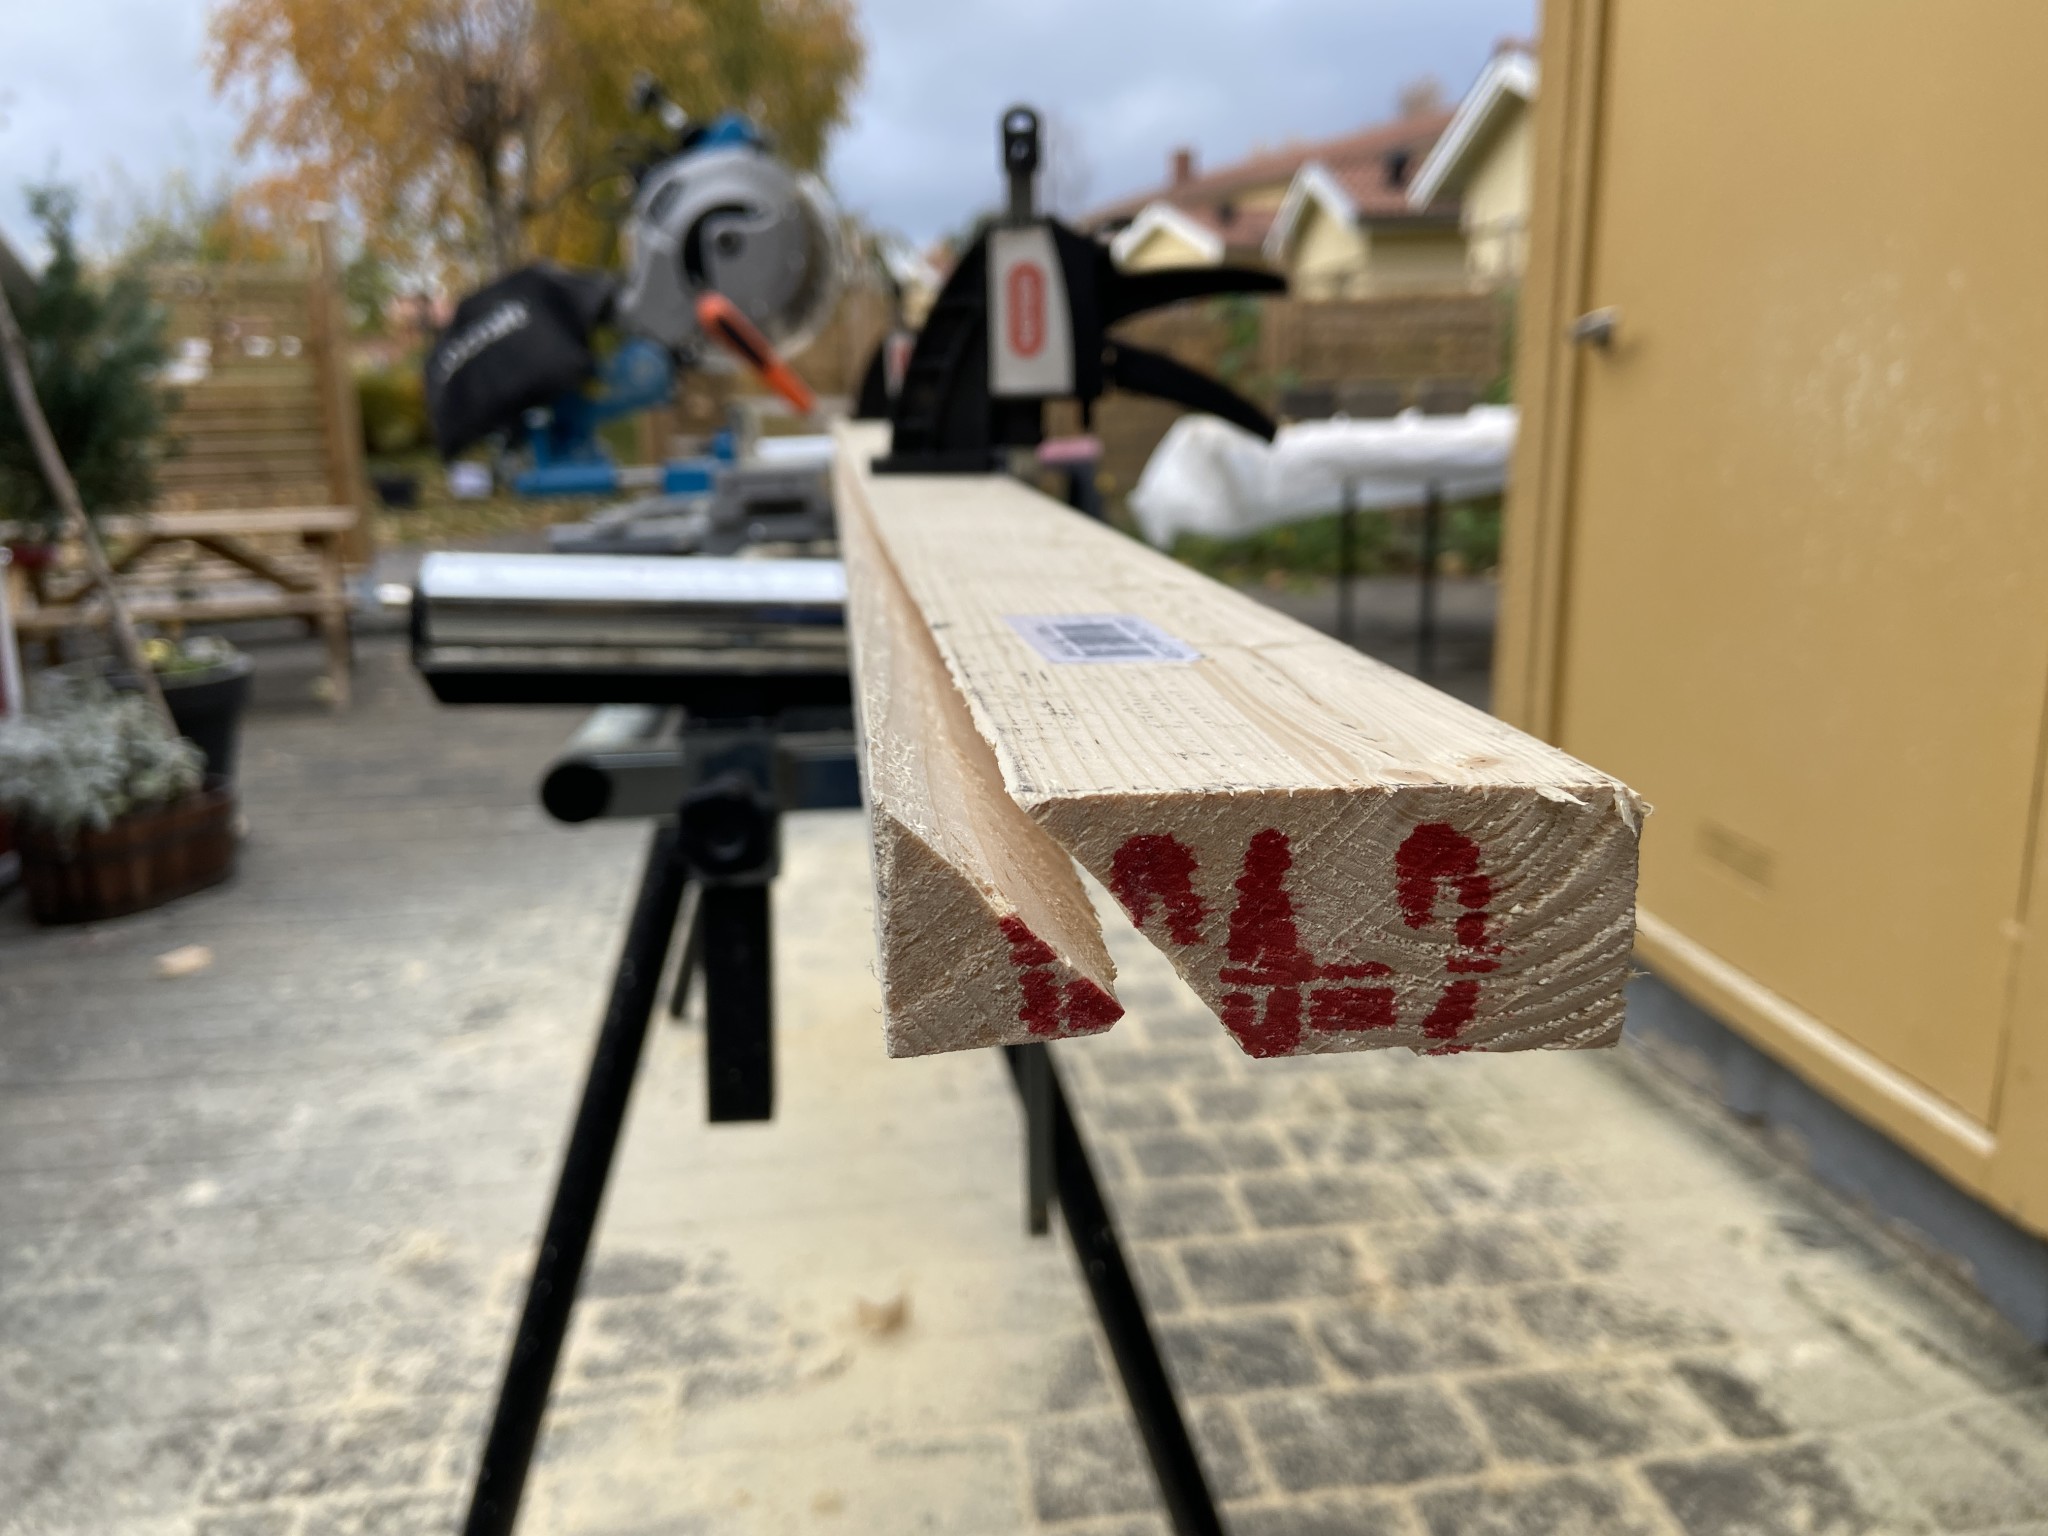
I cut the sill at 45° instead of 22.5°. The tricky part was getting the ceiling stud plumb.
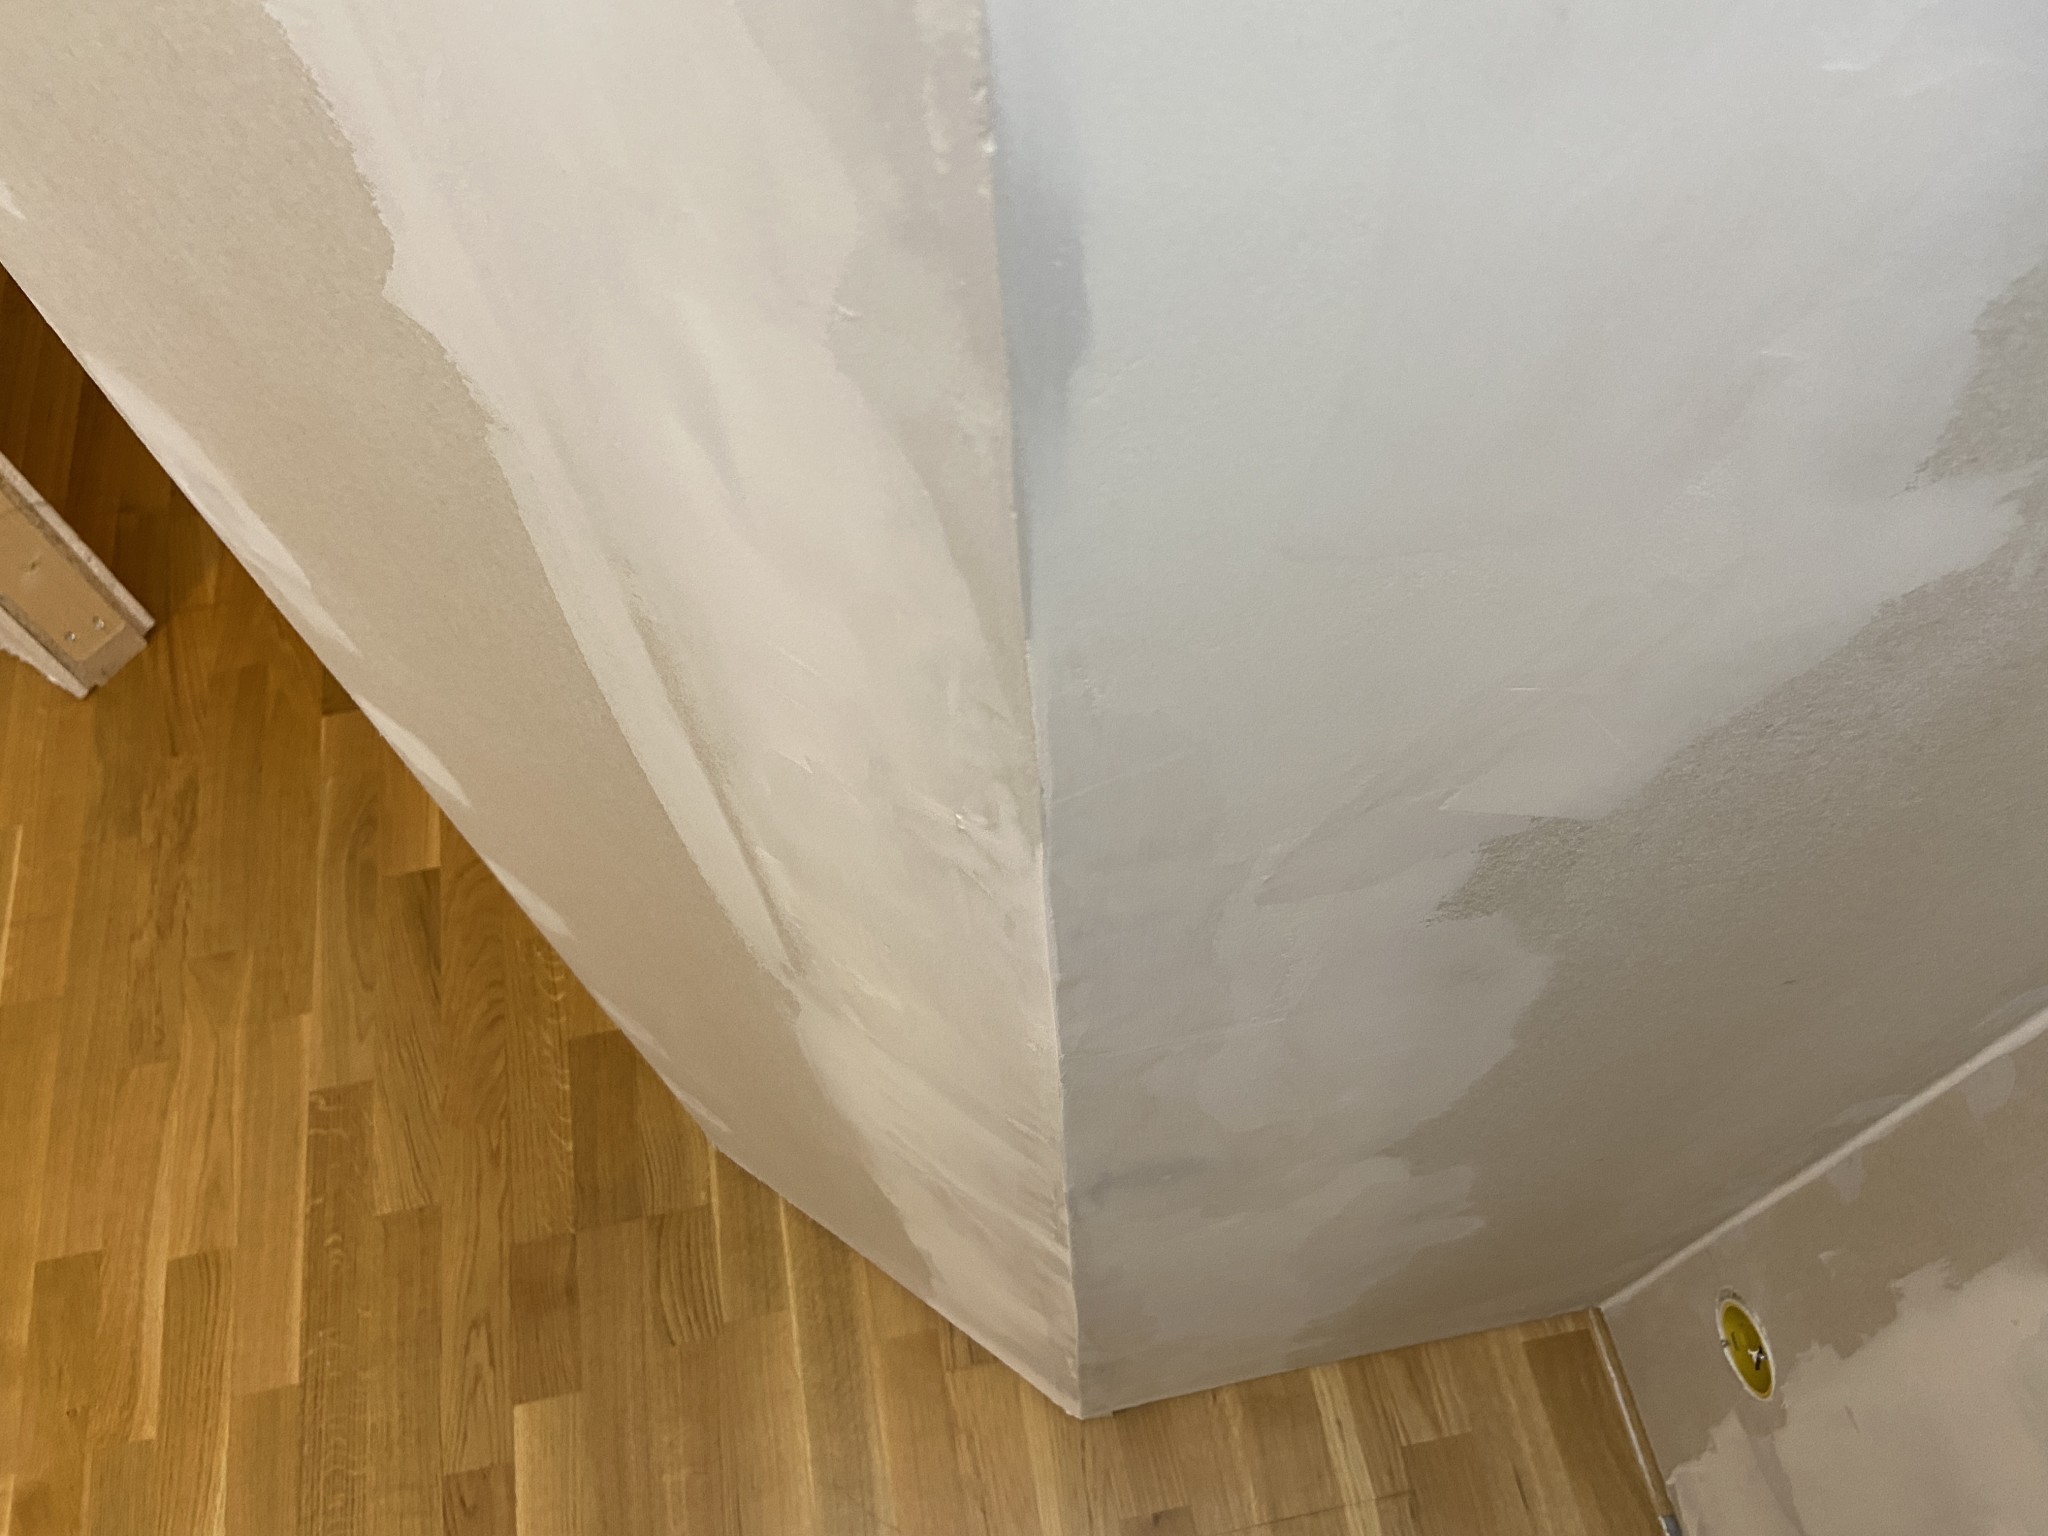
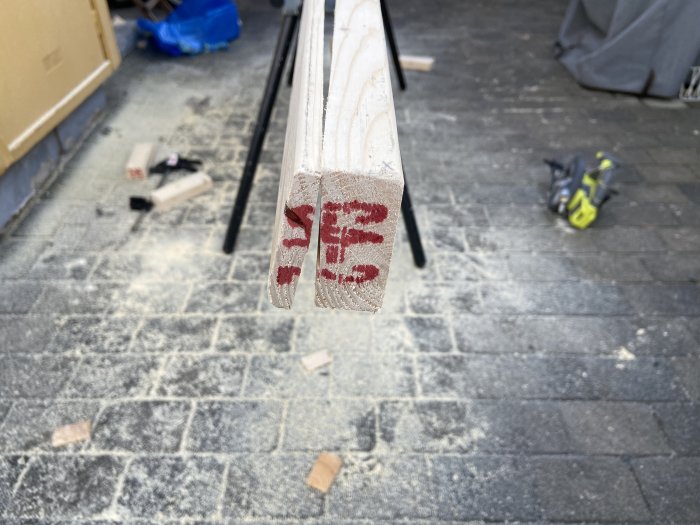
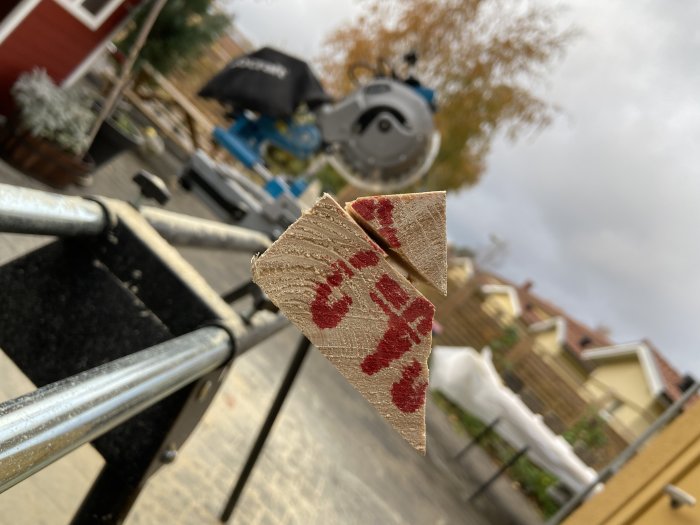
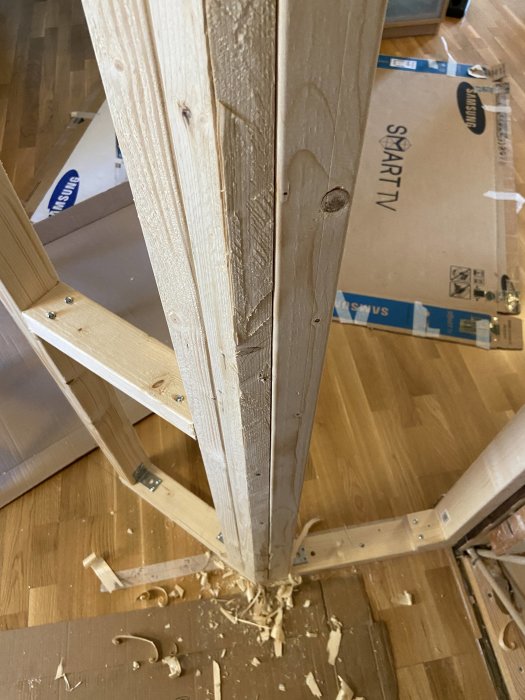
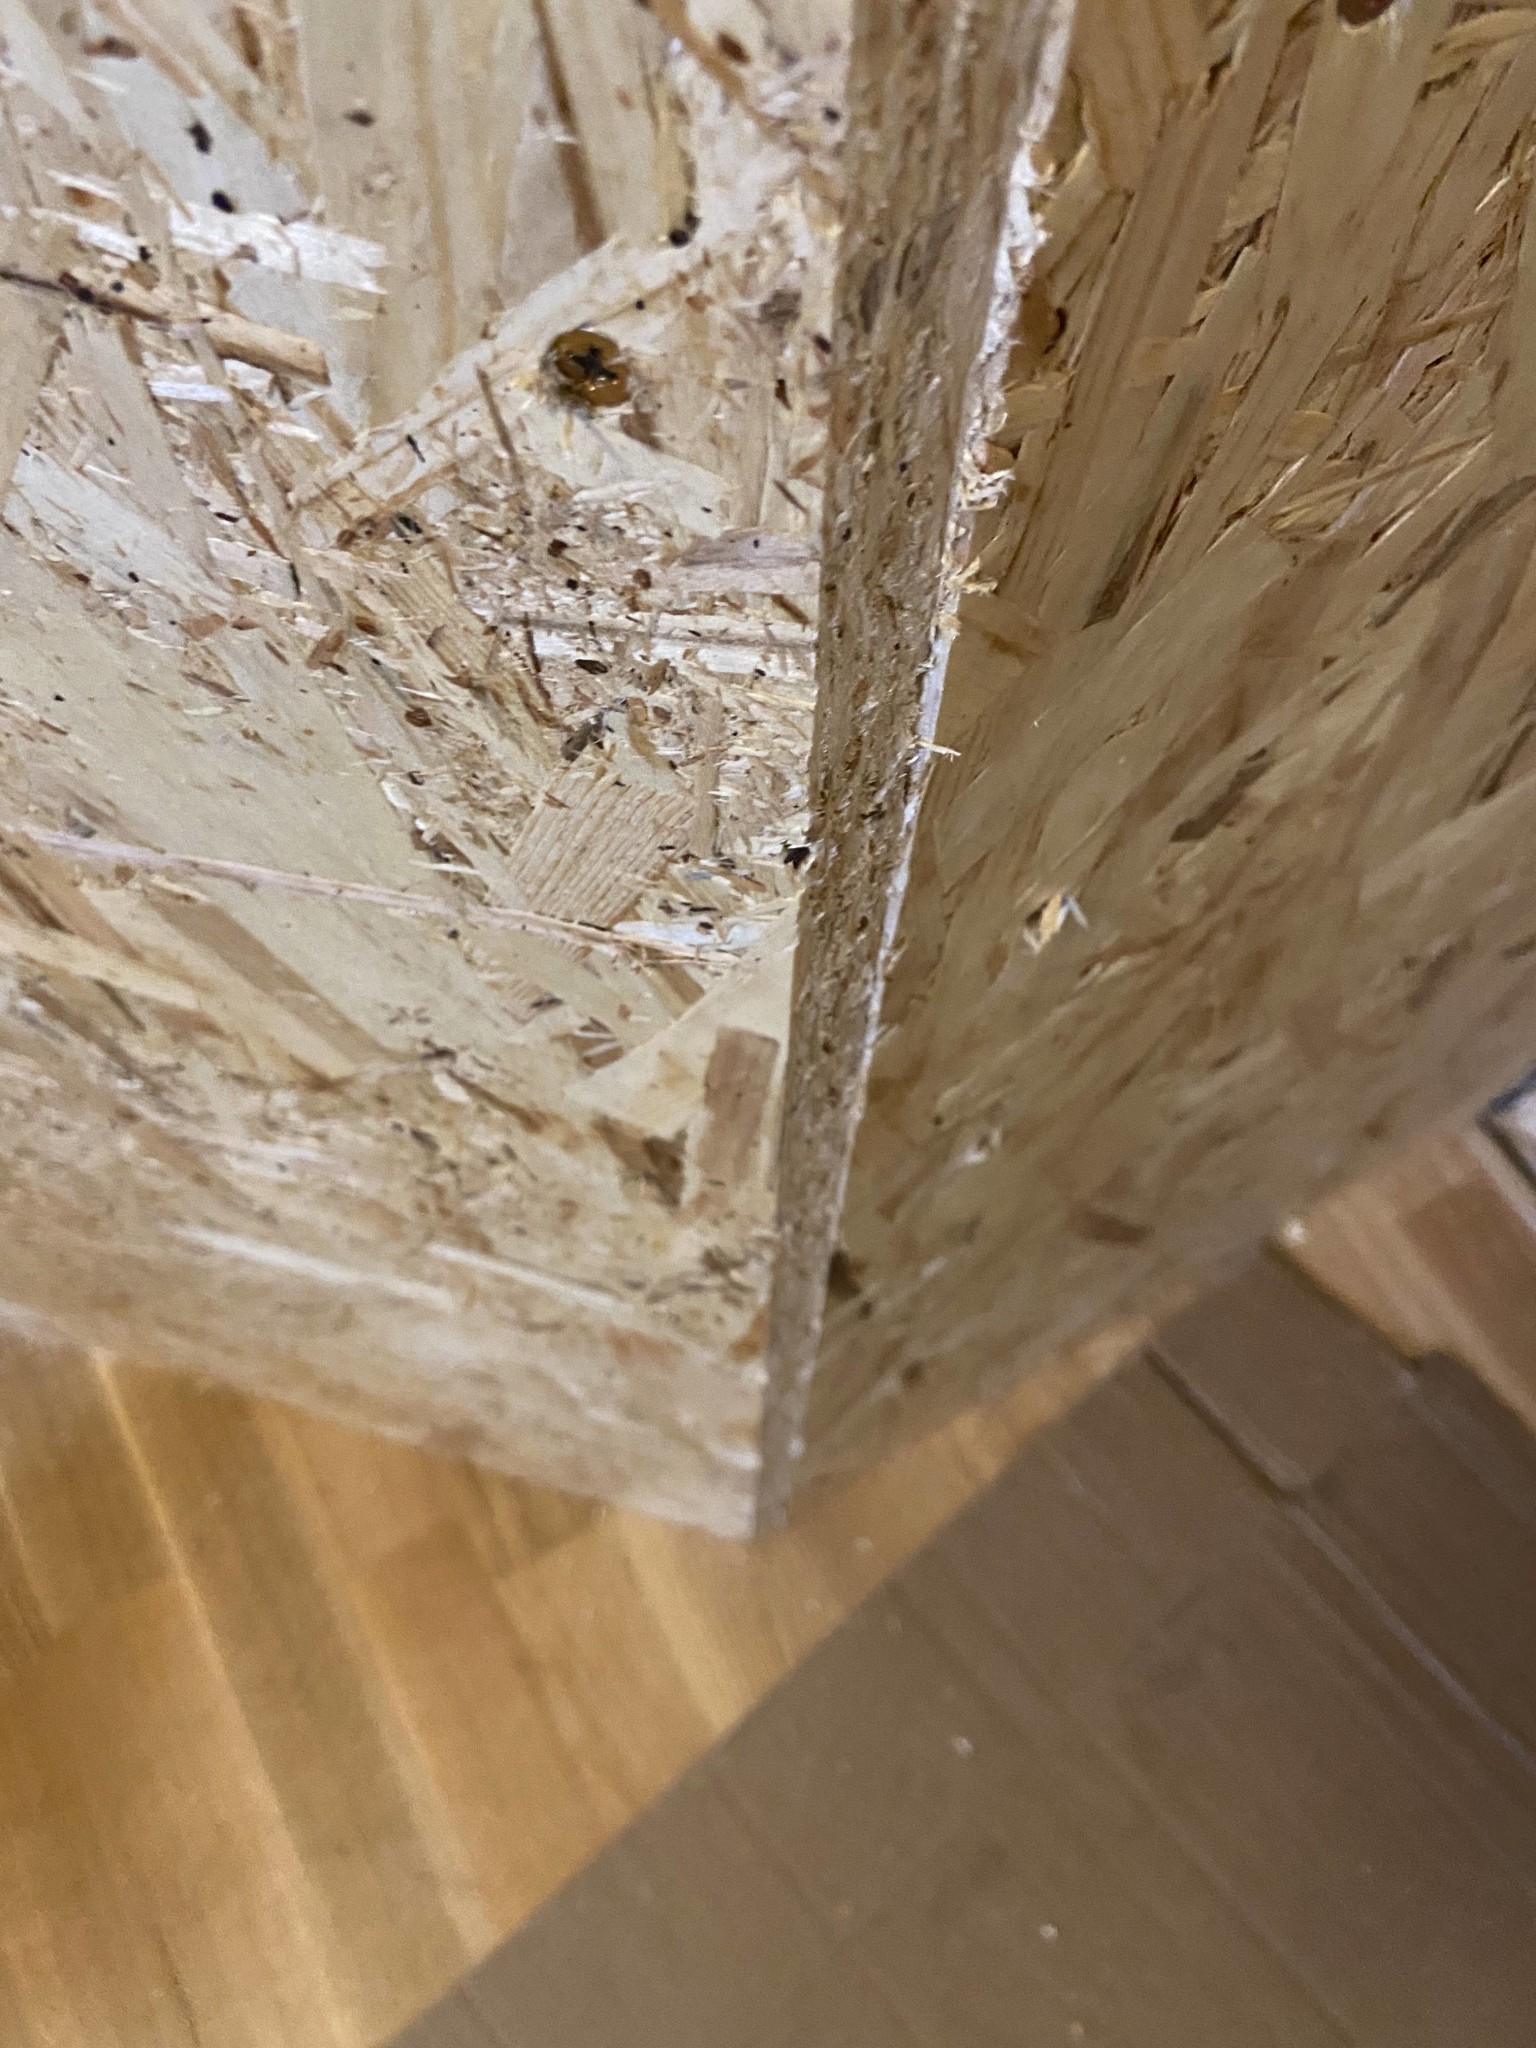
When everything was up, the corners needed fixing. I created a wedge and with today's 70 stud, some magic was required. You have to cut it from 70 -> 30 mm and then bevel cut 45°. Note that everything was done with a Ryobi 18V circular saw... it took time.
When the wedge was up, it was just a matter of fastening it. A little planing was needed because the standing stud was a bit crooked. But it was solved with clamps and a few screws on the side. Almost a perfect fit... it got a little tricky when wedging the wedge in =).
Thanks for the advice!
Oh right... I was stingy... only bought angle brackets for the places that were difficult to screw. Then I toe-nailed most places.
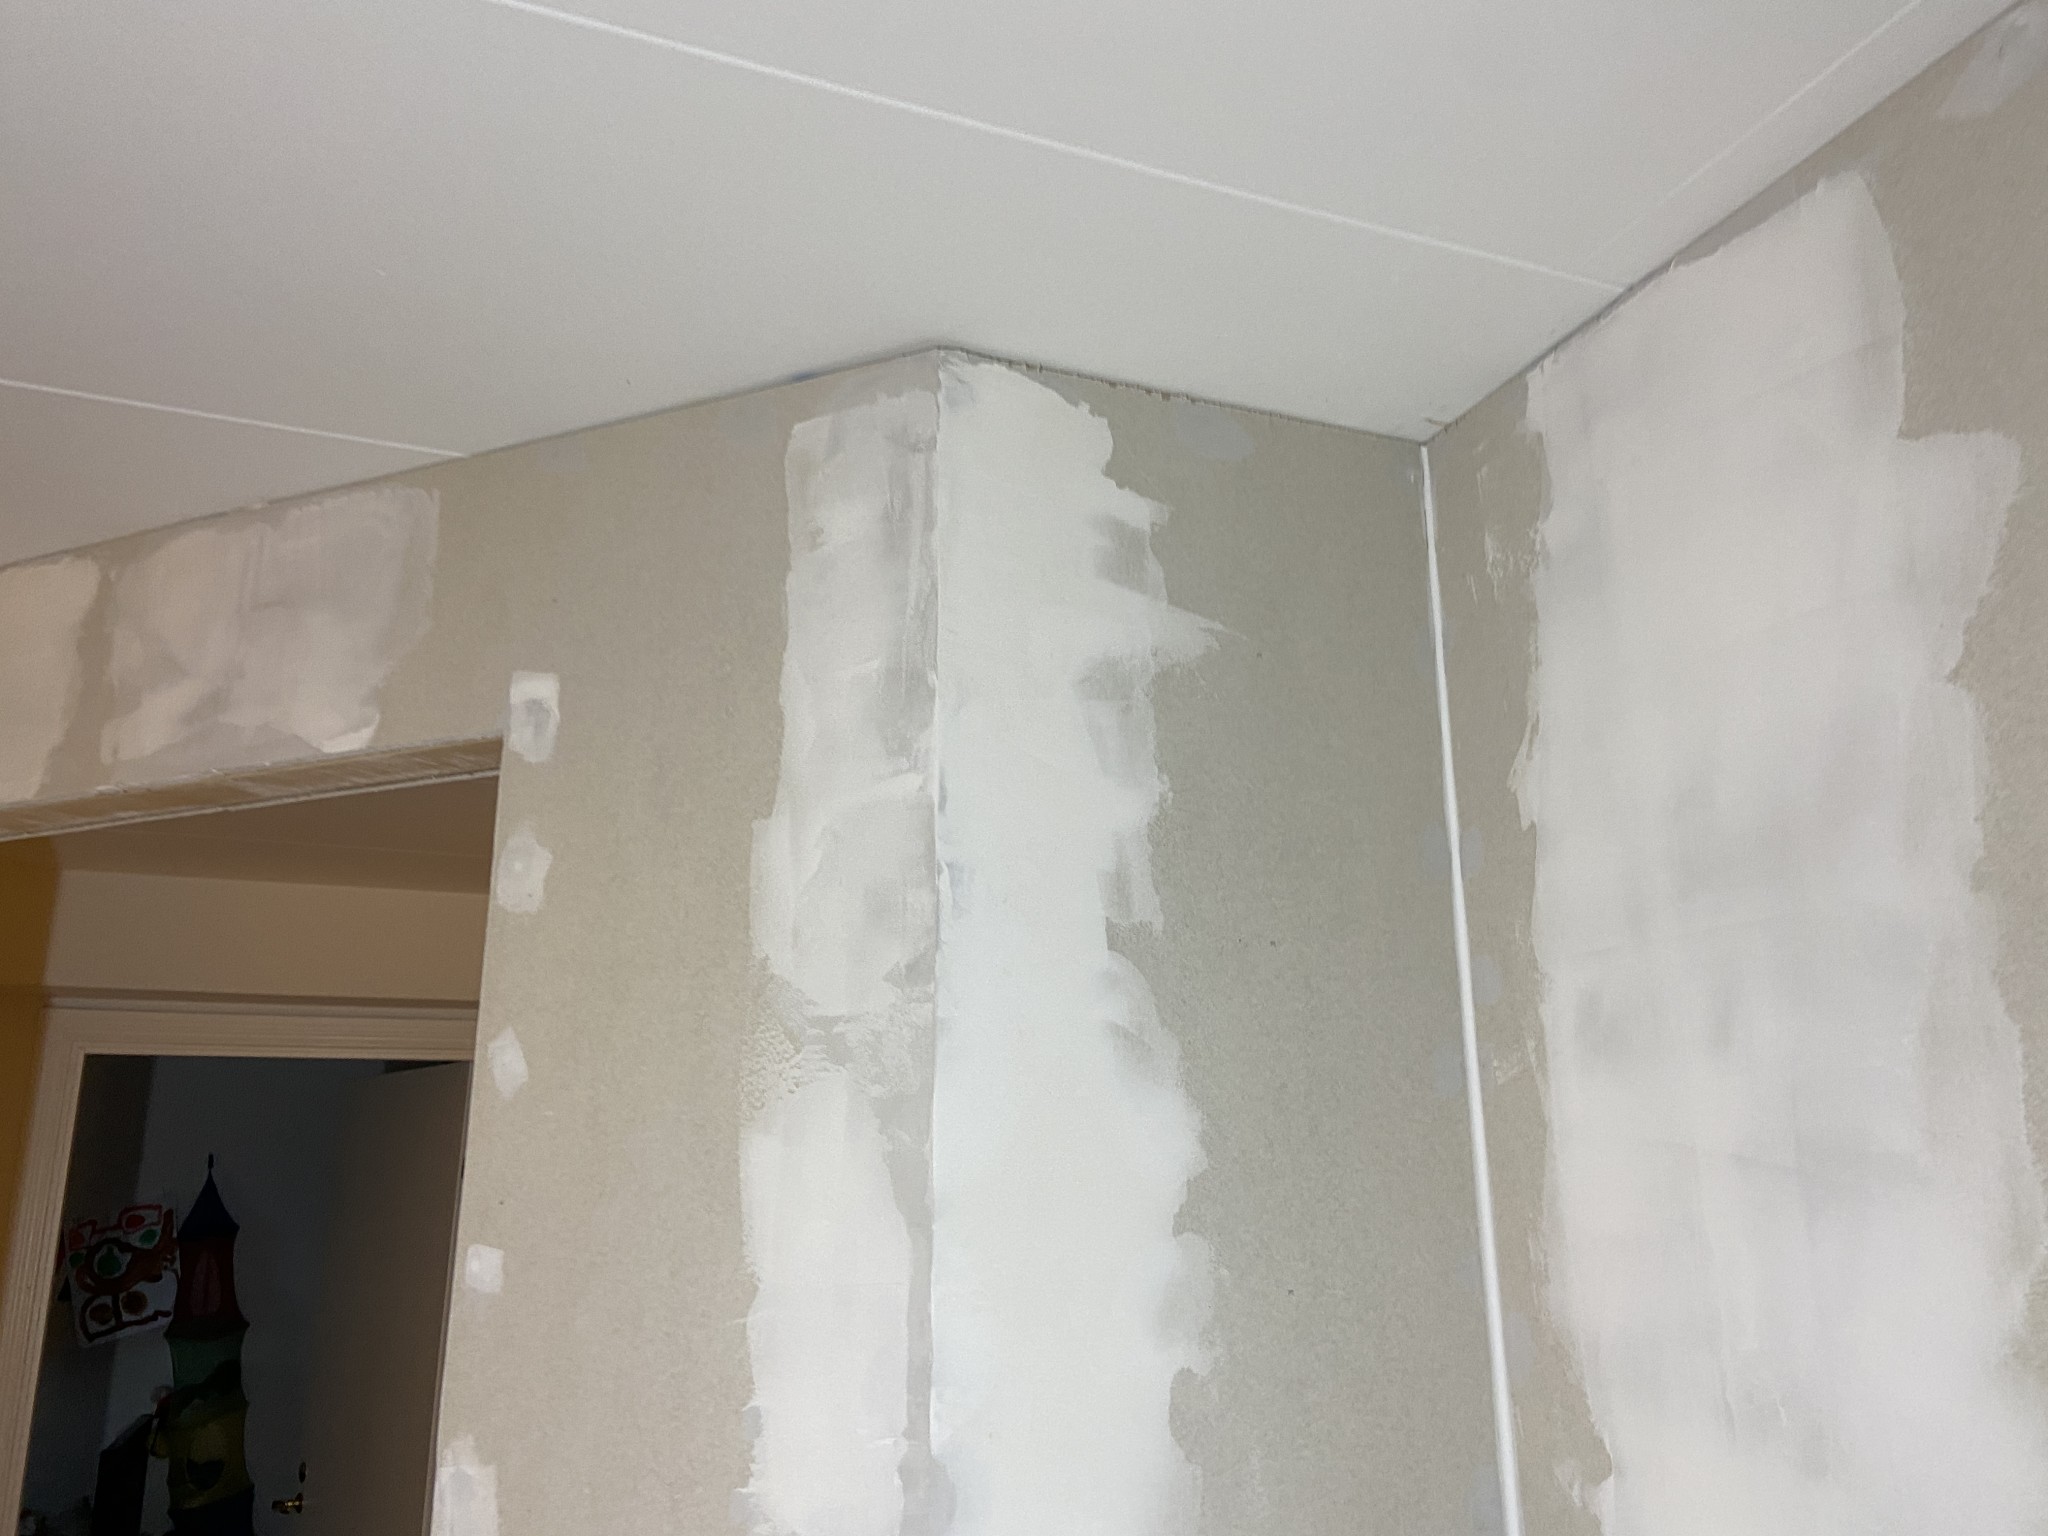
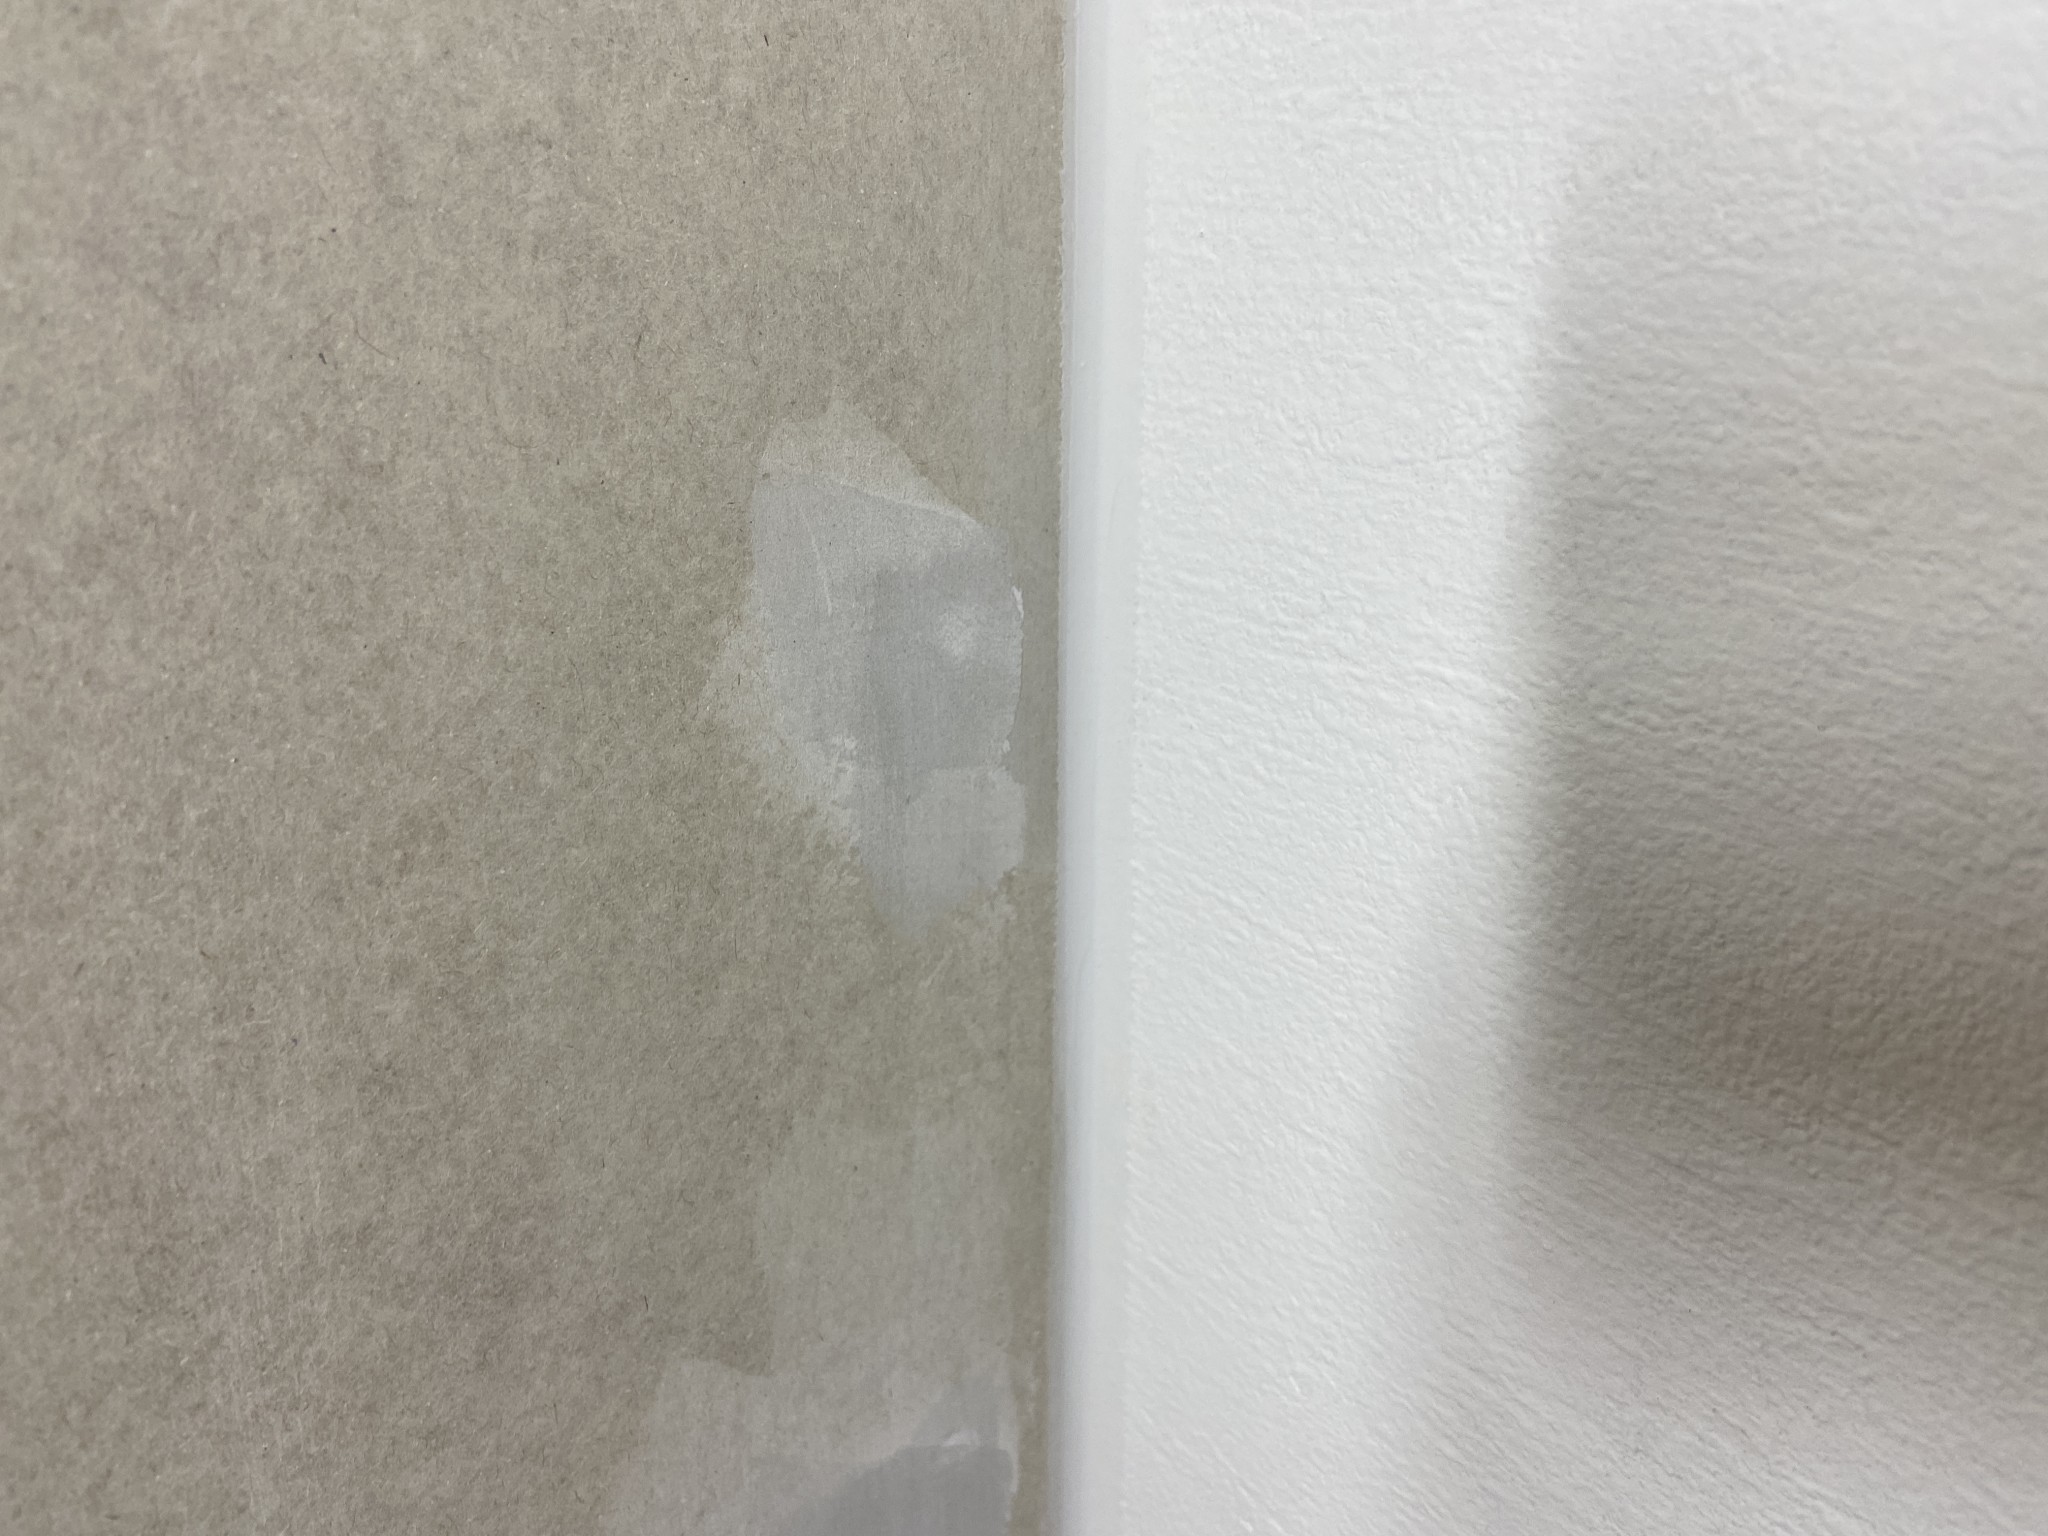
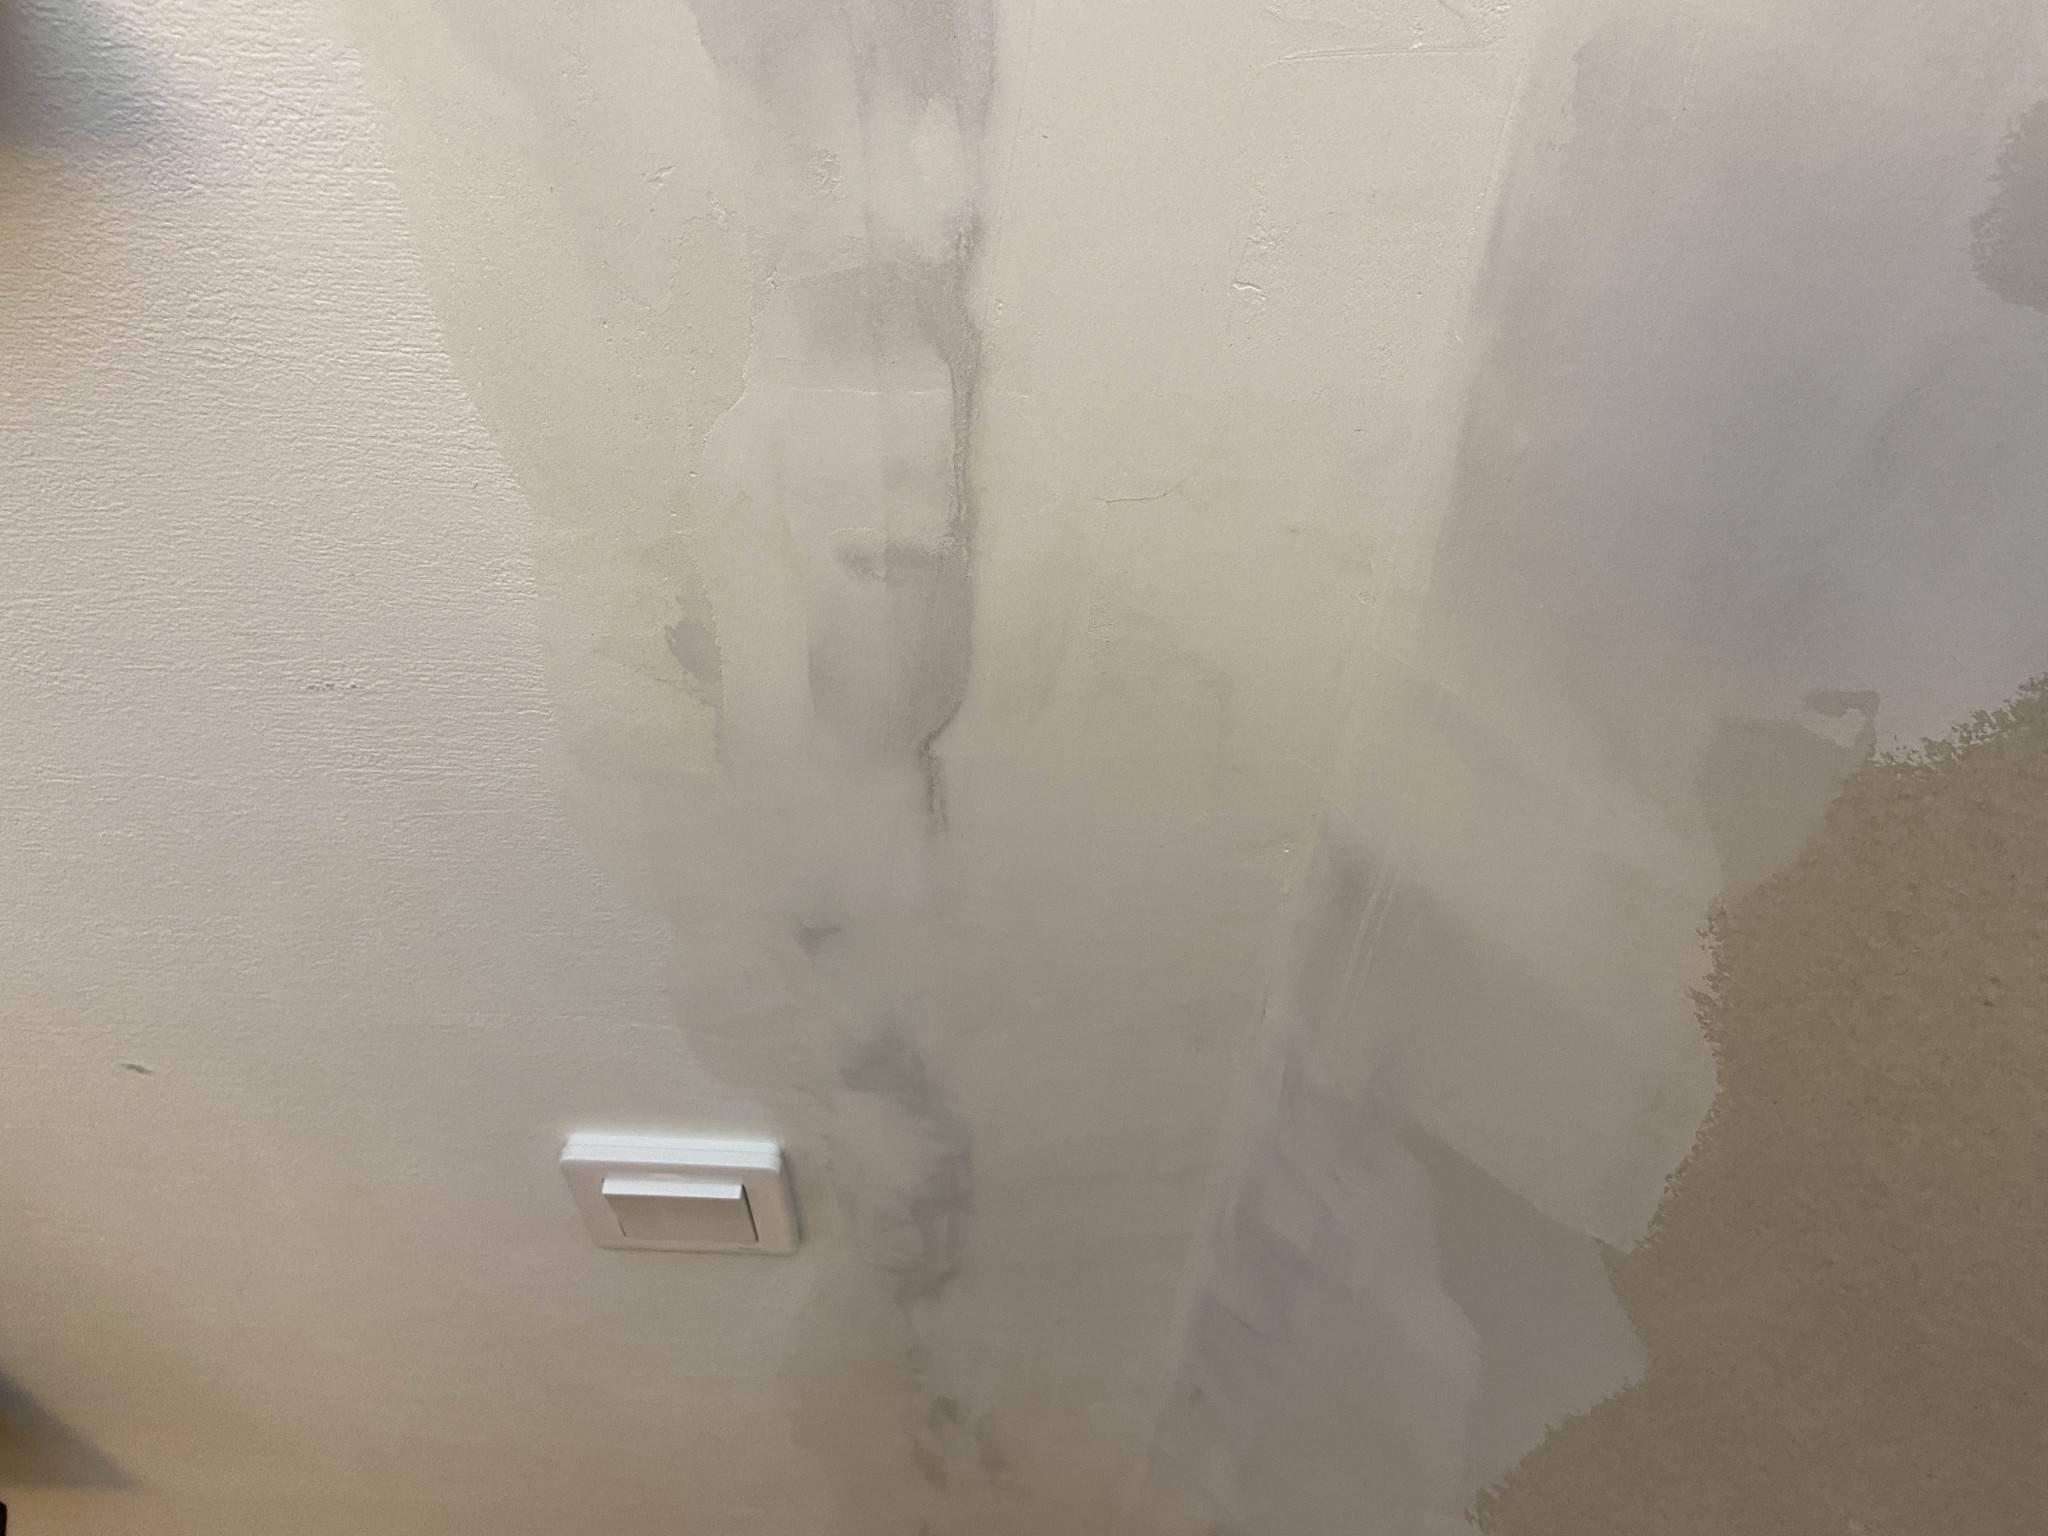
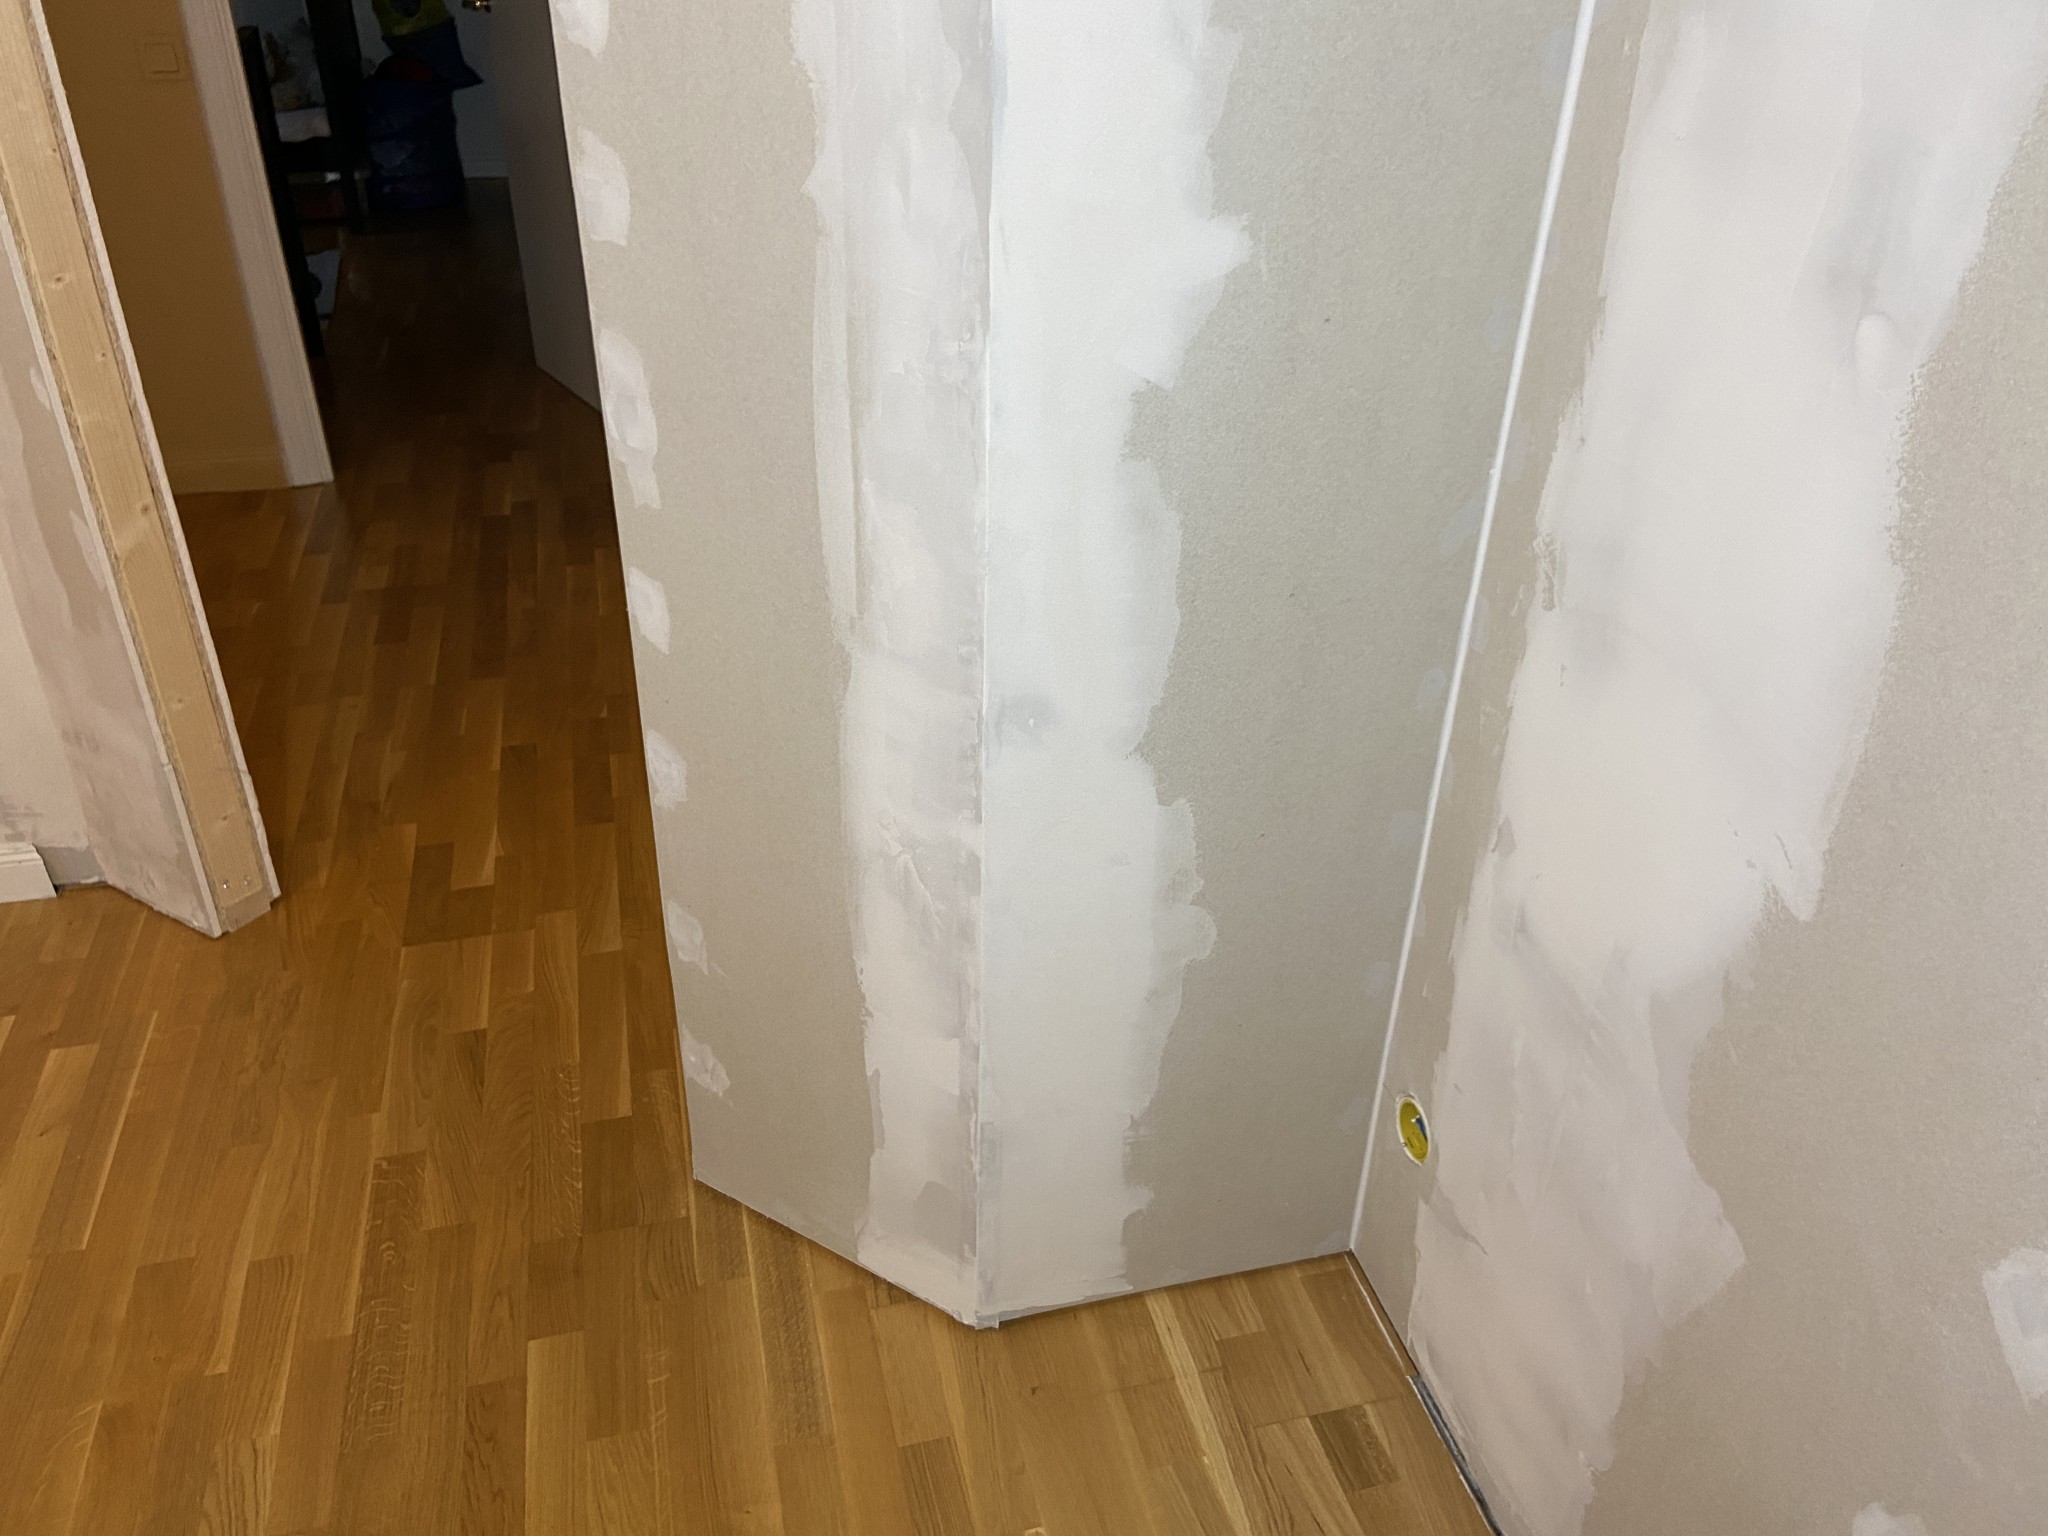
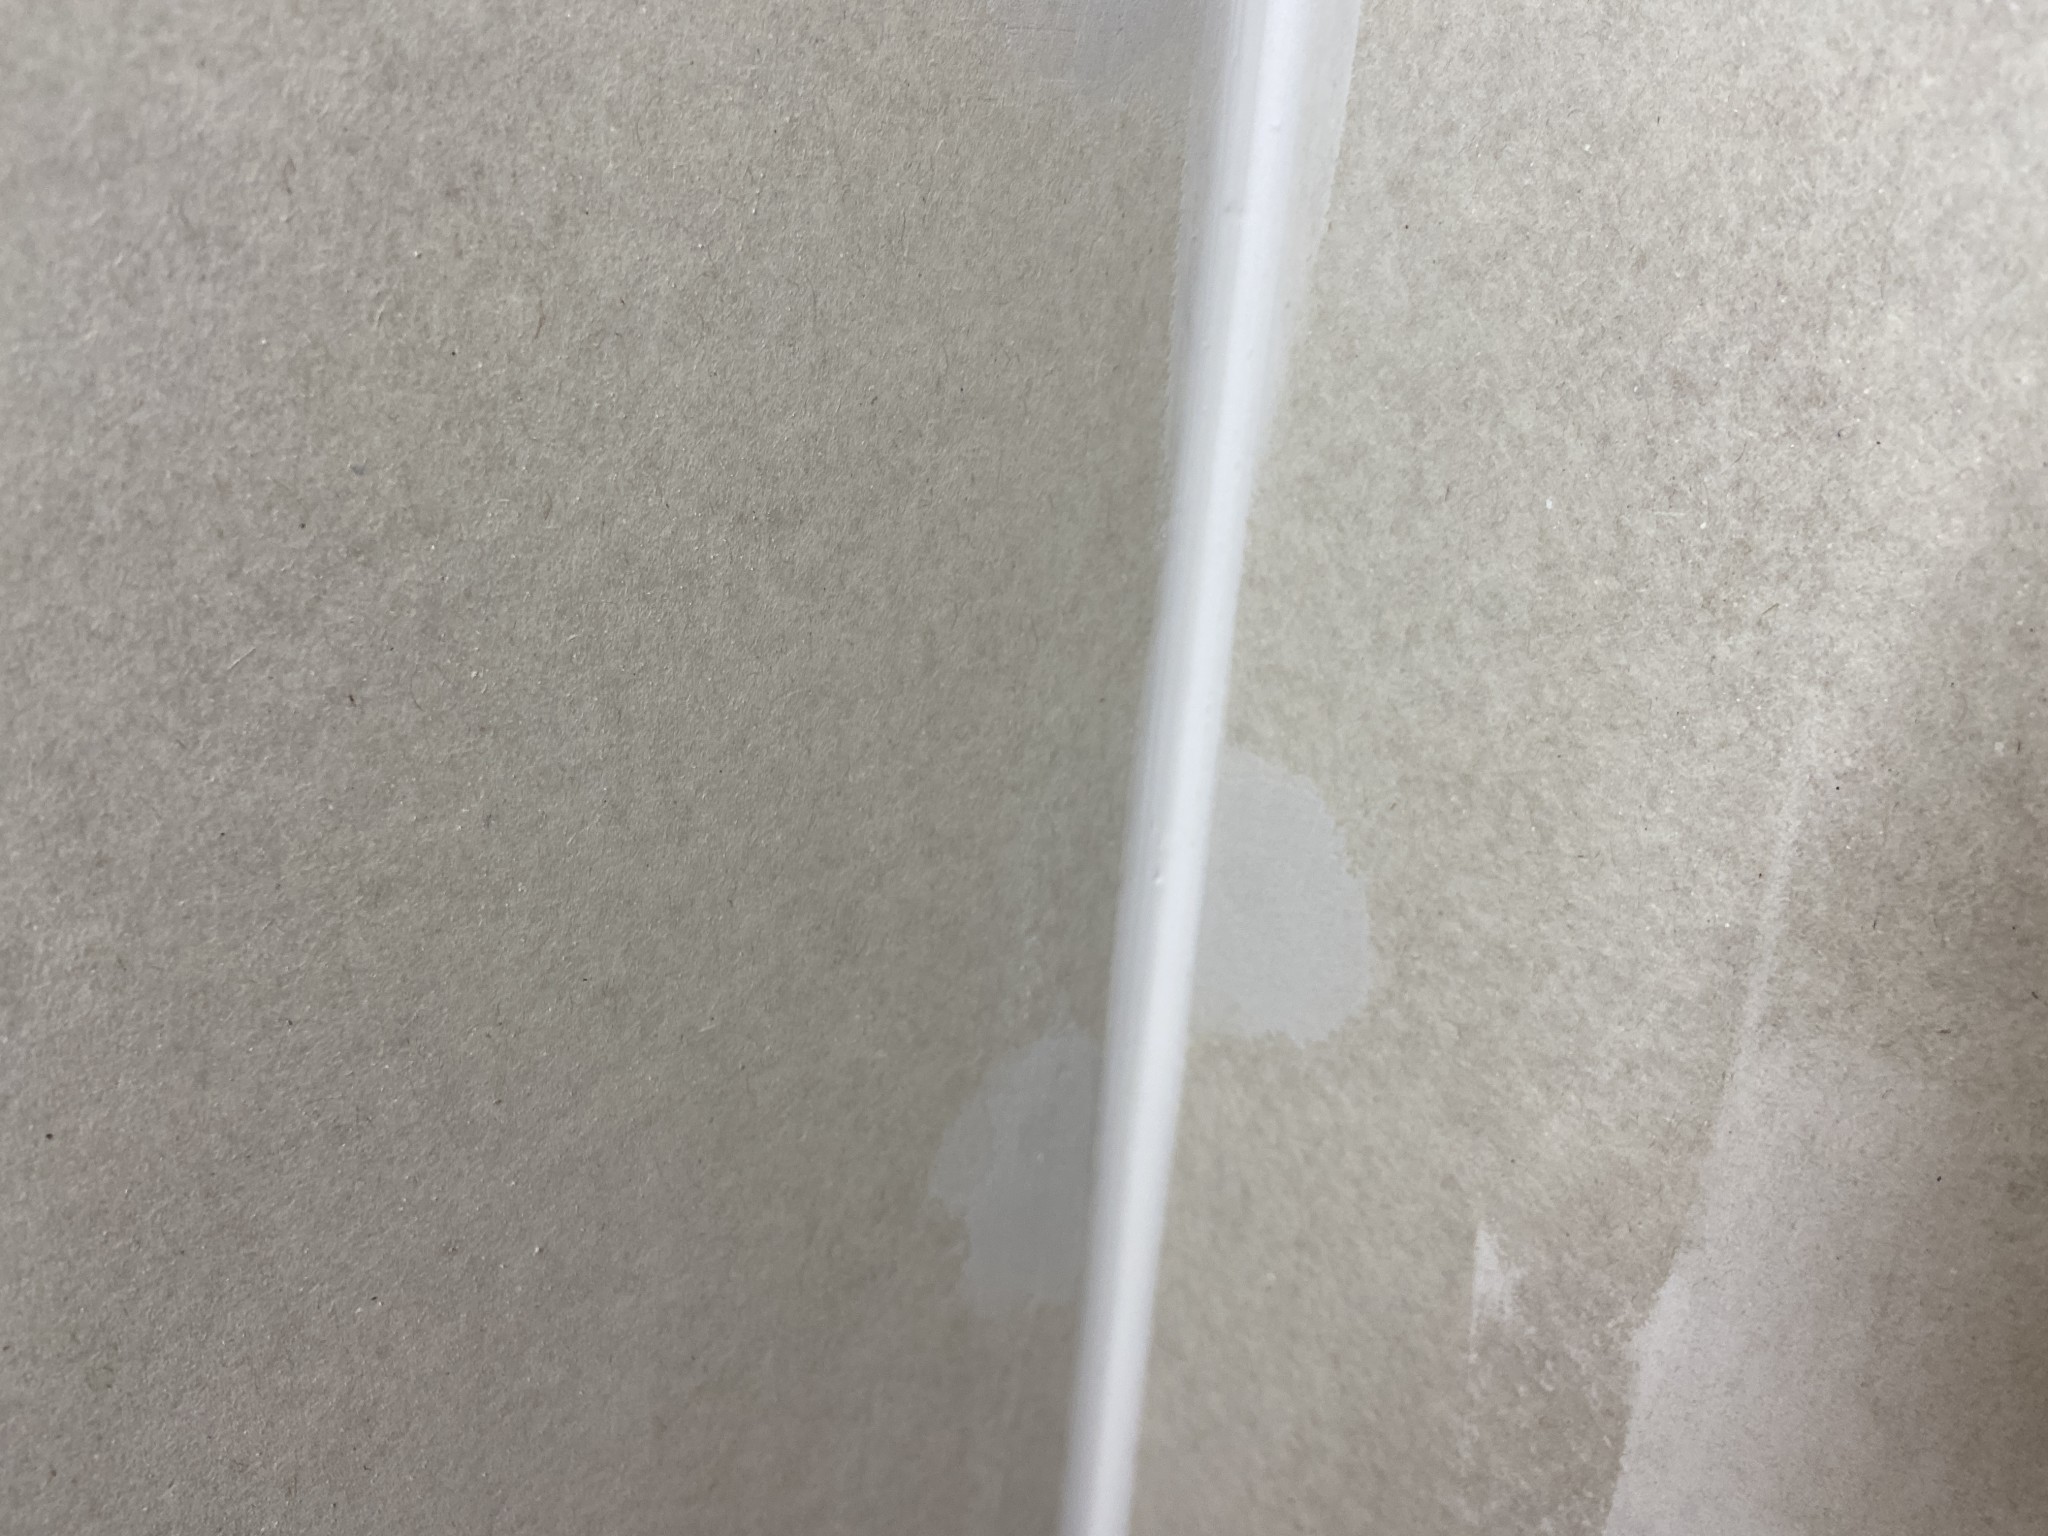
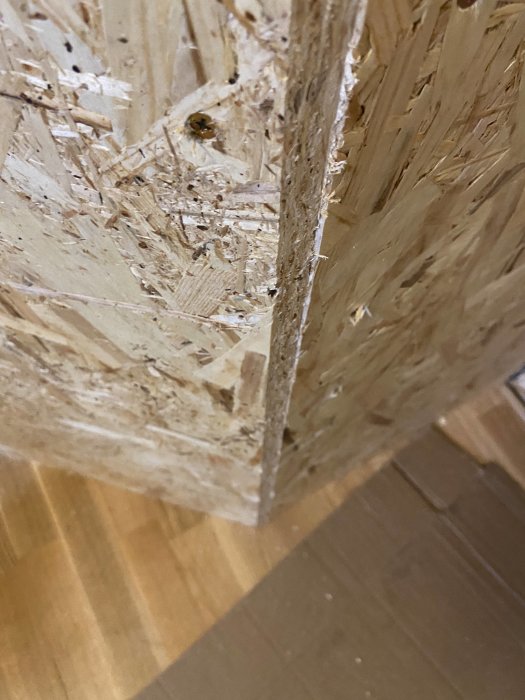
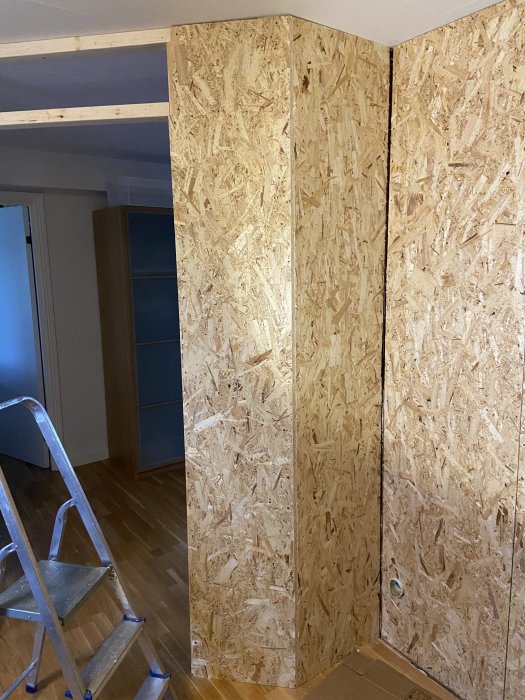
It turned out great. A lot of measuring though, and straight studs are a must. However, now I've "hit a snag." I was going over some things to buy before spackling and discovered, how the heck do you do this... Should you just fill with spackling and even it out? It can't be that simple, can it... it's about 5-8 mm in height in certain places and there's a gap of 3-4 mm depending on the spot. The stud was maybe a bit too big and has bulged outwards on two axes... should have cut it 2 mm smaller, but here we are...
Litw tips and advice would be great,
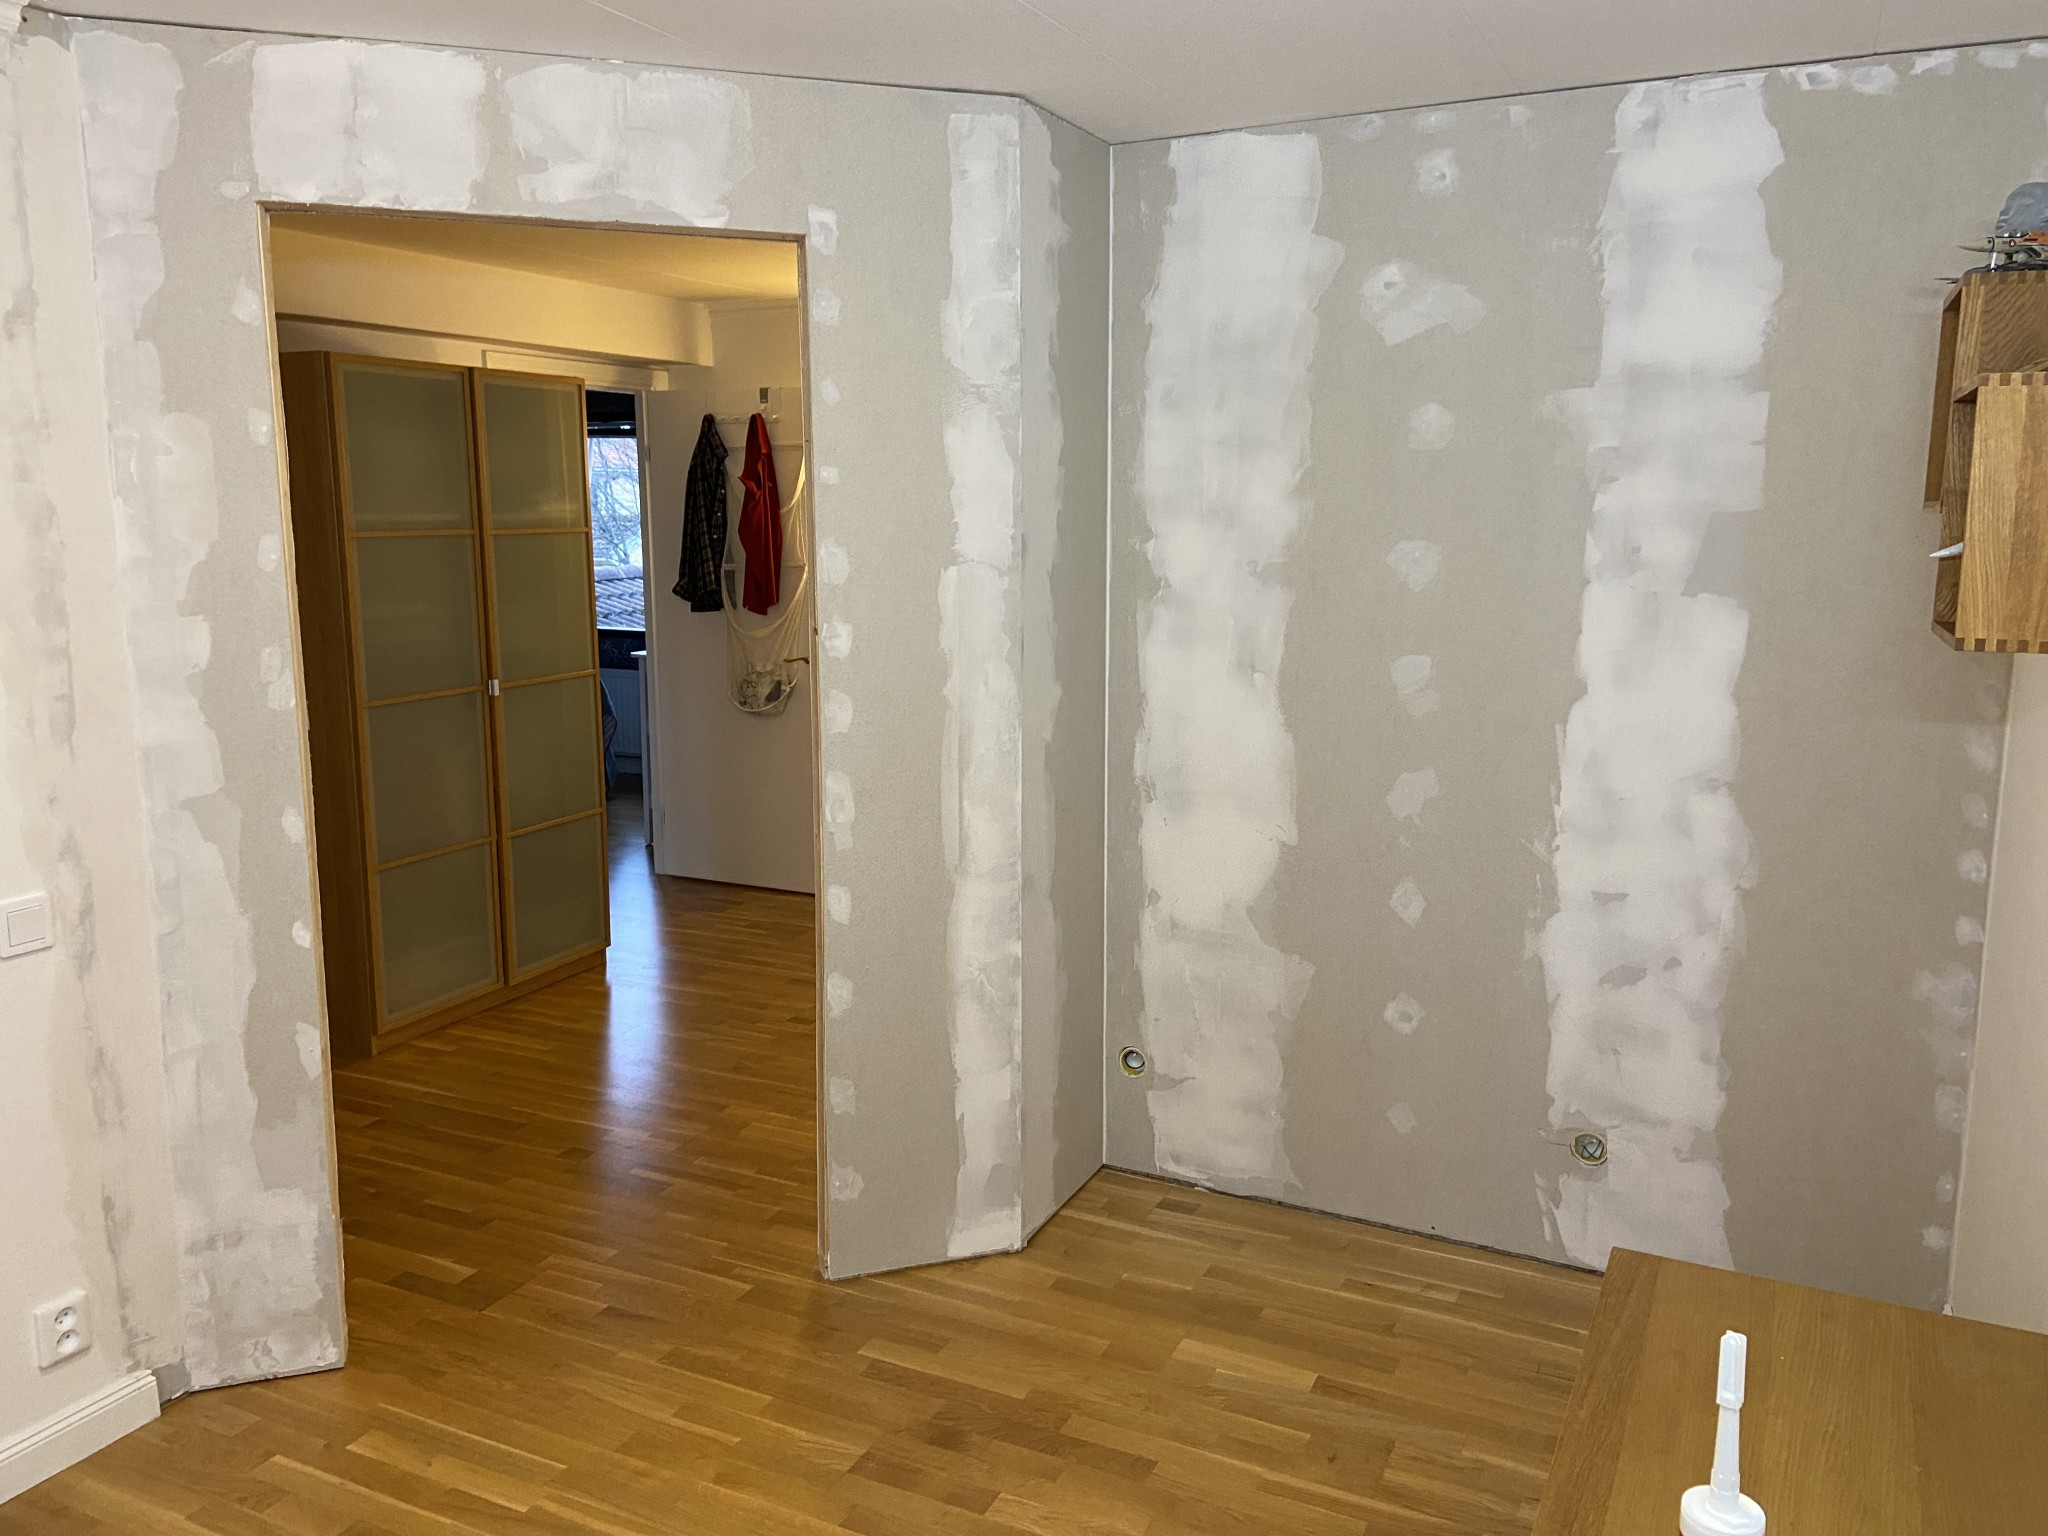
Bonus picture... OSB is in place and a bit more plasterboard.
I assume it is the narrow plaster strip that is 5-8mm further in and 3-4 mm from the old wall?
5-8 mm can be filled with putty. If it's about 6mm, it might be possible to fill it with renovation plaster first. Otherwise, just fill it up with putty It might need to be done in several steps. There is a risk it might crack a bit later on, though. You can put a fabric over it (as is usually done with ceiling plaster, when there are no chamfered edges for puttying), which should hold much better and usually results in a very smooth and nice finish. If you plan to wallpaper over it, it's less sensitive, of course, but it looks like everything is painted otherwise.
A simpler alternative is, of course, to accept that it is not on the same level and fill the 3-4mm gap with painter's caulk. The painter's caulk will absorb some movement and will hopefully avoid cracks, but you will have a level difference instead.
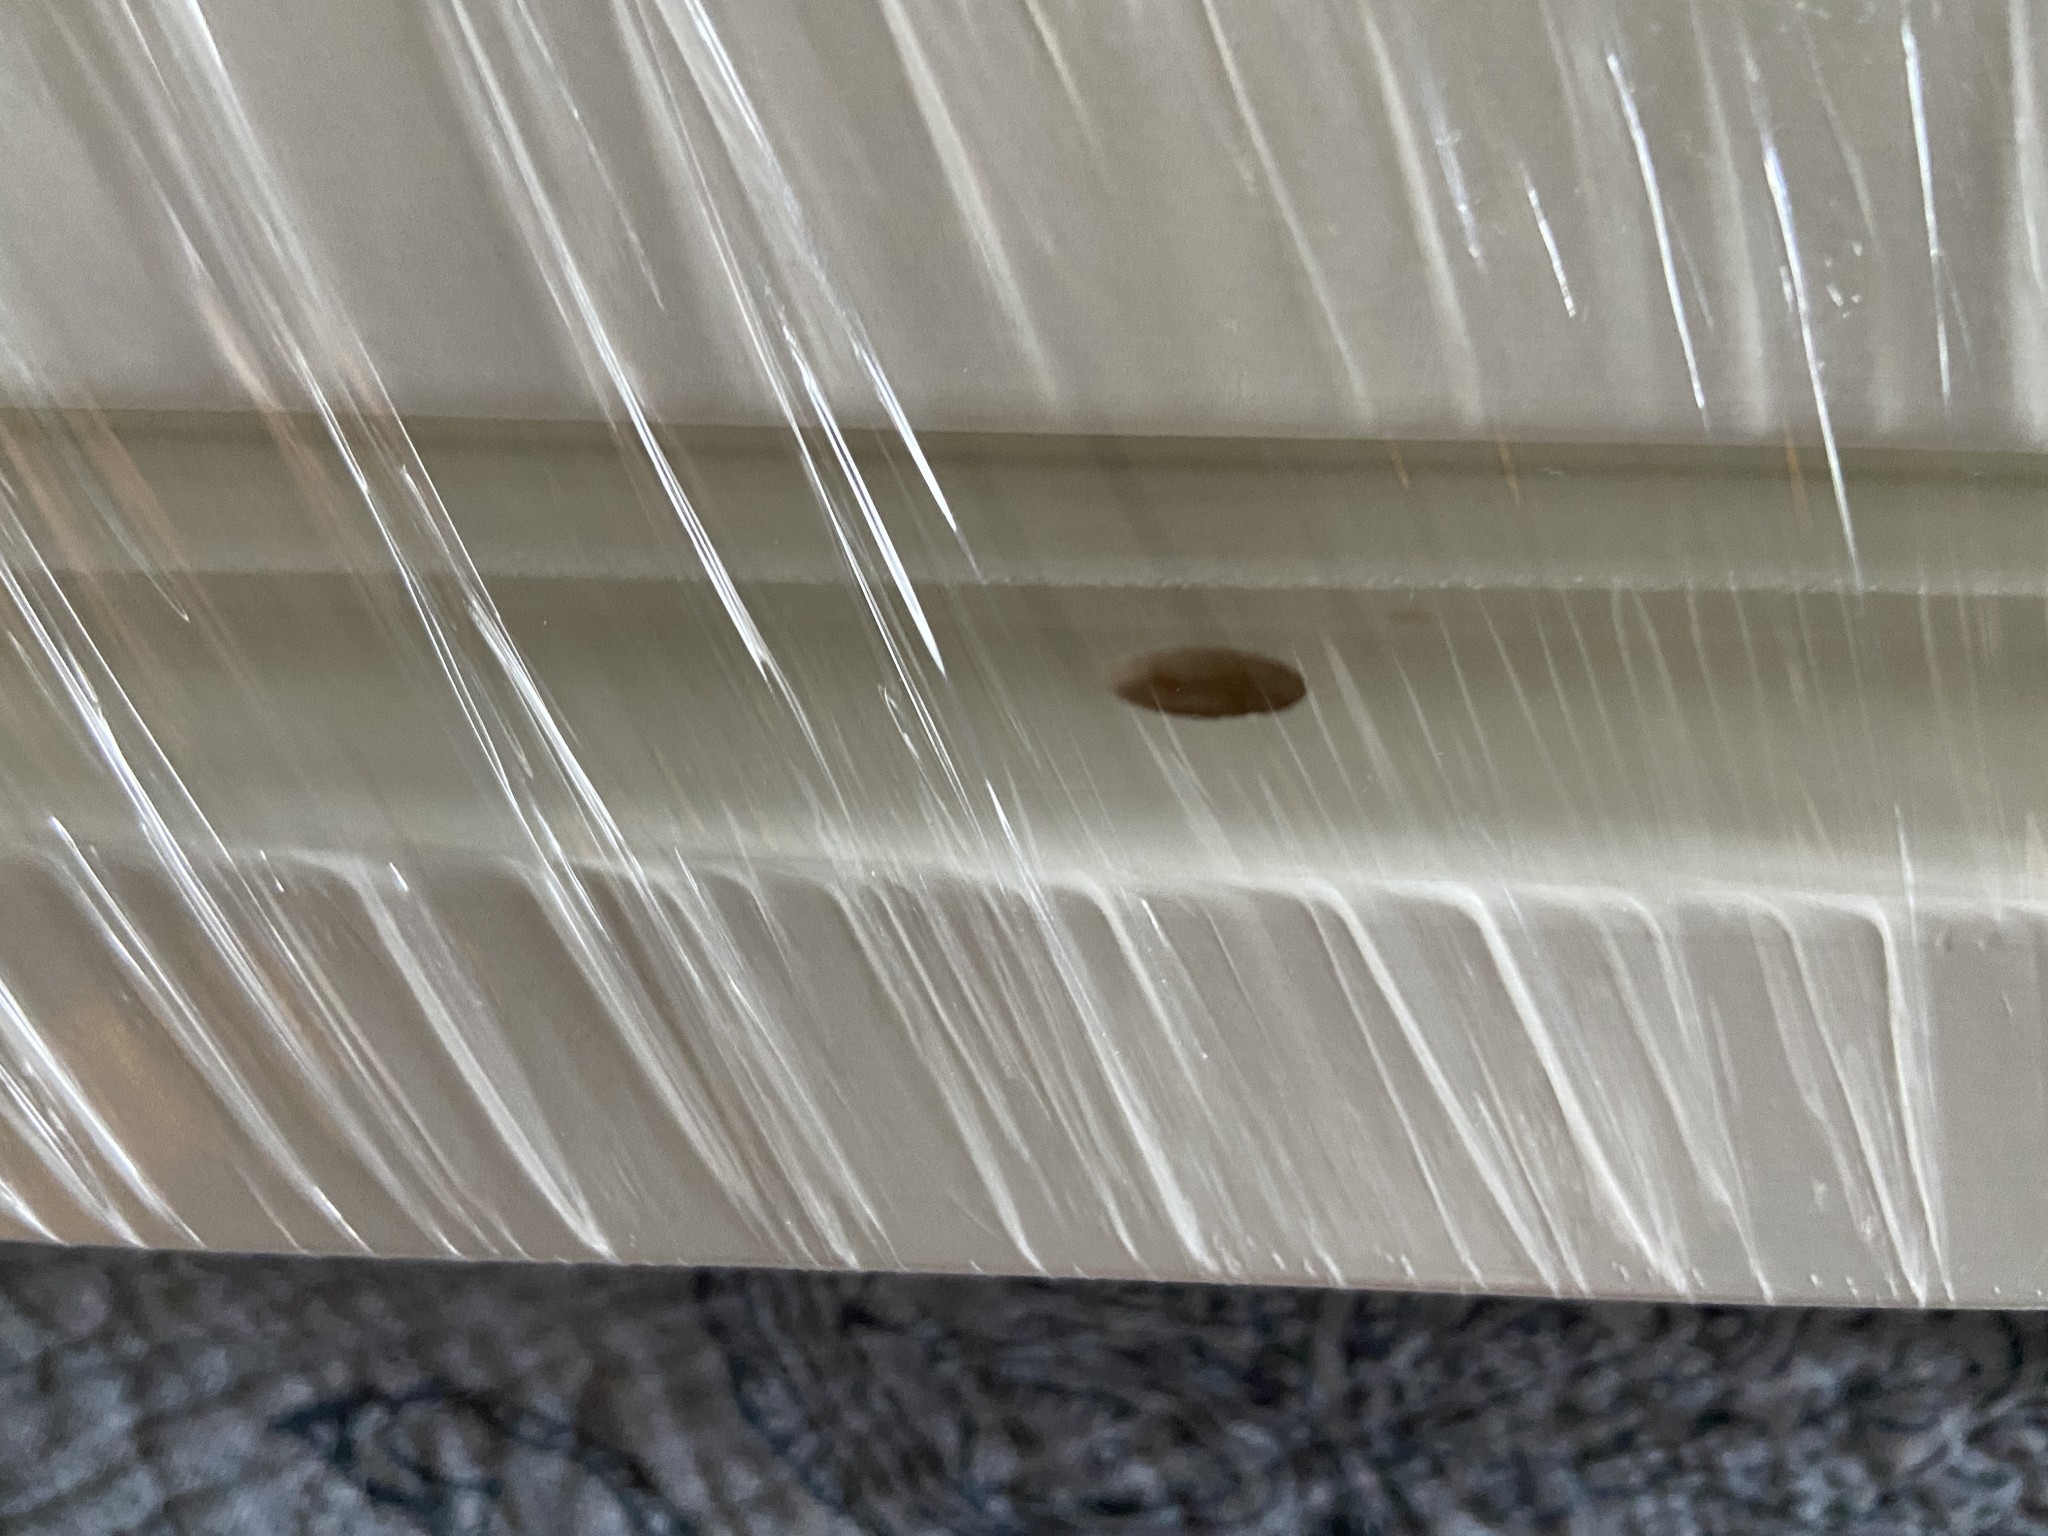
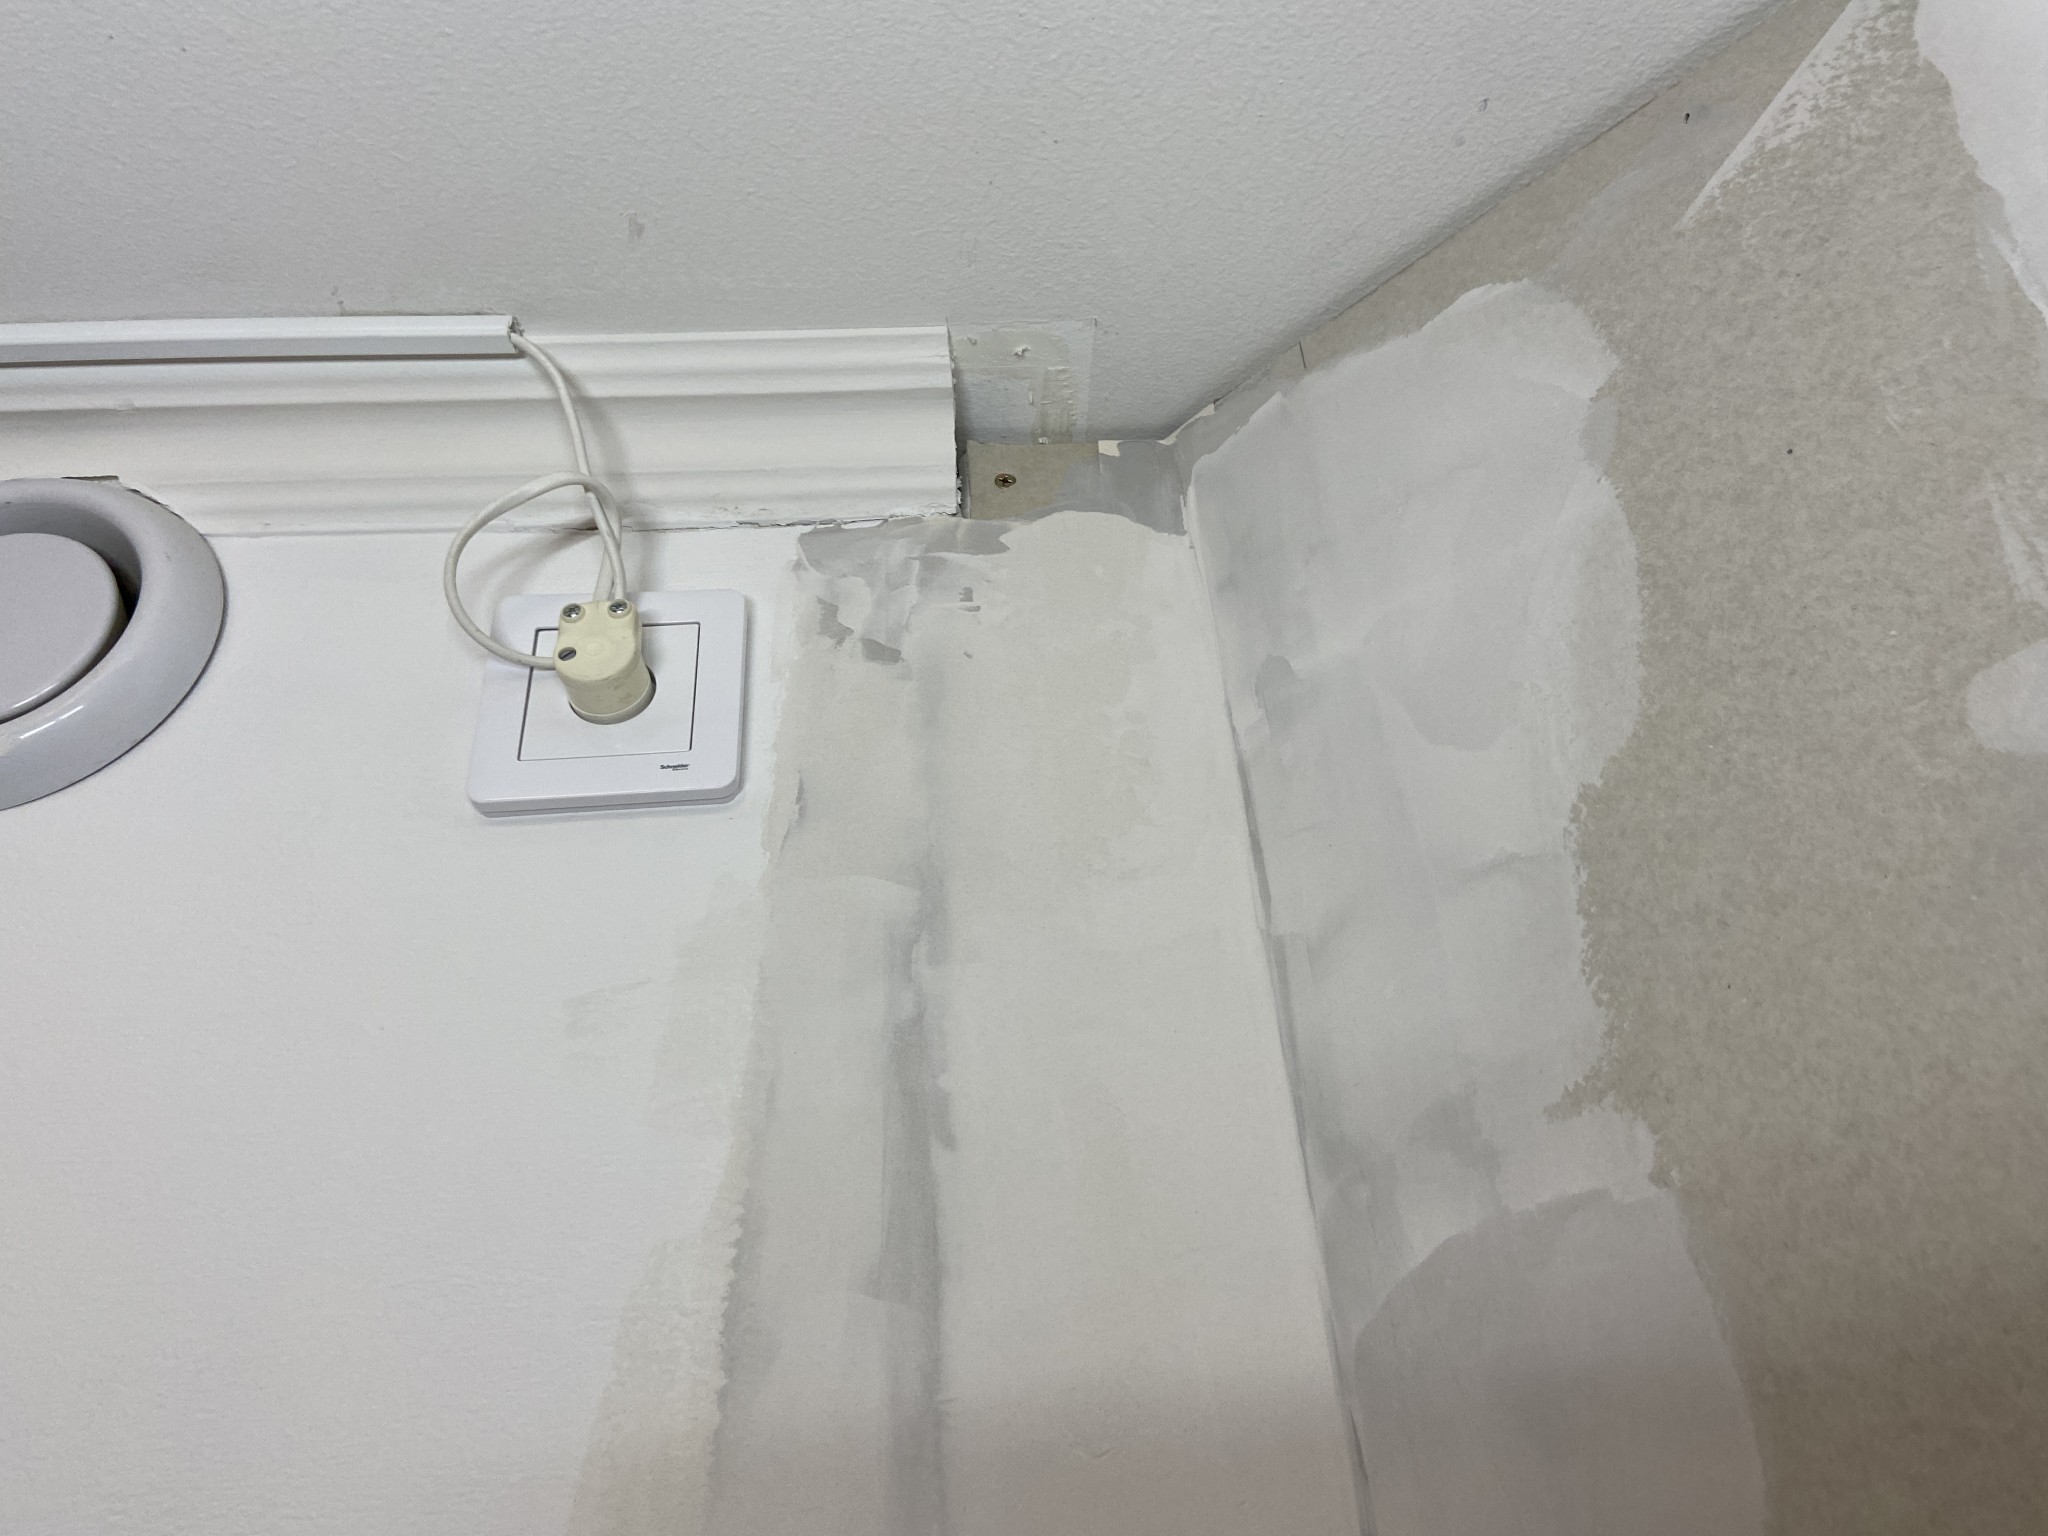
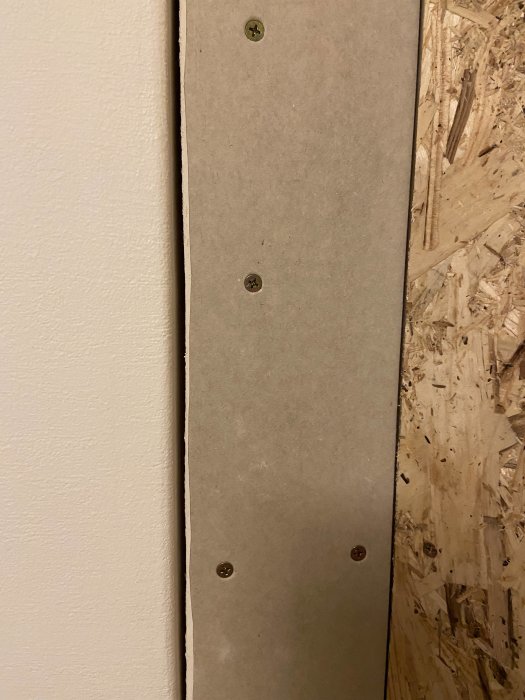
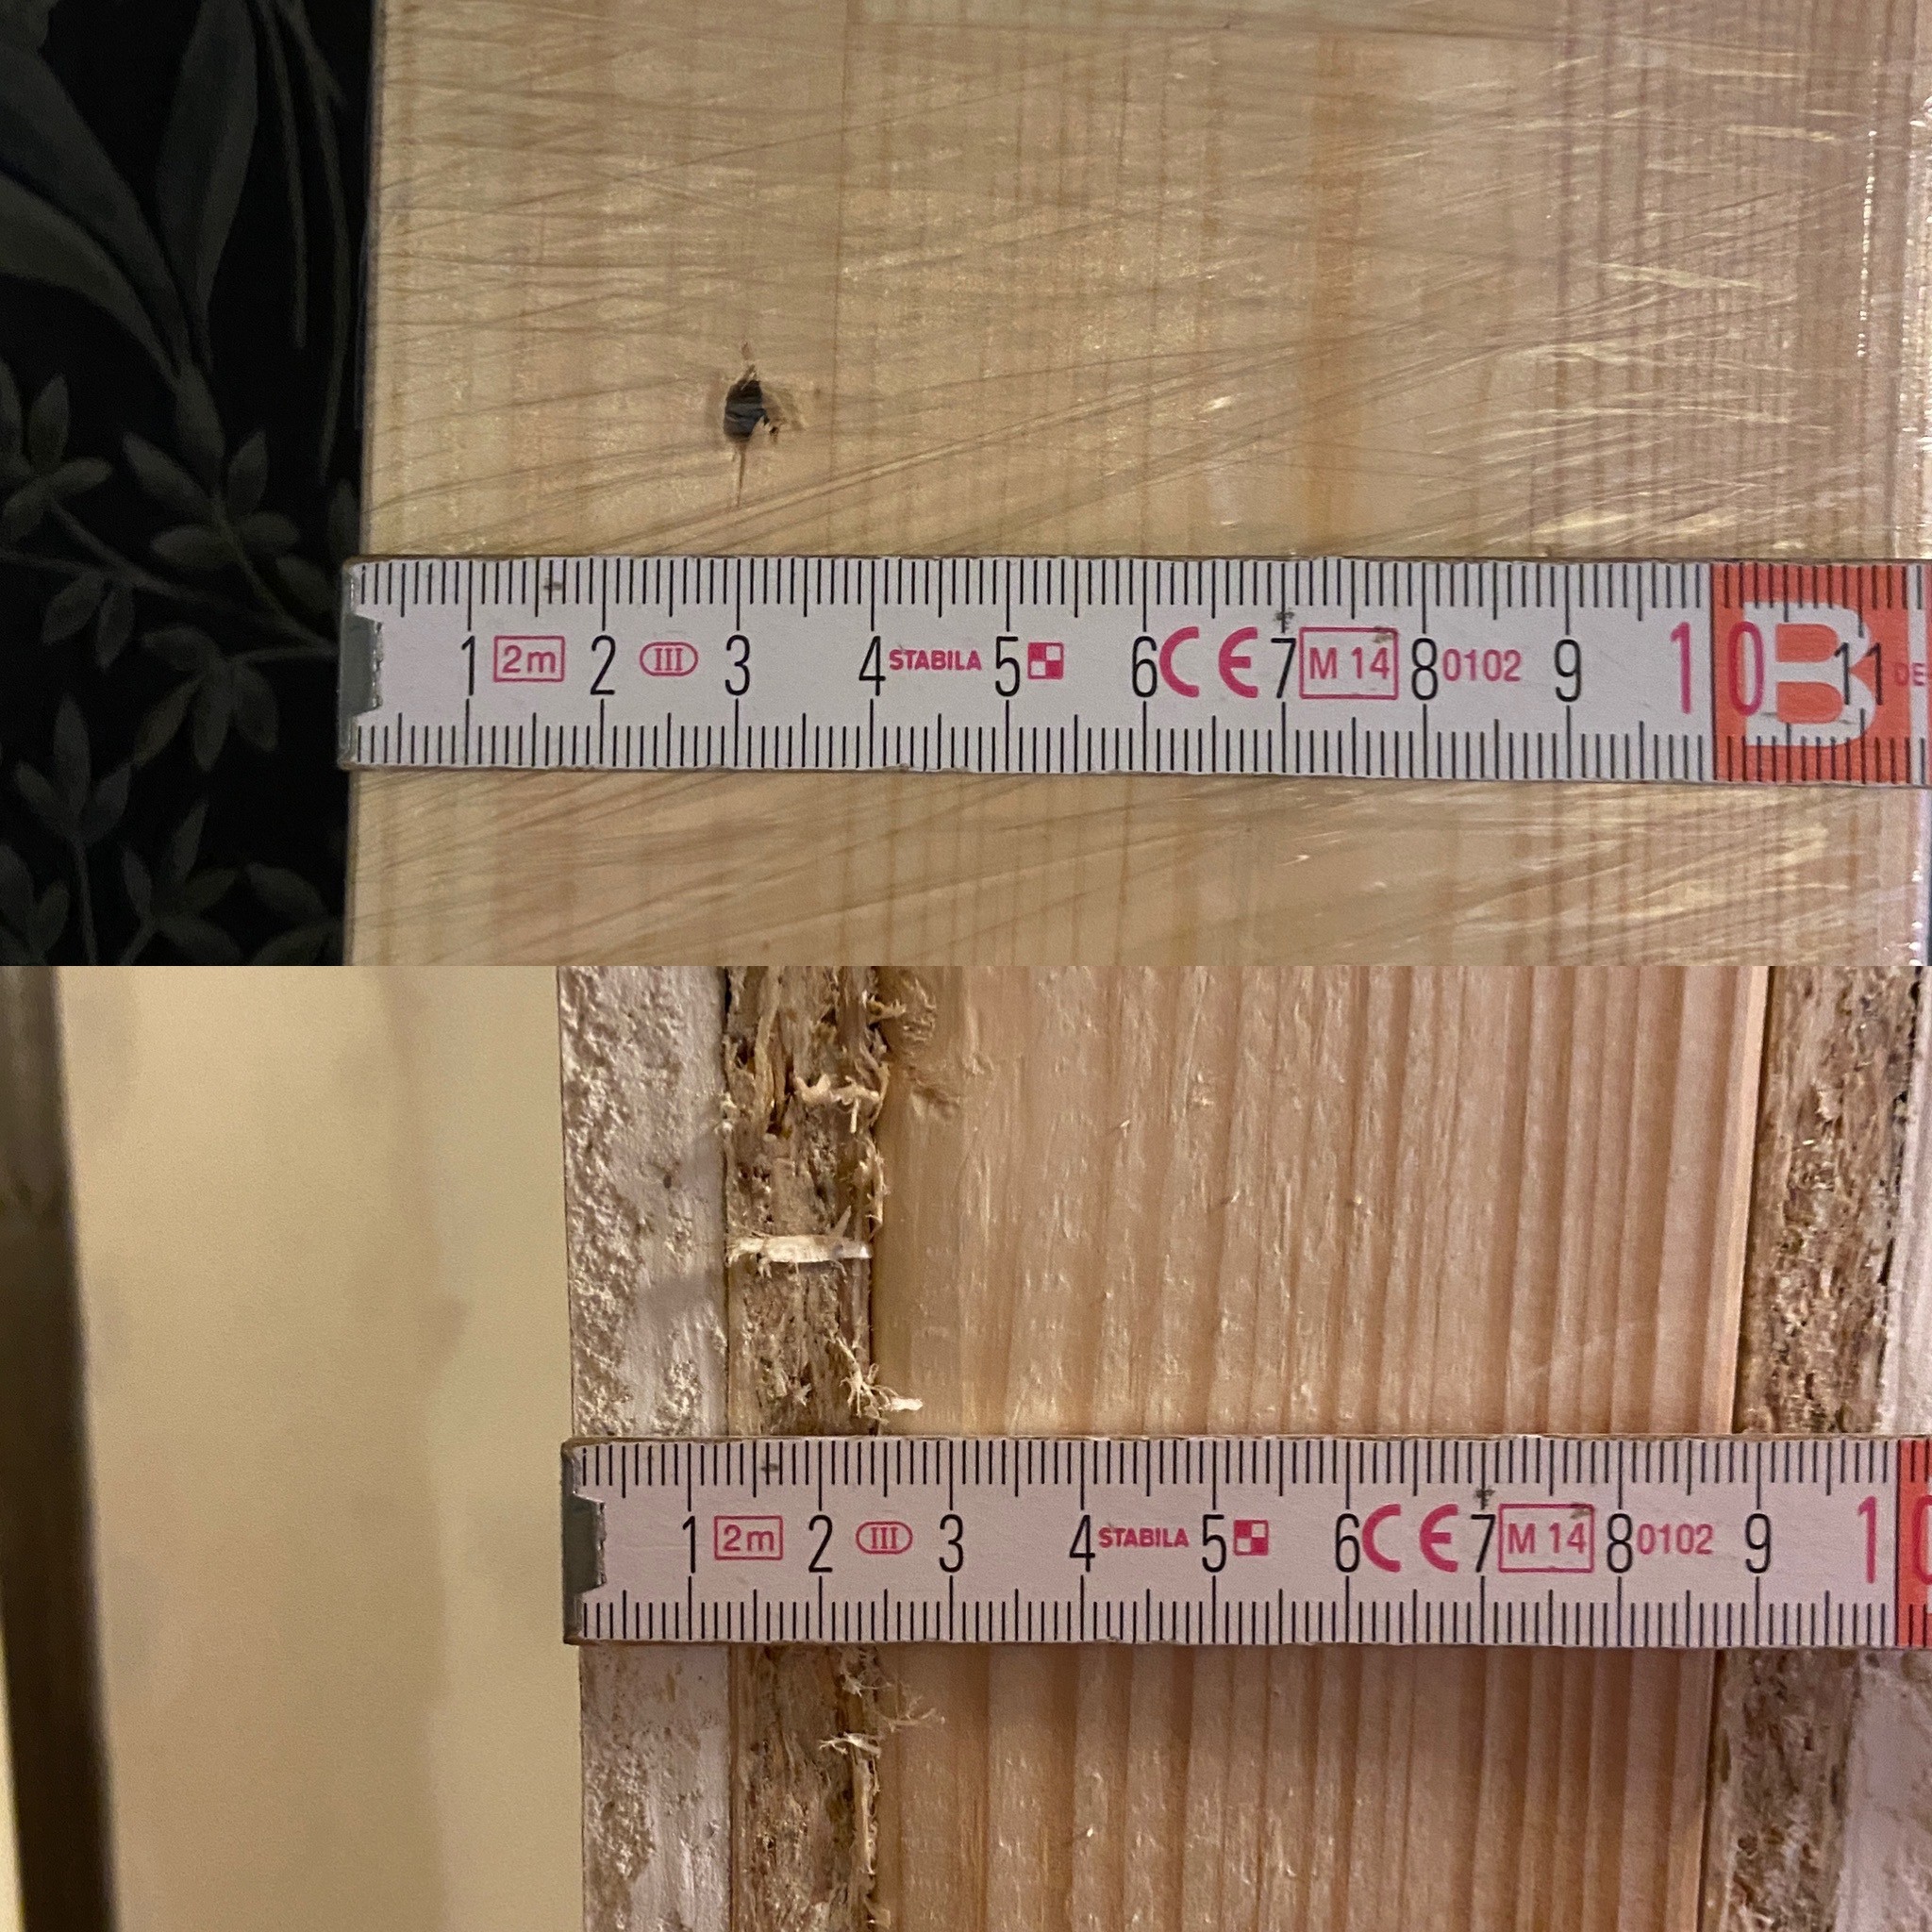
Have been plastering, sanding, and plastering for about a week or so. Have now started looking at the door frame. I have acquired a 118 mm door frame. According to 2x gypsum and 2x OSB + 70 rule. Perfect... But when I was checking the fastening, I noticed that the holes are a bit... Off?
The holes for the frame go right into the edge of the stud... What did I do wrong...
I don't think you've done anything wrong, it's just that the old fastening probably doesn't fit your frame. In that case, you need to refit, and plug (if they are large) and fill the old holes.
I don't quite understand what the top picture shows, but I assume it's the outside of the frame? Was it attached with a nail in the small hole? The by far easiest way to get the frame and door straight and good is to use frame screws.
I don't think you've done anything wrong; rather, the old mounting simply doesn't fit your framework. If so, you need to attach anew, and plug (if they are large) and fill the old holes.
I don't quite understand what the top picture shows, but I assume it's the outside of the frame? Was it attached with a nail in the small hole? By far the simplest way to get the frame and door straight and good is to use frame screws.
Thank you for the explanation.
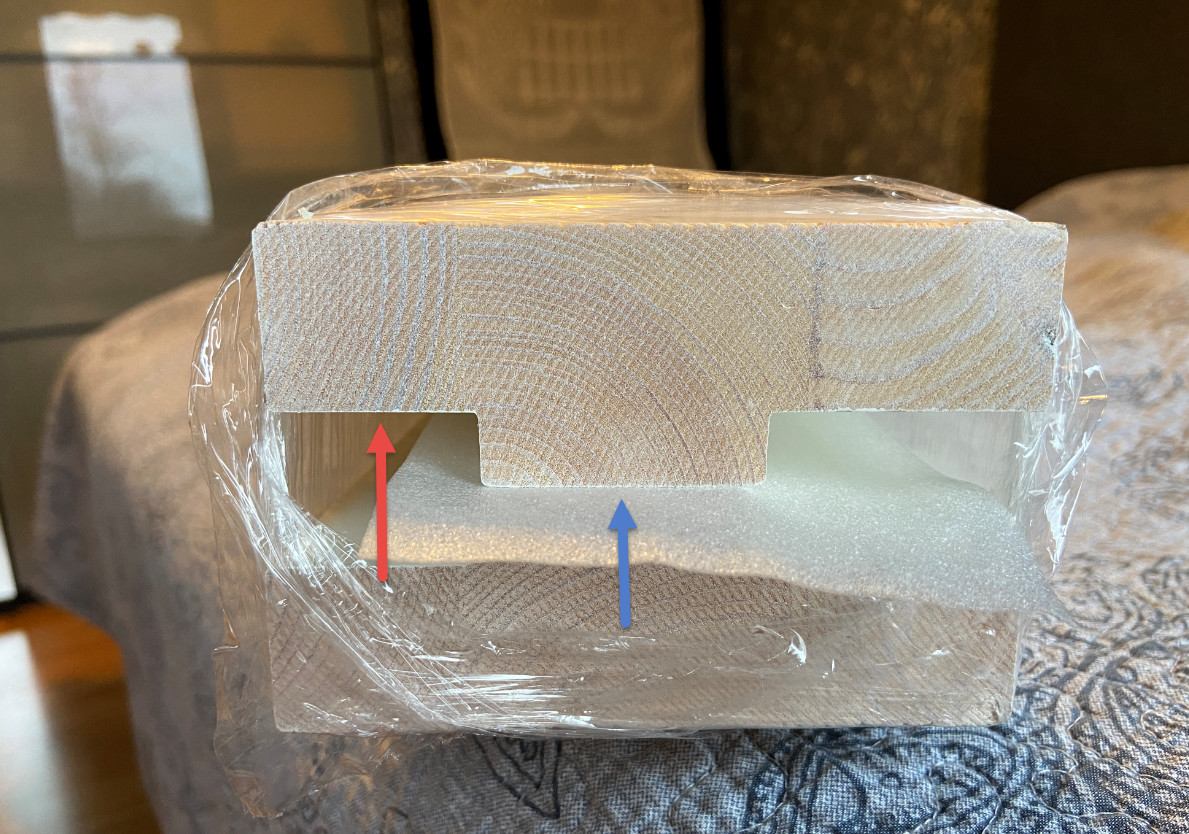
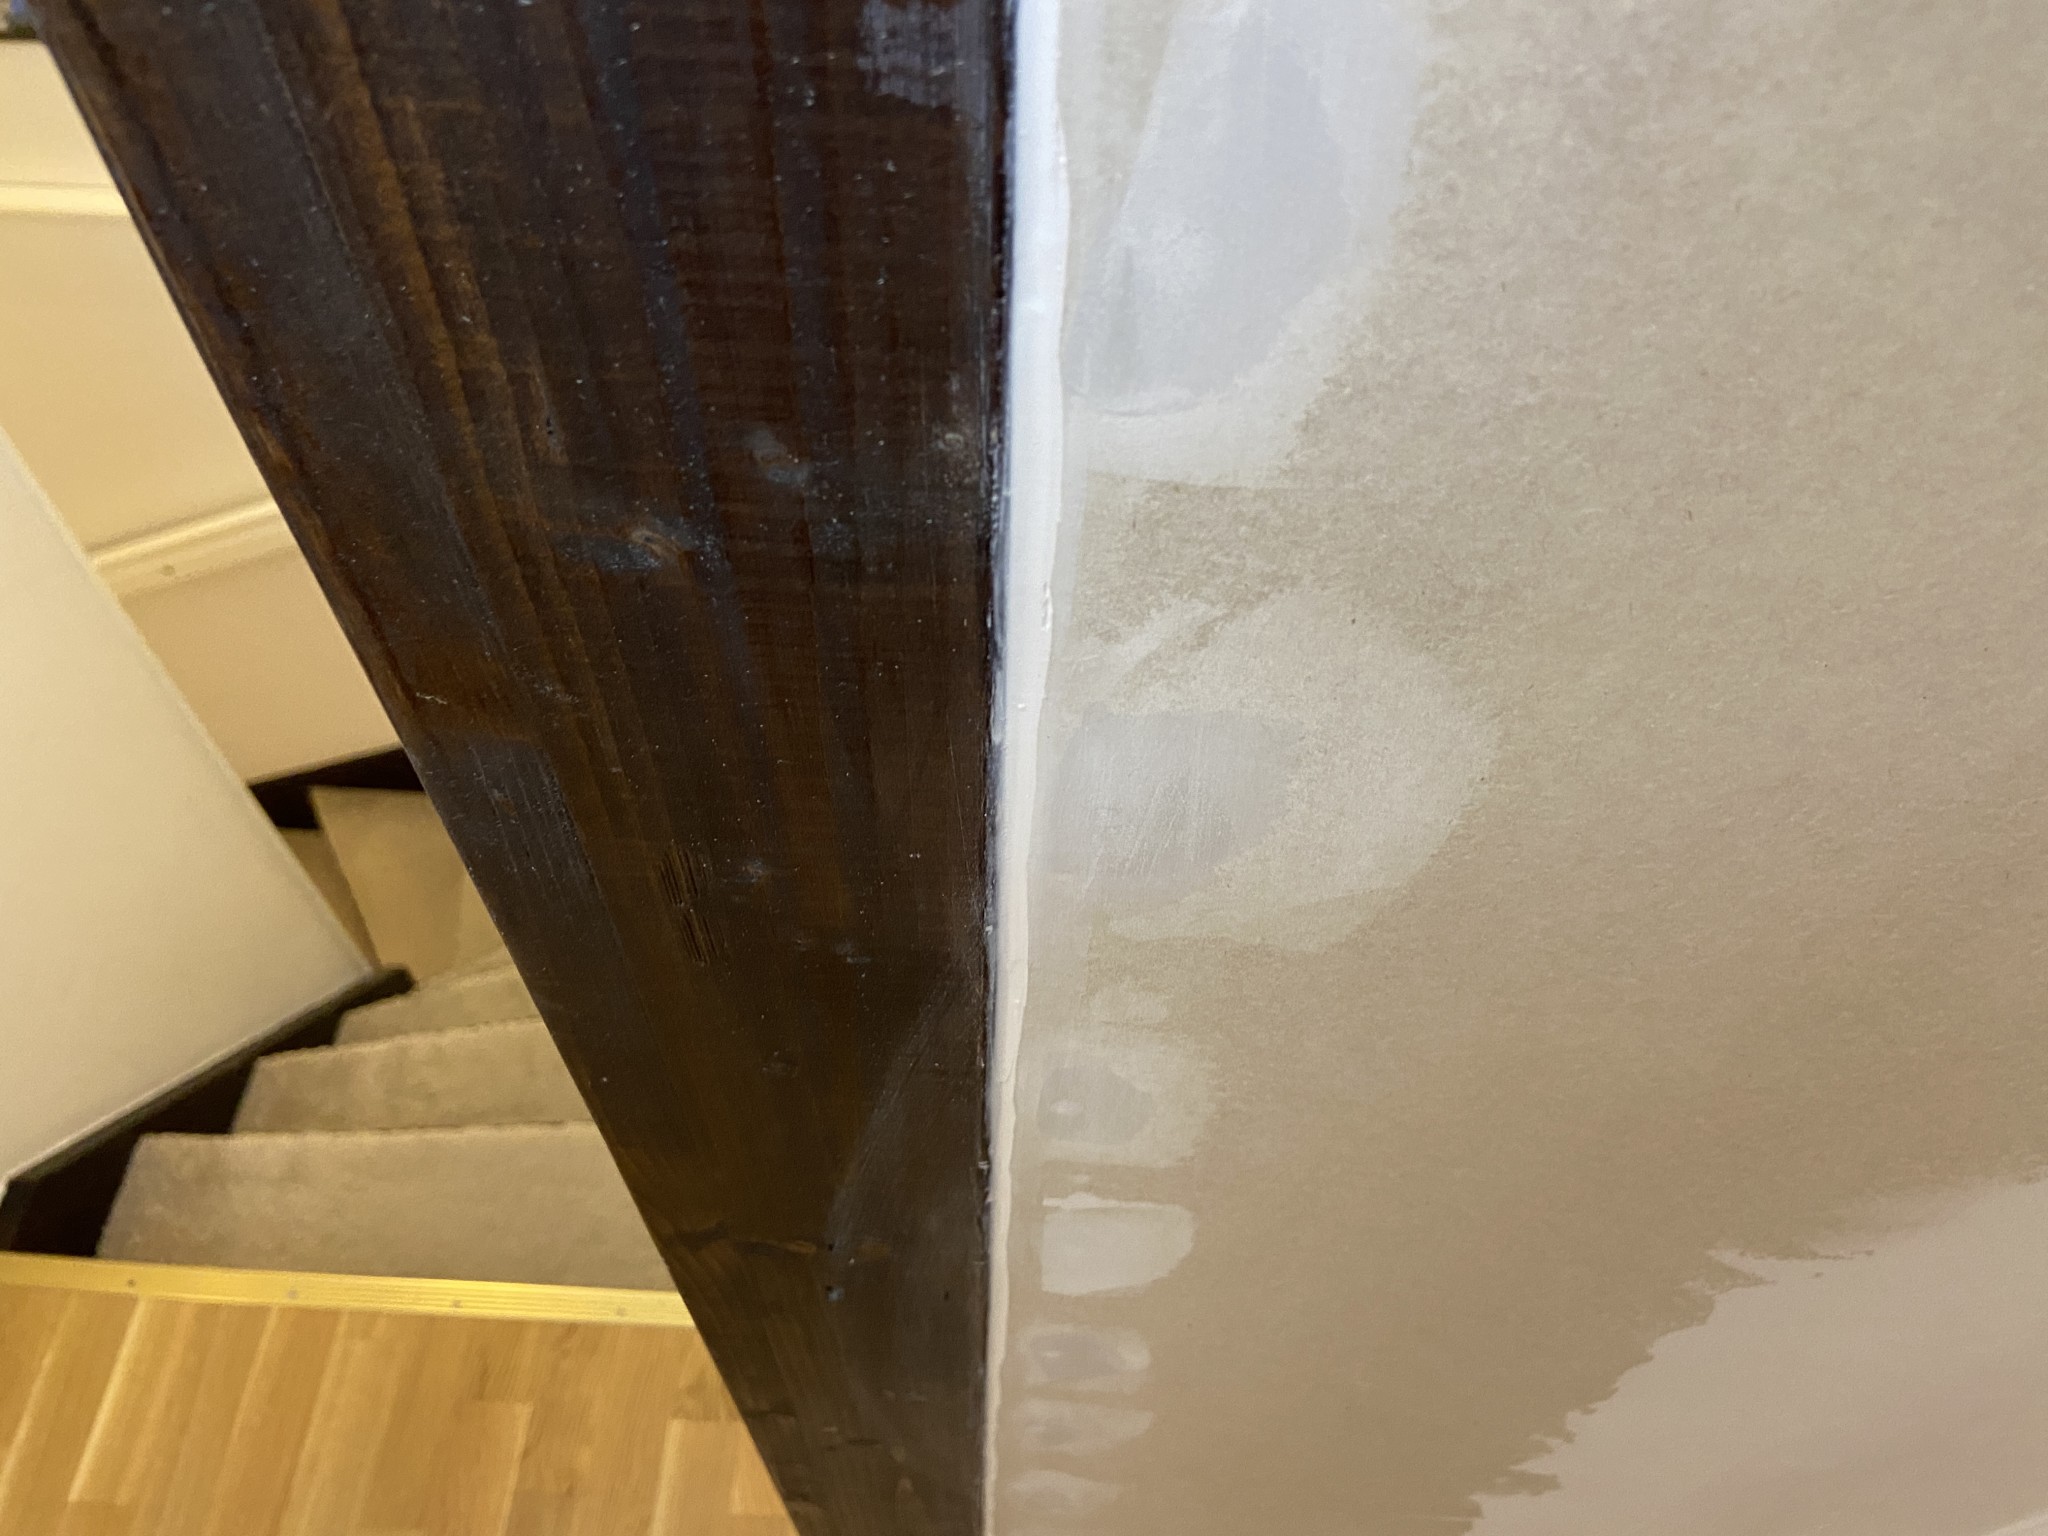
The top picture is of the outside of a frame. Here's the inside.
The frame is pre-drilled with a 14mm countersunk hole and then the small 5 mm hole (the one you see). I don't dare open the package in case I need to return it.
So if I've understood you correctly... I plug (fill or whatever that might be) these 14 mm (red arrow) and then make new holes in the frame (blue arrow)?
Speaking of frame screws... I'm a complete rookie at installing doors... should one take frame sleeves instead of frame screws? I've heard that centering frame screws is really difficult for a first-timer...
It will be only 5-6mm from the edge of the rule at best? Then you need to move the hole as you drew. Most frames I've seen have the holes placed so that they're hidden when the door is closed, so it might look a bit less tidy, but that's probably the only disadvantage I can see (besides the fact that it always hurts a little when you have to drill or saw into something that's brand new from the factory).
When I see the frame in the picture, it looks like there might be a narrower frame for the same door..? Then you can have the holes more centered on the rule. You would then need to add an additional strip on one (or both) sides so that it aligns with the wall, but you avoid having to fill and fix your new frame. I think that's what I would do if there is a narrower frame available.
I've installed quite a few doors and windows with frame screws, and I would say it's quite easy. I have actually never installed one with a frame sleeve, but when I looked into it now, it seems even easier. So choose what you think seems best. Both work.
It will only be 5-6mm from the edge of the rule at best? Then you need to move the hole as you drew. Most frames I’ve seen have the holes placed so that they are hidden when the door is closed, so it might look a little less clean, but that is probably the only downside I can see (besides the fact that it always hurts a little when you have to drill or saw into something that is brand new from the factory).
When I look at the frame in the picture, it looks like there could be a narrower frame for the same door..? Then you can have the holes more centered on the rule. Then you have to add an extra strip on one (or both) sides so that it comes up to the same level as the wall, but you avoid having to fill and fix your new frame. I probably would have done that if there was a narrower frame available.
I've installed quite a few doors and windows with frame screws and I would say it's pretty easy. I've actually never installed one with frame sleeves, but when I looked into it now, I think it seems even easier. So go with what seems best to you. Both work.
So, it ended up with me drilling holes in the frame instead. I looked for a lot of strips and there were none with the exact measurements, and I don’t have a table saw to cut them to the right thickness, and also, it's fiddly work. I also didn’t feel like returning it to then buy a new narrower frame. But it turned out well. I drilled a pilot hole with a template and then let the frame drill follow the pilot hole. Biltema doesn’t have the world's best frame drill, as it was a bit... skewed? It wasn’t straight anyway. But it worked. Then it was just a matter of slapping up the door with frame screws. I let thriftiness and overconfidence take over. Yes... as you said, easy. Almost no adjustment afterward.
There it was done, fine-tuning with moldings and baseboards, that will be next year. Big thanks for the guidance, I probably wouldn’t have managed it within a reasonable time without your input. I’m grateful for that.


") It might need to be done in several steps. There is a risk it might crack a bit later on, though. You can put a fabric over it (as is usually done with ceiling plaster, when there are no chamfered edges for puttying), which should hold much better and usually results in a very smooth and nice finish. If you plan to wallpaper over it, it's less sensitive, of course, but it looks like everything is painted otherwise.
It might need to be done in several steps. There is a risk it might crack a bit later on, though. You can put a fabric over it (as is usually done with ceiling plaster, when there are no chamfered edges for puttying), which should hold much better and usually results in a very smooth and nice finish. If you plan to wallpaper over it, it's less sensitive, of course, but it looks like everything is painted otherwise.
Tswl said:
I don't think you've done anything wrong; rather, the old mounting simply doesn't fit your framework. If so, you need to attach anew, and plug (if they are large) and fill the old holes.