JohanLun yes, I also realize it's not optimal, but it will result in a much more logical layout. Hopefully not too expensive.
So it should be entirely possible to remove the top layer, soundproof, and then build continuous wooden floors. I will take the drawings to a structural engineer who can provide an opinion that I can submit to the board. Based on your insights, it certainly sounds like it’s possible.
Hello!
To all parties involved, I am happy to inform you that I now have a constructor's statement that both the construction of the floor and the demolition of the wall can proceed smoothly without affecting the floor structure and load-bearing capacity. Thank you all for your input!
Hello!
To all involved parties, I am pleased to inform you that I now have a constructor's statement that both the construction of the floor and the demolition of the wall can be done nicely without affecting the joists and bearing capacity. Thanks everyone for the input!
Awesome
Don't forget to tell the neighbor downstairs to take down the chandelier before you start :wow:
Yes indeed, the job is done. It was divided into several stages.
1. Remove the existing linoleum mat
Time spent, about 5 minutes. It was on some fiberboard that was surprisingly easy to remove. Then it was just a matter of folding it up and throwing it into garbage bags.
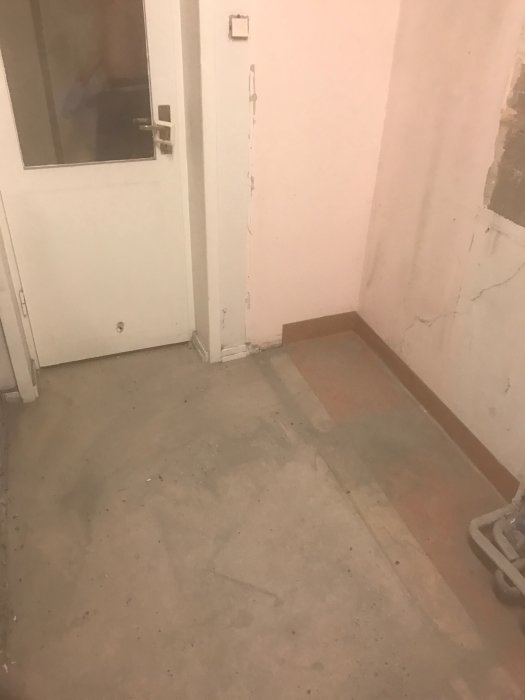
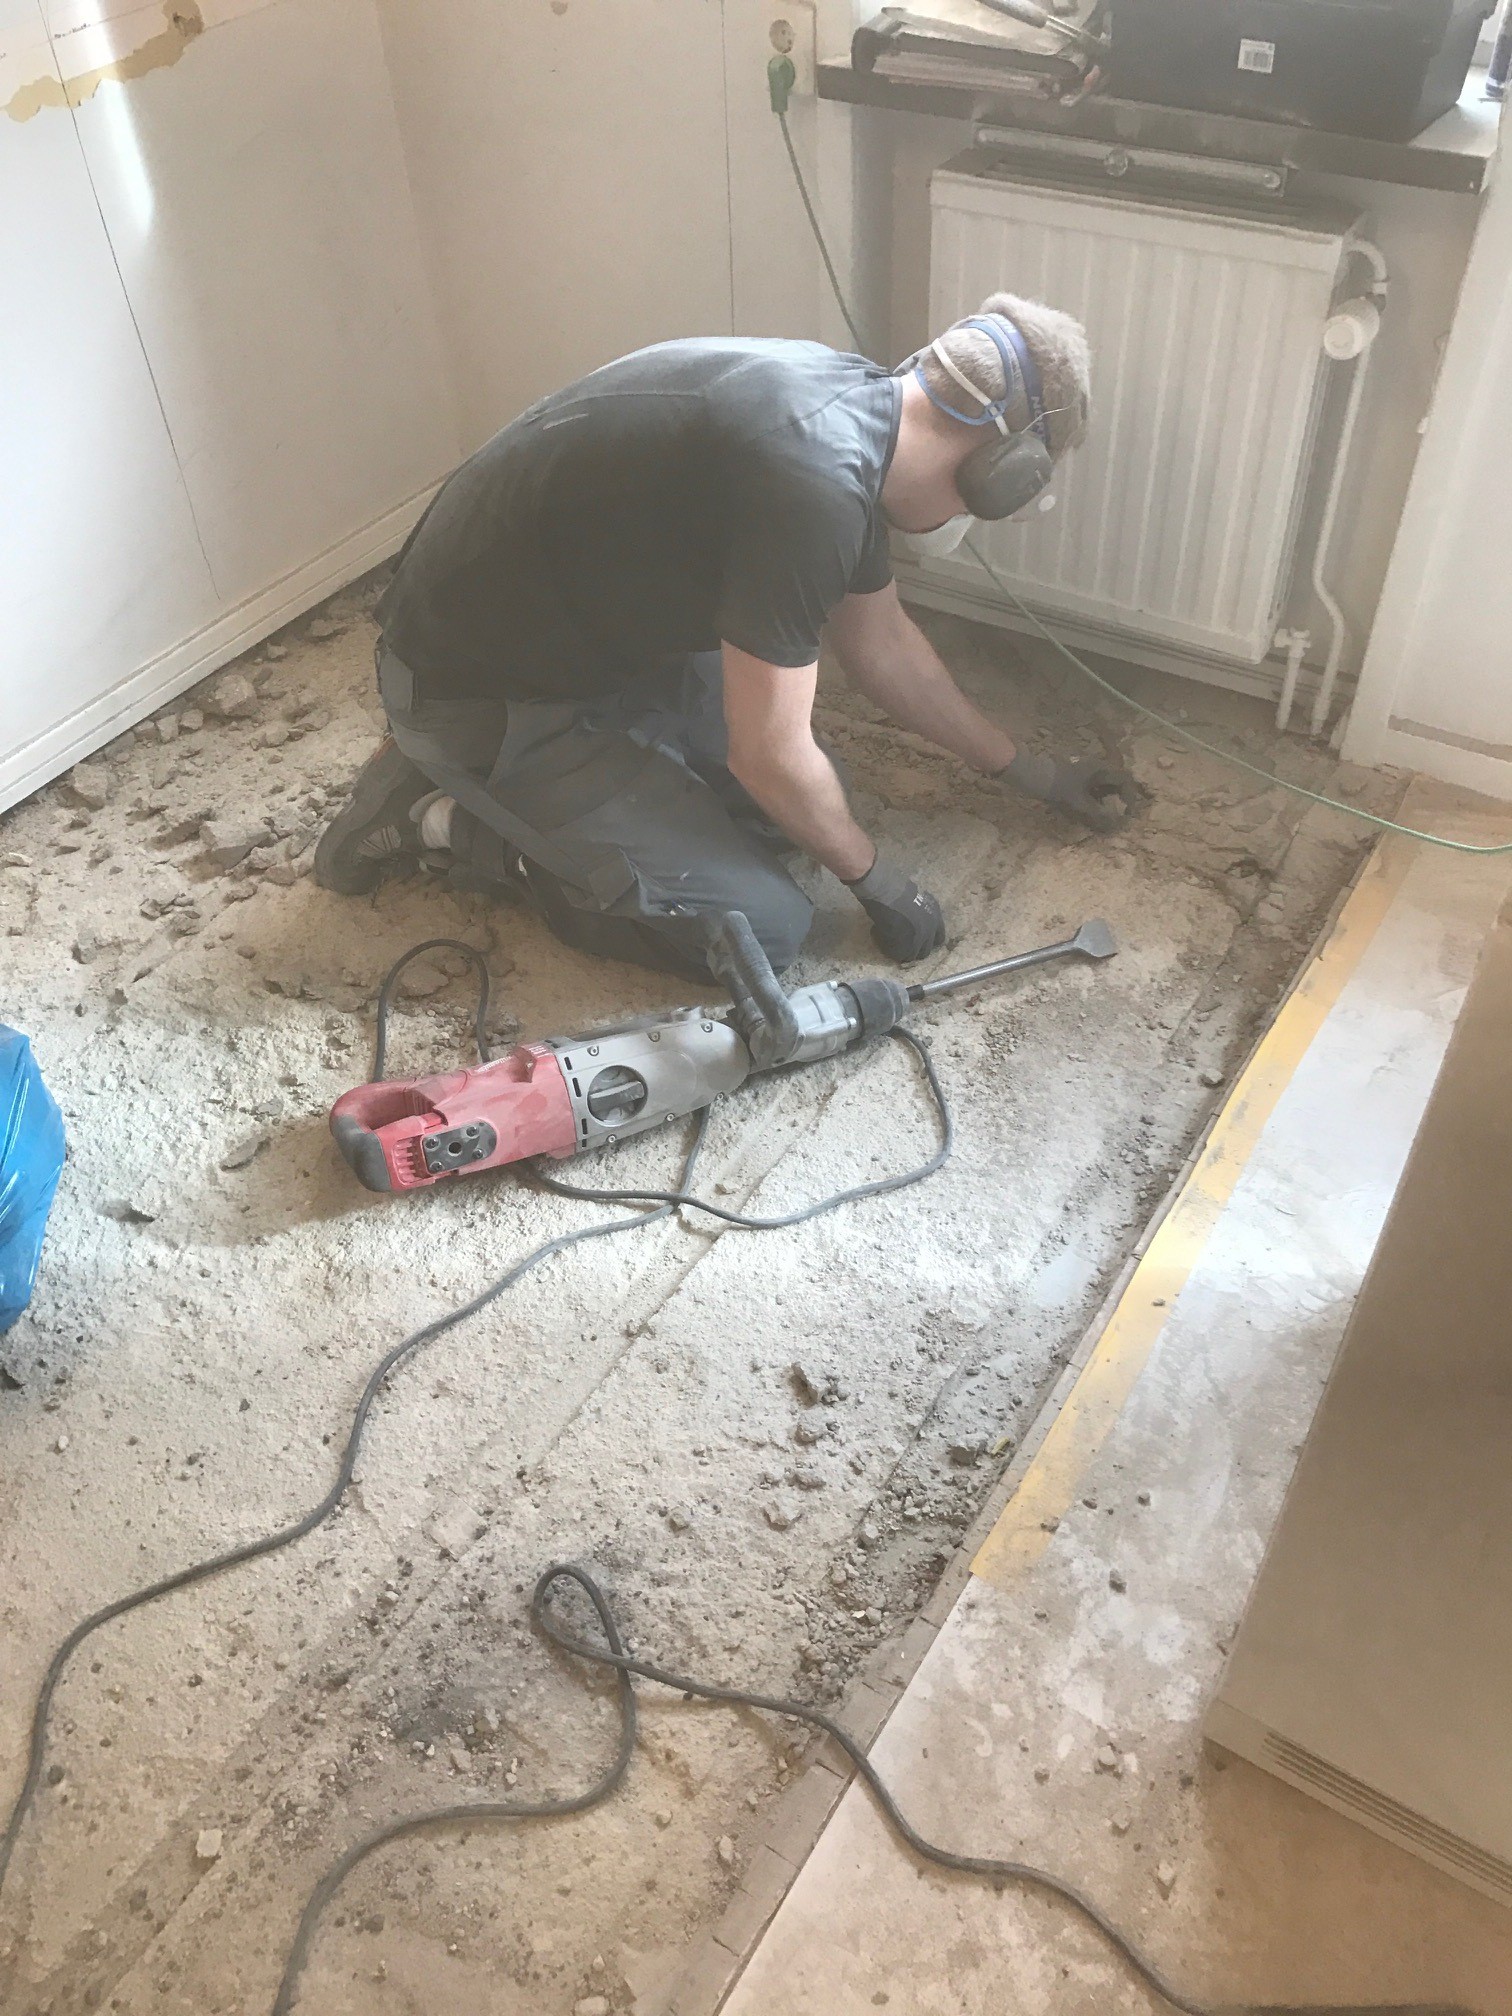
Before removing the linoleum mat. The kitchen from 1990-something we dismantled in two hours. The next day we tore down the wall between the kitchen and the living room, and now this linoleum mat is to be removed, along with the entire leveling and concrete all the way down to the structural concrete. The floor installer wanted 8 cm to get a nice floor, but it will be a maximum of 6 cm.
2. Break up the surface leveling
The first thing we encountered in breaking was the concrete that seemed to level the surface for the linoleum mat. It was a real pain to break up but easy to transport away. Weighed a couple of hundred kilos in total. Time spent about 1 hour.
Here you see my friend when we got through the first layer (self-leveling compound?) together with a really sharp demolition machine.
3. Break up the 4 cm thick concrete slab
When we got through the first layer, it became easy to see that there was about a 4 cm thick concrete slab on top of the structural concrete. It was much more porous than the top layer and was very easy to crack with the chiseling hammer. But they were really heavy pieces to carry, the slab probably weighed around 800 kilos, we threw away 40 garbage bags, and my estimate is that it was about 1 ton of concrete debris in total. Total time spent about 2 hours with packing in bags.
Incredibly heavy to carry but cracking it was like breaking crispbread, the machine was heavy but really easy to maneuver
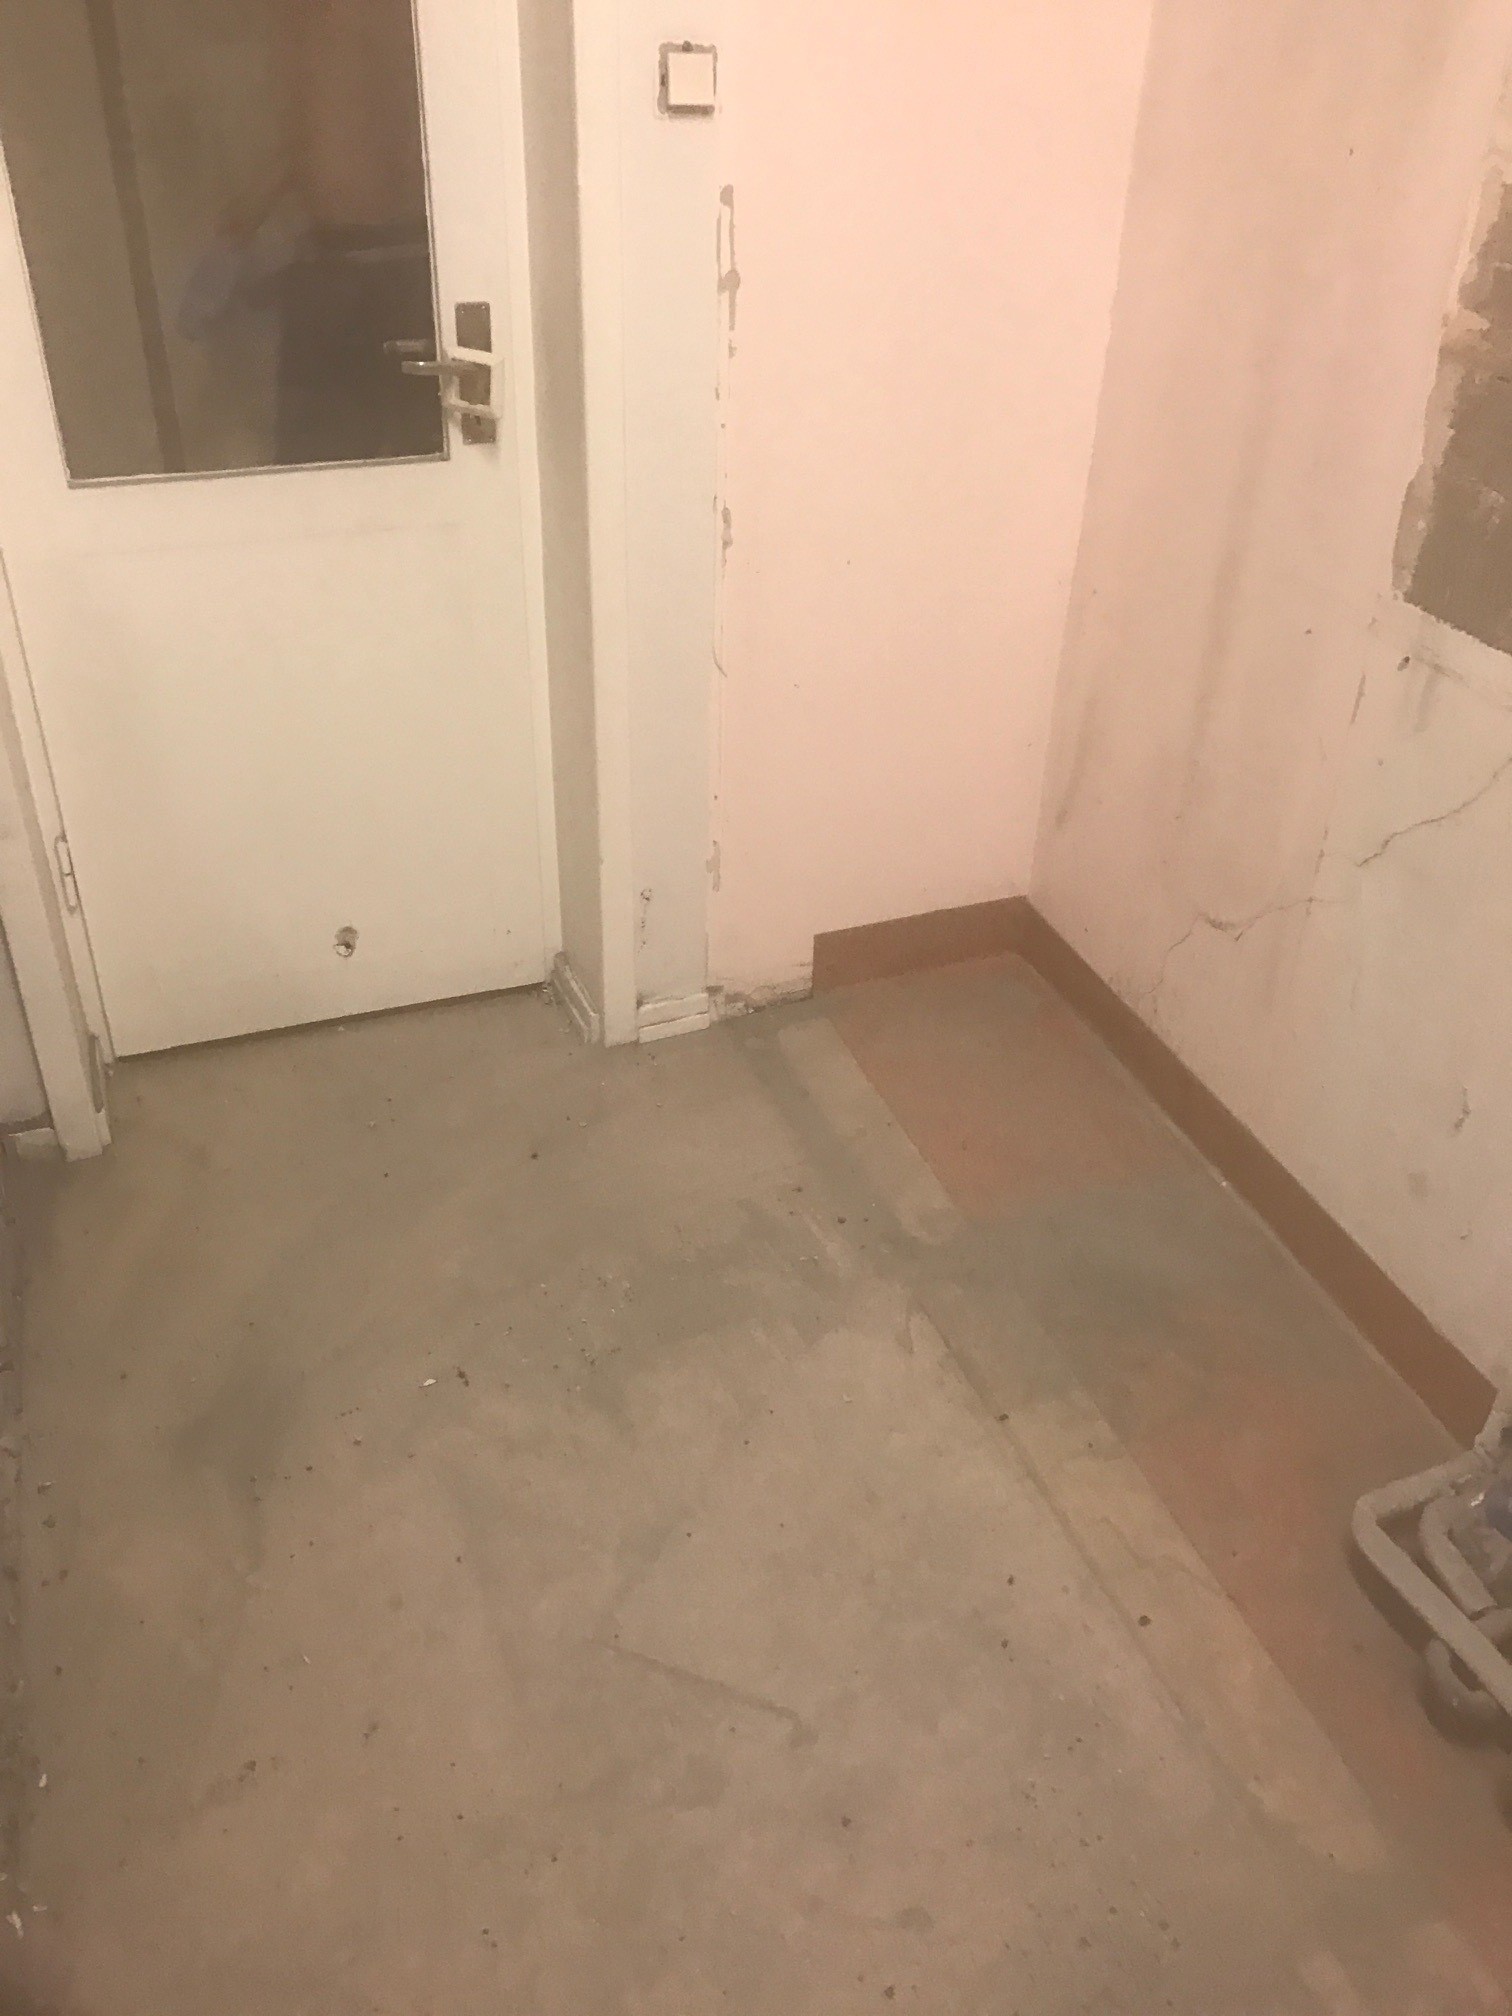
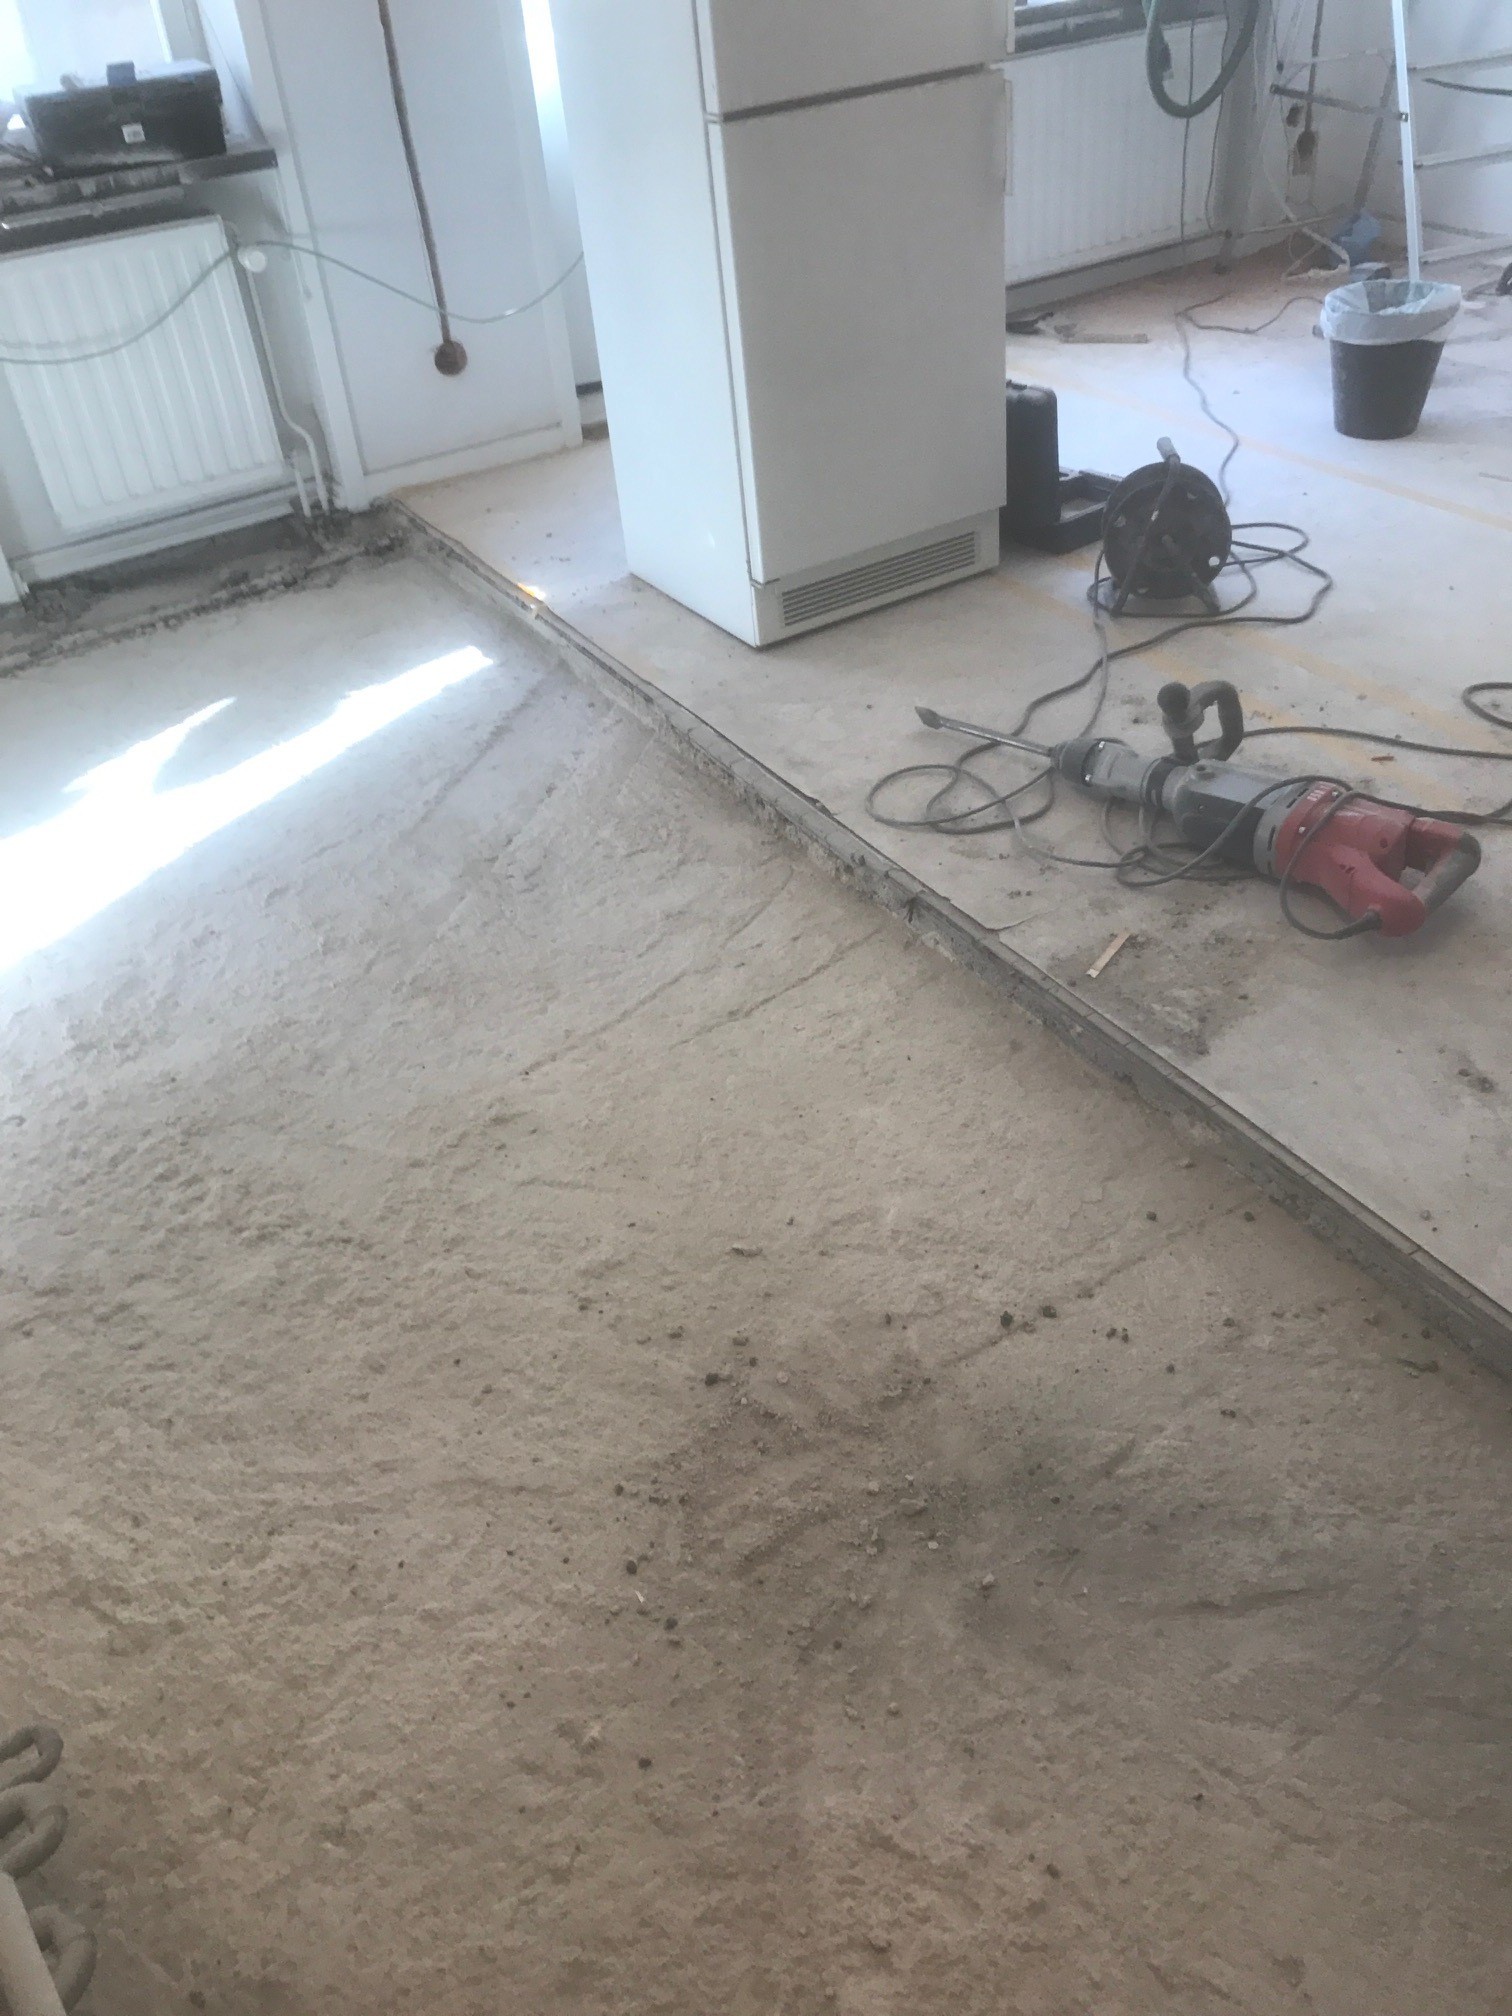
The end result - About 6 cm of level difference compared to the living room floor to the right. Now, herringbone parquet will be laid and then sanding, oiling, and varnishing to achieve a seamless uniform floor throughout the apartment.
Budget
Structural engineer's report 3,600 SEK (both okay with dismantling the wall and breaking the floor)
Rental of Milwaukee demolition machine top model - 1,000 SEK
Garbage bags 4 rolls - 200 SEK
Chiseling hammer 150 SEK
Paid pizza + soda for friend 220 SEK
Collection - Via the Tiptapp app 1,100 SEK (they picked up all the bags + some other junk)
Reflections
This type of work is incredibly dusty, both during the breaking process and during removal. The particles are so fine that it's very difficult to protect yourself from thorough cleaning - I used a U Cover Zipper door against the bedroom but still got quite a bit of dust in. How, I have no idea. It was a very physically demanding task, and I had muscle soreness for several days after, but it was worth it!
Maybe too late now...
But big risk that the pipes to the radiators are lying on the construction concrete..
Yes I realized it by an incredible coincidence when I was chiseling in the corner. You can glimpse the pipes in the last picture. They survived but the right pipe got a nick.. No water, thank goodness
Thank you very much for the information! I think this is a dilemma in many 50s apartments that you want to bring into the 2000s. We are currently looking for an apartment in a 50s area in Stockholm, so I might get in touch again if it becomes relevant to do something similar!
Thank you very much for the information! I think this is a dilemma in many 50s apartments that one wants to bring into the 2000s. We are currently looking for an apartment in a 50s area in Stockholm, so I might get in touch again if it becomes relevant to do something similar!
Hi TS! I'm in a similar situation now in a house where we've torn down a wall between the kitchen/living room and noticed a difference in floor height, where we had hoped to extend the herringbone parquet in a nice way. Do you have any after photos to share? Did the result turn out as you had hoped?
Yes indeed, the job is done. It was divided into several steps.
1. Remove existing linoleum flooring
Time spent, about 5 minutes. It was on some kind of paper backing that was surprisingly easy to remove. Then it was just a matter of folding up and throwing in garbage bags.
[image]
Before removing the linoleum flooring. We tore down the 1990-something kitchen in two hours. The next day, we tore down the wall between the kitchen and living room, and now this linoleum flooring had to go, along with all the leveling and concrete all the way down to the structural concrete. The floor installer wanted 8 cm to get a nice floor, but it will be max 6 cm.
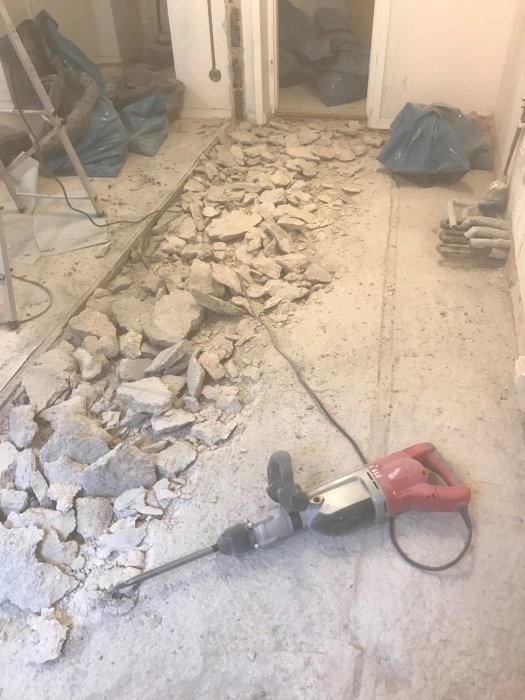
2. Chisel up the surface leveling
The first thing we encountered during the chiseling was the concrete that seemed to level the surface for the linoleum flooring. It was a real nightmare to chisel up but easy to transport away. It weighed a couple of hundred kilos in total. Time spent about 1 hour.
[image]
Here you can see my friend when we got through the first layer (leveling compound?) together with a really sharp chisel machine
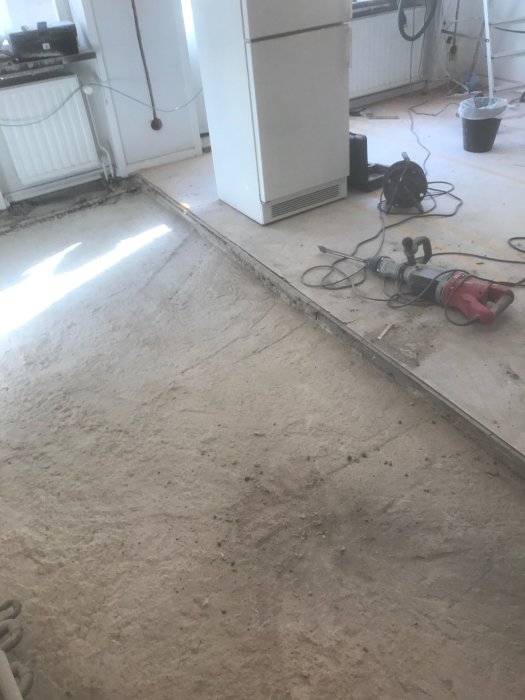
3. Chisel up the 4 cm thick concrete slab
Once we got through the first layer, it was easy to see there was about a 4 cm thick concrete slab on top of the structural concrete. It was much more porous than the top layer and was very easy to crack with the chisel. But it was really heavy pieces to carry, that slab probably weighed around 800 kilos, we threw out 40 garbage bags, and my estimate is that there was about 1 ton of concrete debris in total. Total time spent about 2 hours with packing in bags.
[image]
Incredibly heavy to carry but it was like cracking crispbread, the machine was heavy but really easy to maneuver
[image]
The end result - About 6 cm level difference compared to the living room floor to the right. Now herringbone parquet is to be laid and then sanding, oiling, and varnishing to get a single uniform floor throughout the apartment.
Budget
Engineer statement 3,600 SEK (both ok disassembly of the wall and chiseling of the floor)
Rent Milwaukee chisel machine a beast model - 1,000 SEK
Garbage bags 4 rolls - 200 SEK
Chisel 150 SEK
Paid pizza + soda for friend 220 SEK
Pickup - Via the Tiptapp app 1,100 SEK (they picked up all the bags + some other debris)
Reflections
This type of work dusts something terrible, both during the chiseling itself and during the removal. The particles are so thin that it's very difficult to protect against major cleaning - I used a U Cover Zip Door against the bedroom but still got quite a bit of dust in. How, heaven knows. It was a very physically demanding job and I had muscle soreness for several days after, but it was worth it!
Fantastic thread!
I'm still a n00b at chiseling but will start with the bathroom, which is on the upper floor. Was there much difference between the layers? I'm worried that you start and then oops you're down in the basement.
Click here to reply
Vi vill skicka notiser för ämnen du bevakar och händelser som berör dig.
")