13,270 views ·
51 replies
13k views
51 replies
Load-bearing floor structure for a bathtub
Yes, it will of course make a big difference in cost. Ours will be 5 years old this fall.D d0nnie said:
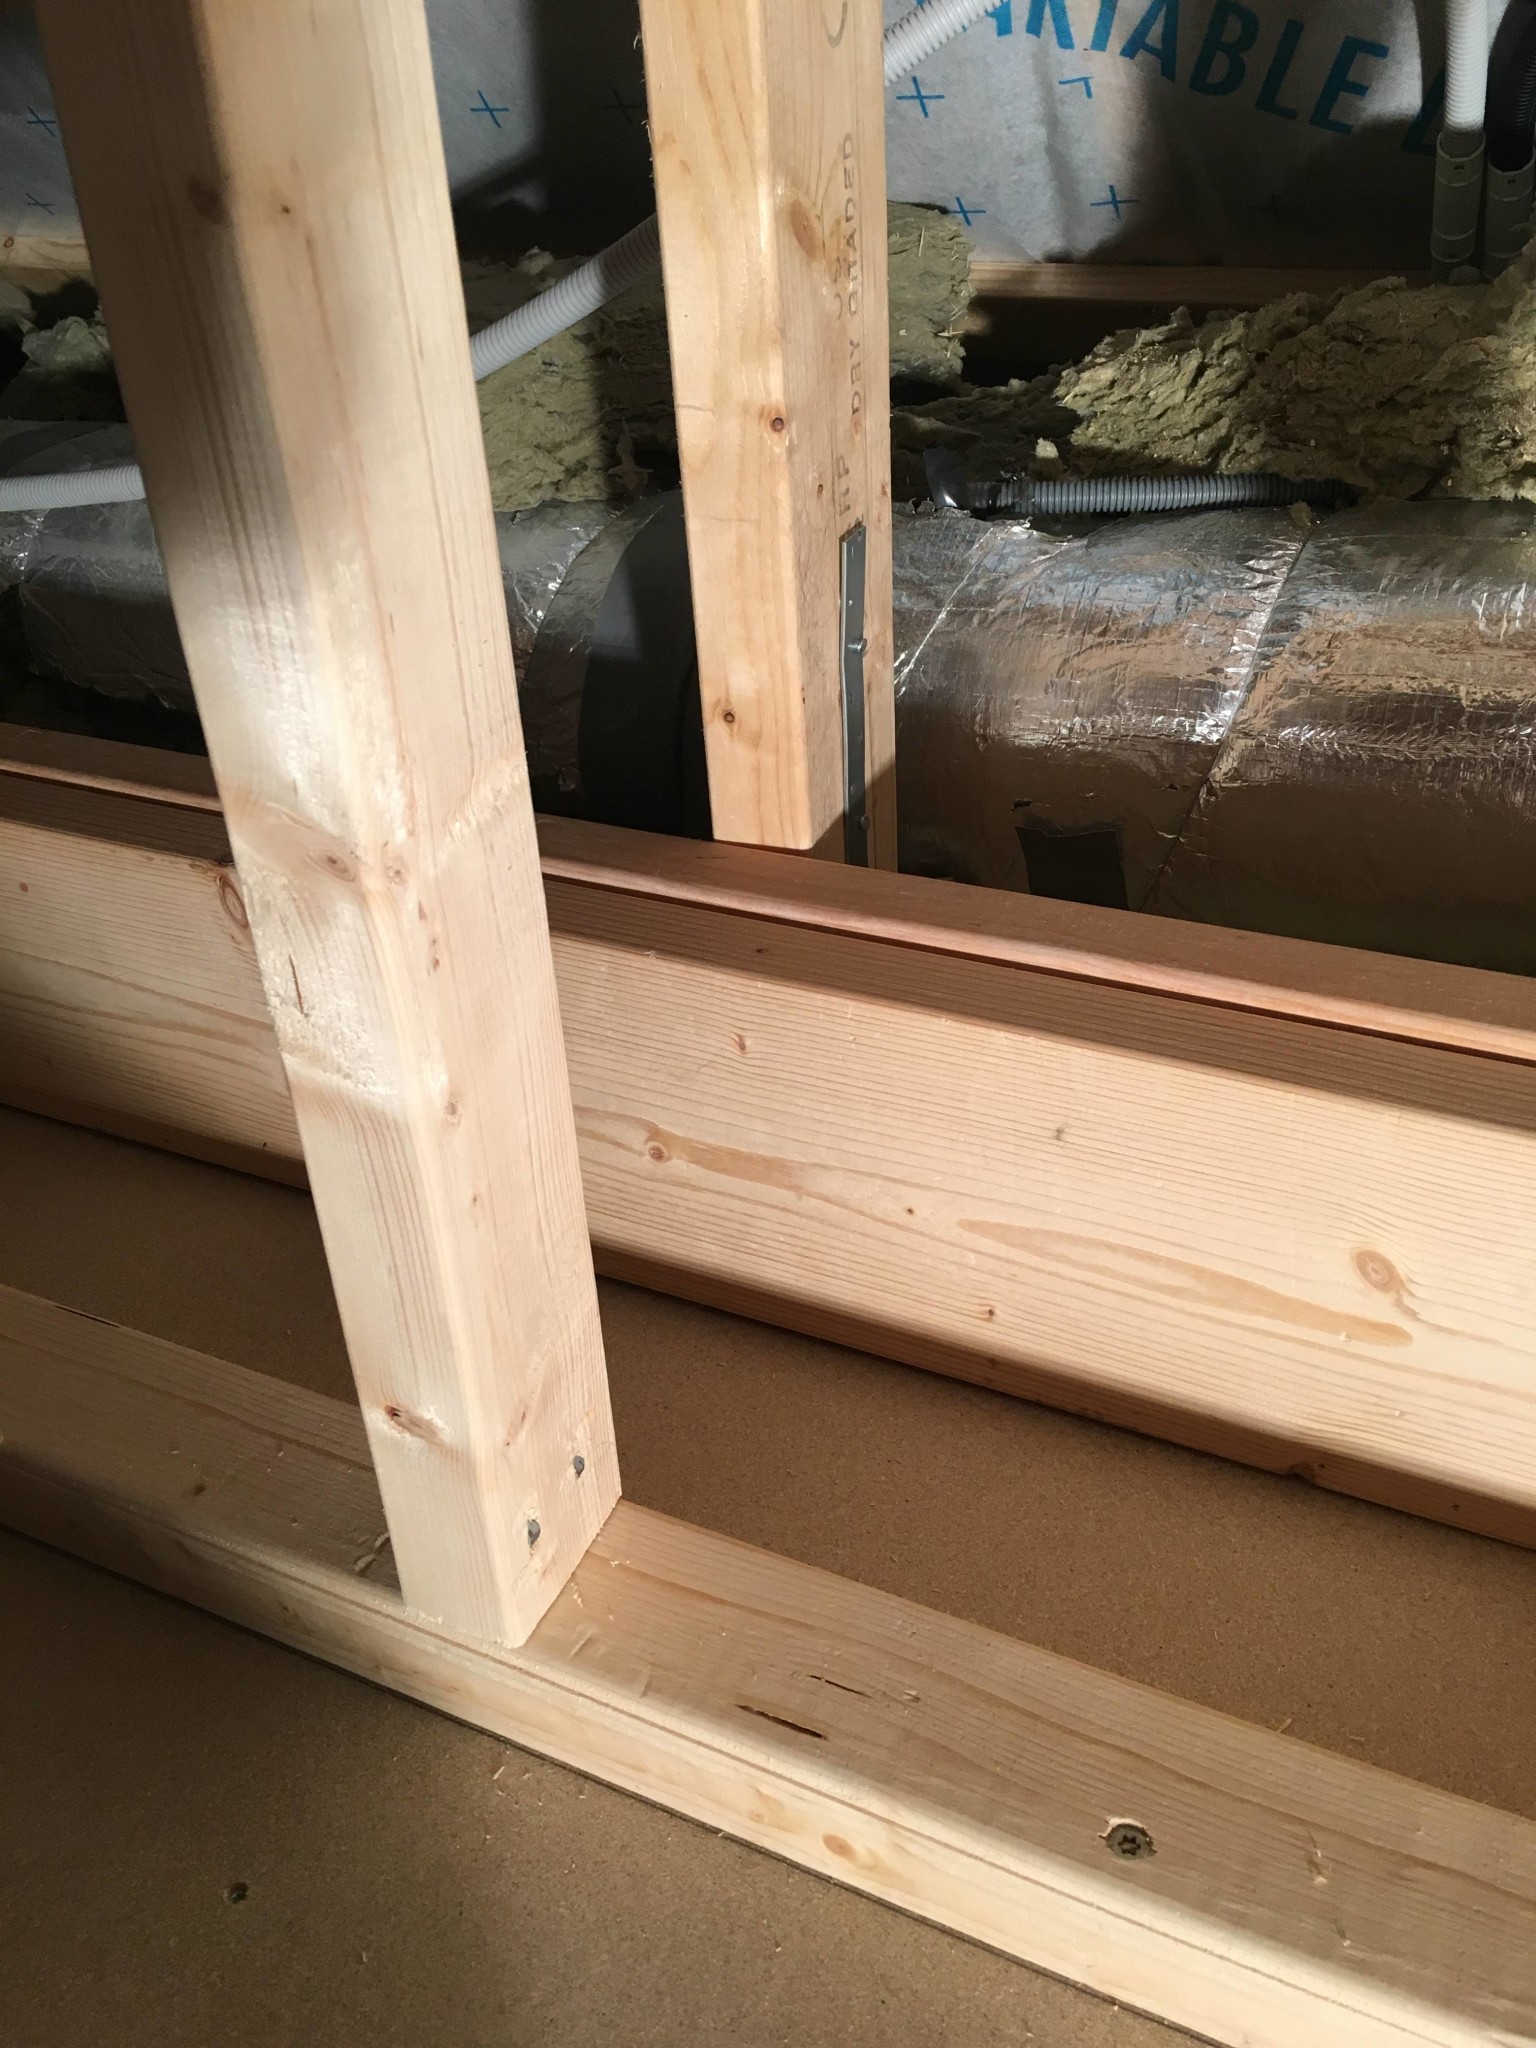
I've actually come up with a good and very simple solution. Two crossbeams screwed and glued together with support from the outer wall (rafter closest to the outer wall) and support from the wall between the laundry room and the bathroom downstairs (rafter 240 cm in from the outer wall). This way, it acts as a bearer. Then I attach all the floor joists to it so they become "hanging" from it.
This reduces the span from about 390 cm to only 270.
")
See picture.
Interesting and smart solution! But then you are effectively raising the floor in the bathroom as you are essentially building your own floor structure above the house's existing structure, correct?L Långbro Fridhem said:[image] [image] [image]
Yes, there will of course be a big difference in cost. Ours will be 5 years this fall.
I have actually come up with a good and very simple solution. Two crossbars screwed and glued together with support from the outer wall (rafter closest to the outer wall) and support from the wall between the laundry room and the bathroom downstairs (the rafter 240 cm in from the outer wall). Then it acts as a load-bearing beam. Then I attach all the floor joists to it so they become "hanging" from it.
Then the span is reduced from about 390 cm to only 270.
See picture.
Do you possibly have more pictures (preferably from a bit of a distance) so that one can see the whole solution?
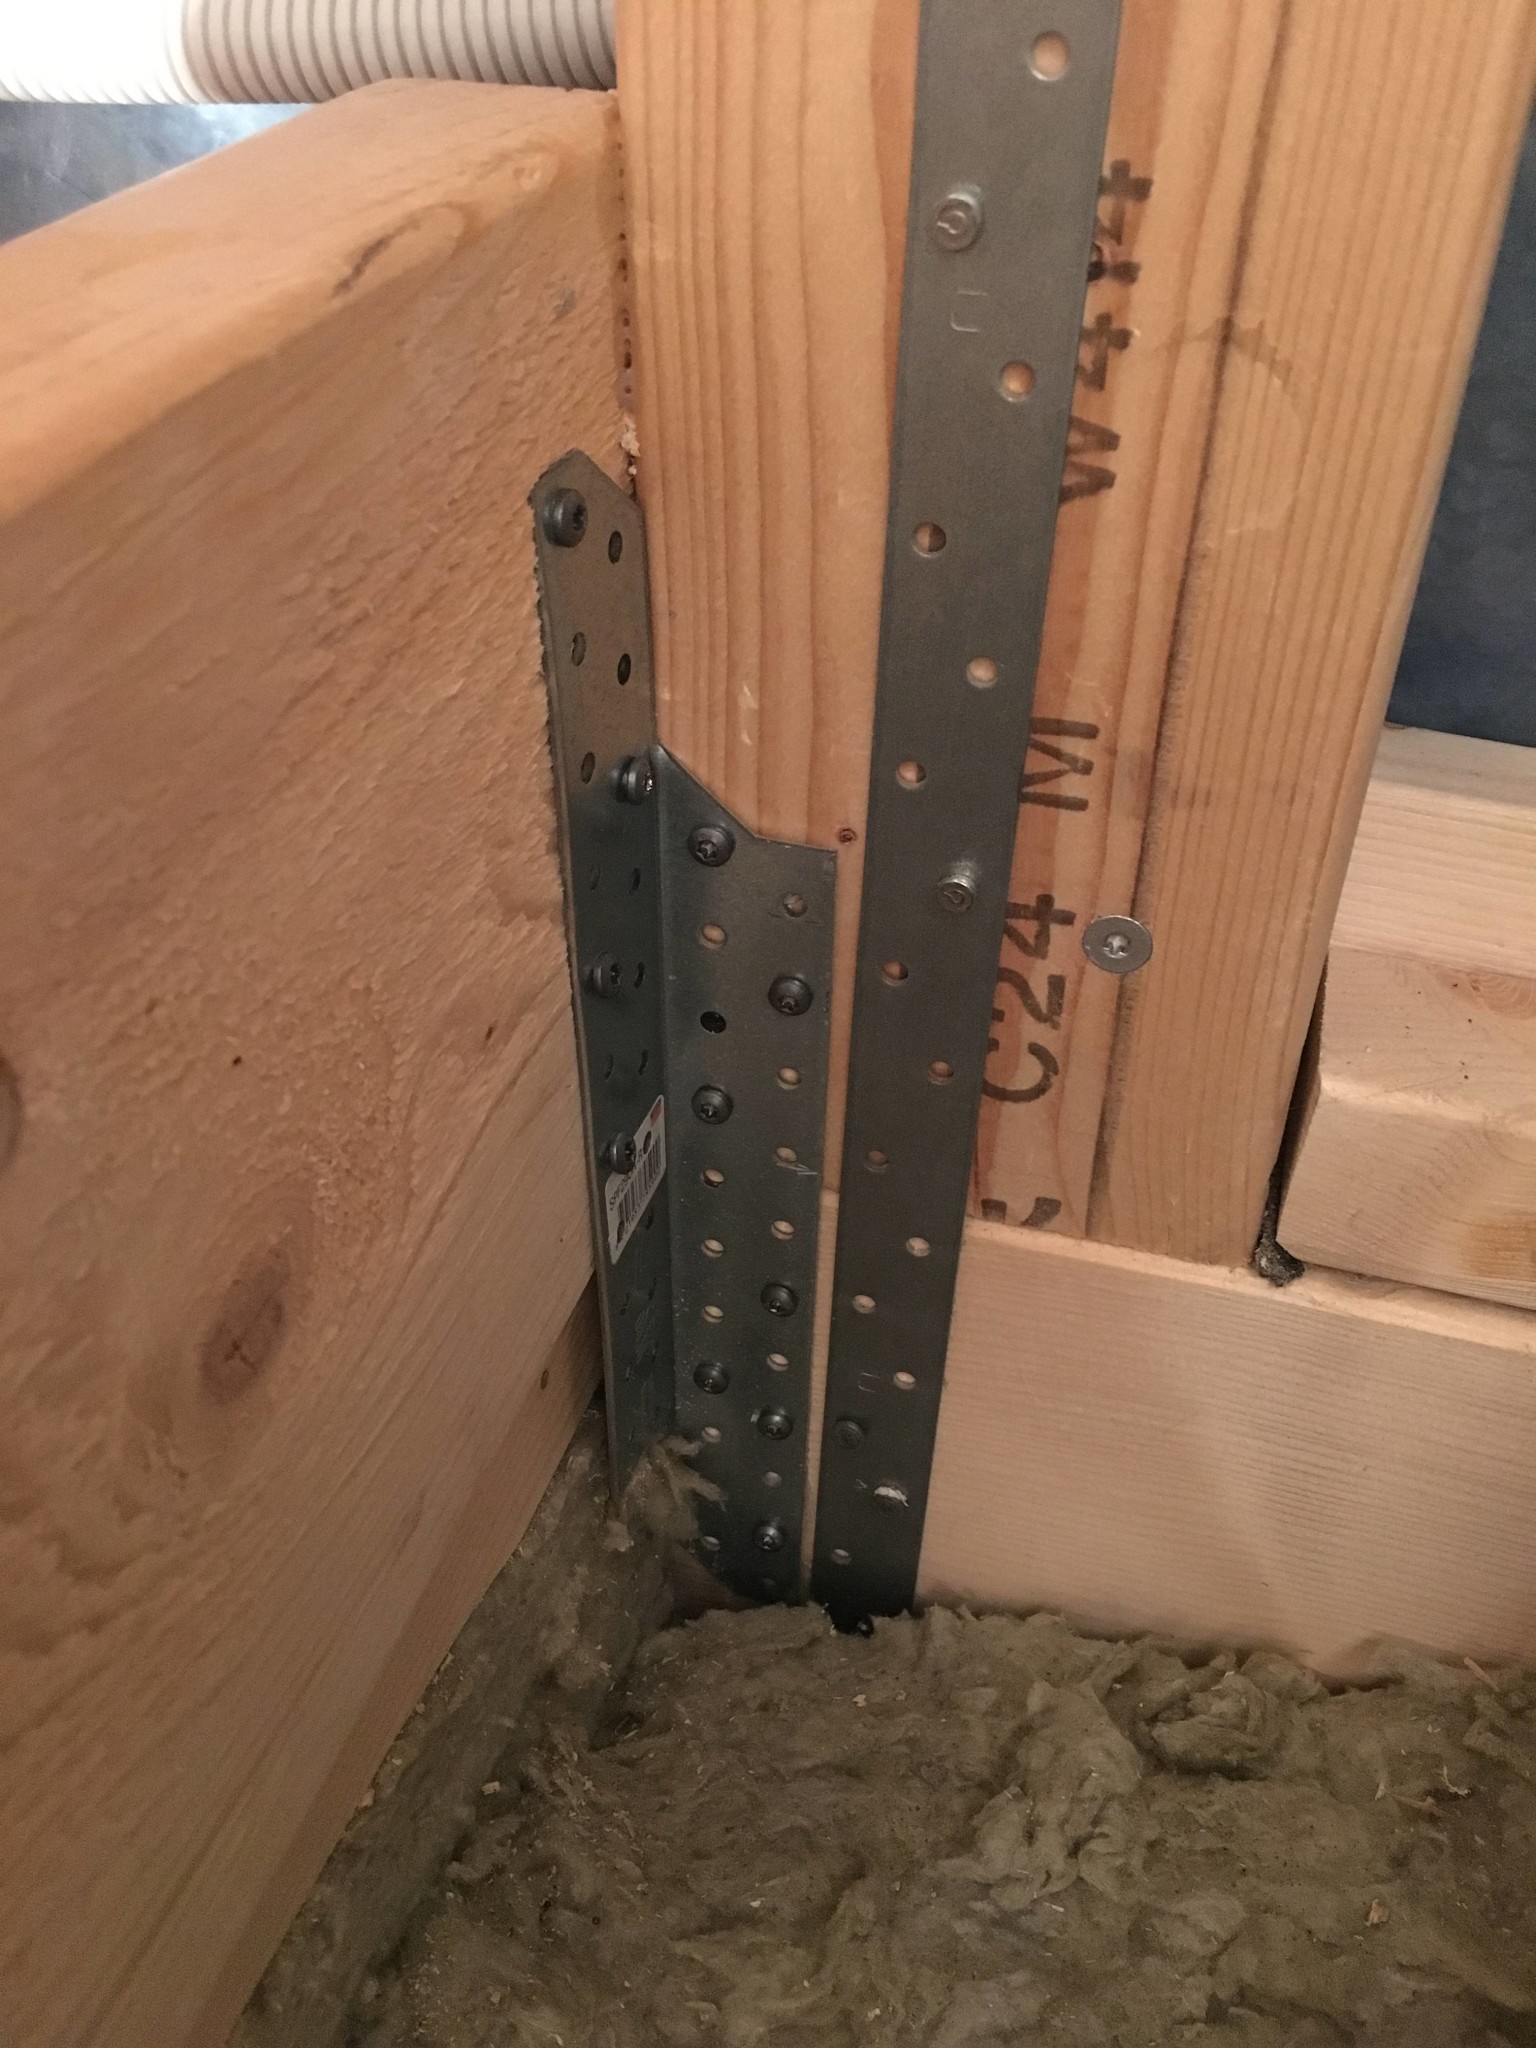
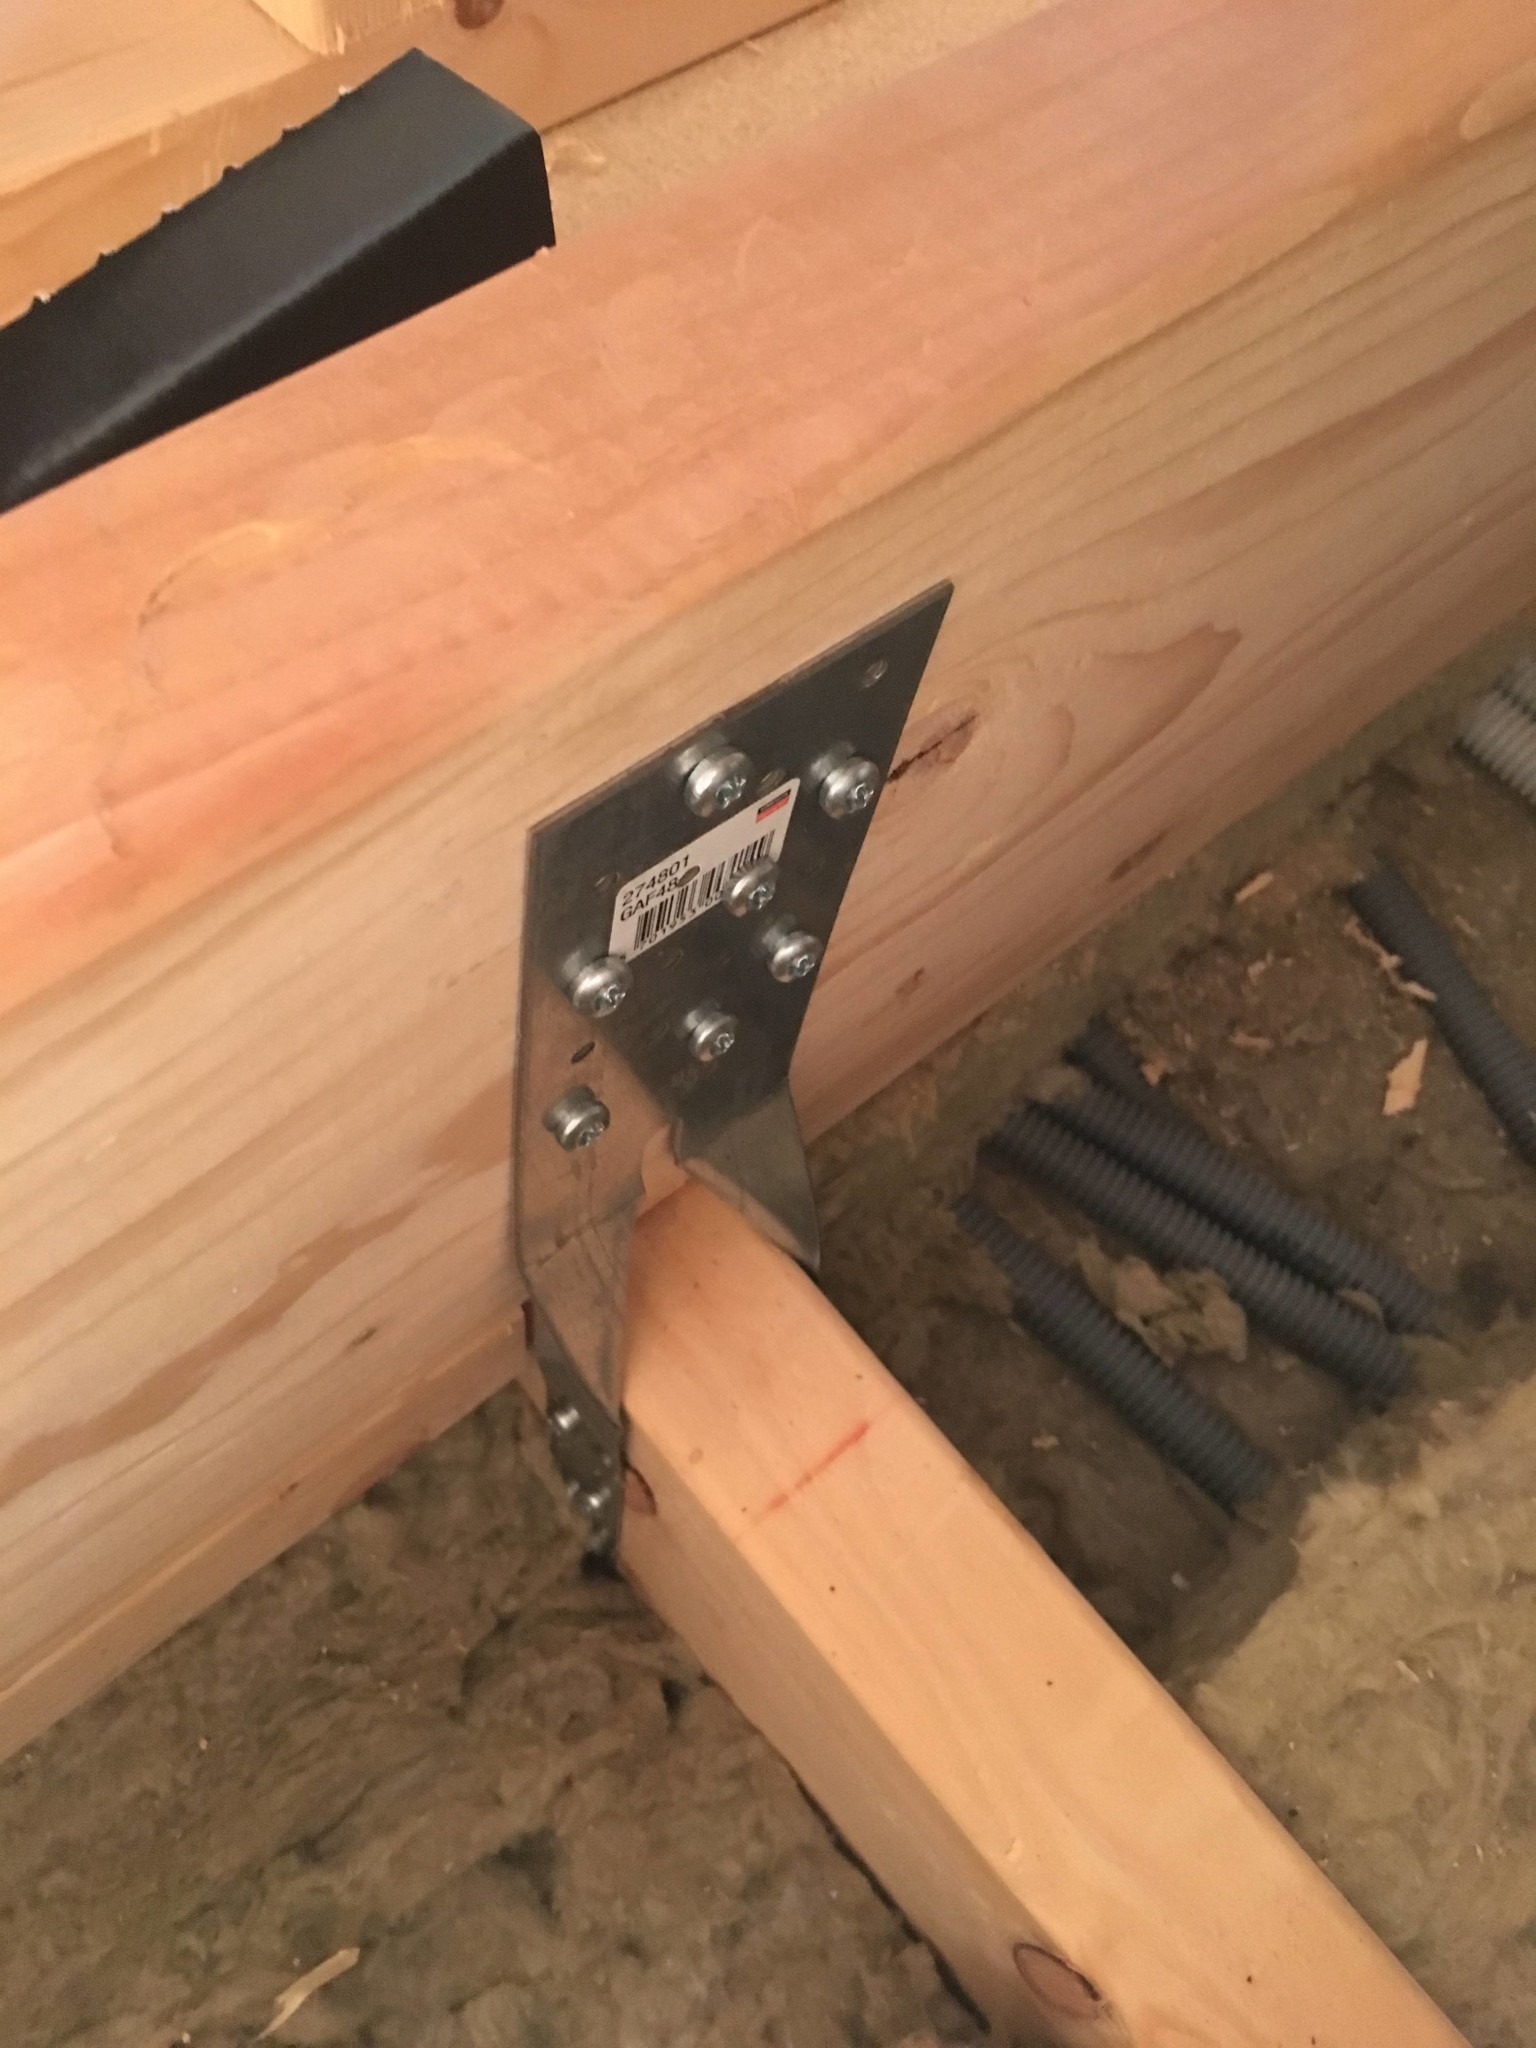
No, the joist remains unchanged. The beams I install act only as a support beam inside the future wall towards the crawl space. Then I attach each floor joist to it with fittings. In this way, the span has been reduced. I'll get back with more pictures. I haven't installed this yet. Electric work today.D d0nnie said:
Yes, curious to see how it turns out since I don't really understand where the second support beam is supposed to go. I get that you're placing one (which consists of two glued 220x45 beams) along the crawl space posts but I'm not sure where the other one goes...L Långbro Fridhem said:No, the floor structure remains unchanged. The beams I install will act as a support beam inside the upcoming wall towards the crawl space. Then I will attach each floor joist to it with brackets. This way, the span is reduced. I will return with more pictures. I haven't installed this yet. Doing electrical work today.
But, with a few more pictures, it would surely become clear
I'm considering replicating your solution with a horizontal support beam at the crawl space posts. It's probably a good way to reinforce the construction further as it distributes the weight across multiple cross joists.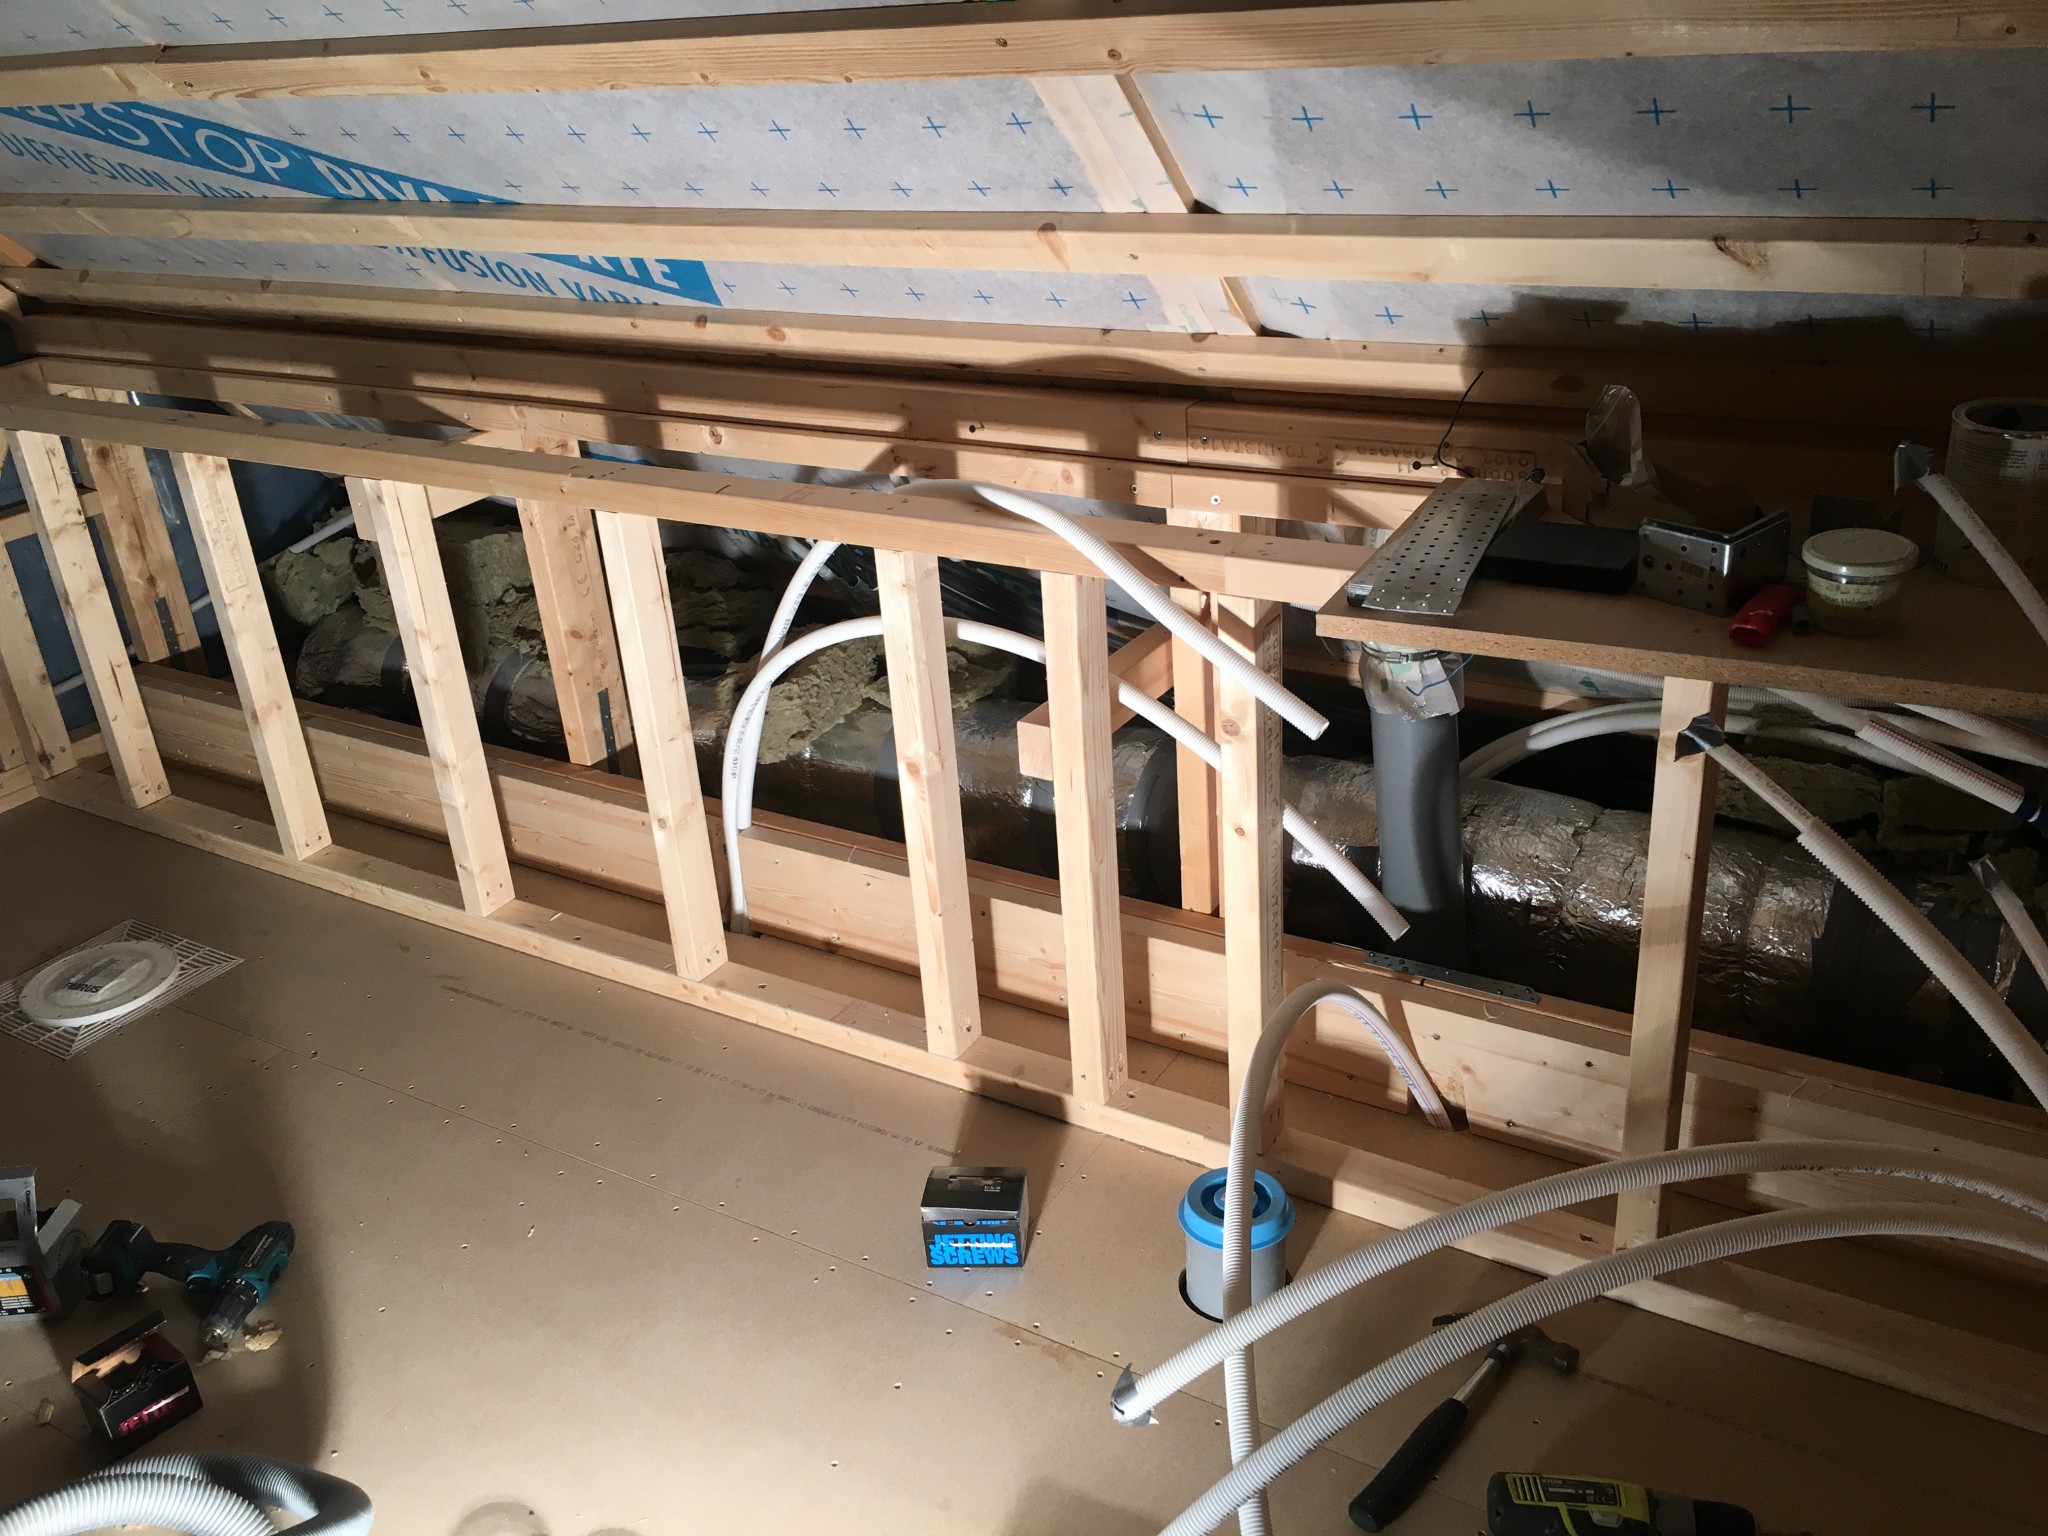
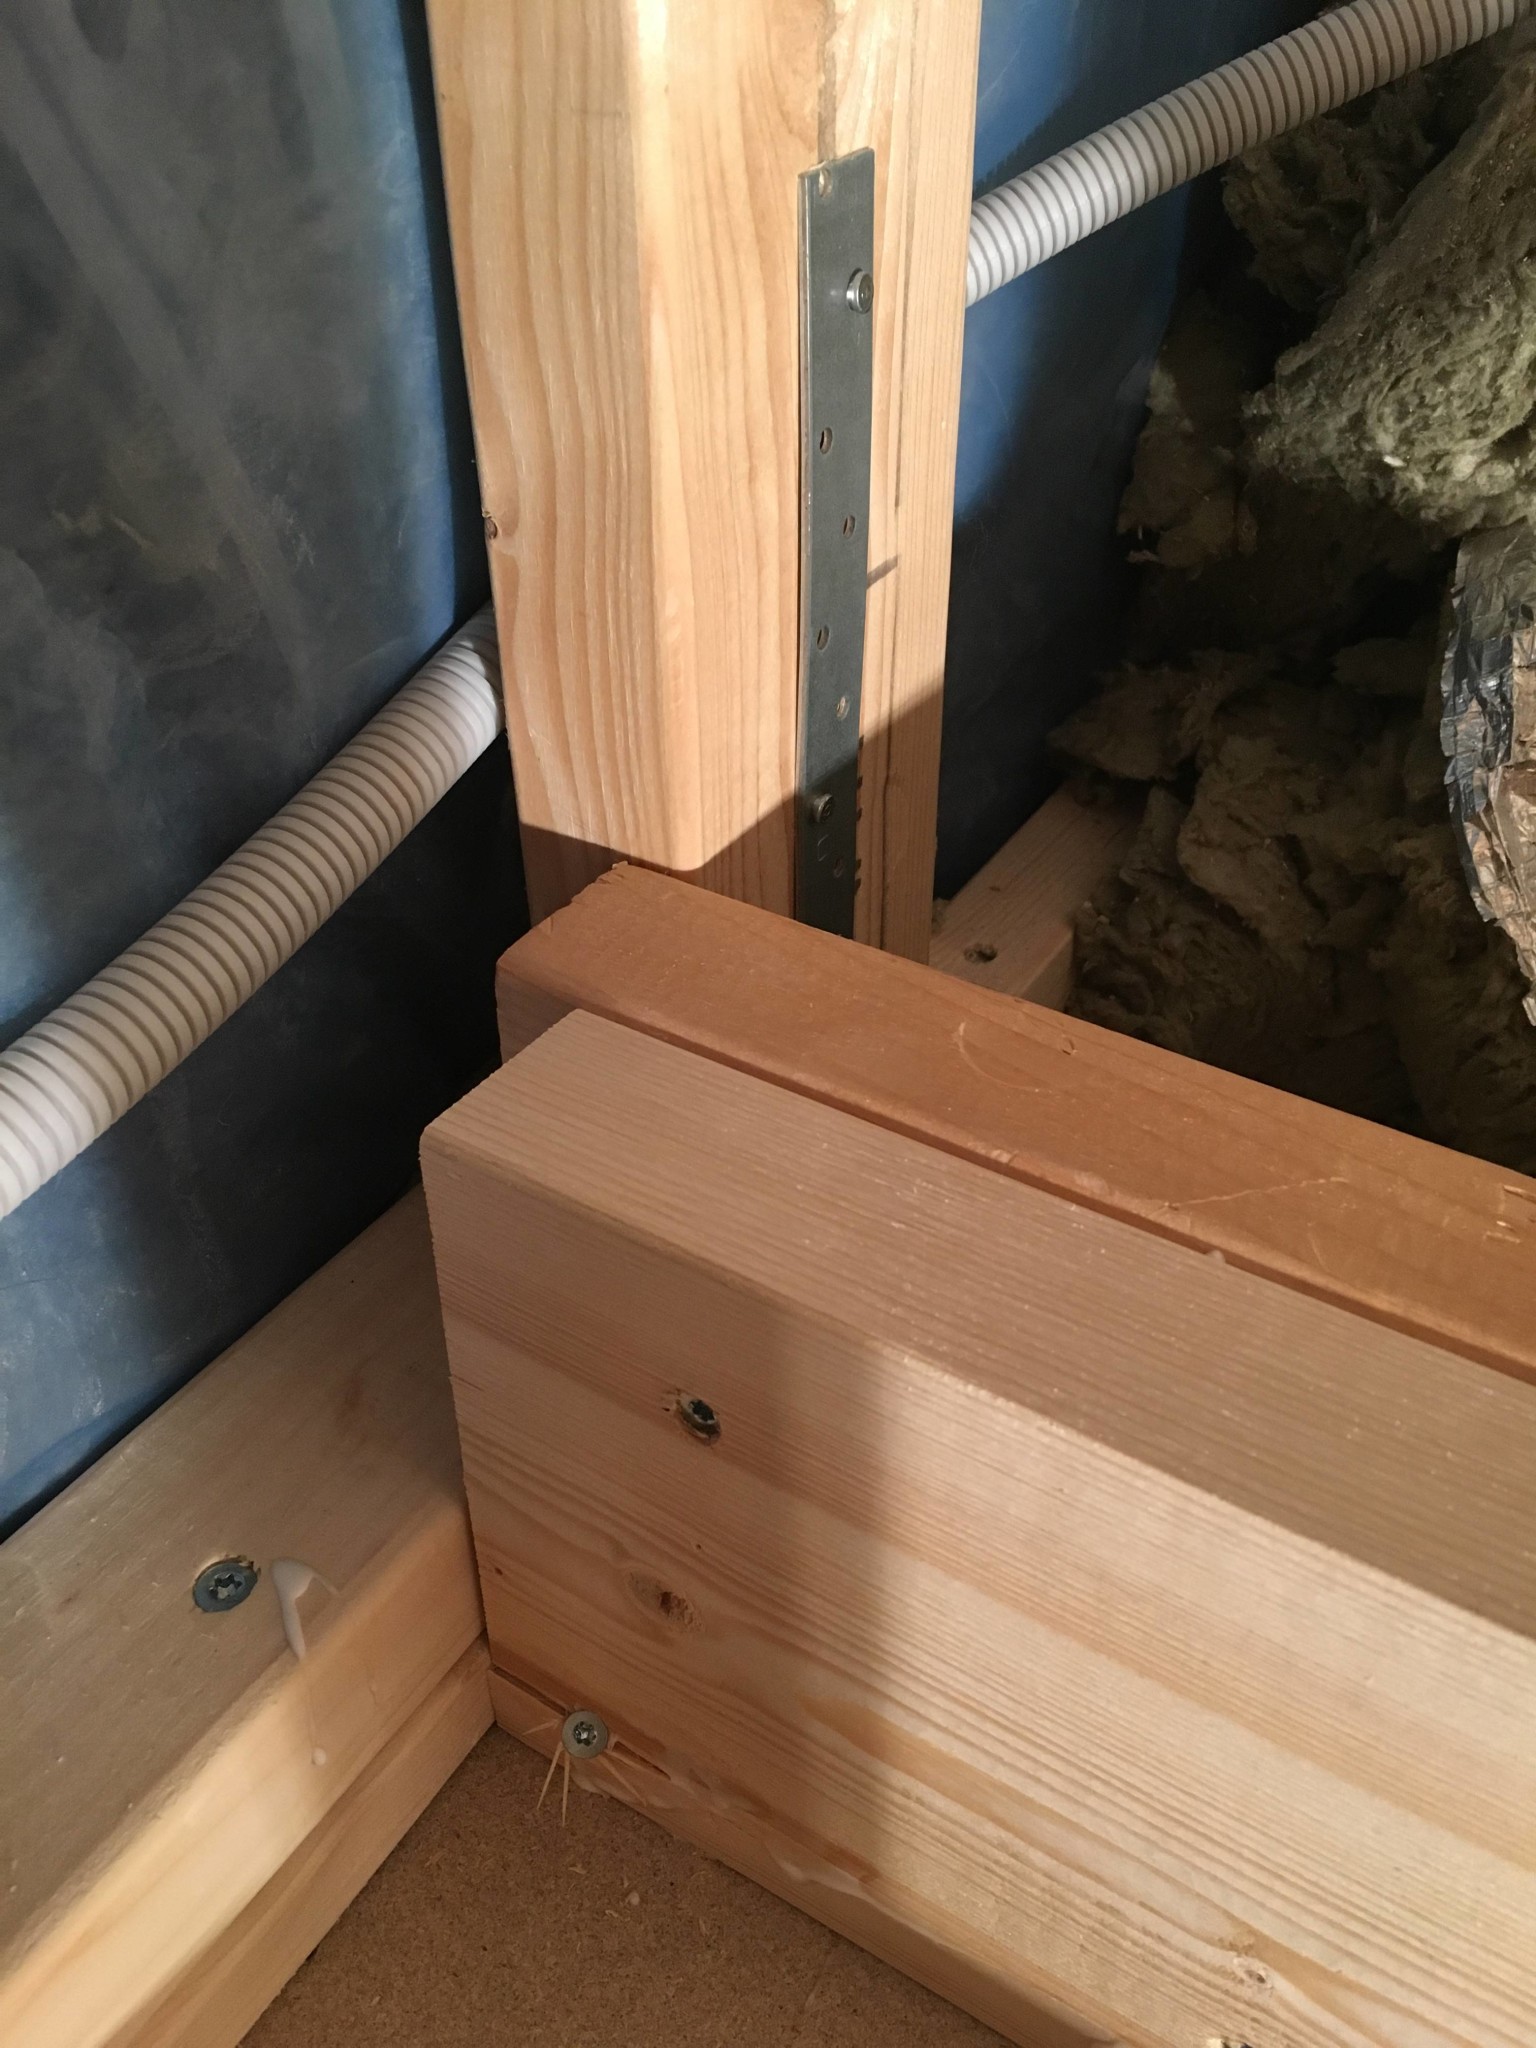
No, it's just that one. The others are already there. The center wall and the outer wall. This one is just an extra beam. The best would have been a glued beam instead. But I would never have gotten one in a single piece there as I have already framed for the wall.D d0nnie said:Yes, curious to see how it turns out as I don't quite understand where the other beam is supposed to go. I get that you're putting one (consisting of 2 glued 220x45 beams) right up against the knee wall posts but I'm not clear on where the other one should be...
But, with a few more pictures, one would surely see it
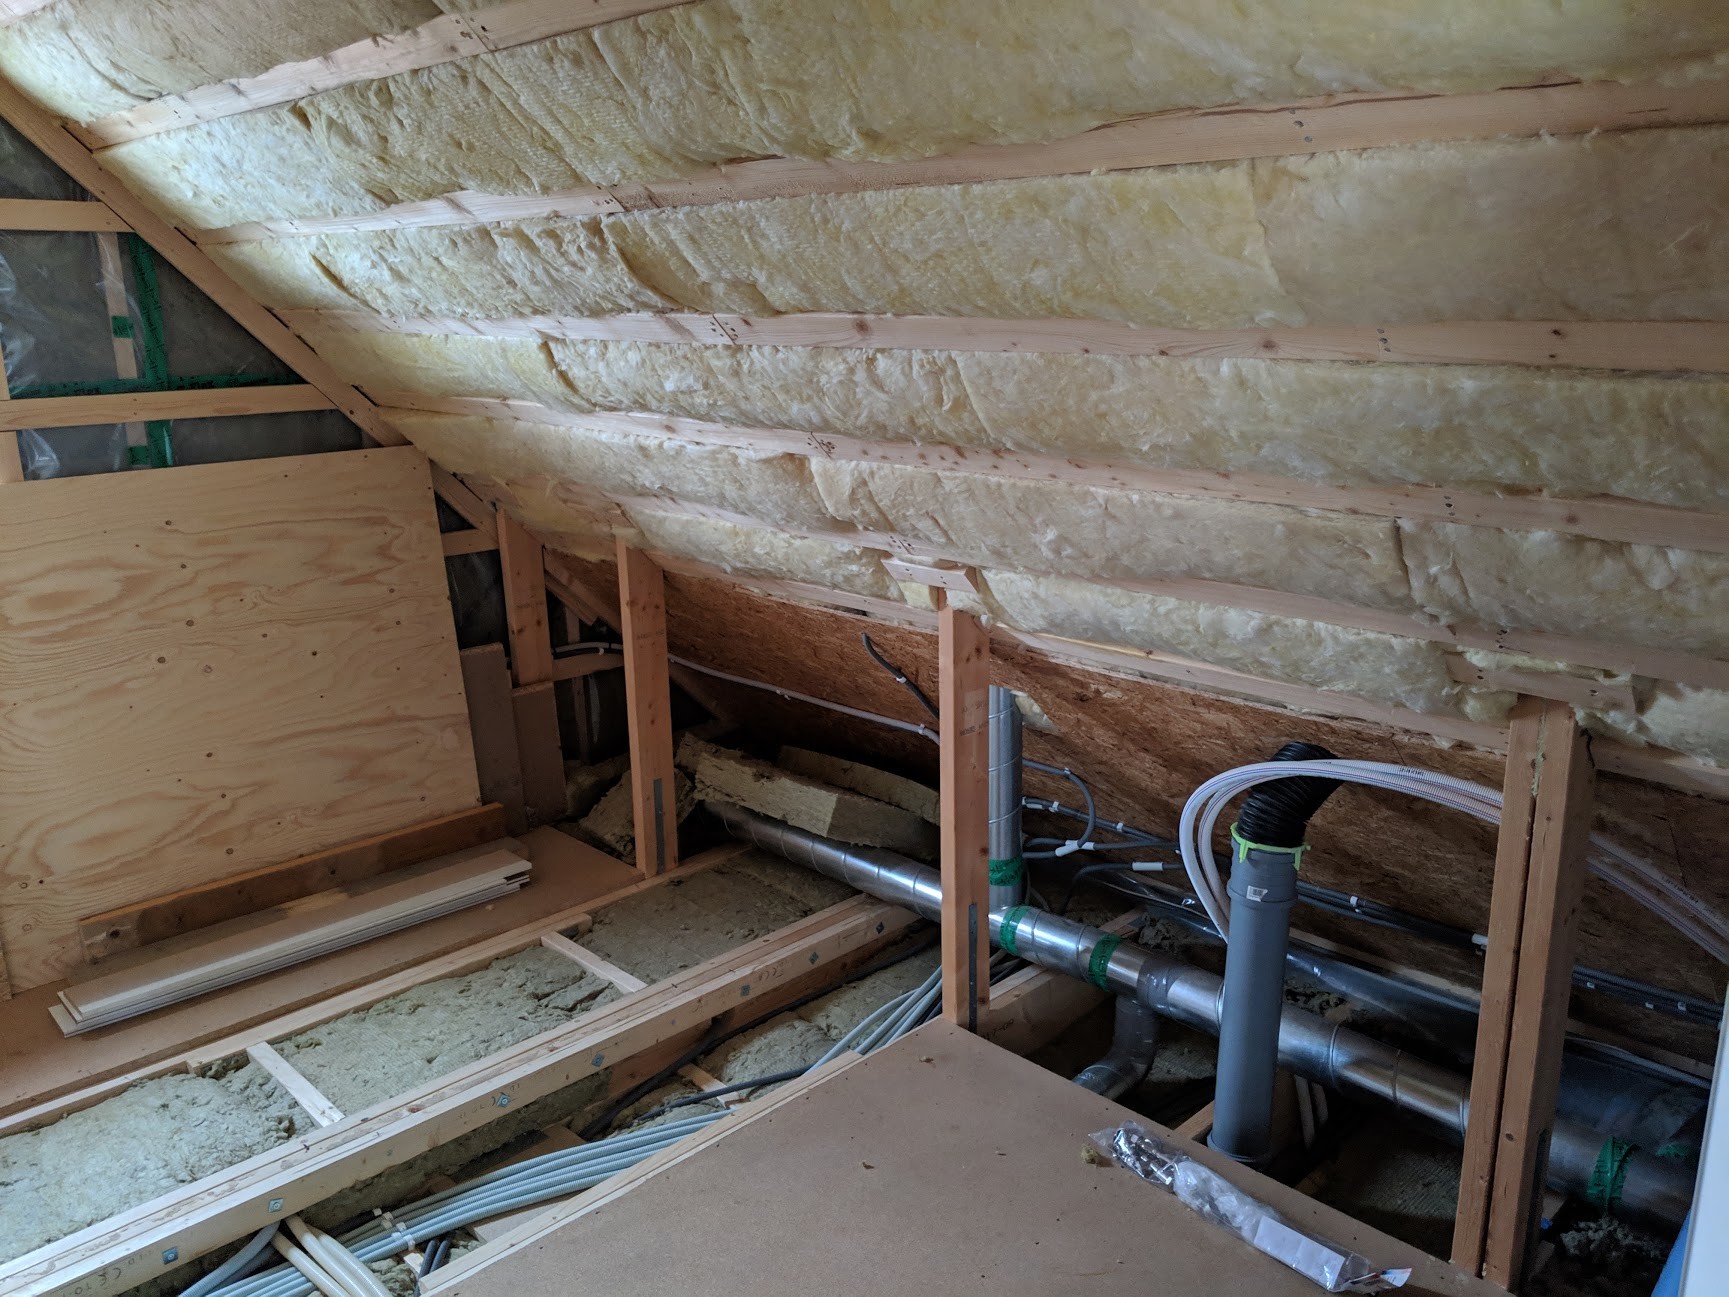
On Friday, I talked to an expert at SMV to get it "approved" as a solution. He thought it seemed really good. He talked about how they should also use it in the description for furnishing the upper floor instead of the cumbersome cc30 option.
Aha, now I get it! Does this new beam go from outer wall to outer wall or does it only extend where the bathroom will be?L Långbro Fridhem said:[image] [image]
No, it's just that one. The others already exist. The heart wall and the outer wall. This will just be an extra beam. The best would have been a glulam beam instead. But I would never have been able to put one in a piece since I have already framed for the wall.
On Friday, I talked to an expert at SMV to get it "approved" as a solution. He thought it seemed great. He talked about how they should also use it in the description for the attic renovation instead of the cumbersome alternative cc30.
I like the simplicity of it and how easy it is to apply. I'm just unsure how much it actually does if it doesn't stretch across the entire house. To become or be considered load-bearing, it should have the support of the outer walls (at least that's what I think...)
But, I do believe that the solution helps as a support between the transverse beams that will be affected by the weight of the bathtubs, which is really the important part.
It only spans the length of the bathroom. But I assume you also have the bathroom downstairs in the same location as I do. Then the floor joist, which is 240cm from the gable, rests on the wall between the laundry room and bathroom. The remaining joists cross over the bathroom wall towards the hallway downstairs.D d0nnie said:Aha, now I understand! Does this new support beam go from outer wall to outer wall or does it only span where the bathroom will be?
I like the simplicity of it and how easy it is to apply. I'm just unsure about how effective it really is if it doesn't span the entire house. To be or count as load-bearing, it should have the support of the outer walls (at least that's what I think...)
However, I do think this solution helps to distribute the load between the transverse joists that are affected by the weight of the bathtubs, which is really what's important.
These are not load-bearing walls, but they do support some load. It is distributed out.
I can't provide any guarantees. But both I and SMV believe in this idea.
As you saw, I managed to install it yesterday evening. So I'll go up and do a test jump later when the glue has fully dried.
Good luck and jump onL Långbro Fridhem said:It only extends along the length of the bathroom. But I assume you have the bathroom downstairs in the same place as I do. Then the floor joist, which is 240cm in from the gable, rests on the wall between the laundry room and the bathroom. The remaining joists then span across the bathroom wall toward the hallway downstairs. They aren't load-bearing walls, but they can handle some load anyway. It's distributed across. I can't give any guarantees. But both I and SMV believe in this idea. As you saw, I managed to mount it last night. So I'm going to go up and do a test jump later when the glue has dried.
I think it'll be good! As I mentioned, I will copy your solution since the work effort is minimal and it hardly hurts to do as you did. It only gets better with more weight distribution.Another question, have you connected the VA (drain pipes) yourself? Thinking about the well that you see in the floor, for example... Considering doing it myself (it's just pipes connected to the ventilation) but don't want to take any risks with doing it and then hearing that you're not allowed to...L Långbro Fridhem said:[image] [image]
No, it's just that. The others are already there. The heart wall and the outer wall. This will just be an additional support beam. The best solution would have been a glulam beam instead. But I could never have put one in as a single piece since I've already framed the wall.
Last Friday I talked to an expert at SMV to get this "approved" as a solution. He thought it looked great. He mentioned that they should also use it in the description for furnishing the upper floor instead of the cumbersome alternative cc30.
Allowed or not. As I interpret it, it must be done professionally. I connected it myself. And prepared the joist for the drains. Then a plumber came to approve the routing and installed the drains. I felt I wanted a receipt for that part. Would you mind taking a photo of the support leg farthest out towards the gable in your bathroom? I'm a bit curious about your conditions to secure a support point there.D d0nnie said:
Yes, here they come. I have planned to build the support wall about 50cm in front of the existing support legs so that the bathroom will become quite narrow. Another idea I'm thinking about is to make a laundry chute from the bathroom into the laundry room below.L Långbro Fridhem said:Allowed and allowed. As I interpret it, it must be professionally done. I connected myself. And prepared the joists for the drains. Then a plumber had to come and approve the routing and installed the drains. I felt that I wanted a receipt for that part.
Do you feel like taking a picture at the support leg farthest towards the gable in your bathroom? A little curious about your conditions to get a support point there.

I was thinking more of a closer picture of the outer wall where you can get support for the beam.D d0nnie said:
I also suggested a laundry chute during the construction phase, but it was quickly voted down...
I can easily get support by cutting a small piece of the vapor barrier and then inserting the rule into the insulation.L Långbro Fridhem said: