Thank you all for your help. I summarize the solution below.
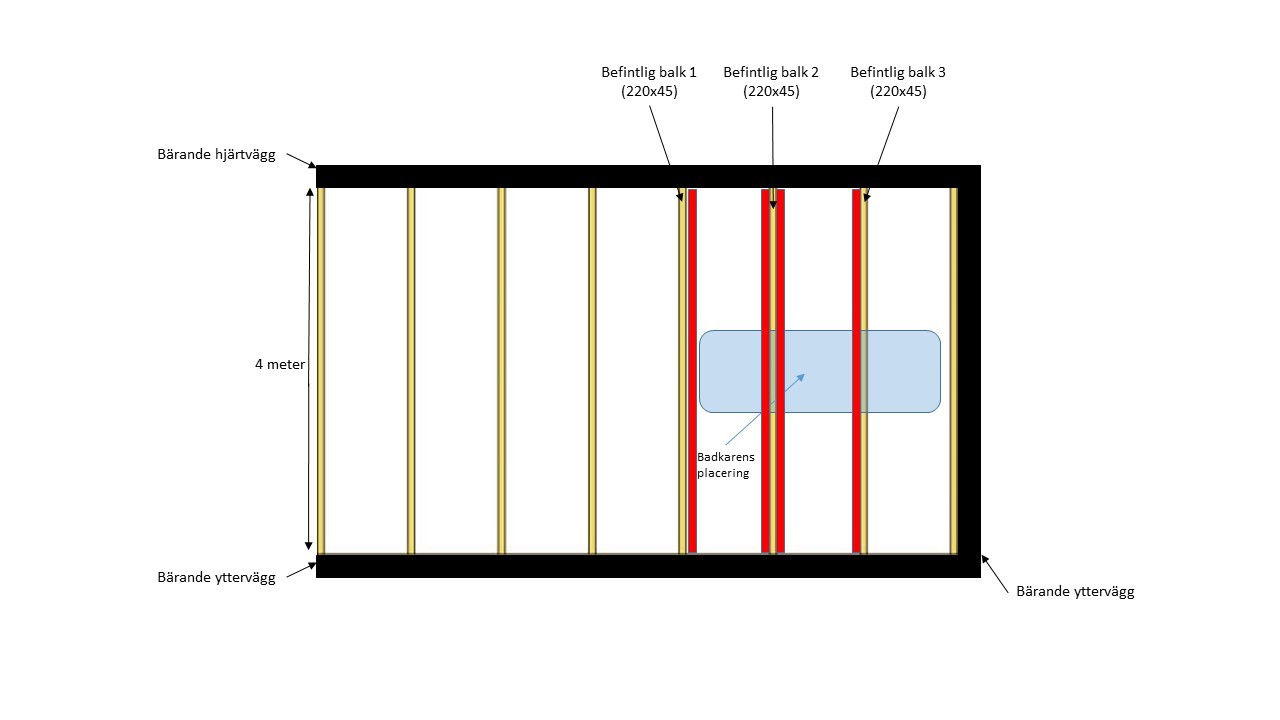
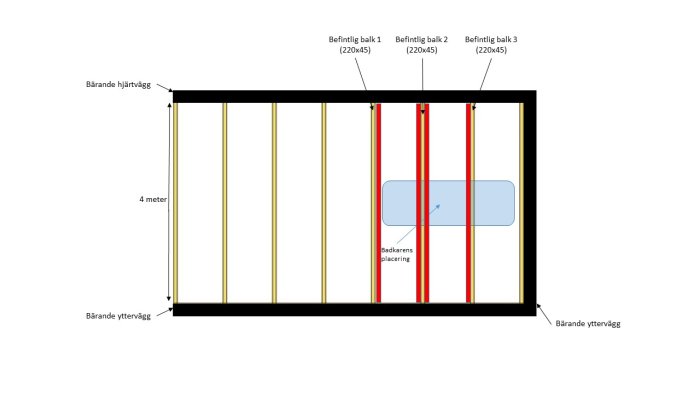
45x70 studs are screw-glued with regular wood glue lengthwise to existing beams 1 and 3. This is done on one side of the beam both at the top and bottom.
45x70 studs are screw-glued with regular wood glue lengthwise to existing beam 2. This is done on both sides of the beam both at the top and bottom.
The actual fastening of the 45x70 studs to the load-bearing outer wall and interior wall is not important but is done as well as possible (difficult to reach so far in to screw). Improved stiffness is achieved by the improved cross-section of the new beams.
Is there anything else I might have missed or any other opinions, I would gladly listen. Otherwise, feel free to agree if you think the solution will be good
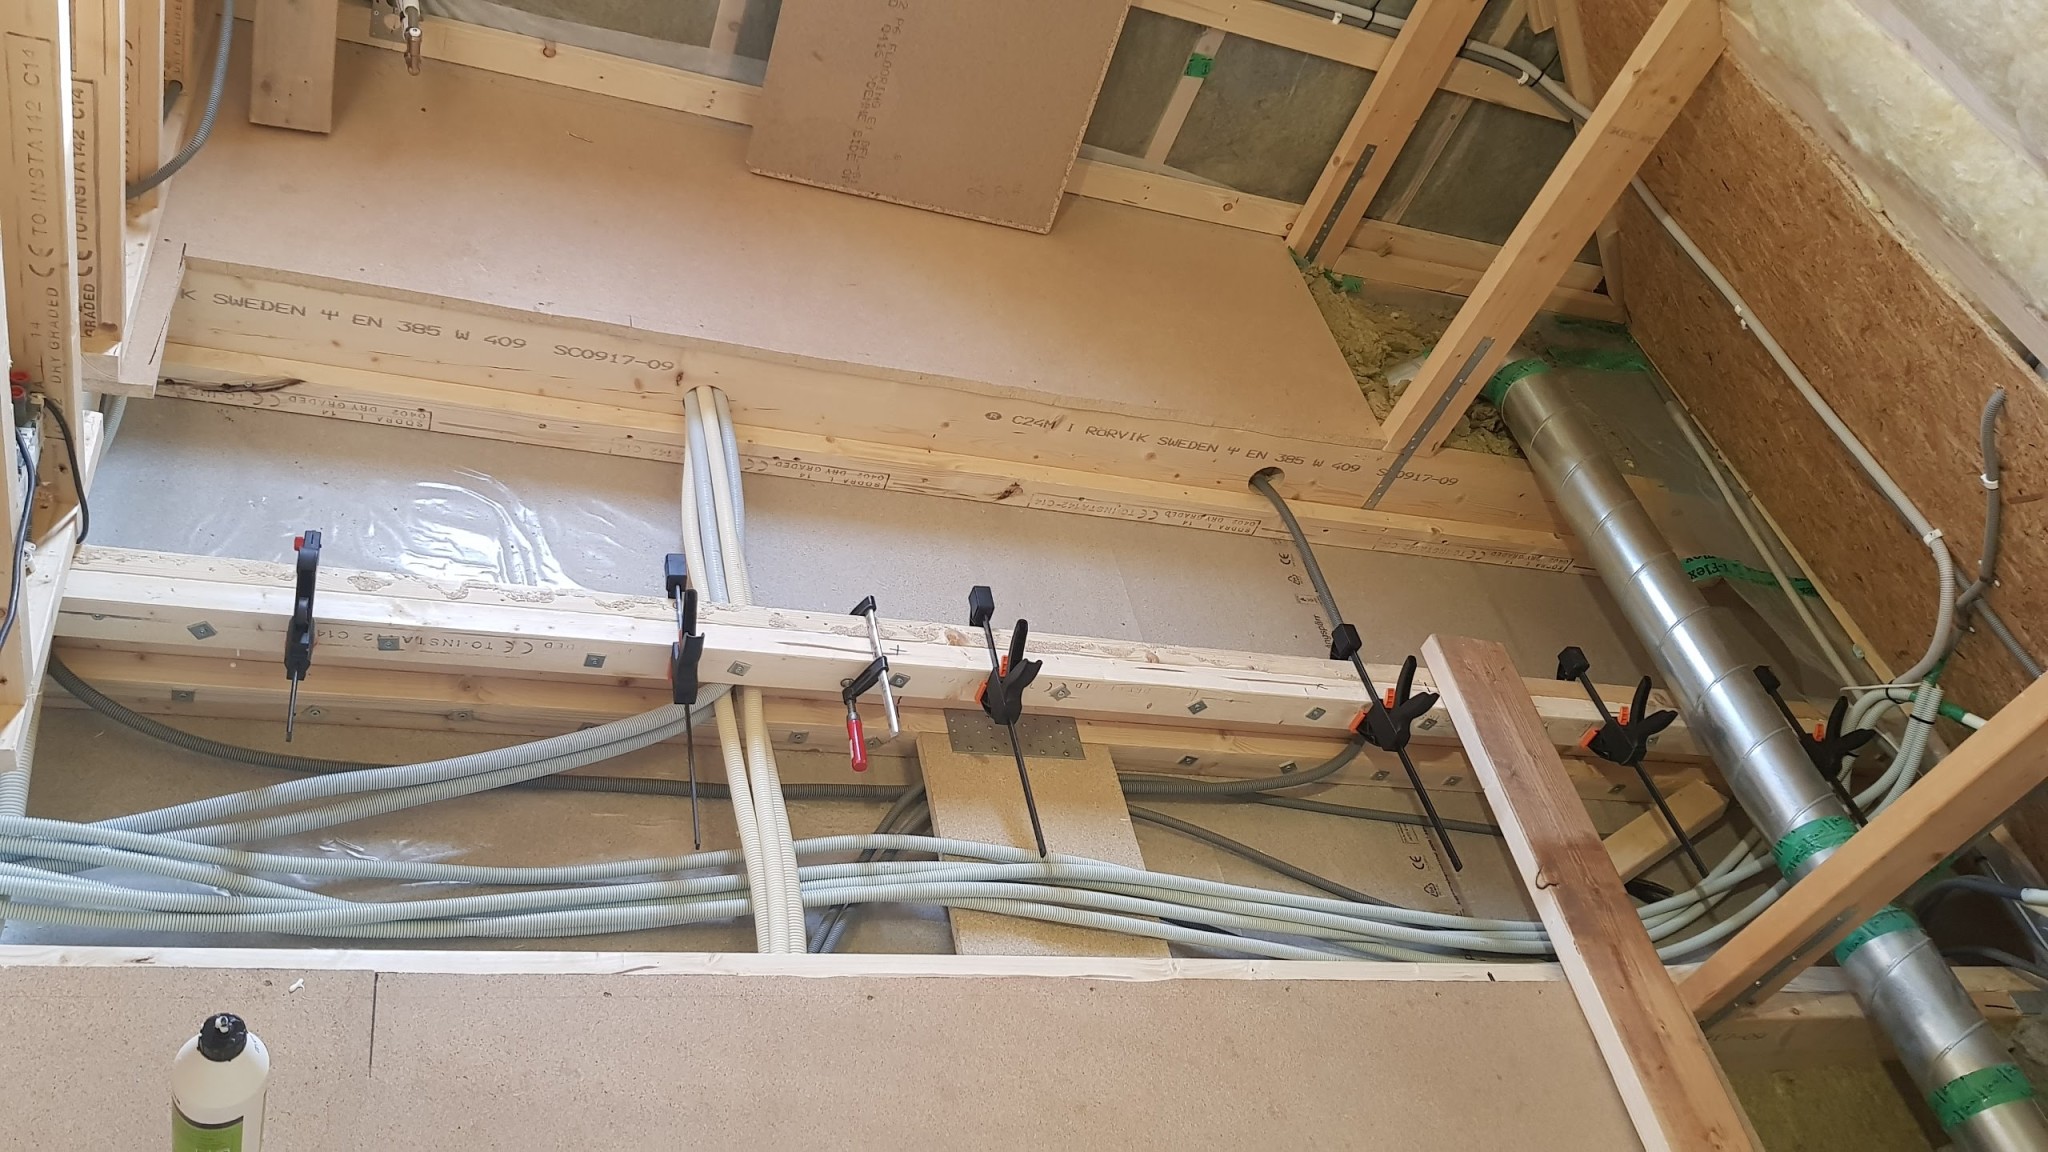
Here is a profile picture of the solution, the question is if it is enough like in figure 1? I want to cut up as little of the floor as possible. But of course, if needed, that's what has to be done...
[image]
Good faen, that's how I'm going to reinforce my trusses/floor when I redo the kitchen
Have the same problem/opportunity with a bunch of electrical cables.
You can reinforce the beams on top and bottom so they become like I-beams. If you can screw-glue a 45x70 joist on either side at the top and bottom, then you can drive a tank on the floor.
New challenges
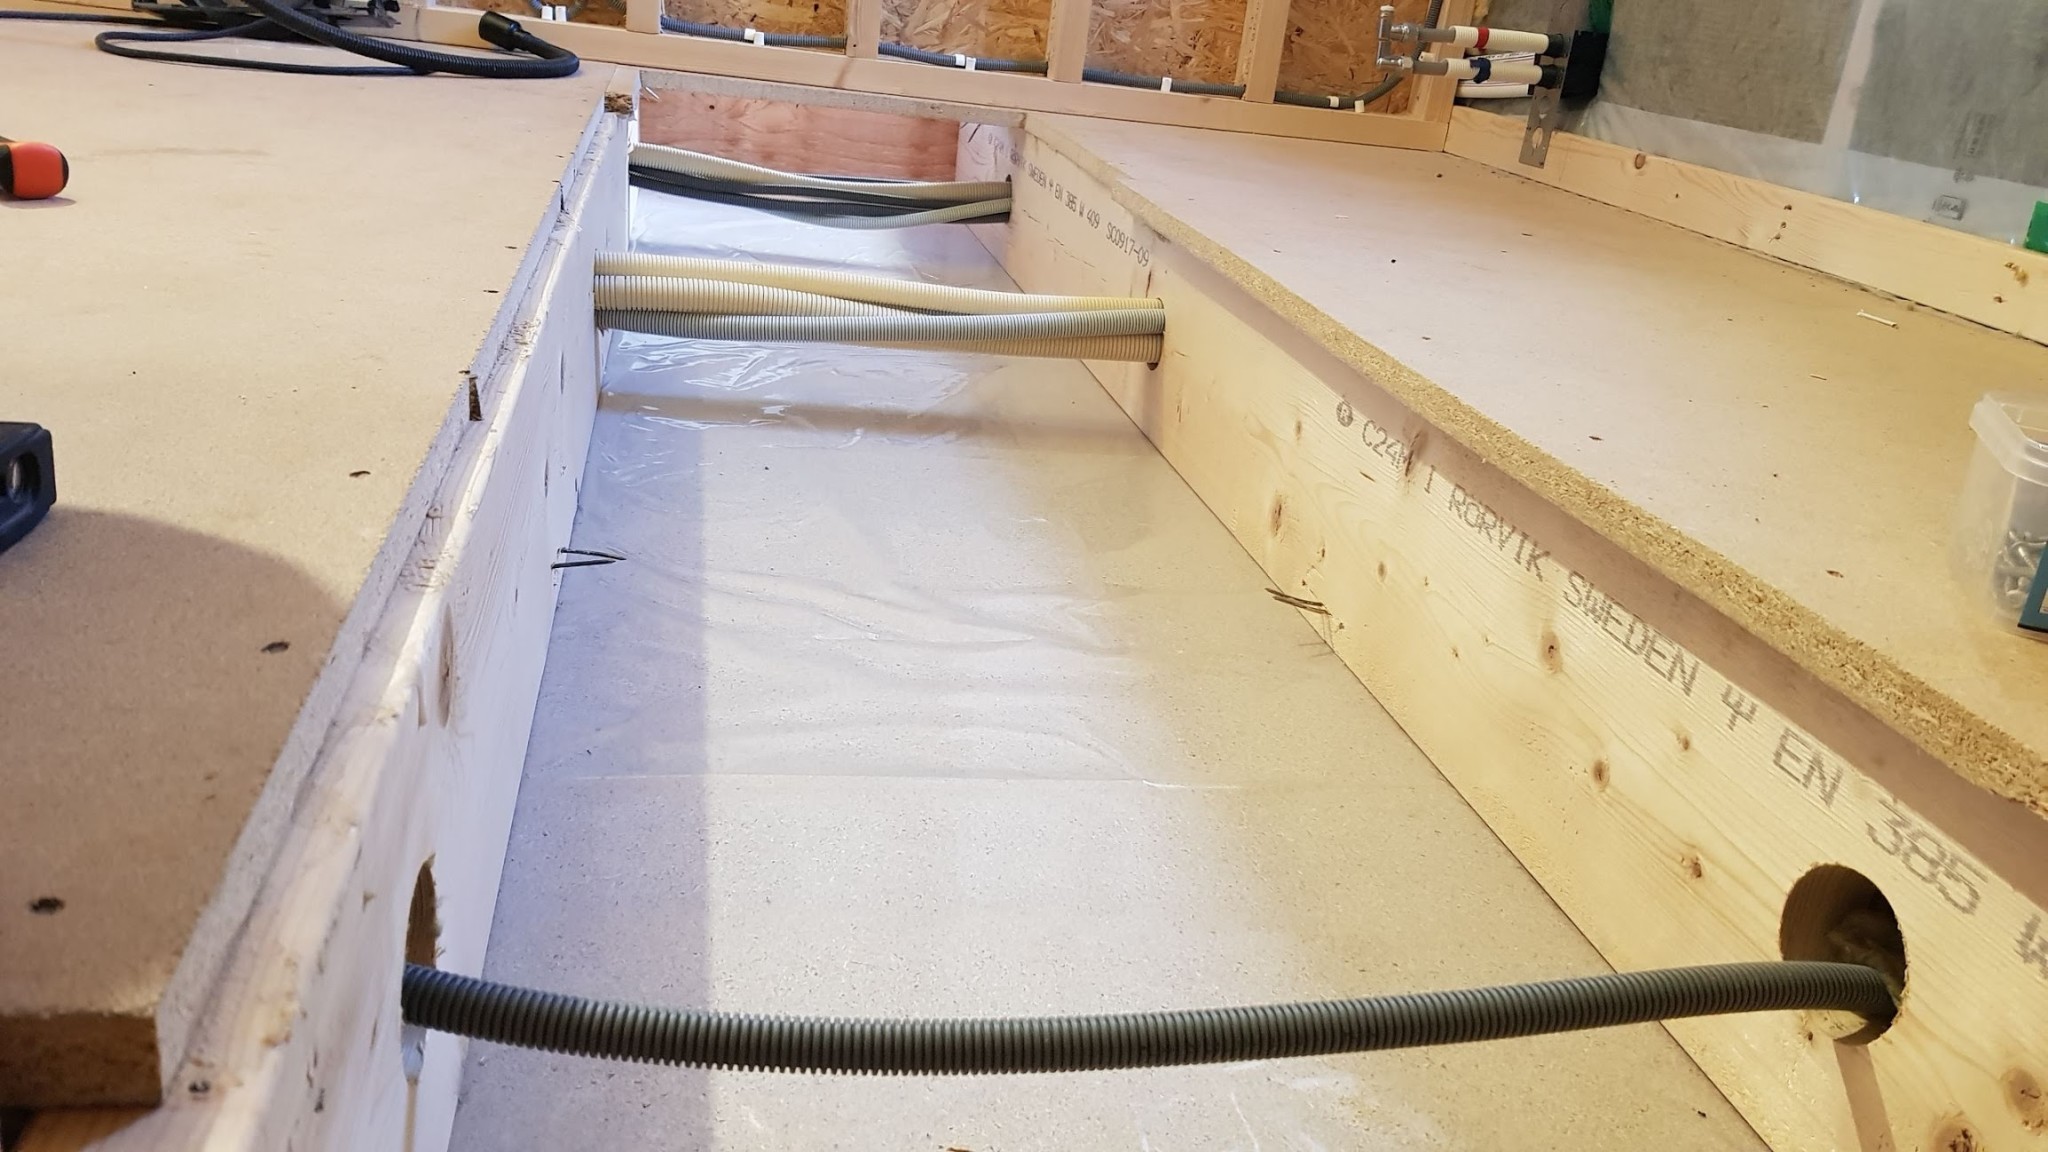
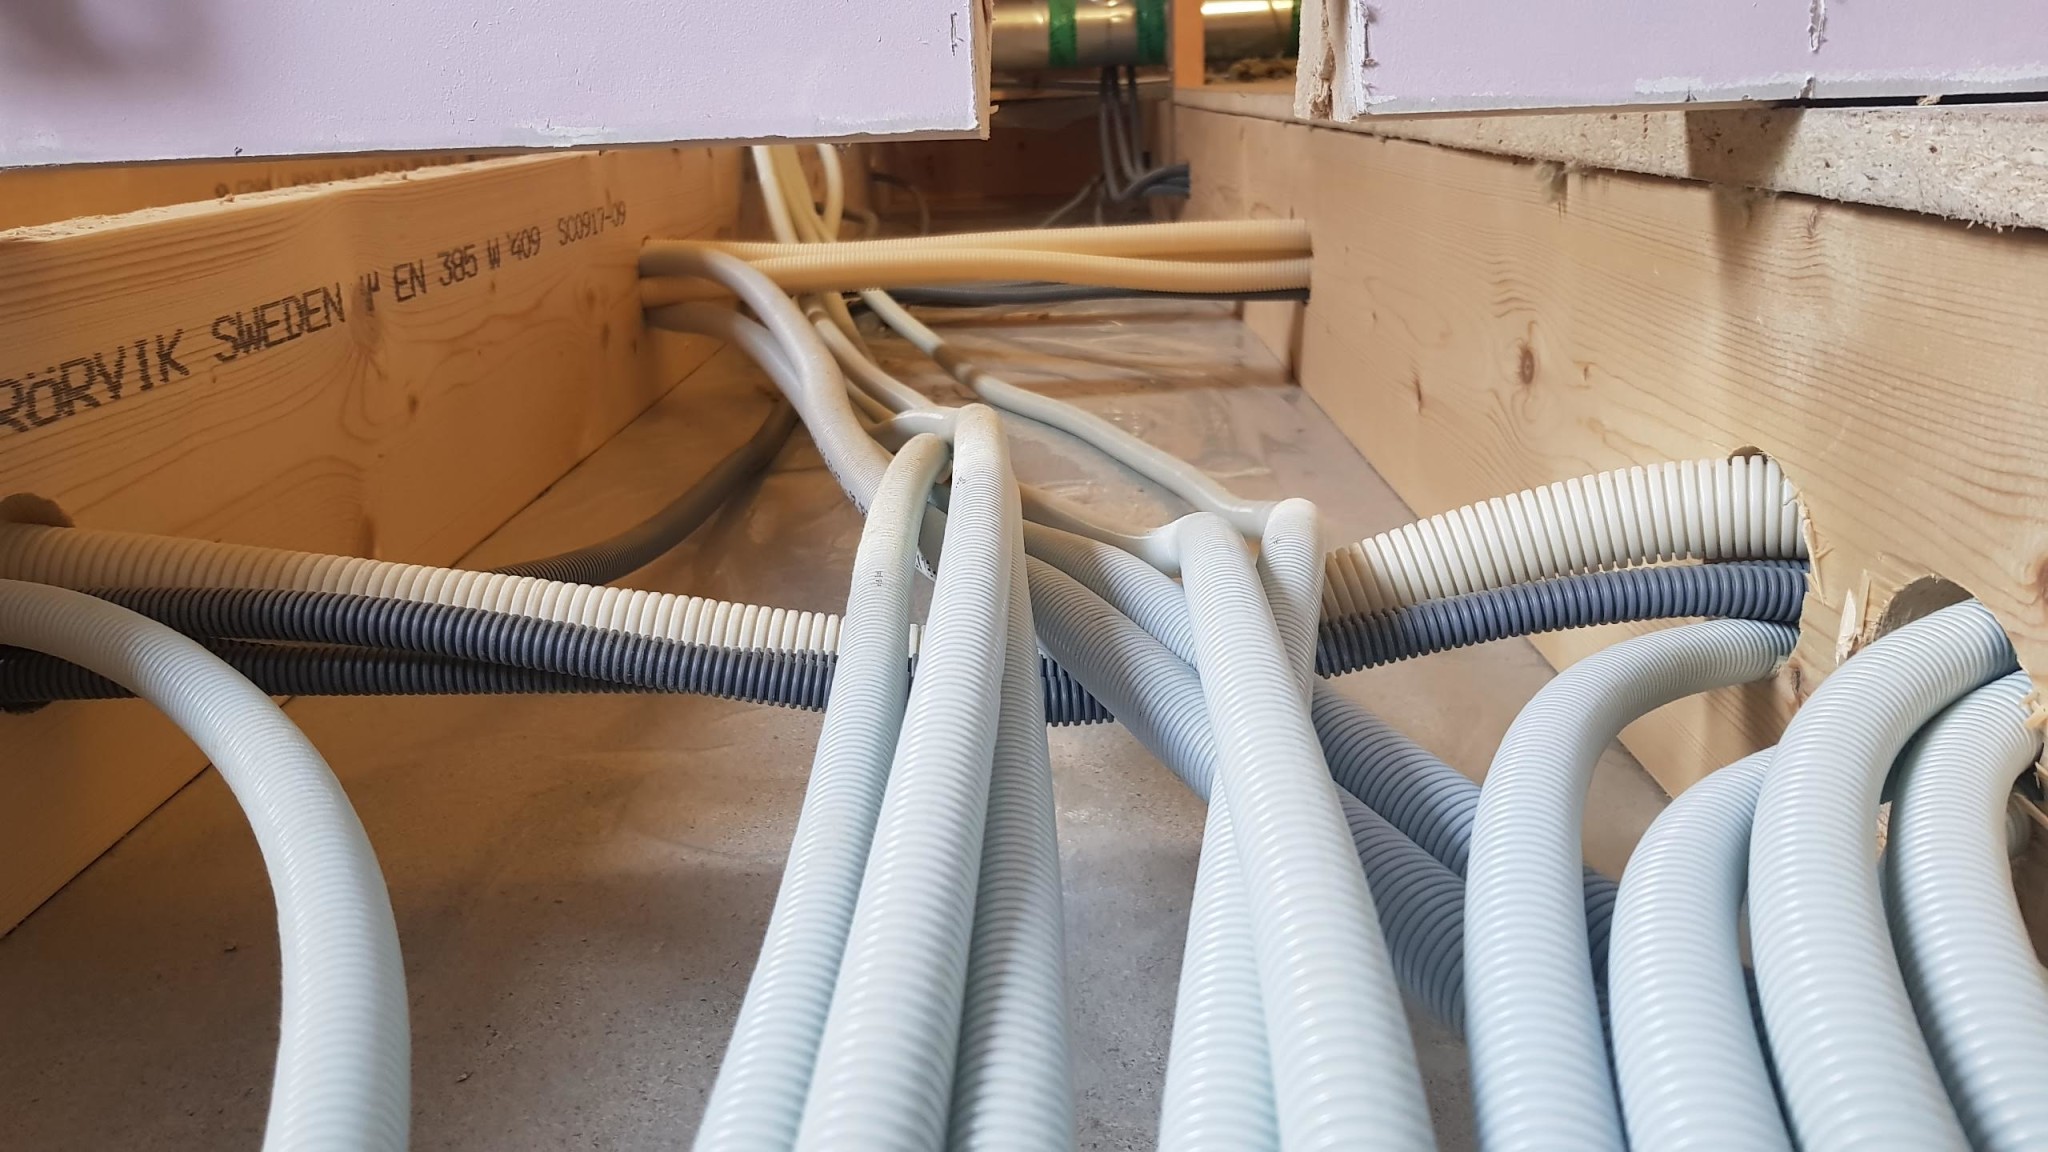
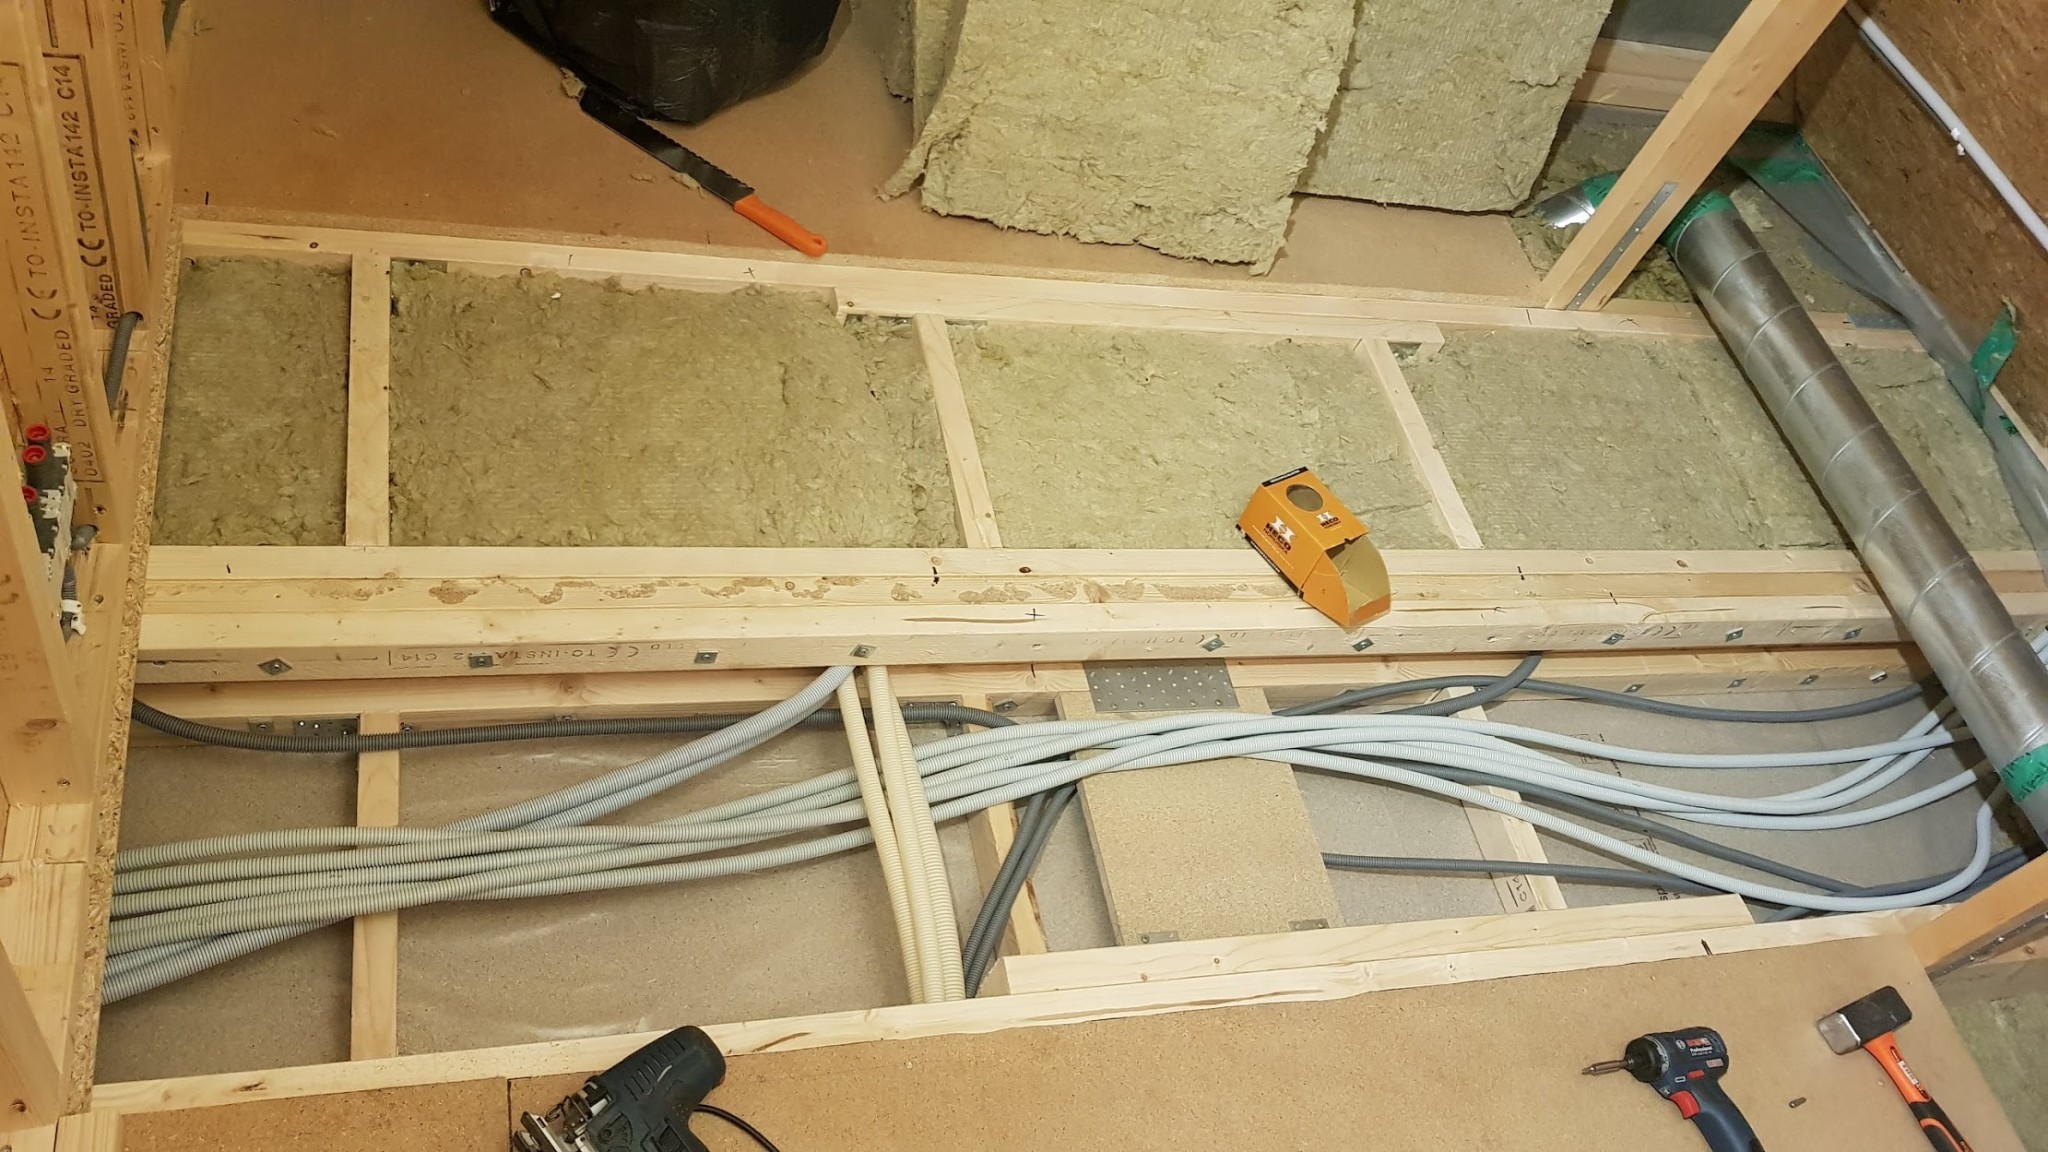
I measured the distance between the central wall and the outer wall, and it's exactly 3.90 meters (so 10cm shorter than I initially thought). When I removed the whole chipboard, I found even more electrical cables, which means I can only screw-glue about 3m of the stretch, at least at the underside of the beam. However, at the top edge, I believe I can screw-glue the entire length...
What to do? Is it enough to screw-glue 3m of the total length of 3.90m?!
Is it enough to screw glue 3m of the total length 3.90m?!
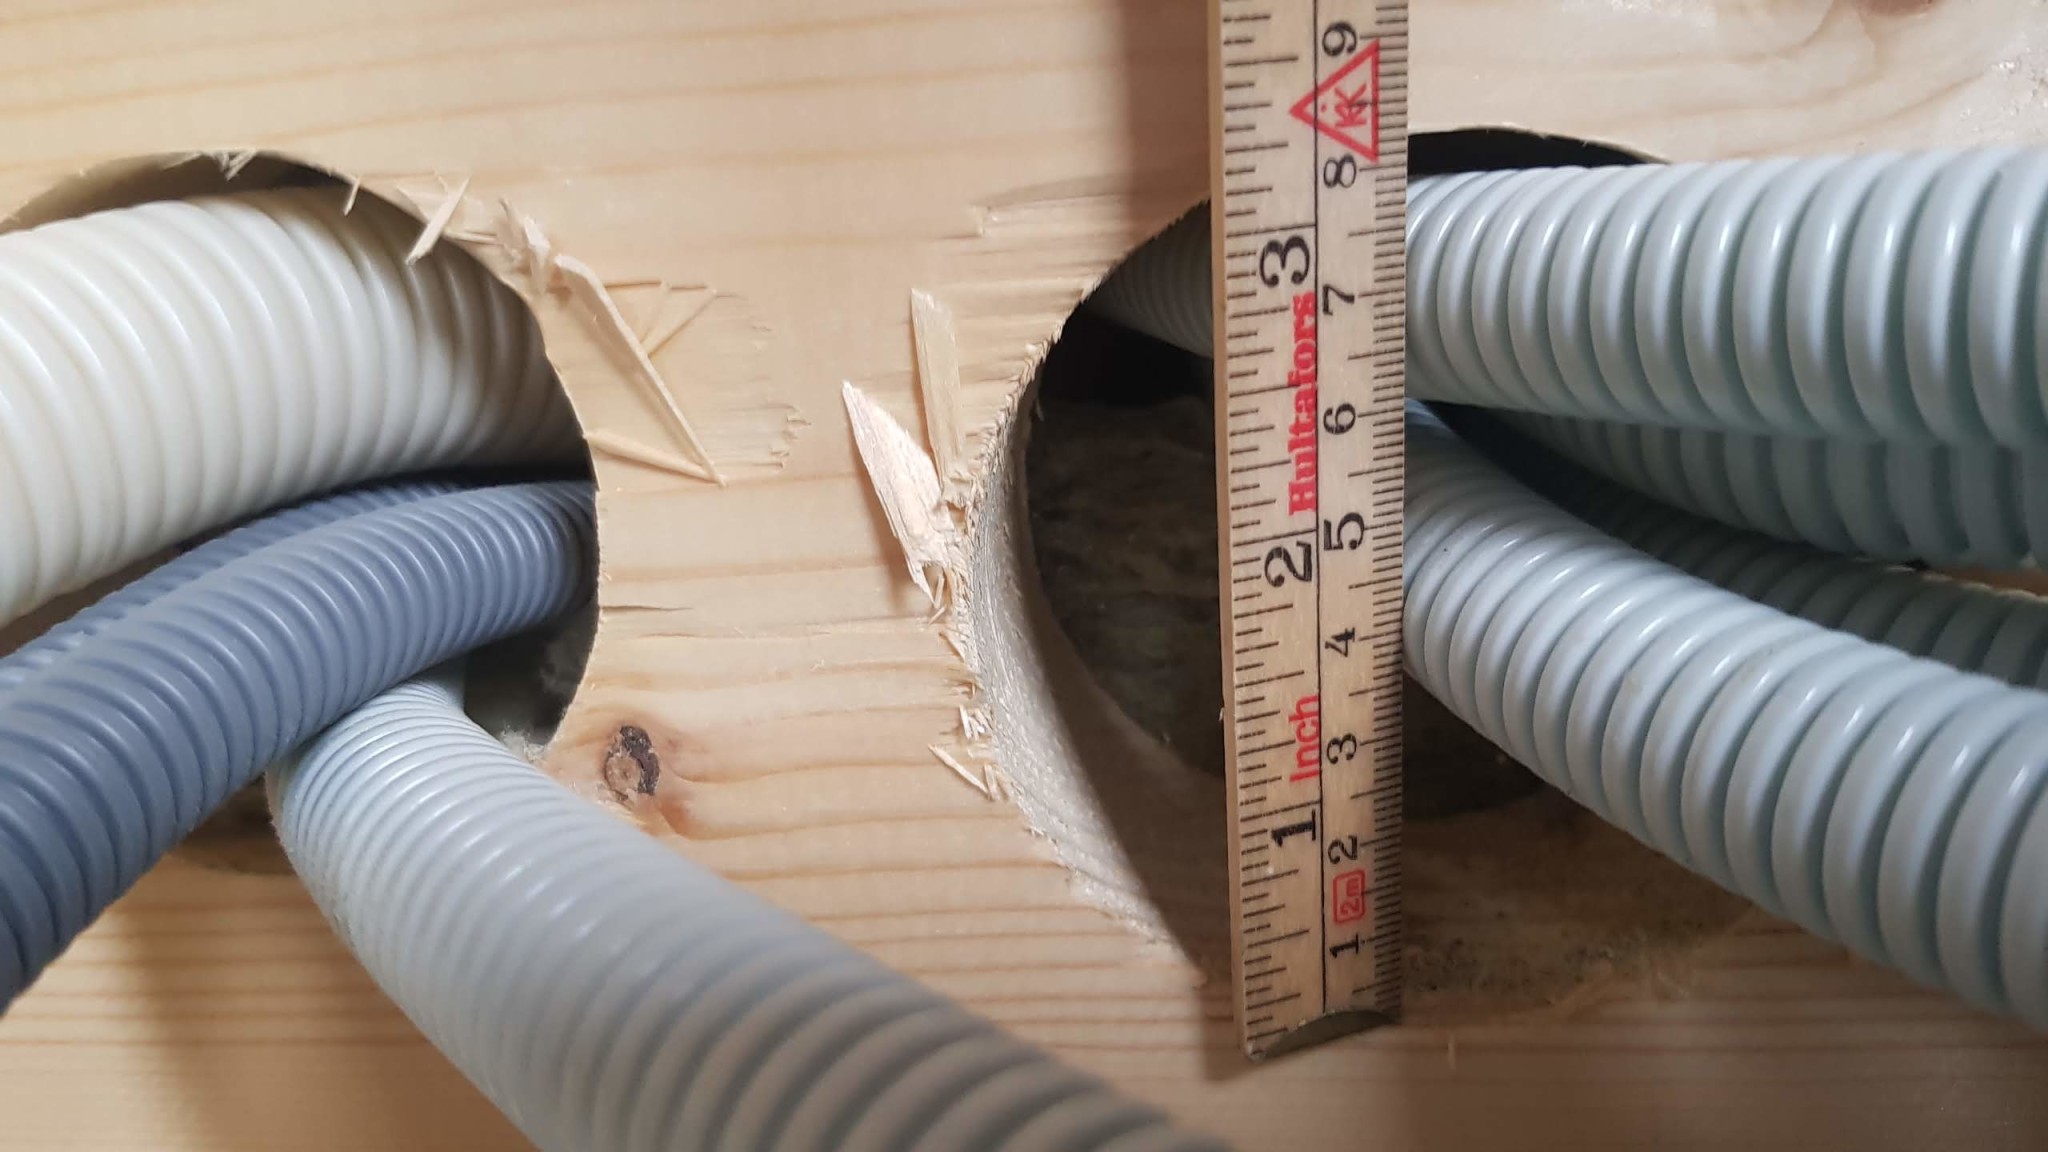
It won't be as good, but better than nothing. Apply it along the entire length on the top and as much as you can on the bottom. The new cross-section is most beneficial in the middle of the span. The way the hole cuttings are made makes me doubt the competence of those responsible. Hole cuttings should preferably be made in the middle of both the length and height and absolutely not near the supports. The holes are also too many and unnecessarily large.
It won't be as good, but better than nothing. Run the entire length on the top side and as much as you can on the underside. The new cross-section does the most good in the middle of the span. The way the holes are made makes me doubt the competence of those responsible. Holes should preferably be made in the middle of both the length and the height and absolutely not near the supports. The holes are also too many and unnecessarily large.
Yes, I completely agree with you. Why drill a 70mm hole for a small 16mm flex pipe?! There is actually another 70mm hole with another 16mm flex pipe that is behind the picture. Poorly done by Smålandsvillan!!
But anyway, even more reason to reinforce. Now for some better news...I actually managed to get the joists on the underside to be 3.40m! The top side will be full length (i.e. 3.90m).
When I screw-glue, how close would you space the screws? I was thinking about 30 cm apart and in the center of the new 70mm joist. Or should I have them closer? Using 6mmx80 wood screws.
The screws are, among other things, instead of the clamps. With a perfect gluing, you should see the glue being pressed out in all joints. What is an appropriate distance depends somewhat on how flat the beams are. A larger distance than 30 cm feels doubtful. You might need to place them in a zig-zag pattern.
Excuse the question, but can't new houses today handle having a bathtub in the bathroom? Or are you finishing the interior yourself?
No, Smålandsvillan Kalmar can't handle a larger bathtub on the upper floor without reinforcing the joists. They advise that you should reinforce the joists if the total weight of the bathtub exceeds 250kg.
The plastic you see is a vapor barrier, and since the house is delivered without a finished upper floor (cold attic), the plastic is needed until it's fully constructed. We've done/are doing that part ourselves, and the bathroom is the final piece of the puzzle
The screws are, among other things, instead of the clamps. With a perfect gluing, you should see the glue pressed out in all joints. What is a suitable distance depends a little on how flat the beams are. Greater distance than 30 cm feels questionable. You may need to put them in a zig-zag pattern.
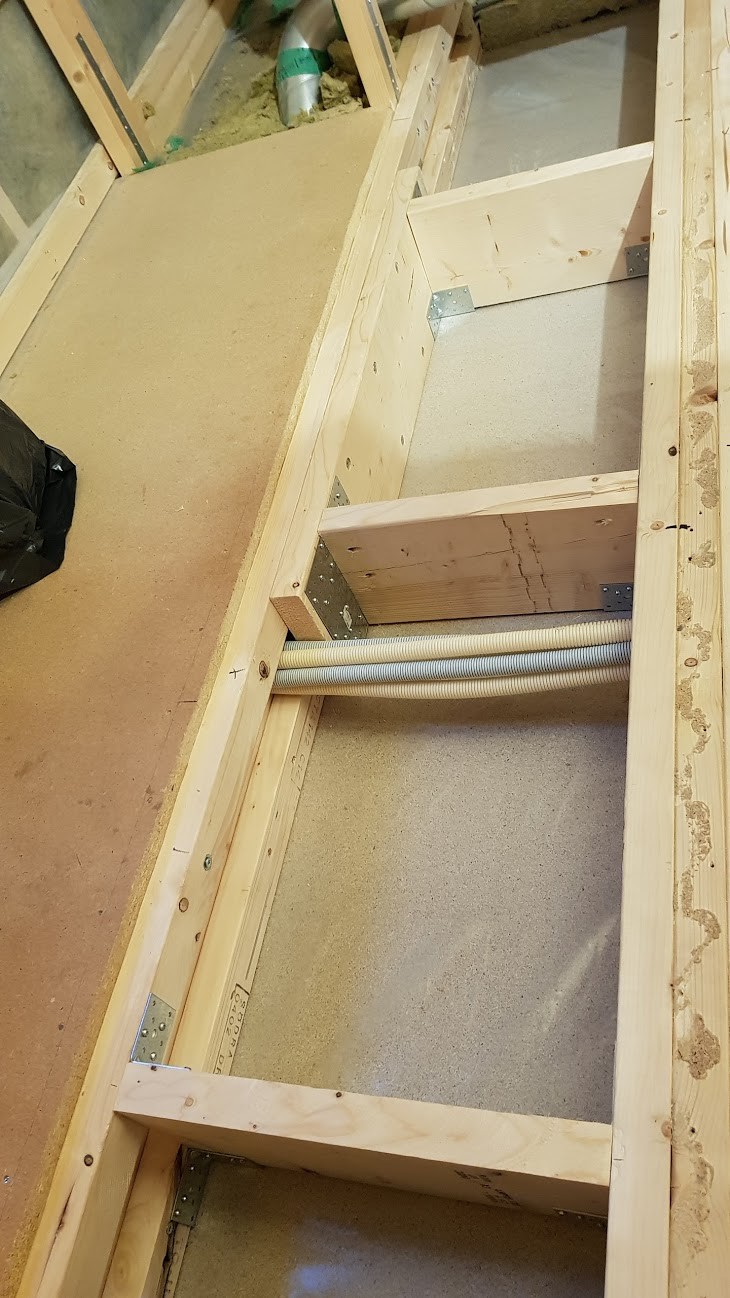
This is how it turned out in the end... I also found a hole in one of the beams that was actually larger than 70mm Therefore, it feels even better to reinforce. A few noggings were added to further distribute the weight.
Hello!
How has it been going for you? I'm currently working on a bathroom in a Nybro. I have the same problem as you. I don't see any plumbing in your floor structure. Have you reached that stage yet?
Hi!
How is it going for you? I am working on a bathroom in a Nybro myself. I have the same problem as you. I don't see any installation of VA in your joist. Have you gotten to that point yet?
Nothing more has happened yet. We plan to resume construction at the beginning of next year.
Vi vill skicka notiser för ämnen du bevakar och händelser som berör dig.
")