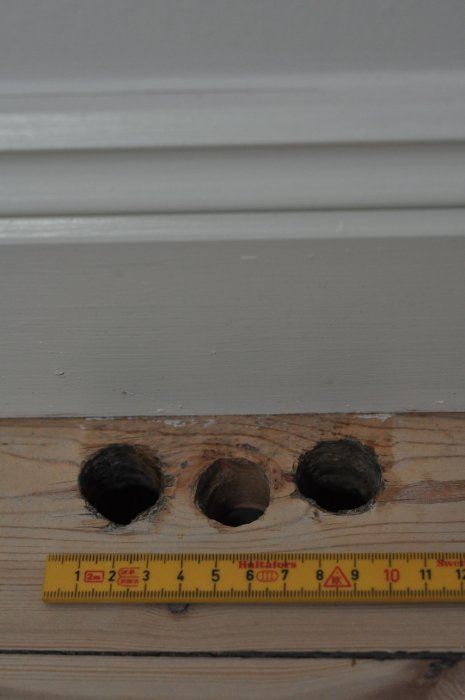
Hi! So I have three holes next to each other - see picture - in the pine floor with a diameter of about 20 mm. Pipes for heating and electrical supply used to go there. The floor is only soap-"treated" otherwise (so I can fine-sand over a repair without dulling any lacquer) and I want to do a repair that's as good as possible. I have several planks with a similar color tone left over from renovating other rooms.
One option would have been to rout around the holes and repair all with a single 5mm thick piece glued in place. But it's not easy to reach, as you can see, and if you mess up with the router (I'm still a bit new at routing) you can do more harm than good .
Dowel might be okay even if the grain direction is wrong (I'm probably exaggerating now).
I read a post earlier from bengtn or Mats Bengtsson I believe, with a link to a video on Fine Woodworker or similar that showed nice repairs. But I can't find it now.
As mentioned, tips are gratefully received, it is in a very visible spot...
The guy who sanded my floor sanded plugs that were slightly conical, which he tapped into the holes along with a bit of wood glue. Once it had cured, he sanded down the plugs to the same height as the floor. Has held up well for thirteen years!
In principle, you can fill the holes with anything. Wine cork, e.g. But it doesn't become "invisible," and should it really be? These holes tell a part of the house's history. Filled with plugs, dowels, cork, plastic wood, or whatever, they aren't eye-catching but they are visible. An "invisible" repair by removing a larger piece of wood would probably look worse. I think.
You drill out the holes so that they become perfectly round and with clean edges using a wood drill of suitable dimension, and then you drill out matching dowels in the right type of wood and with the correct grain direction using a dowel drill. To simplify drilling into the floor, you can insert a temporary plug into the hole so there is something to guide the drill. (It can be difficult if it's empty in the middle.) You can then glue the dowel into the hole. Sand and lacquer, and it's done.
Thanks for the response! However, I don't have a drill press, but of course, one can try to drill by hand; precision is hardly important in this case, nice edges at the top will suffice. A good excuse to get a new drilling machine too, I won't attempt to tap drill with a 10.8V screwdriver
Then I don't really know how to be able to sand the plug to make it a bit conical, feels a bit troublesome, but maybe it's possible.
By the way, a pillar drill is not needed either. A sturdy hand drill in a drill stand works fine. A 10.8V screwdriver is definitely out of the question... The plug will not be straight and evenly thick if you try to hold it by hand.
You can buy ready-made plugs (from a tap drill in any wood) from a fine carpentry shop and likely have them sent by mail. Commonly used among wooden boat renovators.
I usually make a guide template from masonite for the knot drill. That is, first drill through the masonite. Fix the masonite piece over the hole that needs to be enlarged. And drill with a steady hand down through the masonite and floor. You don't have to drill all the way through.
You glue the plug in with wood glue and then carefully chisel it off with a chisel.
Pondus snickeri on Kungsholmen in Stockholm, I believe, sells plugs in small packages.
Thanks, spot-on tip! I'll check out the carpentry this week.
Using hardboard as a drill template, yes, I had thought about that to avoid damaging the floor if the drill bit slips.
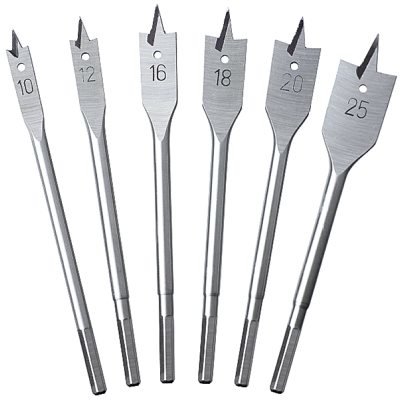
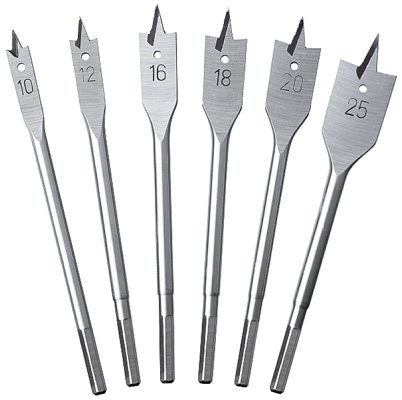
But as mentioned, the holes already exist, and it's just a matter of drilling them out slightly to get a better fit with the plug. If I use a center drill (see image), perhaps I can use 12 mm plywood, which has been drilled with the same dimension beforehand, and thus let the "walls" of this hole act as support for the drill since I will be drilling in an existing hole without "grip" in the center. You don't want it to start wobbling...
The alternative mentioned in earlier posts is to temporarily plug it, making it easier to drill out with proper support. Safer but a bit cumbersome.
Yes, that's exactly how I use the masonite. The walls guide it. But of course, it's easier with a thicker plyfa.
But you should probably use a proper Forstner bit to get good edges. Big difference compared to a center bit, I think.
I believe the carpentry shop sells Forstner bits if you don't have one. Otherwise, you can find them at Clasa or Jula, etc.
Click here to reply
Vi vill skicka notiser för ämnen du bevakar och händelser som berör dig.
") .
.