3,696 views ·
17 replies
4k views
17 replies
Recess electrical wiring in old plank wall
Hello!
I have been reading the forum for a long time, but this will be my first post.
Please see the images below to better understand the text.
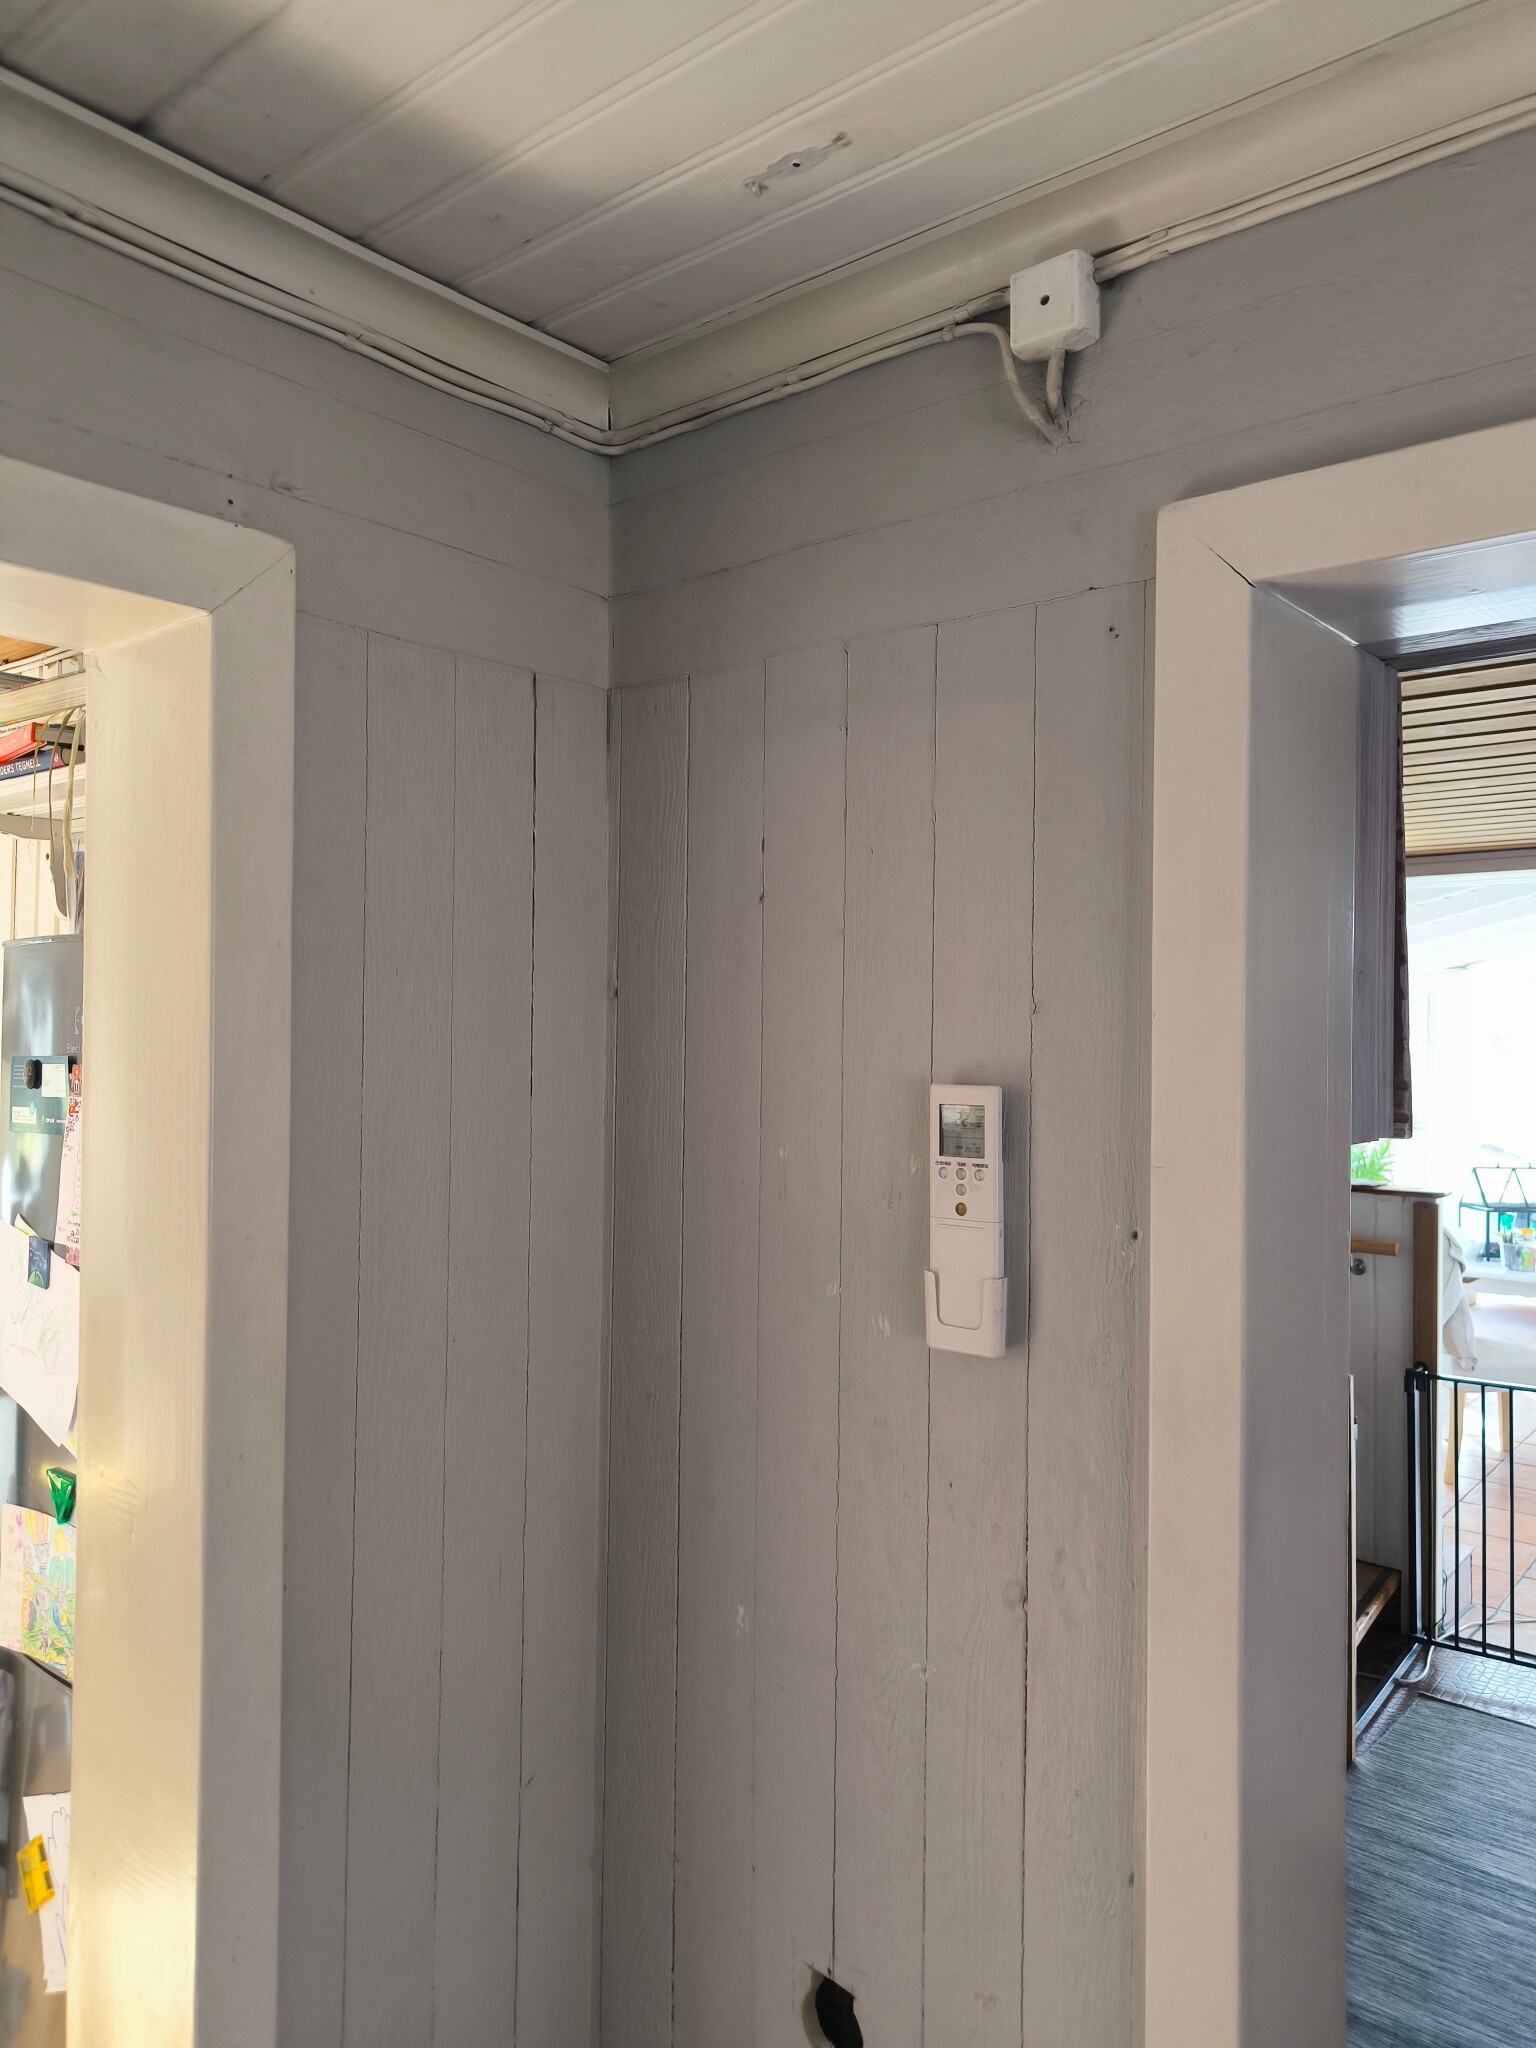
I live in a house where the core is from the early 1900s and parts of the interior walls are plank walls.
We are planning to fix the surface and take the opportunity to install the electrical wiring. The idea is to then install new pipes/conduits and electrical cables.
I was thinking of either removing a few of the planks or making grooves in them and finally mounting thin drywall sheets on top.
However, I have learned that plank walls in older houses can be important for the structural integrity, which makes me a bit worried.
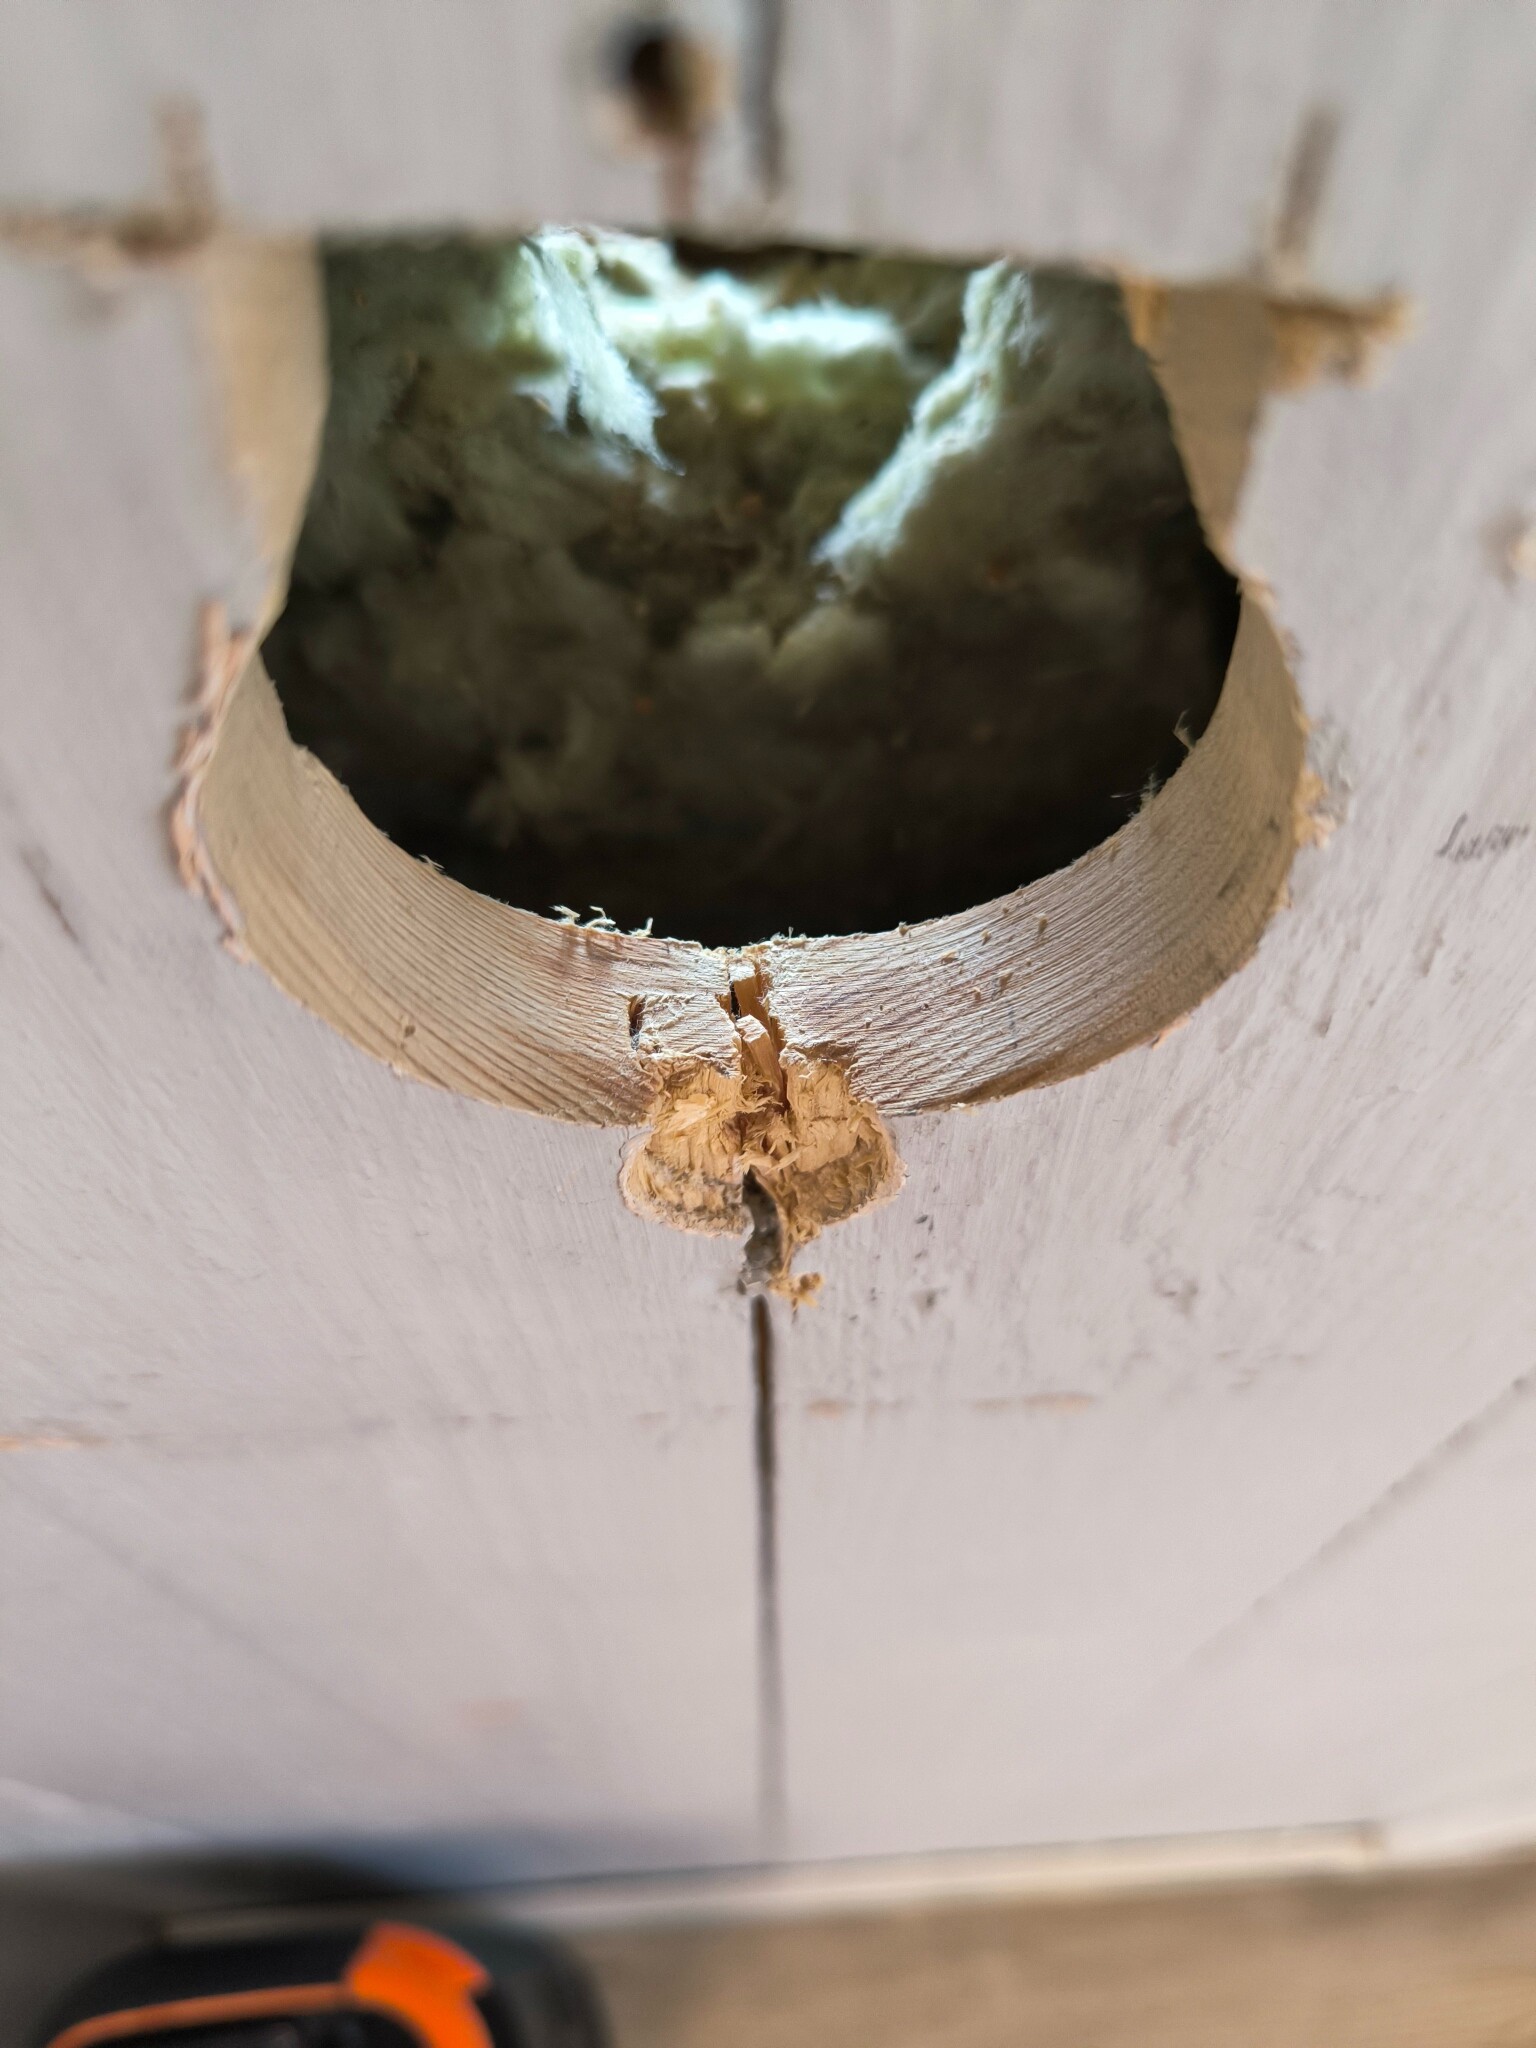
I have an inspection hole where I can see that there are vertical studs and then horizontal noggings, which has allowed the mounting of standing and lying planks. The planks are about 90*20 mm.
Does anyone have experience with this and know how/if one can determine if the planks are load-bearing? Would you affect this by making 2 cm grooves in horizontal and vertical directions?
Thanks in advance!
I have been reading the forum for a long time, but this will be my first post.
Please see the images below to better understand the text.
I live in a house where the core is from the early 1900s and parts of the interior walls are plank walls.
We are planning to fix the surface and take the opportunity to install the electrical wiring. The idea is to then install new pipes/conduits and electrical cables.
I was thinking of either removing a few of the planks or making grooves in them and finally mounting thin drywall sheets on top.
However, I have learned that plank walls in older houses can be important for the structural integrity, which makes me a bit worried.
I have an inspection hole where I can see that there are vertical studs and then horizontal noggings, which has allowed the mounting of standing and lying planks. The planks are about 90*20 mm.
Does anyone have experience with this and know how/if one can determine if the planks are load-bearing? Would you affect this by making 2 cm grooves in horizontal and vertical directions?
Thanks in advance!
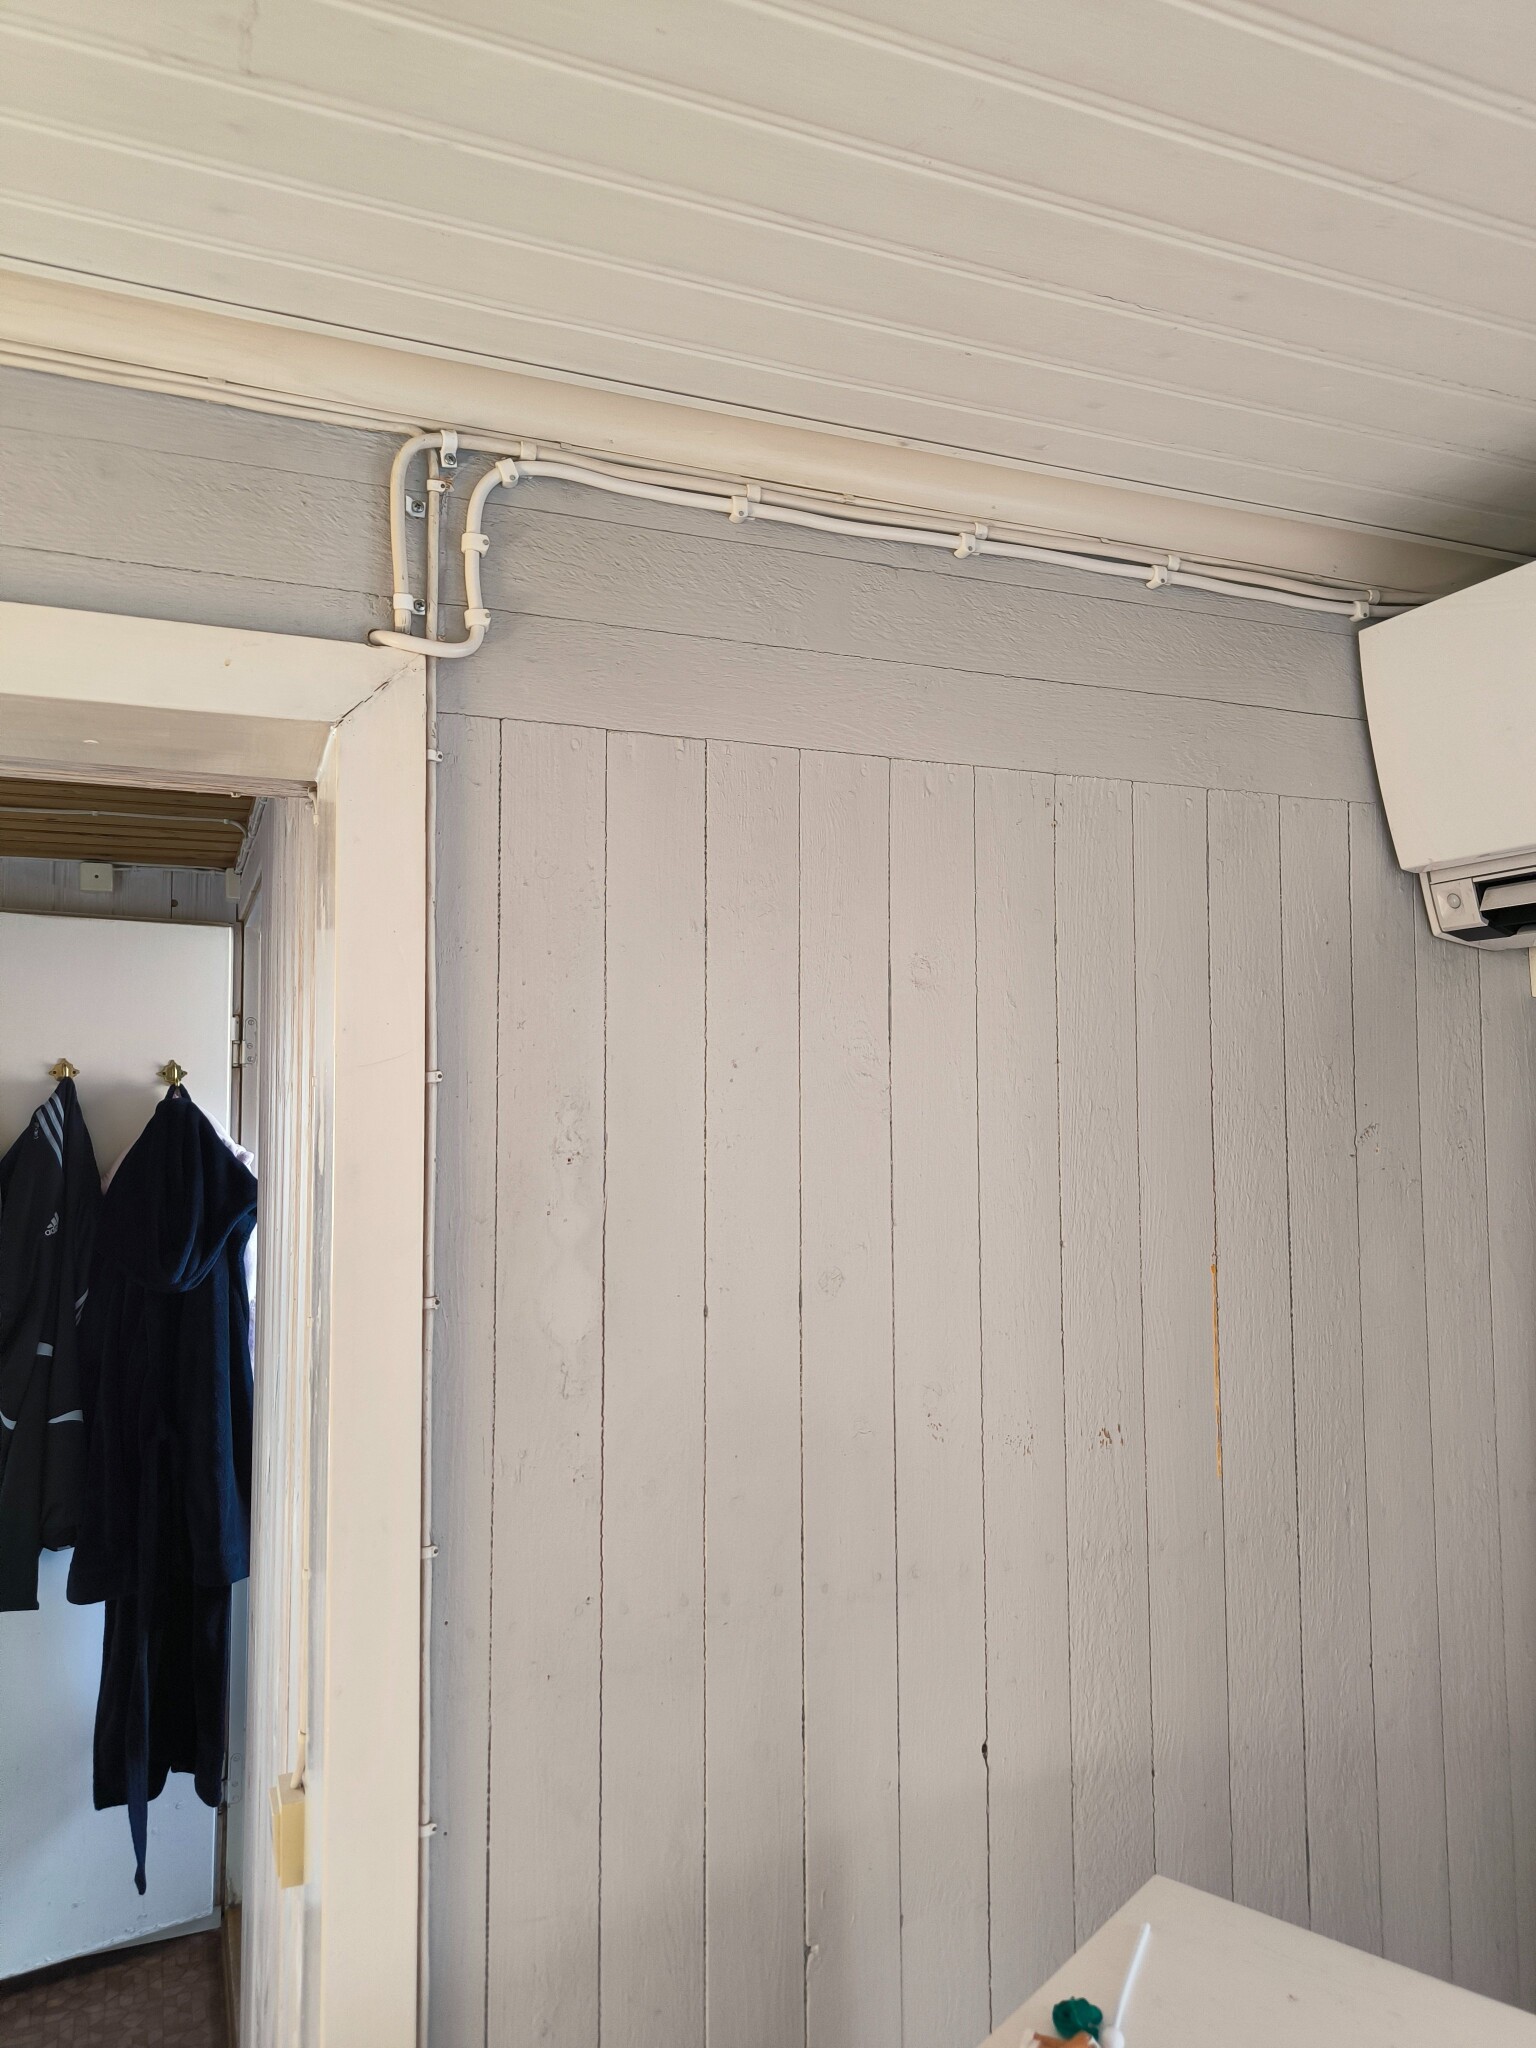
It might be the best, but there will be a lot of holes and fishing as a total of 10 meters of flex pipes will certainly be needed in different directions.
P Peter_Ker said:

90x20 are boards and hardly load-bearing. You probably have a frame that bears the load and boards on either side of it as a surface layer. The plank walls I have seen have been at the thinnest about 45 and about 120 wide.
C cpalm said:
The idea was to install renovation plasterboards on top of the plank walls, then putty and paint/wallpaper and replace moldings, baseboards, etc.C cpalm said:
I would run ROT boxes, conduit and fish tape. Go horizontally as much as possible and choose a few well-chosen places where you need to go vertically over kortlingarna where you remove a board. Note that you need to loosen 3-4 boards to avoid breaking the tongue. Not that it might matter much if you are going to plaster anyway.
What you show in the picture seems to be a wall of rough-sawn tongue and groove boards; the boards themselves should not be load-bearing.
I have a house with plank walls; the planks are tongue and grooved and about 2-3 inches thick, i.e., approximately 6 cm. On one side, it's just the planks, on the other side, there's a spacer of about one inch, and then rough-sawn tongue and groove boards that are also about an inch thick.
I have recessed all electricity; in the plank wall, I sawed off the outer part of the tongue (it was quick to track with a circular saw, one cut, and laid the conduit, drilled for a standard box (exactly the diameter of the box), on the rough-sawn side, I drilled with a hole saw where the horizontal battens go and then fished the wires through. Rough-sawn boards, spacer + renovation gypsum was just enough to fit a Multifix BP-202 box (the usual green ones).
Horizontally, I have always run the conduits on the rough-sawn side, i.e., in the cavity in the wall, never cut into the planks. Doing so would affect the load-bearing capacity. Vertically removing 1/3 of the thickness in a tongue doesn't matter.
Alternatively, the conduits are run in the ceiling, which is lowered 22 mm to accommodate the wiring.
That was my thought too but I felt uncertainKarl-Ove Qvarfordt said:
Sounds like you are right. It's probably råspont 20x95 mm that has been used. Then I should be able to make 2 cm grooves at least without worrying.N nb. said:What you show in the picture seems to be a wall of råspont, the råspont itself should not be load-bearing.
I have a house with plank walls, the planks are tongue-and-groove and about 2-3 inches thick, i.e. 6 cm-ish. On one side there are only the planks, on the other side there is a distance of about an inch and then råspont which is also about an inch.
I have embedded all the electricity, in the plank wall I have sawed off the outer part of the tongue (then it was quick to track with a circular saw, one cut and put in the conduit, drilled for a regular box (with exactly the box's diameter, on the råspont side I have drilled with a hole saw where the horizontal battens go and then fished. Råspont, gap + renovation gypsum was just enough to fit a Multifix BP-202 box (the usual green ones).
Horizontally, I have always run the conduits on the råspont side, i.e. in the gap in the wall, never cut into the planks. That would have affected the load-bearing capacity. Vertically removing 1/3 of the thickness in a tongue does not matter.
Or the conduits are run in the ceiling, which is lowered 22 mm to make room for electricity.
It's enough to cut 12 mm deep and lay cable, not pipes/tubes. Fully allowed even if many electricians don't know it. There are more threads about this here.
Heart walls in older villas do not have to be constructed with solid three-inch planks. They can be "sandwich" style: two sides with vertically tongue-and-groove boards with dense supporting studs/noggins in between.
Since you're going to put plasterboard on the walls anyway, can’t you just extend the wall enough so the tubes fit behind the plasterboards? It seems like less work than carving into the wall or removing boards, etc.D Dr spikskalle said:Hello!
I've been reading the forum for a long time but this will be my first own post.
Please see the pictures below to better understand the text.
I live in a house where the core of the house is from the early 1900s and parts of the interior walls are plank walls.
We're planning to fix the surface layer and take the opportunity to recess the electricity. The idea is to then run new pipes/tubes and electrical cables.
I had thought of either removing a couple of the planks or making grooves in them and finally mounting thin plasterboards on top.
However, I have learned that plank walls in older houses may be important for load-bearing capacity, which makes me a bit worried.
I have an inspection hole where I see that there are vertical studs and then horizontal noggings which have allowed vertical and horizontal planks to be mounted. The planks are about 90*20 mm.
Does anyone have experience with this and know how/if it's possible to determine if the planks are load-bearing? Would you affect this by making 2 cm grooves in horizontal and vertical directions?
Thanks in advance!
But then TS will have a fragile single-layer plasterboard with all its disadvantages.P Processengine said:
I just did this in a room. I used a hole saw where the boxes were supposed to be. Then I used the hole saw at the top of the wall as well and ran vp pipes in between. It was significantly easier with a rigid vp pipe instead of a hose. From outlet/switch straight up to the ceiling then out onto the roof boarding where everything was connected via ceiling boxes. Then furring strips in the ceiling + surface layer.