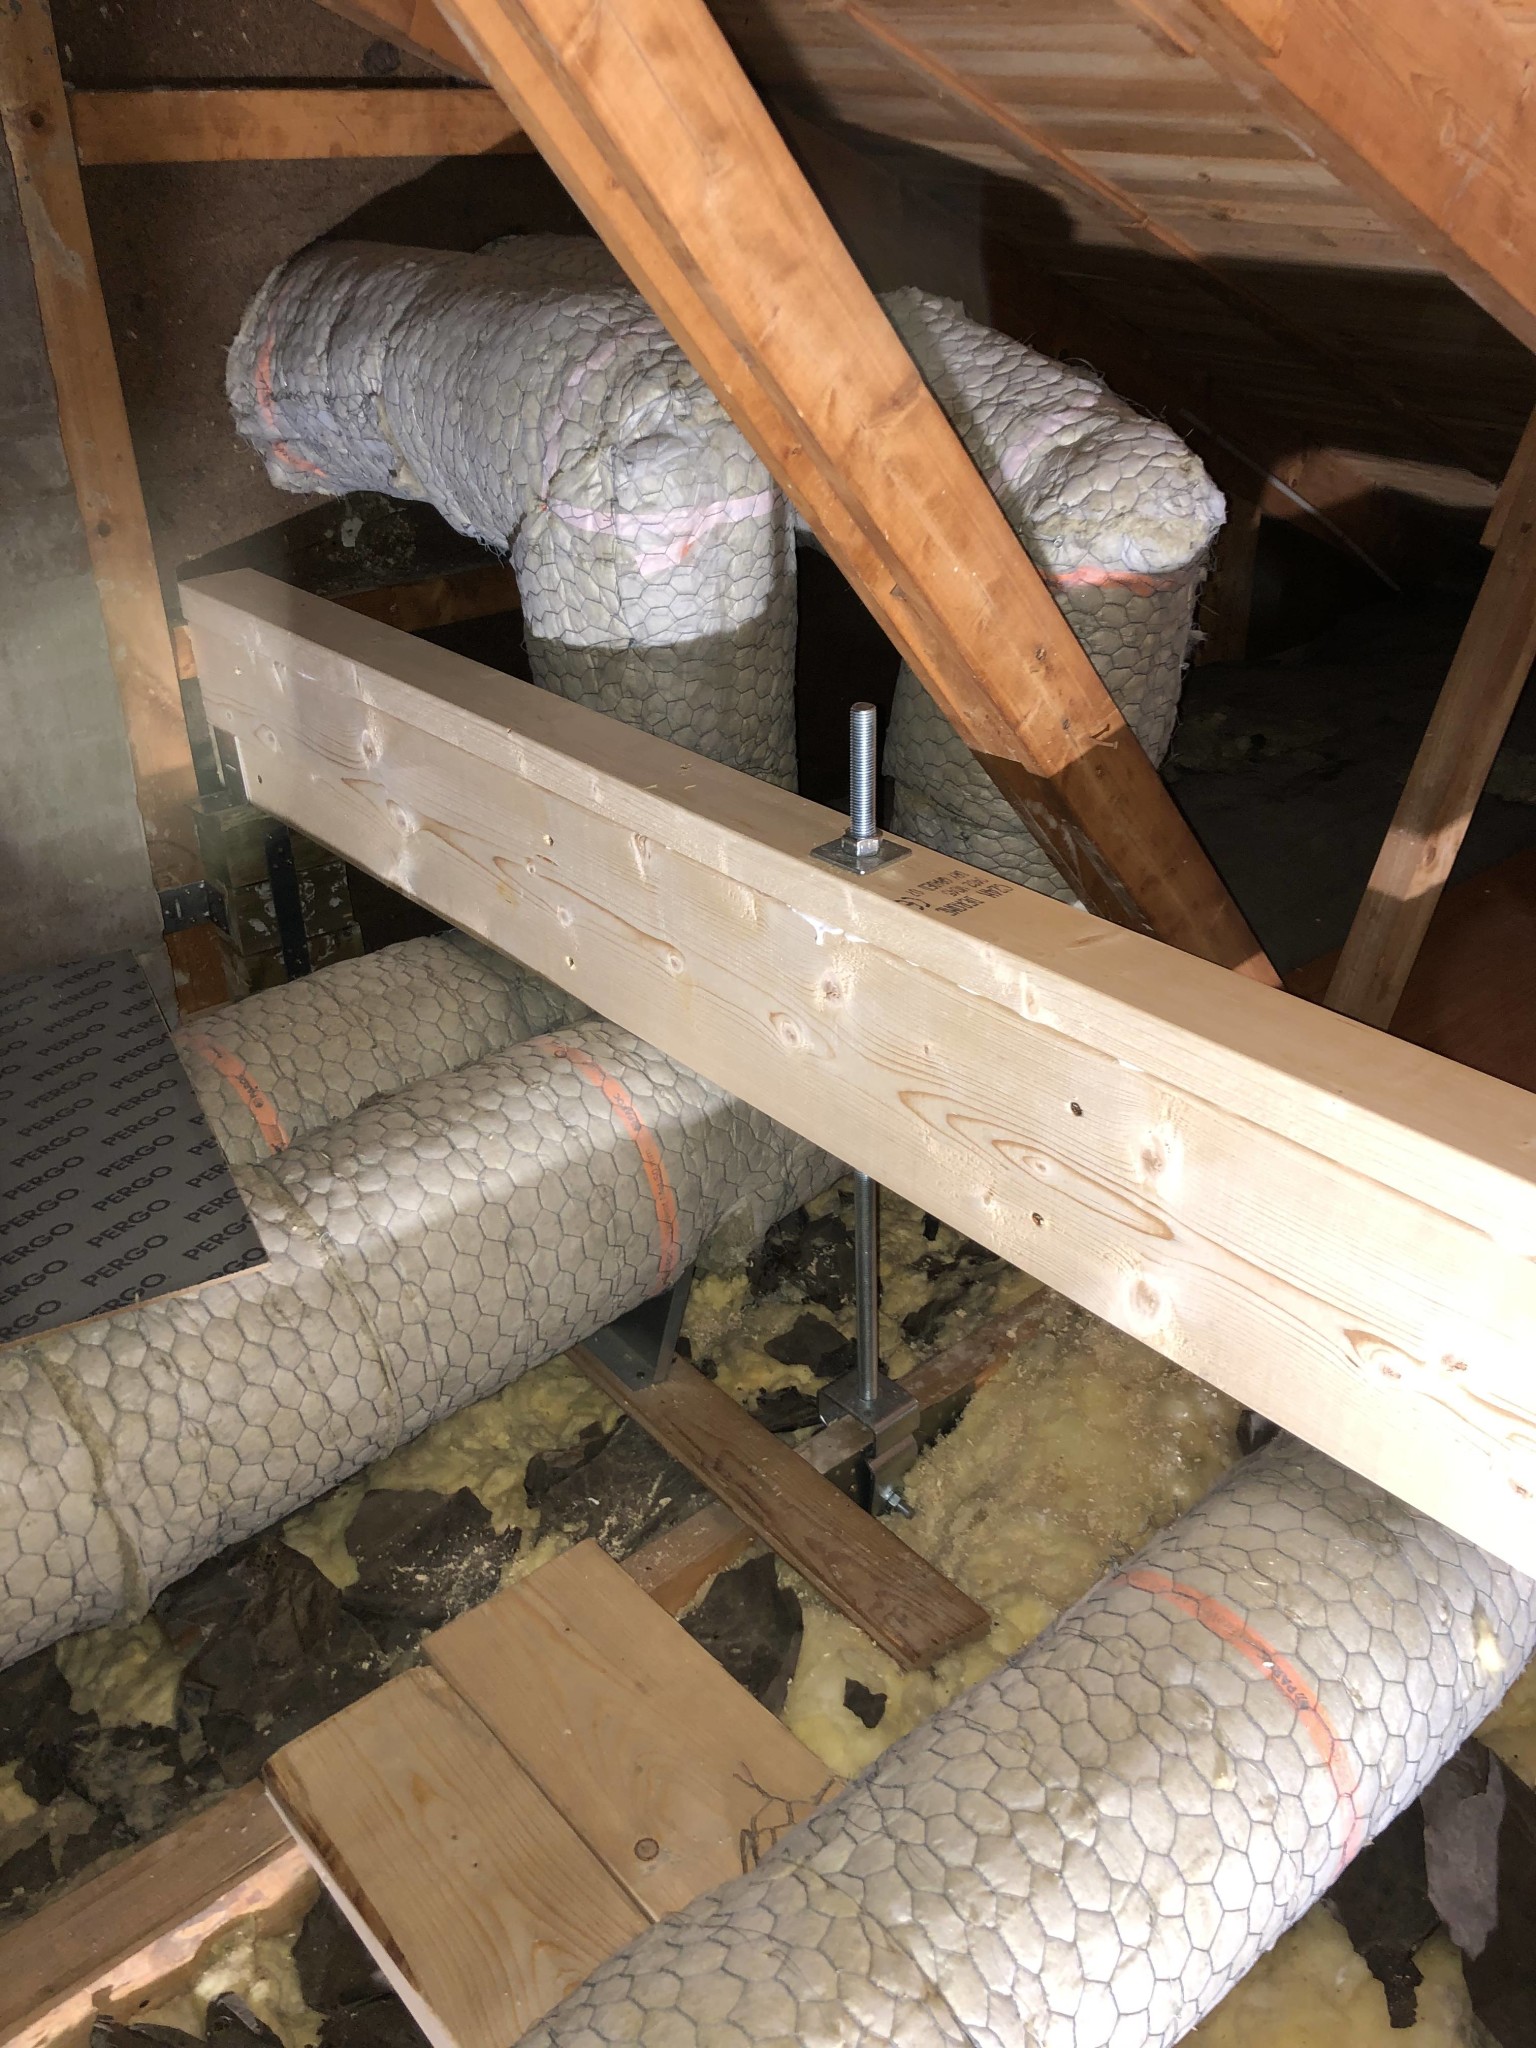
I have observed that a couple of the roof trusses on the house that are not on load-bearing walls have been pushed down a couple of cm, probably due to switching from light glazed tiles that allowed the snow to slide off to slightly heavier concrete tiles with more friction, as well as a wet snow event in 2016. I'm thinking of attempting to either install a cross beam that is slightly raised on load-bearing walls, then using thick threaded rods and thick steel flanges to screw up the trusses that have dropped a bit. Alternatively, using some kind of winch, cable winch, or similar. Is there a good method/product to secure up after lifting a truss with some kind of steel or cable contraption? A makeshift option might be to have a couple of cable winches up there permanently. But it might not look so nice. A threaded rod solution might work well with a couple of large thick metal plates with 4 holes and four threaded rods to tighten? I know you can use posts and push from underneath but I would prefer not to cut open the floor to get down to the slab, so I'm thinking of this solution if it works. Considering using turbo flanges, I haven't found anything with thick steel and pre-drilled, does anyone know where to find that otherwise? Turbo flanges are quite expensive. https://www.speeding.nu/thumb/7782/640x0/T6-twin-turbo-flange-stainless.jpg?q=50
The alternative is to buy perforated band in a slightly stronger version and use a perforated band tensioner https://www.fastdon.se/product/halbandspannare-varmforzinkad
Alternatively, turnbuckles that might be able to tighten up a bit harder.
Anyone have any good tips on products?
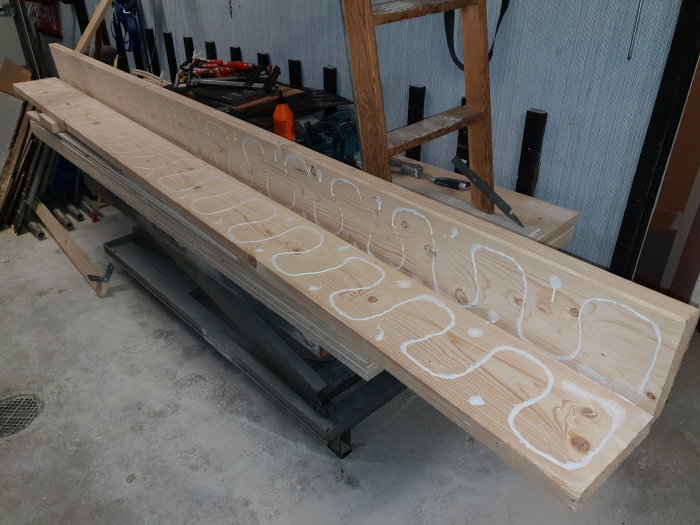
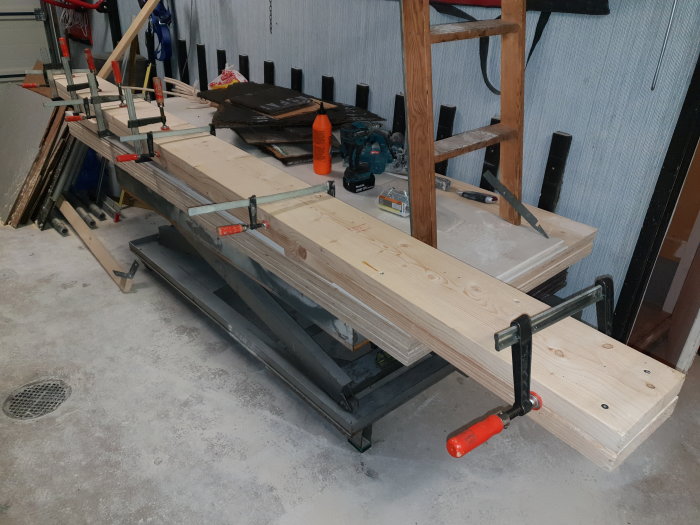
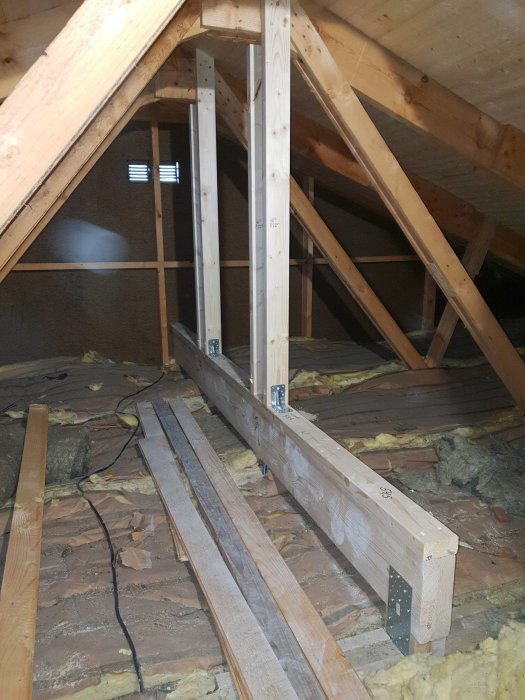
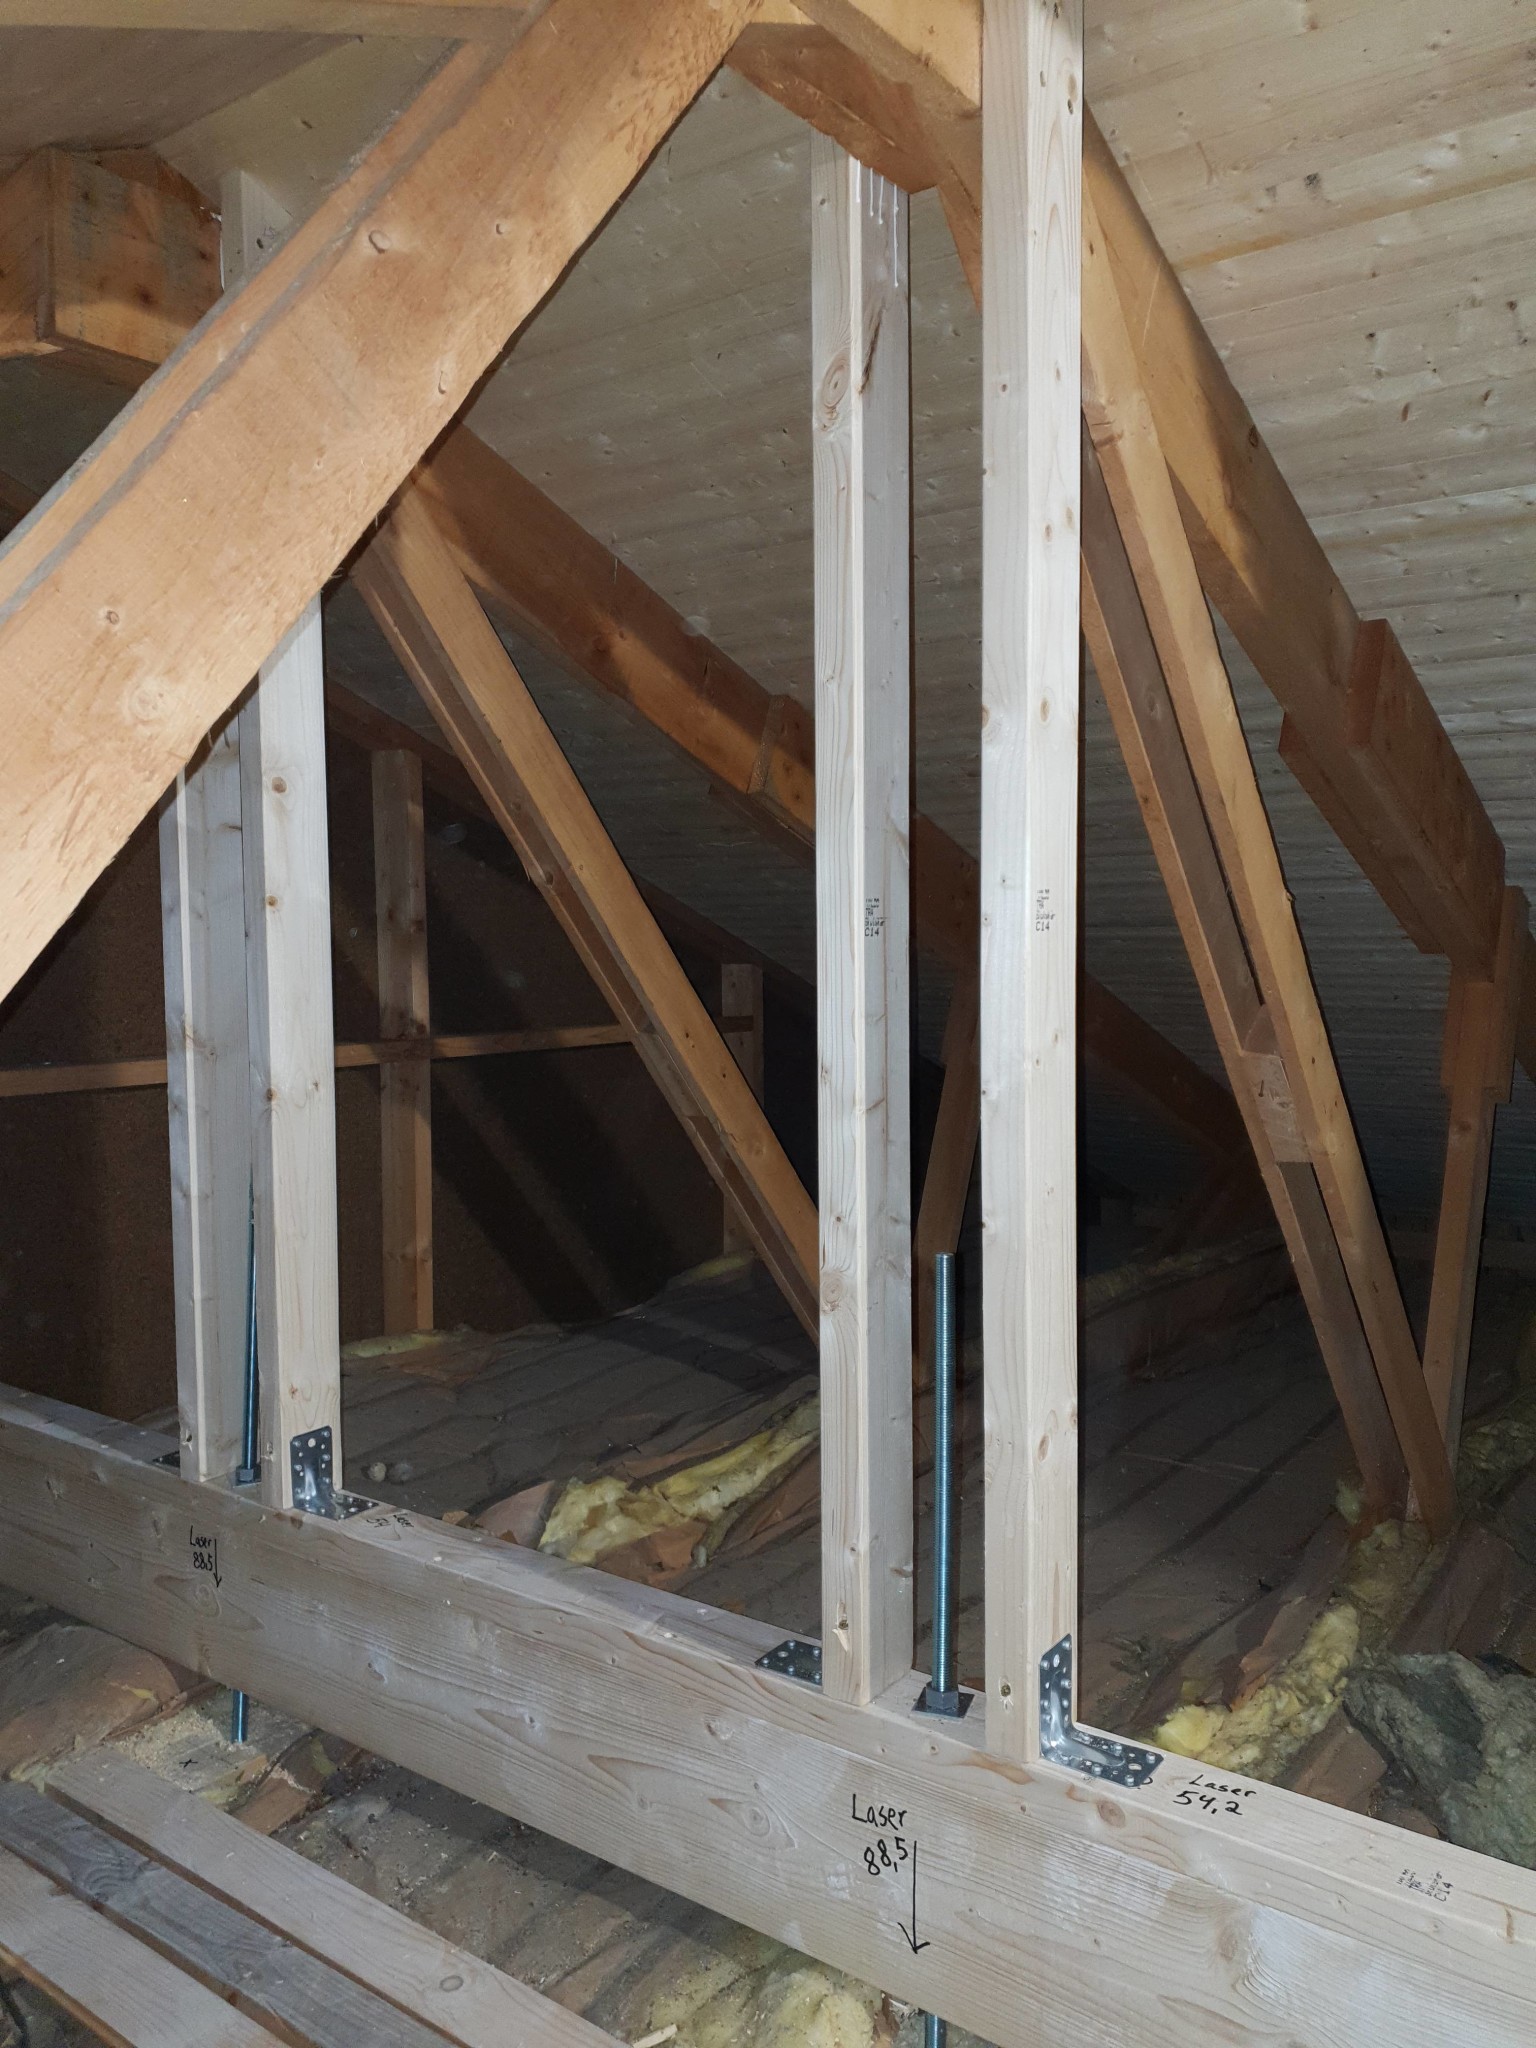
Had the same problem, 2 roof trusses had sagged about 35mm and I solved it like this...
[image] [image] [image] [image] [image]
Nice, okay you drilled holes in them and a big washer and nut underneath. Good also with support upwards in case it wants to bow over time. Considered laminated timber for that reason, but leaning towards two regular 45x220. However, I still have my under-roof and want to avoid taking it down or cutting into it, so I hope to insert something between the truss and the ceiling. However, the ceiling is a bit strained now by the truss, so it could be tough.
Nice, okay you drilled holes in them and a large washer and nut underneath. Good also with counter support upwards in case it wants to warp over time. Considered glulam for that reason but leaning towards two regular 45x220. I still have my under-roof and would prefer not to take it down or cut into it, so I hope to get something in between the roof truss and the ceiling. However, the ceiling is now slightly held down by the truss, so it might be tough.
Yes, I used M20 threaded rods right through the roof trusses, and square washers. With this solution, it can be adjusted later if, against all odds, it settles further.
I assume you have access to the roof trusses from the attic, and then you should be able to use the same solution if you have 28mm batten, then you can fit a washer and nut between the roofing and the batten.
The only thing is that I prefer not to drill as I think it might create problems with weakening and possible breakage when drilling into the chairs. Then how on earth did you manage to drill so straight and long distance, is there a drill on a stand? I am considering instead using a montage band, steel has a fantastic tensile strength so I think it should hold, then a larger turnbuckle on each one so that you can adjust it later. For example, this montage band below, you will need to put bolts through and washers with some form of eyelet at the ends of the band so you can pull the band tightly without it breaking. I had a reinforcement beam earlier that they anchored with the help of a montage band, I don’t know if it was original on the house or done afterwards, but it is the largest room that has long distances between load-bearing walls where it’s attached
Buy a piece of slightly thicker angle iron from the nearest scrap yard or steel supplier and cut it into suitably long pieces so you can put a threaded rod on each side of the beam.
Buy a piece of slightly stronger angle iron from the nearest scrap yard or steel wholesaler and cut it into suitably long pieces so you can put a threaded rod on each side of the beam.
Not quite sure what you mean, do you mean that you place a piece of angle iron perpendicularly on the underside and drill holes in them for studs? If so, it might be better with a square or a thicker steel plate with some weld nuts since it will probably be difficult with space with the ceiling there.
The only thing is that I reluctantly want to drill as I think it might cause problems with weakening and possible breakage reports when drilling into the chairs. Then how on earth did you manage to drill so straight and for such a long distance; is there a drill on a stand? I'm thinking of instead using a mounting band, steel has fantastic tensile strength, so I think it should hold, then a bigger turnbuckle on each just so you can adjust afterward. For example, this mounting band below, you need to put bolts through and washers with some kind of eye loop at the ends of the band so you can pull the band properly without breaking it. I had previously a reinforcement beam anchored with the help of a mounting band, don't know if it was original to the house or added later, but it's in the largest room with a long span between load-bearing walls [image]
For me, the underframe is spliced with plates on each side, so in the middle the underframe is 3x50mm, so there was no problem with weakening due to the drilling. I used 2 cross lasers to ensure I drilled straight through the underframe.
Just like someone else wrote, I would head to a blacksmith who could bend a thick flat steel into an omega shape, which you either drill and thread directly on each side of the underframe or just as you mentioned, weld on 2 nuts alternatively a flat steel if you don't need more room over the vapor barrier (if there is one).
Make sure to have screw jacks on hand when it's time to press up the roof. I bought 4 at Hornbach for a cheap price.
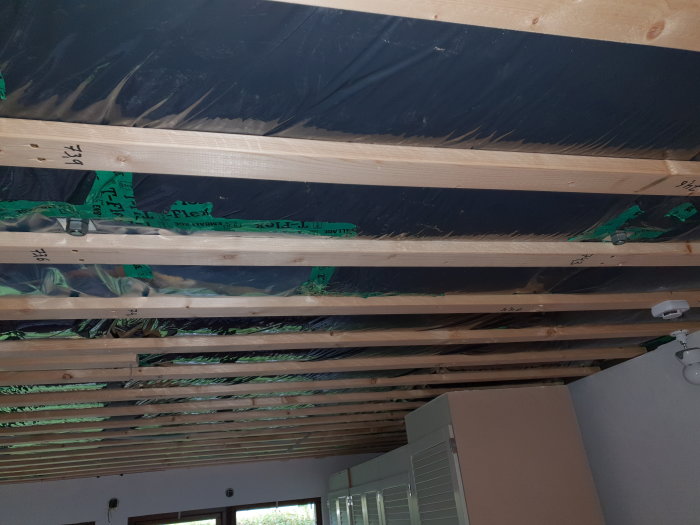
Unfortunately, it was found that there was exactly 0cm of space under the truss. Raw planking was nailed directly under the insulation.
I'm thinking I'll have to make some kind of clamp with through bolts that can be tightened. Then lift using these clamps. Regarding supports, I thought they could be skipped, fearing the ceiling might get crushed. But perhaps the easiest is to cut holes in the ceiling and floor to get down to the slab and just push the stuff up. Then secure with something, maybe adjustable.
Unfortunately noted that there was exactly 0cm of space under the roof truss. There was nailed rough-cut boards directly under the insulation.
I'm thinking I have to make some kind of clamp iron with through bolts that you tighten. Then lift with these irons. Regarding prop, I thought maybe it could be skipped, afraid that the ceiling would be crushed. But maybe the simplest is to cut holes in the ceiling and floor to get down to the slab and just push the stuff up. Then secure with something maybe adjustable.
Yes it shouldn't be easy....
Then I would have gone to a blacksmith who would have made a U-profile in heavy steel that is about 200mm wide so you get proper distribution on the through (4?) bolts, the same height as the underframe and adapted to the timber dimension (45mm?) and with a threaded rod welded to the upper part, then you can go with the same solution as I did with the relieving beam/glulam beam.
I wouldn't chance skipping the support and just relying on the threads!
This is how I did it.
Used two gerber brackets I received on the underside of the rafters. Then an upside-down post base over drilled for m20 upwards. Also a through m12 that was tightened hard. Will set a few props upwards later when I have pulled them up properly.


useless said: