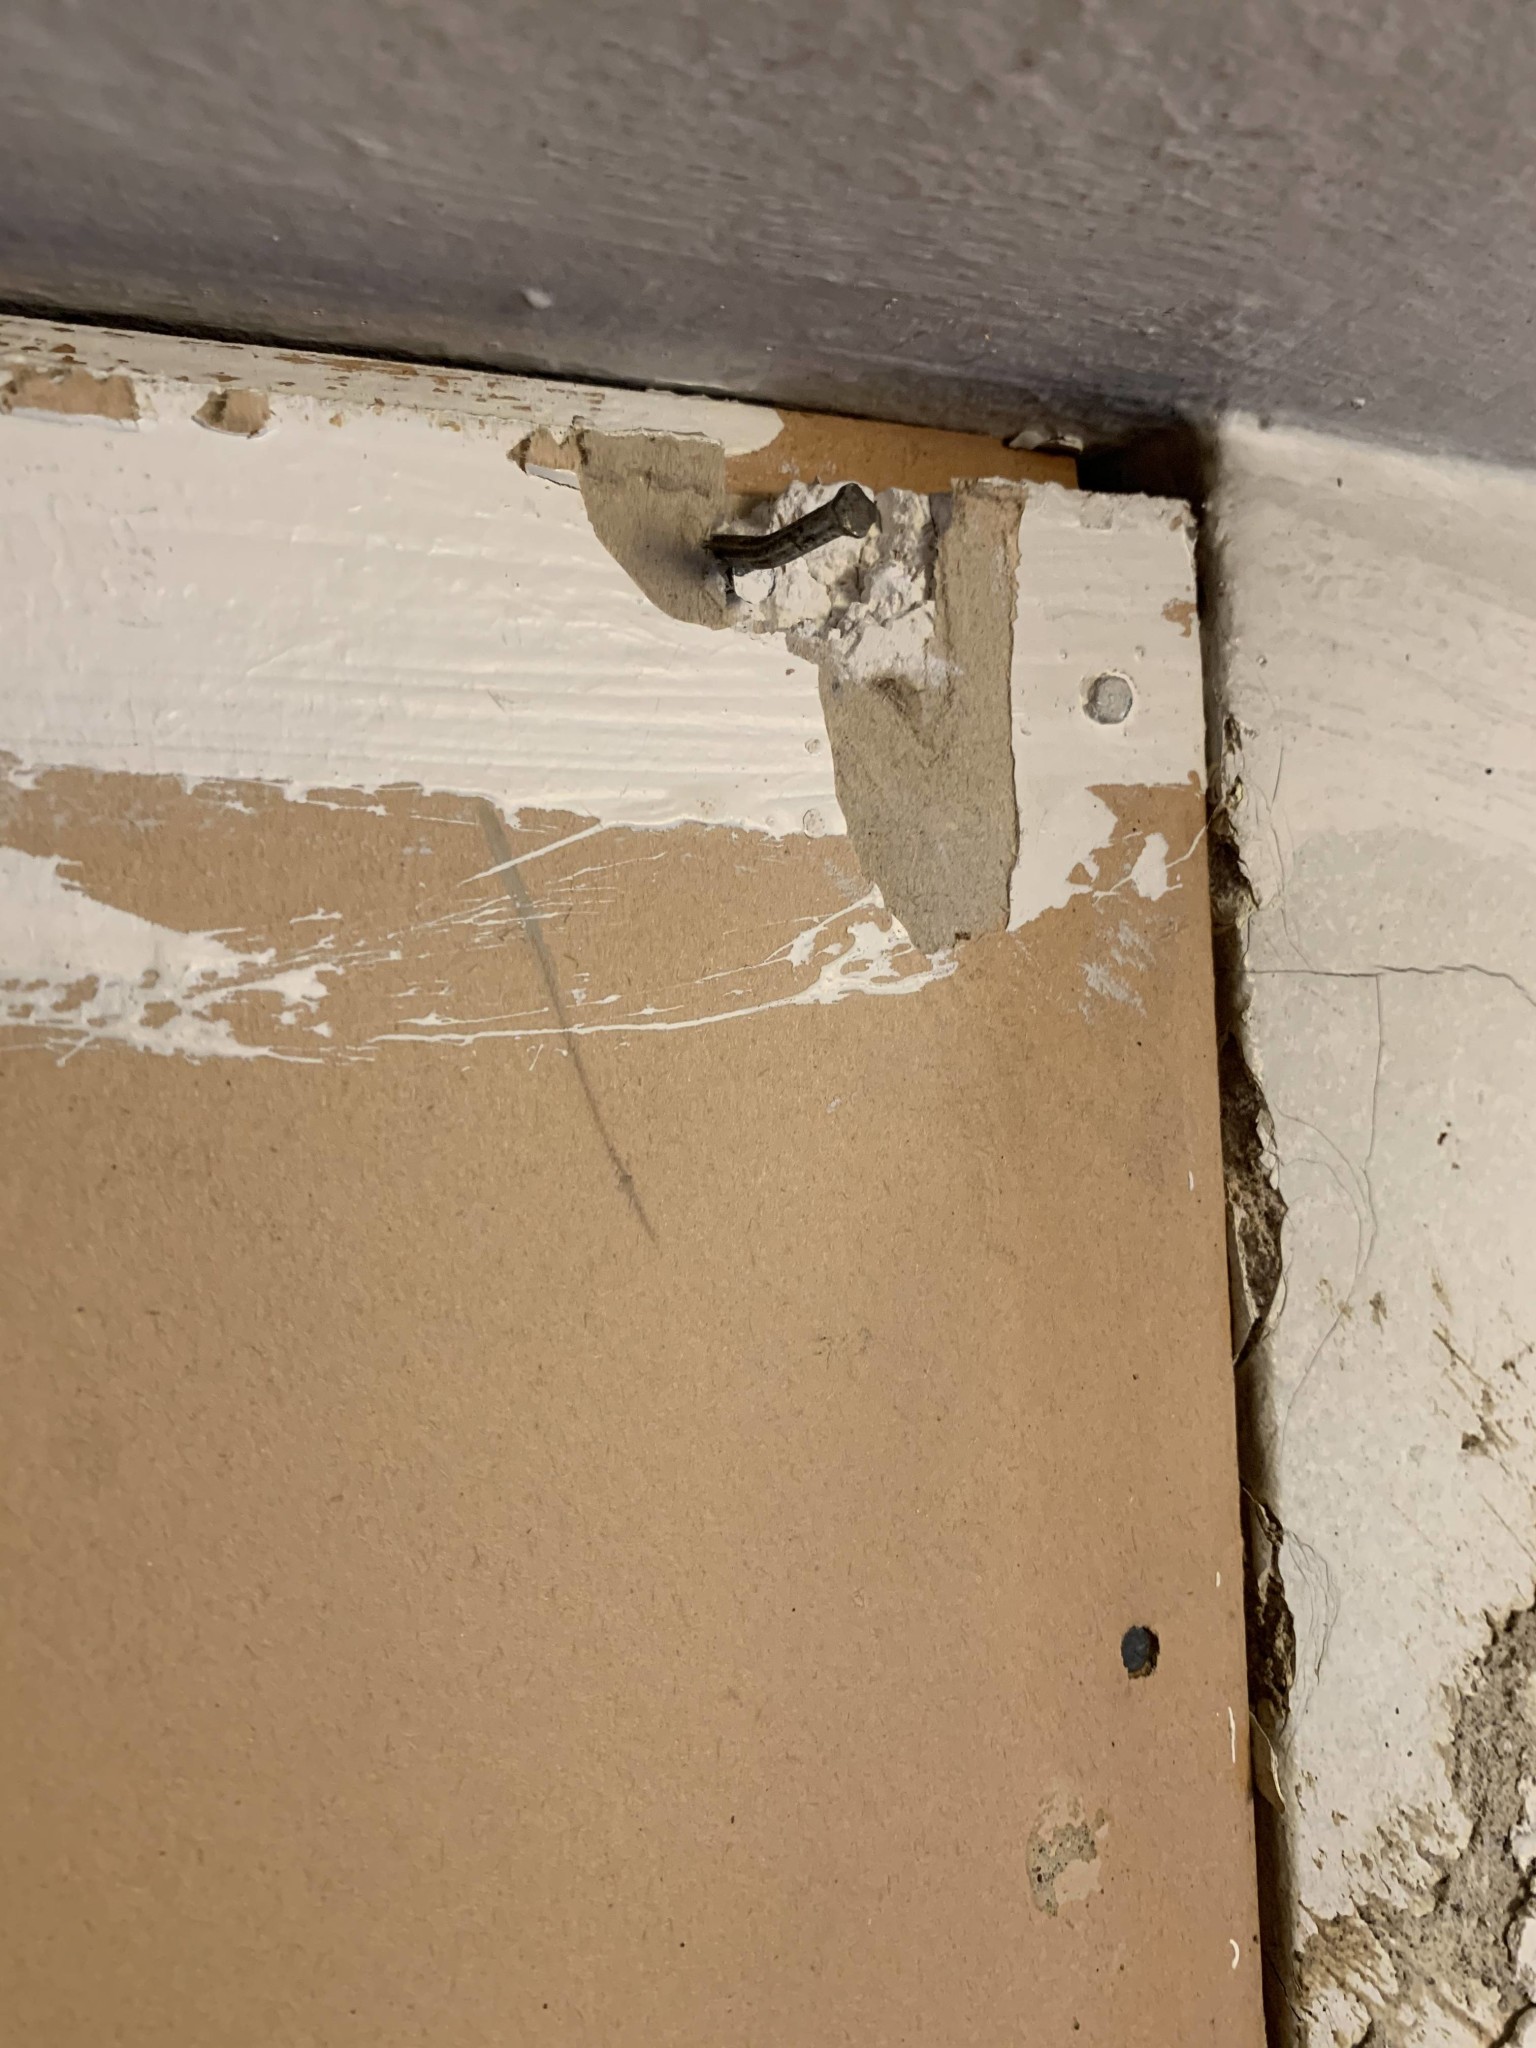
Regarding the screws, you must not screw them in so far that the paper tears. If you don't have the right fingertip feel, it's better to screw them in a little too little. They will still be covered by the tiles later.
Yes, that's what I was afraid of, that the screw would go in too much. Maybe it will go better next time I screw.
You don't need to buy a new board unless you plan to break the old one in half... Just put it back and screw it in slightly beside the old screw holes.
I would have done it to be on the safe side so the plaster doesn't move and the joint doesn't crack. It doesn't take much time/work/money to do it and then you're on the safe side.
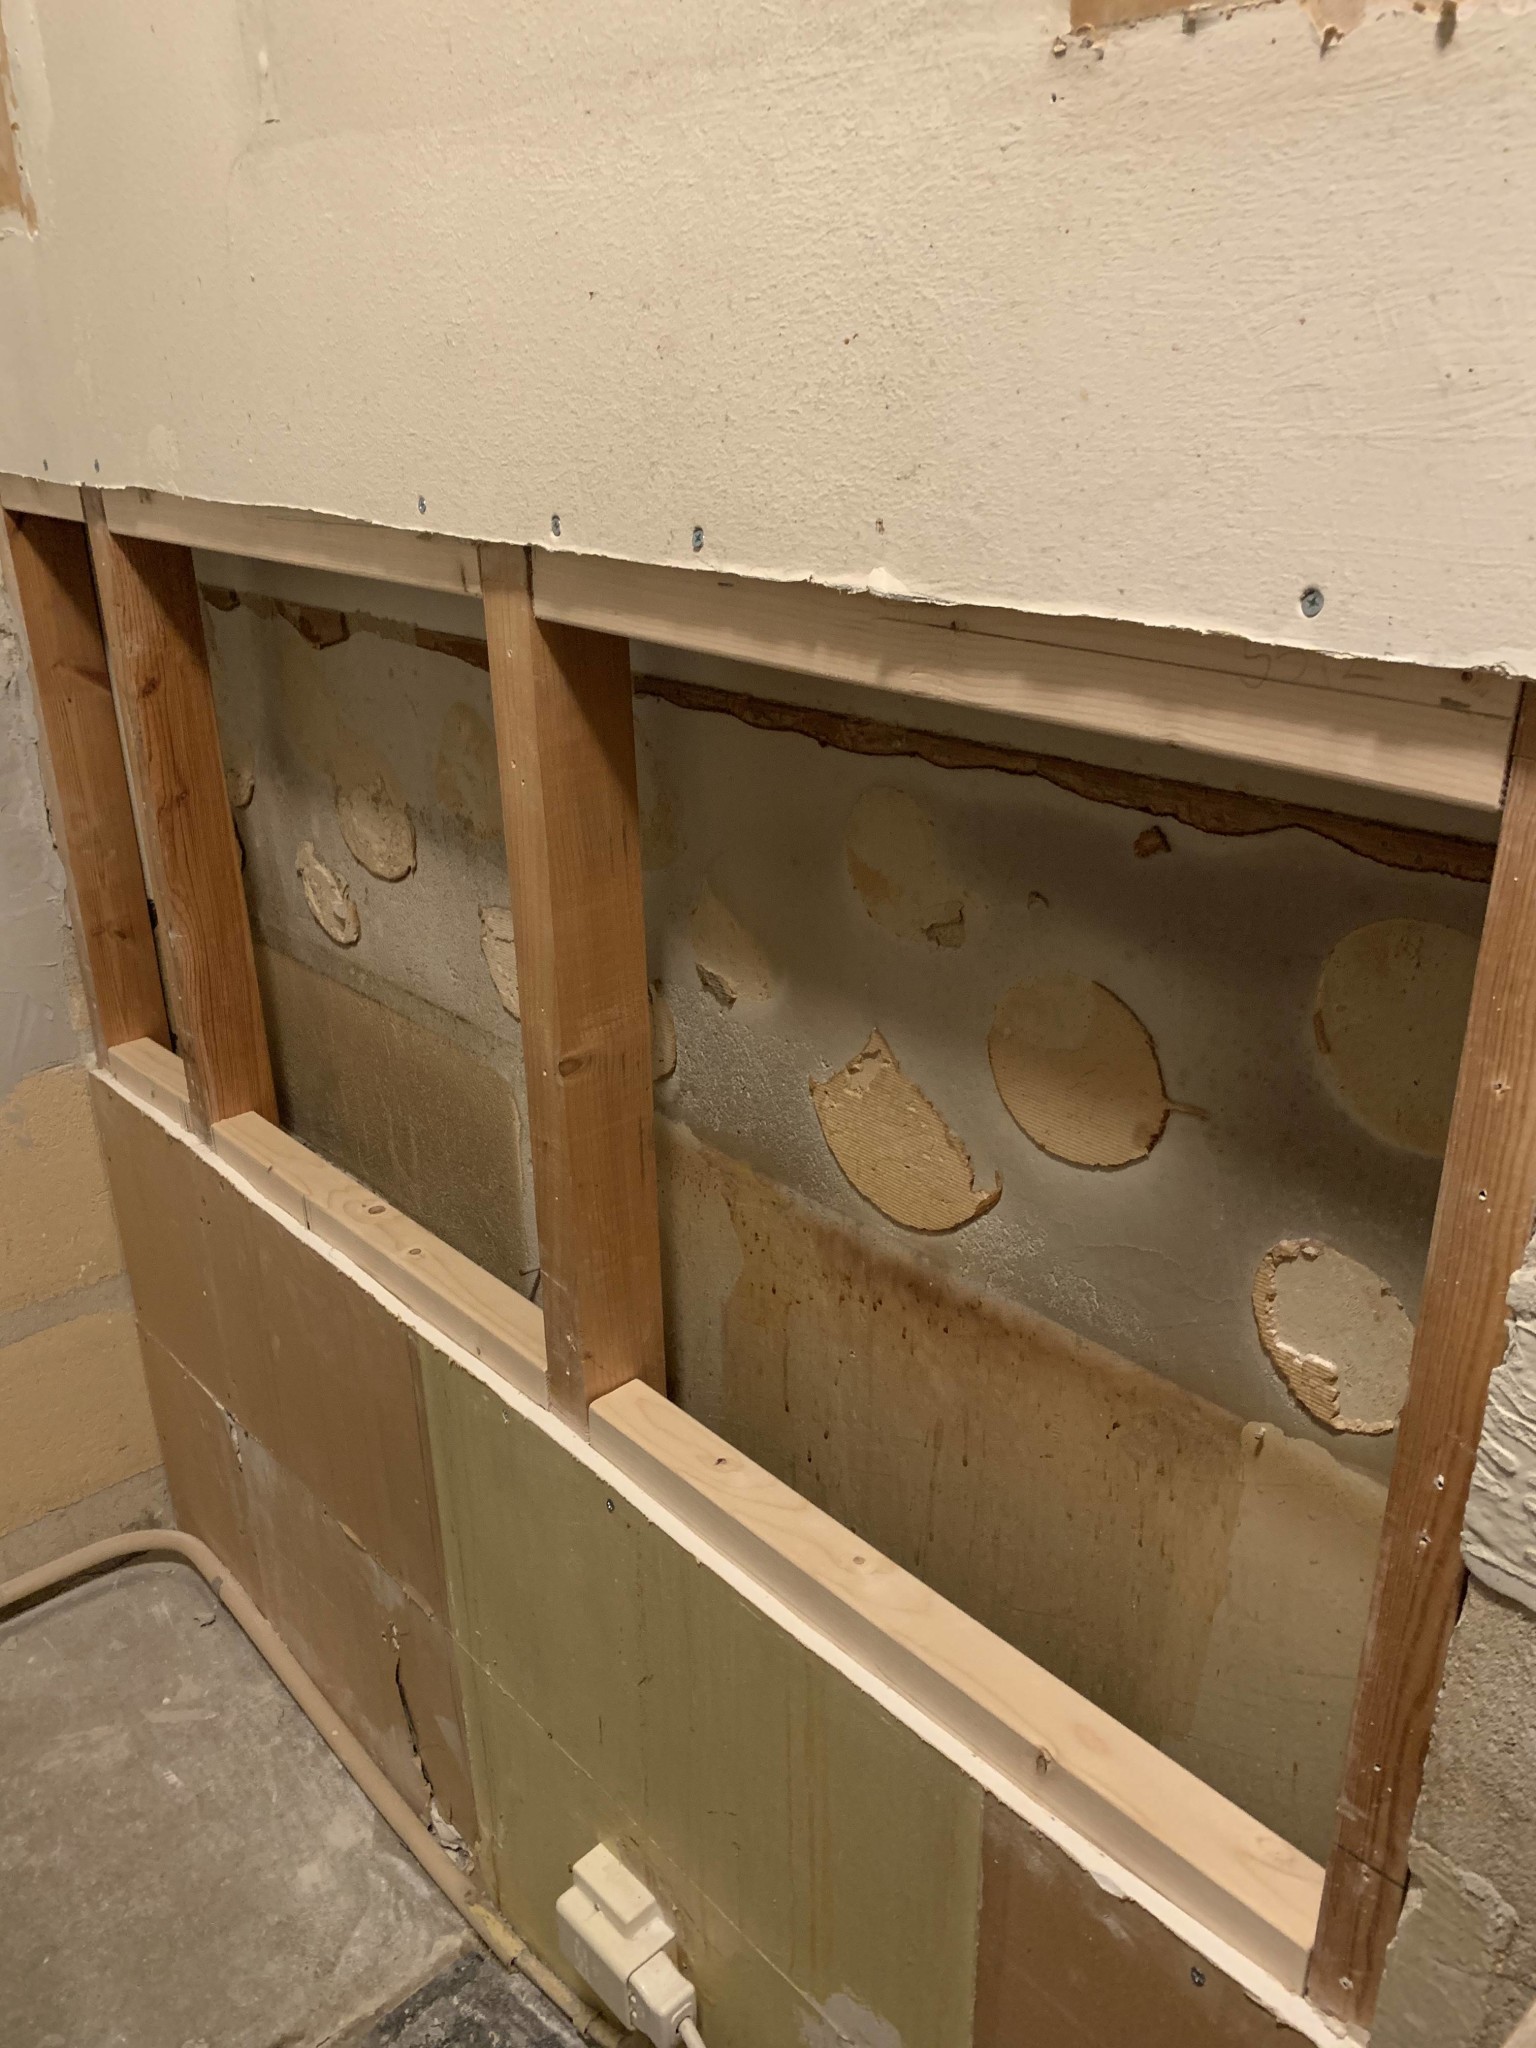
Exactly like that! I might have added a few more screws so they're about every 20 cm, but otherwise, it looks very good. Just attach the old plasterboard now, and you're almost done then
Exactly! I might have added a few more screws so they sit about every 20 cm, but otherwise, it looks really good. Put the old drywall back on now, and you're almost done then
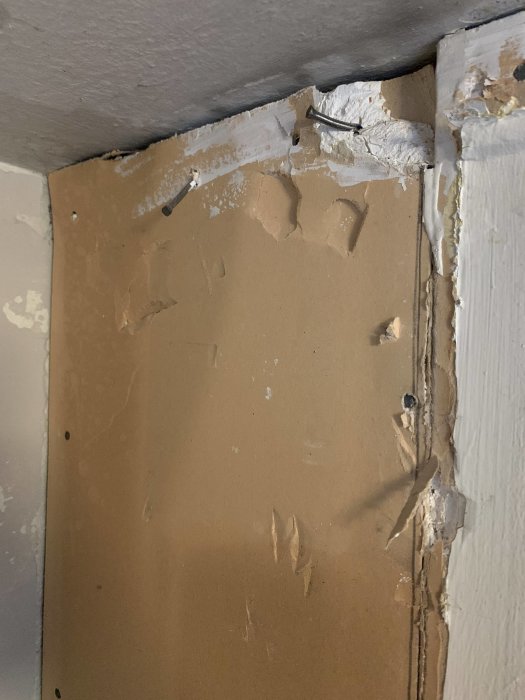
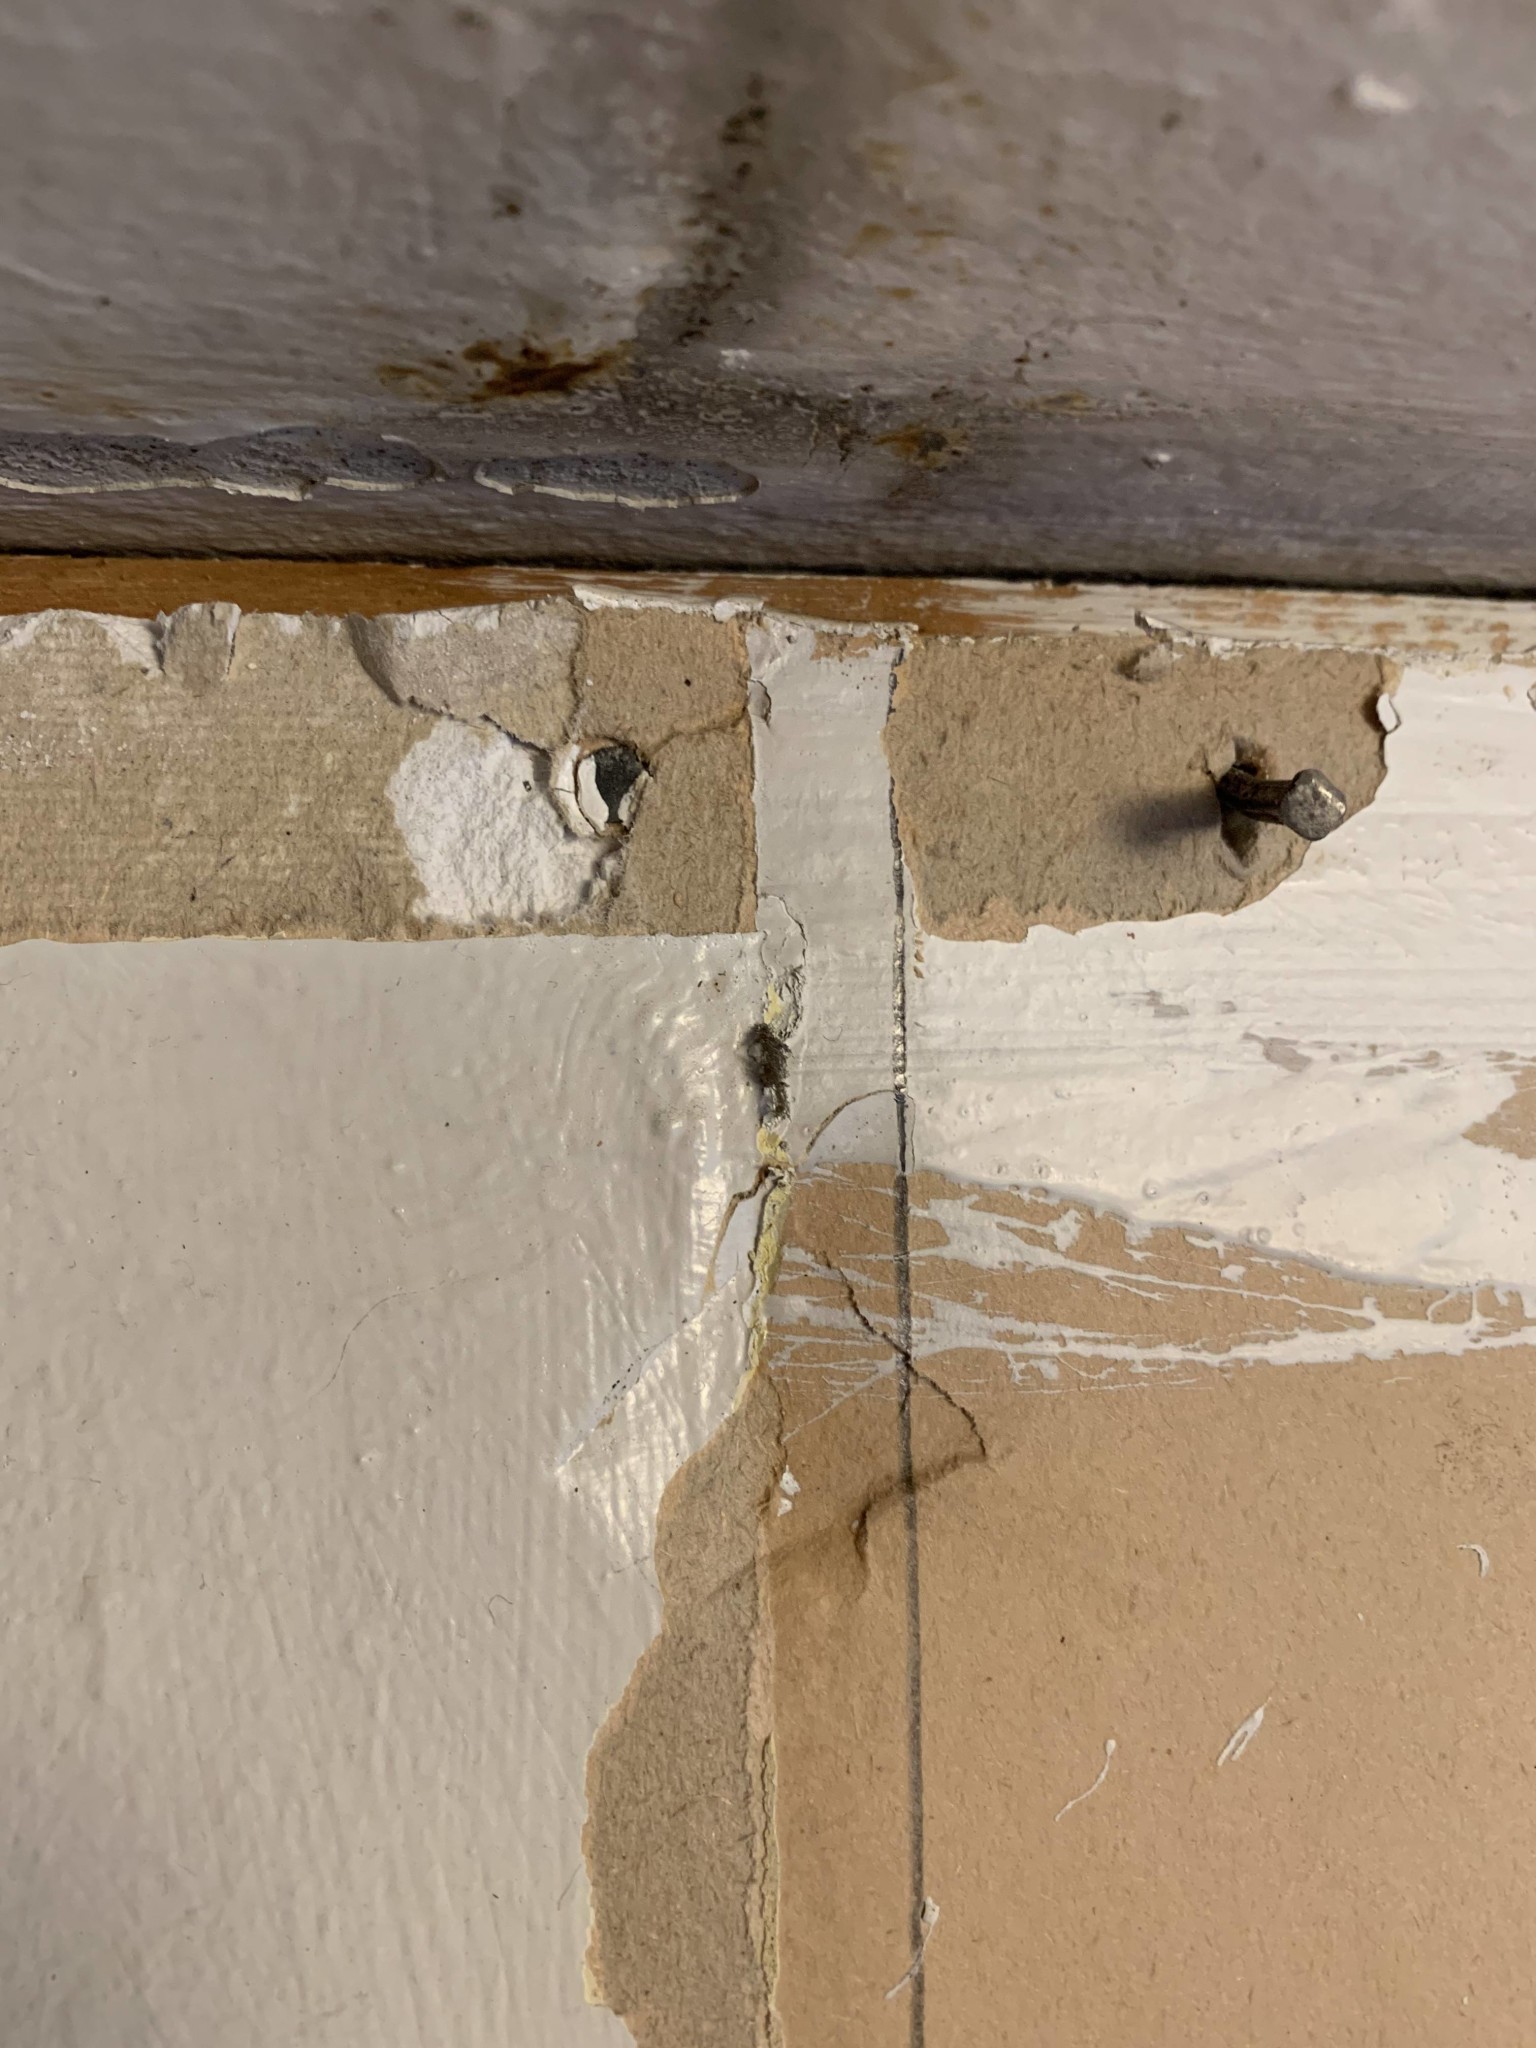
Now I'm wondering a bit about the drywall against the ceiling. In the left corner, it's a little damaged, but it will likely be covered by a cabinet. The board is crookedly installed from before, as the gap on the far right is almost 1 cm.
How do I handle that in the best way?
1. If I'm going to paint, there needs to be a neat finish against the ceiling. Do you put some special trim against the ceiling that you can fill in? So that it creates a smooth transition. A paper tape might not work in that joint since the gap is quite large on the right side.
2. If I decide to tile all the way up, the problem is probably smaller. But should you still fill the wall on the drywall?
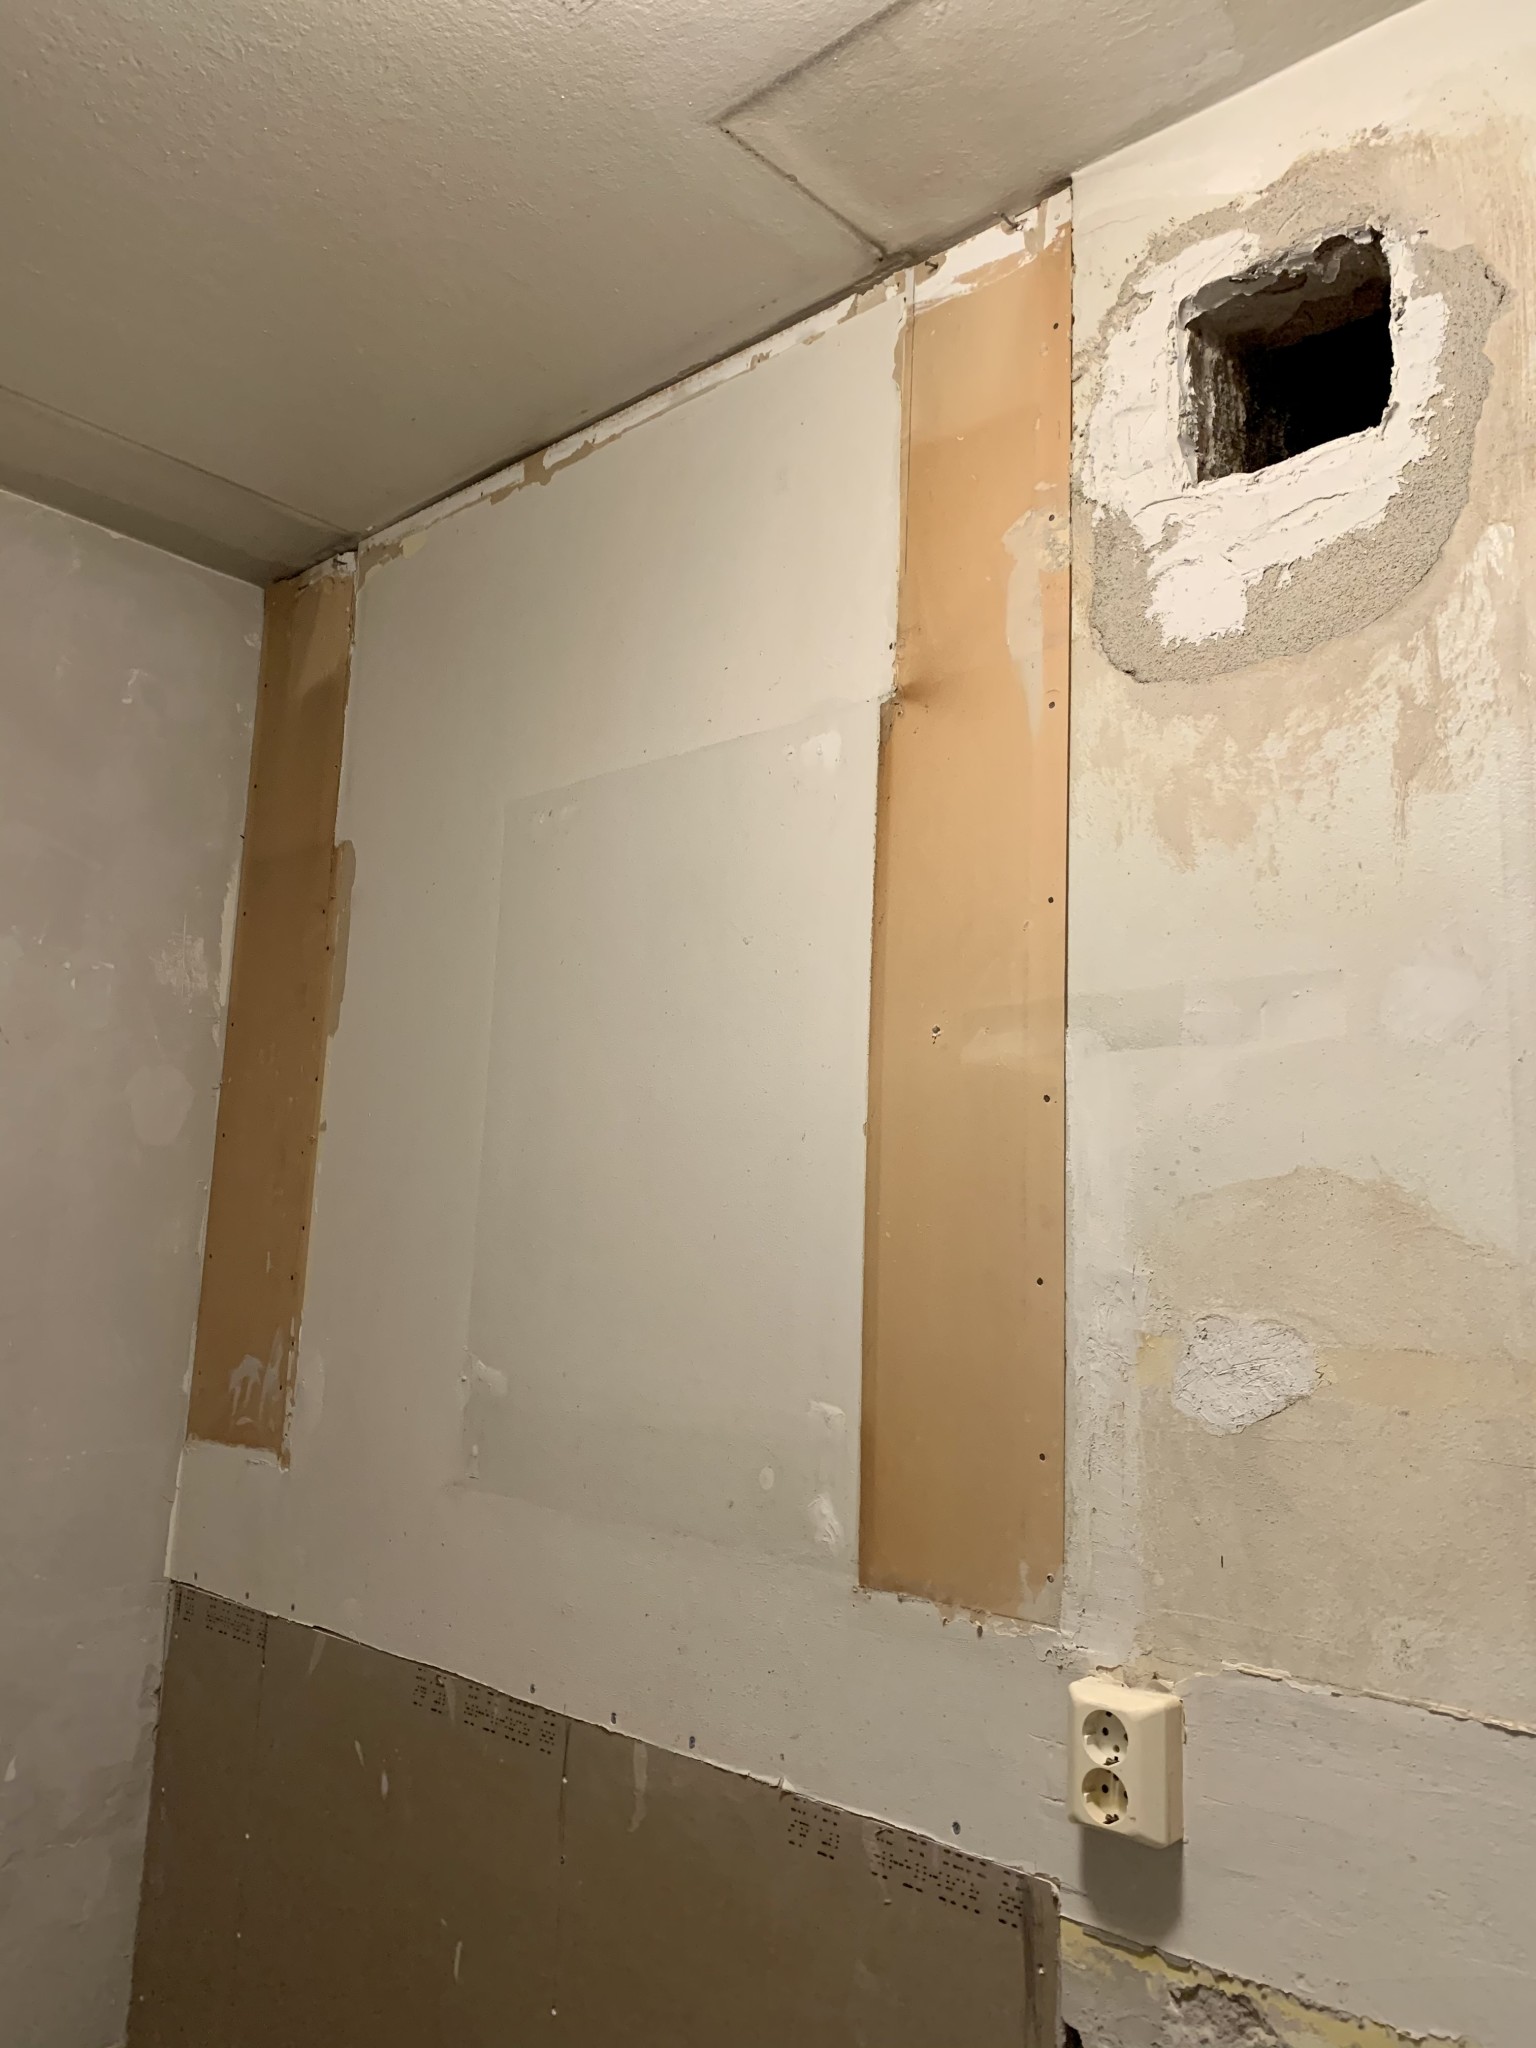
Honestly, the wall looks quite poor, damaged drywall even at the bottom, different thicknesses of drywall; I don't know what's covered by cabinets etc., but I would have replaced the drywall on that entire wall instead
Honestly, the wall looks pretty bad, damaged drywall even at the bottom, different thicknesses of drywall, I don't know what's covered by cabinets etc. but I would have replaced the drywall on that entire wall instead
Oh no, do I have to redo everything with the studs I've already done? Feels really exhausting
Can I replace the board at the top instead? Like what I did at the bottom. But with a larger area?
Can't you take an overview picture so we see more of the wall and also describe where the cabinets will be placed, where the tiling will be, and where it will be painted, etc. Then it will be easier to give advice.
Can't you take an overview picture so we can see a bit more of the wall and also describe where cabinets will be placed, where tiles will be, and where it will be painted etc. That way, it will be easier to give advice.
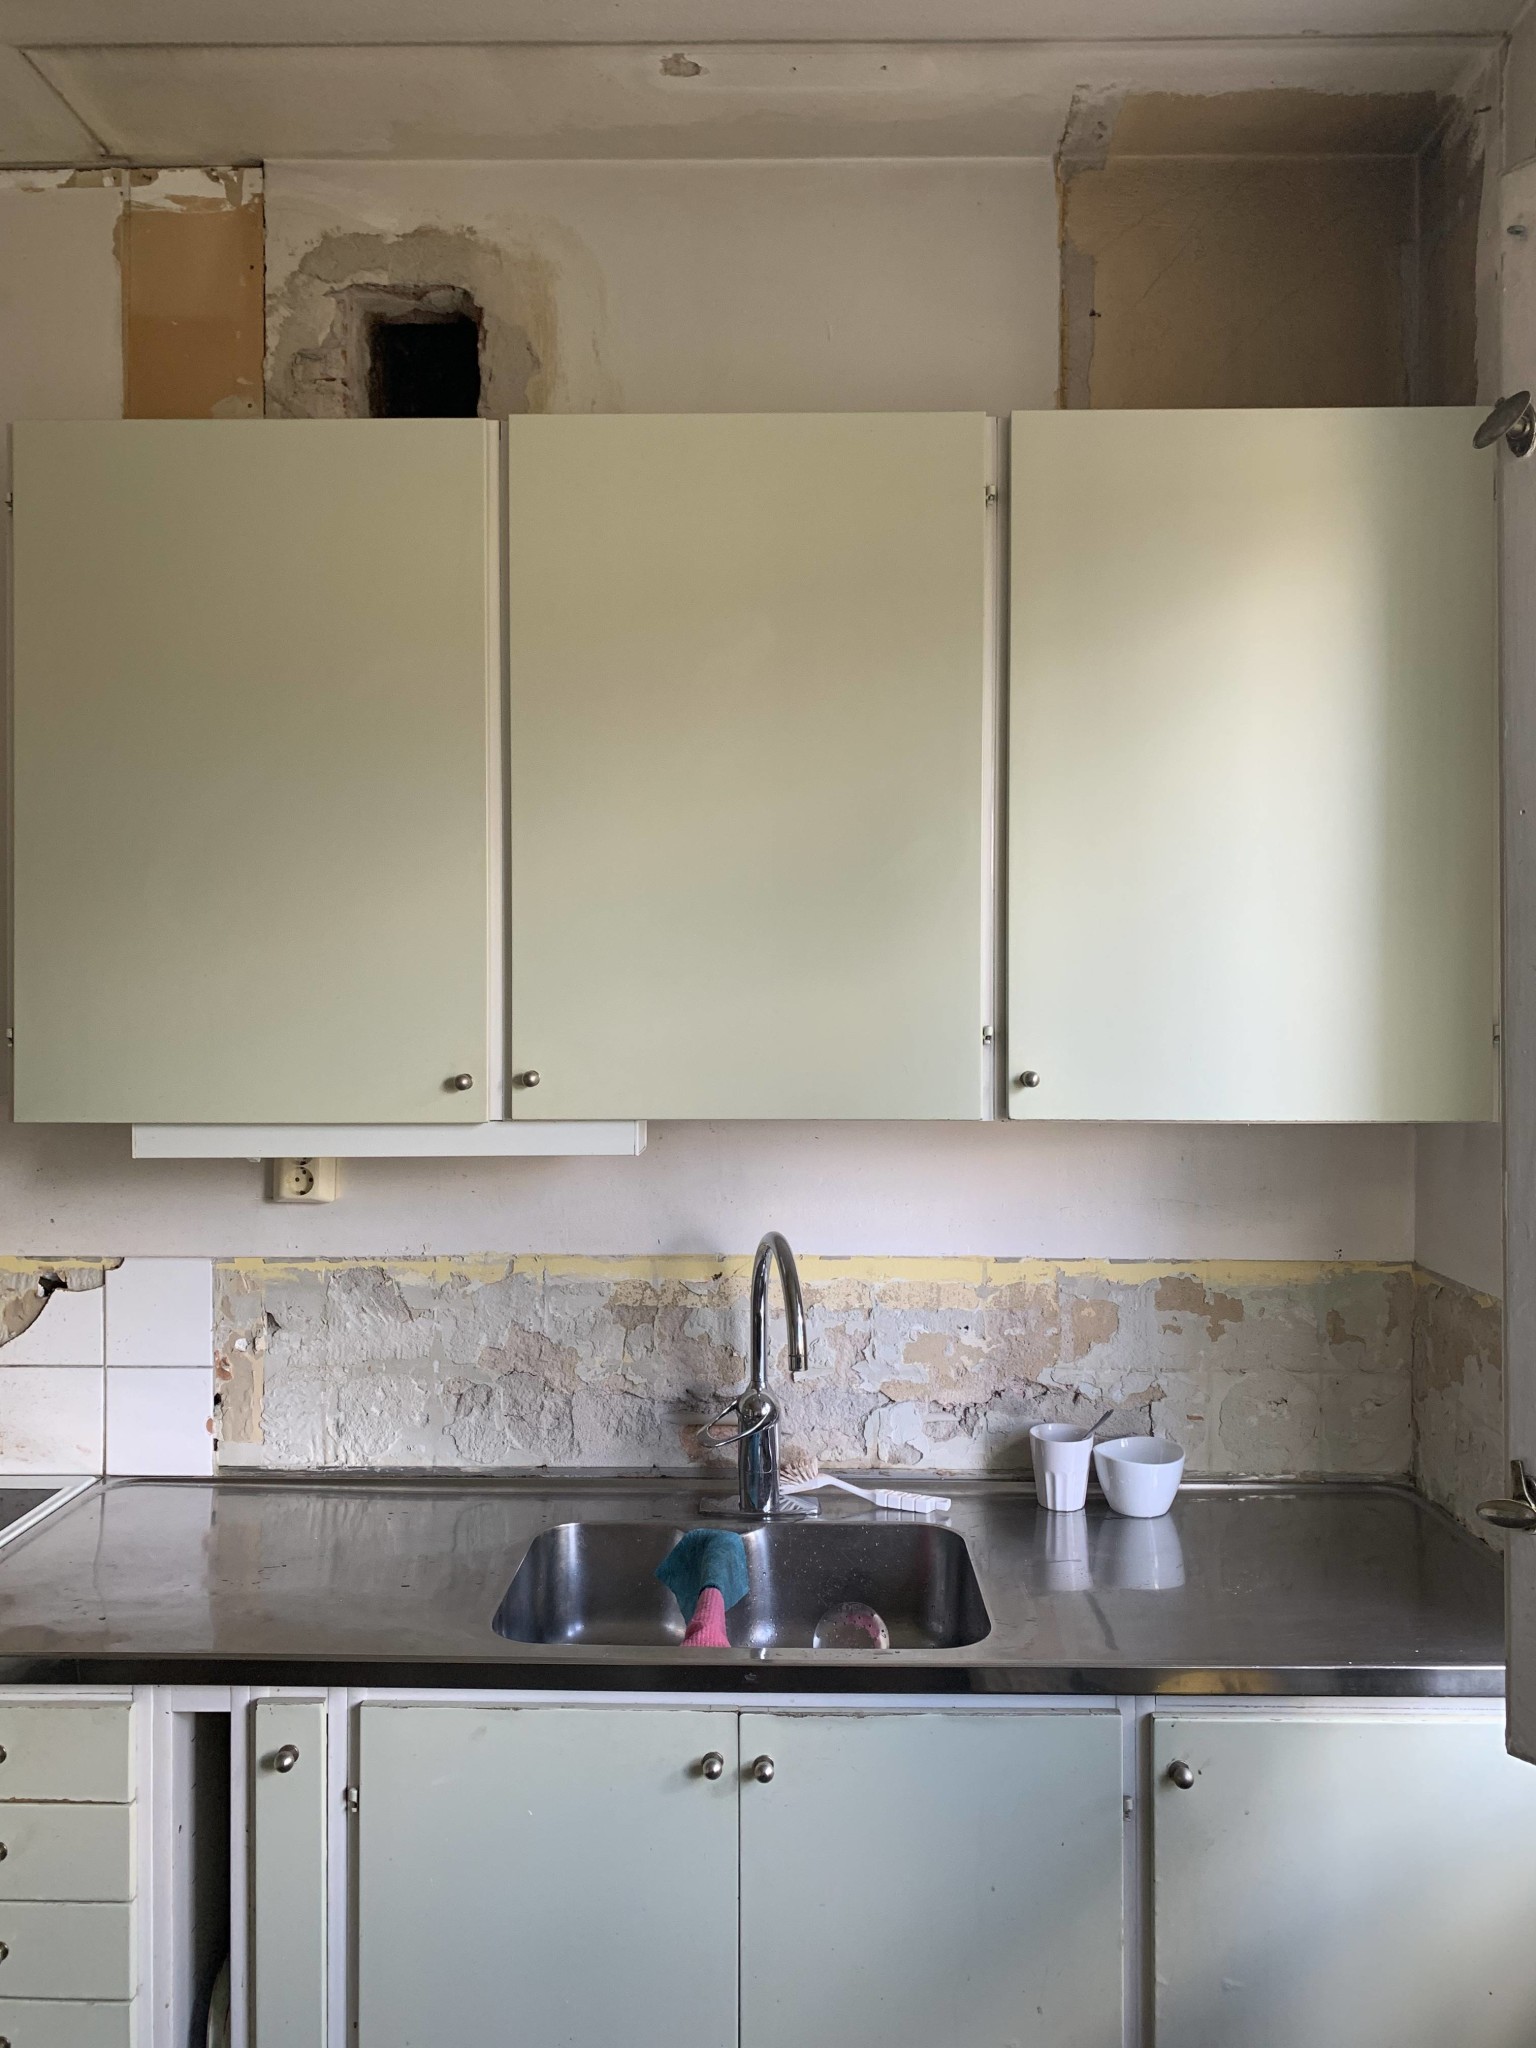
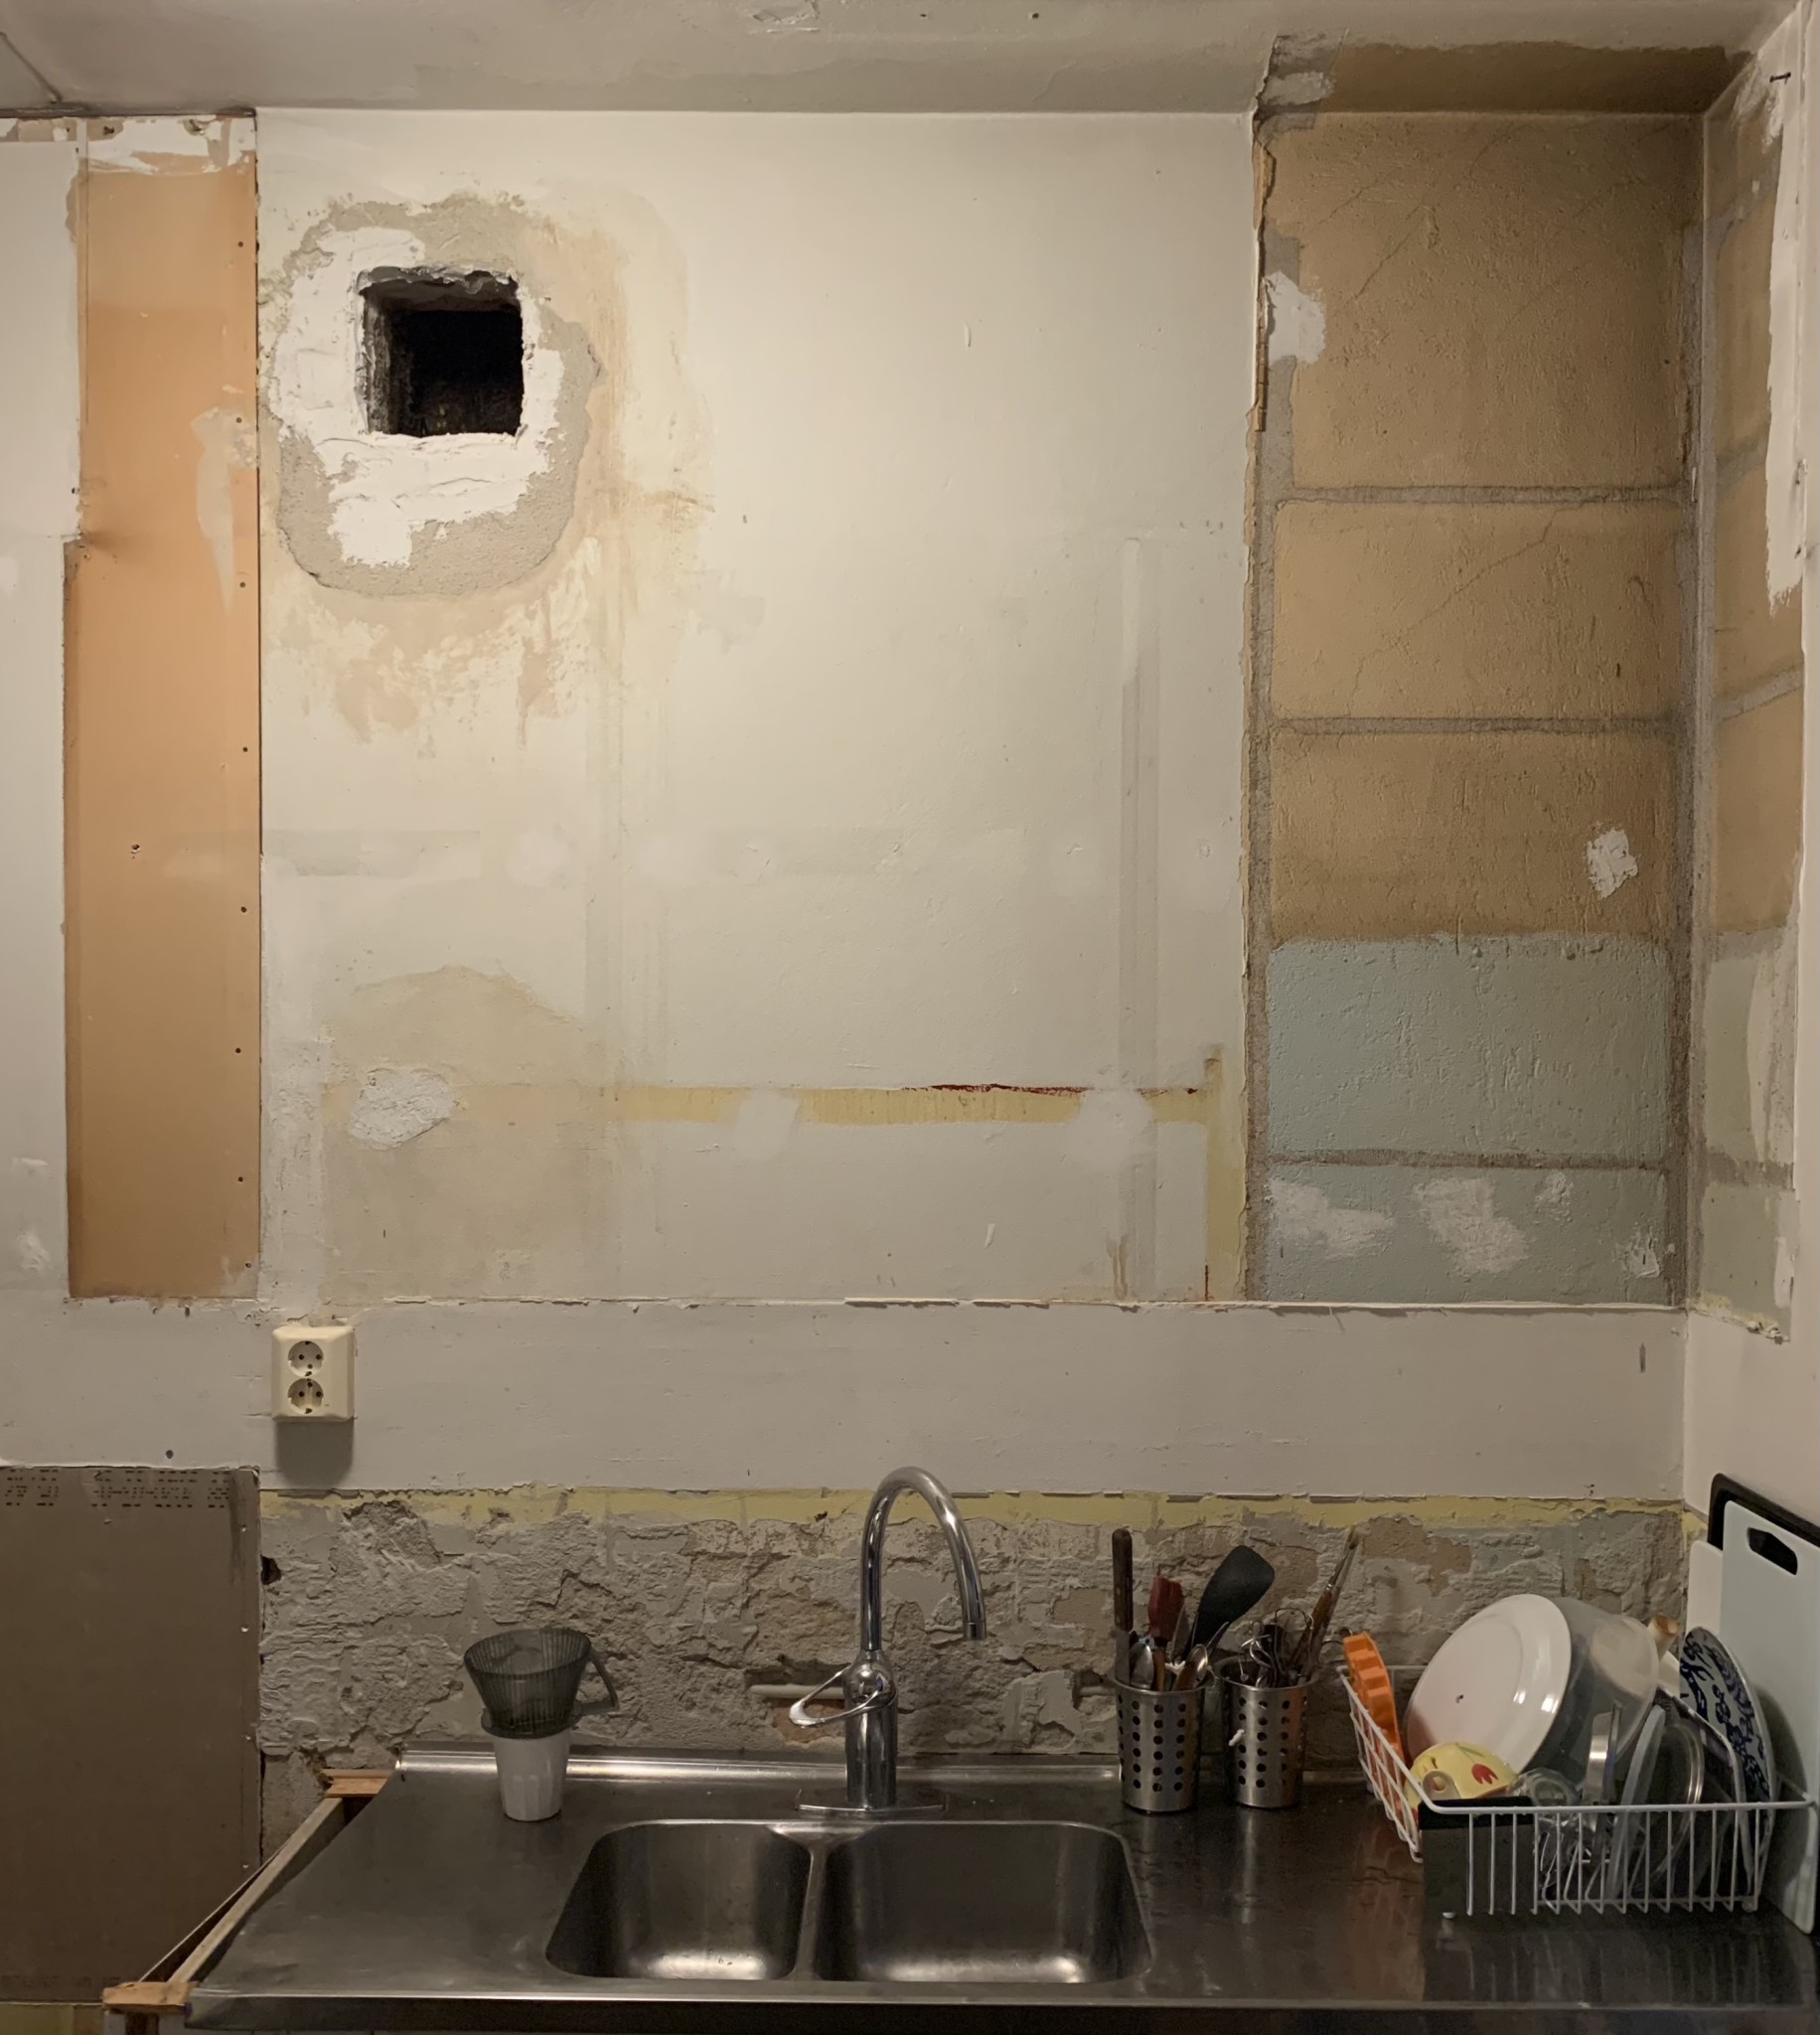
Pictures of both the old kitchen and after demolition. NOTE! It was not a nice functionalist kitchen but from the 70s-80s. Now it's going to be an IKEA kitchen with white Veddinge doors broken up by shelves in ash veneer.
There will be cabinets above the sink. Either all the way up towards the ceiling. But I don't want a gap there that collects dust and cannot be cleaned.
Or lower cabinets.
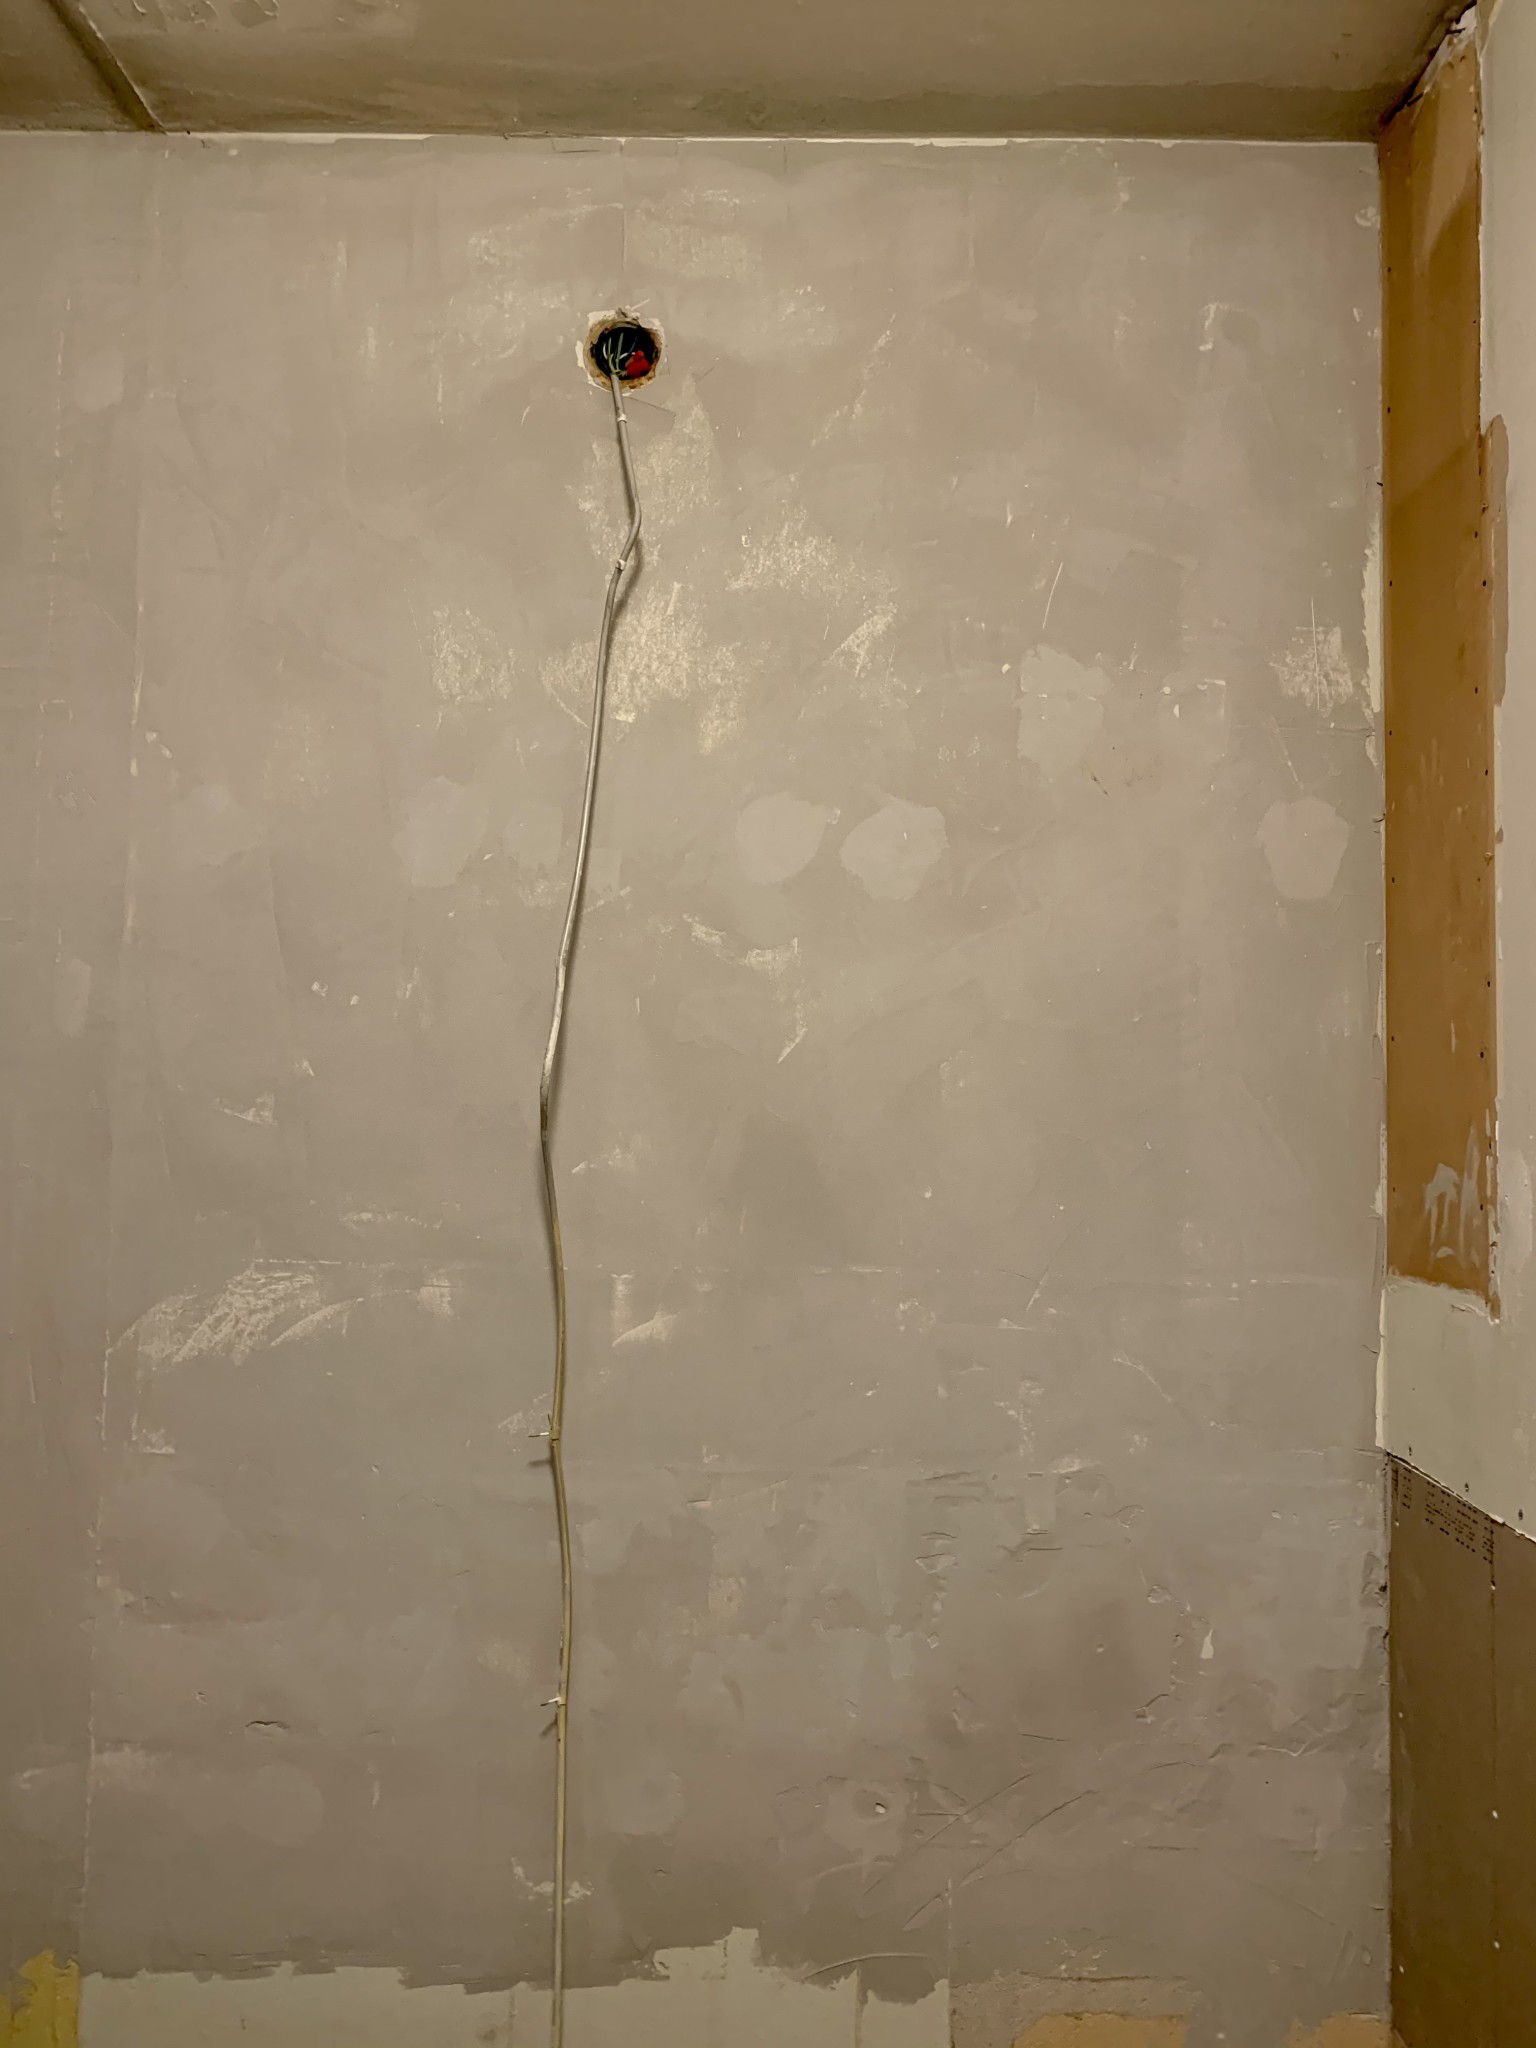
To the left of the sink, there will be a wall-mounted charcoal filter fan hanging above the stove. Then cabinets either to the left of the fan or on the wall where the electrical cord hangs.
Previously, a trim covered the edge against the ceiling on the plasterboard wall. It hid the edge. Maybe an idea.
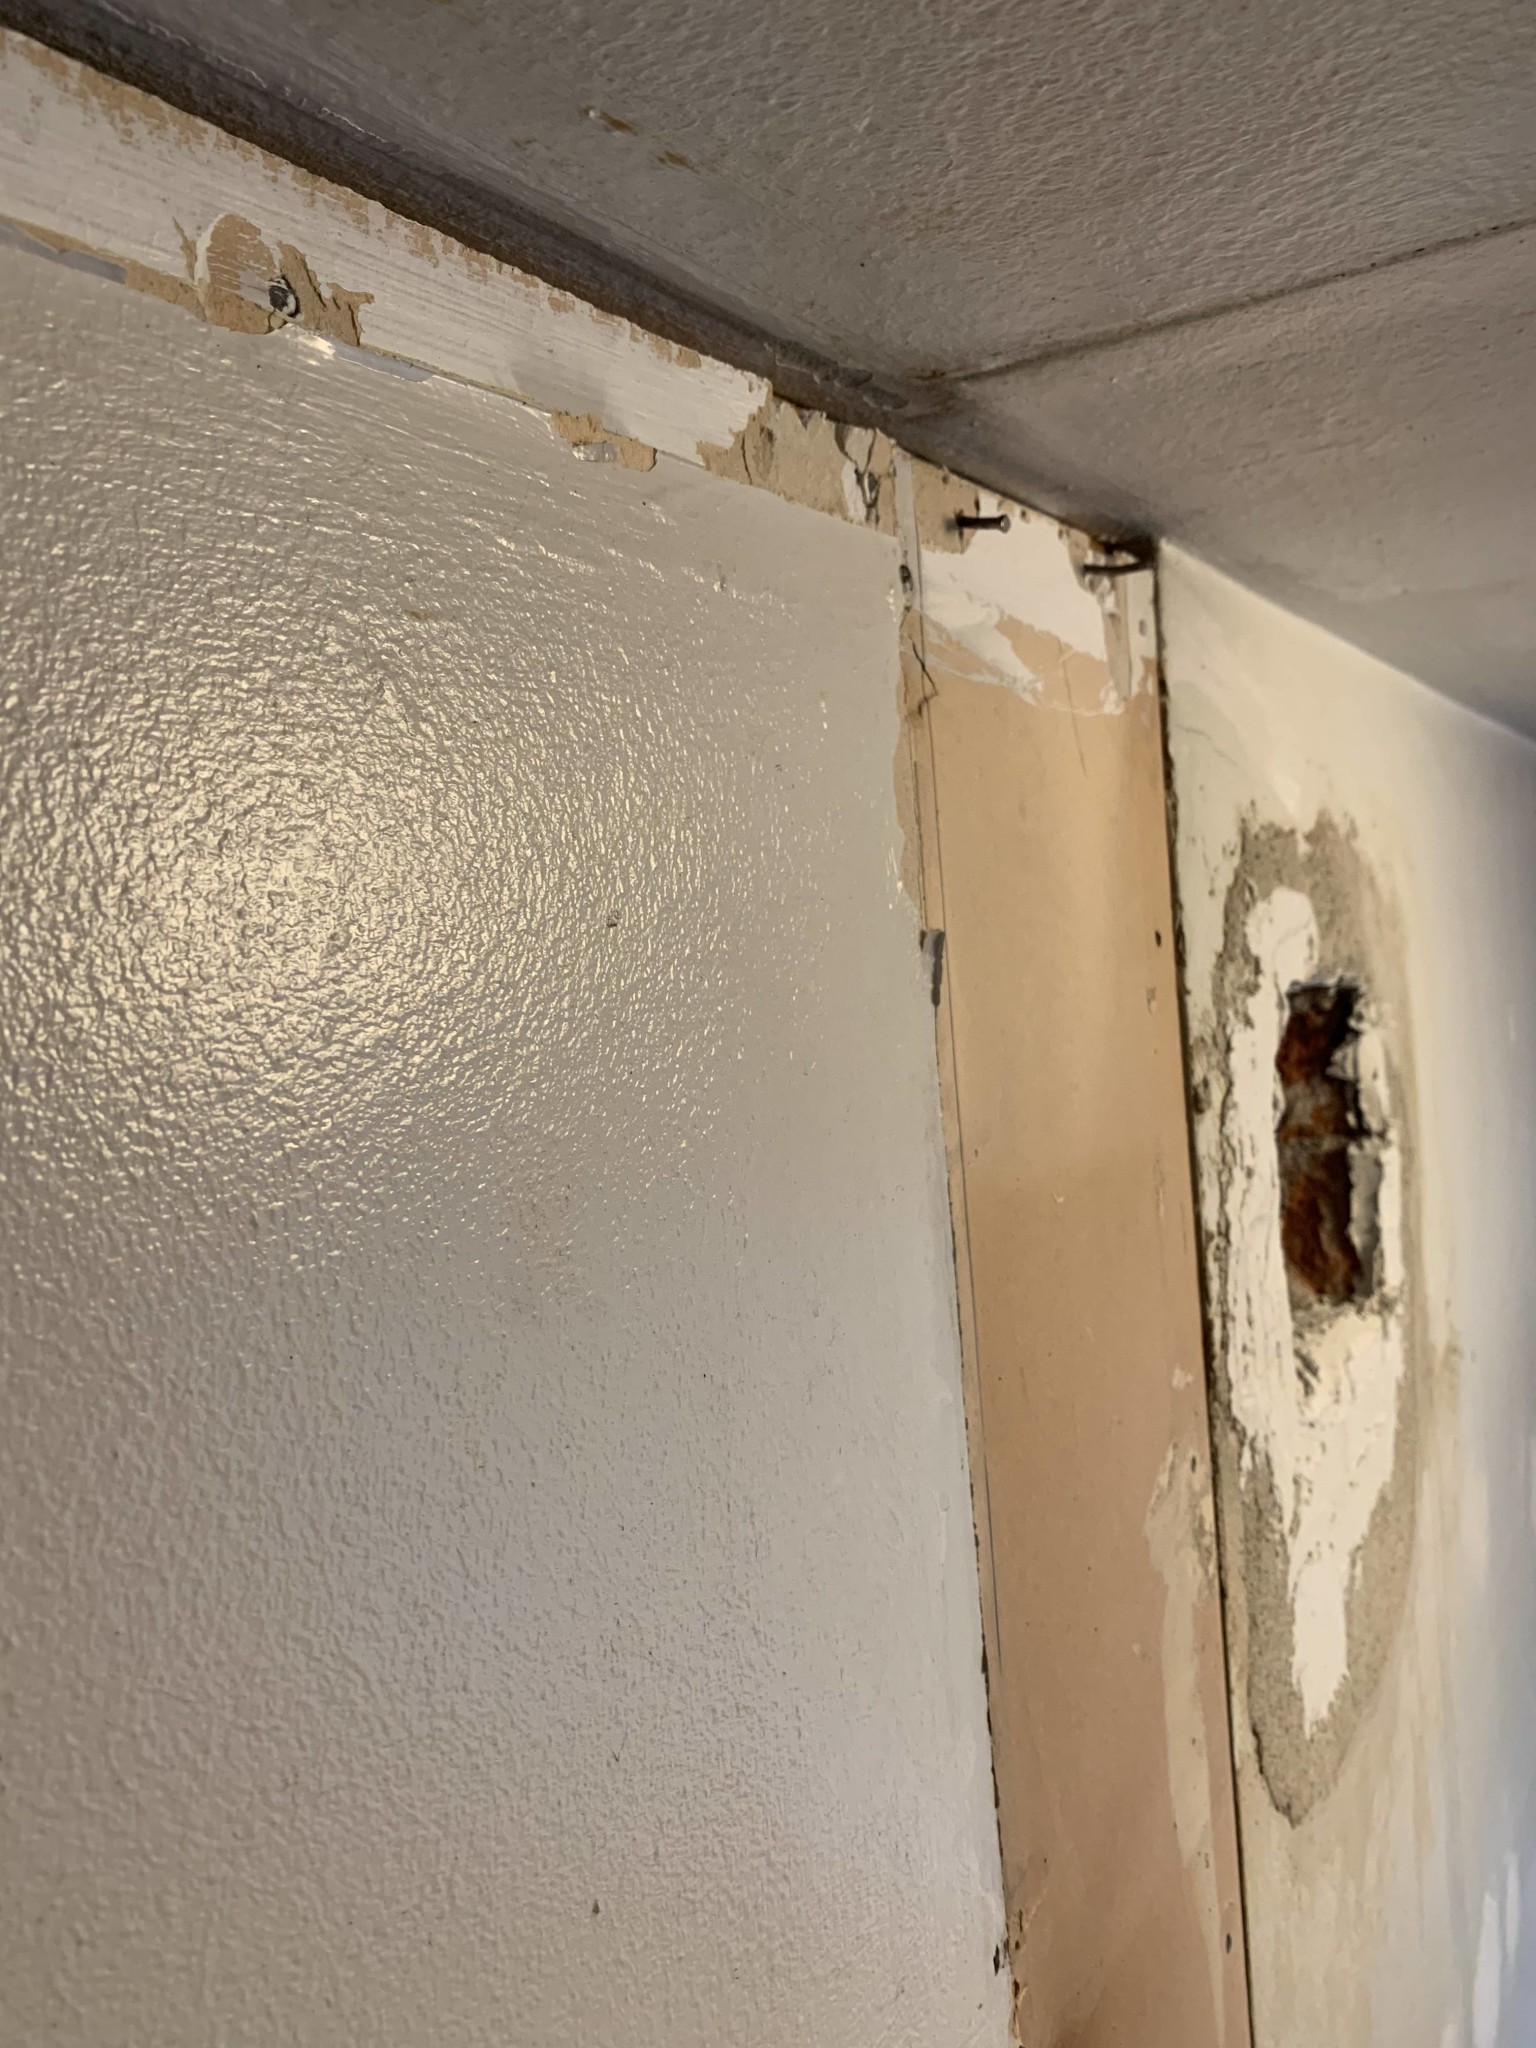
The wall also consists of a type of plaster and concrete above the sink. Tiles will be put up a bit towards the bottom edge of the cabinets or all the way to the ceiling behind the fan.
On the wall above the sink, there will be cabinets, either up to the ceiling or lower down.
To the left of the sink, a wall-mounted charcoal filter fan will hang. The extraction part, the square hole, is sealed with a plate valve, if it is visible it must somehow be painted into the wall. Otherwise, it can be covered by a cabinet and the plate valve attached to the short side of the cabinet.
spontaneously, I would say that where cabinets are going to be, do as little as possible. Where there is going to be tile, make it somewhat smooth, but you don't need to sand and spackle excessively. However, if you're considering painting, it needs to be done properly so the wall is completely smooth. The slightest unevenness will show once the paint is applied, unfortunately.
Don't forget boxes for power outlets, stove fan, and under-cabinet lighting.
The craftsmen will take care of that. I just want to lay a foundation so they can install the cabinets and handle the electricity and plumbing. Maybe I'll save a few bucks.
useless said:
")