Facing a restoration after a moisture damage that is now dehumidified.
I have tried to search for a similar question without direct success.
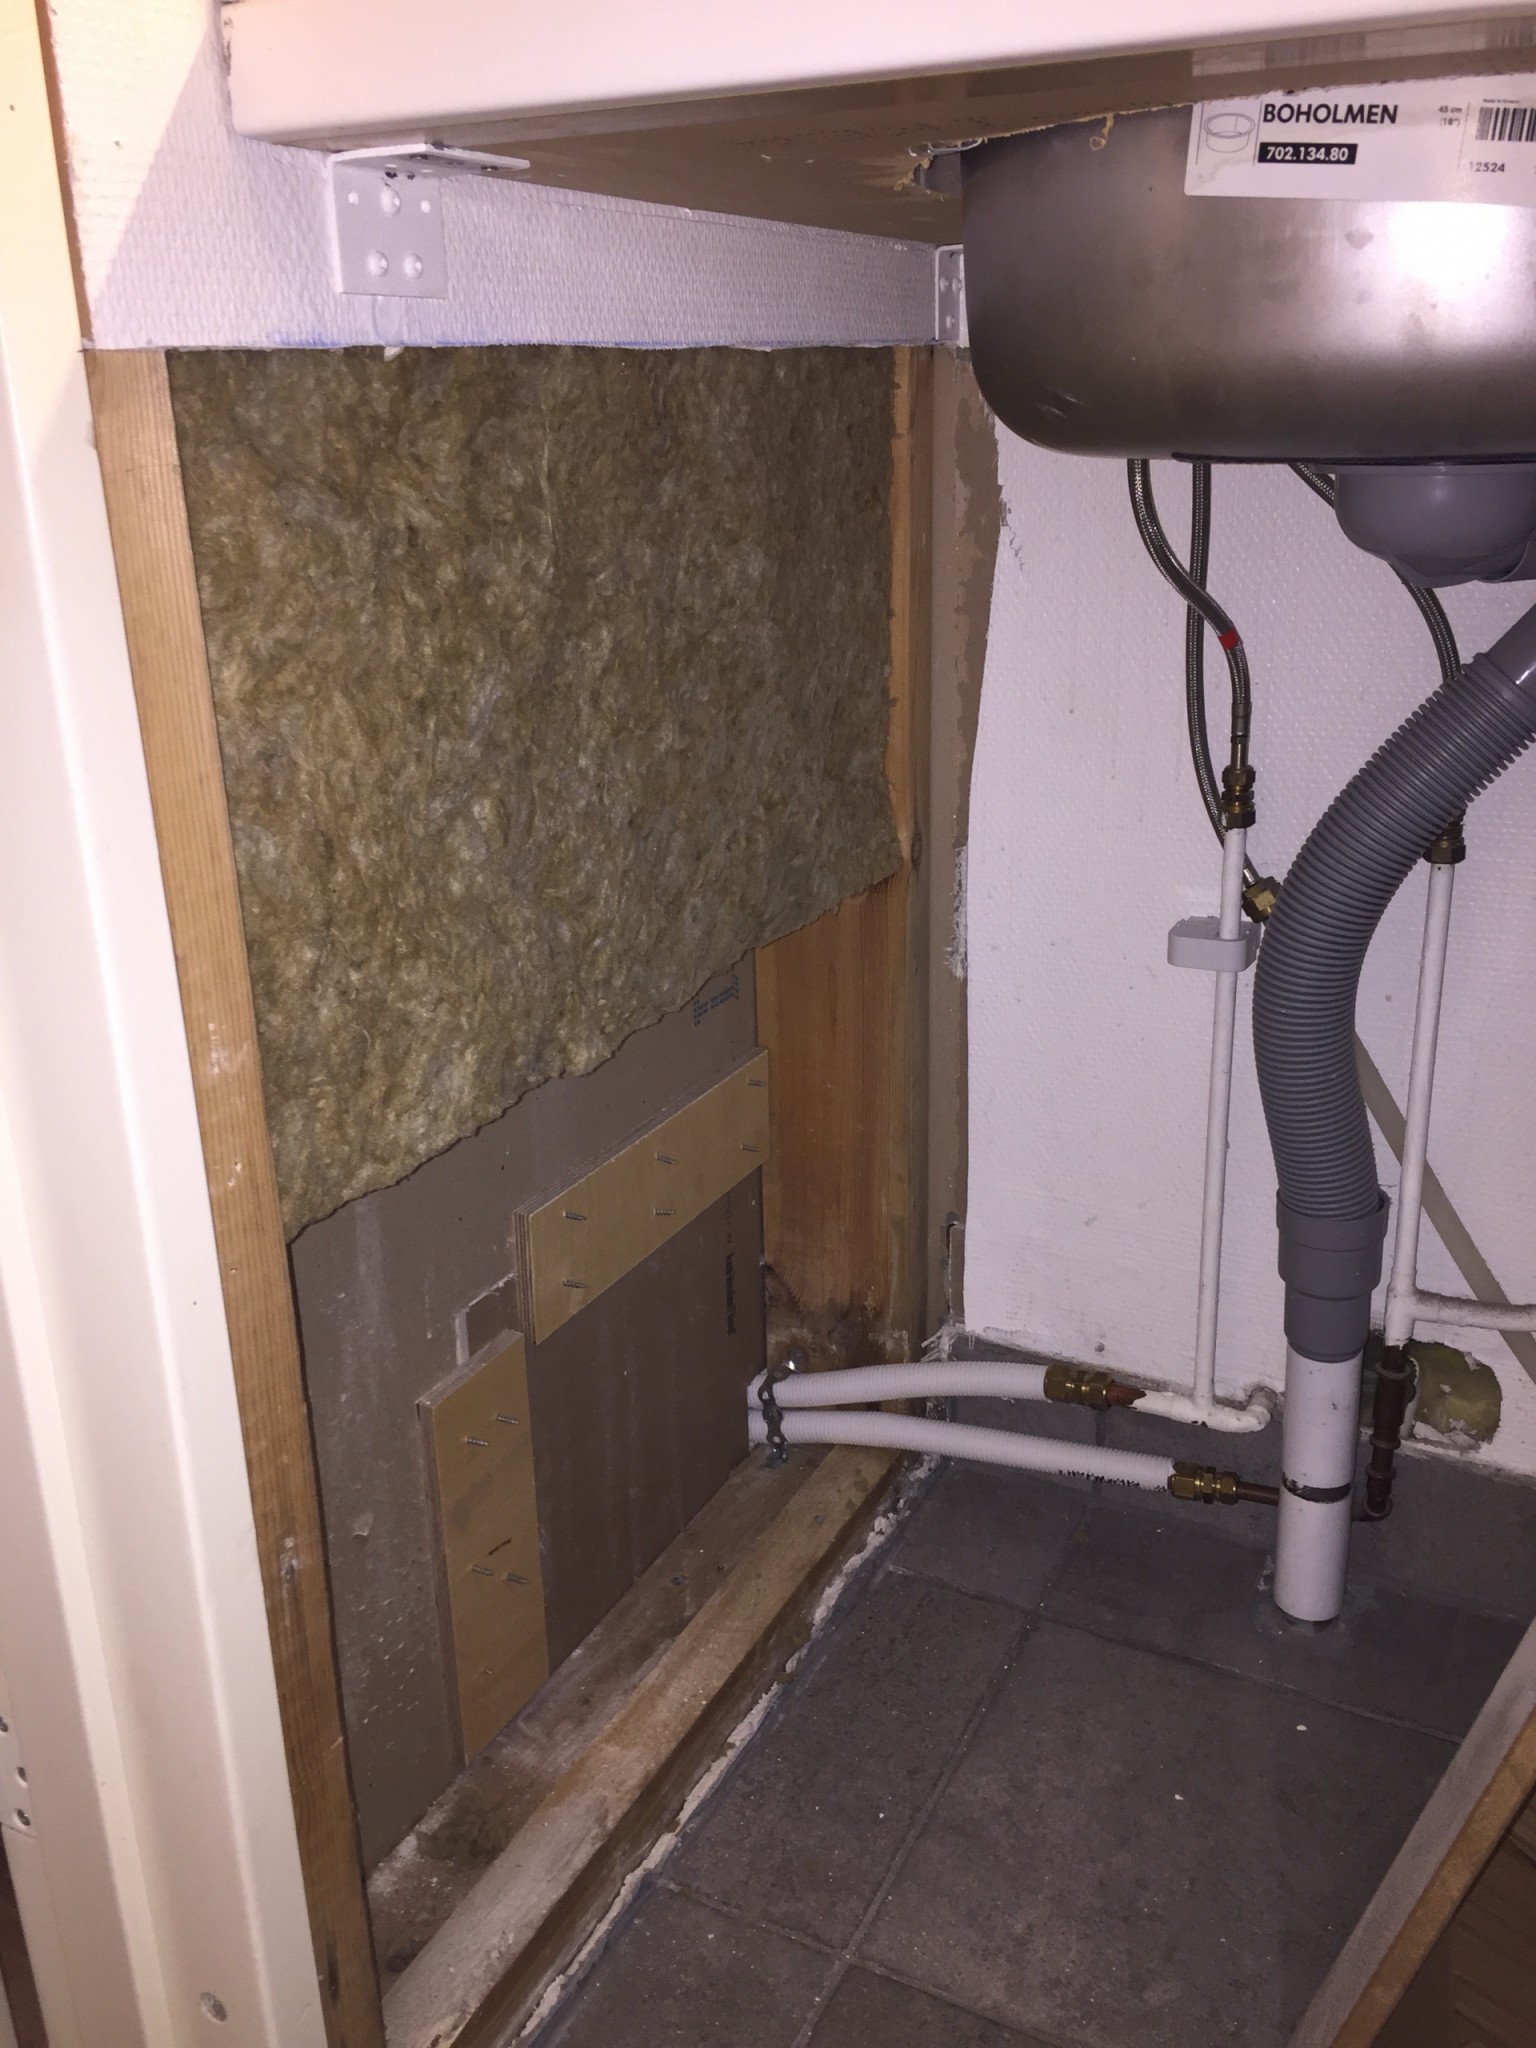
As seen in the above picture, the drywall is cut beneath the counter in our utility room.
How do I best plaster the seam without it cracking in the future?
I am thinking of cutting a strip of plywood that I will screw in with drywall screws behind today's drywall and the new drywall.
But how do I plaster the seam since the craftsmen who cut up the wall have trimmed the wall a few centimeters below the counter and don't have much space for wide plastering over the plaster tape?
Not keen on removing the counter directly.
The wall will be covered with fiberglass wallpaper afterwards.
First of all, is it important that it doesn't crack? Will it be visible or will there be cabinets in front? If not, it’s just unnecessary work to fix that part. You will have fiberglass wallpaper over it anyway, and that doesn't crack.
Otherwise, the solution is this:
plywood or a piece of wood behind the drywall, then you splice with the new drywall. Place a piece of wood under the countertop edge and support it. Then remove the angle irons. Once that is done, taper the drywall edges and then apply a joint tape. (experienced carpenters and painters embed it at the same time) If you are inexperienced with paper joint tape, glue it with fabric glue or regular white wood glue. Let it dry during the day and in the evening apply a thin layer of filler. When it has dried the next day, sand it lightly and then apply the final layer of filler. Thin. This way you avoid the joint tape bubbling up and detaching if you are inexperienced. Even painters recommend this solution to inexperienced private individuals. When that’s done, apply your new wallpaper and wait for the final painting. Done =)
Time required for carpenter including joint tape about 1.5h
Time required for enthusiastic DIYer including filler and drying time + sanding + filler + sanding + wallpaper/glue 2 days
Yes, it's best to use joint tape since the area is open and visible.
Previously, I have used gluing the tape to be on the safe side, so that's probably what I'll do this time as well
Click here to reply
Vi vill skicka notiser för ämnen du bevakar och händelser som berör dig.

")