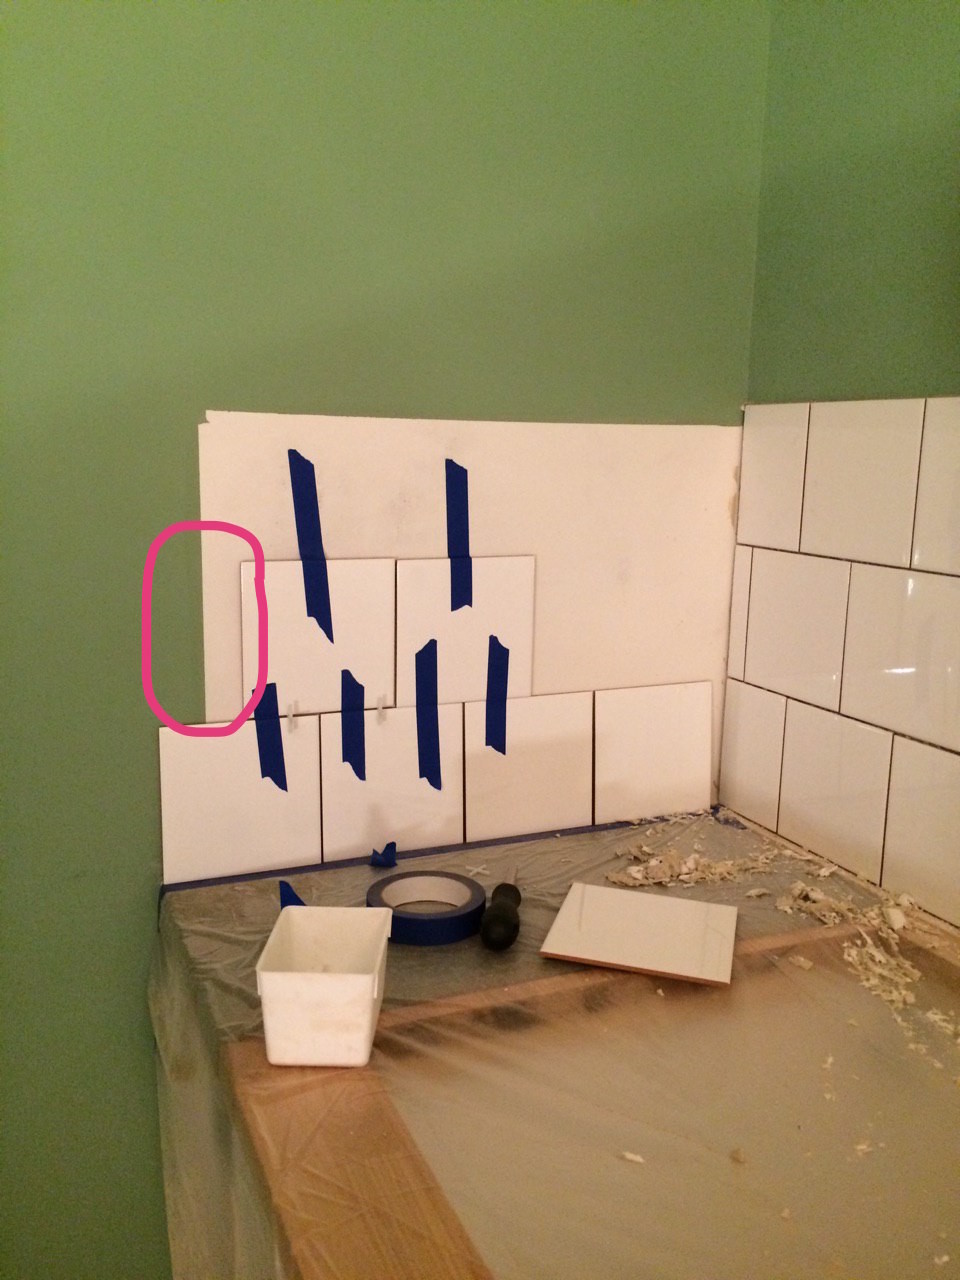
I have a bit of a headache about how to get a nice finish on tiles in a half-bond pattern on the short side of the kitchen counter. The tiles should only go up to the edge of the countertop. There is a total of ONE tile that will need to have a cut edge at the end (the spot circled in a picture further down), but my skill with the tile cutter isn't the best so the edges don't turn out very neat.
Ideally, I would have had a half tile to stick in there, but alas.
Unfortunately, I'm allergic to the plastic or aluminum edging profiles, and besides, they don't cover the edge, they just end up edge to edge, right?
So instead, I'm considering a wooden tile trim, but the ones I've found are way too large for my taste! 55 mm wide seems to be the minimum, and I would have wanted a maximum of 30 mm.
I've also looked at baseboard moldings, but there the problem is that the rebate height seems to be around 13 mm and my tiles are only 6 mm thick.
The general style of the kitchen the tiles are in is functionalism meets farmhouse. Tips are warmly welcomed!
nah it's exactly those I don't like. wrote it in the introductory post.
now I'm thinking that I have enough tiles to practice my technique a bit more, so maybe I can manage an acceptable edge, and then I can turn it inward toward the next tile instead of having that edge on the outside....
If you want to go with the breast molding option and have access to an electric planer, you can plane down the back of the breast molding to get the correct thickness of the rabbet.
a bit late tip, there are tiles that have half-tiles, as well as tiles for corners, etc. - so I understand that's often what was done in the past...
I used Gysinge's tiles for the kitchen, they had half-tiles. It might not be economical for larger areas but in a kitchen, the material cost for tiles is usually not so enormous compared to everything else...
yes it's unfortunately a bit late now. I know it exists, but it would probably have been outside the budget anyway. I have now looked around a bit for a smooth glossy 7.5x15 with a thickness of 6mm, but it hasn't been easy and I haven't found that it's sold individually unless it's something like gysinge or byggfabriken but I doubt they would work well with the tiles I currently have.
Where do you live? A wooden strip in a suitable dimension and suitable wood type does not take many minutes to make for a carpentry shop or a decently equipped home workshop. In fact, it can probably be done with just a table saw as the only tool.