I am planning to attach and mount 6 monitors on a wall.
Here is my story, explanation, and background as to why I no longer know how to proceed and need help and suggestions.
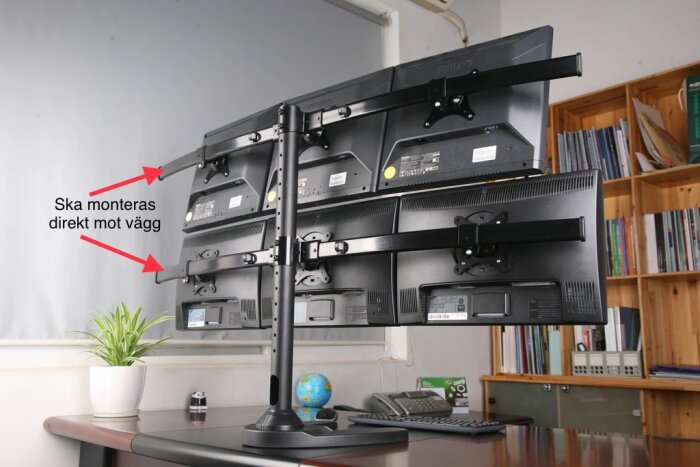
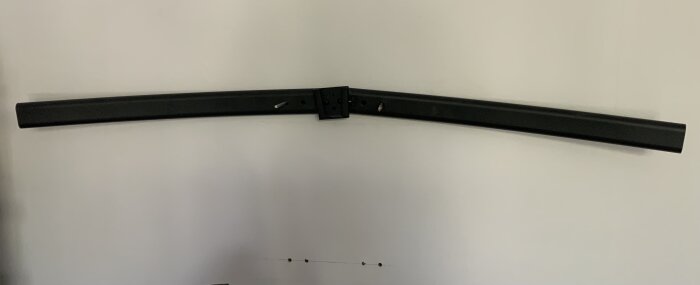
At my home workspace, I have long had 6 monitors on a stand on the desk. Two rows above each other with three monitors in each row, as seen in some pictures. The stand consists of two horizontal support bars which are attached to a vertical rod that is fixed to the desk. Three monitors hang on each horizontal holder.
The disadvantage of this is that the stand and the vertical rod take up a bit too much space. Additionally, I need to get the monitors a bit higher up than the vertical rod allows.
Therefore, I am now thinking of trying to mount the two horizontal support bars directly on the wall. The wall behind is a sturdy heart wall about 50 cm thick in an old stone and concrete house. You can see it in the pictures.
Shouldn't be a problem at all, I thought, and was about to start mounting the two horizontal holders with 4 long 8 mm threaded rods that I drilled well into the 50 cm stone wall with chemical anchors.
So I thought!!
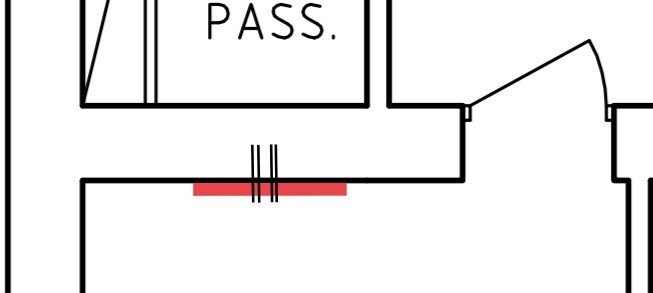
But it turned out that it wasn't a stone wall!! At least not precisely where I was going to mount the monitors. As mentioned, the house is old (> 130 years) and has probably been remodeled several times, so it has probably once been a doorway right behind my desk.
I drilled all 8 holes and everywhere the wall seems to consist of first about a 2 cm layer of some wood board (perhaps a bit softer/porous), then comes an empty space of about 4 cm, and then another few cm thick type of wooden wall - perhaps a hidden/built-in wooden door.
After drilling through these two layers of wood, there seems to be a large empty space again. I guess that empty space extends all the way to the other side of the approximately 50 cm thick "heart wall," which is now clad on the other side with large wall tiles (in a bathroom).
Had it not been for the tiles on the other side of the heart wall, I might have been able to insert really long threaded rods (>50 cm) through that wall. But it doesn't seem like a good idea precisely because of the tiles.
How can/should I proceed? Is there any suitable fastener that at least goes into and through the second wood layer, i.e., a total of perhaps about 8-10 cm in from the outside, and that can be made to attach (expand) behind the second wood layer (hidden door?)
And perhaps most importantly - do you think it will hold for the weight that the monitors have?
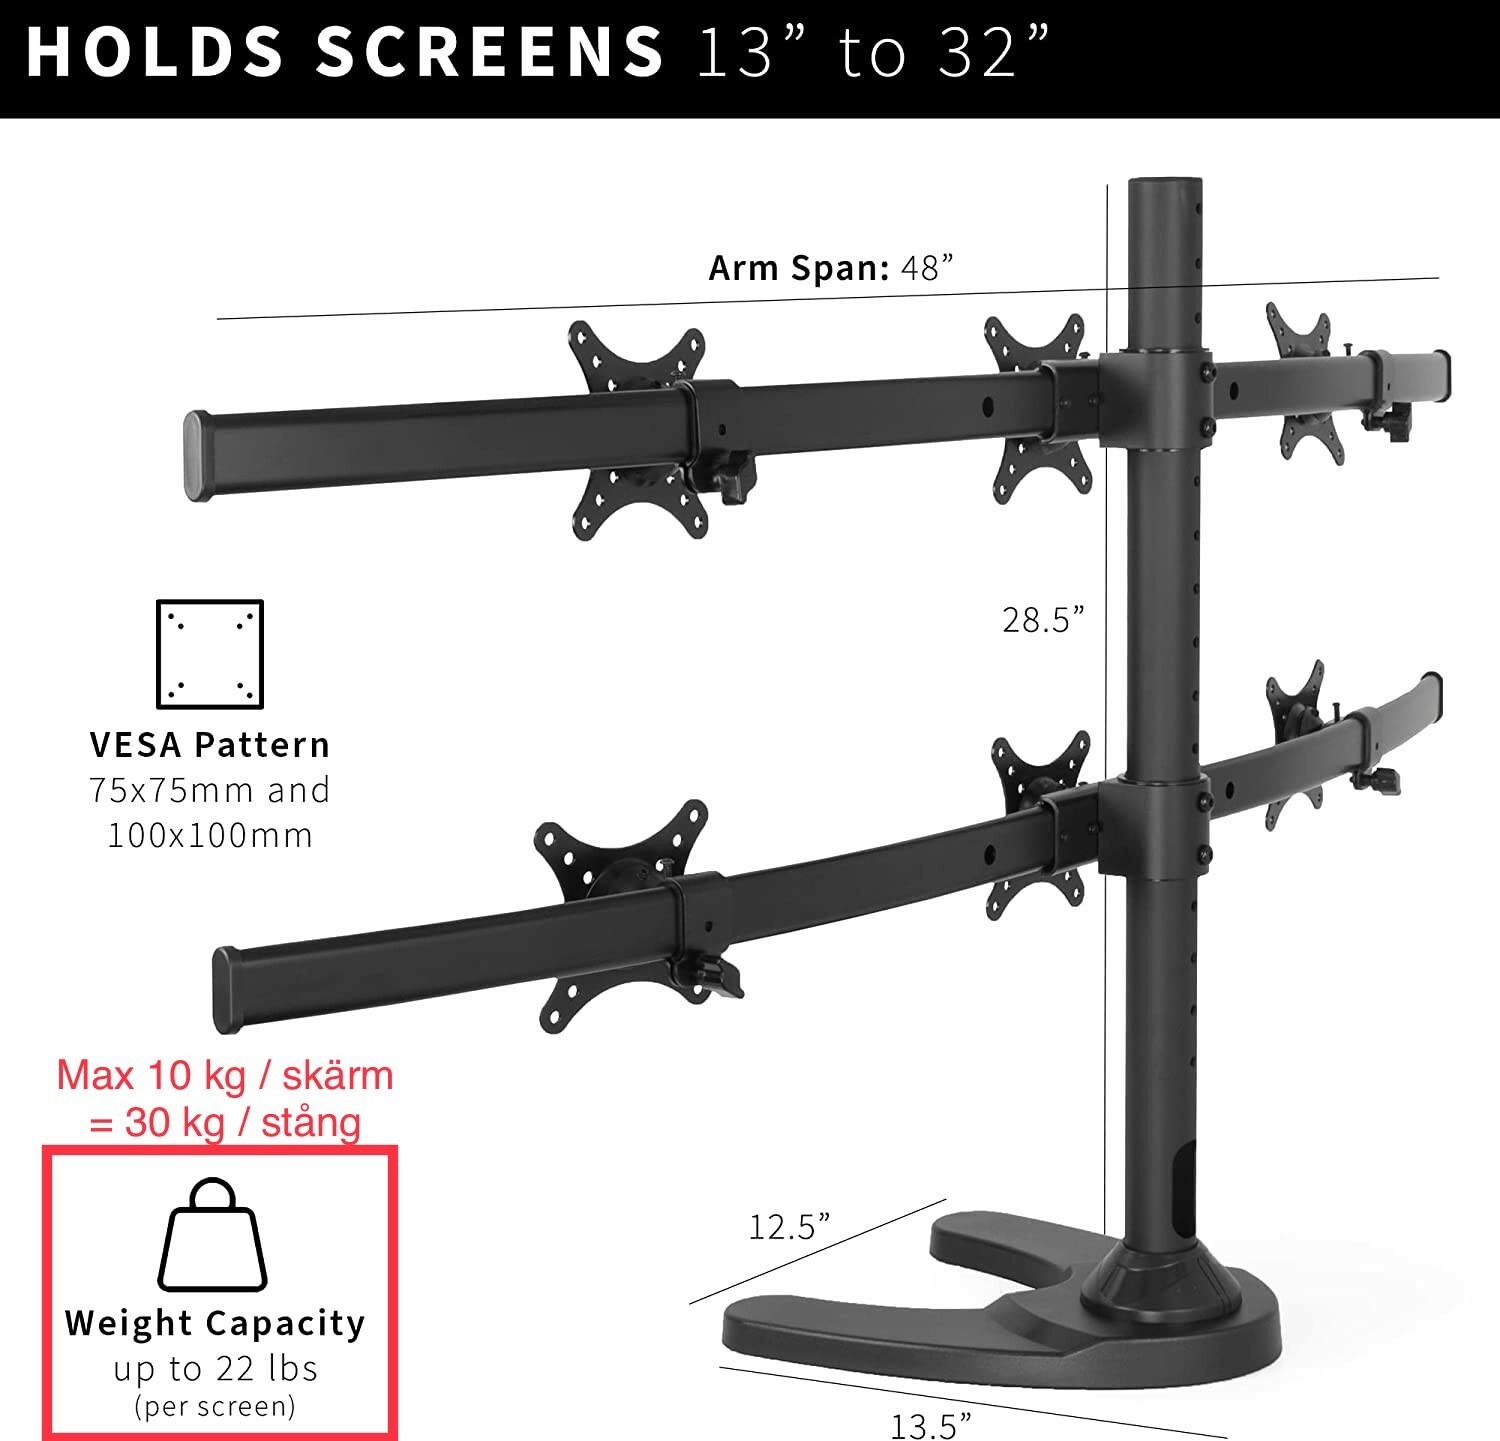
The stand itself is specified to handle monitors weighing 10 kg each, i.e., on each horizontal support bar a maximum of 30 kg. My monitors weigh 7 kg each, so that becomes 21 kg that the four fasteners must handle. In two rows - i.e., a total of about 42 kg on the wall for my 6 monitors.
Very grateful for any help and suggestions I can get.
Plywood/mdf/ultraboard and a construction adhesive. It helps if you insert a few screws along the edges to hold it in place during drying time, and the screws can stay in, as it's just extra work to remove them. It doesn't need to be the best hold, just something that lasts a few hours. If there's somewhere you know has a good hold, then definitely insert a few screws there. Before screwing anything, mark with tape where the screws for your tracks should go so you don't place a screw there or in the immediate vicinity.
Surface treatment
If you plan to paint, prime before assembly and then fill the screw holes, etc. after it's assembled.
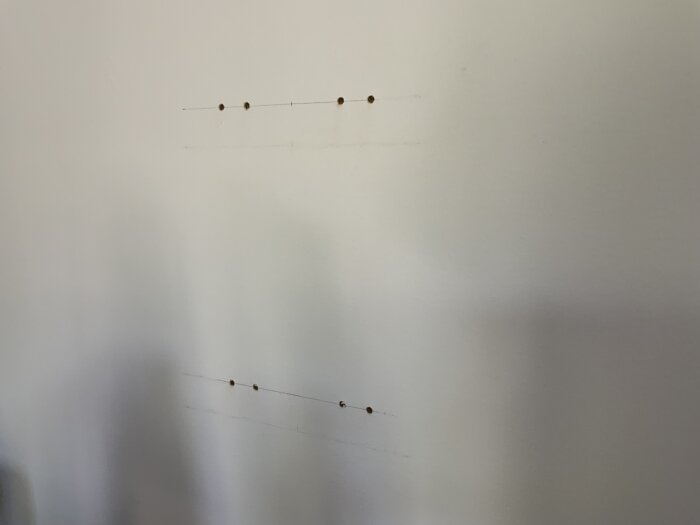
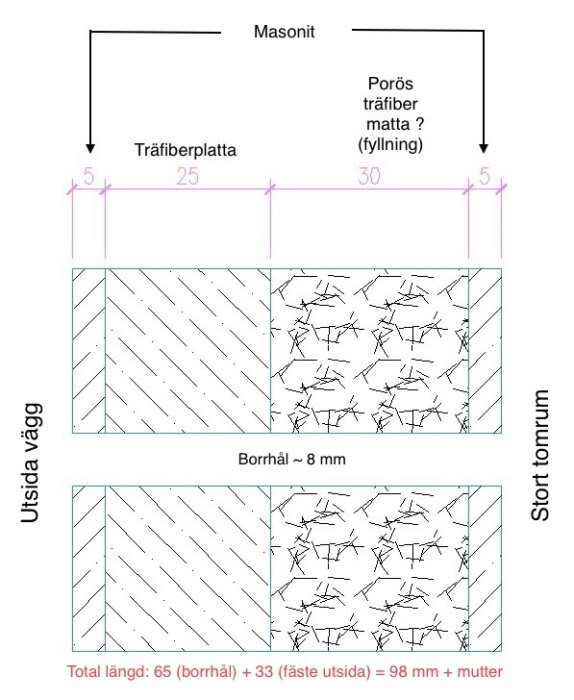
Many thanks for the tips on mounting. I looked and measured a bit more carefully how the wall was constructed and drew a sketch.
In total, the wall was 65 mm thick followed by a large empty space, which must have been a previous door opening. First, there was about 5 mm of masonite, then about 25 mm of wood fiberboard (particle board), then 30 mm of soft porous filling, and finally another 5 mm of masonite.
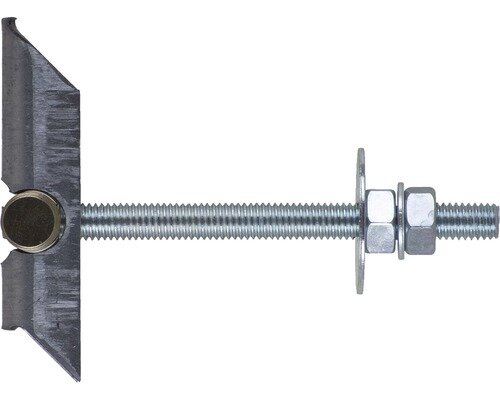
Based on the tips I received, I found a mounting called panel anchor. Other names for the same thing were toggle anchor.
This panel anchor has an 8 mm threaded rod that is 100 mm long, and requires the mounting hole to be 20 mm. Since the stand I am mounting is itself 33 mm thick and the wall 65 mm = total 98 mm, I had to replace the threaded rod with a longer variant to accommodate the nut.
And since the mounting hole needed to be 20 mm, and to ensure the 8 mm threaded rod was centered in the large hole, I also had to use a bushing around the threaded rod made from a round bar in which I drilled an 8 mm hole in the middle. It all worked out quite well.
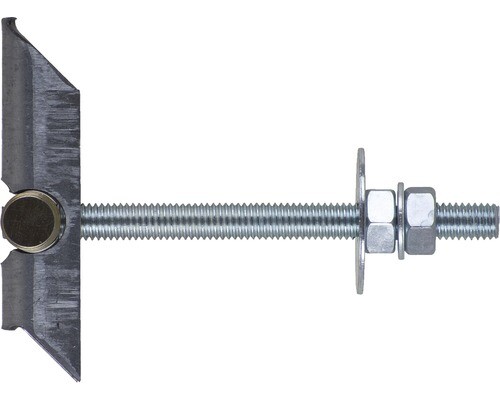
Many thanks for the tips on mounting. I looked and measured a bit more carefully how the wall was constructed and drew a sketch. [image]
The total thickness of the wall was 65 mm followed by a large void, which must have been a former door opening. First, there was about 5 mm hardboard, then about 25 mm fiberboard (chipboard), then 30 mm soft porous filling, and finally another 5 mm hardboard.
Based on the tips I received, I found a mounting called a toggle anchor. Other names for the same thing were toggle bolt. [image]
This toggle anchor has an 8 mm threaded rod that is 100 mm, and requires the mounting hole to be 20 mm. Since the frame I am mounting is 33 mm thick and the wall 65 mm = total of 98 mm, I had to replace the threaded rod with a longer variant to also accommodate the nut.
And since the mounting hole needed to be 20 mm, and for the 8 mm threaded rod to center in the large hole, I also had to use a bushing around the threaded rod made from a dowel into which I drilled an 8 mm hole in the center. It all turned out pretty well.
Thanks for the help.
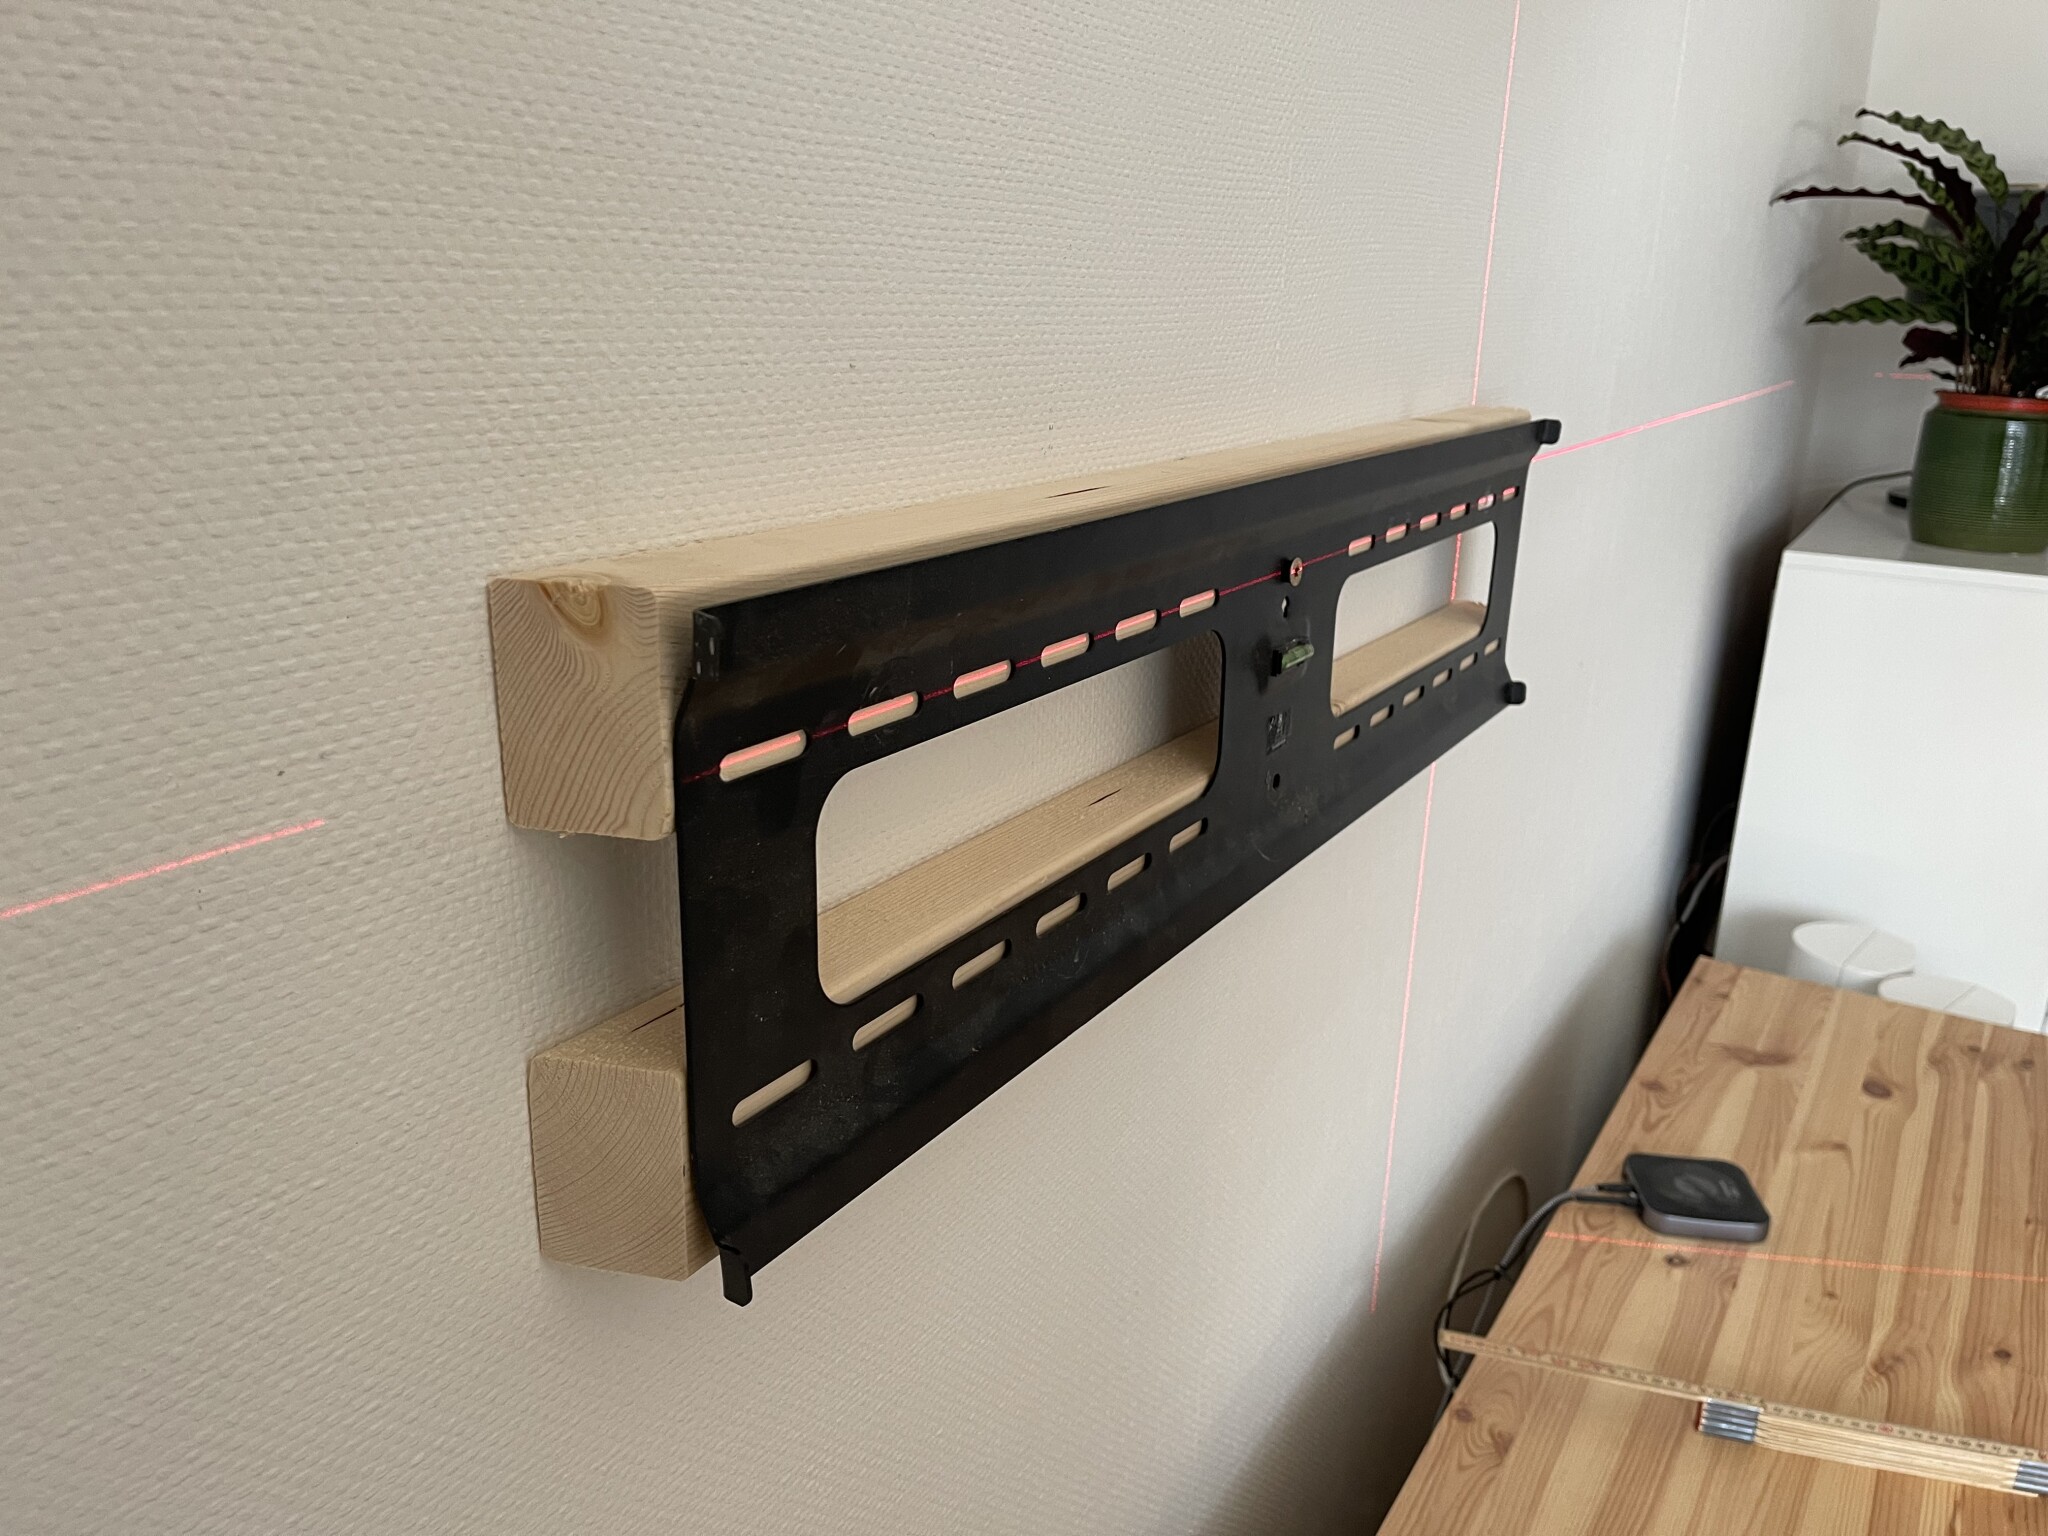
If you really want to secure it, you could place two battens (like furring strips 70x28 or 70x45) along the entire width of the wall, to which you then screw the mount. There is a risk that the board will give way now that the screws are centered.
Example image
Click here to reply
Vi vill skicka notiser för ämnen du bevakar och händelser som berör dig.


Phiplex said:
Many thanks for the tips on mounting. I looked and measured a bit more carefully how the wall was constructed and drew a sketch. [image]