6,639 views ·
6 replies
7k views
6 replies
Lower ceiling with sparse in concrete
Hello!
Correct me if I'm on the wrong forum!
After x number of attempts and still no result, I'm thinking maybe I should ask around. I'm planning to lower the ceiling in the kitchen and part of the living room. The ceiling is concrete, probably 50+ years old and in other words **hard as a rock**. I tried drilling and plugging, but it didn't go well as I can't get as far into the concrete as I'd like. I rented a nail gun from Cramo, powder and with 62mm nails. The problem is that the furring strips that should be mounted (28x70) either crack or the nail doesn't go all the way in. It ends with 4-6mm of the nail sticking out and I can't possibly hammer it in. If that doesn't happen, part of the concrete comes off, or the nail bends.. I don't know if I should try with 45x45 studs instead? I'm open to any tips you have!")
Worth mentioning is that there are 10mm washers between the concrete and the furring, but as far as I know, that shouldn't affect anything?
Correct me if I'm on the wrong forum!
After x number of attempts and still no result, I'm thinking maybe I should ask around. I'm planning to lower the ceiling in the kitchen and part of the living room. The ceiling is concrete, probably 50+ years old and in other words **hard as a rock**. I tried drilling and plugging, but it didn't go well as I can't get as far into the concrete as I'd like. I rented a nail gun from Cramo, powder and with 62mm nails. The problem is that the furring strips that should be mounted (28x70) either crack or the nail doesn't go all the way in. It ends with 4-6mm of the nail sticking out and I can't possibly hammer it in. If that doesn't happen, part of the concrete comes off, or the nail bends.. I don't know if I should try with 45x45 studs instead? I'm open to any tips you have!
Worth mentioning is that there are 10mm washers between the concrete and the furring, but as far as I know, that shouldn't affect anything?
(Assuming it was a Hilti DX 460 you rented)S Stressad said:Rented a Bolt gun at Cramo, powder and with 62mm nails. The problem is that the sparse panel that needs to be fastened (28x70) either cracks or the bolt doesn't go all the way in. Ends up with 4-6mm of the bolt remaining and unable to drive it in further. If that doesn't happen, a part of the concrete breaks off, or the nail bends.. I don't know if I should try with 45x45 studs instead? I would gladly accept any tips you have!
Worth mentioning is that there are 10mm washers between the concrete and the sparse panel, but as far as I know, that shouldn't affect anything?
The idea of shooting up the sparse panel is of course good, but there are several things that have caused it not to work for you! Unfortunately, the Cramo salesperson might not have recommended that solution if the person in question didn't explain very thoroughly.
First and foremost, the nails are too long for the purpose. One should use fastening material +20mm when it comes to concrete. The nails come in x2 and x7 variants - thus a 47mm nail should be used here. Regardless, when using a bolt gun, you need to "calibrate" with 2-3-4..-8 shots until you find the right one. Also, which powder to use (green, yellow, red, or black), in this case, you probably took home red powder strips which may be too strong. It's best to start with green and work your way up. Then once you find the right powder (the nail sticks in the substrate without splitting the wood but maybe goes a little too far in or not far enough), you adjust the gun with the adjustment dial on the side. It moves in 0.5 steps up or down. Once this is done, you know how to shoot for the best result! Then you count on about 80% accuracy, so 2 out of 10 shots will probably not hit, so include that in the cost calculation. Then it is very tricky to shoot into cracked concrete (underside of the floor slab) overall because that's where the larger stones in the concrete have gathered during casting. When a nail hits a stone in the concrete, it is easy for it to "slide along" instead of breaking the stone, and that's when the nail bends.
Finally, it will NEVER work to shoot if you have washers between the sparse panel and the concrete. It must be completely solid for it to work optimally.
Conclusion: Use nail plugs. Rent a proper rotary hammer and good drill bits from Cramo instead, and you can get through both stones and rebar without problems.
I have spaced in a concrete ceiling using the following method.
1. Pre-drill holes in the gleas
2. Press up the gleas into the ceiling
3. Drill holes in the concrete
4. Lower the gleas
5. Plug the holes
6. Raise the gleas
7. Screw the gleas in place
Extremely tiring and time-consuming, but the gleas is secured well.
1. Pre-drill holes in the gleas
2. Press up the gleas into the ceiling
3. Drill holes in the concrete
4. Lower the gleas
5. Plug the holes
6. Raise the gleas
7. Screw the gleas in place
Extremely tiring and time-consuming, but the gleas is secured well.
When I thinned out my apartment I had many years ago, I used nail plugs.
1. Pre-drill the lattice so you avoid the drilling being difficult enough to hold the lattice with one hand and the impact drill with the other.
2. Hold up the lattice and drill somewhere in the middle.
3. Insert the nail plug.
4. Drill and nail in the other nail plugs in the lattice.
In retrospect, I've read somewhere that you shouldn't use plastic plugs due to the risk of the ceiling collapsing in a fire, so I probably would have used expansion sleeves if I were to do the job today.
Don't know if this helps you, but maybe for some future DIY enthusiast.
Just installed about 25m2 of ceiling in concrete. Concrete from 1967 so not particularly soft...
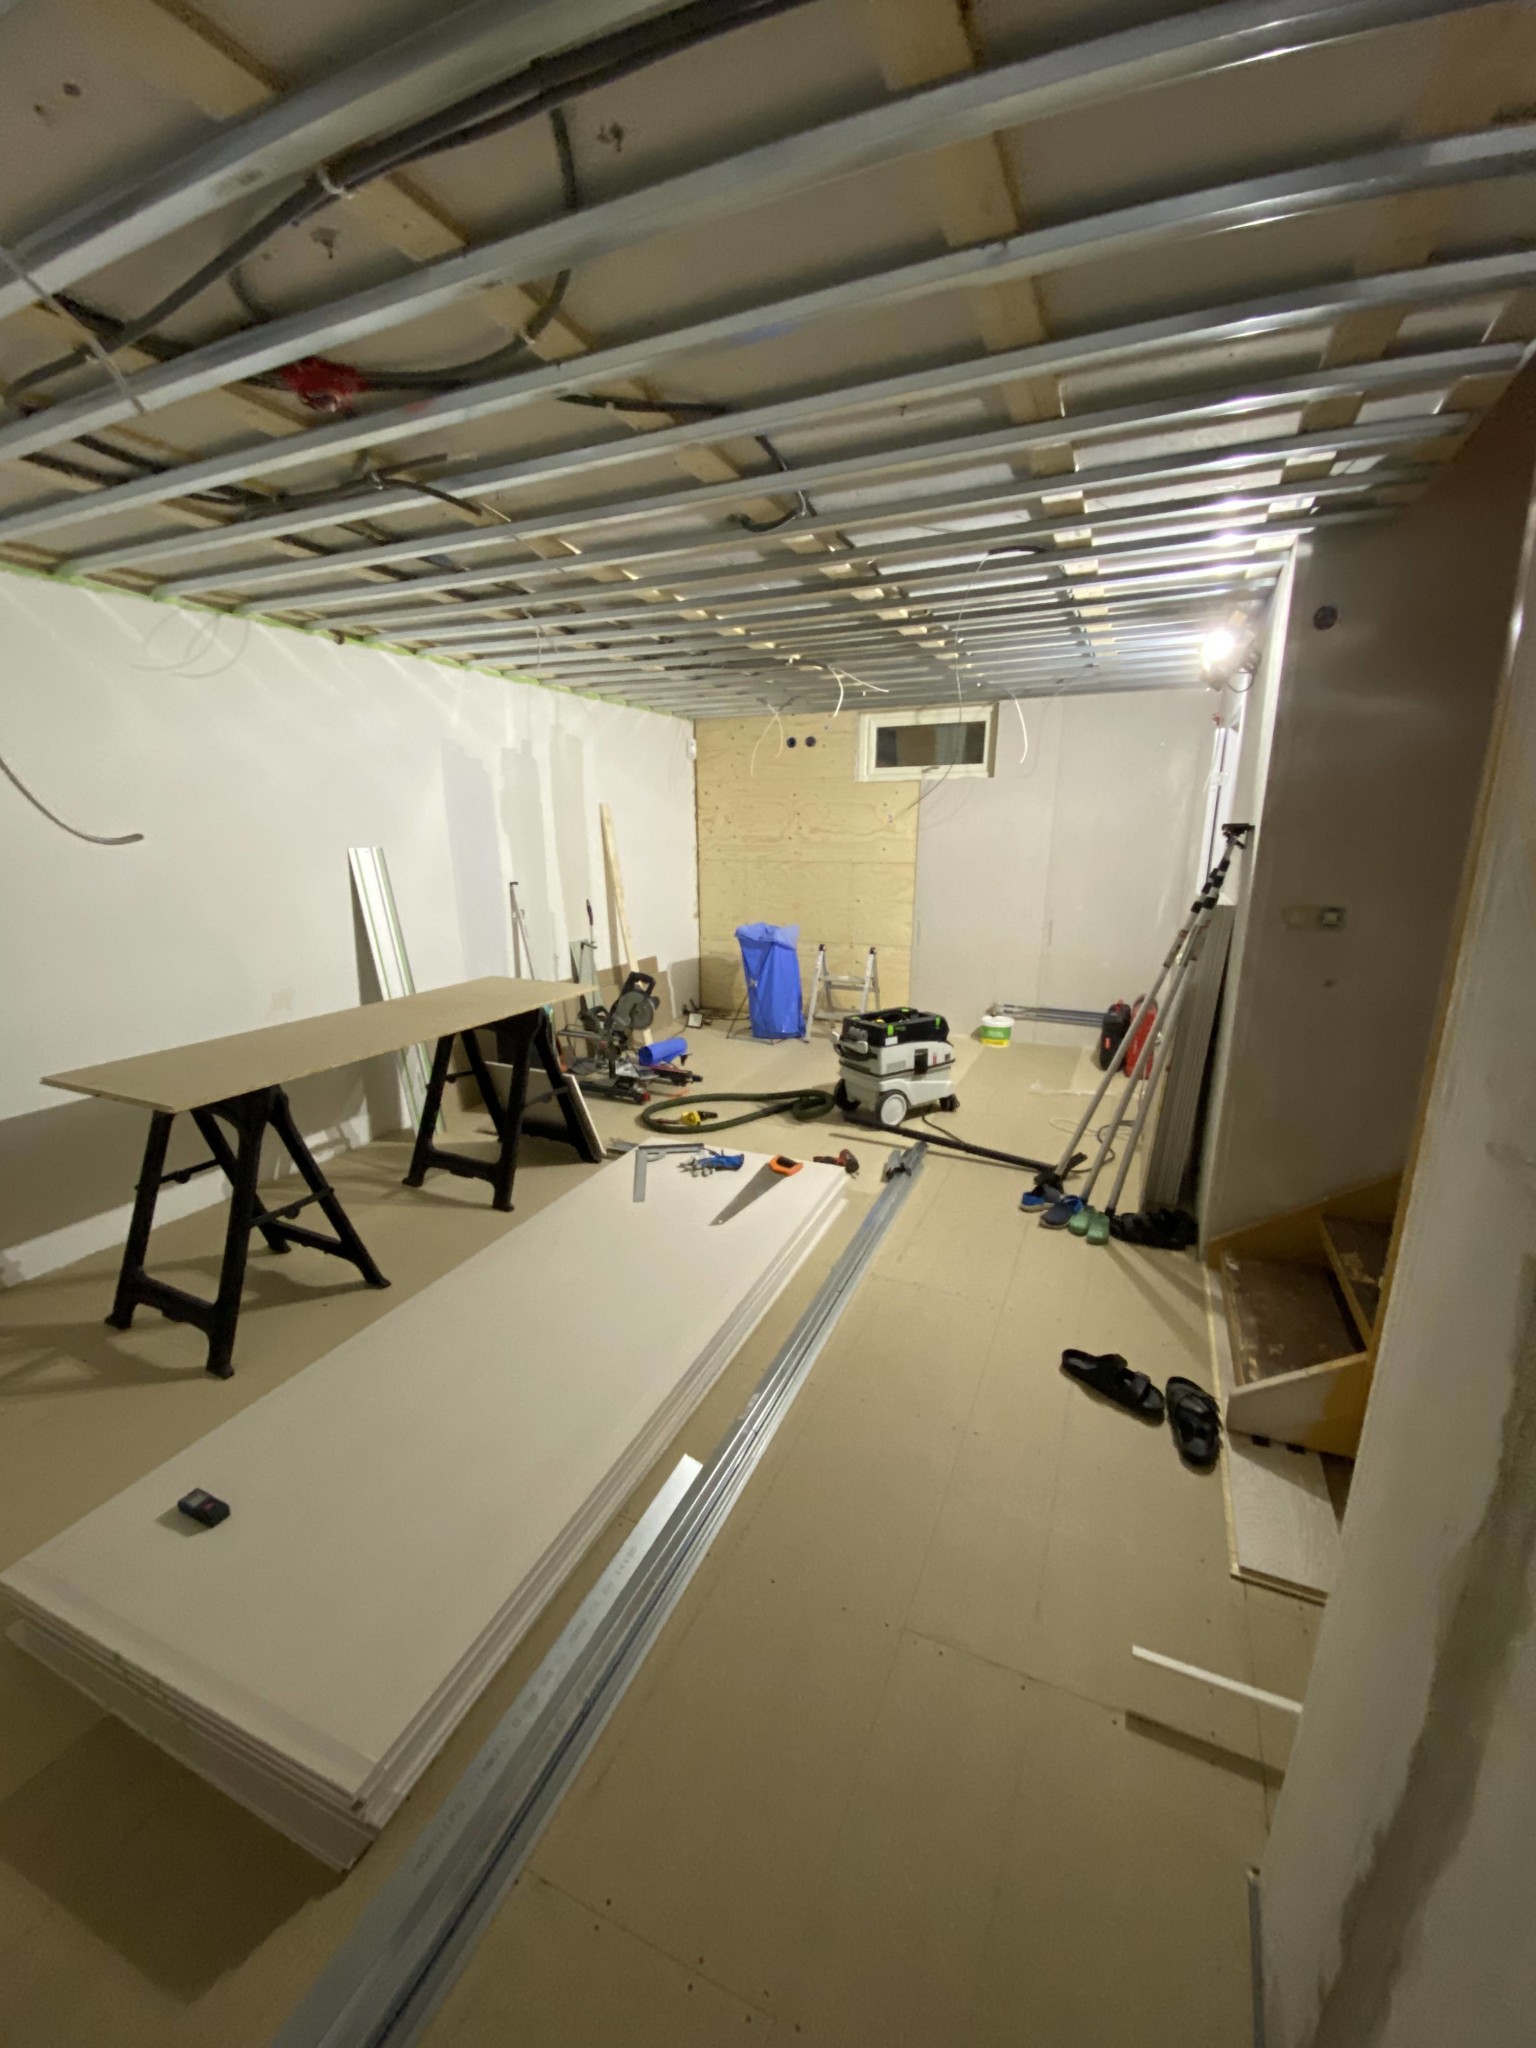
For my project, the construction height was in focus and lowering the ceiling as little as possible to accommodate spotlights. Total 60mm with plasterboard was the final result.
The solution also enabled easy electrical wiring.
Recipe:
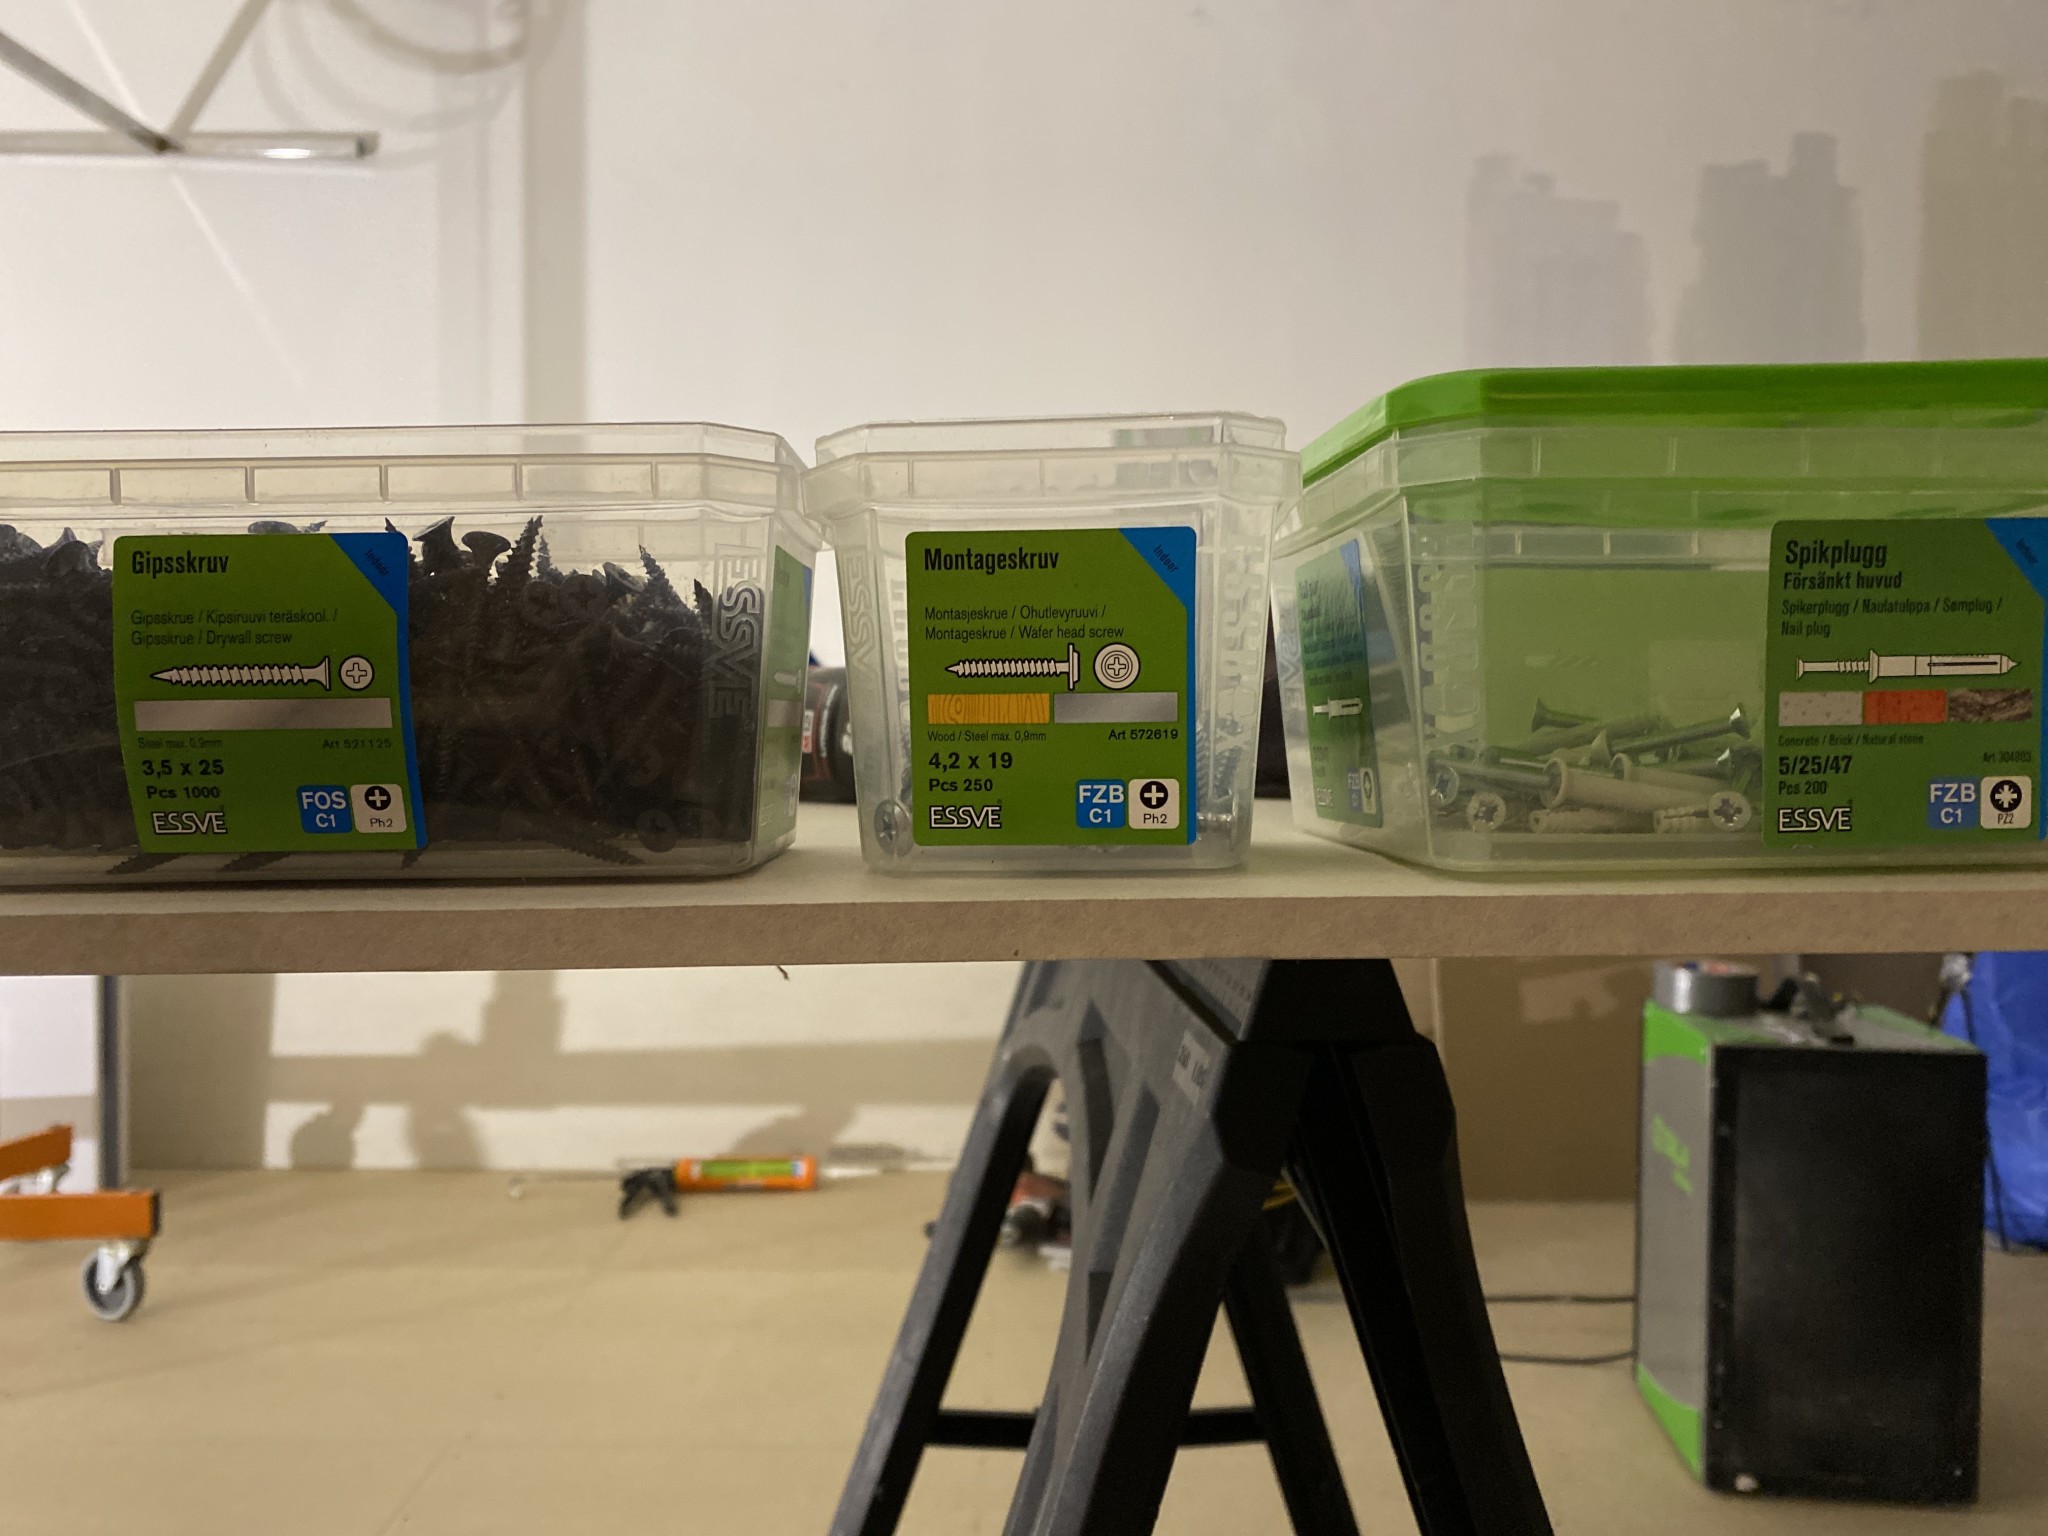
Framed at about 60 cc with 22x90 panel. Nail plugs as fasteners about 50 cc (Essve Nail Plug Countersunk Head 5/25/47). Lift the board and then drill straight through the wood with the hammer drill (5mm drill). Insert the nail plug and hammer it in. Possibly screw it in if it gives trouble.
Secondary rule Norgips S25/85 attachment to the beams with mounting screws (Essve Mounting Screw 4.2x19). 6 screws per wood beam, 3 screws per side). Just press a little with the screwdriver, the metal is thin. These were mounted 30 cc apart.
I screwed the plasterboard with Essve Drywall Screws 3.5x25. Used 15 cc, which is probably a bit too many screws, but at least the ceiling stays up.
I can take the opportunity to recommend Tesa Dust Shield. In that kit, there are 4 adjustable aluminum supports - perfect for holding up the beams while they are being fastened.
See pictures for reference on screws and results.
Just installed about 25m2 of ceiling in concrete. Concrete from 1967 so not particularly soft...
For my project, the construction height was in focus and lowering the ceiling as little as possible to accommodate spotlights. Total 60mm with plasterboard was the final result.
The solution also enabled easy electrical wiring.
Recipe:
Framed at about 60 cc with 22x90 panel. Nail plugs as fasteners about 50 cc (Essve Nail Plug Countersunk Head 5/25/47). Lift the board and then drill straight through the wood with the hammer drill (5mm drill). Insert the nail plug and hammer it in. Possibly screw it in if it gives trouble.
Secondary rule Norgips S25/85 attachment to the beams with mounting screws (Essve Mounting Screw 4.2x19). 6 screws per wood beam, 3 screws per side). Just press a little with the screwdriver, the metal is thin. These were mounted 30 cc apart.
I screwed the plasterboard with Essve Drywall Screws 3.5x25. Used 15 cc, which is probably a bit too many screws, but at least the ceiling stays up.
I can take the opportunity to recommend Tesa Dust Shield. In that kit, there are 4 adjustable aluminum supports - perfect for holding up the beams while they are being fastened.
See pictures for reference on screws and results.

Last edited:
What did this solution cost? I'm thinking of everything from frames to electricity to the finished surface.N norl1ng said:Not sure if this helps you but maybe some future home DIYer.
Just put up about 25m² of a ceiling in concrete. Concrete from 1967 so not particularly soft...
For my project the construction height was in focus and lowering the ceiling as little as possible to fit spotlights.
Total 60mm with plasterboard was the end result.
The solution also made electrical wiring easy.
Recipe:
Framed about cc 60 with 22x90 panel. Nail plug as fastening about cc 50 (Essve Nail Plug Countersunk head 5/25/47).
Put up the board and then drill straight through the wood with the hammer drill (5mm drill).
Insert the Nail Plug and hammer it in. Possibly screw it in if it gives trouble.
Secondary frame Norgips S25/85 fastening in the beams with mounting screws (Essve Mounting Screw 4.2x19). 6 screws per wood beam, 3 screws per side). Just press a bit with the screwdriver, the metal is thin.
These were mounted cc 30.
I screwed the plasterboard with Essve Plasterboard Screw 3.5x25. Used cc 15 which is probably a bit too many screws but the ceiling is at least in place.
I can take the opportunity to recommend Tesa Dust Shield. In that kit are 4 adjustable aluminum props - perfect for holding up the beams while they're being fastened.
See pictures for reference on screws and result.
Click here to reply