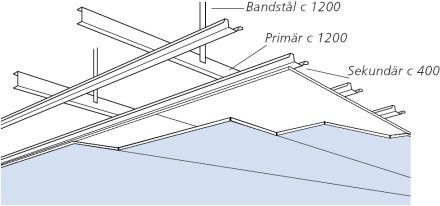
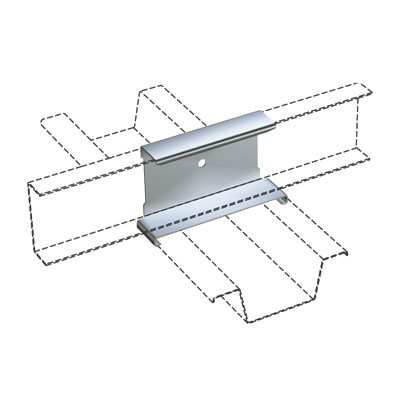
The ceiling will be lowered using Gyproc SK70, primaries and secondaries. I'm not sure if this image contains the correct product name, but the concept seems to match.
I went to Beijer and got everything with the help of the salesperson. The room is a rectangle measuring 265 x 420 cm. The salesperson gave me 5 primaries at 3800 cm and 8 secondaries at 3500 cm (hat profiles) and said, so now you have minimal waste but still more than enough.
The plasterboards will be 120 cm wide; these should be fastened with screws at 40 cm intervals on the secondaries, right? 420 / 8 = 52.5 cm, and that doesn’t fit, does it? So I guess I have to adjust these to 40 cm in width.
Each secondary's joint will be approximately 85 cm long, are these long enough to be used if I need more than 8 in width?
A few questions:
- Should I measure 40 -> 40 -> 40 -> 40 -> across the width of the secondaries?
- What distance should I set the primaries at widthwise?
- Should the primaries or secondaries run along the room's longer or shorter side?
- Should the primaries be fastened to the SK70 with assembly screws first (by the way, should these screws be placed from underneath or above and with one or two screws at each attachment?), and then relieve it with perforated strip?
- How many perforated strips might be needed per joist in this room, and how do I attach this to the primary, with two assembly screws on the rail and two attachment nails in the ceiling per perforated strip? Or is that a bit overkill?
- Do I need to drill anything to get the assembly screws into the primary, or can they bore through on their own?
Many questions, I know I would be extremely grateful for answers to at least a couple of these
Hello and welcome to the forum.
I will try to help you as best as I can from my tablet.
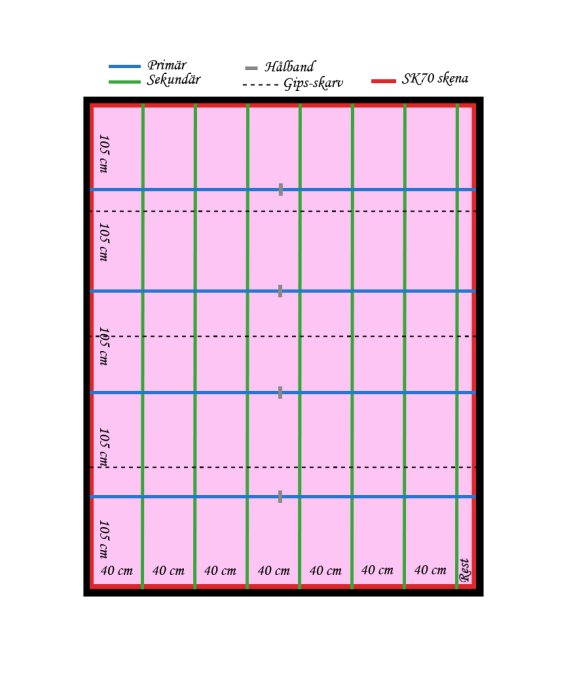
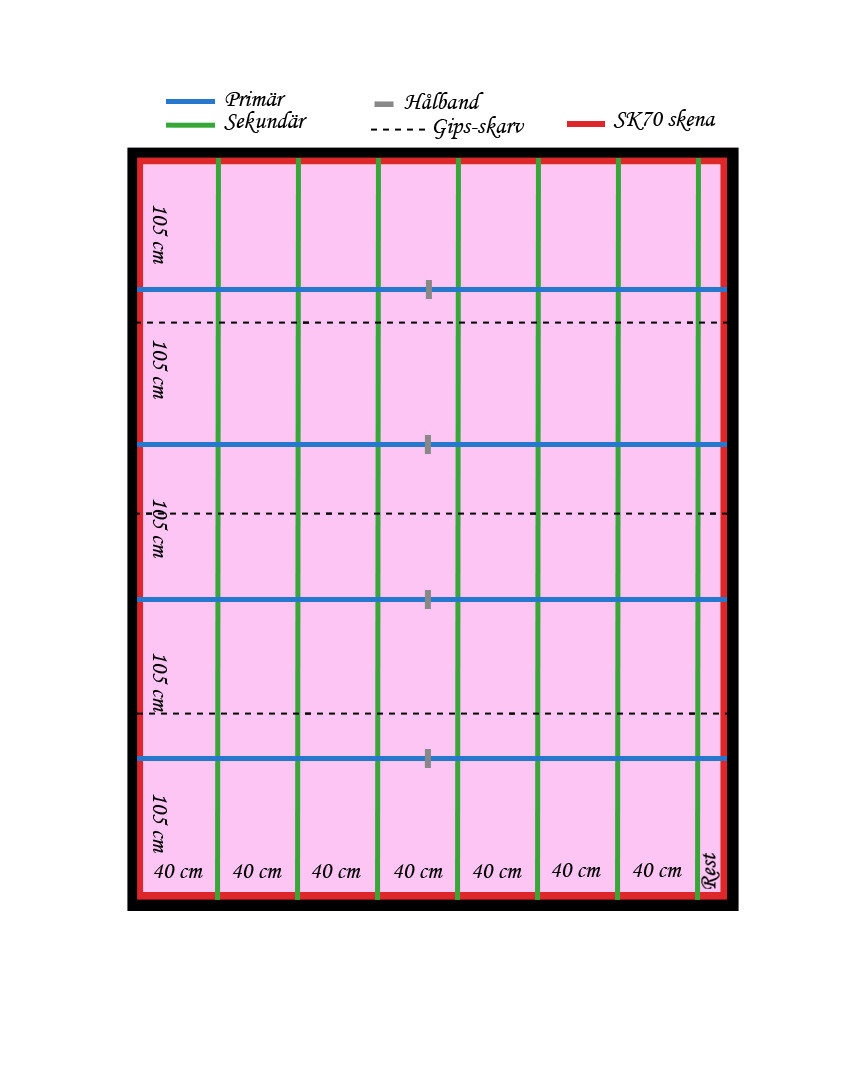
First, I would like to say that Beijers has made a mistake regarding your material. They intended to place the gypsum lengthwise in the room. Which I think is wrong because if you set it in the other direction, you can use 2.7 m gypsum and avoid having seams in the length. Enough about this. Here's how they thought you should do it.
1. The primaries are intended to be set on the shorter length of 2.65m. You fasten the first to the wall, then place the rest with 1.2m center to center. The last one you attach to the wall just like the first one. One metal strip in the middle is enough, with 2 screws.
2. You attach the first of the secondaries to the wall lengthwise in the room, 4.2m. The next one you place 40cm to center measured from the wall, then fasten the rest c/c 40. The last one you attach to the wall. 2 screws in each hat profile against the primary rule, you screw from below with self-drilling screws.
Since you wanted the primaries with 120 cm in between, only three would fit in the room, so I reduced it to 105.
The drawing is not completely to scale, and it ends up being 3.5 plasterboards per layer, not three as in the picture.
But then I would have had to splice the plaster on the long side instead?
How do I attach the band steel? Should it be attached to the primary itself or looped around and just secured to the ceiling?
Is just one band steel in the middle really enough? Feels like I would want two per primary.
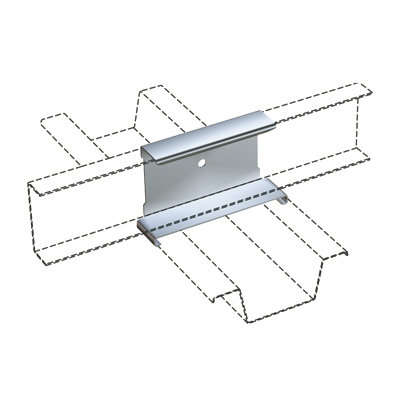
Maybe a bit advanced, but I've used these with good results between primary and secondary. The clips come from Lindab and you can easily just press the primary and secondary together without any screwing - Although I usually do put a screw in the primary anyway.
If you mark the CC on the primaries before mounting and attach a clip, you simply snap the secondaries in where they should be. Easy!
More steel bands don't hurt, and two per primary only make it more stable - You just wrap the steel band around the primary and screw it in. Attach to the ceiling in a suitable way.
It looked nice!
Simple is always welcome, yes Lindab recommends replacing every fifth clip with screws so it's not wrong to put a screw in each.
Thanks for the info about the steel band!

 I would be extremely grateful for answers to at least a couple of these