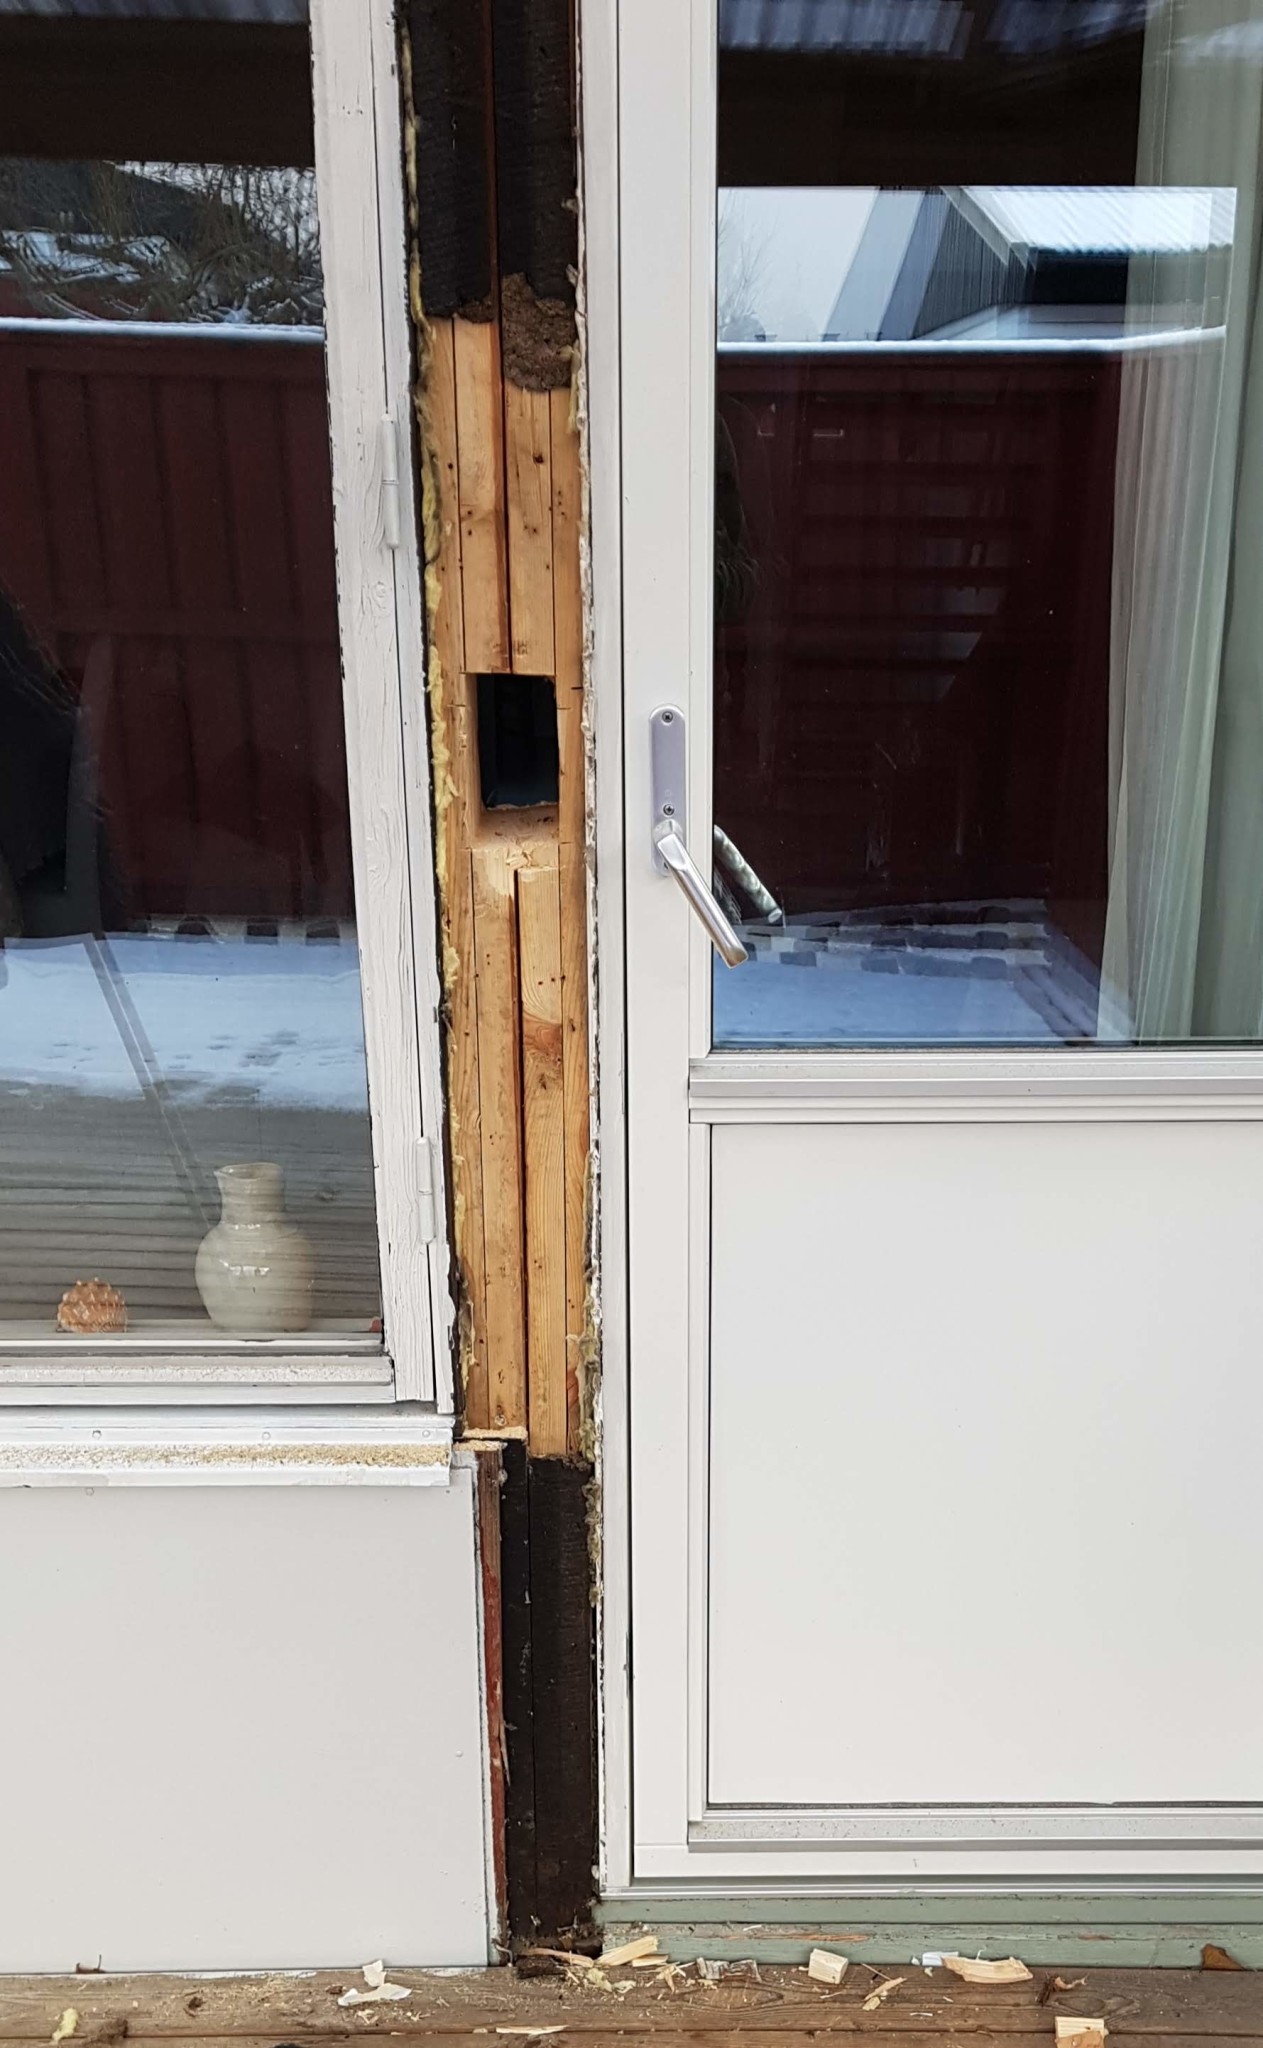
My mother was out with the dog in the forest and lost the key this weekend, and the locksmith didn't have time (until next week), so I had to find an alternative way in. There were probably other good ways, but this is how it turned out. The wall can be 5" thick and I managed to saw through with a jigsaw. Now my question is:
Do I need to offload the ceiling and replace this stud, or is it enough to place/wedge in a block and attach a wider board on the outside (I'm thinking a wider one replaces the two battens that should be on either side, and I nail it to the studs) on the outside?
Unclear what I mean? Feel free to ask questions. Thanks,
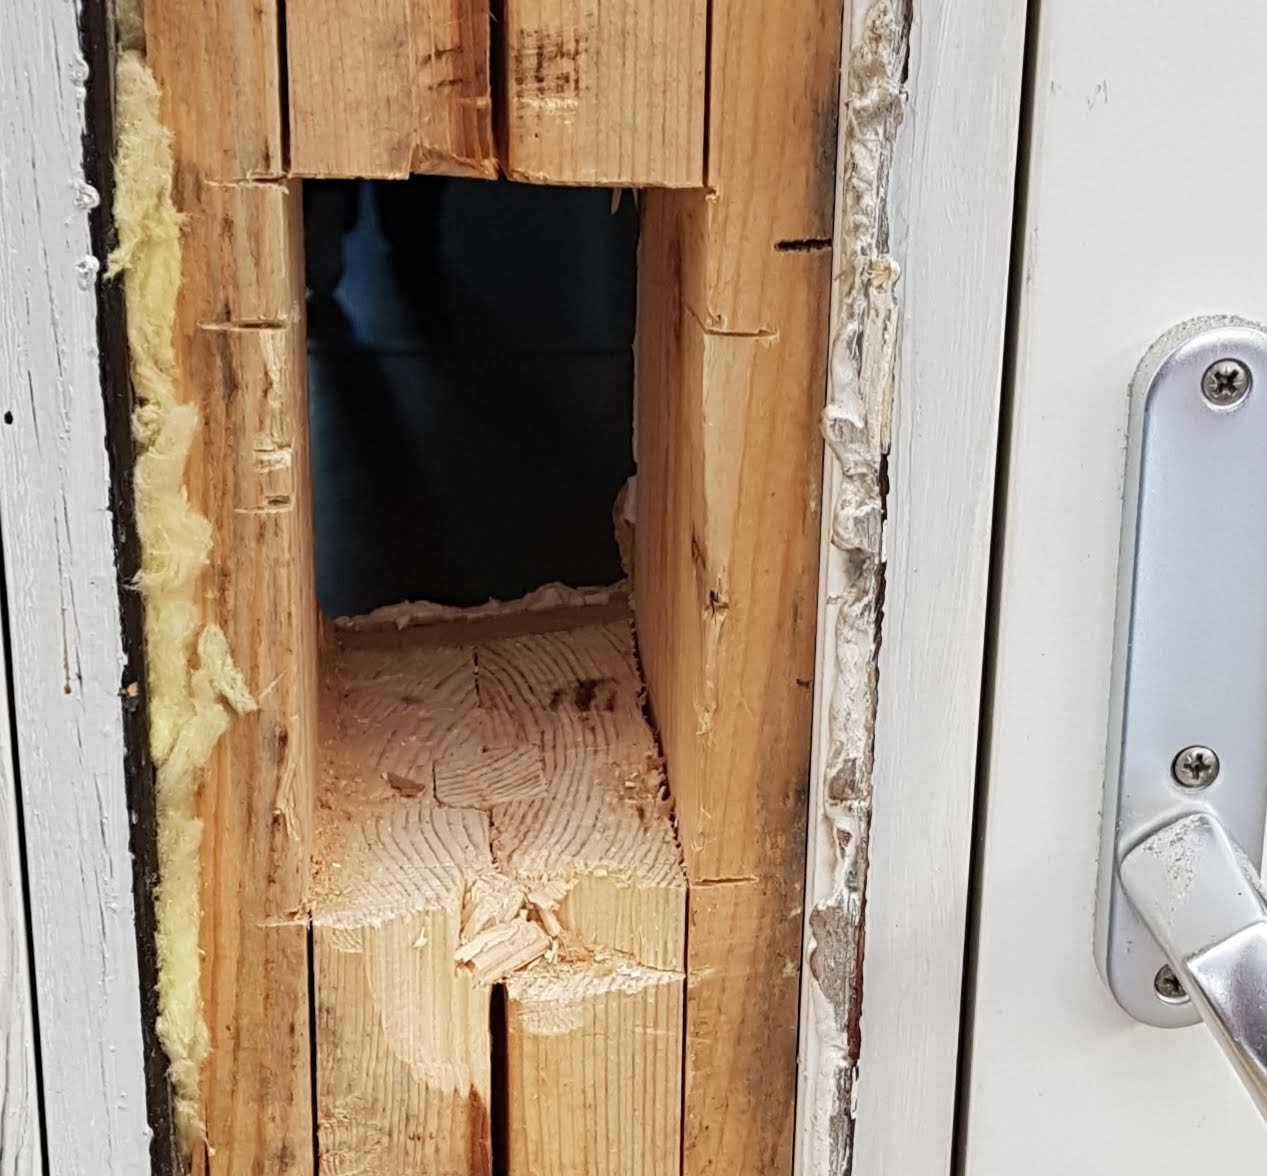
@Stefan N Yes, I only cut the studs in the middle. I only opened up where I needed to go in and didn't look higher up at how it looked. Are they load-bearing (supporting) or maybe just something nailed into the stud in the middle to hold the karnarna in place?
Saw into pieces that fit in the hole, but about 6 mm too short, plenty of wood glue on them and 4 wedges that are not too steep, 2 on each side, which are driven in and fastened upwards with glue on them, then you are back to square one in load-bearing.
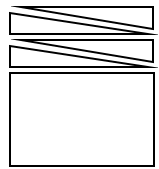
Precis, then it will be bearing and as strong as before the cutting. It's good to have several wedges so the contact on everything becomes as large as possible. If you have more wedges, you can increase the spacing to 10-15 mm, make sure the wedges have a slight angle, it is best.
It is for the wedges to fit as tightly as possible against each other in the entire space, hence they shouldn't have too steep of an incline and there should be as little air between them as possible. Hammering from two sides is perfect and it doesn't matter if there are multiple wedges, what counts is the contact surface.
So
1. First, I cut a board (or probably 2 since the hole is wider than 2”) and glue them together so they form a block that is pressed into the hole widthwise. Above the block, there is space (about 15 mm) for wedges.
2. I cut 4 wedges that are thin, spread a good glue on all sides of the wedges, and insert them from each side of the hole until it is completely full.
If this is to be tight and good, there will probably be some wedge sticking out on both sides, which I will then simply knock off before putting the panel back on.
The fact that four studs have been used for this post indicates that the constructor assessed the post's load as significant, and that the post's so-called buckling length is quite large due to the surrounding windows. Right now, it's calm because no snow has arrived yet, but it won't be long.
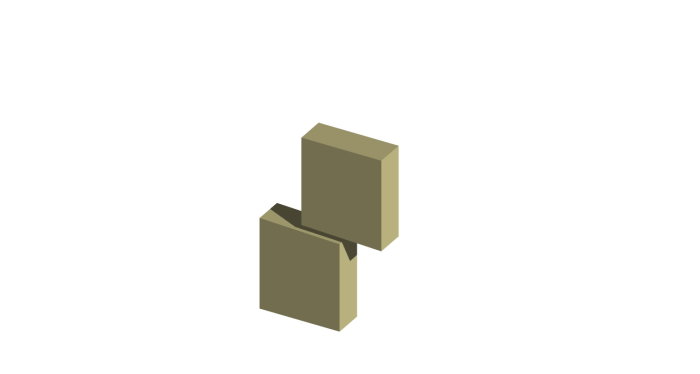
Since the post is primarily subjected to compressive forces and the outer studs are intact, it can be repaired with smaller pieces that are wedged in. To avoid settlements, I believe each stud should be repaired separately. The best way is to use two slightly wedge-shaped pieces per stud where the beveled surfaces face each other to achieve maximum clamping. (See the image below). I think small, thin wedges should be avoided, and there should also be no air in the wedging. Glue is not really needed; it is better to lock them mechanically. However, a thin layer of glue can function as a lubricant but should not be applied until it has been confirmed that the wedges are appropriately sized.
That's correct, and you should tap in the wedges so they bite. You will need to tap a little on each side until you can't get them in any further, then wait a day, preferably 2, so the glue has time to dry properly. It will turn out well.
The use of four studs for this post is a sign that the designer has deemed the post's load to be significant, as well as that the post's so-called buckling length is quite large due to the surrounding windows. Right now it's calm as there hasn't been any snow, but it won't be long.
Since the post is primarily subjected to compressive forces and the outer studs are intact, it's fine to repair it with smaller pieces that are wedged in. To avoid settlement, I think each stud should be repaired separately. The best approach is to use two slightly wedge-shaped pieces per stud with the beveled surfaces facing each other to achieve maximum clamping. (See the image below). I think you should avoid small thin wedges and there shouldn't be any air in the wedging process. Glue is not really needed; it's better to lock them mechanically. A thin layer of glue can act as a lubricant, but it shouldn't be applied until the wedges are confirmed to be the right size.
[image]
Thanks.
So how do I mechanically lock the wedges?
From the inside, I probably can't fit anything other than a metal plate or similar, but it will be difficult to cover it with putty, right? On the inside, there is only a bit of masonite on the studs and then wallpaper.
On the outside, however, I can attach something more stable. Could I pound in those two wedges and then screw them into the sides of the stud already there? That should hold them in place. Then I could screw the cladding board into the wedges (which would also be screwed all the way up)?
The best is then to use two slightly wedge-shaped pieces per board where the beveled surfaces are facing each other for maximum clamping. (See image below).
[image]
Now we've talked during work coffee break and we're not completely in agreement on this issue. Why should I cut two pieces with an angle instead of one (for each board)?
Wouldn't it be more stable with a whole piece, pounded in and glued at the bottom and top?
Vi vill skicka notiser för ämnen du bevakar och händelser som berör dig.