297 views ·
3 replies
297 views
3 replies
How to repair and plaster interior walls in a basement floor?
Hello.
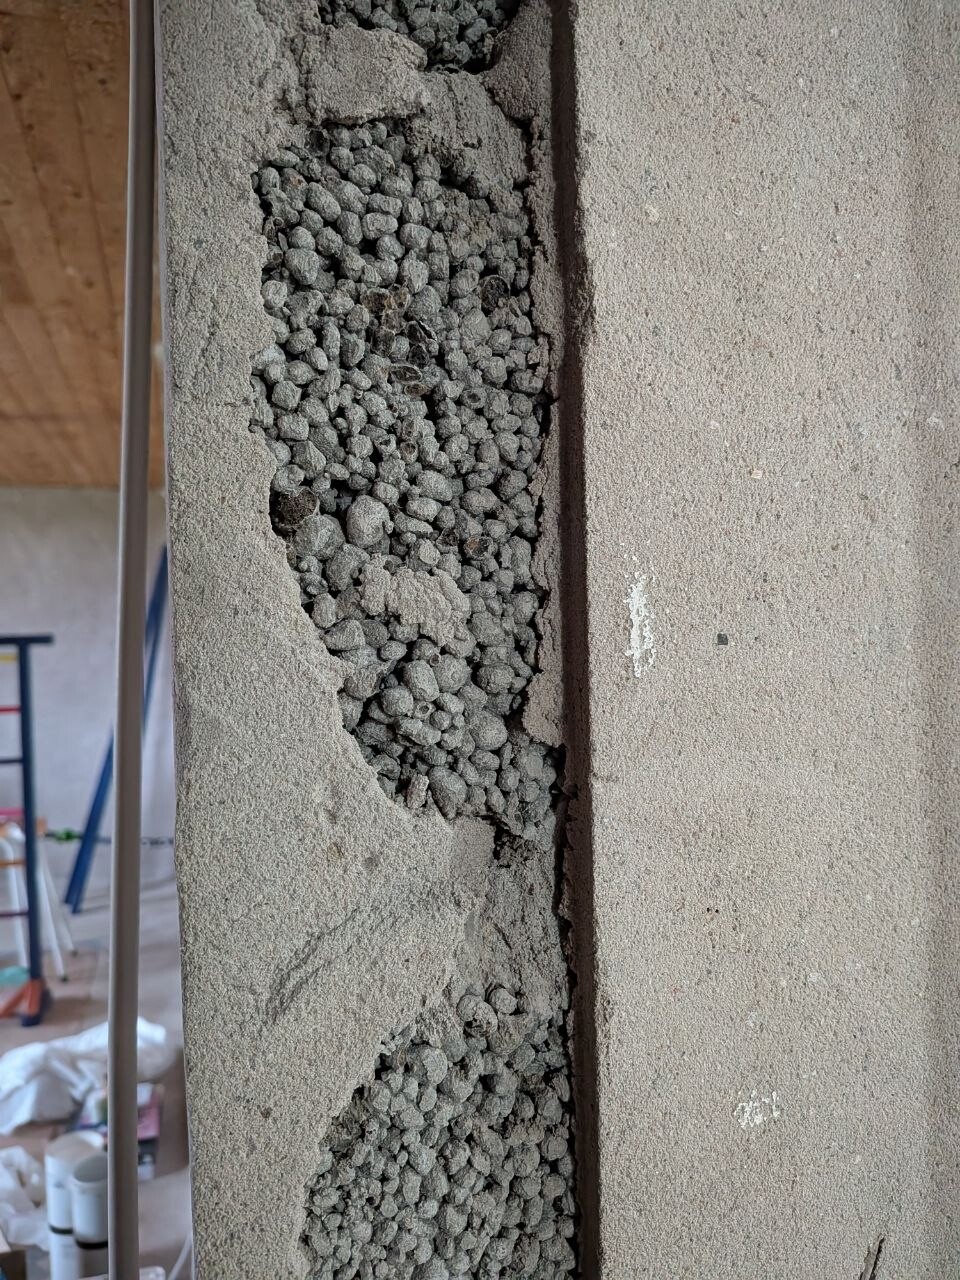
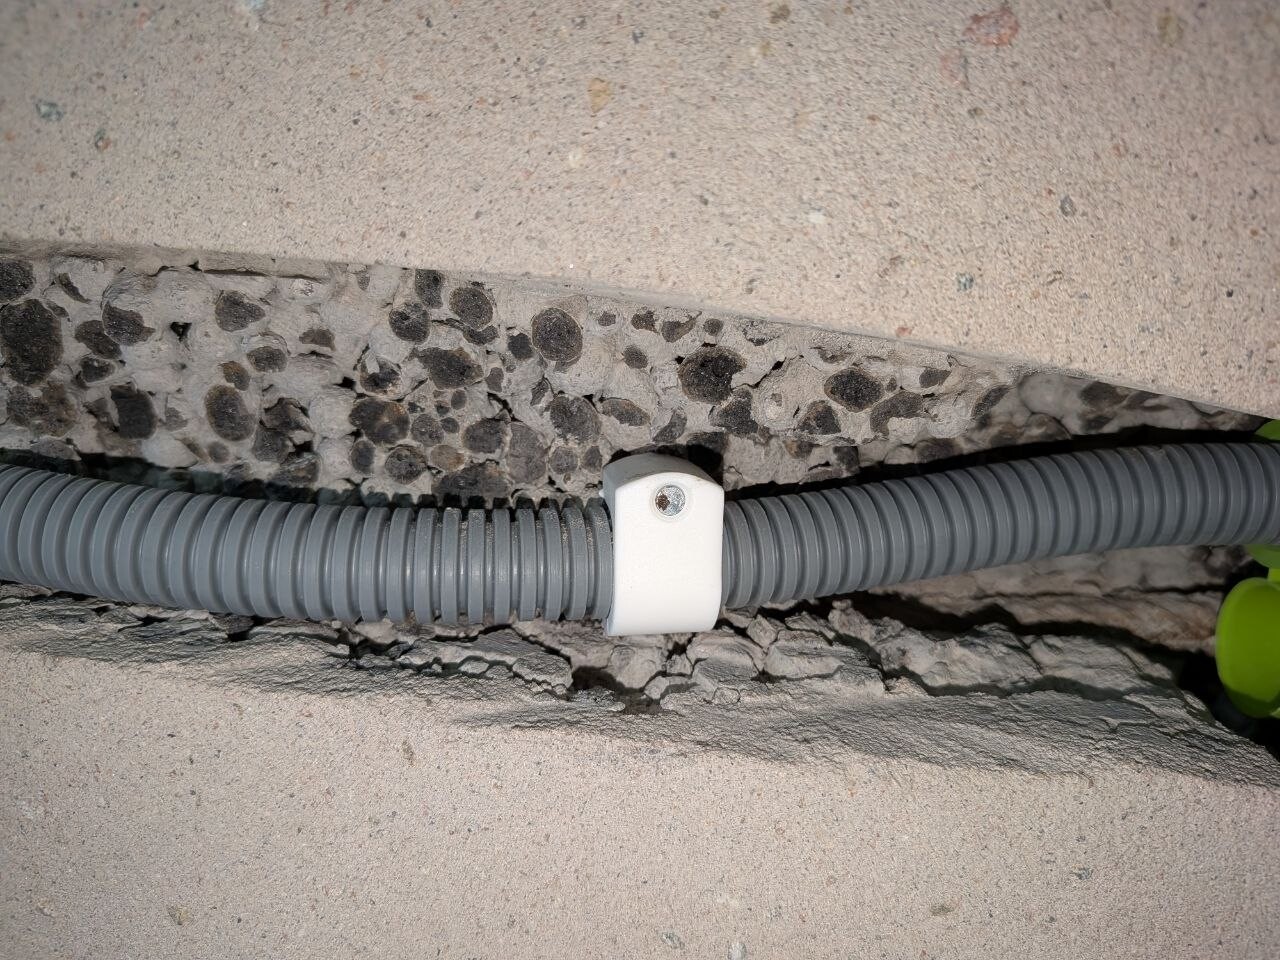
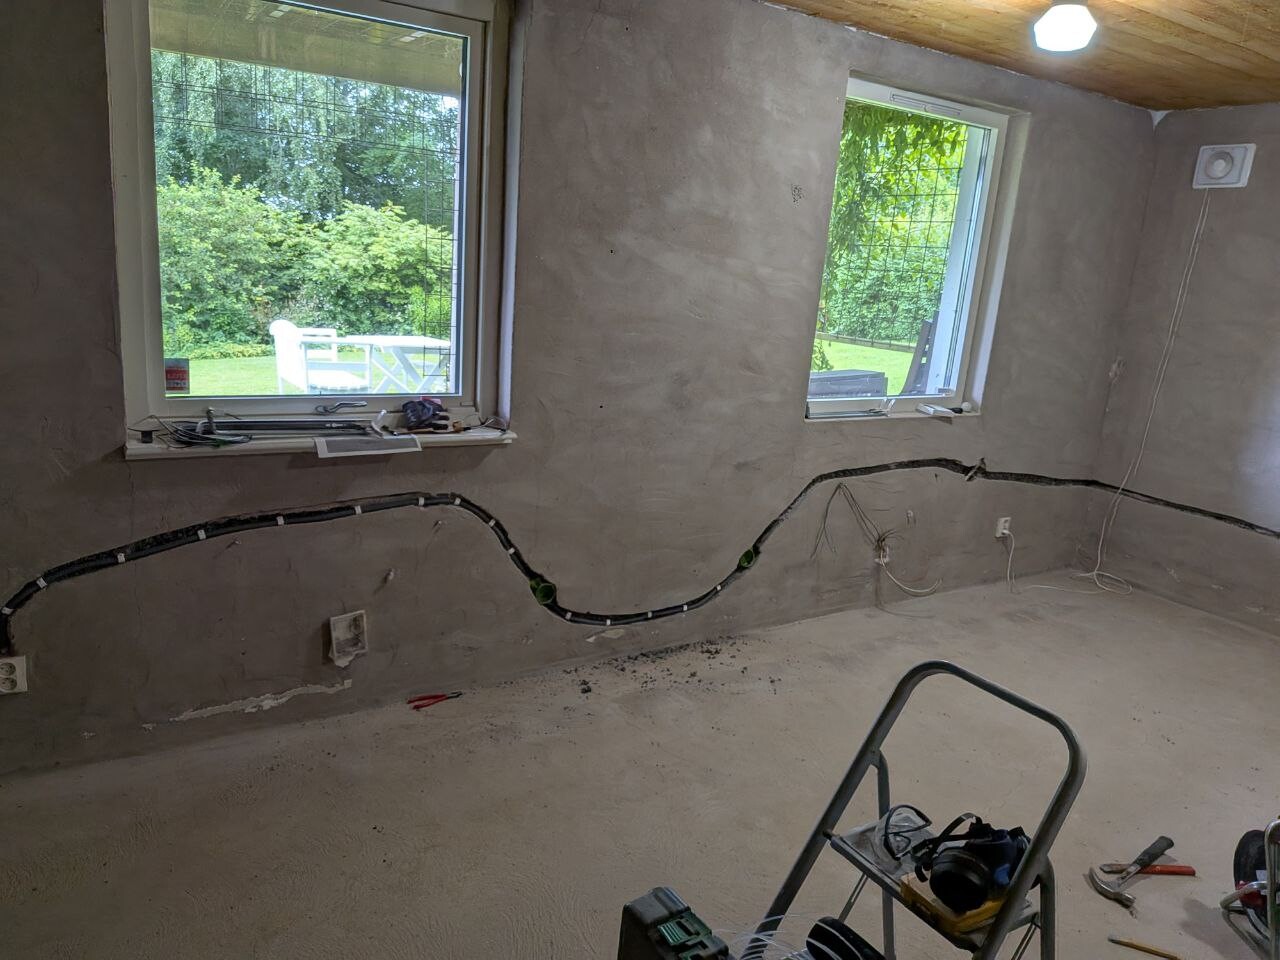
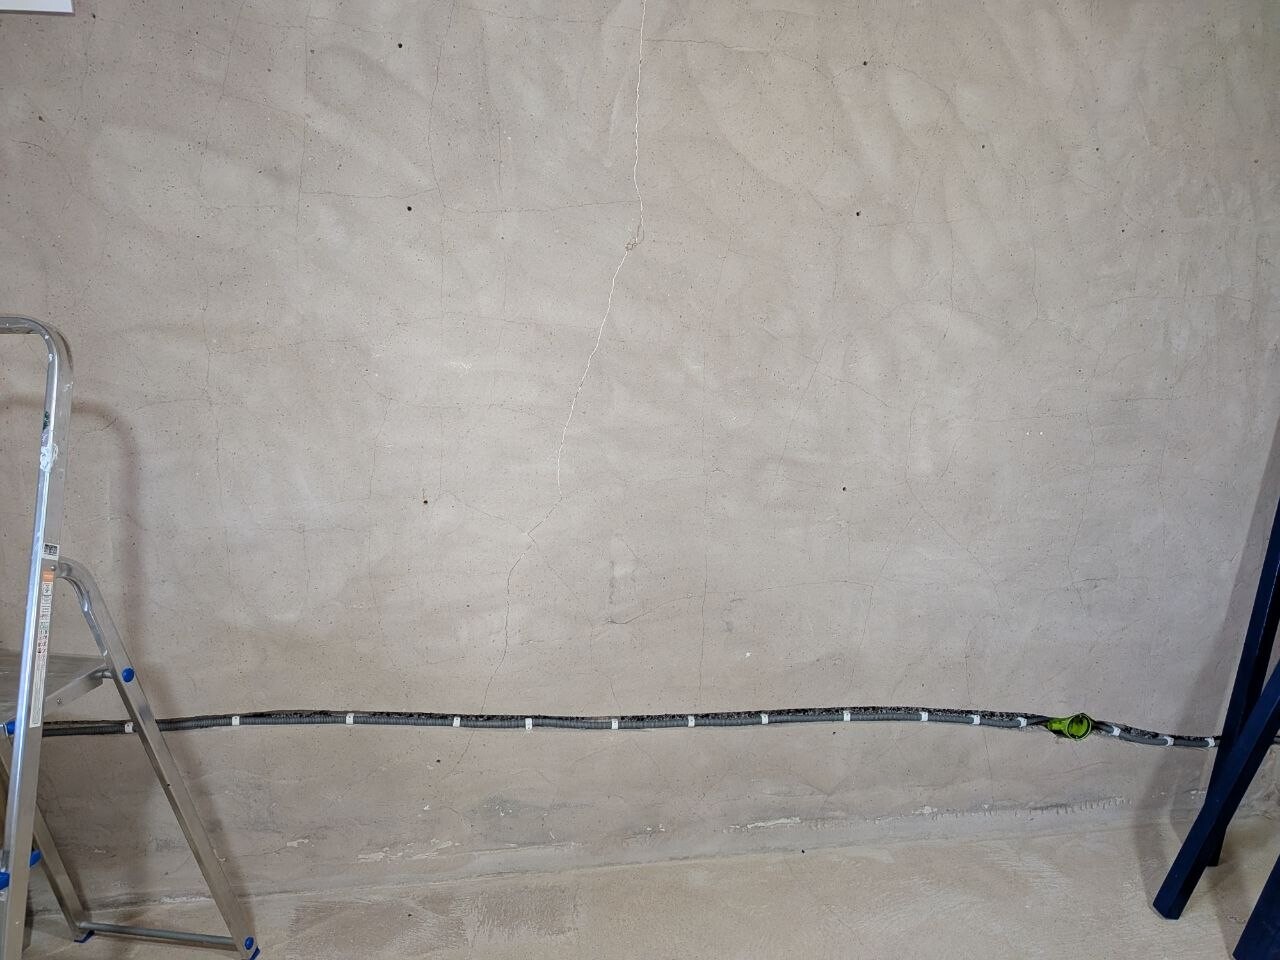
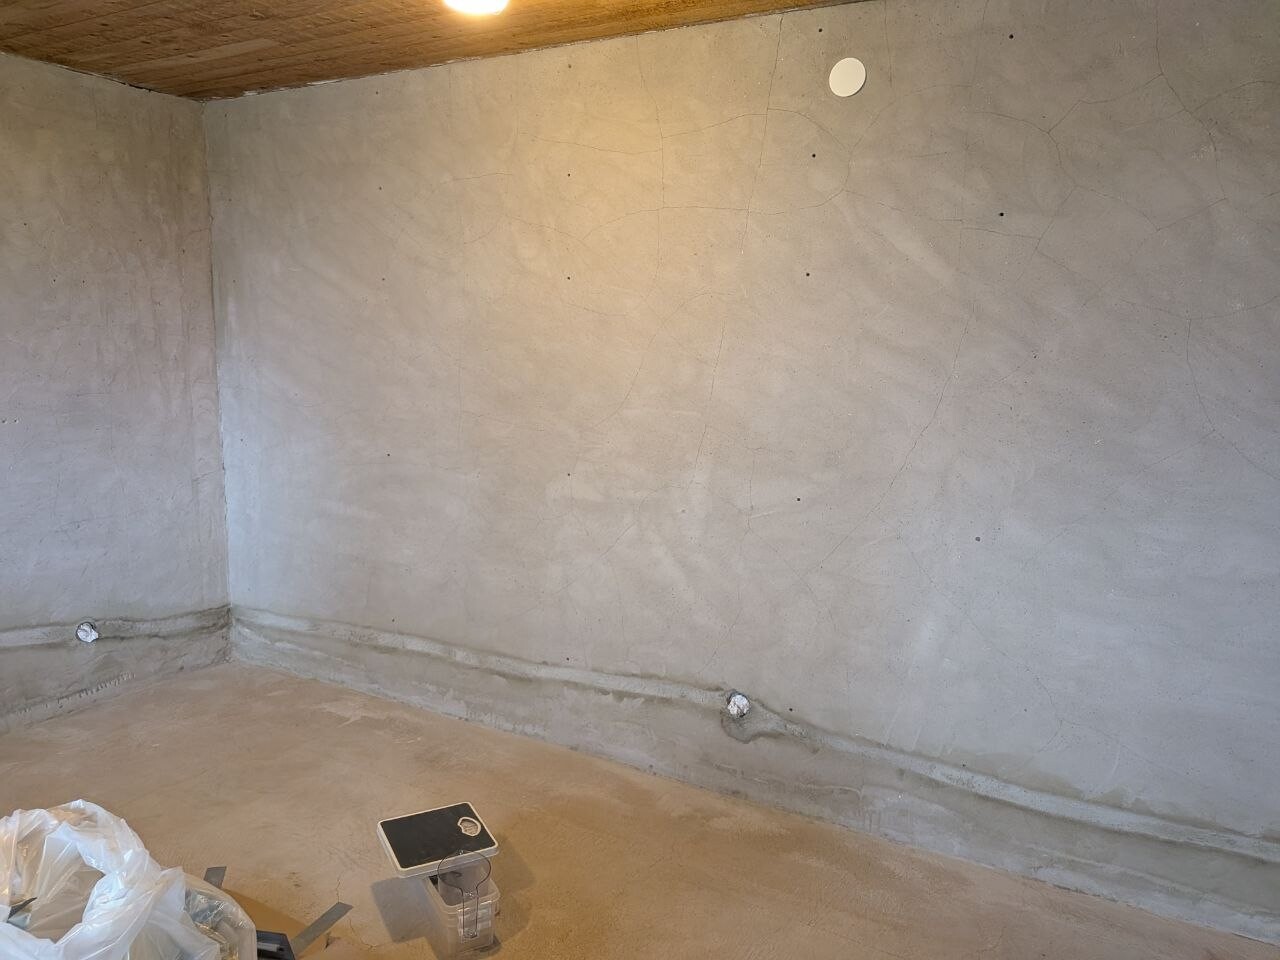
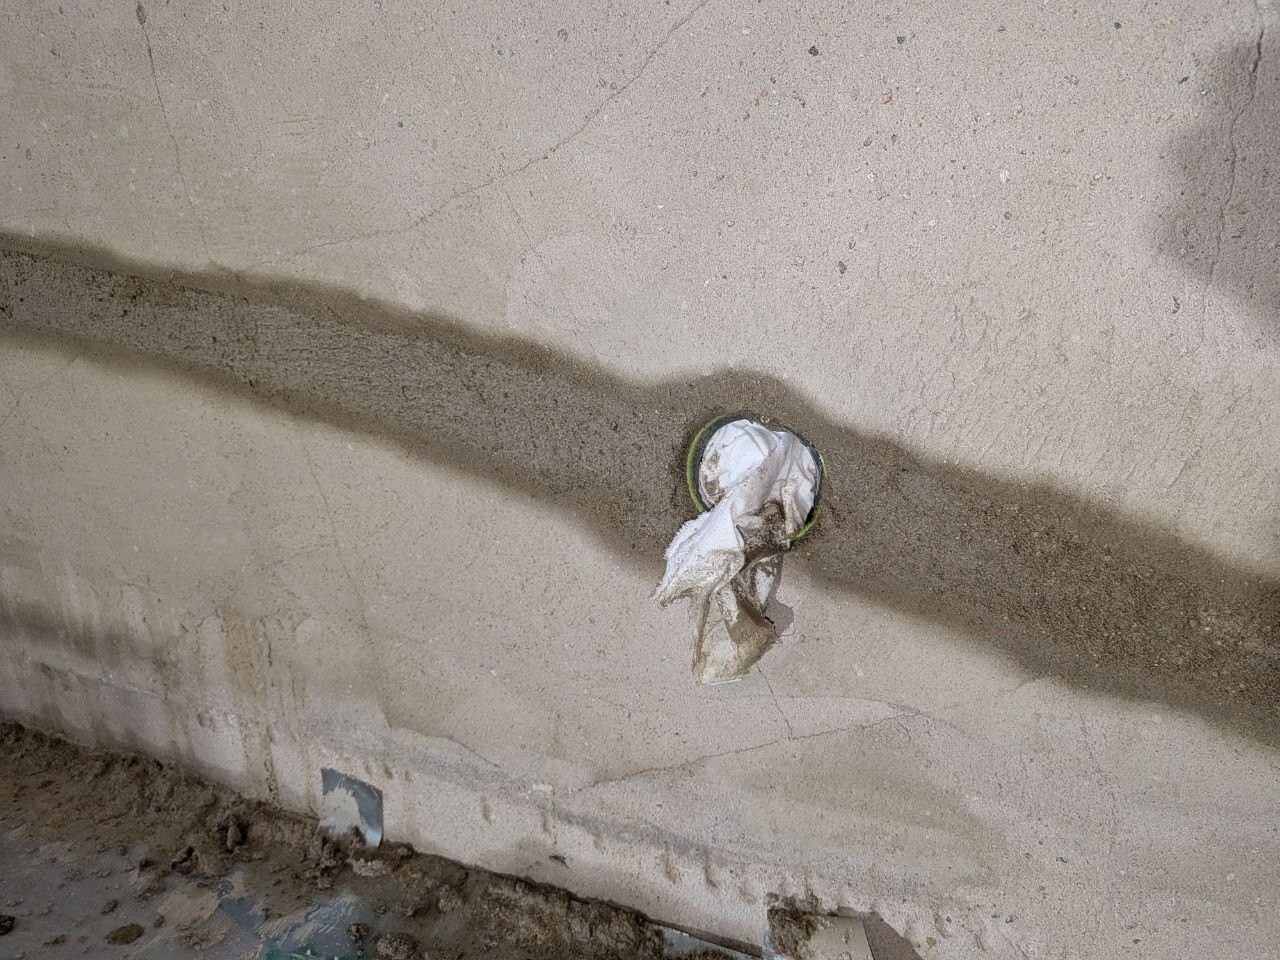
We are in the process of renovating our split-level basement due to typical moisture issues (built in 1978). Wallpapers, over-insulated floors, and paint have been mostly removed (only the WC/D remains). In one of the rooms, the office, additional electrical boxes and flexible conduits have been embedded.
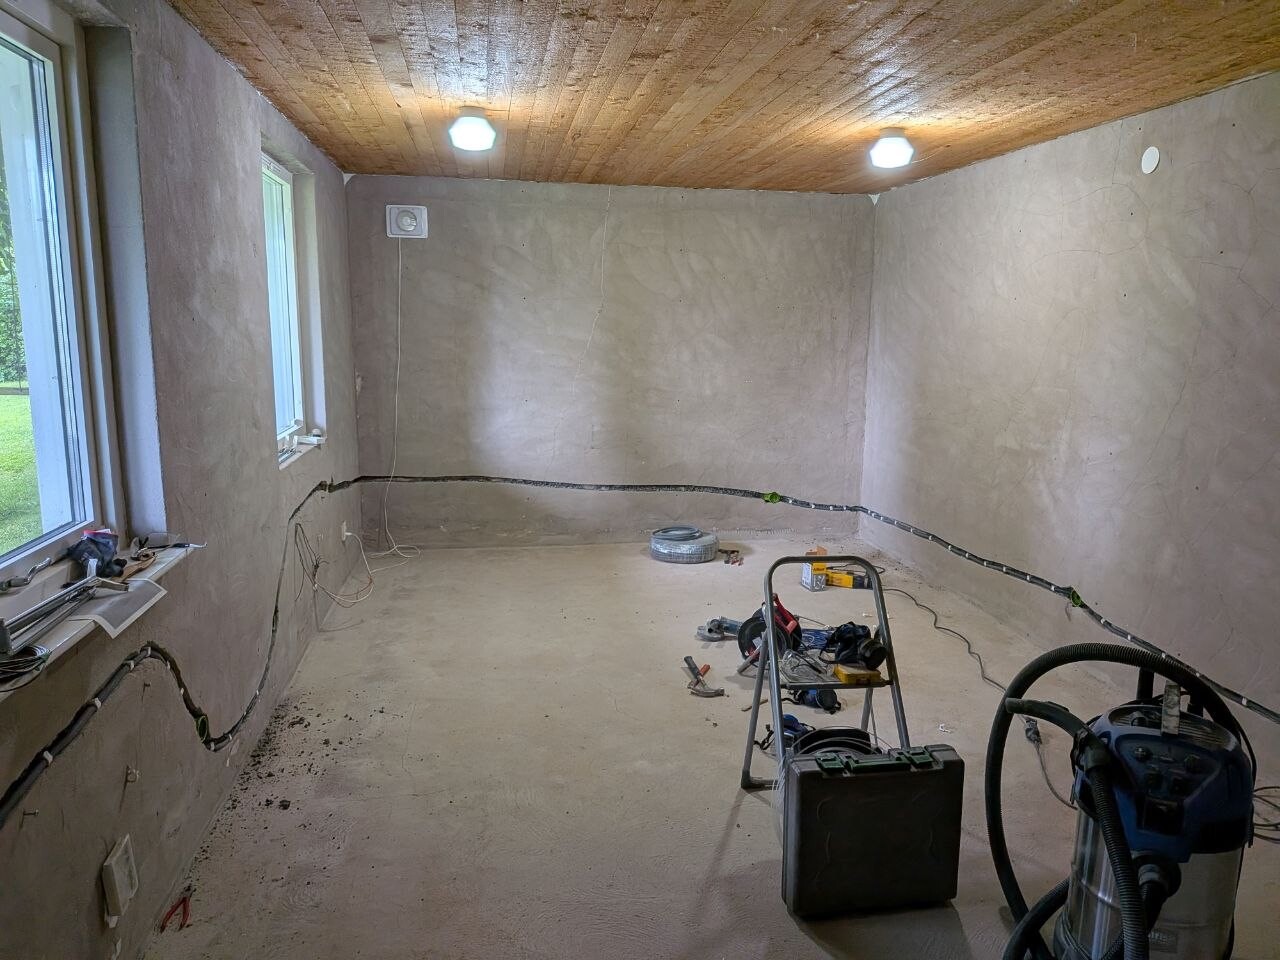
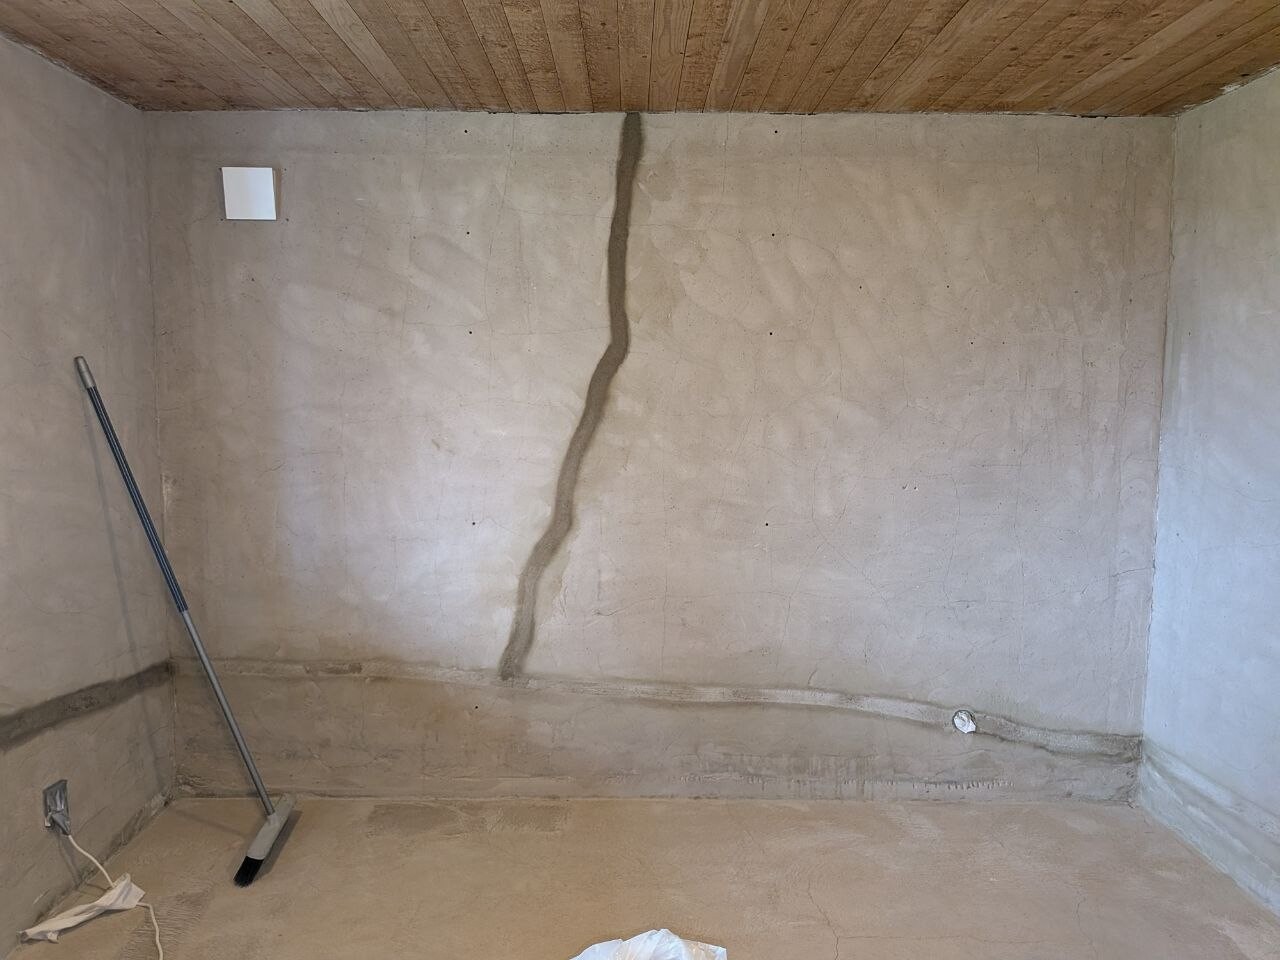
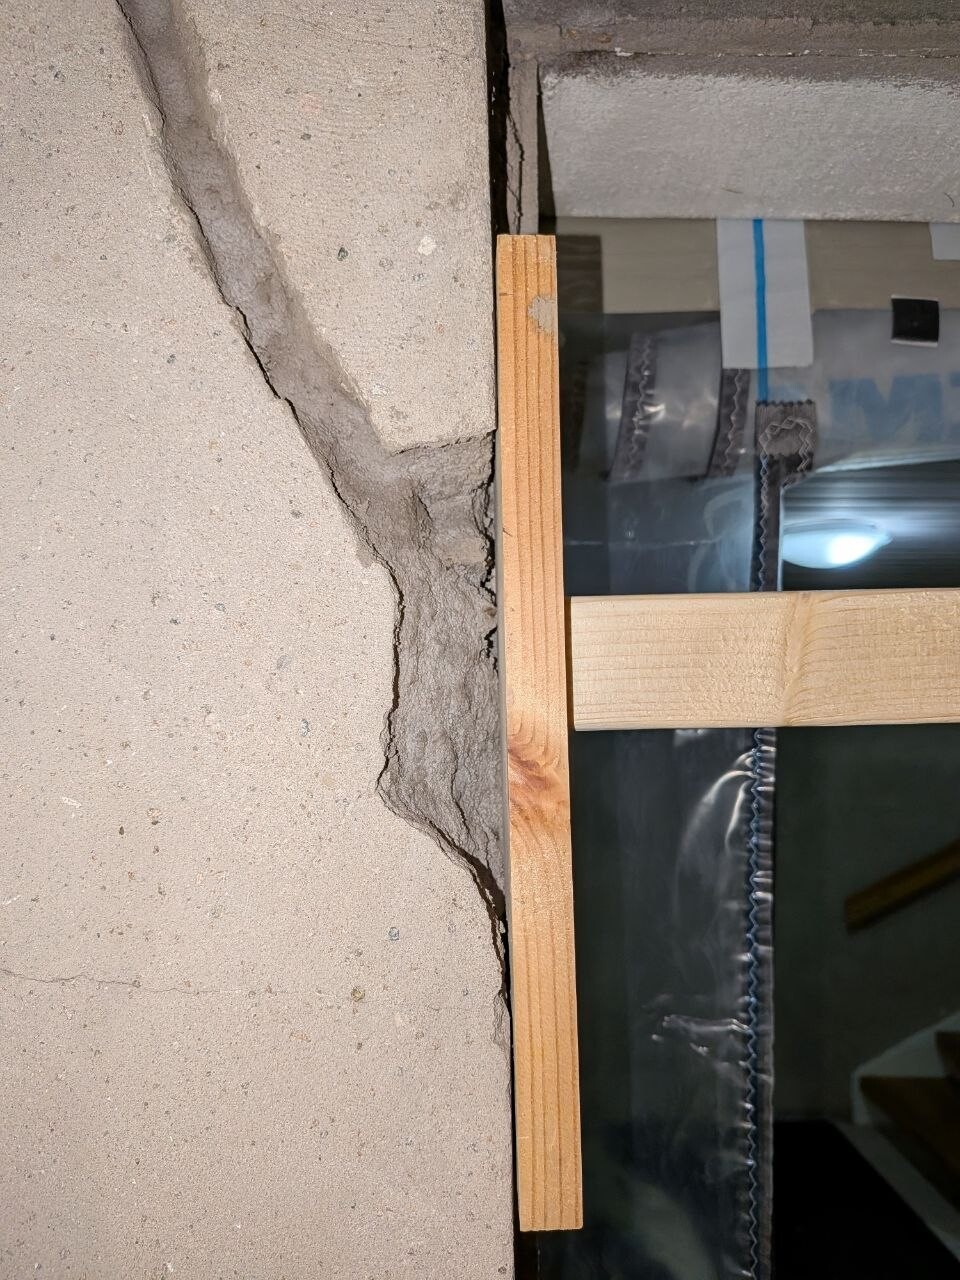
The office is the first priority for completion. The grooves in the existing plaster need to be filled and then the walls need to be replastered because they have become uneven when the paint was milled/flexed off and they have many cracks in the outer layer of the plaster (they are not structural settlement cracks).
After getting a quote from a mason, we have decided to try it ourselves first. Hiring contractors for the entire floor of 115 sqm is too expensive, even though it will be done in at least three stages. The company that was here and provided a quote suggested that the walls must be meshed before new plaster is applied to avoid new crack formation.
The slab and basement wall are uninsulated and the drainage is original (therefore poor and will need addressing eventually), so everything needs to withstand additional moisture and be vapor-permeable. The basement wall is made of lightweight clinker/leca blocks. I don't know what plaster is on it today, but it's at least not lime plaster.
What we need help with is:
1) What type of mortar is suitable for repairing the grooves?
2) Should we prime the grooves and if so, with what?
3) Is meshing really necessary?
4) What type of mortar should be used for plastering? Does it depend on whether it's meshed or not? Prime or water it?
5) We want a smooth and even surface, is a final plaster necessary and if so, what type of mortar for that, or can one type be used for the entire walls?
We will follow up with pictures.
We are in the process of renovating our split-level basement due to typical moisture issues (built in 1978). Wallpapers, over-insulated floors, and paint have been mostly removed (only the WC/D remains). In one of the rooms, the office, additional electrical boxes and flexible conduits have been embedded.
The office is the first priority for completion. The grooves in the existing plaster need to be filled and then the walls need to be replastered because they have become uneven when the paint was milled/flexed off and they have many cracks in the outer layer of the plaster (they are not structural settlement cracks).
After getting a quote from a mason, we have decided to try it ourselves first. Hiring contractors for the entire floor of 115 sqm is too expensive, even though it will be done in at least three stages. The company that was here and provided a quote suggested that the walls must be meshed before new plaster is applied to avoid new crack formation.
The slab and basement wall are uninsulated and the drainage is original (therefore poor and will need addressing eventually), so everything needs to withstand additional moisture and be vapor-permeable. The basement wall is made of lightweight clinker/leca blocks. I don't know what plaster is on it today, but it's at least not lime plaster.
What we need help with is:
1) What type of mortar is suitable for repairing the grooves?
2) Should we prime the grooves and if so, with what?
3) Is meshing really necessary?
4) What type of mortar should be used for plastering? Does it depend on whether it's meshed or not? Prime or water it?
5) We want a smooth and even surface, is a final plaster necessary and if so, what type of mortar for that, or can one type be used for the entire walls?
We will follow up with pictures.
No comments? Then it will be a monologue. ")
I skimmed through parts of the basement renovation thread á la @Etnoy because I knew that he has described how he did it. So, we will repair the grooves/milling with putty and masonry mortar C; the wife's starting this weekend and I'll handle the logistics.
Then the big question is whether to just add new plaster, with or without mesh, or if it would work with some cement-based filler like Lip 320E. The cracks were previously hidden by paint, but I don't know if silicate paint covers as well as plastic paint...
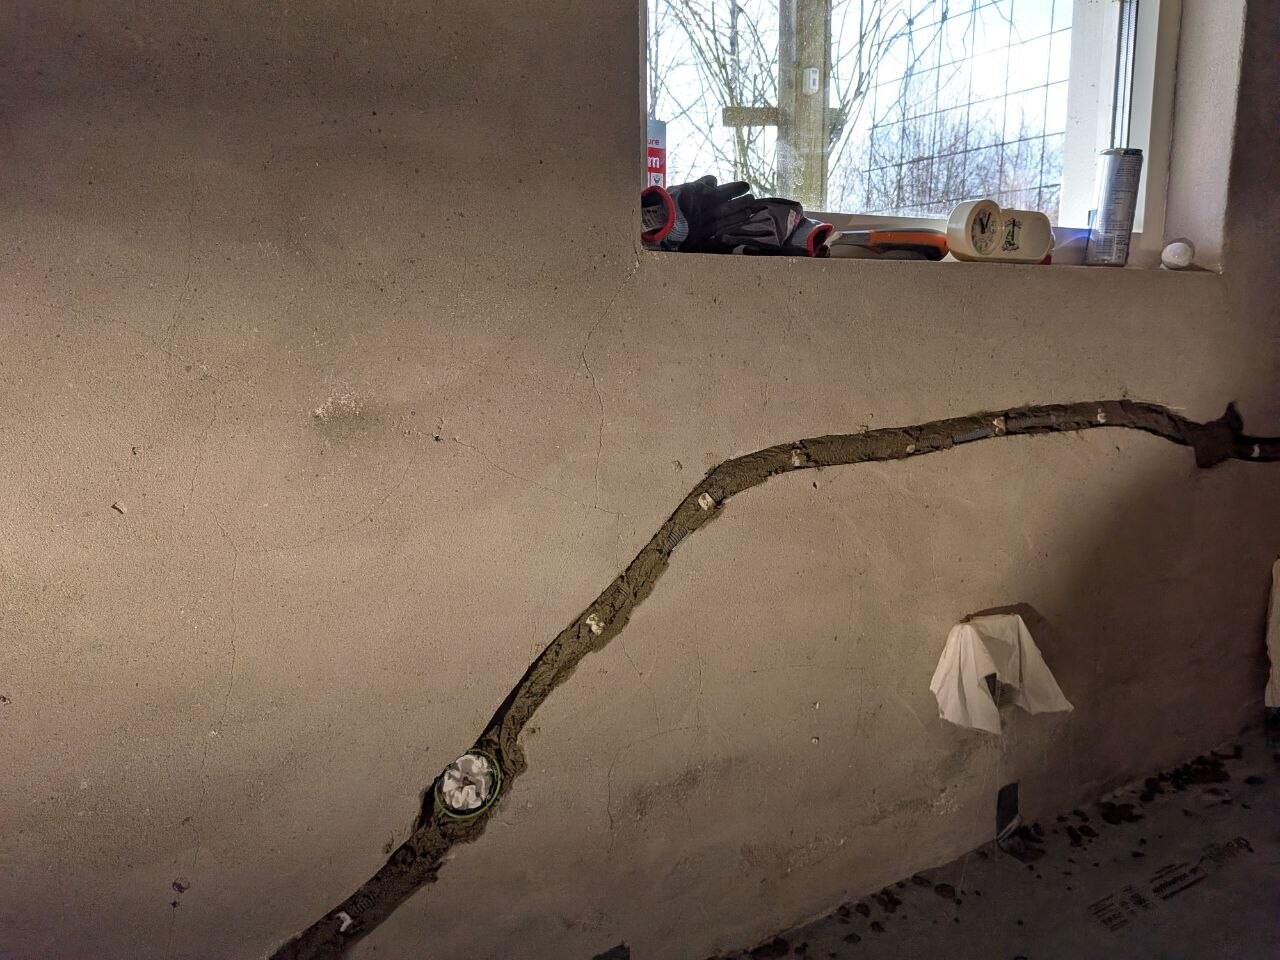
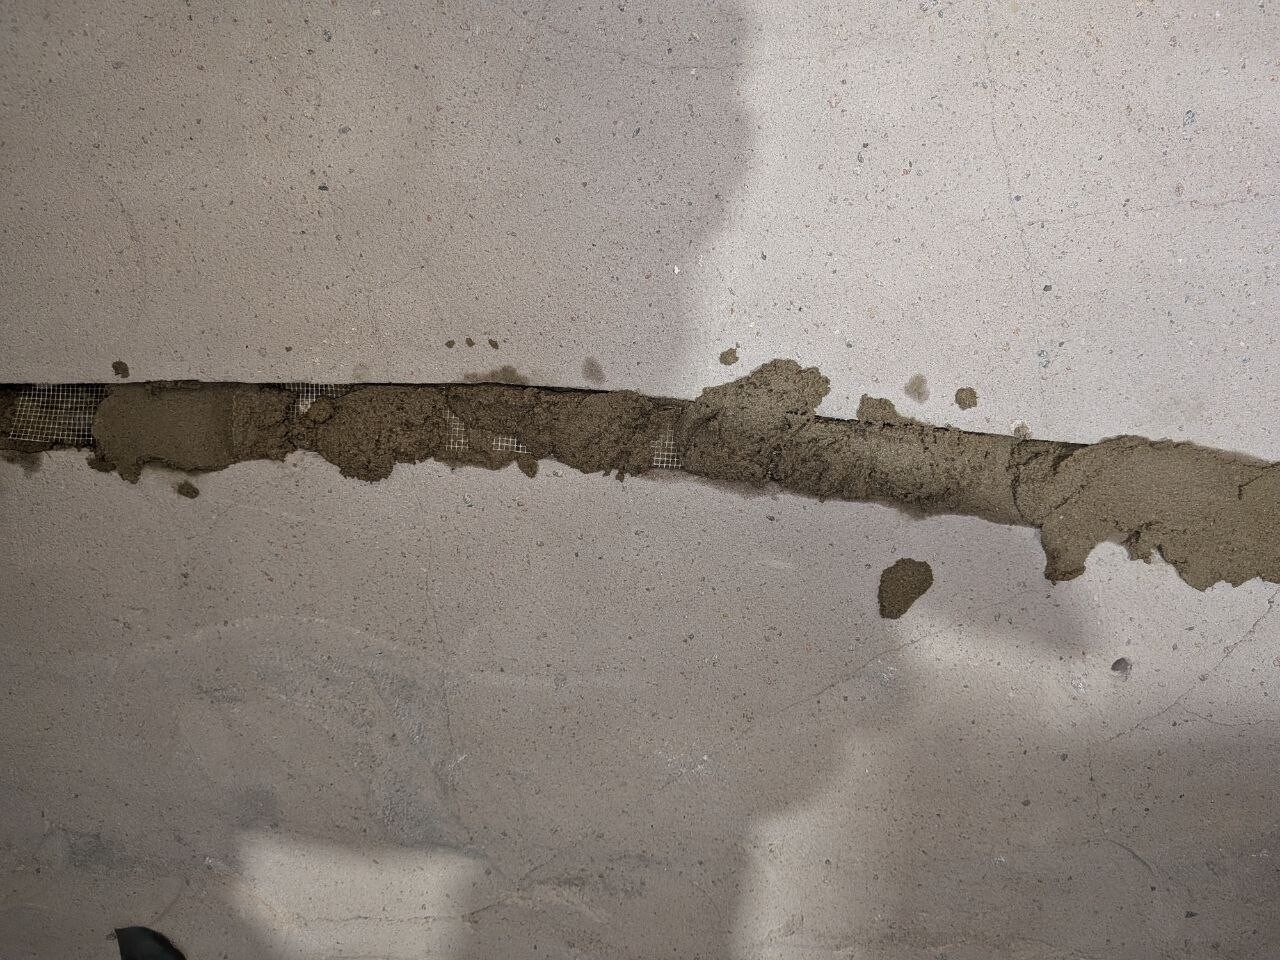
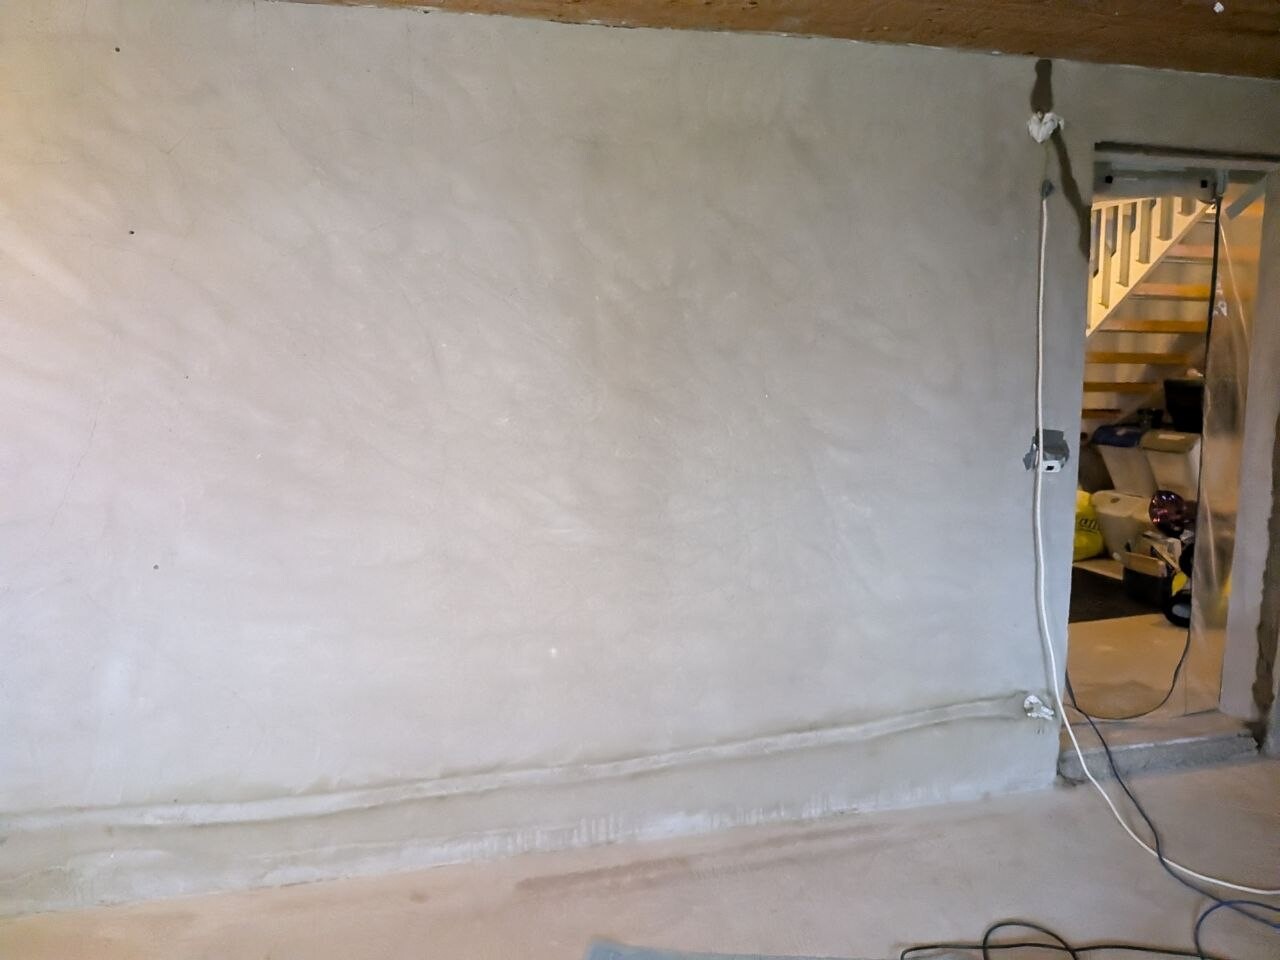
Status after my wife has been working a few evenings last week and throughout the weekend.
First, a thin layer of primer A at the bottom and then filled with plaster and mortar C along with fiberglass mesh. It's watered occasionally, and so far it looks good. The texture of this plaster is coarser than the existing one.
Her hope is to continue with the entire walls during the Easter holiday. By then, we need to decide if we will proceed with mesh and plaster in multiple layers or try something like Lip 320E.
Click here to reply